start stop button Seat Ateca 2017 User Guide
[x] Cancel search | Manufacturer: SEAT, Model Year: 2017, Model line: Ateca, Model: Seat Ateca 2017Pages: 328, PDF Size: 6.36 MB
Page 178 of 328
Operation
Disable the ESC “Snow” mode
T urn the Driv
ing Experience button to select a
different driving mode ››› page 226. WARNING
The ESC Sport mode should be activated only
when tr affic
conditions and the ability of the
driver allow it. Danger of skidding!
● With ESC in Sport mode, the stabilising
fu
nction will be limited to allow for a sportier
drive. The driving wheels could spin and the
vehicle could skid. WARNING
You should only activate the Offroad Mode or
di s
able the ASR if the experience of the driver
and traffic conditions allow it. Danger of skid-
ding!
● With the Offroad mode activated, the stabi-
lis
ation function is limited. In particular, if
the road is too smooth and slippery, the driv-
ing wheels could spin and the vehicle could
skid. Note
If the ASR is disconnected or the ESC’s Sport
mode i s
selected, cruise control* will be
switched off. Manual gearbox
Ch an
ging gear Read the additional information carefully
› ›
› page 40
In some countries the clutch pedal must be
fully pressed down for the engine to start.
Selecting reverse gear ● Engage reverse gear only when the vehicle
is
stopped.
Changing down gears
While driving, changing down a gear must al-
ways be done gradually, i.e. to the gear di-
rectly below and when the engine speed is
not too high ››› . Changing down while by-
p a
ssing one or various gears at high speeds
or at high engine speeds can damage the
clutch and the gearbox, even if the clutch
pedal remains depressed ››› .
WARNING
When the engine is running, the vehicle will
s t
art to move as soon as a gear is engaged
and the clutch released. This is also the case
with the electronic parking brake switched
on.
● Never engage reverse gear when the vehi-
cl
e is moving. WARNING
If the gear is changed down inappropriately
b y
selecting a gear that is too low, you may
lose control of the vehicle, causing an acci-
dent and serious injuries. CAUTION
When travelling at high speeds or at high en-
gine s peed
s, selecting a gear that is too low
can cause considerable damage to the clutch
and the gearbox. This can also occur if the
clutch pedal is pressed and held and it does
not engage. CAUTION
To prevent damage and avoid premature
w e
ar, please observe the following:
● Do not rest your hand on the gear lever
whil
e driving. The pressure applied by your
hand is transmitted to the gearbox selector
forks.
● Always ensure that the vehicle is complete-
ly s
topped before engaging the reverse gear.
● Always press the clutch to the floor when
ch
anging gears.
● Never hold the vehicle “on the clutch” on
hil
ls with the engine on. 176
Page 179 of 328
Driving
Automatic gearbox/DSG auto-
m atic
gearbox*
Introduction Your vehicle is equipped with an electronical-
ly
c
ontrolled manual gearbox. Torque be-
tween the engine and the gearbox is trans-
mitted via two independent clutches. They re-
place the torque converter found on conven-
tional automatic gearboxes and allow for
smooth, uninterrupted acceleration of the ve-
hicle.
The tiptronic system allows the driver to
change gears manually if desired
››› page 179, Changing gears in tiptronic
mode*.
Selector lever positions Read the additional information carefully
› ›
› page 41
The selector lever position engaged is high-
lighted on the display in the instrument clus-
ter. With the selector lever in the manual
gearbox positions G, D, E and S, the engaged
gear is also indicated on the display.
P – Parking lock
When the selector lever is in this position,
the driven wheels are locked mechanically. The parking lock must be engaged only when
the v
ehicle is stationary ››› .
The int erloc
k button (the button on the selec-
tor lever handle) must be pressed in and si-
multaneously the brake pedal must be de-
pressed before moving the selector lever ei-
ther in or out of position P.
R – Reverse gear
Reverse gear must be engaged only when the
vehicle is stationary and the engine is idling
››› .
T o mo
ve the selector lever to position R, the
interlock button must be pressed in and at
the same time the brake pedal must be de-
pressed. The reverse lights come on when
the selector lever is in the R position with the
ignition on.
N – Neutral (idling)
With the selector lever in this position, the
gear is in neutral.
D/S – Permanent drive (forward) position
The selector lever in the D/S position enables
the gears to be controlled in normal mode (D)
or Sport (S). To select Sport mode (S), move
the selector lever backwards. Moving the lev-
er again will select normal mode (D). The se-
lected driving mode is shown on the instru-
ment panel display. In normal mode
(D), the g
earbox automatical-
ly selects the best gear ratio. This depends
on the engine load, the road speed and the
dynamic gear control programme (DCP).
Sport mode (S) must be selected for a sporty
driving style. This setting makes use of the
engine's maximum power output. When ac-
celerating the gear shifts will be noticeable.
Press the brake pedal to move the selector
lever from N to D/S when the vehicle is sta-
tionary or at speeds below 3 km/h (2 mph)
››› .
Under c er
tain circumstances (e.g. when driv-
ing in mountains) it can be advantageous to
switch temporarily to tiptronic mode
››› page 179, in order to manually select gear
ratios to suit the driving conditions. WARNING
● Tak
e care not to accidentally press the ac-
celerator pedal when the vehicle is stopped.
The vehicle could otherwise start moving im-
mediately (in some cases even if the parking
brake is engaged) resulting in the risk of an
accident.
● Never move the selector lever to R or P
when drivin
g. Failure to follow this instruc-
tion could result in an accident.
● With selector lever in any position (except
P) the v
ehicle must always be held with the
foot brake when the engine is running. This is
because an automatic gearbox still transmits » 177
Technical data
Advice
Operation
Emergencies
Safety
Page 180 of 328
Operation
power even at idling speed, and the vehicle
t
end
s to “creep”. The accelerator pedal must
on no account be pressed inadvertently when
a gear is engaged with the vehicle stationary.
The vehicle could otherwise start moving im-
mediately (in some cases even if the parking
brake is engaged) resulting in the risk of an
accident.
● While you are selecting a gear and the vehi-
cl
e is stopped with the engine running, do
not accelerate. Failure to follow this instruc-
tion could result in an accident.
● As a driver you should never leave your ve-
hicl
e if the engine is running and a gear is en-
gaged. If you have to leave your vehicle while
the engine is running, you must apply the
handbrake and engage the parking lock (P).
● To avoid accidents, apply the handbrake
and put
the selector lever in position P before
opening the bonnet and working on the vehi-
cle with the engine running. Please always
observe the important safety warnings
››› page 282, Work in the engine compart-
ment. Note
● If the sel
ector lever is moved accidentally
to N when driving, release the accelerator and
let the engine speed drop to idling before se-
lecting gear range D or S again.
● Should the power supply to the selector
lev
er be interrupted in position P, the selector
lever will be locked. If this should happen the
manual release can be used ›››
page 41. Selector lever lock
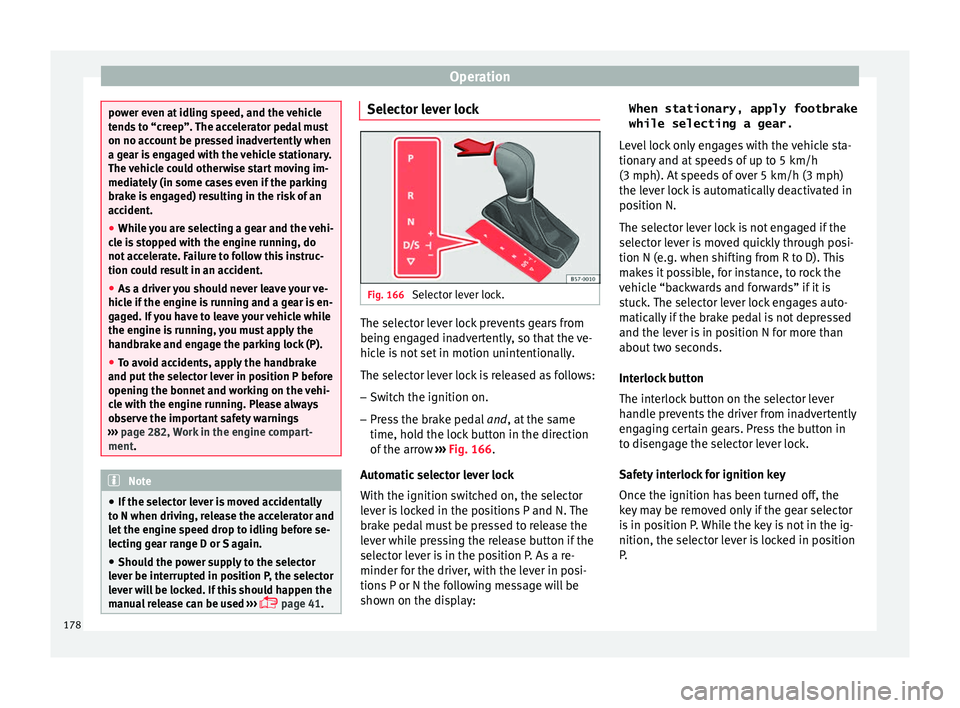
Fig. 166
Selector lever lock. The selector lever lock prevents gears from
bein g en
gaged inadvertently, so that the ve-
hicle is not set in motion unintentionally.
The selector lever lock is released as follows:
– Switch the ignition on.
– Press the brake pedal and
, at the same
time, hold the lock button in the direction
of the arrow ››› Fig. 166.
Automatic selector lever lock
With the ignition switched on, the selector
lever is locked in the positions P and N. The
brake pedal must be pressed to release the
lever while pressing the release button if the
selector lever is in the position P. As a re-
minder for the driver, with the lever in posi-
tions P or N the following message will be
shown on the display: When stationary, apply footbrake
while selecting a gear.
Lev
el lock only engages with the vehicle sta-
tionary and at speeds of up to 5 km/h
(3 mph). At speeds of over 5 km/h (3 mph)
the lever lock is automatically deactivated in
position N.
The selector lever lock is not engaged if the
selector lever is moved quickly through posi-
tion N (e.g. when shifting from R to D). This
makes it possible, for instance, to rock the
vehicle “backwards and forwards” if it is
stuck. The selector lever lock engages auto-
matically if the brake pedal is not depressed
and the lever is in position N for more than
about two seconds.
Interlock button
The interlock button on the selector lever
handle prevents the driver from inadvertently
engaging certain gears. Press the button in
to disengage the selector lever lock.
Safety interlock for ignition key
Once the ignition has been turned off, the
key may be removed only if the gear selector
is in position P. While the key is not in the ig-
nition, the selector lever is locked in position
P.
178
Page 182 of 328
Operation
When accelerating, the gearbox automatical-
ly shif
ts up into the next gear shortly before
the maximum engine speed is reached.
If you select a lower gear, the automatic gear-
box will not shift down until there is no risk of
over-revving the engine.
When the kick-down feature is used, the
gearbox shifts down to a lower gear, depend-
ing on road speed and engine speed.
Driving tips The gearbox changes gear ratios automatical-
ly
a
s the vehicle moves.
The engine can only start with the selector
lever in position P or N. At low temperatures,
below -10°C (50°F), the engine can only start
with the selector lever in position P.
Starting the vehicle
– Press and hold the brake pedal.
– Press and hold the interlock button (the
butt
on on the selector lever handle), move
the selector lever to the desired position,
for instance D ›››
page 177, and release the
interlock button.
– Wait for the gearbox to engage the gear (a
slight
movement can be felt).
– Release the brake and press the accelerator
››
› . Stopping briefly
– Apply the foot brake to hold the vehicle
briefly when s
tationary (for instance at traf-
fic lights). Do not press the accelerator.
Stopping/Parking
If the driver door is opened and the selector
lever is not in position P, the vehicle could
move. The driver message will be: Gear
change: selector lever in the
drive position! . Additionally, a buzzer
will sound.
– Press and hold the brake pedal ››
› .
– Apply the handbrake.
– Move the selector lever to position P.
Ho l
ding the car on a hill
– Always apply the brake pedal firmly to pre-
v
ent the vehicle from “moving backwards;
if necessary, apply the handbrake” ››› .
Do not tr y
to stop the vehicle “rolling back”
by increasing the engine speed when a
gear is engaged (pressing the accelerator)
››› .
St ar
ting off uphill
– Apply the handbrake.
– Once you have engaged a gear press the
acc
elerator carefully and disengage the
handbrake. Driving down hills: in some sit
uations (on
mountain roads or when towing a trailer or
caravan) it can be advantageous to switch
temporarily to the manual gearbox pro-
gramme so that the gear ratios can be selec-
ted manually to suit the driving conditions
››› .
On l ev
el ground it is sufficient to move the
selector lever to position P. On slopes, first
engage the parking brake and then put the
selection lever into the P position. This
avoids overloading the locking mechanism
and it will be easier to move the selector lev-
er from position P. WARNING
Observe the safety warnings ››
› in Selector
l ev
er positions on page 177.
● Never allow the brake to rub and do not use
the brak
e pedal too often or for long periods.
Constant braking causes overheating in the
brakes. This could significantly reduce brak-
ing power, increase braking distance or even
result in the total failure of the brake system.
● To avoid rolling back on gradients always
hol
d the vehicle with the footbrake or hand-
brake if you have to stop. CAUTION
● If
you stop the vehicle on a gradient, do not
attempt to stop it from rolling by depressing
the accelerator when a gear has been selec-
ted. This could cause overheating and 180
Page 191 of 328
Driver assistance systems
– When the c lut
ch pedal is pressed the en-
gine will start up again. The warning lamp
will switch off.
Vehicles with an automatic gearbox
– Use the foot brake to bring the vehicle to a
st
op and keep the brake pedal pressed
down with your foot. The engine will switch
off. The warning lamp will appear in the
display.
– When you take your foot off the brake pedal
the engine w
ill start up again. The warning
lamp will switch off.
Additional information related to the auto-
matic gearbox
The engine stops when the selector lever is in
the positions P, D, N and S, in addition to
when in manual mode. With the selector lev-
er in position P, the engine will also remain
switched off when you take your foot off the
brake pedal. In order to start the engine up
again the accelerator must be pressed, or an-
other gear engaged or the brake released.
If the selector lever is placed in position R
during the stopping phase, the engine will
start up again.
Change from position D to P to prevent the
engine from accidentally starting when
changing and passing by position R. Note
● You c
an control whether the engine should
switch off or not by reducing or increasing the
brake force applied. While the vehicle re-
mains stopped, the engine will not stop if the
brake pedal is slightly pressed, in traffic jams
with frequent stopping and starting for exam-
ple. As soon as strong pressure is applied to
the brake pedal, the engine will stop.
● In vehicles with manual gearbox, during
the st
opping phases the brake pedal must re-
main depressed to prevent the vehicle from
moving.
● If the engine “stalls” in vehicles with man-
ual
gearbox, it can be directly started up
again by immediately pressing the clutch
pedal. General notes
The system can interrupt the Start-Stop mode
fr
equently
for different reasons.
The engine does not switch off
Before the stopping phase, the system veri-
fies whether certain conditions are met. The
engine does not switch off, in the following
situations for example:
● The engine has not yet reached the mini-
mum requir
ed temperature for the Start-Stop
mode. ●
The interior t
emperature selected for the air
conditioner has not yet been reached.
● The interior temperature is very high/low.
● Defrost function button activated
››
› page 42.
● The parking aid* is switched on.
● The battery is very low.
● The steering wheel is overly turned or is be-
ing t
urned.
● If there is a danger of misting.
● After engaging reverse gear.
● In case of a very steep gradient.
The indication i
s shown on the instrument
panel display, and in addition, the driver in-
formation system* shows, .
The engine starts by itself
During a stopping phase the normal Start-
Stop mode can be interrupted in the follow-
ing situations: The engine restarts by itself
without involvement from the driver.
● The interior temperature differs from the
value sel
ected on the air conditioner.
● Defrost function button activated
››
› page 42.
● The brake has been pressed several times
con
secutively.
● The battery is too low.
● High power consumption. »
189
Technical data
Advice
Operation
Emergencies
Safety
Page 192 of 328
Operation
Note
In vehicles with an automatic gearbox, if the
sel ect
or lever is placed in position D, N or S
after engaging reverse gear, the vehicle must
be driven at a speed faster than 10 km/h (6
mph) for the system to return to conditions in
which the engine can be stopped. Manually switching on/off the Start-
St
op sy
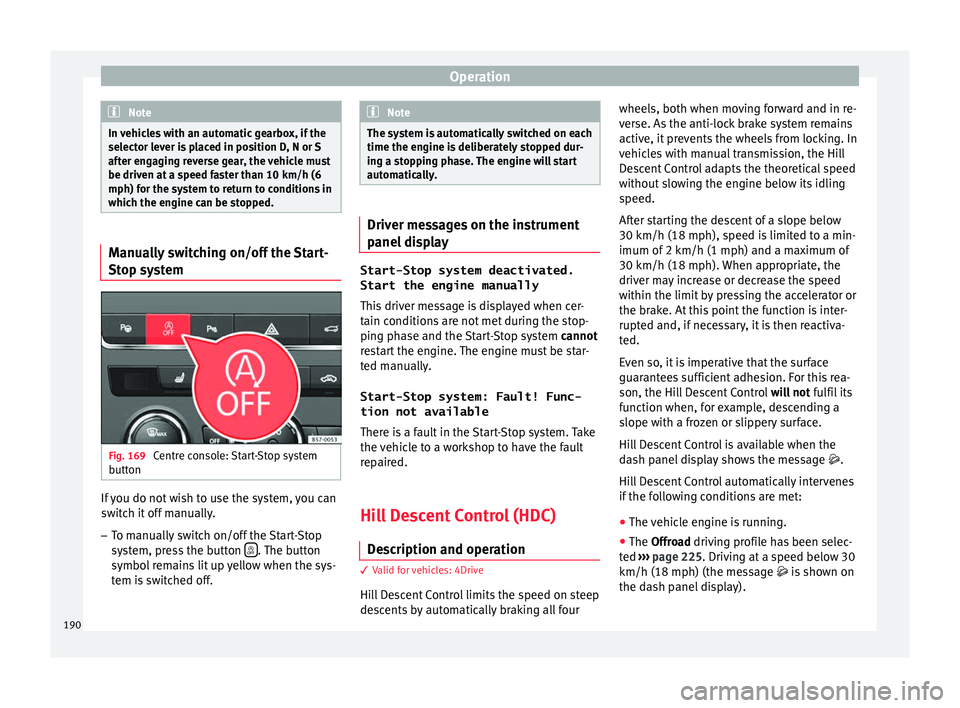
stem Fig. 169
Centre console: Start-Stop system
b utt
on If you do not wish to use the system, you can
sw
it
ch it off manually.
– To manually switch on/off the Start-Stop
sys
tem, press the button . The button
symbo l
remains lit up yellow when the sys-
tem is switched off. Note
The system is automatically switched on each
time the en gine i
s deliberately stopped dur-
ing a stopping phase. The engine will start
automatically. Driver messages on the instrument
p
anel
display Start-Stop system deactivated.
Start the engine manually
Thi s
driver message is displayed when cer-
tain conditions are not met during the stop-
ping phase and the Start-Stop system cannot
restart the engine. The engine must be star-
ted manually.
Start-Stop system: Fault! Func-
tion not available There is a fault in the Start-Stop system. Take
the vehicle to a workshop to have the fault
repaired.
Hill Descent Control (HDC) D e
scription and operation 3
V
alid for vehicles: 4Drive
Hill Descent Control limits the speed on steep
descents by automatically braking all four wheels, both when moving forward and in re-
v
er
se. As the anti-lock brake system remains
active, it prevents the wheels from locking. In
vehicles with manual transmission, the Hill
Descent Control adapts the theoretical speed
without slowing the engine below its idling
speed.
After starting the descent of a slope below
30 km/h (18 mph), speed is limited to a min-
imum of 2 km/h (1 mph) and a maximum of
30 km/h (18 mph). When appropriate, the
driver may increase or decrease the speed
within the limit by pressing the accelerator or
the brake. At this point the function is inter-
rupted and, if necessary, it is then reactiva-
ted.
Even so, it is imperative that the surface
guarantees sufficient adhesion. For this rea-
son, the Hill Descent Control will not fulfil its
function when, for example, descending a
slope with a frozen or slippery surface.
Hill Descent Control is available when the
dash panel display shows the message .
Hill Descent Control automatically intervenes
if the following conditions are met:
● The vehicle engine is running.
● The Offroad driving profile has been selec-
t
ed ›››
page 225. Driving at a speed below 30
km/h (18 mph) (the message is shown on
the dash panel display).
190
Page 204 of 328
Operation
Any modification to the programmed speed
i s
shown on the bottom left part of the instru-
ment panel display.
Adjusting distance level
The distance according to speed with regard
to the vehicle in front can be controlled on
the Easy Connect system on 5 levels
››› page 26.
In wet road conditions, you should always set
a larger distance with regard to the vehicle in
front than when driving in dry conditions.
The following distances can be preselected:
● Very short
● Short
● Media
● Long
● Very long
In the Ea
sy Connect system the distance that
must be set when connecting the ACC may be
adjusted using the button and the
Set
up and
Driv
er a
ssistance function buttons
› ›
› page 26.
Adjusting the driving programme
In vehicles with driving profile selection
(SEAT Drive Profile), the profile selected can
influence acceleration behaviour
››› page 225. The following driving programmes items can
be select
ed:
● Normal
● Sport
● Eco
● Convenience
In v
ehicles without the driving profile selec-
tion function, acceleration behaviour can be
influenced by selecting a driving programme
on the Easy Connect system using the button and the
Set
up and
Driv
er a
ssistance function buttons
››
›
page 26.
The following conditions may lead the ACC
not to react:
● If the accelerator is pressed.
● If there is no gear engaged.
● If the ESC is controlling.
● If the driver is not wearing his/her seat
belt.
● If
several brake lights of the vehicle or elec-
trical
ly connected trailer are damaged.
● If the vehicle is reversing.
● Driving faster than 210 km/h (150 mph). WARNING
There is a danger of rear collision when the
minimum di s
tance to the vehicle in front is
exceeded and the speed difference between both vehicles is so great that a speed reduc-
tion b
y
the ACC will not suffice. In this case
the brake pedal should be applied immedi-
ately.
● The ACC may not be able to detect all situa-
tions
properly.
● “Stepping” on the accelerator may cause
the AC
C not to intervene in braking. Driver
braking will have priority over intervention by
the speed control or adaptive cruise control.
● Always be ready to use the brakes!
● Observe country-specific provisions gov-
erning o
bligatory minimum distances be-
tween vehicles. Note
● The pr ogr
ammed speed is erased once the
ignition or the ACC are switched off.
● When the traction control system (ASR) is
deactiv
ated during acceleration or else the
ESC is activated in Sport* Mode
( ››› page 108), the ACC switches off automati-
cally.
● In vehicles with the Start-Stop system, the
engine sw
itches off automatically during the
ACC stopping phase and restarts automatical-
ly to begin driving. Vehicles with an automatic gearbox
If the vehicle is equipped with automatic
g
e
arbox, the ACC can brake the vehicle until
202
Page 205 of 328
Driver assistance systems
it stops completely if a vehicle in front of it
s t
ops.
The ACC will still be available for a few sec-
onds. The vehicle will restart by itself if the
vehicle in front moves (traffic jam assistant).
Disconnection criteria
The ACC will switch off if the driver applies
the brake pedal or the driver's door is
opened.
Restarting the vehicle with the ACC manually
The ACC can be activated again by moving
the lever to position 2
› ›
›
Fig. 180. CAUTION
● If
your vehicle with ACC does not start up
as expected, you can drive off by briefly step-
ping on the accelerator.
● The Start-Stop system usually acts if you
are driv
ing with ACC. Interrupting control
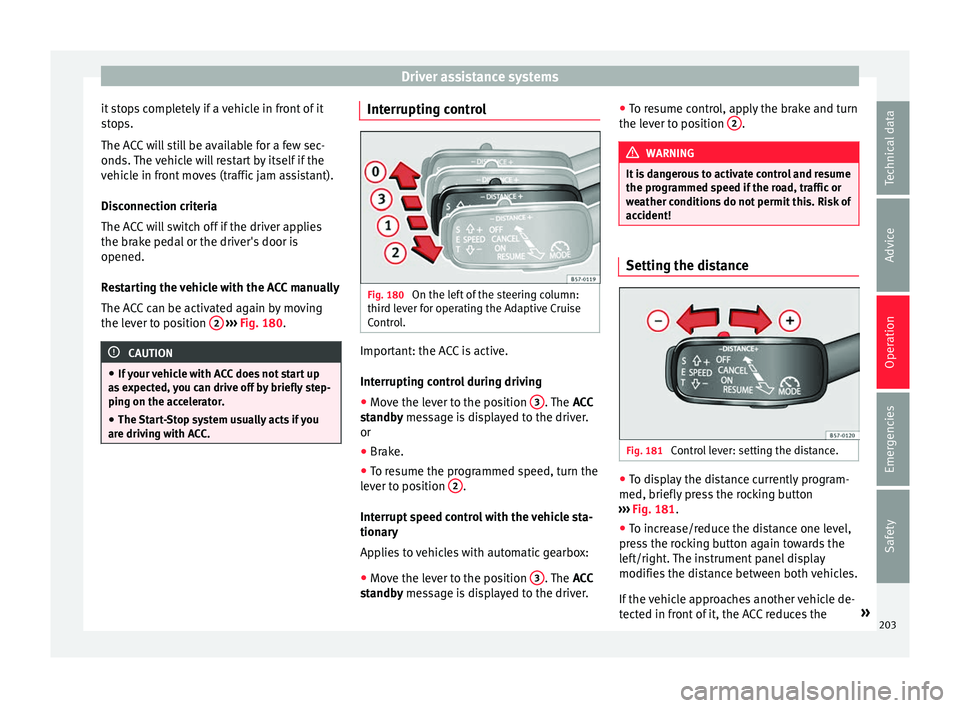
Fig. 180
On the left of the steering column:
thir d l
ever for operating the Adaptive Cruise
Control. Important: the ACC is active.
Int
erruptin
g control during driving
● Move the lever to the position 3 . The
ACC
s
tandby message is displayed to the driver.
or
● Brake.
● To resume the programmed speed, turn the
lev
er to position 2 .
Int errupt
speed control with the vehicle sta-
tionary
Applies to vehicles with automatic gearbox:
● Move the lever to the position 3 . The
ACC
s
tandby message is displayed to the driver. ●
To r
esume control, apply the brake and turn
the lever to position 2 .
WARNING
It is dangerous to activate control and resume
the pr ogr
ammed speed if the road, traffic or
weather conditions do not permit this. Risk of
accident! Setting the distance
Fig. 181
Control lever: setting the distance. ●
To display the distance currently program-
med, briefly pr
ess the rocking button
››› Fig. 181.
● To increase/reduce the distance one level,
pre
ss the rocking button again towards the
left/right. The instrument panel display
modifies the distance between both vehicles.
If the vehicle approaches another vehicle de-
tected in front of it, the ACC reduces the »
203
Technical data
Advice
Operation
Emergencies
Safety
Page 235 of 328
Driver assistance systems
with the operation of the Park Assist system
and c
au
se damage.
● The Park Assist system uses as a reference
park
ed vehicles, curbs and other objects.
Make sure that the tyres and wheels are not
damaged while parking. If necessary, oppor-
tunely interrupt the parking manoeuvre to
avoid damaging the vehicle.
● The ultrasound sensors on the bumper may
be dam
aged or shifted in the event of a colli-
sion, for example, when entering or exiting a
parking space.
● If you use high-pressure or vapour equip-
ment t
o clean the ultrasound sensors, do not
apply it directly unless very briefly and al-
ways from a distance of more than 10 cm.
● A registration plate or plate holder on the
front
with larger than the space for the regis-
tration plate, or a registration plate that is
curved or warped can cause:
– false detections,
– loss of sensor visibility,
– cancellation of the parking manoeuvre or
defective parking.
● If one of the ultrasonic sensors is damaged,
the are
a corresponding to that group of sen-
sors (front or rear) is deactivated and cannot
be activated until the fault is corrected. How-
ever, you can still use the sensors of the oth-
er bumper as per usual. If there is a fault in
the system, consult a specialist workshop.
SEAT recommends visiting a SEAT dealership
for this. Note
● In or der t
o guarantee good system opera-
tion, keep the ultrasound sensors of the
bumper clean, free of snow or ice, and do not
cover them with adhesives or other objects.
● Certain sources of noise, such as rough as-
pha
lt or paving stones and the noise of other
vehicles can induce the Park Assist system or
ParkPilot to give erroneous warnings.
● In order to become familiar with the system
and its
functions, SEAT recommends that you
practice operating the Park Assist system in
an area where there is not too much traffic or
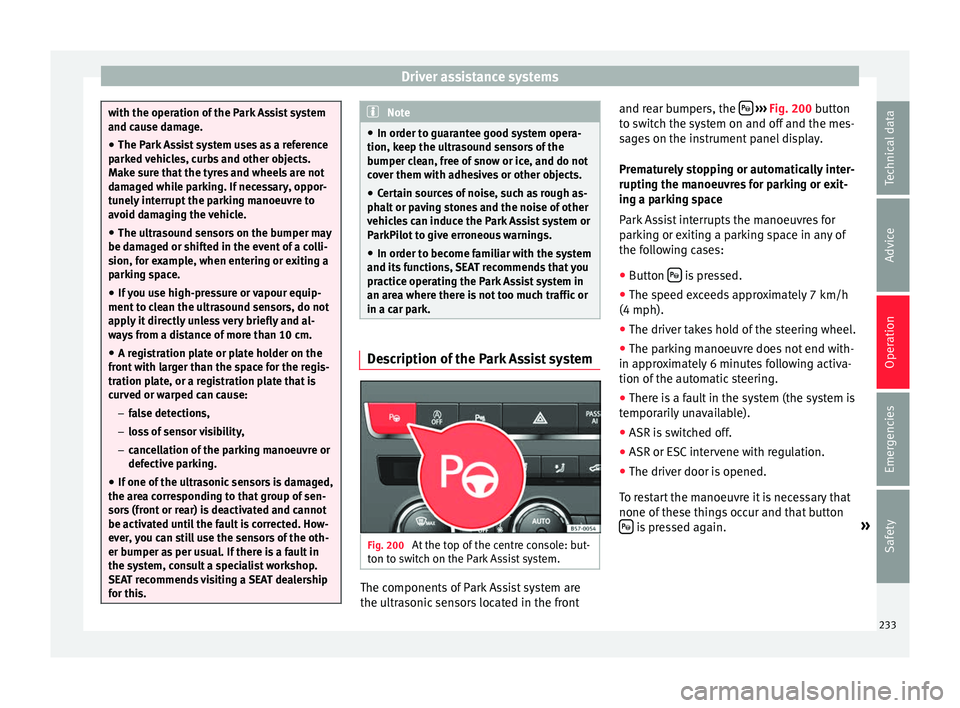
in a car park. Description of the Park Assist system
Fig. 200
At the top of the centre console: but-
t on t
o switch on the Park Assist system. The components of Park Assist system are
the u
ltr
asonic sensors located in the front and rear bumpers, the
› ››
Fig. 200
button
to switch the system on and off and the mes-
sages on the instrument panel display.
Prematurely stopping or automatically inter-
rupting the manoeuvres for parking or exit-
ing a parking space
Park Assist interrupts the manoeuvres for
parking or exiting a parking space in any of
the following cases:
● Button is pressed.
● The speed exceeds approximately 7 km/h
(4 mph).
● The driver takes hold of the steering wheel.
● The parking manoeuvre does not end with-
in ap pr
oximately 6 minutes following activa-
tion of the automatic steering.
● There is a fault in the system (the system is
tempor
arily unavailable).
● ASR is switched off.
● ASR or ESC intervene with regulation.
● The driver door is opened.
To r
estart the manoeuvre it is necessary that
none of these things occur and that button is pressed again.
»
233
Technical data
Advice
Operation
Emergencies
Safety
Page 257 of 328
Towing bracket device*
Towing bracket device* T r
ailer mode
Introduction Take into account country-specific regula-
tion
s
about driving with a trailer and the use
of a towing bracket.
The vehicle has been developed primarily for
carrying people, although it can also be used
to tow a trailer if fitted with the correspond-
ing technical equipment. This additional load
has an effect on the useful life, fuel con-
sumption and vehicle performance and in
some cases can reduce the service intervals.
Driving with a trailer requires more force from
the vehicle, and thus more concentration
from the driver.
In winter, winter tyres should be fitted on
both the vehicle and the trailer.
Maximum vertical load technically permissi-
ble on the coupling
The maximum vertical load technically per-
mitted from the trailer draw bar on the towing
bracket's tow hitch is 85 kg.
Vehicles with the Start-Stop system
If the vehicle has a factory-fitted towing
bracket or one that is retrofitted by SEAT, the Start-Stop system operates as normal. No
s
pec
ial characteristics need to be taken into
account.
If the system does not recognise the trailer or
the trailer bracket has not been retrofitted by
SEAT, the Start-Stop system must be discon-
nected by pressing the corresponding button
in the lower part of the centre console before
driving with the trailer, and it should remain
off for the rest of the journey ››› .
V ehic
les with driving profile selection
If you are going to be towing a trailer, the use
of the Eco driving profile is not recommen-
ded. You are advised to select another of the
available driving profiles before beginning to
drive with a trailer. WARNING
Never use the trailer to transport people,
s inc
e it would put their life in danger and is
also prohibited. WARNING
Undue use of the towing bracket may cause
injur y
and accidents.
● Only use the towing bracket if it is in a per-
fect
state of repair and is properly secured.
● Never modify or repair the towing bracket
in any
way.
● In order to reduce the danger of injury in
the event
of rear-end collisions and to avoid injury to pedestrians and cyclists when park-
in
g the
vehicle, cover or remove the tow hitch
when you are not using a trailer.
● Never fit a towing bracket “with weight dis-
tribution” or “lo
ad compensation”. The vehi-
cle has not been designed for this type of
towing bracket. The towing bracket could fail
and the trailer could be released from the ve-
hicle. WARNING
Driving with a trailer and transporting heavy
or l ar
ge objects can affect driving properties
and even cause an accident.
● Always secure the load properly using belts
or str
aps that are suitable and in good condi-
tion.
● Adapt your speed and driving style at all
times
to suit visibility, weather, road and traf-
fic conditions.
● Trailers with a high centre of gravity are
more lik
ely to overturn than those with a low
one.
● Avoid sudden braking and manoeuvres.
● Take great care when overtaking.
● Reduce speed immediately if you notice
that
the trailer is swaying, however slightly.
● Never drive at more than 80 km/h (50 mph)
when to
wing a trailer (or at more than
100 km/h (60 mph) in exceptional circum-
stances). This also applies in countries where
driving at higher speeds is permitted. Take » 255
Technical data
Advice
Operation
Emergencies
Safety