reset Seat Ateca 2017 Owner's Manual
[x] Cancel search | Manufacturer: SEAT, Model Year: 2017, Model line: Ateca, Model: Seat Ateca 2017Pages: 328, PDF Size: 6.36 MB
Page 30 of 328
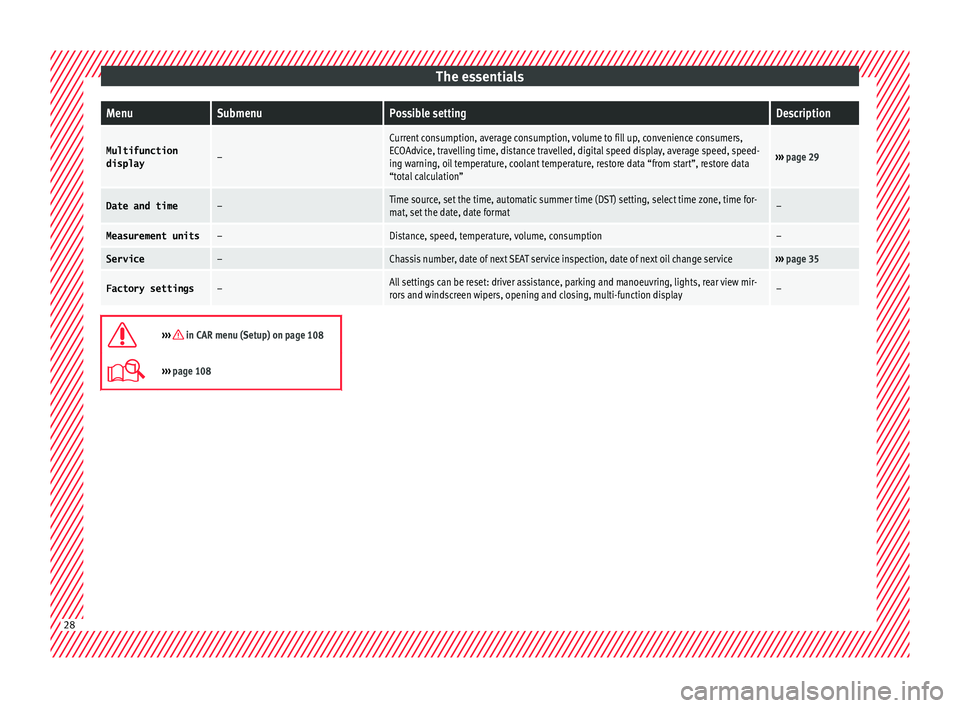
The essentialsMenuSubmenuPossible settingDescription
Multifunction
display–
Current consumption, average consumption, volume to fill up, convenience consumers,
ECOAdvice, travelling time, distance travelled, digital speed display, average speed, speed-
ing warning, oil temperature, coolant temperature, restore data “from start”, restore data
“total calculation”
››› page 29
Date and time–Time source, set the time, automatic summer time (DST) setting, select time zone, time for-
mat, set the date, date format–
Measurement units–Distance, speed, temperature, volume, consumption–
Service–Chassis number, date of next SEAT service inspection, date of next oil change service››› page 35
Factory settings–All settings can be reset: driver assistance, parking and manoeuvring, lights, rear view mir-
rors and windscreen wipers, opening and closing, multi-function display–
››› in CAR menu (Setup) on page 108
›››
page 108 28
Page 38 of 328
The essentials
the display mode changes. A clock symbol
ap pe
ars and the number of days until the
next service is due.
Vehicles with text messages : Service in
--- km or --- days will be shown on the
instrument panel display.
Service due
When the service date is due , an audible
warning is given when the ignition is switch-
ed on and the spanner displayed on the
screen flashes for a few seconds .
Vehicles with text messages : Service now
will be shown on the instrument panel dis-
play.
Reading a service notification
With the ignition switched on, the engine off
and the vehicle at a standstill, the current
service notification can be read:
Press and hold the button ›››
Fig. 115
4 for more than 5 seconds to consult the serv-
ic
e me
ssage.
When the service date has passed , a minus
sign is displayed in front of the number of kil-
ometres or days.
Vehicles with text messages : the following
message is displayed: Service --- km
(miles) or --- days ago .The time can also be set via the
key and
Set up function button in the Easy Connect
sy s
tem ›››
page 108.
Resetting service interval display
If the service was not carried out by a SEAT
dealership, the display can be reset as fol-
lows: ● Switch off the ignition, press and hold but-
ton ›
›› Fig. 115
4 .
● Switch ignition back on.
● Release THE 4
› ›
›
Fig. 115 button and
press it again for the next 20 seconds. Note
● The ser v
ice message disappears after a few
seconds, when the engine is started or when OK/RESET is pressed on the windscreen wiper
l ev
er, or OK on the multifunction steering
wheel .
● In
vehicles with the LongLife system in
which the b
attery has been disconnected for
a long period of time, it is not possible to cal-
culate the date of the next service. Therefore
the service interval display may not be cor- rect. In this case, bear in mind the maximum
service intervals permitted in the ››› Book-
let Maintenance Programme.
● If you reset the display manually, the next
serv
ice interval will be indicated as in vehi-
cles with fixed service intervals. For this rea-
son we recommend that the service interval
display be reset by a SEAT authorised Dealer. Cruise control
Oper atin
g the cruise control system
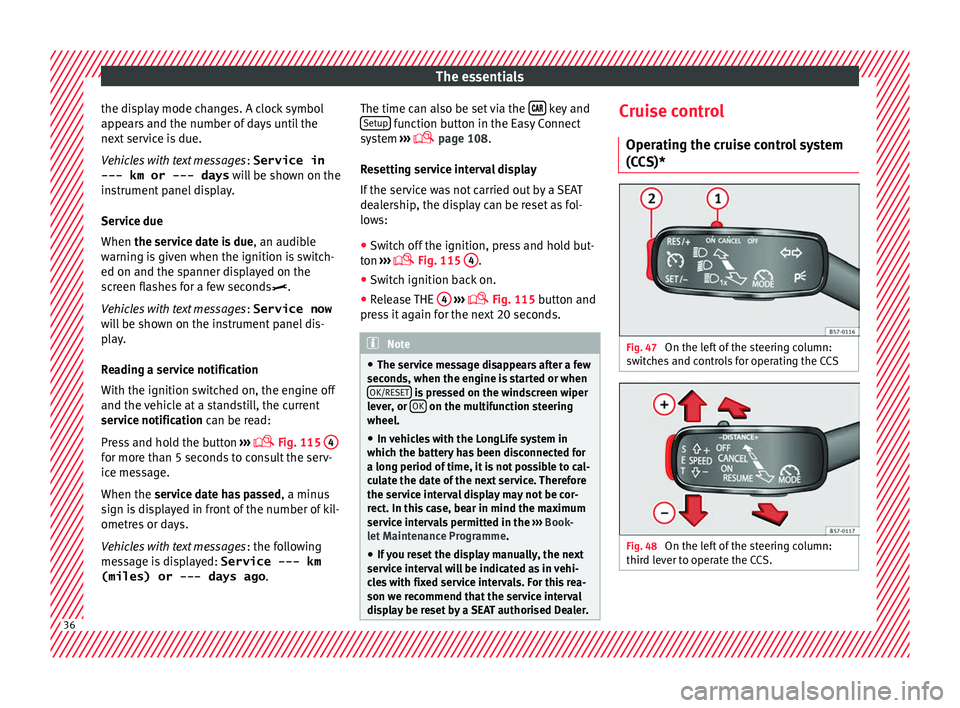
(CCS)* Fig. 47
On the left of the steering column:
sw it
ches and controls for operating the CCS Fig. 48
On the left of the steering column:
thir d l
ever to operate the CCS. 36
Page 106 of 328
Operation
● St ar
t-Stop system status display
››› page 188.
● Active cylinder management display
(ACT ®
)* ›
›› page 185
● Signs recognised by the traffic signal de-
tection sy
stem ››› page 228
● Low consumption driving status (ECO)
››
› page 104
● Identifying letters on engine (MKB).
Dis
tance travelled
The odometer registers the total distance
travelled by the car.
The odometer (trip ) shows the distance
travelled since the last odometer reset. The
last digit of the trip recorder indicates distan-
ces of 100 metres or one tenths of a mile.
● Briefly press the button ››
› Fig. 115 4 to re-
set the trip r
ecorder to 0.
● Keep the button 4 pressed for about 3
sec ond
s and the previous value will be dis-
played.
Time
● To set the time, keep the button ››
› Fig. 115
4 pressed for more than 3 seconds to select
the hour or minut e di
splay.
● To continue setting the time, press the up-
per or low
er part of the button 4 . Hold but-ton down to scroll through the numbers
quic
k
ly.
● Press the button 4 again in order to finish
settin g the time.
The time c
an also be set via the key and
Set up function button in the Easy Connect
sy s
tem ››› page 108.
Compass
With the ignition on and the navigation sys-
tem on, the cardinal point corresponding to
the direction of travel of the vehicle is dis-
played on the instrument panel.
Selector lever position
The selected gear is displayed on the side of
the selector lever and on the instrument pan-
el display. In positions D and S, and with the
Tiptronic, the corresponding gear is also dis-
played.
Recommended gear (manual gearbox)
The recommended gear in order to save fuel
is displayed on the instrument panel while
you are driving ›››
page 31.
Second speed display (mph or km/h)
In addition to the speedometer, the speed
can also be displayed in a different unit of
measurement (in miles or in km per hour). This option cannot be deactivated in models
des
tined for countries in which the second
speed must always be visible.
The second speed display can be adjusted in
the Easy Connect system via the key and
the Set
up function button
››
› page 108.
Speed warning
When the speed setting is exceeded, this will
be indicated on the instrument panel display.
This is very useful, for example when using
winter tyres that are not designed for driving
at the maximum speed of the vehicle
››› page 35.
The speed warning settings can be adjusted
in the Easy Connect system via the key
and the Set
up function button
››
› page 108.
Start-Stop operating display
Updated information relating to the status is
displayed on the instrument panel
››› page 188.
Low consumption driving status (ECO)*
Depending on the equipment, when driving,
the “ECO ” display appears on the instrument
panel when the vehicle is in low consump-
tion status due to active cylinder manage-
ment (ACT ®
)* ›››
page 185.
104
Page 107 of 328

Instruments and warning/control lamps
Identifying letters on engine (MKB)
Ho l
d the button ››› Fig. 115 4 down for more
th an 15 sec
onds to display the identifying
letters of the vehicle engine (MKB). To do
this, the ignition must be switched on and
the engine switched off. WARNING
Observe the safety warnings ››
› in Warning
and c ontr
ol lamps on page 107. WARNING
Even though outside temperatures are above
fr eez
ing, some roads and bridges may be icy.
● At outside temperatures above +4°C
(+39°F), even when the “ic
e crystal” symbol
is not visible, there may still be patches of ice
on the road.
● Do not rely on the outside temperature in-
dicat
or! Note
● Diff er
ent versions of the instrument panel
are available and therefore the versions and
instructions on the display may vary. In the
case of displays without warning or informa-
tion texts, faults are indicated exclusively by
the warning lamps.
● Depending on the equipment, some set-
ting
s and instructions can also be carried out
in the Easy Connect system. ●
When sev er
al warnings are active at the
same time, the symbols are shown succes-
sively for a few seconds and will stay on until
the fault is rectified. Odometer
Fig. 116
Instrument panel: odometer and re-
set b
utton. The distance covered is displayed in “kilome-
tr
e
s” or miles “m”. It is possible to change
the measurement units (kilometres
“km”/miles “m”) in the radio/Easy Connect*.
Please refer to the Easy Connect* Instructions
Manual for more details.
Odometer/trip recorder
The odometer shows the total distance cov-
ered by the vehicle.
The trip recorder shows the distance that has
been travelled since it was last reset. It is used to measure short trips. The last digit of
the trip rec
order indicates distances of 100
metres or tenths of a mile.
The trip recorder can be set to zero by press-
ing 0.0/SET
› ››
Fig. 116
.
Fault display
If there is a fault in the instrument panel, the
letters DEF will appear in the trip recorder
display. Have the fault repaired immediately,
as far as is possible.
Coolant temperature gauge For vehicles with no coolant temperature
g
aug
e, a control lamp appears for high
coolant temperatures ››› page 286. Please
note ››› .
The c oo
lant temperature gauge 2 ›››
Fig. 115 on ly
works when the ignition is
switched on. In order to avoid engine dam-
age, please read the following notes for the
different temperature ranges.
Engine cold
If only the diodes in the lower part of the
scale light up, this indicates that the engine
has not yet reached operating temperature.
Avoid high revs and heavy acceleration and
do not make the engine work hard. »
105
Technical data
Advice
Operation
Emergencies
Safety
Page 112 of 328
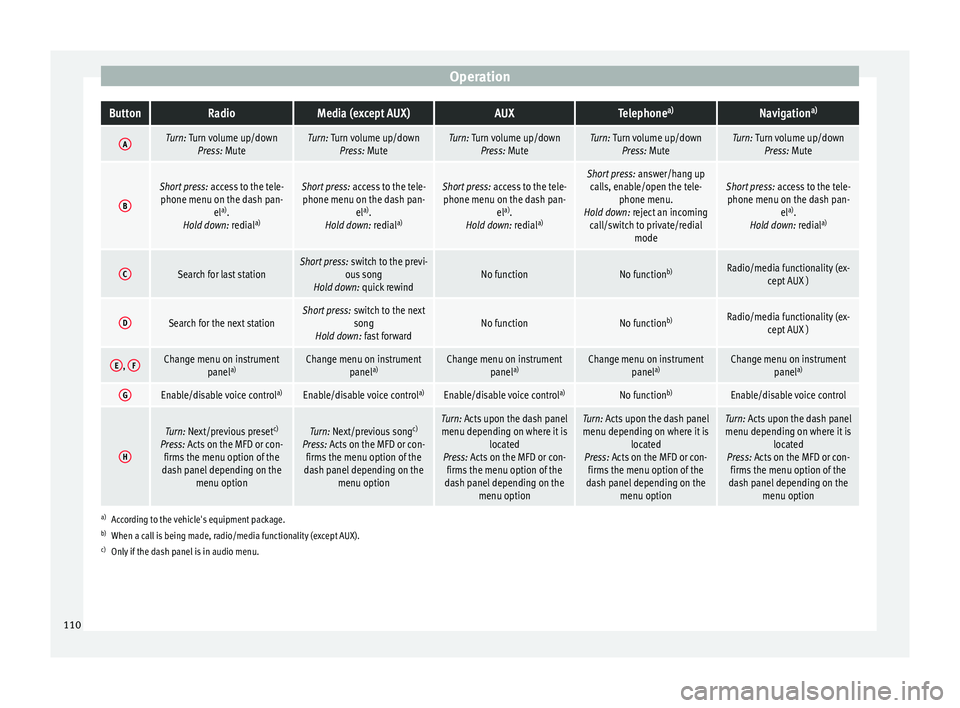
OperationButtonRadioMedia (except AUX)AUXTelephone
a)Navigation a)
ATurn: Turn volume up/down
Press: MuteTurn: Turn volume up/downPress: MuteTurn: Turn volume up/downPress: MuteTurn: Turn volume up/downPress: MuteTurn: Turn volume up/downPress: Mute
B
Short press: access to the tele-
phone menu on the dash pan- ela)
.
Hold down: redial a)Short press:
access to the tele-
phone menu on the dash pan- ela)
.
Hold down: redial a)Short press:
access to the tele-
phone menu on the dash pan- ela)
.
Hold down: redial a)Short press:
answer/hang up
calls, enable/open the tele- phone menu.
Hold down: reject an incoming call/switch to private/redial modeShort press: access to the tele-
phone menu on the dash pan- ela)
.
Hold down: redial a)
CSearch for last stationShort press:
switch to the previ-
ous song
Hold down: quick rewindNo functionNo function b)Radio/media functionality (ex-
cept AUX )
DSearch for the next stationShort press: switch to the next
song
Hold down: fast forwardNo functionNo function b)Radio/media functionality (ex-
cept AUX )
E, FChange menu on instrument
panela)Change menu on instrument
panela)Change menu on instrument
panela)Change menu on instrument
panela)Change menu on instrument
panela)
GEnable/disable voice control a)Enable/disable voice controla)Enable/disable voice controla)No functionb)Enable/disable voice control
H
Turn: Next/previous preset c)
Press: Acts on the MFD or con- firms the menu option of the
dash panel depending on the menu optionTurn: Next/previous song c)
Press: Acts on the MFD or con- firms the menu option of the
dash panel depending on the menu optionTurn: Acts upon the dash panelmenu depending on where it is located
Press: Acts on the MFD or con- firms the menu option of the
dash panel depending on the menu optionTurn: Acts upon the dash panelmenu depending on where it is located
Press: Acts on the MFD or con- firms the menu option of the
dash panel depending on the menu optionTurn: Acts upon the dash panelmenu depending on where it is located
Press: Acts on the MFD or con- firms the menu option of the
dash panel depending on the menu option
a)According to the vehicle's equipment package.
b) When a call is being made, radio/media functionality (except AUX).
c) Only if the dash panel is in audio menu.
110
Page 127 of 328
Opening and closing
The opening angle is memorised. Memorisa-
tion i s
indicated by blinking of the hazard
warning lights and an audible warning.
Resetting and memorising the opening angle
For the rear lid to reopen completely, the
opening angle must be reset and memorised
again.
● Release the rear lid and open it to the
memorised height
.
● Lift the rear lid by hand until it stops. To do
this, some f
orce will have to be used.
● Press the ››
› Fig. 129 button available in
the rear lid for at least 3 seconds.
● This resets and memorises the factory-set
opening an
gle. Memorisation is indicated by
blinking of the hazard warning lights and an
audible warning.
Automatic protection against overheating
If the system is operated repeatedly in a
short space of time, it automatically switches
off to prevent overheating.
Once the system is cool again, the function
can be reused. Until then the rear lid can only
be opened and closed by hand using reason-
able force.
If with the rear lid open the vehicle battery is
disconnected ››› page 289 or the corre-
sponding fuse burns out ››› page 90, the sys- tem will have to be reset. This requires clos-
ing the r
ear lid completely once.
Emergency unlocking
››› page 11 WARNING
If a lot of snow builds up on the rear lid or it
i s
heavily loaded, the rear lid may not open
or, after opening, it may lower by itself due to
the extra weight and cause serious injury.
● Never open the rear lid when there is a lot
of s
now on it or when carrying a load (e.g. on
a rack).
● Before opening the rear lid, remove the
sno
w or the load. WARNING
If the rear lid is closed incorrectly or without
due c ar
e, it could result in serious injury.
● Never leave the vehicle unattended or allow
chi
ldren to play inside or next to it, especially
if the rear lid is open. Children could enter
the luggage compartment, close the rear lid
and become trapped. A locked vehicle can
reach extremely high and low temperatures,
depending on the time of year, thus causing
serious injuries, illness or even death. CAUTION
Before opening or closing the rear lid, make
s ur
e that there is enough space to open or close it, e.g. when pulling a trailer or in a ga-
r
ag
e. Tailgate automatic lock
Where the vehicle has been locked by press-
in
g the button on the remote control with
the r e
ar lid open, the rear lid will lock auto-
matically when closed.
The automatic tailgate locking time extension
function can be activated. Where this func-
tion is activated and once the rear lid has
been unlocked by pressing the button on
the r emot
e control key ››› page 114, the rear
lid can be re-opened for a certain length of
time.
Where required, the automatic tailgate lock-
ing time extension function can be activated
or deactivated at an Authorised SEAT Service,
which will provide all the necessary informa-
tion.
Before the vehicle locks automatically, there
is a risk of intruders getting into the vehicle.
Therefore, we recommend you always lock
the vehicle by pressing the button on the
r emot
e control or by using the central locking
button. WARNING
Observe the safety warnings ››
› in Intro-
duction on p ag
e 85. » 125
Technical data
Advice
Operation
Emergencies
Safety
Page 130 of 328
Operation
One-touch opening and closing One-touch opening and closing means you
do not
h
ave to hold down the button.
Buttons ››› Fig. 131 1 ,
2 ,
3 and
4 have
tw o po
sitions for opening windows and two
for closing them. This makes it easier to open
and close windows to the desired position.
One-touch closing
– Pull up the window button briefly up to the
second po
sition. The window closes fully.
One-touch opening
– Push down the window button briefly up to
the sec ond po
sition. The window opens
fully.
Resetting one-touch opening and closing
The automatic open and close function will
not work if the battery has been temporarily
disconnected. The function can be restored
as follows:
– Close the window as far as it will go by lift-
ing and ho
lding the electric window switch.
– Release the switch and then lift it again for
1 second.
This will re-enable the automatic
function.
If you push (or pull) a button to the first
stage, the window will open (or close) until
you release the button. If you push or lift the button briefly to the second stage, the win-
dow w
ill open (one-touch opening) or close
(one-touch closing) automatically. If you op-
erate the button while the window is opening
or closing, it stops at this position.
Sunroof*
Introduction The sunroof consists of two glass parts. The
r
e
ar part is fixed and cannot be opened. It al-
so has a sun blind. WARNING
If the sunroof is used negligently or without
p a
ying due attention, it can cause serious in-
jury.
● Open or close the sunroof and the sun blind
only
when no one is in their path of move-
ment.
● Never leave any key inside the vehicle
when ex
iting.
● Never leave a child or any other person who
ma
y need help in the vehicle, especially if
they have access to the vehicle key. If using
they key unattended, they could lock the ve-
hicle, start the engine, switch on the ignition
and activate the sunroof.
● After switching off, it is still possible to
open or clo
se the sunroof during a short space of time provided that neither the driver
nor p
a
ssenger door is opened. CAUTION
● To pr
event damage, during winter tempera-
tures remove any ice or snow that might be
on the car roof before opening the sunroof or
adjusting the tilt position.
● Before leaving the vehicle or in case of rain-
fa
ll, always close the sunroof. With the sun-
roof open or in a tilted position, water can en-
ter the interior and can cause considerable
damage to the electrical system. As a result,
other damage can occur in the vehicle. Note
● Le
aves and other loose objects that accu-
mulate on the sunroof rails should be regular-
ly cleaned away either by hand or with a vac-
uum.
● If the sunroof does not work correctly, the
anti-trap f
unction will not work either. Con-
tact a specialised workshop.
● Some settings can be saved in user ac-
cou
nts of the personalisation function
››› page 26.128
Page 139 of 328
Lights and visibility
The light distribution of the halogen and full-
LED he a
dlights allows the specific “tourist
light” values to be met without the need for
stickers or changes in the settings. Note
“Tourist light” is only allowed temporarily. If
y ou ar
e planning a long stay in a country that
drives on the other side, you should take the
vehicle to an Authorised Technical Service to
change the headlights. Headlight range control, lighting of
the in
s
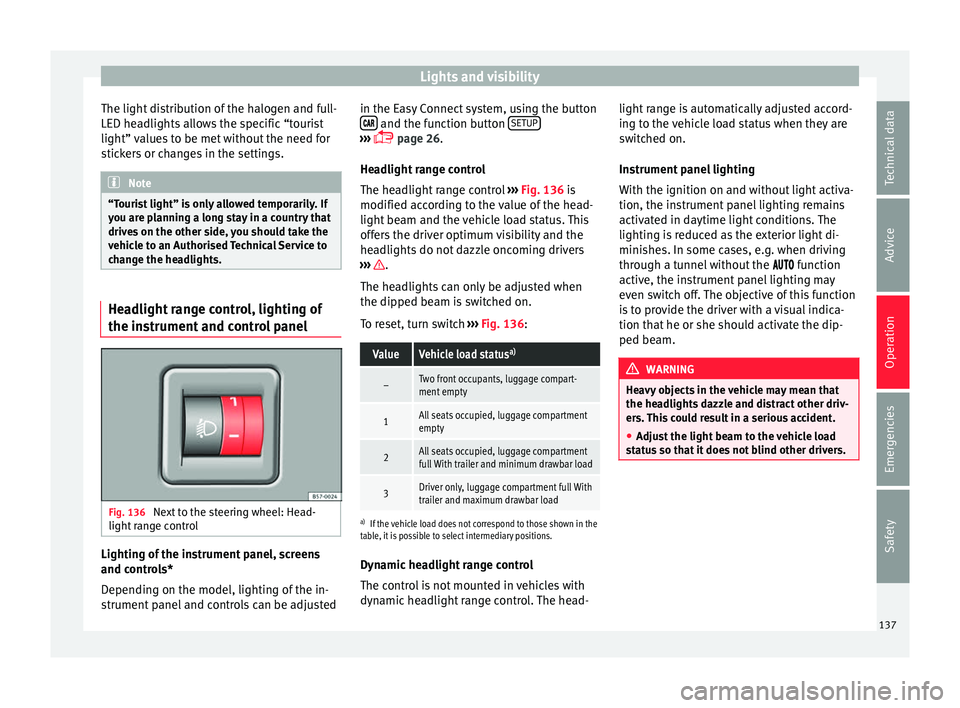
trument and control panel Fig. 136
Next to the steering wheel: Head-
light r
ange control Lighting of the instrument panel, screens
and c
ontr
ols*
Depending on the model, lighting of the in-
strument panel and controls can be adjusted in the Easy Connect system, using the button
and the function button
S
ETUP ›››
p
age 26.
He
adlight range control
The headlight range control ››› Fig. 136 is
modified according to the value of the head-
light beam and the vehicle load status. This
offers the driver optimum visibility and the
headlights do not dazzle oncoming drivers
››› .
The he a
dlights can only be adjusted when
the dipped beam is switched on.
To reset, turn switch ››› Fig. 136:
ValueVehicle load status a)
–Two front occupants, luggage compart-
ment empty
1All seats occupied, luggage compartment
empty
2All seats occupied, luggage compartment
full With trailer and minimum drawbar load
3Driver only, luggage compartment full With
trailer and maximum drawbar load
a)
If the vehicle load does not correspond to those shown in the
table, it is possible to select intermediary positions.
Dynamic headlight range control
The control is not mounted in vehicles with
dynamic headlight range control. The head- light range is automatically adjusted accord-
ing t
o the vehicle load status when they are
switched on.
Instrument panel lighting
With the ignition on and without light activa-
tion, the instrument panel lighting remains
activated in daytime light conditions. The
lighting is reduced as the exterior light di-
minishes. In some cases, e.g. when driving
through a tunnel without the function
active, the instrument panel lighting may
even switch off. The objective of this function
is to provide the driver with a visual indica-
tion that he or she should activate the dip-
ped beam. WARNING
Heavy objects in the vehicle may mean that
the he a
dlights dazzle and distract other driv-
ers. This could result in a serious accident.
● Adjust the light beam to the vehicle load
st
atus so that it does not blind other drivers. 137
Technical data
Advice
Operation
Emergencies
Safety
Page 169 of 328
Driving
remains switched on. Make sure that the igni-
tion i
s
switched off before leaving the
vehicle, otherwise the battery could dis-
charge. Starter button*
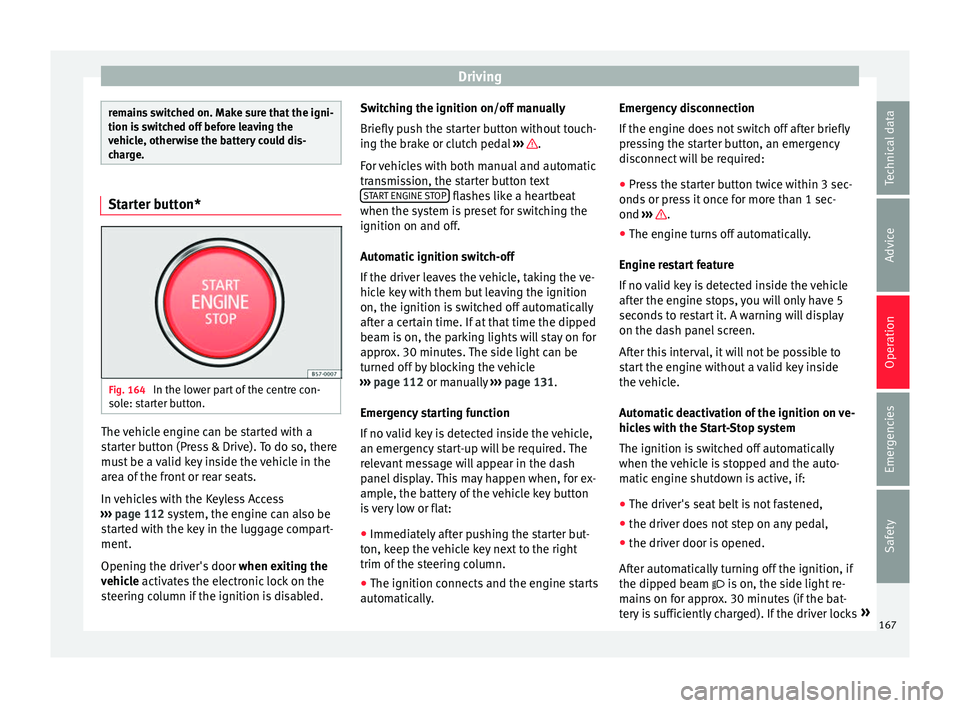
Fig. 164
In the lower part of the centre con-
so l
e: starter button. The vehicle engine can be started with a
s
t
arter button (Press & Drive). To do so, there
must be a valid key inside the vehicle in the
area of the front or rear seats.
In vehicles with the Keyless Access
››› page 112 system, the engine can also be
started with the key in the luggage compart-
ment.
Opening the driver's door when exiting the
vehicle activates the electronic lock on the
steering column if the ignition is disabled. Switching the ignition on/off manually
Briefly p
ush the starter button without touch-
ing the brake or clutch pedal ››› .
F or
vehicles with both manual and automatic
transmission, the starter button text START ENGINE STOP flashes like a heartbeat
when the sy s
tem is preset for switching the
ignition on and off.
Automatic ignition switch-off
If the driver leaves the vehicle, taking the ve-
hicle key with them but leaving the ignition
on, the ignition is switched off automatically
after a certain time. If at that time the dipped
beam is on, the parking lights will stay on for
approx. 30 minutes. The side light can be
turned off by blocking the vehicle
››› page 112 or manually ››› page 131.
Emergency starting function
If no valid key is detected inside the vehicle,
an emergency start-up will be required. The
relevant message will appear in the dash
panel display. This may happen when, for ex-
ample, the battery of the vehicle key button
is very low or flat: ● Immediately after pushing the starter but-
ton, k
eep the vehicle key next to the right
trim of the steering column.
● The ignition connects and the engine starts
autom
atically. Emergency disconnection
If the en
gine does not switch off after briefly
pressing the starter button, an emergency
disconnect will be required:
● Press the starter button twice within 3 sec-
onds
or press it once for more than 1 sec-
ond ››› .
● The engine turns off automatically.
En gine r
estart feature
If no valid key is detected inside the vehicle
after the engine stops, you will only have 5
seconds to restart it. A warning will display
on the dash panel screen.
After this interval, it will not be possible to
start the engine without a valid key inside
the vehicle.
Automatic deactivation of the ignition on ve-
hicles with the Start-Stop system
The ignition is switched off automatically
when the vehicle is stopped and the auto-
matic engine shutdown is active, if:
● The driver's seat belt is not fastened,
● the driver does not step on any pedal,
● the driver door is opened.
Aft
er automatically turning off the ignition, if
the dipped beam is on, the side light re-
mains on for approx. 30 minutes (if the bat-
tery is sufficiently charged). If the driver locks »
167
Technical data
Advice
Operation
Emergencies
Safety
Page 218 of 328
Operation
If the driver does not react to this, the system
al so al
erts the driver with a little shaking mo-
tion through the brakes and, if the vehicle
has it, activates the Emergency Assist func-
tion ››› page 218.
In vehicles without Emergency Assist, the
adaptive lane guidance function will be disa-
bled after the corresponding warnings to the
driver.
The lane assist system is active but it is not
available (the control lamp is lit up yellow)
● When driving at speeds below 65 km/h (38
mph).
● When the Lane Assist system does not de-
tect
the dividing lines of the road. For exam-
ple, in the event warnings indicating road
works, and snow, dirt, moisture or reflec-
tions.
● When the radius of a curve is too small.
● When no road markings can be seen.
● When the distance to the next marking to
too gr
eat.
● When the system does not detect any clear
and active s
teering movement during a long
period of time.
● Temporarily, in the event of very dynamic
drivin
g styles.
● If a turn signal is activated.
● With the stability control system (ESC) in
Spor
t mode or switched off. Side Assist PLUS
If the
vehicle is also equipped with Side As-
sist and the system is switched on, the driver
is alerted when changing lanes during a pos-
sible critical situation (level of information,
warning level) through a corrective steering
wheel intervention. This occurs even if the
turn signal is activated in the corresponding
direction. If the driver over-regulates the
steering wheel intervention, an additional
warning is given through a vibration in the
steering wheel. Note
● Bef
ore starting a journey, verify that the
field of vision of the camera is not covered
››› Fig. 191.
● Always keep the field of vision of the cam-
era c
lean. Switching off the Lane Assist system
in the f
o
llowing situations Due to the limits of the Lane Assist system,
sw
it
ch it off in the following situations:
● When more attention is required of the
driver
● When driv
ing in a sporty style
● In unfavourable weather conditions
● On roads in poor condition ●
In are
as of road works
Traffic Jam Assist De
scription and operation
› ›
›
table on page 2
Traffic Jam Assist helps the driver keep the
car within its lane and to move in convoy in
case of traffic congestion or slow traffic.
Traffic Jam Assist is an additional function of
Lane Assist ›››
page 213 and combines Lane
Assist functions with Adaptive Cruise Control
(ACC) ›››
page 197. Therefore, it is essential
that you read these two chapters carefully
and note the limitations of the systems and
the information about them.
Operation of Traffic Jam Assist
At speeds of below 60 km/h (40 mph), Traffic
Jam Assist can maintain a (temporary) dis-
tance preset by the driver with respect to the
vehicle ahead and help stay within the lane
››› .
T o do thi
s, the system automatically controls
the acceleration, brakes and steering, and
slows down the vehicle if necessary until it
stops fully before a vehicle that has stopped,
before moving off again automatically.
216