ignition Seat Ateca 2018 Owner's Manual
[x] Cancel search | Manufacturer: SEAT, Model Year: 2018, Model line: Ateca, Model: Seat Ateca 2018Pages: 348, PDF Size: 7.32 MB
Page 298 of 348
Advice
Operations prior to refilling
P ark
the
vehicle on a flat surface. If the vehi-
cle is not parked on a flat surface, but, for ex-
ample, on a slope or on the side of a curb,
the level indicator may not detect the load
properly.
If a warning message about AdBlue ®
levels
appears on the dash panel display, fill at
least the minimum amount required (approx.
5 litres). Only after adding this amount will
the system detect that AdBlue ®
has been
added and you will be able to start the en-
gine again. The maximum amount that can
be refilled is 11 litres.
Switch the ignition off. If the ignition is not
switched off during refilling, the warning to refill may continue to appear on the instru-
ment panel display.
Fill with a refill bottle
Only use AdBlue ®
that complies with ISO
22241-1. Only use original containers.
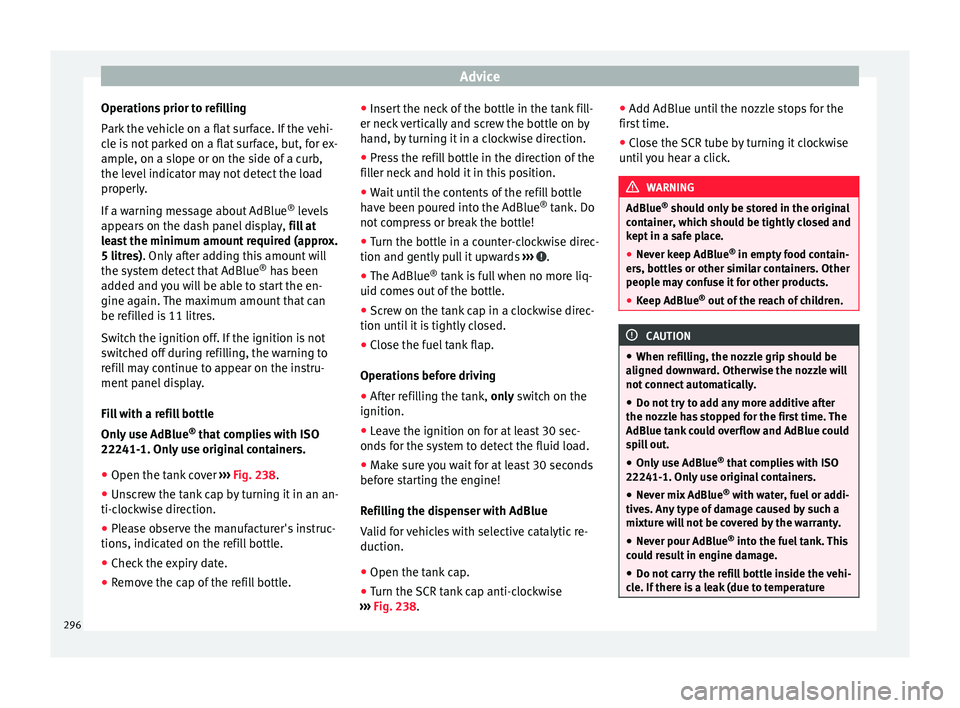
â Open the tank cover âºâºâº
Fig. 238.
â Unscrew the tank cap by turning it in an an-
ti-clock
wise direction.
â Please observe the manufacturer's instruc-
tions, indicat
ed on the refill bottle.
â Check the expiry date.
â Remove the cap of the refill bottle. â
Insert
the neck of the bottle in the tank fill-
er neck vertically and screw the bottle on by
hand, by turning it in a clockwise direction.
â Press the refill bottle in the direction of the
fill
er neck and hold it in this position.
â Wait until the contents of the refill bottle
have been pour
ed into the AdBlue ®
tank. Do
not compress or break the bottle!
â Turn the bottle in a counter-clockwise direc-
tion and gently p
ull it upwards âºâºâº .
â The AdBlue ®
tank
i
s full when no more liq-
uid comes out of the bottle.
â Screw on the tank cap in a clockwise direc-
tion until
it is tightly closed.
â Close the fuel tank flap.
Operations
before driving
â After refilling the tank, only sw
itch on the
ignition.
â Leave the ignition on for at least 30 sec-
onds f
or the system to detect the fluid load.
â Make sure you wait for at least 30 seconds
before s
tarting the engine!
Refilling the dispenser with AdBlue
Valid for vehicles with selective catalytic re-
duction.
â Open the tank cap.
â Turn the SCR tank cap anti-clockwise
âºâºâº
Fig. 238. â
Add AdBlue unti
l the nozzle stops for the
first time.
â Close the SCR tube by turning it clockwise
until
you hear a click. WARNING
AdBlue ®
shoul d on
ly be stored in the original
container, which should be tightly closed and
kept in a safe place.
â Never keep AdBlue ®
in empty food c
ontain-
ers, bottles or other similar containers. Other
people may confuse it for other products.
â Keep AdBlue ®
out of the r
each of children. CAUTION
â When refi l
ling, the nozzle grip should be
aligned downward. Otherwise the nozzle will
not connect automatically.
â Do not try to add any more additive after
the nozzl
e has stopped for the first time. The
AdBlue tank could overflow and AdBlue could
spill out.
â Only use AdBlue ®
that c
omplies with ISO
22241-1. Only use original containers.
â Never mix AdBlue ®
with wat
er, fuel or addi-
tives. Any type of damage caused by such a
mixture will not be covered by the warranty.
â Never pour AdBlue ®
into the fuel
tank. This
could result in engine damage.
â Do not carry the refill bottle inside the vehi-
cle. If
there is a leak (due to temperature296
Page 301 of 348
Checking and refilling levels
WARNING
â Swit c
h the engine off, remove the key from
the ignition and apply the hand brake. If the
vehicle has a manual gearbox, place the lever
in neutral; if it has an automatic gearbox,
place the selector lever in position P. Wait for
the engine to cool down.
â Keep children away from the engine com-
partment
.
â Never spill liquids used for vehicle opera-
tion on the engine comp
artment, as these
may catch fire (e.g. the antifreeze in coolant).
â Take care not to cause short circuits in the
electrica
l system, especially when working
on the battery.
â If working inside the engine compartment,
remember that, ev
en when the ignition is
switched off, the radiator fan may start up au-
tomatically, and therefore there is a risk of in-
jury.
â Never cover the engine with additional in-
sul
ating materials such as a blanket. Risk of
fire!
â Do not unscrew the cap on the coolant ex-
pans
ion tank when the engine is hot. The
cooling system is under pressure.
â Protect face, hands and arms by covering
the cap with a l
arge, thick rag to protect
against escaping coolant and steam.
â If it is necessary to work in the engine com-
partment
while the engine is running, the ro-
tating components (for example, poly-V belt, alternator, radiator fan) and the high voltage
ignition sys
t
em are an additional hazard.
â Observe the following additional warnings
if work
on the fuel system or the electrical
system is necessary:
â Always disconnect the battery from the
on-board network.
â Do not smoke.
â Never work near naked flames.
â Always keep an approved fire extinguish-
er immediately available. CAUTION
When topping up fluids make sure the correct
fluid is p
ut into the correct filler opening, oth-
erwise this can cause serious malfunctions or
engine damage. For the sake of the environment
Inspect the ground underneath your vehicle
re gu
larly so that any leaks are detected at an
early stage. If you find spots of oil or other
fluids in the area where it was parked, have
your vehicle inspected at the workshop. Note
In right-hand drive vehicles* some brake flu-
id re ser
voirs are on the other side of the en-
gine compartment âºâºâº Fig. 239. Opening the bonnet
Read the additional information carefully
âºâº âº
ï¨ page 17
The bonnet is released from inside the vehi-
cle.
Check that the windscreen wiper arms are
not unfolded. Otherwise the paint may be
damaged.
The bonnet can only be unlocked when the
driver door is open. WARNING
Never open the bonnet if you see steam or
drips of
coolant being released from the en-
gine compartment. Failure to comply could
result in burns. Wait until no steam or coolant
can be seen before opening the bonnet. Closing the bonnet
â
Slightly lift the bonnet.
â Release the bonnet stay before pressing it
bac
k
into its support.
â Carefully close the bonnet.
â Press the bonnet down until it locks into
plac
e.
â Make sure that the bonnet catches onto its
cla
sp. Do not press down too hard âºâºâº .
»
299
Technical data
Advice
Operation
Emergencies
Safety
Page 304 of 348
Advice
WARNING
Oil is highly inflammable! Ensure that no oil
come s
into contact with hot engine compo-
nents when topping up. CAUTION
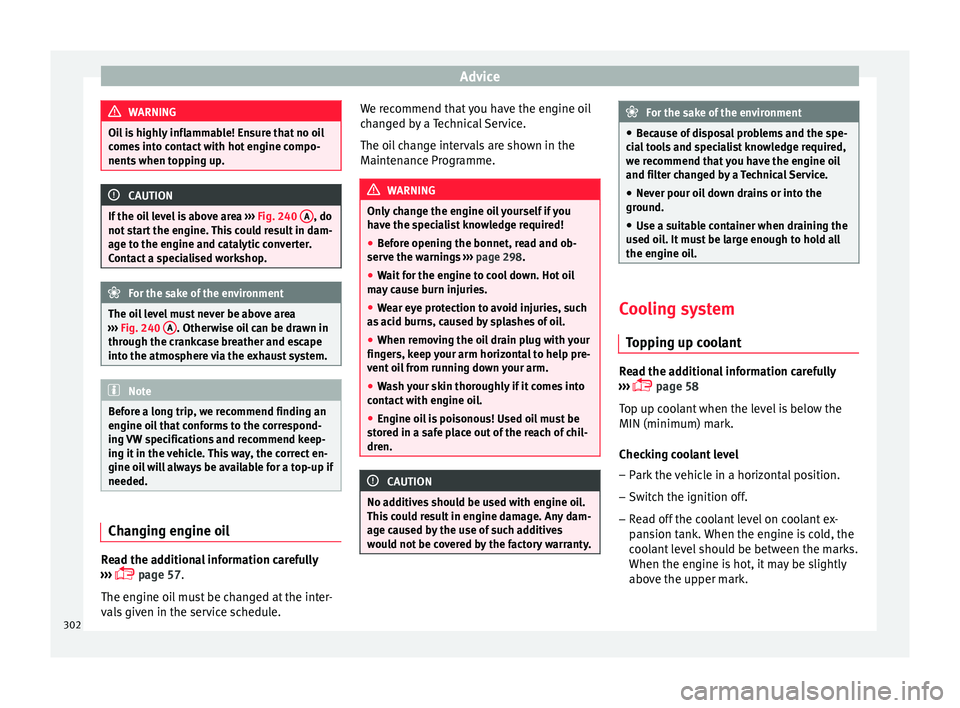
If the oil level is above area âºâºâº
Fig. 240 A , do
not s t
art the engine. This could result in dam-
age to the engine and catalytic converter.
Contact a specialised workshop. For the sake of the environment
The oil level must never be above area
âºâº âº
Fig. 240 A . Otherwise oil can be drawn in
through the c r
ankcase breather and escape
into the atmosphere via the exhaust system. Note
Before a long trip, we recommend finding an
engine oi l
that conforms to the correspond-
ing VW specifications and recommend keep-
ing it in the vehicle. This way, the correct en-
gine oil will always be available for a top-up if
needed. Changing engine oil
Read the additional information carefully
⺠âº
âº
ï¨ page 57.
The engine oil must be changed at the inter-
vals given in the service schedule. We recommend that you have the engine oil
chan
ged by a Technical Service.
The oil change intervals are shown in the
Maintenance Programme. WARNING
Only change the engine oil yourself if you
hav e the s
pecialist knowledge required!
â Before opening the bonnet, read and ob-
serve the w
arnings âºâºâº page 298.
â Wait for the engine to cool down. Hot oil
may
cause burn injuries.
â Wear eye protection to avoid injuries, such
as ac
id burns, caused by splashes of oil.
â When removing the oil drain plug with your
finger
s, keep your arm horizontal to help pre-
vent oil from running down your arm.
â Wash your skin thoroughly if it comes into
contact
with engine oil.
â Engine oil is poisonous! Used oil must be
stor
ed in a safe place out of the reach of chil-
dren. CAUTION
No additives should be used with engine oil.
This c
ould result in engine damage. Any dam-
age caused by the use of such additives
would not be covered by the factory warranty. For the sake of the environment
â Bec au
se of disposal problems and the spe-
cial tools and specialist knowledge required,
we recommend that you have the engine oil
and filter changed by a Technical Service.
â Never pour oil down drains or into the
ground.
â U
se a suitable container when draining the
used oil
. It must be large enough to hold all
the engine oil. Cooling system
Top
pin
g up coolant Read the additional information carefully
⺠âº
âº
ï¨ page 58
Top up coolant when the level is below the
MIN (minimum) mark.
Checking coolant level
â Park the vehicle in a horizontal position.
â Switch the ignition off.
â Read off the coolant level on coolant ex-
pans
ion tank. When the engine is cold, the
coolant level should be between the marks.
When the engine is hot, it may be slightly
above the upper mark.
302
Page 305 of 348
Checking and refilling levels
Topping up coolant
â Wait for the engine to cool down.
â Cover the coolant expansion tank cap with
a c loth and c
ar
efully unscrew it to the left
âºâºâº .
â Top up the coolant only if there is still cool-
ant in the e
xp
ansion tank, otherwise you
could damage the engine. If there is no
coolant in the expansion tank, do not con-
tinue driving. You should obtain professio- nal assistance âºâºâº .
â If there is still some coolant in the expan-
sion t
ank, t
op up to the upper mark.
â Top up with coolant until the level becomes
stab
le.
â Screw the cap back on correctly.
Any lo
ss of coolant fluid normally indicates a
leak in the cooling system. Take the vehicle
straight to a specialised workshop to have
the cooling system examined. If there are no
leaks in the engine cooling system, a loss of
coolant can only occur if the coolant boils
and is forced out of the system as a result of
overheating. WARNING
â The coo lin
g system is under pressure. Do
not unscrew the cap on the coolant expan-
sion tank when the engine is hot: risk of
burns! â
The antifreez e and c
oolant fluid can be a
health hazard. Therefore, the antifreeze
should be stored in the original container in a
safe place out of reach of children. Failure to
comply could result in poisoning.
â If working inside the engine compartment,
remember that, ev
en when the ignition is
switched off, the radiator fan may start up au-
tomatically, and therefore there is a risk of in-
jury. WARNING
If there is not enough anti-freeze in the cool-
ant sys
tem, the engine may fail leading to se-
rious damage.
â Please make sure that the percentage of
additiv
e is correct with respect to the lowest
expected ambient temperature in the zone in
which the vehicle is to be used.
â When the outside temperature is very low,
the cool
ant could freeze and the vehicle
would be immobilised. In this case, the heat-
ing would not work either and inadequately
dressed passengers could die of cold. CAUTION
Do not top up the expansion tank with cool-
ant fluid if it
is empty! Air could enter the
cooling system. In this case, stop driving.
Seek specialist assistance. Otherwise, there
is a risk of engine damage. CAUTION
The original additives should never be mixed
with c oo
lants which are not approved by
SEAT. Otherwise, you run the risk of causing
severe damage to the engine and the engine
cooling system.
â If the fluid in the expansion tank is not pur-
ple b
ut is, for example, brown, this indicates
that the G13 additive has been mixed with an
inadequate coolant. The coolant must be
changed as soon as possible if this is the
case! This could result in serious faults and
engine damage. For the sake of the environment
Coolants and additives can contaminate the
env ir
onment. If any fluids are spilled, they
should be collected and correctly disposed
of, with respect to the environment. Brake fluid
Top up br
ak
e fluid Read the additional information carefully
⺠âº
âº
ï¨ page 59
Checking the brake fluid level
The brake fluid level must be between the
MIN and MAX markings. »
303
Technical data
Advice
Operation
Emergencies
Safety
Page 307 of 348
Checking and refilling levels
CAUTION
â Do not mi x
cleaning products recommen-
ded by SEAT with other products. This could
lead to flocculation and may block the wind-
screen washer jets.
â When topping up service fluids, make abso-
lutely c
ertain that you fill the fluids into the
correct reservoirs. Using the wrong fluids
could cause serious malfunctions and engine
damage!
â Not having windscreen wiper fluid reduces
vis
ibility through the windscreen, and leads
to loss of visibility in headlights in models
with headlight washer. Battery
Gener a
l
informationRead the additional information carefully
⺠âº
âº
ï¨ page 59.
The battery is located in the engine compart-
ment and is almost maintenance-free. It is
checked as part of the Inspection Service.
Nevertheless, check the terminals are clean
and have the correct tightening torque, espe-
cially in summer and winter.
Disconnecting the battery
The battery should only be disconnected in
exceptional cases. When the battery is dis- connected, some of the vehicle's functions
are âlos
tâ (âºâºâº table on page 305). These
functions will require resetting after the bat-
tery is reconnected.
Deactivate the anti-theft alarm* before you
disconnect the battery Otherwise the alarm
will be triggered.
FunctionReprogramming
One-touch function of
the electric windowsâºâºâº page 141, One-touch
opening and closing.
Remote control key
If the vehicle does not re-
spond to the key, they
should be synchronised
âºâºâº page 134.
Digital clockâºâºâº page 116.
ESC warning lampAfter driving for a few me-
tres, the warning lamp goes
out again. If the vehicle is not used for long periods
The
v
ehic
le has a system for monitoring the
current consumption when the engine is left
unused for long periods of time âºâºâº page 203.
Some functions, such as the interior lights, or
the remote door opening, may be temporarily
disabled to prevent the battery from running
flat. These functions will come back on as
soon as the ignition is switched on and the
engine started. Winter conditions
During the w
inter, the starting power may be
reduced, and if necessary, the battery should
be charged âºâºâº in Important safety warn-
in g
s
for handling a vehicle battery on
page 306
Important safety warnings for han-
dling a v
ehicle battery All work on batteries requires specialist
kno
wl
edg
e. Please refer to a SEAT Official
Service or a workshop specialising in batter-
ies: risk of burns or exploding battery!
The battery must not be opened. Never try to
change the fluid level of the battery. Other-
wise explosive gas is released from the bat-
tery that could cause an explosion. ï
Wear eye protection.
ï
Battery acid is very corrosive and caustic. Wear
protective gloves and eye protection. In the event
of electrolyte splashes, rinse off with plenty of
water.
ï
Fires, sparks, open flames and smoking are pro-
hibited.
ï
The battery should only be charged in a well-ven-
tilated zone. Risk of explosion!
ï
Keep children away from acid and batteries!»
305
Technical data
Advice
Operation
Emergencies
Safety
Page 308 of 348
Advice
WARNING
â When rep airin
g or working on the electrical
system, proceed as follows:
â1. Remove the key from the ignition. The
negative cable on the battery must be
disconnected.
â 2. When the repair is finished, reconnect
the negative pole of the battery.
â Switch off all electrical devices before re-
connecting the b
attery. Reconnect first the
positive cable and then the negative cable.
Never reverse the polarity of the connections.
This could cause an electrical fire.
â Ensure that the vent hose is always connec-
ted to the b
attery.
â Never use damaged batteries. This could
cause an e
xplosion! Replace a damaged bat-
tery immediately. CAUTION
â Never di s
connect the battery if the ignition
is switched on or if the engine is running.
This could damage the electrical system or
electronic components. Charging the battery
Terminals for charging the battery are fitted
in the en
gine comp
artment. â
Note the warnin
gs âºâºâº in Important safety
w arnin
g
s for handling a vehicle battery on
page 306 and âºâºâº .
â Switch off all electrical devices. Remove the
ignition k ey
.
â R
aise the bonnet âºâºâº
page 299.
â Open the battery cover.
â Connect the charger clamps as described
to the po
sitive pole of the battery (+) and
exclusively to an earth on the bodywork
(â).
â Only use a charger which is compatible for
use with 12
V nominal voltage batteries.
The charge must not exceed a voltage of 15
V.
â Now connect the battery charger to the
power soc
ket and switch on.
â After charging the battery: switch off the
batter
y charger and disconnect the power
socket cable.
â Finally disconnect the charger cables from
the batter
y.
â Replace the battery cover correctly.
â Close the bonnet âºâºâº
page 299.
Important: Before you charge the battery
make sure you read the manufacturer's in-
structions for using the battery charger. WARNING
Never charge a battery that has frozen: re-
pl ac
e battery! Failure to do so may lead to an
explosion. Note
Use only the terminals in the engine compart-
ment t o c
harge the battery. Replacing the battery
The new battery should have the same speci-
fic
ation
s
(amperage, load and voltage) as the
used battery.
Your vehicle is equipped with an intelligent
power management system to control the
distribution of electrical energy âºâºâº
page 203.
The power management function ensures
that the battery is charged much more effi-
ciently than on vehicles without a power
management system. To maintain this func-
tion after replacing the battery, we recom-
mend that the replacement battery used is of
the same make and type as the original fitted
battery. To make proper use of the power
management function after the battery has
been changed, have the battery coded to the
power management mode at a specialised
workshop.
306
Page 314 of 348
Advice
Tyre monitoring control lamp If a light appears
ïThe pressure in one or more tyres has
clearly reduced in comparison to the
tyre pressure set by the driver or the
tyre has structural damage.
Additionally, an audible warning can be heard and a text
message can be seen on the instrument panel display.
ï²Stop! Reduce speed immediately! Stop the vehicle
safely as soon as possible. Avoid sudden manoeuvres
and braking! Check all tyres and pressures. Replace any
damaged tyres. If flashing
ï
System malfunction
The control lamp flashes for approximately one minute
and then lights up permanently.
If tyre pressure is correct, switch the ignition off and on
again. If the control lamp remains lit up, the tyre moni-
toring indicator can be calibrated. Have the system
checked by a specialised workshop.
Several warning and control lamps light up
f
or a f
ew sec
onds when the ignition is switch-
ed on while the function is verified. They will
switch off after a few seconds. WARNING
When the tyres are inflated at different pres-
sur e
s or at a pressure that is too low then a
tyre may be damaged resulting in a loss of control of the vehicle and a serious or fatal
acc
ident
.
â If the warning lamp ï lights up
, stop im-
mediately and check the tyres.
â If the tyres are inflated at different pres-
sure
s or if a tyre pressure is too low, this will
increase tyre wear, negatively affecting vehi-
cle stability and increasing braking distan-
ces.
â If tyres are inflated at different pressures or
a tyre pr
essure is too low, a tyre may be dam-
aged and burst resulting in a loss of control
of the vehicle.
â The driver is responsible for ensuring that
all
of the vehicle tyres are correctly inflated
to the right pressure. The recommended tyre
pressure is indicated on the label
âºâºâº page 319.
â The tyre monitoring system can only oper-
ate corr
ectly if all of the tyres are inflated to
the correct pressure when cold.
â Driving with tyres at the wrong pressure
can dam
age them and result in an accident.
Ensure that the tyre pressures of all the tyres
correspond to the vehicle load.
â Before starting a journey, always inflate
tyre
s to the correct pressure.
â Tyres with insufficient pressure are subjec-
ted to mor
e flexing. Due to this, the tyre
could become excessively hot, causing tread
separation and also tyre blow-out.
â With an overloaded vehicle at high speed,
the tyre
s can overheat and burst resulting in
a loss of vehicle control. â
Ty r
e pressures which are too high or too
low reduce the useful life of the tyre, affect-
ing vehicle performance.
â If a tyre has not been punctured and it does
not hav
e to be changed immediately, drive to
the nearest specialised workshop at a moder-
ate speed and have the tyre checked and in-
flated to the correct pressure. WARNING
Observe the safety warnings âº
âºâº
in Warning
and contr o
l lamps on page 119. Note
â If e x
cessively low tyre pressure is detected
with the ignition on, an audible warning will
sound. In the event that there is a fault in the
system, an audible warning will sound.
â Driving on dirt tracks for a long period of
time or driving in a s
porty style can tempora-
rily deactivate the TPMS. The control lamp
shows a fault, but disappears when road con-
ditions or the driving style change. 312
Page 315 of 348
Wheels
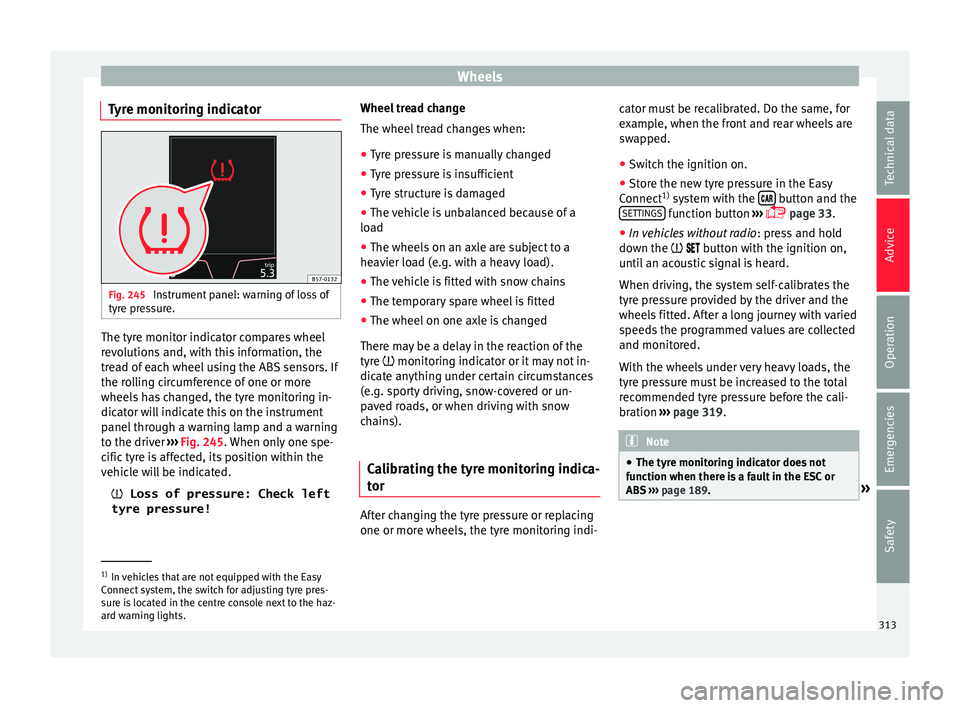
Tyre monitoring indicator Fig. 245
Instrument panel: warning of loss of
ty r
e pr
essure. The tyre monitor indicator compares wheel
r
ev
o
lutions and, with this information, the
tread of each wheel using the ABS sensors. If
the rolling circumference of one or more
wheels has changed, the tyre monitoring in-
dicator will indicate this on the instrument
panel through a warning lamp and a warning
to the driver âºâºâº Fig. 245. When only one spe-
cific tyre is affected, its position within the
vehicle will be indicated.
ï Loss of pressure: Check left
tyre pressure! Wheel tread change
The wheel tre
ad changes when:
â Tyre pressure is manually changed
â Tyre pressure is insufficient
â Tyre structure is damaged
â The vehicle is unbalanced because of a
load
â The wheel
s on an axle are subject to a
heavier lo
ad (e.g. with a heavy load).
â The vehicle is fitted with snow chains
â The temporary spare wheel is fitted
â The wheel on one axle is changed
There ma
y be a delay in the reaction of the
tyre ï monitoring indicator or it may not in-
dicate anything under certain circumstances
(e.g. sporty driving, snow-covered or un-
paved roads, or when driving with snow
chains).
Calibrating the tyre monitoring indica-
tor After changing the tyre pressure or replacing
one or mor
e wheel
s, the ty
re monitoring indi-cator must be recalibrated. Do the same, for
examp
le, when the front and rear wheels are
swapped.
â Switch the ignition on.
â Store the new tyre pressure in the Easy
Connect 1)
sys
tem with the ïïï button and the
S ET
TINGS function button
âºâº
âº
ï¨ page 33.
â In vehicles without radio : pres
s and hold
down the ï ïï
ï button with the ignition on,
until an acoustic signal is heard.
When driving, the system self-calibrates the
tyre pressure provided by the driver and the
wheels fitted. After a long journey with varied
speeds the programmed values are collected
and monitored.
With the wheels under very heavy loads, the
tyre pressure must be increased to the total
recommended tyre pressure before the cali-
bration âºâºâº page 319. Note
â The tyr e monit
oring indicator does not
function when there is a fault in the ESC or
ABS âºâºâº page 189. »1)
In vehicles that are not equipped with the Easy
Connect sy
stem, the switch for adjusting tyre pres-
sure is located in the centre console next to the haz-
ard warning lights. 313
Technical data
Advice
Operation
Emergencies
Safety
Page 320 of 348
Technical data
Vehicle data sticker
The v
ehic
le data sticker is under the carpet
trim in the luggage compartment, in the
spare wheel well. A sticker with the vehicle
data is attached to the inside cover of the
Maintenance Programme.
The following information is provided on the
vehicle data sticker: âºâºâº Fig. 248
Vehicle identification number (chassis
number)
Vehicle type, model, capacity, engine
type, finish, engine power and gearbox
type
Engine code, gearbox code, external
paint code and internal equipment code
Optional extras and PR numbers
Identifying letters
The identifying letters of the engine can be
viewed on the instrument panel when the en-
gine is switched off and the ignition is on.
â Hold down the button 0.0/SET on the dash
p anel
f
or more than 15 seconds.
1 2
3
4 Information on fuel consump-
tion
Fuel
c
onsumption Approved consumption values are derived
from me
a
surements performed or supervised
by certified EU laboratories, according to the
legislation in force at the time (for more infor-
mation, see the Publications Office of the Eu-
ropean Union on the EUR-Lex website: © Eu-
ropean Union, http://eur-lex.europa.eu/) and
apply to the specified vehicle characteristics.
The values relating to fuel consumption and
CO 2 emissions can be found in the documen-
tation provided to the purchaser of the vehi-
cle at the time of purchase.
Fuel consumption and CO 2 emissions depend
on the equipment/features of each individual
vehicle, as well as on the driving style, road
conditions, traffic conditions, environmental
conditions, load or number of passengers. Note
In practice, and considering all the factors
mentioned here, c on
sumption values can dif-
fer from those calculated in the current Euro-
pean regulations. Weights
Kerb weight refers to the basic model with a
fuel
t
ank filled to 90% capacity and without
optional extras. The figure quoted includes
75 kg to allow for the weight of the driver.
Special versions, optional equipment fittings
or retro-fitting accessories will increase the
weight of the vehicle âºâºâº .
WARNING
â Ple a
se note that the centre of gravity may
shift when transporting heavy objects; this
may affect vehicle handling and lead to an ac-
cident. Always adjust your speed and driving
style to suit road conditions and require-
ments.
â Never exceed the gross axle weight rating
or the gros
s vehicle weight rating. If the per-
missible axle load or the permissible total
weight is exceeded, the driving characteris-
tics of the vehicle may change, which could
lead to accidents, injuries and damage to the
vehicle. 318
Page 332 of 348
Index
Audible warning signal lights . . . . . . . . . . . . . . . . . . . . . . . . . . . . . . . . .
144
se at
belt not fastened . . . . . . . . . . . . . . . . . . . . 79
warning and control lamps . . . . . . . . . . . . . . . 119
Auto Hold . . . . . . . . . . . . . . . . . . . . . . . . . . . . . . . 211
Auto Hold function . . . . . . . . . . . . . . . . . . . . . . . . 211
Auto Lock (central locking) . . . . . . . . . . . . . . . . . 125
Automatic car washes switching the Auto Hold function off . . . . . . . . 212
Automatic dipped beam control . . . . . . . . . . . . . 146
Automatic gearbox . . . . . . . . . . . . . . . . . . . . . . . . 193 downhill speed control . . . . . . . . . . . . . . . . . . 198
driving tips . . . . . . . . . . . . . . . . . . . . . . . . . . . . 196
emergency program . . . . . . . . . . . . . . . . . . . . . 199
kick-down feature . . . . . . . . . . . . . . . . . . . . . . . 197
launch control program . . . . . . . . . . . . . . . . . . 197
manual release of the selector lever . . . . . . . . . 49
safety interlock for ignition key . . . . . . . . . . . . 181
selector lever lock . . . . . . . . . . . . . . . . . . . . . . . 194
selector lever positions . . . . . . . . . . . . . . . . . . 193
steering wheel with gear shift paddles . . . . . . 195
tiptronic . . . . . . . . . . . . . . . . . . . . . . . . . . 193, 195
towing . . . . . . . . . . . . . . . . . . . . . . . . . . . . . . . . . 99
AUX-IN . . . . . . . . . . . . . . . . . . . . . . . . . . . . . . . . . . 123
Auxiliary heater . . . . . . . . . . . . . . . . . . . . . . . . . . 177 activating . . . . . . . . . . . . . . . . . . . . . . . . . . . . . 179
electric consumers . . . . . . . . . . . . . . . . . . . . . . 180
operating instructions . . . . . . . . . . . . . . . . . . . 180
programming . . . . . . . . . . . . . . . . . . . . . . . . . . 179
remote control . . . . . . . . . . . . . . . . . . . . . . . . . 178
remote control range . . . . . . . . . . . . . . . . . . . . 179
special features . . . . . . . . . . . . . . . . . . . . . . . . 178
switching off . . . . . . . . . . . . . . . . . . . . . . . . . . . 177
switching on . . . . . . . . . . . . . . . . . . . . . . . . . . . 177
things to note . . . . . . . . . . . . . . . . . . . . . . . . . . 180 B
Batter
y . . . . . . . . . . . . . . . . . . . . . . . . . . . . . . . . . . 133
replacement in the remote control (auxiliary heater) . . . . . . . . . . . . . . . . . . . . . . . . . . . . . . 178
Before setting off . . . . . . . . . . . . . . . . . . . . . . . . . . 73
Belt tensioners control lamp . . . . . . . . . . . . . . . . . . . . . . . . . . . . 89
Belt tightening . . . . . . . . . . . . . . . . . . . . . . . . . . . . 83
Bench seat . . . . . . . . . . . . . . . . . . . . . . . . . . . . . . 159
Bicycle rack fitting on the retractable tow hitch . . . . . . . . . 277
maximum load . . . . . . . . . . . . . . . . . . . . . . . . . 277
Biodiesel . . . . . . . . . . . . . . . . . . . . . . . . . . . . . . . . 294
Blind spot detector (BSD) . . . . . . . . . . . . . . . . . . 237 control lamps . . . . . . . . . . . . . . . . . . . . . . . . . . 237
driving situations . . . . . . . . . . . . . . . . . . . . . . . 240
indication in the external rear view mirror . . . 238
malfunction . . . . . . . . . . . . . . . . . . . . . . . . . . . . 237
operating . . . . . . . . . . . . . . . . . . . . . . . . . . . . . . 238
towing . . . . . . . . . . . . . . . . . . . . . . . . . . . . . . . . 242
Bonnet . . . . . . . . . . . . . . . . . . . . . . . . . . . . . 17, 298 opening the bonnet . . . . . . . . . . . . . . . . . . . . . 299
Brake fluid . . . . . . . . . . . . . . . . . . . . . . . . . . . . . . . 59
Brakes . . . . . . . . . . . . . . . . . . . . . . . . . . . . . . . . . . 188 brake fluid . . . . . . . . . . . . . . . . . . . . . . . . . . . . . 303
brake servo . . . . . . . . . . . . . . . . . . . . . . . . . . . . 188
electronic parking brake . . . . . . . . . . . . . . . . . 186
emergency braking function . . . . . . . . . . . . . . 187
new brake pads . . . . . . . . . . . . . . . . . . . . . . . . 188
Braking front assist . . . . . . . . . . . . . . . . . . . . . . . . . . . . 189
BSD see Blind spot detector (BSD) . . . . . . . . . . . . . 237
BSD Plus . . . . . . . . . . . . . . . . . . . . . . . . . . . . . . . . 232 C
Camera
c
leaning . . . . . . . . . . . . . . . . . . . . . . . . . . . . . . 287
cleanliness . . . . . . . . . . . . . . . . . . . . . . . . . . . . 245
Lane Assist . . . . . . . . . . . . . . . . . . . . . . . . . . . . 230
Capacities . . . . . . . . . . . . . . . . . . . . . . . . . . . . . . . . 56 AdBlue tank . . . . . . . . . . . . . . . . . . . . . . . . . . . 295
fuel tank . . . . . . . . . . . . . . . . . . . . . . . . . . . . . . 118
windscreen washer water . . . . . . . . . . . . . . . . 304
Car-care products . . . . . . . . . . . . . . . . . . . . . . . . . 285
Catalytic converter . . . . . . . . . . . . . . . . . . . . . . . . 204 malfunction . . . . . . . . . . . . . . . . . . . . . . . . . . . . 204
CCS . . . . . . . . . . . . . . . . . . . . . . . . . . . . . . . . . . . . . 44
CD-ROM player (navigation) . . . . . . . . . . . . . . . . 161
Central locking . . . . . . . . . . . . . . . . . . . . . . . . . . . 125 adjusting . . . . . . . . . . . . . . . . . . . . . . . . . . . . . . 128
anti-theft alarm . . . . . . . . . . . . . . . . . . . . . . . . . 134
central locking switch . . . . . . . . . . . . . . . . . . . . 128
electric windows . . . . . . . . . . . . . . . . . . . . . . . . 140
emergency locking . . . . . . . . . . . . . . . . . . . . . . . 16
Keyless Access . . . . . . . . . . . . . . . . . . . . . . . . . 129
Panoramic sliding/tilting sunroof . . . . . . . . . . 140
remote control key . . . . . . . . . . . . . . . . . . . . . . 127
selective unlocking system . . . . . . . . . . . . . . . 127
Central wheel trim . . . . . . . . . . . . . . . . . . . . . . . . . 64
Centre console . . . . . . . . . . . . . . . . . . . . . . . . . . . . 11
Cetane number (diesel fuel) . . . . . . . . . . . . . . . . 294
Changing a bulb . . . . . . . . . . . . . . . . . . . . . . . . . . 106 dipped beam . . . . . . . . . . . . . . . . . . . . . . . . . . 107
fog light . . . . . . . . . . . . . . . . . . . . . . . . . . . . . . . 108
main beam . . . . . . . . . . . . . . . . . . . . . . . . . . . . 107
number plate light . . . . . . . . . . . . . . . . . . . . . . 110
rear bulb in the side panel . . . . . . . . . . . . . . . . 109
rear light in the rear lid . . . . . . . . . . . . . . . . . . . 110
turn signal . . . . . . . . . . . . . . . . . . . . . . . . . . . . . 107
Changing a wheel . . . . . . . . . . . . . . . . . . . . . . . . . 64 subsequent work . . . . . . . . . . . . . . . . . . . . . . . . 67
330