tow Seat Cordoba 2008 Owner's Manual
[x] Cancel search | Manufacturer: SEAT, Model Year: 2008, Model line: Cordoba, Model: Seat Cordoba 2008Pages: 258, PDF Size: 7.87 MB
Page 5 of 258

Contents3
ContentsThe structure of this manual
. . . . .
Content
. . . . . . . . . . . . . . . . . . . . . . . . . . . . . . . .
Safety First
. . . . . . . . . . . . . . . . . . . . . . . . . . .
Safe driving
. . . . . . . . . . . . . . . . . . . . . . . . . . . . . .
Brief introduction . . . . . . . . . . . . . . . . . . . . . . . .
Proper sitting position for occupants . . . . . . . . .
Pedal area . . . . . . . . . . . . . . . . . . . . . . . . . . . . . .
Stowing luggage . . . . . . . . . . . . . . . . . . . . . . . . .
Seat belts
. . . . . . . . . . . . . . . . . . . . . . . . . . . . . . . .
Introduction . . . . . . . . . . . . . . . . . . . . . . . . . . . . .
Why wear seat belts? . . . . . . . . . . . . . . . . . . . . . .
Seat belts . . . . . . . . . . . . . . . . . . . . . . . . . . . . . . .
Belt tension devices* . . . . . . . . . . . . . . . . . . . . .
Airbag system
. . . . . . . . . . . . . . . . . . . . . . . . . . . .
Brief introduction . . . . . . . . . . . . . . . . . . . . . . . .
Front airbags . . . . . . . . . . . . . . . . . . . . . . . . . . . .
Side airbags . . . . . . . . . . . . . . . . . . . . . . . . . . . . .
Curtain airbags . . . . . . . . . . . . . . . . . . . . . . . . . .
Deactivating airbags* . . . . . . . . . . . . . . . . . . . . .
Child safety
. . . . . . . . . . . . . . . . . . . . . . . . . . . . . .
Brief introduction . . . . . . . . . . . . . . . . . . . . . . . .
Child seats . . . . . . . . . . . . . . . . . . . . . . . . . . . . . .
Securing child seats . . . . . . . . . . . . . . . . . . . . . .
Operating instructions
. . . . . . . . . . . .
Cockpit
. . . . . . . . . . . . . . . . . . . . . . . . . . . . . . . . . . .
Overview . . . . . . . . . . . . . . . . . . . . . . . . . . . . . . .
Instruments . . . . . . . . . . . . . . . . . . . . . . . . . . . . .
Digital display in the instrument panel . . . . . . .
Warning lamps . . . . . . . . . . . . . . . . . . . . . . . . . . .
Steering wheel controls*
. . . . . . . . . . . . . . . . . .
Audio control from controls on the steering
wheel . . . . . . . . . . . . . . . . . . . . . . . . . . . . . . . . . .
Unlocking and locking
. . . . . . . . . . . . . . . . . . . .
Doors . . . . . . . . . . . . . . . . . . . . . . . . . . . . . . . . . .
Central locking* . . . . . . . . . . . . . . . . . . . . . . . . . .
Keys . . . . . . . . . . . . . . . . . . . . . . . . . . . . . . . . . . .
Radio frequency remote control . . . . . . . . . . . . .
Anti-theft alarm system* . . . . . . . . . . . . . . . . . . .
Tailgate . . . . . . . . . . . . . . . . . . . . . . . . . . . . . . . . .
Windows . . . . . . . . . . . . . . . . . . . . . . . . . . . . . . .
Sliding/tilting roof* . . . . . . . . . . . . . . . . . . . . . . .
Lights and visibility
. . . . . . . . . . . . . . . . . . . . . . .
Lights . . . . . . . . . . . . . . . . . . . . . . . . . . . . . . . . . .
Interior lights . . . . . . . . . . . . . . . . . . . . . . . . . . . .
Visibility . . . . . . . . . . . . . . . . . . . . . . . . . . . . . . . .
Windscreen washers . . . . . . . . . . . . . . . . . . . . . .
Windscreen . . . . . . . . . . . . . . . . . . . . . . . . . . . . .
Mirrors . . . . . . . . . . . . . . . . . . . . . . . . . . . . . . . . .
Seats and stowage
. . . . . . . . . . . . . . . . . . . . . . .
The importance of correct seat adjustment . . . .
Head restraints . . . . . . . . . . . . . . . . . . . . . . . . . .
Front seats . . . . . . . . . . . . . . . . . . . . . . . . . . . . . .
Rear seat bench . . . . . . . . . . . . . . . . . . . . . . . . . .
Stowage compartments . . . . . . . . . . . . . . . . . . .
Ashtrays, cigarette lighter and electrical sockets First-aid kit, warning triangle, fire extinguisher*
Luggage compartment . . . . . . . . . . . . . . . . . . . .
Heating, Ventilation and Air conditioning
. .
Heating and ventilation . . . . . . . . . . . . . . . . . . .
Air conditioning* . . . . . . . . . . . . . . . . . . . . . . . . .
Climatronic . . . . . . . . . . . . . . . . . . . . . . . . . . . . . .
General notes . . . . . . . . . . . . . . . . . . . . . . . . . . .
Driving
. . . . . . . . . . . . . . . . . . . . . . . . . . . . . . . . . . .
Address . . . . . . . . . . . . . . . . . . . . . . . . . . . . . . . .
Safety . . . . . . . . . . . . . . . . . . . . . . . . . . . . . . . . . .
Ignition lock . . . . . . . . . . . . . . . . . . . . . . . . . . . . .
Starting and stopping the engine . . . . . . . . . . .
Manual gearbox . . . . . . . . . . . . . . . . . . . . . . . . . .
Automatic gearbox* . . . . . . . . . . . . . . . . . . . . . .
Handbrake . . . . . . . . . . . . . . . . . . . . . . . . . . . . . .
Cruise control system (CCS)* . . . . . . . . . . . . . . .
Tips and Maintenance
. . . . . . . . . . . . .
Intelligent technology
. . . . . . . . . . . . . . . . . . . . .
Brakes . . . . . . . . . . . . . . . . . . . . . . . . . . . . . . . . .
Anti-lock brake system and traction control ABS
Electronic stabilisation programme (ESP)* . . . .
Driving and the environment
. . . . . . . . . . . . . .
Running-in . . . . . . . . . . . . . . . . . . . . . . . . . . . . . .
Exhaust gasses purification system . . . . . . . . . .
Driving abroad . . . . . . . . . . . . . . . . . . . . . . . . . . .
Trailer towing . . . . . . . . . . . . . . . . . . . . . . . . . . . .
Driving economically and with respect for the
environment . . . . . . . . . . . . . . . . . . . . . . . . . . . . .
5
6
7
7
7
9
14
15
16
16
18
21
25
27
27
30
33
37
40
42
42
44
47 51
51
51
52
54
60
68
68
70
70
70
76
78
80
83
84
87
89
89
94
95
96
98
99
102
102
103
105
107
108
111 113
114
116
116
119
122
125
127
127
128
129
130
133
134
138
139
143
143
143
144
145
147
147
148
149
154
156
COR_ING_0707 Seite 3 Mittwoch, 1. August 2007 6:25 18
Page 6 of 258
Contents
4Cleaning and caring for your vehicle
. . . . . . .
General notes . . . . . . . . . . . . . . . . . . . . . . . . . . .
Care of the vehicle exterior . . . . . . . . . . . . . . . . .
Care of the vehicle interior . . . . . . . . . . . . . . . . .
Accessories, parts replacement and
modifications
. . . . . . . . . . . . . . . . . . . . . . . . . . . .
Accessories and parts . . . . . . . . . . . . . . . . . . . . .
Modifications . . . . . . . . . . . . . . . . . . . . . . . . . . . .
Roof aerial* . . . . . . . . . . . . . . . . . . . . . . . . . . . . .
Mobile telephones and two-way radios . . . . . . .
Fitting a towing bracket* . . . . . . . . . . . . . . . . . . .
Checking and refilling levels
. . . . . . . . . . . . . .
Refuelling . . . . . . . . . . . . . . . . . . . . . . . . . . . . . . .
Petrol . . . . . . . . . . . . . . . . . . . . . . . . . . . . . . . . . .
Diesel . . . . . . . . . . . . . . . . . . . . . . . . . . . . . . . . . .
Working in the engine compartment . . . . . . . . .
Engine oil . . . . . . . . . . . . . . . . . . . . . . . . . . . . . . .
Coolant . . . . . . . . . . . . . . . . . . . . . . . . . . . . . . . . .
Washer fluid and windscreen wiper blades . . . .
Brake fluid . . . . . . . . . . . . . . . . . . . . . . . . . . . . . .
Battery . . . . . . . . . . . . . . . . . . . . . . . . . . . . . . . . .
Wheels . . . . . . . . . . . . . . . . . . . . . . . . . . . . . . . . .
If and when
. . . . . . . . . . . . . . . . . . . . . . . . . . . . . .
Vehicle tools, spare wheel . . . . . . . . . . . . . . . . .
Wheel change . . . . . . . . . . . . . . . . . . . . . . . . . . .
Tyre repair kit* (Tyre Mobility System) . . . . . . . .
Fuses . . . . . . . . . . . . . . . . . . . . . . . . . . . . . . . . . .
Bulb change . . . . . . . . . . . . . . . . . . . . . . . . . . . . .
Jump-starting . . . . . . . . . . . . . . . . . . . . . . . . . . . .
Towing and tow-starting . . . . . . . . . . . . . . . . . . .
Te c h n i c a l D a t a
. . . . . . . . . . . . . . . . . . . . . . .
General notes on the technical data
. . . . . . .
What you should be aware of . . . . . . . . . . . . . . .
How are the figures measured? . . . . . . . . . . . . . Towing a trailer . . . . . . . . . . . . . . . . . . . . . . . . . .
Wheels . . . . . . . . . . . . . . . . . . . . . . . . . . . . . . . . .
Techn ical Data
. . . . . . . . . . . . . . . . . . . . . . . . . . . .
Checking fluid levels . . . . . . . . . . . . . . . . . . . . . .
Petrol engine 1.2 51 kW (69 bhp) . . . . . . . . . . .
Petrol engine 1.4 63 kW (86 bhp) . . . . . . . . . . .
Petrol engine 1.4 litre 55 kW (75 hp). Automatic
Petrol engine 1.4 74 kW (100 bhp) . . . . . . . . . .
Petrol engine 1.6l 77 kW (105 bhp) . . . . . . . . . .
Diesel engine 1.4 litre TDI 51 kW (70 bhp) . . . .
Diesel engine 1.4 TDI 59 kW (80 bhp). . . . . . . .
Diesel engine 1.9l TDI 74 kW (100 bhp) . . . . . .
Diesel engine 1.9l TDI 96 kW (131 bhp) . . . . . .
Dimensions and capacities . . . . . . . . . . . . . . . .
Index
. . . . . . . . . . . . . . . . . . . . . . . . . . . . . . . . . .
158
158
159
164
167
167
167
168
168
170
172
172
173
174
175
178
182
185
187
188
190
196
196
197
203
205
211
221
224
227
227
227
229 230
230
232
232
233
234
235
237
238
239
240
242
243
245
247
COR_ING_0707 Seite 4 Mittwoch, 1. August 2007 6:25 18
Page 17 of 258
Safe driving15
Safety First
Operating instructions
Tips and Maintenance
Te c h n i c a l D a t a
WARNING
•
If the pedals are obstructed, you could cause an accident. Risk of
serious injuries.
•
Ensure that the floor mats are always securely attached.
•
Never lay or fit floor mats or other floor coverings over the original floor
mats. This would reduce the pedal area and could obstruct the pedals. Risk
of accident.
Stowing luggageLoading the luggage compartment
All luggage and other loose object s must be safely secured in
the luggage compartment.Unsecured objects which shift back and forth could affect safety or
driving characteristics of the vehicle by shifting the centre of gravity.
– Distribute the load evenly in the luggage compartment.
– Lay and stow heavy luggage as far forward as possible in the luggage compartment.
– Stow heavy luggage as low as possible in the luggage compart- ment.
WARNING
•
Loose luggage and other objects in the luggage compartment can
cause serious injuries.
•
Always put objects in the luggage compartment.
•
During sudden manoeuvres or accidents, loose objects can be thrown
forward, injuring vehicle occupants or even to third parties. This increased
risk of injury will be further increased if a loose object is struck by an
inflating airbag. If this happens, objects can be transformed into
“missiles”. Risk of fatal injury.
•
Please note that the centre of gravity may shift when transporting
heavy objects; this may affect the vehicle's handling and lead to an acci-
dent. Therefore, it is essential to adjust your speed and driving style
accordingly, to avoid accidents.
•
Never exceed the allowed axle loads or allowed maximum weight. If the
allowed axle load or the allowed total weight is exceeded, the driving char-
acteristics of the vehicle may change, leading to accidents, injuries and
damage to the vehicle.
•
Never leave your vehicle unattended, especially when the tailgate is
open. Children could climb into the luggage compartment closing the door
behind them; they will remain trapped without help and there is a mortal
risk.
•
Never allow children to play in or around the vehicle. Close and lock
both the tailgate and all the doors when you leave the vehicle. Before you
lock the vehicle, make sure that ther e are no adults or children in the
vehicle.
•
Never transport passengers in the luggage compartment. Every
passenger must be properly belted in ⇒ page 16.Note
•
Air circulation in the vehicle helps reduce fogging of the windows. Used
air escapes through ventilation slits in the side trim of the luggage compart-
ment. Ensure that the ventil ation slits are never covered.WARNING (continued)
COR_ING_0707 Seite 15 Mittwoch, 1. August 2007 6:25 18
Page 23 of 258
Seat belts21
Safety First
Operating instructions
Tips and Maintenance
Te c h n i c a l D a t a
•
Fasten your seat belt before every trip - even when driving in town. That
applies also to your front and rear passengers – danger of injury!
•
The seat belt cannot offer its full protection if the belt web is not posi-
tioned correctly.
•
Never allow two passengers (even children) to share the same seat belt.
•
Keep both feet in the foot-well in front of your seat as long as the
vehicle is in motion.
•
Never unbuckle a seat belt while the vehicle is in motion. Risk of fatal
injury.
•
The belt webbing must never be twisted while it is being worn.
•
The belt webbing should never lie on hard or fragile objects (such as
glasses or pens, etc.) because this can cause injuries.
•
Do not allow the seat belt to be damaged or jammed, or to rub on any
sharp edges.
•
Never wear the seat belt under the arm or in any other incorrect posi-
tion.
•
Loose, bulky clothing (such as an overcoat over a jacket) impairs the
proper fit and function of the belts, reducing their capacity to protect.
•
The slot in the seat belt buckle must not be blocked with paper or other
objects, as this can prevent the latch plate from engaging securely.
•
Never use seat belt clips, retaining rings or similar instruments to alter
the position of the belt webbing.
•
Frayed or torn seat belts or damage to the connections, belt retractors
or parts of the buckle could cause severe injuries in the event of an acci-
dent. Therefore, you must check the co ndition of all seat belts at regular
intervals.
•
Seat belts which have been worn in an accident and stretched must be
replaced by a qualified workshop. Renewal may be necessary even if there
is no apparent damage. The belt anchorage should also be checked.
•
Do not attempt to repair a damaged se at belt yourself. The seat belts
must not be removed or modified in any way.
•
The belts must be kept clean, ot herwise the retractors may not work
properly ⇒page 166.
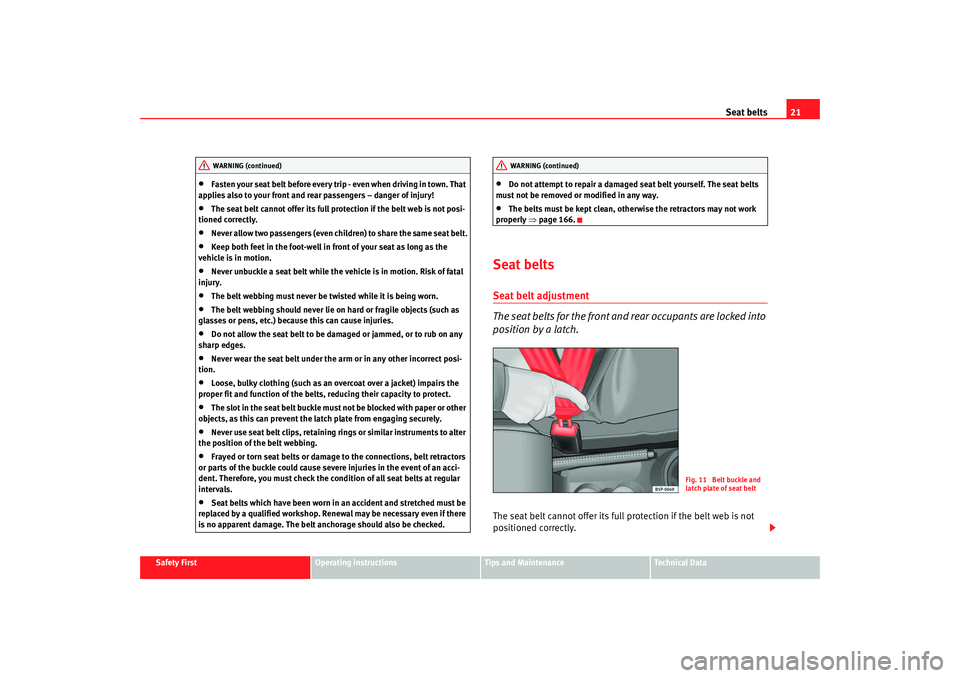
Seat beltsSeat belt adjustment
The seat belts for the front and rear occupants are locked into
position by a latch.The seat belt cannot offer its full protection if the belt web is not
positioned correctly.
WARNING (continued)
WARNING (continued)
Fig. 11 Belt buckle and
latch plate of seat belt
COR_ING_0707 Seite 21 Mittwoch, 1. August 2007 6:25 18
Page 53 of 258

Cockpit51
Safety First
Operating instructions
Tips and Maintenance
Te c h n i c a l D a t a
Operating instructionsCockpitOverviewOverview of the instrument panel
This overview will help you to familiarise yourself with the
controls and displays.
Door release lever
Air vent
Light switch . . . . . . . . . . . . . . . . . . . . . . . . . . . . . . . . . . . . . . . . .
Light dimmer for instrument panel ligh ting* . . . . . . . . . . . . . .
Headlight range control* . . . . . . . . . . . . . . . . . . . . . . . . . . . . . .
Turn signal and dipped beam lever and cruise control system*
Instrument panel an d warning lights:
− Instruments . . . . . . . . . . . . . . . . . . . . . . . . . . . . . . . . . . . . . . .
− Indication lamps . . . . . . . . . . . . . . . . . . . . . . . . . . . . . . . . . . .
Horn (works only when the igni tion is on)/ and driver front
airbag* . . . . . . . . . . . . . . . . . . . . . . . . . . . . . . . . . . . . . . . . . . . . .
Steering and starter lock . . . . . . . . . . . . . . . . . . . . . . . . . . . . . .
Windscreen wiper and windscreen wash lever and operation of
the multi-function display* . . . . . . . . . . . . . . . . . . . . . . . . . . . . .
Switch for hazard warning lights . . . . . . . . . . . . . . . . . . . . . . . .
Switch for heated rear window . . . . . . . . . . . . . . . . . . . . . . . . . .
Airbag disconnected warning light* . . . . . . . . . . . . . . . . . . . . .
Cup holder* . . . . . . . . . . . . . . . . . . . . . . . . . . . . . . . . . . . . . . . . . Radio casing*/Radio navigation system*
Passenger airbag* . . . . . . . . . . . . . . . . . . . . . . . . . . . . . . . . . . .
Glove box/Stowage compartment . . . . . . . . . . . . . . . . . . . . . . .
Switches for:
−
Heating and ventilation . . . . . . . . . . . . . . . . . . . . . . . . . . . . .
− Air conditioning* . . . . . . . . . . . . . . . . . . . . . . . . . . . . . . . . . .
− Climatronic* . . . . . . . . . . . . . . . . . . . . . . . . . . . . . . . . . . . . . .
Ashtray/ cigarette lighter/socket . . . . . . . . . . . . . . . . . . . . . . . .
Handbrake lever . . . . . . . . . . . . . . . . . . . . . . . . . . . . . . . . . . . . .
Automatic / manual gearbox lever* . . . . . . . . . . . . . . . . . . . . .
Pedals . . . . . . . . . . . . . . . . . . . . . . . . . . . . . . . . . . . . . . . . . . . . .
Controls on the steering wheel* . . . . . . . . . . . . . . . . . . . . . . . . .
Steering column control lever* . . . . . . . . . . . . . . . . . . . . . . . . .
Stowage compartment . . . . . . . . . . . . . . . . . . . . . . . . . . . . . . . .
Bonnet release lever . . . . . . . . . . . . . . . . . . . . . . . . . . . . . . . . . .
Control for adjusting electric wing mirrors* . . . . . . . . . . . . . . .
Central locking button* . . . . . . . . . . . . . . . . . . . . . . . . . . . . . . .
Electric window controls* . . . . . . . . . . . . . . . . . . . . . . . . . . . . .
Note
Some of the items of equipment listed here are fitted only on certain
models/model years or are optional extras.
A1A2A3
89
A4
90
A5
90
A6
92, 139
A7
52
60
A8
27
A9
129
A10
96, 55
A11
91
A12
90
A13
28
A14
110
A15A16
30
A17
108
A18
116
119
122
A19
111
A20
138
A21
134,133
A22
14
A23
68
A24
127
A25
108
A26
177
A27
100
A28
73
A29
84
COR_ING_0707 Seite 51 Mittwoch, 1. August 2007 6:25 18
Page 65 of 258
Cockpit63
Safety First
Operating instructions
Tips and Maintenance
Te c h n i c a l D a t a
There is a fault in the electro-hydraulic steering system if the lamp does not
go out or lights up whilst the vehicle is in motion. Take the vehicle to the
Authorised Service Centre as soon as possible.
Note
When towing the vehicle with the engine stopped or due to a fault in the
power steering, this will not operate. The vehicle can still be steered, but it
will require greater force to turn the steering wheel.Engine management
This warning lamp monitors th e engine management system
for petrol engines.
The warning lamp
(Electronic Power Control) lights up when the ignition
is switched on to show that the lamp is working properly. It should go out
when the engine has started running.
If a fault develops in the electronic engine management system while you are
driving, this warning lamp will light up. Stop the vehicle and seek technical
assistance.
Glow plug system / Engine fault*
The warning lamp lights up to show that the glow plugs are
preheating. It flashes if there is an engine fault.
Warning lamp
is lit
The warning lamp lights up while the glow plugs are preheating. When the
warning lamp goes off, the engine should be started straight away. Warning lamp
flashes
If a fault develops in the engine management system while you are driving,
the glow plug lamp will flash
. Take the vehicle to an Authorised Service
Centre as soon as possible and have the engine checked.
Tu r n si g nals
The warning lamp flashes when the turn signals are in oper-
ation.Depending on which turn signal is operated, either the left
or right
indi-
cator lamp flashes. Both warning lamps will flash at the same time when the
hazard warning lights are switched on.
If one turn signal fails, the warning lamp will start flashing twice as fast.
Further information on the turn signals ⇒page 92.
Coolant Level* / temperature
The warning lamp lights up if the coolant temperature is too
high or if the coolant level is too low.There is a fault if:•
The warning symbol does not go out again after a few seconds.
•
The warning lamp lights up or flashes while the vehicle is moving, while
three acoustic warning signals ⇒ are emitted.
This means that either the coolant level is too low or the coolant temperature
is too high.
COR_ING_0707 Seite 63 Mittwoch, 1. August 2007 6:25 18
Page 69 of 258
Cockpit67
Safety First
Operating instructions
Tips and Maintenance
Te c h n i c a l D a t a
Electronic immobiliser
Inside the key there is a chip that deac tivates the electronic immobiliser auto-
matically when the key is inserted into the ignition. The immobiliser will be
activated again automatically as soon as you pull the key out of the ignition
lock.
The engine can, however, be started if the appropriate coded SEAT genuine
key is used.
Note
The vehicle cannot be operated properly if you do not have a genuine SEAT
key.Engine oil pressure
This warning lamp indicates that the engine oil pressure is
too low.If this warning symbol starts to flash, and is accompanied by three audible
warnings , switch off the engine and check the oil level. If the oil level is too
low, add more engine oil ⇒page 178.
If the symbol flashes although the oil level is correct, do not drive on. The
engine must not even run at idle speed. Obtain technical assistance.
Trailer turn signals
This warning lamp also flashe s when the turn signals are
operated while towing a caravan or trailer.The warning lamp
flashes when the turn signals are operated, provided a
trailer is correctly attached and connected to the vehicle.
The warning lamp will not flash if one of the turn signals on the trailer fails.
Differential lock fault (EDL)*
EDL operates along with the ABS in vehicles equipped with an
Electronic Stabilisation Program (ESP)*A malfunction in the EDL is indicated by the ABS warning lamp
. Please
take the vehicle to a qualified workshop as soon as possible. For further infor-
mation on the EDL ⇒page 146, “Electronic diff erential lock (EDL)*”.
COR_ING_0707 Seite 67 Mittwoch, 1. August 2007 6:25 18
Page 80 of 258
Unlocking and locking
78Radio frequency remote controlLocking and unlocking the vehicle
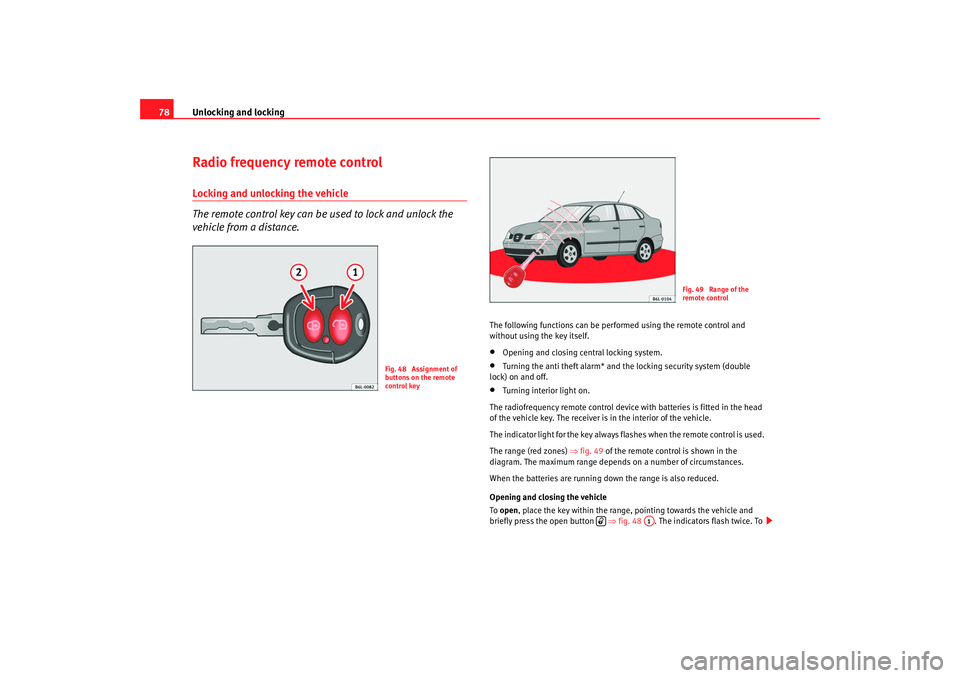
The remote control key can be used to lock and unlock the
vehicle from a distance.
The following functions can be perf ormed using the remote control and
without using the key itself.•
Opening and closing central locking system.
•
Turning the anti theft alarm* and the locking security system (double
lock) on and off.
•
Turning interior light on.
The radiofrequency remote control device with batteries is fitted in the head
of the vehicle key. The receiver is in the interior of the vehicle.
The indicator light for the key always flashes when the remote control is used.
The range (red zones) ⇒fig. 49 of the remote cont rol is shown in the
diagram. The maximum range depends on a number of circumstances.
When the batteries are running down the range is also reduced.
Opening and closing the vehicle
To open , place the key within the range, pointing towards the vehicle and
briefly press the open button ⇒fig. 48 . The indicators flash twice. To
Fig. 48 Assignment of
buttons on the remote
control key
Fig. 49 Range of the
remote control
A1
COR_ING_0707 Seite 78 Mittwoch, 1. August 2007 6:25 18
Page 82 of 258
Unlocking and locking
80
–Maximum time allowed for synchronising is 30 seconds.
– The normal key is used to activate the ignition, and the key with the remote control is the key to be programmed.
– Check that the car is open before commencing programming.
– Place the key without remote control in the contact inside the steering and ignition lock.
– Use the key with remote control and mechanically lock the vehicle from the driver's door.
– Open and close the driver's door lock mechanically, using the remote control key.
– At the same time press the button on the remot
e control
key.
– Complete the procedure by removing the key from the contact
It is possible that the vehicle could no longer be opened and closed with the
remote control if the button is repeatedly pressed outside of the effective
range of the radio frequency remote cont rol. The remote control key will have
to be resynchronised.
Spare remote control keys are available from Authorised Service Centres, they
must be matched to the locking system.
Anti-theft alarm system*Description of anti-theft alarm system*
The anti-theft alarm triggers an alarm if unauthorised move-
ments are detected around the vehicle.The anti-theft alarm makes it more difficult to break into the vehicle or steal
it. Audible and visible alarms are triggered if the car is opened using the
mechanical key, or if unauthorised access is gained to the vehicle.
The anti-theft alarm system is automatically switched on when the vehicle is
locked. For this, either turn the key once in the lock towards the locking posi-
tion or press button on the radio-frequency remote control*. The
system is activated immediately and the indicator light located on the
driver’s door will flash along with the indicators indicating that the alarm and
the locking security system (double lock) have been turned on.
When the vehicle is locked the indicator lamps light up only if the alarm has
been correctly activated (all the protection zones should be correctly closed).
If any of the doors or the bonnet are open, when the alarm is connected these
will not be included in the protection zones of the vehicle. If the door or
bonnet is subsequently closed, they wi ll automatically be included in the
vehicle protection zones and the indicators will flash accordingly.
When does the system trigger an alarm?
The alarm system is triggered, in the locked vehicle, when:•
a door
•
the bonnet or
•
the tailgate
are unduly opened
•
or the ignition is switched on
A1
A2
COR_ING_0707 Seite 80 Mittwoch, 1. August 2007 6:25 18
Page 92 of 258
Lights and visibility
90•
The rear fog light is so bright that it can dazzle drivers behind you. You
should use the rear fog light only when visibility is very poor.
•
If you are towing a trailer equipped with a rear fog light on a vehicle with
a factory-fitted towing bracket, the rear fog light on the car will automatically
be switched off.
•
The use of the lighting described here is subject to the relevant statutory
requirements.
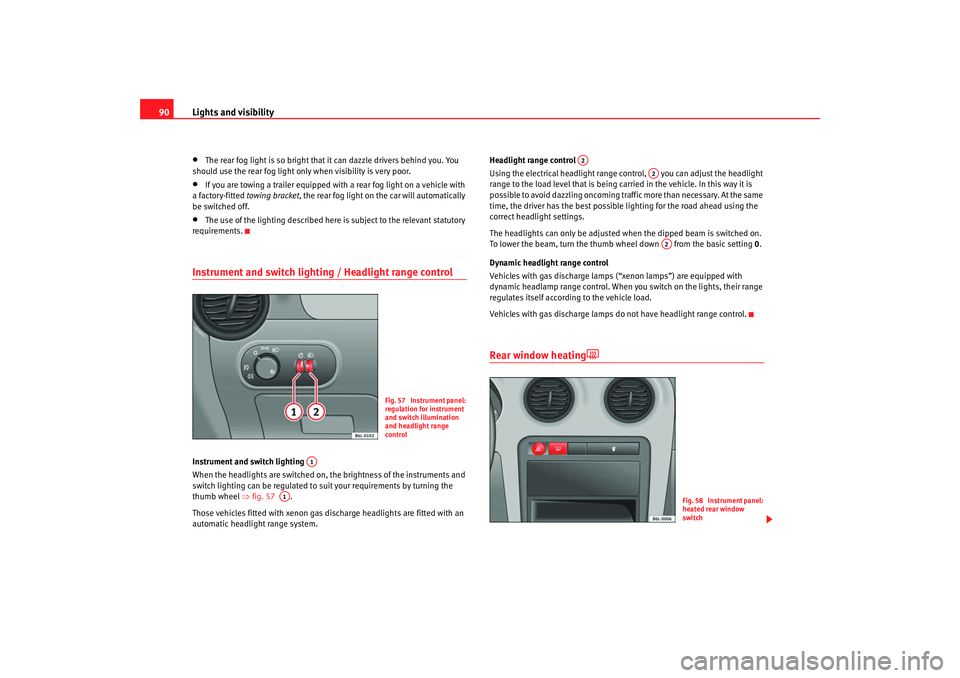
Instrument and switch lighting / Headlight range controlInstrument and switch lighting
When the headlights are switched on, the brightness of the instruments and
switch lighting can be regulated to suit your requirements by turning the
thumb wheel ⇒fig. 57 .
Those vehicles fitted with xenon gas discharge headlights are fitted with an
automatic headlight range system. Headlight range control
Using the electrical headlight range control, you can adjust the headlight
range to the load level that is being carried in the vehicle. In this way it is
possible to avoid dazzling oncoming tra
ffic more than necessary. At the same
time, the driver has the best possible lighting for the road ahead using the
correct headli ght settings.
The headlights can only be adjusted when the dipped beam is switched on.
To lower the beam, turn the thumb wheel down from the basic setting 0.
Dynamic headlight range control
Vehicles with gas discharge lamps (“xenon lamps”) are equipped with
dynamic headlamp range control. When you switch on the lights, their range
regulates itself according to the vehicle load.
Vehicles with gas discharge lamps do not have headlight range control.
Rear window heating
Fig. 57 Instrument panel:
regulation for instrument
and switch illumination
and headlight range
control
A1
A1
A2
A2A2
Fig. 58 Instrument panel:
heated rear window
switch
COR_ING_0707 Seite 90 Mittwoch, 1. August 2007 6:25 18