USB port Seat Ibiza ST 2016 MEDIA SYSTEM PLUS - NAVI SYSTEM - NAVI SYSTEM PLUS
[x] Cancel search | Manufacturer: SEAT, Model Year: 2016, Model line: Ibiza ST, Model: Seat Ibiza ST 2016Pages: 100, PDF Size: 2.53 MB
Page 9 of 100
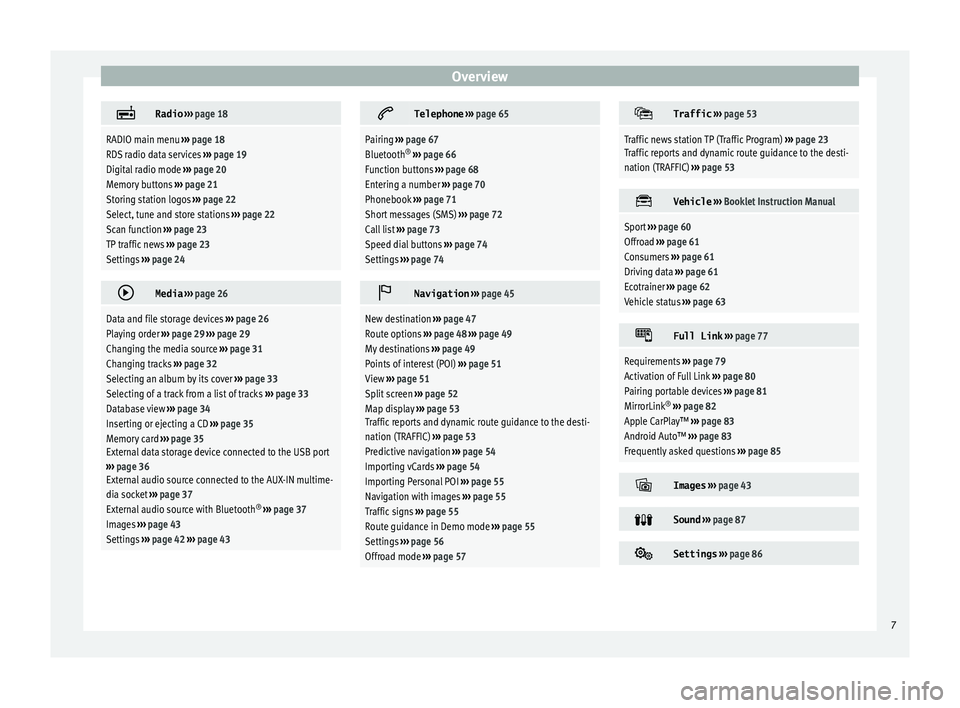
Overview
Radio
››› page 18
RADIO main menu ››› page 18
RDS radio data services ››› page 19
Digital radio mode ››› page 20
Memory buttons ››› page 21
Storing station logos ››› page 22
Select, tune and store stations ››› page 22
Scan function ››› page 23
TP traffic news ››› page 23
Settings ››› page 24
Media
››› page 26
Data and file storage devices ››› page 26
Playing order ››› page 29 ››› page 29
Changing the media source ››› page 31
Changing tracks ››› page 32
Selecting an album by its cover ››› page 33
Selecting of a track from a list of tracks ››› page 33
Database view ››› page 34
Inserting or ejecting a CD ››› page 35
Memory card ››› page 35
External data storage device connected to the USB port
››› page 36
External audio source connected to the AUX-IN multime-
dia socket ››› page 37
External audio source with Bluetooth ®
››› page 37
Images ››› page 43
Settings ››› page 42 ››› page 43
Telephone
››› page 65
Pairing ››› page 67
Bluetooth ®
››› page 66
Function buttons ››› page 68
Entering a number ››› page 70
Phonebook ››› page 71
Short messages (SMS) ››› page 72
Call list ››› page 73
Speed dial buttons ››› page 74
Settings ››› page 74
Navigation
››› page 45
New destination ››› page 47
Route options ››› page 48 ››› page 49
My destinations ››› page 49
Points of interest (POI) ››› page 51
View ››› page 51
Split screen ››› page 52
Map display ››› page 53
Traffic reports and dynamic route guidance to the desti-
nation (TRAFFIC) ››› page 53
Predictive navigation ››› page 54
Importing vCards ››› page 54
Importing Personal POI ››› page 55
Navigation with images ››› page 55
Traffic signs ››› page 55
Route guidance in Demo mode ››› page 55
Settings ››› page 56
Offroad mode ››› page 57
Traffic
››› page 53
Traffic news station TP (Traffic Program) ››› page 23
Traffic reports and dynamic route guidance to the desti-
nation (TRAFFIC) ››› page 53
Vehicle
››› Booklet Instruction Manual
Sport ››› page 60
Offroad ››› page 61
Consumers ››› page 61
Driving data ››› page 61
Ecotrainer ››› page 62
Vehicle status ››› page 63
Full Link
››› page 77
Requirements ››› page 79
Activation of Full Link ››› page 80
Pairing portable devices ››› page 81
MirrorLink ®
››› page 82
Apple CarPlay™ ››› page 83
Android Auto™ ››› page 83
Frequently asked questions ››› page 85
Images
››› page 43
Sound
››› page 87
Settings
››› page 86 7
Page 24 of 100
Audio and Media Mode
Storing station logos Store automatically (only in FM and DAB
mode)
When a s
t
ation is stored the station logo is
automatically assigned.
If there are 2 or more logos in the database,
it gives the option to choose the correct one.
Store manually
The station logos can be imported from a
compatible data medium (for example, mem-
ory card or memories with USB port).
● Press the function button Set
up and then
St ation log
os .
● Press the station button where you wish to
s t
ore the logo of a station.
● Select the source where the logo is stored
(for e
xample, SD card 1 ). We recommend sav-
in g log
os in the memory unit’s root directory.
● Select the station logo.
● Repeat the process to assign other logos;
pre
ss the infotainment button RADIO to re-
t urn t
o the RADIO main menu.
● If you wish to change the logo of a memory
butt
on that already has one assigned to it, it
must first be deleted from the button in ques-
tion. Note
Not all stations are stored in the database
and ther ef
ore it is not always possible to as-
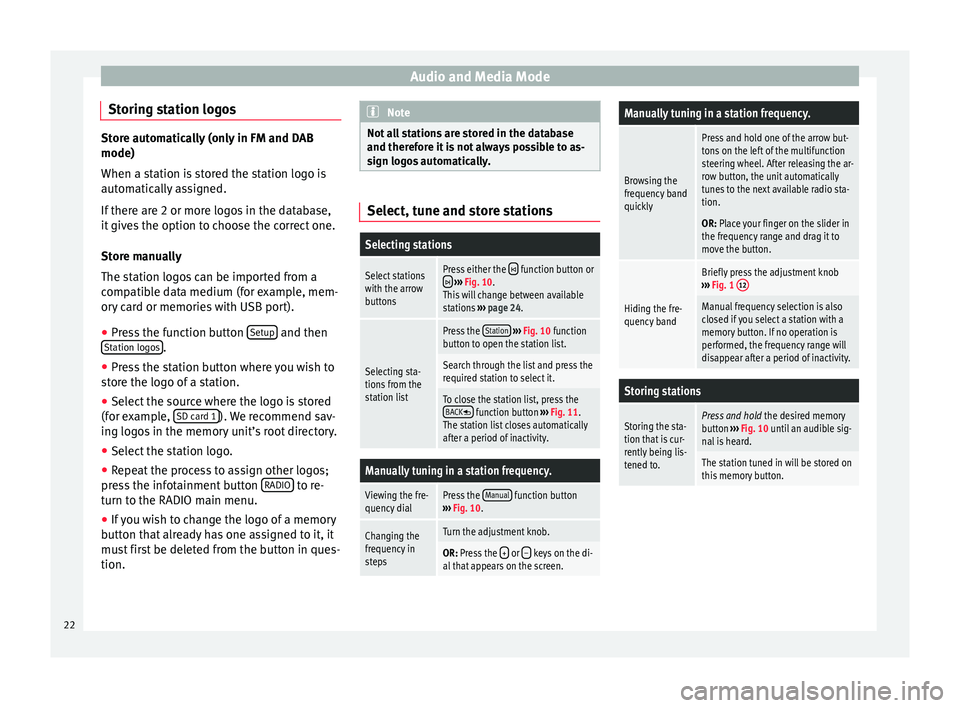
sign logos automatically. Select, tune and store stations
Selecting stations
Select stations
with the arrow
buttonsPress either the function button or
››› Fig. 10.
This will change between available
stations ››› page 24.
Selecting sta-
tions from the
station list
Press the Station
››› Fig. 10 function
button to open the station list.
Search through the list and press the
required station to select it.
To close the station list, press the BACK function button ››› Fig. 11.
The station list closes automatically
after a period of inactivity.
Manually tuning in a station frequency.
Viewing the fre-
quency dialPress the Manual function button
››› Fig. 10.
Changing the
frequency in
stepsTurn the adjustment knob.
OR: Press the + or – keys on the di-
al that appears on the screen.
Manually tuning in a station frequency.
Browsing the
frequency band
quickly
Press and hold one of the arrow but-
tons on the left of the multifunction
steering wheel. After releasing the ar-
row button, the unit automatically
tunes to the next available radio sta-
tion.
OR: Place your finger on the slider in
the frequency range and drag it to
move the button.
Hiding the fre-
quency band
Briefly press the adjustment knob
››› Fig. 1 12
Manual frequency selection is also
closed if you select a station with a
memory button. If no operation is
performed, the frequency range will
disappear after a period of inactivity.
Storing stations
Storing the sta-
tion that is cur-
rently being lis-
tened to.Press and hold
the desired memory
button ››› Fig. 10 until an audible sig-
nal is heard.
The station tuned in will be stored on
this memory button. 22
Page 32 of 100
Audio and Media Mode
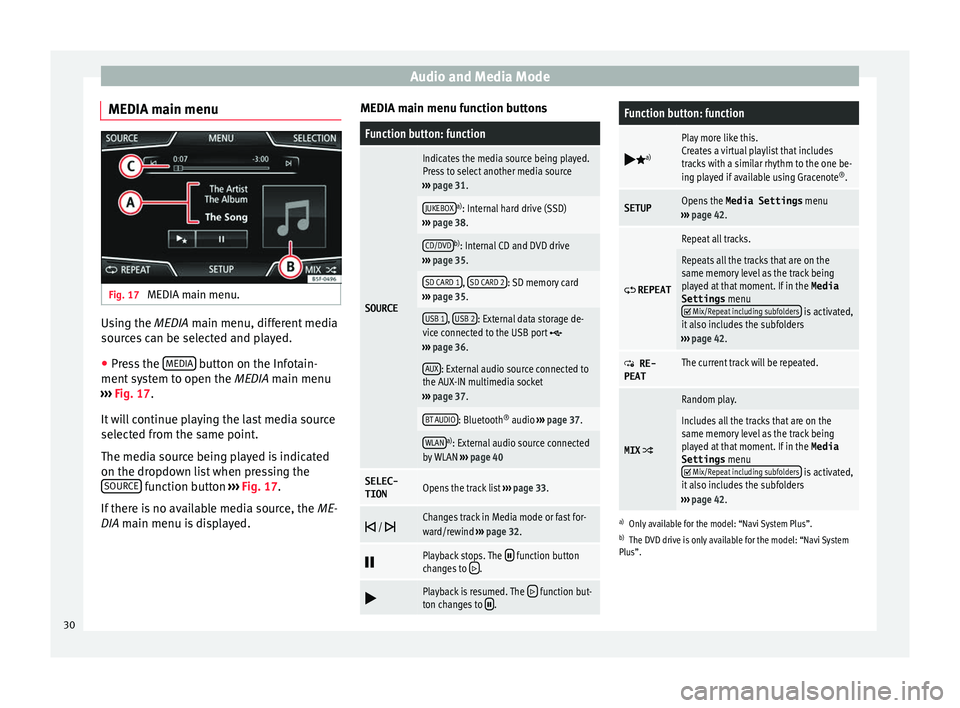
MEDIA main menu Fig. 17
MEDIA main menu. Using the MEDIA m
ain menu, diff
erent media
sources can be selected and played.
● Press the MEDIA button on the Infotain-
ment sy
stem to open the MEDIA main menu
››› Fig. 17.
It will continue playing the last media source
selected from the same point.
The media source being played is indicated
on the dropdown list when pressing the SOURCE function button
››
› Fig. 17.
If there is no available media source, the ME-
DIA main menu is displayed. MEDIA main menu function buttons
Function button: function
SOURCE
Indicates the media source being played.
Press to select another media source
››› page 31.
JUKEBOXa)
: Internal hard drive (SSD)
››› page 38.
CD/DVDb)
: Internal CD and DVD drive
››› page 35.
SD CARD 1, SD CARD 2: SD memory card
››› page 35.
USB 1, USB 2: External data storage de-
vice connected to the USB port ››› page 36.
AUX: External audio source connected to
the AUX-IN multimedia socket
››› page 37.
BT AUDIO: Bluetooth ®
audio ››› page 37.
WLANa)
: External audio source connected
by WLAN ››› page 40
SELEC-
TIONOpens the track list ››› page 33.
/ Changes track in Media mode or fast for-
ward/rewind
››› page 32.
Playback stops. The function button
changes to .
Playback is resumed. The function but-
ton changes to .
Function button: function
a)
Play more like this.
Creates a virtual playlist that includes
tracks with a similar rhythm to the one be-
ing played if available using Gracenote ®
.
SETUPOpens the Media Settings menu
››› page 42.
REPEAT
Repeat all tracks.
Repeats all the tracks that are on the
same memory level as the track being
played at that moment. If in the
Media
Settings menu
Mix/Repeat including subfolders is activated,
it also includes the subfolders
››› page 42.
RE-
PEATThe current track will be repeated.
MIX
Random play.
Includes all the tracks that are on the
same memory level as the track being
played at that moment. If in the Media
Settings menu
Mix/Repeat including subfolders is activated,
it also includes the subfolders
››› page 42.
a)
Only available for the model: “Navi System Plus”.
b) The DVD drive is only available for the model: “Navi System
Plus”.
30
Page 34 of 100

Audio and Media ModeFunction button: Media source
CD/DVDb)Internal CD/DVD drive
››› page 35.
SD CARD 1SD memory card ››› page 35.SD CARD 2*
USB 1External data storage device connected
to the USB port ››› page 36.USB 2*
AUXExternal audio source connected to the
AUX-IN multimedia socket ››› page 37.
BT AUDIOBluetooth ®
audio ››› page 37.
WLANa)External audio source connected by
WLAN ››› page 40
a)
Only available for the model: “Navi System Plus”.
b) The DVD drive is only available for the model: “Navi System
Plus”. Note
The Media source can be changed in the T r
ack
list view ››› page 33. Changing track in the MEDIA main
menu
Fig. 19
MEDIA main menu. It is possible to browse through the tracks of
the M
edi
a source that is currently playing us-
ing the arrow buttons.
It is not possible to exit a playlist or start the
playback of a playlist using the arrow but-
tons. Both actions must be performed man-
ually from the track selection menu
››› page 33. Controlling playback via the MEDIA main
menu
ActionFunction
Briefly press
the func-
tion button once.
Goes to the start of the cur-
rent track. If the track has
been playing for less than 3
seconds, it skips to the be-
ginning of the previous
track.
Quickly press the func-
tion button twice.If the track has been play-
ing for more than 3 sec-
onds, it skips to the begin-
ning of the previous track;
from the first track it skips
to the last track on the data
storage device being
played.
Briefly press the func-
tion button once.Goes to the next track. It
changes from the previous
track to the first track of the
data storage device being
played.
Press and hold the function button.Fast rewind.
Press and hold the function button.Fast forward.
Slide your finger horizon-
tally across the screen.
Changes to the previ-
ous/next track, respecting
the same playing times as
when changing tracks with
the
or buttons.32
Page 36 of 100
Audio and Media ModeFunction button: function
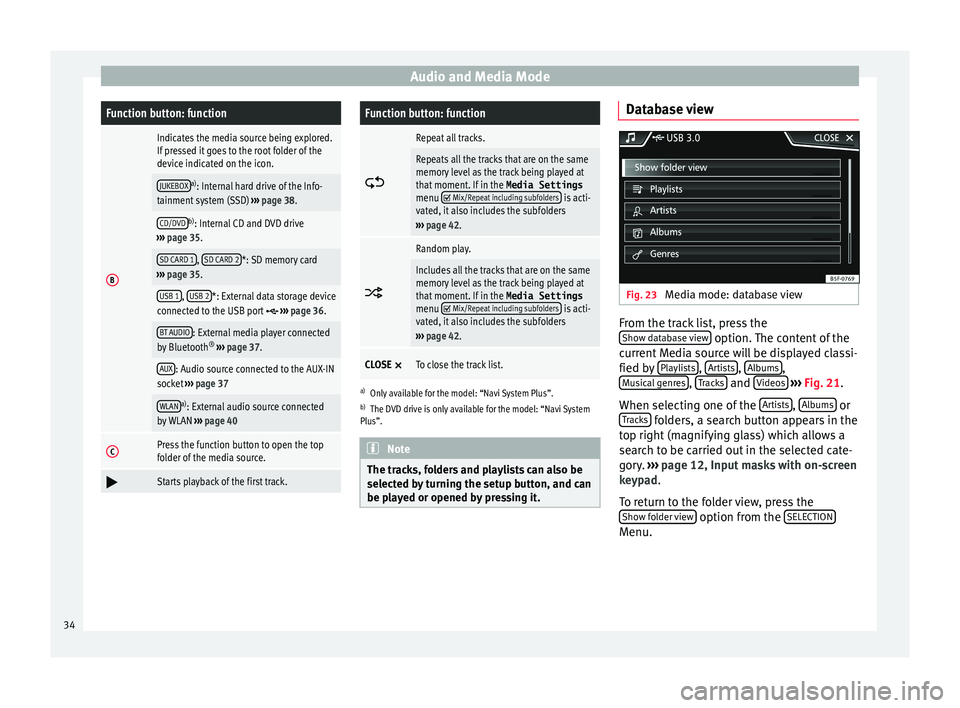
B
Indicates the media source being explored.
If pressed it goes to the root folder of the
device indicated on the icon.
JUKEBOXa)
: Internal hard drive of the Info-
tainment system (SSD) ››› page 38.
CD/DVDb)
: Internal CD and DVD drive
››› page 35.
SD CARD 1, SD CARD 2*: SD memory card
››› page 35.
USB 1, USB 2*: External data storage device
connected to the USB port ››› page 36.
BT AUDIO: External media player connected
by Bluetooth ®
››› page 37.
AUX: Audio source connected to the AUX-IN
socket ››› page 37
WLANa)
: External audio source connected
by WLAN ››› page 40
CPress the function button to open the top
folder of the media source.
Starts playback of the first track.
Function button: function
Repeat all tracks.
Repeats all the tracks that are on the same
memory level as the track being played at
that moment. If in the
Media Settings
menu
Mix/Repeat including subfolders is acti-
vated, it also includes the subfolders
››› page 42.
Random play.
Includes all the tracks that are on the same
memory level as the track being played at
that moment. If in the
Media Settings
menu
Mix/Repeat including subfolders is acti-
vated, it also includes the subfolders
››› page 42.
CLOSE ×To close the track list.
a)
Only available for the model: “Navi System Plus”.
b) The DVD drive is only available for the model: “Navi System
Plus”. Note
The tracks, folders and playlists can also be
sel ect
ed by turning the setup button, and can
be played or opened by pressing it. Database view
Fig. 23
Media mode: database view From the track list, press the
Sho w d
atabase view option. The content of the
c urr
ent Media source will be displayed classi-
fied by Playlists ,
Ar
ti
sts ,
A
l bums ,
M u
sical genres ,
T
r acks and
V
ideo s
› ››
Fig. 21.
When selecting one of the Artists ,
A
l
bums or
T r
acks folders, a search button appears in the
t op right
(magnifying glass) which allows a
search to be carried out in the selected cate-
gory. ››› page 12, Input masks with on-screen
keypad.
To return to the folder view, press the Show folder view option from the
S
ELE
CTION Menu.
34
Page 38 of 100

Audio and Media Mode
menu or press the Infotainment MENU button
and then pr e
ss Settings to open the System
settings menu.
● Press the R
emo
ve safely function button. A
dr opdo
wn menu appears with the following
options: SD1 Card, SD2 Card*, USB1 and
USB2*. After correctly ejecting the memory
card from the system, the function button be-
comes inactive (grey colour).
● Press the inserted memory card. The mem-
ory
card “jumps” to the eject position.
● Remove the memory card.
Unre
adable memory card
If a memory card is inserted and the data
cannot be read, the relevant warning ap-
pears.
External data storage device connec-
ted t
o USB port Depending on the features and the country,
the
v
ehicle may have one or two USB connec-
tions. For their location consult the ›››
Book-
let Instruction Manual.
Audio files on an external data storage de-
vice connected to the USB port can be
played and controlled via the Infotainment
system.
Where this manual refers to external data
storage devices, this means USB mass stor- age devices containing supported audio
fil
es, such as MP3 players, iPods™ and USB
sticks.
Only supported audio files are displayed and
played. Other files are ignored.
Further operation of the external data medi-
um (changing track, selecting tracks and
playback modes) is described in the appro-
priate chapters of this manual ››› page 26.
Instructions and restrictions
Compatibility with Apple™ devices and other
media players depends on the unit.
The USB port supplies the usual USB volt-
age of 5 volts for a USB connection.
External hard disks with a capacity greater
than 32 GB must be reformatted for the
FAT32 file system in some circumstances. You
will find the necessary software and informa-
tion on the Internet.
Take into account all other instructions and
limitations regarding requirements for media
sources ››› page 26.
iPod™, iPad™ and iPhone™
Depending on the country and the equip-
ment, iPods™, iPads™ or iPhones™ can be
connected using the device's USB cable to
the USB port of the vehicle and used as
audio sources. After connecting an iPod™, iPad™ or
iPhone™, the spec
ific list views of the iPod
are displayed in the upper selection level
( Playlists , Artists, Albums ,
Tracks , Podcasts etc.).
Possible error messages after connecting an
external data storage device
Error mes-
sageCauseProcedure
The device
is not
compatibleThe external
data carrier
cannot be
played or com-
munication is
not possible
with the adapt-
er cable being
used.Check the connec-
tion and make sure
the external data
medium is working
correctly.
If possible, update
the data storage de-
vice software.
The device
does not
workCommunication
fault.Check the connec-
tion and make sure
the external data
medium is working
correctly.
Due to the large number of different data storage devi-
ces and various iPod™, iPad™ and iPhone™ genera-
tions available, it is not possible to guarantee fault-free
operation of all functions described here. Disconnecting
An
y
connected data storage devices must be
prepared before their disconnection in order
to remove them.
36
Page 39 of 100
Audio and Media Mode
● From the m
ain Media menu, press the
SETUP button to open the Media Settings
menu or pr e
ss the Infotainment MENU button
and then pr e
ss Settings to open the System
settings menu.
● Press the R
emo
ve safely function button. A
dr opdo
wn menu appears with the following
options: SD1 Card, SD2 Card*, USB1 and
USB2*. After correctly ejecting the data stor-
age device from the system, the function but-
ton becomes inactive (grey colour).
● Now the data storage device can be discon-
nected. Note
● Do not c
onnect an external media player at
the same time to play music via Bluetooth ®
and via the USB port with the Infotain-
ment system, as this could cause playback
limitations.
● If the external player is an Apple device™,
it c
annot be simultaneously connected by
USB and by Bluetooth.
● If a connected device is not recognised, dis-
connect
all the connected devices and try
connecting the device again.
● Do not use memory card adaptors, USB ex-
ten
sion cords or USB hubs! External audio source connected to
the A
UX
-IN multimedia socket Depending on the equipment and country
ther
e m
ay be an AUX-IN multimedia socket
››› Booklet Instruction Manual.
In order to connect the external audio source
to the AUX-IN socket, a suitable cable is re-
quired with a 3.5 mm jack that is inserted in-
to the AUX-IN socket of the vehicle.
The connected external audio source is
played over the vehicle speakers and cannot
be controlled via the Infotainment system
controls.
The connection of an external audio source is
indicated by AUX on the screen.
Connecting an external audio source to the
AUX-IN multimedia socket ● Lower the base volume on the Infotainment
sy s
tem.
● Connect the external audio source to the
AUX
-IN multimedia socket.
● Start playback on the external audio
sourc
e.
● In the MEDIA main menu, press the SOURCE function button and select
A
UX .
The outp ut
volume of the connected external
audio source should be adjusted to the vol-
ume of the other audio sources ›››
page 87. Information on operating an external audio
sourc
e connected to the AUX-IN multimedia
socket
OperationEffect
Selection of another au-
dio source from the Info-
tainment system.The external audio source
continues to run in the
background.
Stopping playback on the
external audio source.The infotainment system
remains in the AUX menu.
Disconnecting the plug
from the AUX-IN multime-
dia socket.The infotainment system
remains in the AUX menu. Note
● Ple
ase read and observe the manufactur-
er's instruction manual for the external audio
source.
● Interference noise may be heard if the ex-
tern
al audio source is powered from the 12-
volt power socket of the vehicle. Connecting an external audio source
v
i
a Bluetooth ® Bluetooth
®
Audio mode al lo
ws you to listen
to audio files being played on a Bluetooth ®
audio source (e.g., a mobile telephone) con-
nected via Bluetooth ®
(audio playback by
Bluetooth ®
) over the vehicle speakers. »
37
Page 40 of 100
Audio and Media Mode
Conditions
● The Bluetooth ®
audio sour c
e must support
the A2DP Bluetooth ®
profile.
● In the Bluetooth settings menu, the
Bluetooth Audio (A2DP/A
VRCP) function must
be activ at
ed ››› page 75.
Starting Bluetooth ®
audio transfer
● Activate Bluetooth ®
vi
sibility on the exter-
nal Bluetooth ®
audio source (e.g., mobile tel-
ephone).
● Lower the base volume on the Infotainment
sys
tem.
● Press the Infotainment MEDIA button.
● Press the SOURC
E function button and then
sel ect
BT audio .
● Press Find new dev
ic
e in order to connect an
e xt
ernal Bluetooth ®
audio source for the first
time ››› page 66.
● OR: Select a Bluetooth ®
e
xternal audio
source from the list.
● Please refer to the instructions on the
sc
reen of the Infotainment system and on the
Bluetooth ®
audio source regarding the rest
of the procedure.
You may still need to manually start playback
on the Bluetooth ®
source.
When playback on the Bluetooth ®
audio
source is stopped, the Infotainment system
remains in Bluetooth ®
Audio mode. Controlling playback
The ext
ent to which the Bluetooth ®
audio
source can be controlled via the Infotainment
system depends on the connected Blue-
tooth ®
audio source.
The available functions will depend on the
Bluetooth ®
Audio profile that the connected
external player supports.
With media players that support the AVRCP
Bluetooth ®
profile, playback on the Blue-
tooth ®
audio source can be automatically
started or stopped when the unit is switched
to Bluetooth ®
Audio mode or to a different
audio source. In addition, it is possible to
view or change the track via the Infotainment
system. Note
● Due t
o the large number of possible Blue-
tooth ®
audio sources, it is not possible to
guarantee fault-free operation of all descri-
bed functions.
● Always switch off the warning and service
tone
s on a connected Bluetooth ®
audio
source, e.g. key tones on a mobile telephone,
to prevent possible interference noise and
malfunctions.
● To play music, do not link the external me-
dia p
layer simultaneously to Bluetooth and
the USB interface of the infotainment system,
as this can cause limitations during playback. ●
Dependin
g on the external player connec-
ted, the response time of the system can
vary.
● Do not connect an external media player to
pl
ay music via Bluetooth ®
and via the USB
port ››› page 36 at the same time with the
Infotainment system, as this could cause playback limitations.
● If the external player is an Apple device™,
it
cannot be simultaneously connected by
USB and by Bluetooth. Jukebox (SSD)
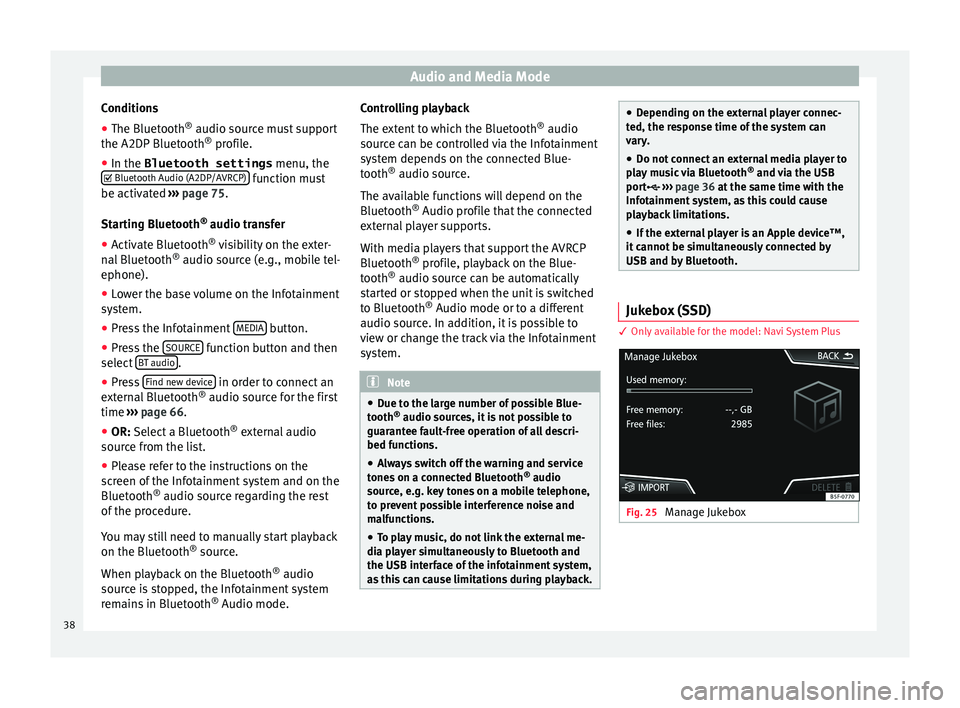
3 On
ly
available for the model: Navi System Plus Fig. 25
Manage Jukebox38
Page 44 of 100

Audio and Media ModeFunction button: function
DUse the arrow buttons to browse the DVD
menu. Confirm the selection by pressing
OK.
EPress to open the DVD main menu.
/ To move to the next or previous chapter.
Playback stops. The function button
changes to .
Playback is resumed. The function button
changes to .
SETUPThis menu contains the Video (DVD) settings
››› page 42. Note
● The v
isual appearance of the DVD film me-
nus and the menu options which it offers are
the responsibility of the DVD manufacturer.
● The difference in behaviour of some films
when us
ing the same mode is the responsi-
bility of the DVD manufacturer.
● You may not be able to play video DVDs
which
you have burned yourself.
● The Infotainment system screen only dis-
pl
ays the image when the vehicle is stopped.
Whilst in motion, the screen disconnects (the
image), but the audio remains active. Video settings (DVD)
3 On
ly available for the model: Navi System Plus
In the
DVD mode main menu, press the
SETTINGS function button and then select the
option V
ideo settings (DVD).
Function button: function
Format: To select the screen format. If Automatic is se-
lected, it adjusts automatically to the optimal format for
the screen.
Audio channel: select language for acoustic voice output.
Subtitles: To select the subtitle language.
Enter/change PIN for parental settings: Parental settings pass-
word.
Parental settings: To select the level of protection for DVD
playback. The options in the Video setup (DVD) menu
m
a
y vary depending on the DVD or the chap-
ter currently being played.
The available audio language channels and
subtitles depend on the inserted DVD.
All or a part of the DVD video content may be
protected by means of a password (PIN) if the
DVD is compatible with parental settings. Fur-
thermore, the level of protection can be set
according to age with 1 being the least re-
strictive (appropriate for all audiences) and
8, the most restrictive (adults). Media settings ●
Select the MEDIA main menu b
y pressing
the Infotainment MEDIA button.
● Press the S
ETUP function button to open
the Media Settings menu.
Function button: function
Sound: Sound settings ››› page 87.
Manage jukeboxa)
: To import files to the jukebox or delete
stored files ››› page 38.
Mix/Repeat including subfolders: Subfolders will be inclu-
ded in the selected playback mode ››› page 26.
Bluetooth: Bluetooth ®
settings ››› page 75
WLANa)
: WLAN settings ››› page 40.
Video settings: Settings for playback of DVD videos or
files.
Remove safely: In order to prepare the external data stor-
age devices for their removal or disconnection. See also
››› page 35, Insert or eject a memory card and
››› page 36, External data storage device connected to
USB port
.
Traffic Program (TP): The TP function (traffic news station
tracking) is active ››› page 23.
a)
Only available for the model: “Navi System Plus”.
42
Page 59 of 100

NavigationFunction button: function
Manage memory: To modify saved destinations.
Sort contacts: To select the sequential order of the en-
tries in the phonebook that have (postal) addresses,
see also ››› page 49.
Define home address: To assign or edit a home address,
see also ››› page 51.
Delete my points of interest (POI): To delete the points of
interest stored in the destination memory ››› page 55.
Update my POIs: To update the stored points of interest
››› page 55.
Import destinations (SD/USB): To import electronic busi-
ness cards (vCards) into the destination memory
››› page 54.
Delete user data: To delete the stored destinations
(e.g., the Last destinations or the Destina-
tion memory ).
Navigation announcements: To make adjustments to naviga-
tion announcements.
Volume: To adjust the volume for driving recommen-
dations.
Entertainment fading (nav. announcements): Adjusting the
volume of the active audio source during navigation
instructions.
Navigation announcementsb) : To adjust driving recom-
mendations during route guidance.
Comprehensive: Detailed driving recommendations
and other directions.
Brief: Some recommendations and directions are
muted.
Function button: function
Congestion only: Recommendations are only given
in the event of congestion along the route (e.g.
traffic jam).
No voice guidance during call: No audible driving in-
structions will be given during a telephone conversa-
tion.
Warning: My points of interest: Audible announcement
when nearing a point of interest.
Fuel options: To make adjustments relating to fuel.
Select preferred fuel station: The selected petrol station
mark will be shown before other points of interest in
the search.
Fuel warning: The warning to refuel is active.
If the fuel level reaches the reserve level, the corre-
sponding warning is generated which permits the
search for petrol stations.
Version information: Information on the stored navigation
data.
Speed limits: Shows the speed limits, depending on the
road, for the current country.
Advanced setup: To make advanced adjustments to the
navigation.
Time display: displayed during route guidance.
Estimated time of arrival: The estimated time of arrival
at the final destination is displayed.
Duration: The estimated travelling time to the final
destination is displayed.
Status line: displayed during route guidance.
Function button: function
Destination: The distance calculated to final desti-
nation is displayed.
Next stopover: The calculated distance until next
stopover is displayed.
Note: National border crossed: Displays the speed lim-
its of the country in question when crossing the bor-
der.
Demo mode: When Demo mode is activated and
route guidance is started, virtual guidance to the en-
tered destination can be initiated ››› page 55.
Define demo mode starting point: if demo mode is acti-
vated, a fictitious starting point for virtual route
guidance can be defined when the vehicle is sta-
tionary.
Waypoint modeb) : To start Offroad navigation.
a) This function depends on the country.
b) Only available for the model: “Navi System Plus”.
Navigation in Offroad mode*
Introduction 3 On
ly
available for the model: Navi System Plus
Offroad* navigation is a function for offroad
driving that provides directions in “non-digi-
tised areas” at low speeds.
Non-digitised areas are areas about which
the system does not have information for the »
57