Seat Leon 5D 2005 Owner's manual
Manufacturer: SEAT, Model Year: 2005, Model line: Leon 5D, Model: Seat Leon 5D 2005Pages: 280, PDF Size: 8.46 MB
Page 191 of 280

Accessories, parts replacement and modifications189
Safety First
Operating instructions
Tips and Maintenance
Te c h n i c a l D a t a
If a towing bracket is to be fitted after the vehicle is purchased, this must be
completed according to the instructions of the towing bracket manufacturer.
The attachment points for the towing bracket are underneath the vehicle.
The distance between the centre of th
e ball coupling and the ground should
never be lower than the measurement indicated when the vehicle is fully
loaded including the maximum resting weight.
Measurement for securin g the towing bracket:
65 mm (minimum)
350 mm to 420 mm (fully laden vehicle)
357 mm
569 mm
875 mm
1,040 mm
Fitting a towing bracket
•
Driving with a trailer implies additional work for the vehicle. For this
reason, before fitting a trailer system, refe r to the Technical Service to find out
if the vehicle cooling system should be adjusted.
•
Observe the legal requirements in yo ur country (e.g. the fitting of a sepa-
rate warning lamp).
•
Certain vehicle componen ts, e.g. the rear bumper must be removed and
reinstalled. The towing bracket securi ng bolts must be tightened using a
torque wrench, and an electrical sock et must be used to connect to the
vehicle's electrical system. This requires specialist knowledge and tools.
•
The figures in the illustration show the dimensions and attachment points
which must be observed if you are retrofitting a towing bracket.
WARNING
Towing brackets should be fitted by specialists.
•
If the towing bracket is incorrectly installed, there is serious danger of
an accident.
•
For your own safety, please observe the instructions provided by the
manufacturer of the towing bracket.Caution
•
If the electrical socket is incorrectly installed, this could cause damage to
the vehicle's electrical system.
AA
ABACADAEAFAG
WARNING (continued)
leon_ingles Seite 189 Donnerstag, 20. Oktober 2005 12:14 12
Page 192 of 280

Checking and refilling levels
190Checking and refilling levelsRefuellingThe fuel cap cover opens automatically with the central
locking system. The tank hold s approximately 55 litres.Unscrewing the tank cap
–Lift the lid.
– Unscrew the cap, turning it anti-clockwise.
Closing the tank cap
– Screw the tank cap to the right, until the point of feeling a “click”.
– Close the drawer. Make sure you hear it click into place. The tank
cap is secured with an anti-loss attachment
The tank flap is at the rear of the vehicle on the right.
If the automatic filler nozzle is operated correctly, it will switch itself off as
soon as the tank is “full”. Never attempt to fill beyond this point, as this will
fill the expansion chamber. Fuel may leak out if ambient conditions are warm.
The correct fuel grade for your vehicle is given on a sticker on the inside of the
fuel tank.
Releasing the fuel tank flap by hand
If the central locking system fails, the fuel tank flap can be opened manually
as follows:•
Open the tailgate
•
Remove the cover from the right side trim in the luggage compartment.
•
Insert a hand and pull the locking device back
•
Open the cap and take out the plug.
WARNING
•
Fuel is highly inflammable and can cause serious burns and other inju-
ries.
−Never smoke or use any naked flame when filling the fuel tank of the
vehicle, or a spare fuel canister, with fuel. This is an explosion hazard.
− Follow legal requirements for the use of spare fuel canisters.
− For safety reasons we do not recommend carrying a spare fuel
canister in the vehicle. The canister could be damaged in an accident
and leak.
•
If, in exceptional circumstances, you have to carry a spare fuel canister,
please observe the following points:
Fig. 132 Tank flap open
leon_ingles Seite 190 Donnerstag, 20. Oktober 2005 12:14 12
Page 193 of 280

Checking and refilling levels191
Safety First
Operating instructions
Tips and Maintenance
Te c h n i c a l D a t a
−
Never fill the spare fuel canister inside the vehicle or on it. An elec-
trostatic charge could build up during filling, causing the fuel fumes to
ignite. This may be fatally explosive. Always place the canister on the
ground to fill it.
− Insert the fuel nozzle into the mouth of the canister as far as
possible.
− If the spare fuel canister is made of metal, the filling nozzle must be
in contact with the canister during filling. This helps prevent an electro-
static charge building up.
− Never spill fuel in the vehicle or in the luggage compartment. Fuel
vapours are explosive. Danger of death.
Caution
•
Fuel spills should be removed from the paintwork immediately.
•
Never run the tank completely dry. An irregular fuel supply could cause
misfiring. As a result, unburnt fuel co uld enter the catalytic converter and
cause damage.For the sake of the environment
Do not try to put in more fuel after the automatic filler nozzle has switched off;
this may cause the fuel to overflow if it becomes warm.
PetrolPetrol types
The correct petrol types are listed on a sticker inside the fuel
tank flap.Only unleaded petrol, corresponding to the standard DIN EN 228 , may be
used for vehicles with catalytic converters (EN = “European Norm”).
Petrol types are categorised according to their octane number, e. g. 91, 95,
98 RON (RON = “research octane number” ). You may use petrol with a higher
octane number than the one recommende d for your engine. However, this
has no advantage in terms of fuel consumption and engine power.
Caution
•
Even one full tank of leaded fuel would permanently impair the efficiency
of the catalytic converter.
•
High engine speed and full throttle can damage the engine when using
petrol with an octane rating lower than the correct grade for the engine.For the sake of the environment
Just one full tank of leaded fuel would seriously impair the efficiency of the
catalytic converter.Petrol additives
Petrol additives improve the quality of the petrol.The quality of the petrol influences running behaviour, performance and
service life of the engine. For this reason you should use good quality petrol
WARNING (continued)
leon_ingles Seite 191 Donnerstag, 20. Oktober 2005 12:14 12
Page 194 of 280

Checking and refilling levels
192containing additives. These additives will help to prevent corrosion, keep the
fuel system clean and prevent deposits from building up in the engine.
If good quality petrol with additives is not available or engine problems occur,
the required additives must be added during refuelling.DieselDiesel*Diesel fuel must correspond to DIN EN 590 (EN = “European standard”). It
must have a cetane number (CN) of at least 51. The cetane number indicates
the ignition quality of the diesel fuel.
Notes on filling with fuel ⇒page 190.RME fuel*
Only those vehicles fitted with special equipment (number PR
2G0 for biodiesel use) may use biodiesel corresponding to
the standard DIN EN 14214.The biodiesel fuel must comply with the DIN EN 14.214 (FAME) Standard.•
Biodiesel is a methylester obtained from rapeseed oil.
• DIN is a German abbrev iation for “Deuts che
s In s
titut für Normug e.V .”, the
German standards institute.
•
EN means E uropean Norm.
• FAME is the English abbrev iation “Fatty Acid
Methy l Este r” If the date sticker of the vehicle includes the number PR 2G0 optional equip-
ment) this means that that vehicle has been prepared for biodiesel use.
Your Authorised Service Centre or automobile association will be able to
advise on where you can obtain RME biodiesel fuel.
Your Authorised Service Centre can also be consulted to know if the vehicle
has been prepared for biodiesel use.
Things to note about RME fuel (biodiesel)
•
The performance of a vehicle using biodiesel maybe somewhat reduced.
•
Fuel consumption of a vehicle using biodiesel maybe slightly higher.
•
RME fuel can be used in winter at
temperatures down to approx. -10°C.
•
At outside temperatures below -10°C, we recommend using winter diesel
fuel.Caution
•
RME fuel can damage the fuel system in vehicles which are not suitably
adjusted.
•
If you decide to use biodiesel in your vehicle, please use only RME fuel
which is DIN E 14,214 compliant.
•
If you use biodiesel that does not me et the required standard, the fuel
filter could become clogged.Note
•
In case of low exterior temperatures and a fuel biodiesel percentage of
higher than 50%, an increase in gas emission may occur during operation of
the independent heating.
•
The fuel filter may become clogged when fuel is changed to biodiesel. For
this reason, we recommend that, about every 300 or 400 km, following a fuel
change, also change the fuel filter. Also. note the instructions in the inspec-
tion and maintenance plan.
leon_ingles Seite 192 Donnerstag, 20. Oktober 2005 12:14 12
Page 195 of 280
Checking and refilling levels193
Safety First
Operating instructions
Tips and Maintenance
Te c h n i c a l D a t a
•
If the vehicle is to remain parked for more than about two weeks, we
recommend filling the fuel tank with biodiesel and driving about 50 km in
order to avoid damage to the injection system.
Winter driving
Diesel can thicken in winter.Winter-grade diesel
When using “summer-grade diesel fuel”, difficulties may be experienced at
sub-zero temperatures because the fuel thickens due to paraffin separation.
For this reason, “winter-grade diesel fuel” is available in some countries
during the cold months. It can be used at temperatures as low as -22
° C.
In countries with different climatic cond itions the diesel fuel sold generally
has different temperature characteristics. Check with an Authorised Service
Centre or filling stations in the country concerned regarding the type of diesel
fuels available.
Filter pre-heater
Your vehicle is fitted with a fuel filter pre-heater, making it well equipped for
operation in winter. This ensures that the fuel system remains operational to
approx. -24
°C, provided you use winter-grade diesel which is safe to -15
°C .
However, if the fuel has waxed to such an extent that the engine will not start
at temperatures of under -24
° C, simply place the vehicle in a warm place for
a while.
Caution
Do not mix fuel additives (“thinners”, or similar additives) with diesel fuel.
Working in the engine compartmentSafety instructions on working in the engine compartment
Any work carried out in the engine compartment or on the
engine must be carried out cautiously.Before starting any work on the engine or in the engine compart-
ment:
1. Switch off the engine and remove the key from the ignition.
2. Apply the handbrake.
3. Move the gear stick to neutral or the selector lever to position P.
4. Wait for the engine to cool down.
5. Keep children away from the vehicle.
6. Raise the bonnet ⇒page 195.You should not do any work in the engine compartment unless you know
exactly how to carry out the jobs and have the correct tools! Have the work
carried out by a qualified workshop if you are uncertain.
All service fluids and consumables, e.g. coolant, engine oil, spark plugs and
batteries, are being constantly developed. SEAT provides a constant flow of
information to the Authorised Service Centres concerning modifications. For
this reason we recommend that you have service fluids and consumables
replaced by an Authorised Service Centre. Please observe the relevant
instructions ⇒page 186. The engine compartment of any motor vehicle is a
hazardous area ⇒ .
leon_ingles Seite 193 Donnerstag, 20. Oktober 2005 12:14 12
Page 196 of 280
Checking and refilling levels
194
WARNING
All work on the engine or in the engine compartment, e.g. checking and
refilling fluids, involves the danger of injury and scalding as well as the risk
of accident or fire.•
Never open the bonnet if you see steam, smoke or coolant escaping
from the engine compartment. Otherwise, there is a risk of sustaining
burns. Wait until no more steam or coolant is emitted, then allow the
engine to cool before carefully opening the bonnet.
•
Switch off the engine and remove the key from the ignition.
•
Apply the handbrake and move the gea r stick to neutral or selector
lever to position P.
•
Keep children away from the vehicle.
•
Never touch hot engine parts. There is a risk of burns.
•
Never spill liquids on a hot engine or on a hot exhaust gas system. This
is a fire hazard.
•
Avoid causing short-circuits in the electrical system, particularly at the
points where the jump leads are attached ⇒page 241. The battery could
explode.
•
Never touch the radiator fan. It is temperature controlled and could
start automatically, even when the engine has been switched off and the
key removed from the ignition!
•
Do not unscrew the cap on the expansion tank when the engine is hot.
If the coolant is hot, the cooling system will be pressurised!
•
Protect face, hands and arms by covering the cap with a large, thick
cloth to protect against escaping coolant and steam.
•
Always make sure you have not left any objects, such as cleaning cloths
and tools, in the engine compartment.
•
If you have to work underneath the vehicle, you must use suitable
stands additionally to support the vehicl e, there is a risk of accident! A
hydraulic jack is insufficient for securing the vehicle and there is a risk of
injury.
•
If any work has to be performed when the engine is started or with the
engine running, there is an additional, potentially fatal, safety risk from the
rotating parts, such as the drive belt s, alternator, radiator fan, etc., and
from the high-voltage ignition system. You should also observe the
following points:
−Never touch the electrical wiring of the ignition system.
− Ensure that jewellery, loose clothing and long hair do not get
trapped in rotating engine parts. Danger of death. Before starting any
work remove jewellery, tie back and cover hair, and wear tight-fitting
clothes.
− Always think carefully about pressing the accelerator if a gear is
engaged in either an automatic or manual gearbox. The vehicle could
move, even if the handbrake is applied. Danger of death.
•
If work has to be carried out on the fuel system or on electrical compo-
nents, you must observe the following safety notes in addition to the above
warnings:
−Always disconnect the battery. The vehicle must be unlocked when
this is done, otherwise the alarm will be triggered.
− Do not smoke.
− Never work near naked flames.
− Always have a fire extinguisher on hand.Caution
When changing or topping up service fluids, make absolutely certain that you
fill the fluids into the correct reservoirs. Failure to observe this point will result
in serious malfunctions and engine damage!
WARNING (continued)
leon_ingles Seite 194 Donnerstag, 20. Oktober 2005 12:14 12
Page 197 of 280

Checking and refilling levels195
Safety First
Operating instructions
Tips and Maintenance
Te c h n i c a l D a t a
For the sake of the environment
Service fluids leaks are harmful to the environment. For this reason you
should make regular checks on the ground underneath your vehicle. If you
find spots of oil or other fluids, have your vehicle inspected in a qualified
workshop.Opening the bonnet
The bonnet is released from inside the vehicle.
Before opening the bonnet ensure that the windscreen wipers are in
rest position.
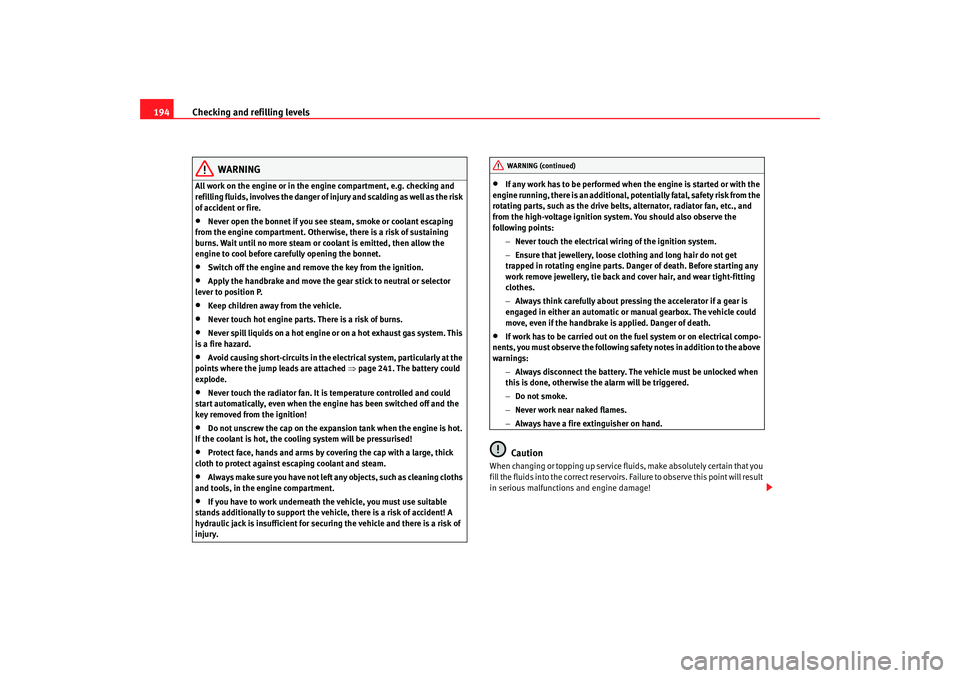
– To release the bonnet, pull the lever under the dashboard ⇒fig. 133 in the direction indicated (arrow). The bonnet will be
released by a spring action ⇒.
– Lift the bonnet using the rele ase lever (arrow) and open the
bonnet.
– Release the bonnet stay and secure it in fixture designed for this in the bonnet.
WARNING
Hot coolant can scald!•
Never open the bonnet if you see steam, smoke or coolant escaping
from the engine compartment.
Fig. 133 Detail of the
footwell: The release lever
for the bonnet is located
in the driver side footwell
Fig. 134 Arrester hook
for bonnet.
leon_ingles Seite 195 Donnerstag, 20. Oktober 2005 12:14 12
Page 198 of 280
Checking and refilling levels
196•
Wait until no more steam, smoke or coolant is emitted from the bonnet,
then carefully open the bonnet.
•
When working in the engine compartment, always observe the safety
warnings ⇒ page 193.
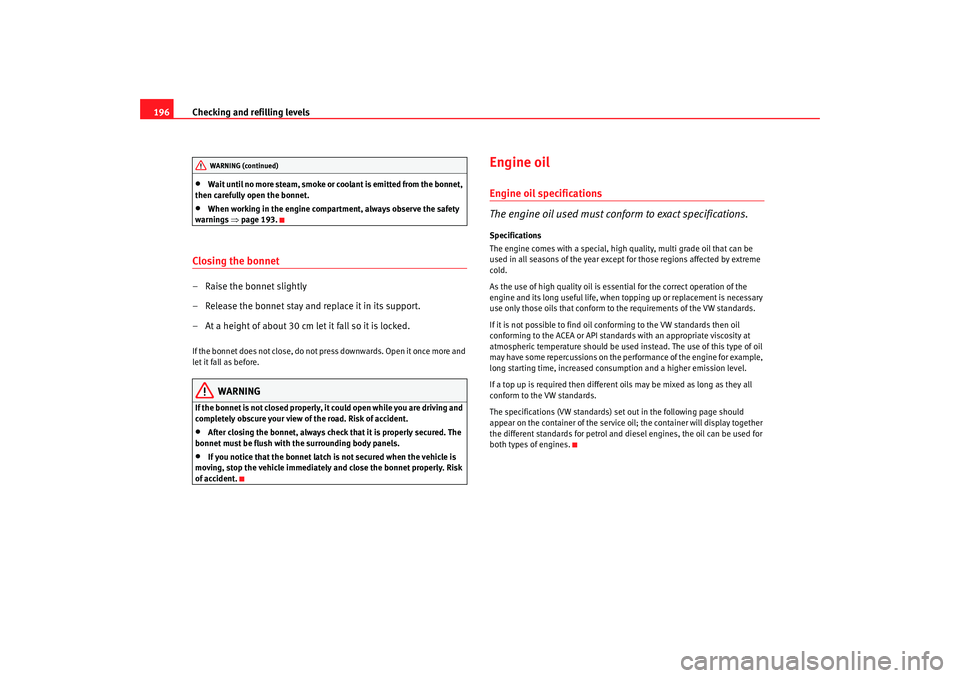
Closing the bonnet– Raise the bonnet slightly
– Release the bonnet stay and replace it in its support.
– At a height of about 30 cm let it fall so it is locked.If the bonnet does not close, do not press downwards. Open it once more and
let it fall as before.
WARNING
If the bonnet is not closed properly, it could open while you are driving and
completely obscure your view of the road. Risk of accident.•
After closing the bonnet, always check that it is properly secured. The
bonnet must be flush with the surrounding body panels.
•
If you notice that the bonnet latch is not secured when the vehicle is
moving, stop the vehicle immediately and close the bonnet properly. Risk
of accident.
Engine oilEngine oil specifications
The engine oil used must conform to exact specifications.Specifications
The engine comes with a special, high quality, multi grade oil that can be
used in all seasons of the year except for those regions affected by extreme
cold.
As the use of high quality oil is essential for the correct operation of the
engine and its long useful life, when topping up or replacement is necessary
use only those oils that conform to the requirements of the VW standards.
If it is not possible to find oil conforming to the VW standards then oil
conforming to the ACEA or API standards with an appropriate viscosity at
atmospheric temperature should be used in stead. The use of this type of oil
may have some repercussions on the performance of the engine for example,
long starting time, increased consumption and a higher emission level.
If a top up is required then different oils may be mixed as long as they all
conform to the VW standards.
The specifications (VW standards) set out in the following page should
appear on the container of the service oil; the container will display together
the different standards for petrol and diesel engines, the oil can be used for
both types of engines.
WARNING (continued)
leon_ingles Seite 196 Donnerstag, 20. Oktober 2005 12:14 12
Page 199 of 280
Checking and refilling levels197
Safety First
Operating instructions
Tips and Maintenance
Te c h n i c a l D a t a
Oil properties
Viscosity
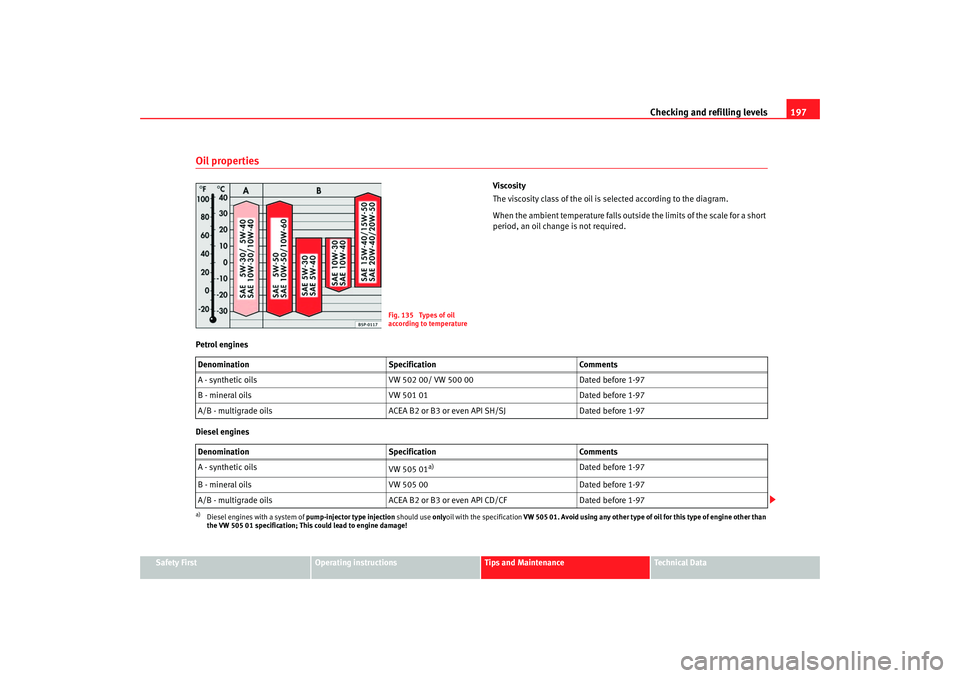
The viscosity class of the oil is selected according to the diagram.
When the ambient temperature falls outside the limits of the scale for a short
period, an oil change is not required.
Petrol engines
Diesel engines
Fig. 135 Types of oil
according to temperature
Denomination SpecificationComments
A - synthetic oils VW 502 00/ VW 500 00Dated before 1-97
B - mineral oils VW 501 01 Dated before 1-97
A/B - multigrade oils ACEA B2 or B3 or even API SH/SJDated before 1-97
Denomination SpecificationComments
A - synthetic oils VW 505 01
a)
a)Diesel engines with a system of pump-injector type injection should use onlyoil with the specification VW 505 01. Avoid using any other type of oil for this type of engine other than
the VW 505 01 specification; This could lead to engine damage!
Dated before 1-97
B - mineral oils VW 505 00 Dated before 1-97
A/B - multigrade oils ACEA B2 or B3 or even API CD/CFDated before 1-97
leon_ingles Seite 197 Donnerstag, 20. Oktober 2005 12:14 12
Page 200 of 280
Checking and refilling levels
198Mono-grade oil
Single grade oils are generally not suitable for all year round use, due to
ranges of viscosity
18).
These oils are only useful in a climate that is constantly very cold or very
warm.
Engine oil additives
No type of additive should be mixed with the engine oil. The deterioration
caused by these additives is not covered by the warranty.
Note
Before a long trip, we recommend findin g an engine oil that conforms to the
corresponding VW specifications and keeping it in the vehicle. This way, the
correct engine oil will always be available for a top-up if needed.
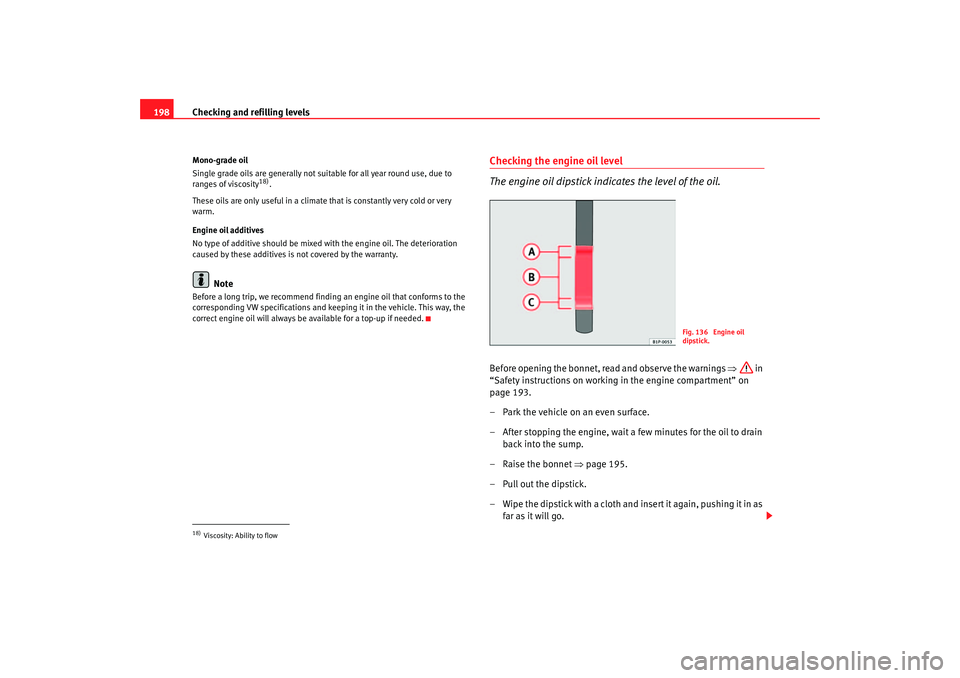
Checking the engine oil level
The engine oil dipstick indicates the level of the oil.Before opening the bonnet, read and observe the warnings ⇒ in
“Safety instructions on working in the engine compartment” on
page 193.
– Park the vehicle on an even surface.
– After stopping the engine, wait a few minutes for the oil to drain back into the sump.
–Raise the bonnet ⇒ page 195.
– Pull out the dipstick.
– Wipe the dipstick with a cloth and insert it again, pushing it in as far as it will go.
18)Viscosity: Ability to flow
Fig. 136 Engine oil
dipstick.
leon_ingles Seite 198 Donnerstag, 20. Oktober 2005 12:14 12