navigation system Seat Leon 5D 2010 MEDIA SYSTEM 2.2
[x] Cancel search | Manufacturer: SEAT, Model Year: 2010, Model line: Leon 5D, Model: Seat Leon 5D 2010Pages: 99, PDF Size: 3.66 MB
Page 36 of 99
Audio mode35
be used to play audio from an external player connected to a Rear Seat Enter-
tainment (RSE ) device through the vehicle sound system
2).
The audio from the external player connected to the RSE is played through the
vehicle loudspeakers but cannot be controlled with the radio and navigation
system controls.
An external audio source connected to the socket is indicated by AUX2 on the
screen.
Playing audio from an RSE system using an additional external audio source
•Lower the base volume on the radio-navigation system ⇒page 10.•Connect the external player to the AUX-RSE connector in the vehicle and
start playback on the external player in accordance with the instructions
given in the RSE handbook.•In Media mode, press the unit button to open the Media setup
menu . Tick the checkbox Activate AUX2 input so that the AUX2 source is
shown in the Media selection menu
3) ⇒ page 34, fig. 28 .
•In the MEDIA main menu, press the unit button to open the Media
selection menu .•Press the AUX2 ⇒ page 34, fig. 29 function button to start playback of the
external audio source connected to the RSE over the vehicle speakers.
The output volume of the connected external audio source should be
adjusted to the volume of the other audio sources ⇒page 41 ( AUX2 volume
in the Media settings menu ⇒ page 34, fig. 28).
Things to note about the AUX2 additional external audio source•If another audio source (CD, SD, etc.) is selected during playback, the
external player connected to the RSE continues playing.
•When playback on the external audio source has finished or if the external
player is disconnected from the AUX-RSE connector, the radio and navigation
system remains in the AUX2 menu.•The AUX2 symbol remains visible and on (highlighted in red), and there-
fore accessible, as long as the “ Activate AUX2 input” check box in the (Media
setup menu ) is ticked. The option should be deactivated when playback has
finished.
Recommendations for use•If your vehicle is not fitted with an RSE system or a MEDIA-IN or MDI multi-
media interface, we recommend that the Activate AUX2 input is always left
unticked . Otherwise, the AUX2 source (if your vehicle does not have MDI) or
the “MDI” source may be shown in the Media selection menu as “active”
(accessible), even if there is no audio source connected to them.•If your vehicle is fitted with a MEDIA-IN or MDI multimedia interface , the
AUX2 additional external source is not available. Use the check box Activate
AUX2 input as described in the section MEDIA-IN or MDI multimedia
interface .
2)If the vehicle is supplied from the factory with an RSE system connected to the radio
and navigation system.3)This option can also be activated using the function button in the pop-up window
which appears when you try to go to the MEDIA main menu when there is no media
source connected or activated.
SETUP
MEDIA
MediaSystem2.1_EN.book Seite 35 Donnerstag, 29. April 2010 4:18 16
Page 37 of 99
Audio mode
36External audio source connected via Bluetooth
®
In Bluetooth audio mode, audio files from an external audio source
connected by Bluetooth
® can be played over the vehicle speakers. The
external audio source must be compatible with the Bluetooth A2DP profile. The external audio source connected via Bluetooth
®
cannot be controlled via
the radio-navigation system.
Starting Bluetooth audio transfer
•Pair and connect the external audio source with the Bluetooth interface of
the mobile telephone provision as described in the owner's manual.•Lower the base volume on the radio-navigation system ⇒page 10.•Start playback on the Bluetooth external audio source.
Depending on the unit, you can start playback of the Bluetooth audio source
via the Media selection menu ⇒page 36.
Starting Bluetooth audio playback•In the MEDIA main menu, press the unit button to open the Media
selection menu .•Select the Bluetooth function button for the mode described
⇒ page 37.
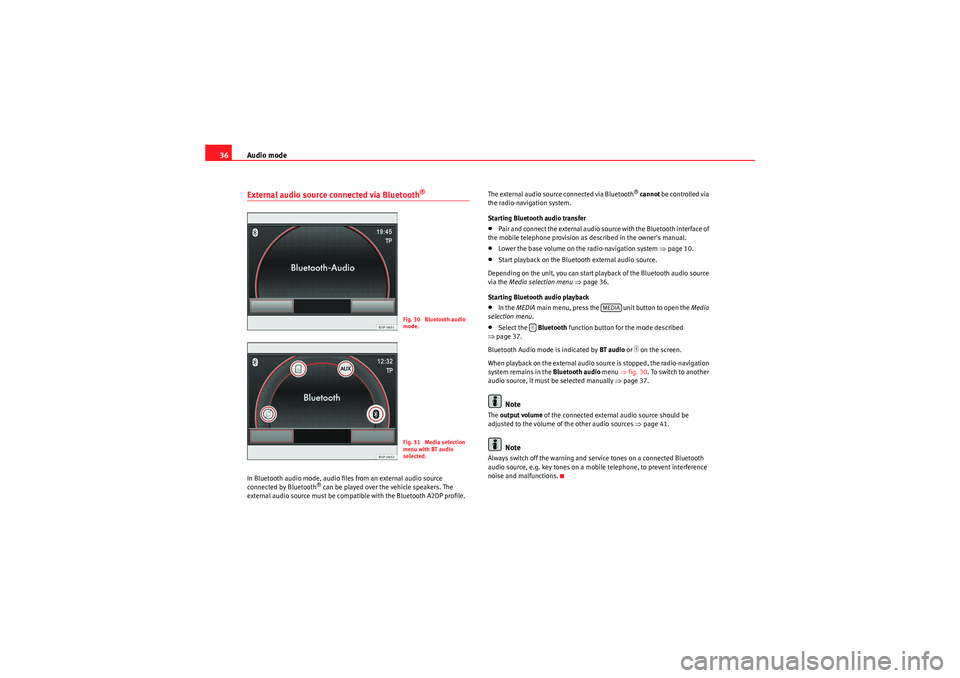
Bluetooth Audio mode is indicated by BT audio or
�
on the screen.
When playback on the external audio source is stopped, the radio-navigation
system remains in the Bluetooth audio menu ⇒fig. 30. To switch to another
audio source, it must be selected manually ⇒page 37.
Note
The output volume of the connected external audio source should be
adjusted to the volume of the other audio sources ⇒page 41.
Note
Always switch off the warning and service tones on a connected Bluetooth
audio source, e.g. key tones on a mobile telephone, to prevent interference
noise and malfunctions.
Fig. 30 Bluetooth audio
mode.Fig. 31 Media selection
menu with BT audio
selected.
MEDIA
�
MediaSystem2.1_EN.book Seite 36 Donnerstag, 29. April 2010 4:18 16
Page 42 of 99
Audio mode41
In units with RDS, the TP function can be switched on by ticking the check box
on the function button ⇒page 21.
Adjusting playback volume
If you need to increase the output volume of an external audio source, first
lower the base volume on the radio-navigation system ⇒page 11.
If the sound from the external audio source is too low, if possible, increase
the output volume on the external audio source. If it is too low, increase the
input volume.
If the sound from the connected external audio source is too loud or
distorted , if possible, lower the output volume on the external audio source.
If it is still too loud, lower the input volume.
WARNING
If the volume is too high, you could damage your hearing. Even if the
volume is too loud for a short period only.
Caution
If the volume is too high or the sound is distorted, the vehicle speakers may
be damaged.
�’Traffic News (TP)
MediaSystem2.1_EN.book Seite 41 Donnerstag, 29. April 2010 4:18 16
Page 43 of 99
Audio mode
42MEDIA-IN multimedia interfaceIntroductionFor the ALHAMBRA model, depending on the version, the MEDIA-IN multi-
media interface is in the passenger storage compartment or the centre
armrest between the two front seats.
For the ALTEA, ALTEA XL, ALTEA Freetrack and LEON models, the MEDIA-IN
multimedia interface offers users a USB connector and an AUX connector,
located on the centre console in the Leon and under the front armrest in the
Alteas.
The supported file formats listed below are collectively referred to in this
manual as “audio files”.
Audio files on an external data medium connected to the MEDIA-IN multi-
media interface can be played and controlled via the radio and navigation
system.
Where this manual refers to external data media, this means USB mass
storage devices containing supported audio files, such as MP3 players,
iPods
® and USB sticks. External data media are displayed as MDI (Media
Device Interface).
The MEDIA-IN multimedia interface supplies the usual USB voltage of 5 volts.
Additional Information:
•Safety notes
�’ ⇒ page 6
•Unit overview ⇒page 8•Media mode ⇒page 29Note
The rubber mat in the storage compartment of the MEDIA-IN multimedia inter-
face can be removed.
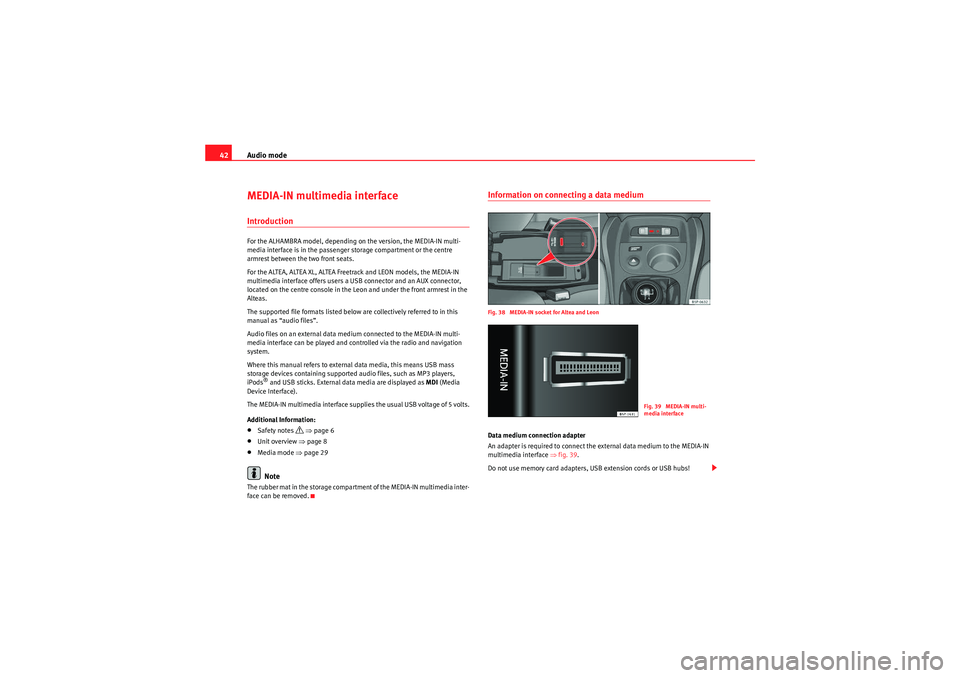
Information on connecting a data mediumFig. 38 MEDIA-IN socket for Altea and LeonData medium connection adapter
An adapter is required to connect the external data medium to the MEDIA-IN
multimedia interface ⇒fig. 39 .
Do not use memory card adapters, USB extension cords or USB hubs!
Fig. 39 MEDIA-IN multi-
media interface
MediaSystem2.1_EN.book Seite 42 Donnerstag, 29. April 2010 4:18 16
Page 44 of 99
Audio mode43
Notes and requirements
Notes and restrictions
Only audio files that can be read via the MEDIA-IN multimedia interface can
be displayed, played and controlled on the radio and navigation system.
In the case of MTP players and depending on the battery charge and the
quantity of data, it may take a few minutes for them to be ready for use.
If an external data medium is divided into several partitions, only the first
partition with compatible audio files will be played.
Please observe the additional instructions and restrictions regarding the
requirements for multimedia sources ⇒page 29.
Connecting and operatingBefore connecting or playing an external data medium, turn down the volume
on the radio-navigation system ⇒ page 11.
Compatible data media
Legible files and formats
Data media compliant with the
USB 2.0 specification.
Data media with the FAT file sys-
tem FAT16 (< 2 GB) or FAT32 (> 2
GB).
iPods
® and iPhones
® of various
generations
a).
MTP players with the “PlaysFor-
Sure” or “ReadyForVista” logo.
a)iPod® and iPhone
® are protected registered trademarks of Apple Inc.
- Audio files in MP3, WMA, OGG-Vorbis
and AAC format.
Playlists in PLS, B4S, ASX and WPL for-
mat.
Please read and observe the external data medium operating instructions.
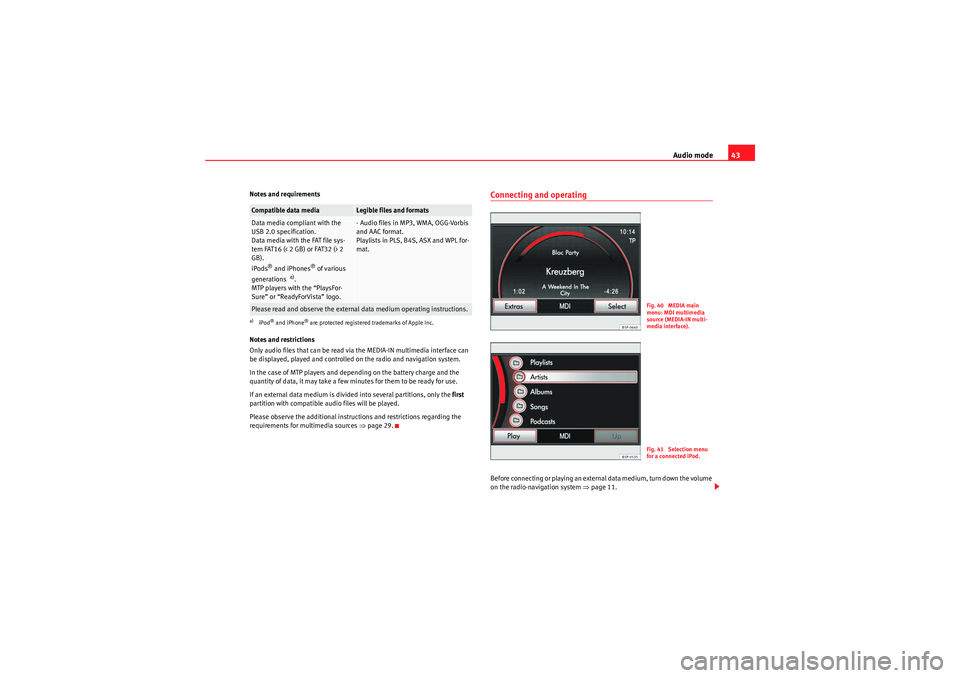
Fig. 40 MEDIA main
menu: MDI multimedia
source (MEDIA-IN multi-
media interface).Fig. 41 Selection menu
for a connected iPod.
MediaSystem2.1_EN.book Seite 43 Donnerstag, 29. April 2010 4:18 16
Page 45 of 99
Audio mode
44Connecting and disconnecting an external data medium (MDI)•Connect the appropriate adapter to the MEDIA-IN multimedia interface
⇒ page 42.•Connect the external data medium to the MEDIA-IN multimedia interface
via the adapter.•I f n e ce s sa r y, s wi tch o n t h e e x t e r na l d a ta m e d i u m o r s e l e c t t h e a p p r o p r i a t e
data mode.
Even though the display may indicate otherwise, the external data medium
may be disconnected from the MEDIA-IN multimedia interface at any time
without data loss.
Connecting or disconnecting an external data medium (MDI) - Altea, Altea XL,
Altea Freetrack, Leon
– Connecting a mass storage device or player with a USB connection
Connect the device to the USB connector of the MEDIA-IN interface.
If necessary, start playback in the external device.
– Connecting an iPod or iPhone in order to control it from the radio and
navigation system
Connect the iPod or iPhone to the MEDIA-IN interface using the cable or
special iPod adapter provided by SEAT.
– Connecting an external device to the AUX input of the MEDIA-IN interface
Connect the device to the AUX input of the MEDIA-IN interface with the
right cable.
Even though the display may indicate otherwise, the external data medium
may be disconnected from the MEDIA-IN multimedia interface at any time
without data loss.
Control through the radio and navigation system
An external data medium correctly connected to the MEDIA-IN multimedia
interface can be controlled through the radio and navigation system. Depending on the unit, when an external data medium is connected and
switched on, it is necessary to change to the radio and navigation system
manually for playback.
•Open the
MEDIA main menu.•Press the unit button to open the Media selection menu .•Press the function button to start or resume playback from the
external data medium.
Further operation of the external data medium (changing track, selecting
tracks and playback modes) is described in the appropriate chapters of this
manual ⇒page 29.
If the selected media source is disconnected from the MEDIA-IN multimedia
interface while being played, the radio and navigation system will remain in
MDI mode. Another audio source must be selected manually.
Special features. ALTEA and LEON models
Depending on the vehicle equipment, from the radio and navigation unit and
via the MEDIA-IN interface, the user can:•play and control audio files from a mass storage device or MP3 player with
USB, iPod or iPhone connection.•play audio from an external player connected to the AUX input of the
Media-In Interface•play audio from an external player connected to the AUX input of the Rear
Seat Entertainment system (if fitted in the vehicle)
Sometimes the additional auxiliary input of the Media-In interface must be
activated in order to use the MDI media source in the media selector.
Activation:•ticking the Activate AUX2 input check box in the Media Setup Menu or,•this option can also be activated using the function button in the pop-up
window which appears when you try to go to the MEDIA main menu when
there is no media source connected or activated.
MEDIAMDI
MediaSystem2.1_EN.book Seite 44 Donnerstag, 29. April 2010 4:18 16
Page 46 of 99
Audio mode45
When should it be activated?•LEON: to play audio from an iPod (via the SEAT adapter cable) or from an
external device connected to the AUX input of the MEDIA-IN interface.•ALTEA, ALTEA XL, Freetrack: to play audio from an external player
connected to the AUX input of the Rear Seat Entertainment system (if fitted in
the vehicle)
iPod® and iPhone
®
When an iPod
® or iPhone
® is connected, a special iPod selection menu is
displayed at the top selection level of the track view ⇒page 43, fig. 41. This
iPod selection menu always has the same structure and is operated in the
familiar way.
The music controls on the connected iPod
® or iPhone
® are disabled.
The output volume of a connected iPod
® or iPhone
® should be adjusted to
the volume of the other audio sources ⇒ page 41.Possible error messages after connecting an external data medium
Note
External audio sources connected to the AUX socket of the MEDIA-IN interface
can be played through the radio and navigation system, but cannot be
controlled from there. To control the external audio source, please see the
manufacturer's instructions. As long as the external audio source is not
switched off, it will continue operating even if another source starts to play in
the radio and navigation system.
Note
The MDI symbol remains visible and on (highlighted in red), and therefore
accessible, as long as the “Activate AUX2 input” check box (Media setup
menu) is ticked. The option should be deactivated when playback has
finished.Error message
Cause
Procedure
Device not
supported
Playback from the
external data medium
or communication via
the adapter cable used
is not possible.
Check adapter cable.
Update the software of the
MEDIA-IN multi-media inter-
face at your Authorised Serv-
ice.
If possible, update the soft-
ware of the external data
medium.
Unit not ready for
operation
Communication inter-
rupted.
Check the connection and
make sure the external data
medium is working correctly.
Due to the large number of different data media and various iPod
® and
iPhone
® generations available, it is not possible to guarantee fault-free
operation of all functions described here.
MediaSystem2.1_EN.book Seite 45 Donnerstag, 29. April 2010 4:18 16
Page 48 of 99
Navigation47
NavigationIntroduction to navigationIntroductionGeneral information
The current vehicle position is determined by means of the GPS system
(Global Positioning System). Sensors in the vehicle measure distances
driven. The measurements are adapted using the detailed information given
in the navigation data medium ma ps and according to the programmed
traffic management. Where applicable, TMC traffic reports are included in the
calculation of routes ⇒ page 70. The navigation system uses these data to
determine an optimal route to the destination.
The destination is defined by entering an address or a point of interest, e.g.
apetrol station or hotel.
Navigation announcements and visual guidance on the navigation unit and
the instrument panel direct you to your destination ⇒page 63.
Depending on the country, some radio-navigation system functions can no
longer be selected when the vehicle is travelling above a certain speed. This
is not a malfunction, but simply a legal requirement.
Navigation data
In normal circumstances, all the necessary navigation data is already stored
in the navigator. A memory card containing the navigation data can be
obtained from an Authorised Service to update this information ⇒page 48.
Additional Information:•Safety notes
�’ ⇒ page 6
•Unit overview ⇒ page 8•Entering a destination ⇒page 52
•Destination memory ⇒page 58•Route guidance ⇒ page 63Note
Dirty or damaged navigation data media may lead to problems when copying
navigation information or even in the navigation itself. Store unused data
media in a suitable container or in the original box to protect them from
mechanical damage, heat, humidity or direct sunlight.Limitations of the navigation functionPossible errors in navigation
If the navigation system is not able to receive data from the GPS satellites
(dense vegetation, underground garage), it is still possible to navigate using
the vehicle sensory analysis.
In areas that are not or only partially digitised on the data medium
(e.g. insufficient definition of one-way streets and road categories), the navi-
gation system will still attempt to provide route guidance.
If navigation data are unavailable or incomplete, the navigation system may
be unable to determine the exact vehicle position. As a result, the navigation
may not be as exact as usual.
Navigation area and age of navigation data
The accuracy of the data (small villages, streets and house numbers)
depends on the respective version for the country.
Roads and streets are subject to constant change (e.g. new roads, changes to
street names and house numbers). After some time, navigation data will no
MediaSystem2.1_EN.book Seite 47 Donnerstag, 29. April 2010 4:18 16
Page 49 of 99
Navigation
48longer be up-to-date. This may lead to inaccurate or incorrect route
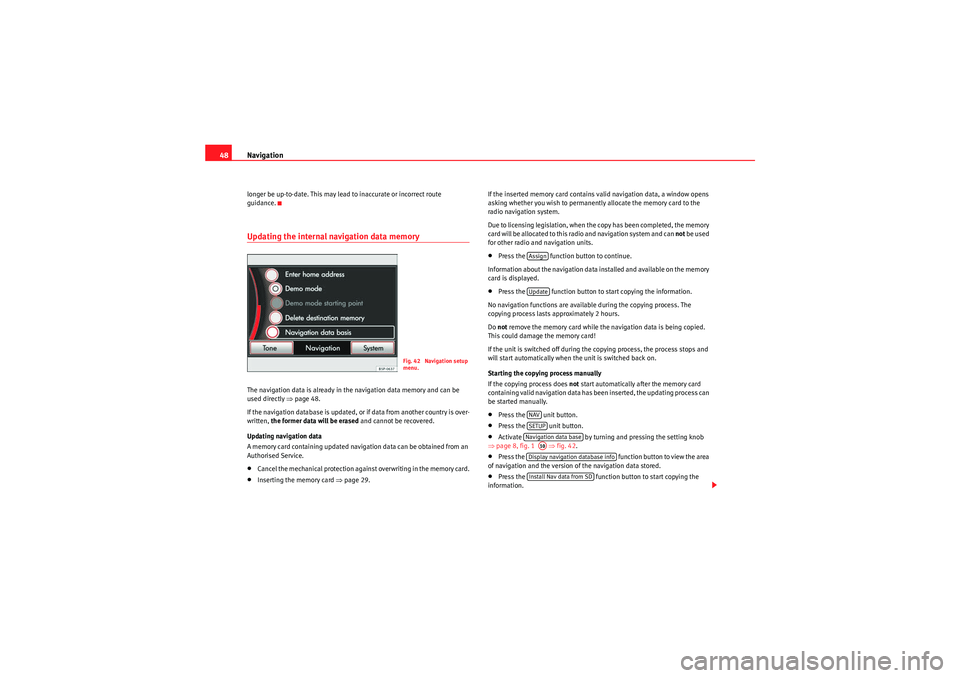
guidance.Updating the internal navigation data memoryThe navigation data is already in the navigation data memory and can be
used directly ⇒page 48.
If the navigation database is updated, or if data from another country is over-
written, the former data will be erased and cannot be recovered.
Updating navigation data
A memory card containing updated navigation data can be obtained from an
Authorised Service.•Cancel the mechanical protection against overwriting in the memory card.•Inserting the memory card ⇒page 29. If the inserted memory card contains valid navigation data, a window opens
asking whether you wish to permanently allocate the memory card to the
radio navigation system.
Due to licensing legislation, when the copy has been completed, the memory
card will be allocated to this radio and navigation system and can
not be used
for other radio and navigation units.
•Press the function button to continue.
Information about the navigation data installed and available on the memory
card is displayed.•Press the function button to start copying the information.
No navigation functions are available during the copying process. The
copying process lasts approximately 2 hours.
Do not remove the memory card while the navigation data is being copied.
This could damage the memory card!
If the unit is switched off during the copying process, the process stops and
will start automatically when the unit is switched back on.
Starting the copying process manually
If the copying process does not start automatically after the memory card
containing valid navigation data has been inserted, the updating process can
be started manually.•Press the unit button.•Press the unit button.•Activate by turning and pressing the setting knob
⇒ page 8, fig. 1 ⇒ fig. 42.•Press the function button to view the area
of navigation and the version of the navigation data stored.•Press the function button to start copying the
information.
Fig. 42 Navigation setup
menu.
AssignUpdateNAVSETUPNavigation data base
A10Display navigation database infoInstall Nav data from SD
MediaSystem2.1_EN.book Seite 48 Donnerstag, 29. April 2010 4:18 16
Page 50 of 99
Navigation49
Caution
Do not remove the memory card while the navigation data is being copied.
This could damage the memory card!Navigation main menu
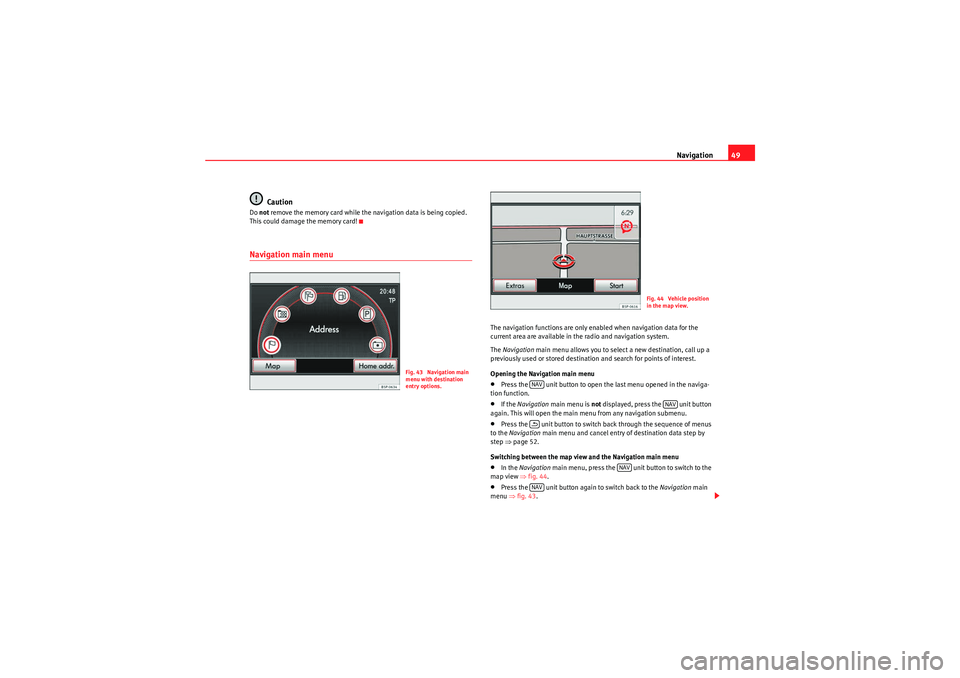
The navigation functions are only enabled when navigation data for the
current area are available in the radio and navigation system.
The Navigation main menu allows you to select a new destination, call up a
previously used or stored destination and search for points of interest.
Opening the Navigation main menu•Press the unit button to open the last menu opened in the naviga-
tion function.•If the Navigation main menu is not displayed, press the unit button
again. This will open the main menu from any navigation submenu.•Press the unit button to switch back through the sequence of menus
to the Navigation main menu and cancel entry of destination data step by
step ⇒page 52.
Switching between the map view and the Navigation main menu•In the Navigation main menu, press the unit button to switch to the
map view ⇒fig. 44 .•Press the unit button again to switch back to the Navigation main
menu ⇒fig. 43.
Fig. 43 Navigation main
menu with destination
entry options.
Fig. 44 Vehicle position
in the map view.
NAV
NAV
�E
NAV
NAV
MediaSystem2.1_EN.book Seite 49 Donnerstag, 29. April 2010 4:18 16