Seat Leon 5D 2011 Workshop Manual
Manufacturer: SEAT, Model Year: 2011, Model line: Leon 5D, Model: Seat Leon 5D 2011Pages: 302, PDF Size: 4.17 MB
Page 51 of 302
49
Child safety
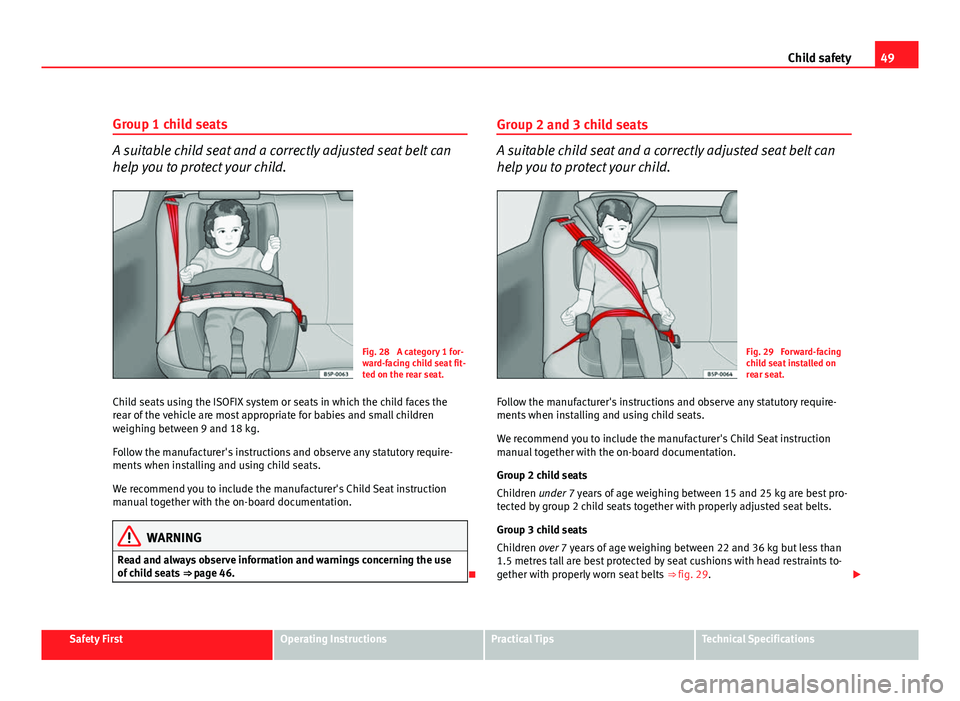
Group 1 child seats
A suitable child seat and a correctly adjusted seat belt can
help you to protect your child.
Fig. 28 A category 1 for-
ward-facing child seat fit-
ted on the rear seat.
Child seats using the ISOFIX system or seats in which the child faces the
rear of the vehicle are most appropriate for babies and small children
weighing between 9 and 18 kg.
Follow the manufacturer's instructions and observe any statutory require-
ments when installing and using child seats.
We recommend you to include the manufacturer's Child Seat instruction
manual together with the on-board documentation.
WARNING
Read and always observe information and warnings concerning the use
of child seats ⇒ page 46.
Group 2 and 3 child seats
A suitable child seat and a correctly adjusted seat belt can
help you to protect your child.
Fig. 29 Forward-facing
child seat installed on
rear seat.
Follow the manufacturer's instructions and observe any statutory require-
ments when installing and using child seats.
We recommend you to include the manufacturer's Child Seat instruction
manual together with the on-board documentation.
Group 2 child seats
Children under 7 years of age weighing between 15 and 25 kg are best pro-
tected by group 2 child seats together with properly adjusted seat belts.
Group 3 child seats
Children over 7 years of age weighing between 22 and 36 kg but less than
1.5 metres tall are best protected by seat cushions with head restraints to-
gether with properly worn seat belts ⇒ fig. 29.
Safety FirstOperating InstructionsPractical TipsTechnical Specifications
Page 52 of 302
50Child safety
WARNING
● The shoulder part of the seat belt must lie approximately on the cen-
tre of the shoulder, never across the neck or the arm. The seat belt must
lie close to the upper part of the body. The lap belt part must lie across
the pelvis, not across the stomach, and always fit closely. Pull the belt
tight if necessary to take up any slack ⇒ page 25, Seat belts.
● Read and always observe information and warnings concerning the
use of child seats ⇒ page 46.
Page 53 of 302
51
Child safety
Securing child seats
Ways to secure a child seat
A child seat can be secured differently on the rear seat and
on the front passenger seat. You can secure a child seat to the rear seat or front passenger seat in the
following ways:
● Child seats in groups 0 to 3 can be secured with a seat belt.
● Child seats in groups 0, 0+ and 1 with the ISOFIX and Top Tether* sys-
tems can be secured without using the seatbelt, thanks to the ISOFIX and
Top Tether* securing rings ⇒ page 51.
CategoryWeightSeat locationsFront passen-
gerRear outerRear centre
Group 0<10 kgU*U/LUGroup 0+<13 kgU*U/LUGroup 19-18 kgU*U/LUGroup 2 / 315-36 kgU*UU
Suitable for universal approved restraining systems for use in this age
category (universal retention systems are those fitted using the adult
seat belt).
Move the front passenger seat as far back as possible, as high as pos-
sible and always deactivate the airbag.
Suitable for retention systems using the ISOFIX and Top Tether* an-
chors.
U:
*:
L:
WARNING
● When travelling, children must be secured in the vehicle with a re-
straint system suitable for age, weight and size.
● Never install a child seat facing backwards on the front passenger
seat unless the front passenger airbag has been disabled. This could
cause fatal injuries to the child! However, if, in exceptional cases, it is
necessary to transport a child in the front passenger seat, the front pas-
senger airbag ⇒ page 44, Deactivating airbags* must always be disabled
and the seat adjusted to its highest position, where possible.
● Read and always observe information and warnings concerning the
use of child seats ⇒ page 46.
Child seats fastened with the “ISOFIX” and Top Tether*
system
Child seats with the ISOFIX or Top Tether* system can be se-
cured quickly, easily and safely on the rear outer seats.
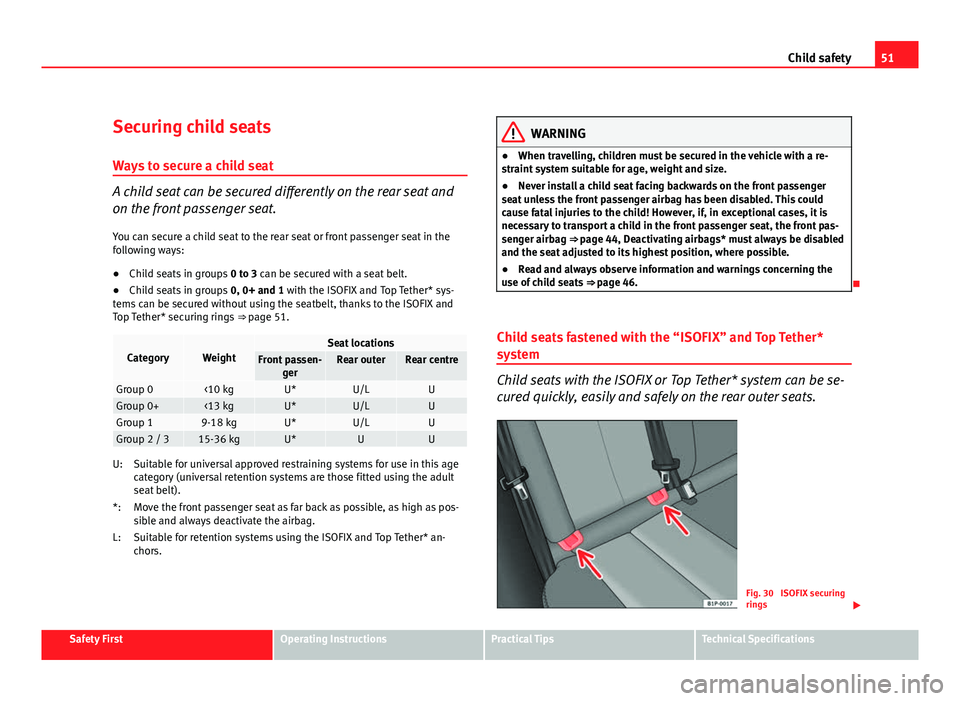
Fig. 30 ISOFIX securing
rings
Safety FirstOperating InstructionsPractical TipsTechnical Specifications
Page 54 of 302
52Child safety
When removing or fitting the child seat, please be sure to follow
the manufacturer's instructions.
–Move the seat as far to rear as it will go.
– Press the child seat onto the ISOFIX retaining rings until the
child seat can be heard to engage securely. If the child seat is
equipped with Toptether* anchor points, secure it to the corre-
spondent ring. Observe the manufacturer's instructions.
– Pull on both sides of the child seat to ensure that it is secure.
Two ISOFIX retaining rings are fitted on each rear seat. In some vehicles, the
rings are secured to the seat frame and, in others, they are secured to the
rear floor. The access to the ISOFIX rings is between the rear seat backrest
and the seat cushioning. The Top Tether* anchors are located at the rear of
the backs seats (behind the seat or in the luggage compartment).
Child seats with the ISOFIX and Top Tether* attachment system are available
from the Authorised Service Centres.
WARNING
● The securing rings are designed only for use with ISOFIX and Top
Tether* child seats.
● Never secure child seats that do not have the ISOFIX and Top Tether*
system, retaining belts or other objects to the securing rings – this could
result in potentially fatal injuries to the child!
● Ensure that the child seat is secured correctly using the “ISOFIX” and
Top Tether* securing rings.
Page 55 of 302
53
Child safety
Safety FirstOperating InstructionsPractical TipsTechnical Specifications
Page 56 of 302
54Cockpit
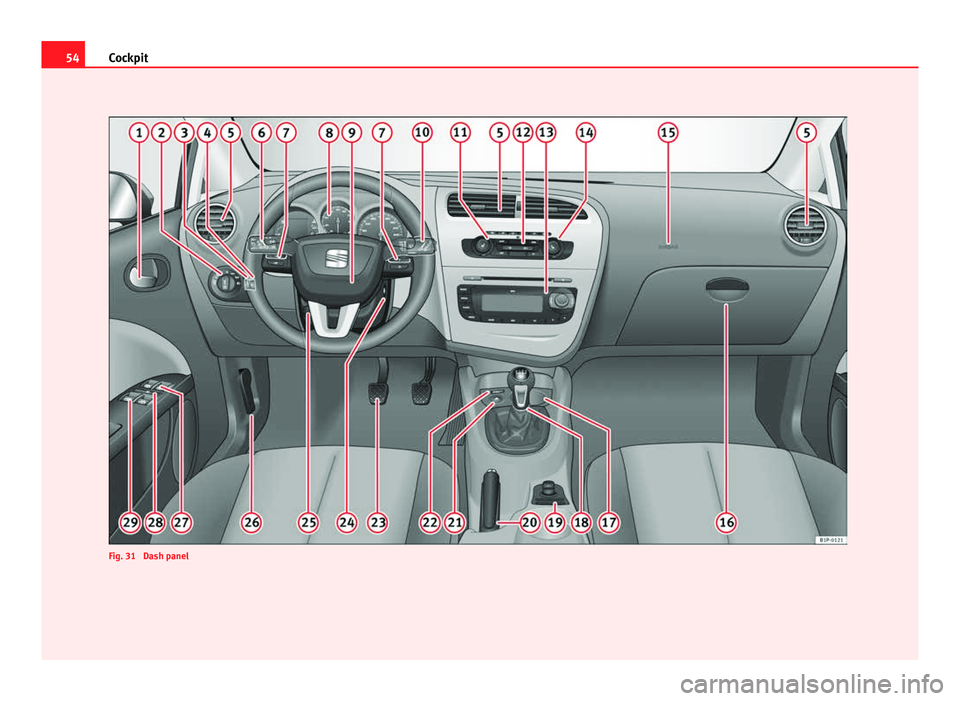
Fig. 31 Dash panel
Page 57 of 302
55
Cockpit
Operating Instructions Cockpit
Overview Overview of the dash panel
This overview will help you to familiarise yourself with the
controls and displays. Door release lever
Light switch . . . . . . . . . . . . . . . . . . . . . . . . . . . . . . . . . . . . . . . . . . . . . . . 115
Lighting control for instrument and control lighting . . . . . . . . .119
Headlight range control . . . . . . . . . . . . . . . . . . . . . . . . . . . . . . . . . . . 119
Air vent
Turn signal and main beam lever and cruise control system* 122, 178
Controls on the steering wheel . . . . . . . . . . . . . . . . . . . . . . . . . . . . . 91
Instrument panel:
– Instruments . . . . . . . . . . . . . . . . . . . . . . . . . . . . . . . . . . . . . . . . . . . . 57
– Display . . . . . . . . . . . . . . . . . . . . . . . . . . . . . . . . . . . . . . . . . . . . . . . . 61
– Indicator lamps . . . . . . . . . . . . . . . . . . . . . . . . . . . . . . . . . . . . . . . . . 77
Horn (works only when the ignition is on)/ Driver front airbag . .30
Windscreen wiper and washer lever and operation of the
multifunction display* . . . . . . . . . . . . . . . . . . . . . . . . . . . . . . . . . . . . . 125, 63
Left seat heating button . . . . . . . . . . . . . . . . . . . . . . . . . . . . . . . . . . . 136
1
2345678
910
11
Controls for
–
Heating* and ventilation . . . . . . . . . . . . . . . . . . . . . . . . . . . . . . . . 145
– Climatic* . . . . . . . . . . . . . . . . . . . . . . . . . . . . . . . . . . . . . . . . . . . . . . . 147
– Climatronic* . . . . . . . . . . . . . . . . . . . . . . . . . . . . . . . . . . . . . . . . . . . . 151
Radio/Navigator*
Right seat heating button . . . . . . . . . . . . . . . . . . . . . . . . . . . . . . . . . . 136
Front passenger airbag . . . . . . . . . . . . . . . . . . . . . . . . . . . . . . . . . . . . 30
Glove compartment lever . . . . . . . . . . . . . . . . . . . . . . . . . . . . . . . . . . 138
Cup holder compartment . . . . . . . . . . . . . . . . . . . . . . . . . . . . . . . . . . 139
Selector lever . . . . . . . . . . . . . . . . . . . . . . . . . . . . . . . . . . . . . . . . . . . . . 168
Controls on the centre console:
– Central locking . . . . . . . . . . . . . . . . . . . . . . . . . . . . . . . . . . . . . . . . . 97
– ESC (ESP) . . . . . . . . . . . . . . . . . . . . . . . . . . . . . . . . . . . . . . . . . . . . . . 184
– Tyre pressure monitoring
– Park Pilot* . . . . . . . . . . . . . . . . . . . . . . . . . . . . . . . . . . . . . . . . . . . . . 175
– Cigarette lighter / Power socket . . . . . . . . . . . . . . . . . . . . . . . . . 140
– Exterior mirror adjustment . . . . . . . . . . . . . . . . . . . . . . . . . . . . . . 130
– Start-Stop* . . . . . . . . . . . . . . . . . . . . . . . . . . . . . . . . . . . . . . . . . . . . . 164
Handbrake . . . . . . . . . . . . . . . . . . . . . . . . . . . . . . . . . . . . . . . . . . . . . . . . 173
Hazard warning light switch . . . . . . . . . . . . . . . . . . . . . . . . . . . . . . . 120
Warning lamp for deactivated front passenger airbag . . . . . . .44
Pedals
Ignition lock . . . . . . . . . . . . . . . . . . . . . . . . . . . . . . . . . . . . . . . . . . . . . . 159
Steering column control lever* . . . . . . . . . . . . . . . . . . . . . . . . . . . . . 157
12
13141516171819
202122232425
Safety FirstOperating InstructionsPractical TipsTechnical Specifications
Page 58 of 302
56Cockpit
Handle for releasing the bonnet . . . . . . . . . . . . . . . . . . . . . . . . . . . . 217
Button for opening and closing the front windows . . . . . . . . . .110
Safety switch* for the rear windows . . . . . . . . . . . . . . . . . . . . . . . .110
Control* for opening and closing the rear windows . . . . . . . . . .110
Note
Some of the items of equipment listed here are fitted only on certain model
versions or are optional extras.
26272829
Page 59 of 302
57
Cockpit
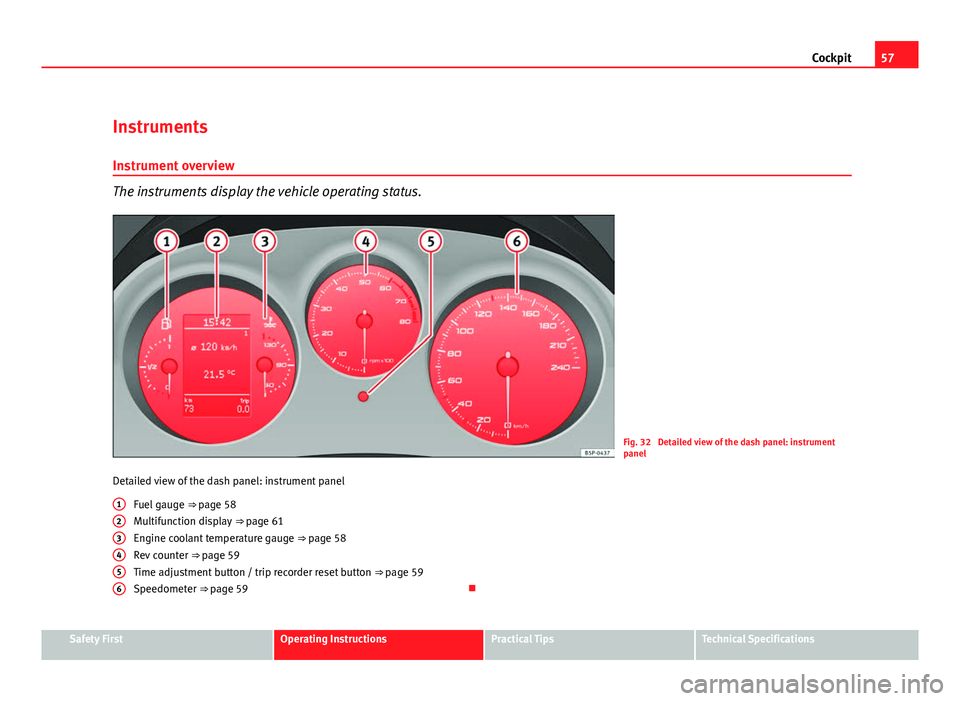
Instruments Instrument overview
The instruments display the vehicle operating status.
Fig. 32 Detailed view of the dash panel: instrument
panel
Detailed view of the dash panel: instrument panel Fuel gauge ⇒ page 58
Multifunction display ⇒ page 61
Engine coolant temperature gauge ⇒ page 58
Rev counter ⇒ page 59
Time adjustment button / trip recorder reset button ⇒ page 59
Speedometer ⇒ page 59
1
23456
Safety FirstOperating InstructionsPractical TipsTechnical Specifications
Page 60 of 302

58Cockpit
Fuel gauge and reserve indicator
Fig. 33 Instrument pan-
el: fuel gauge
Instrument panel: fuel gauge
The fuel tank has a capacity of approx. 55 litres.
When the needle reaches the reserve area ⇒ fig. 33 (arrow), the warning
lamp will light up and an acoustic signal will sound reminding the driver to
refuel. At this point there are still 7 litres of fuel in the tank.
The following text appears on the instrument panel display 1)
PLEASE REFUEL
[XXX]*. Engine coolant temperature gauge
This gauge shows the engine coolant temperature.
Fig. 34 Instrument pan-
el: engine coolant tem-
perature gauge
Needle in cold zone A
Avoid high engine speeds and heavy engine loads
⇒ fig. 34.
Needle in normal zone B
In normal driving conditions, the needle should be in the middle section of
the scale. The temperature may also rise when the engine is working hard,
especially at high outside temperatures. This is no cause for concern as
long as the warning lamp does not light up and no warning message* ap-
pears on the instrument panel display.
1)
Depending on the version of the model.