technical specifications Seat Leon 5D 2012 Repair Manual
[x] Cancel search | Manufacturer: SEAT, Model Year: 2012, Model line: Leon 5D, Model: Seat Leon 5D 2012Pages: 289, PDF Size: 3.81 MB
Page 124 of 289

123
Lights and visibility
● If necessary the right exterior mirror adjustment may need correcting.
Turn the knob to position R.
● In the Easy Connect system the exterior mirrors can be adjusted using
the CAR
button and the function button SETUP.
Tilt function for front passenger exterior mirror*
The mirror can automatically tilt slightly to provide a better view of the kerb
when parking backwards. The control must be in the position R for this fea-
ture to be operational.
The mirror returns to its original position as soon as you drive forwards at
over 15 km/h (10 mph) or switch off the ignition. It also returns to its origi-
nal position if the position of the control is adjusted.
WARNING
Convex or wide-angle* exterior mirrors give a larger field of vision. How-
ever, they make objects look smaller and further away than they really
are. If you use these mirrors to estimate the distance to vehicles behind
you when changing lane, you could misjudge the distance. Risk of acci-
dent!
CAUTION
● If one of the mirror housings is knocked out of position (e.g. when park-
ing), the mirrors must first be fully retracted with the electric control. Do not
readjust the mirror housing by hand, as this will interfere with the mirror ad-
juster function.
● Before washing the vehicle in an automatic car wash, please make sure
to retract the exterior mirrors to prevent them from being damaged. Electri-
cally retractable exterior mirrors must NOT be folded in or out by hand. Al-
ways use the electrical power control.
Note
If the electrical adjustment should fail to operate, both of the mirrors can be
adjusted by hand by lightly pressing the edge of the mirror glass. Anti-dazzle rear vision mirrors
Your vehicle is fitted with an interior rear vision mirror with a
manual or automatic control for anti-dazzle position.
Fig. 70 Interior rear vi-
sion mirror with automat-
ic setting for anti-dazzle
position
Interior rear vision mirror with manual setting for anti-dazzle
position
– Position the small lever of the lower edge of the mirror to face
towards the rear.
Anti-dazzle rear vision mirror with automatic setting*
– Press the button A
. Warning lamp B will light up. Depending
on the amount of light incidence, the interior rear vision mirror
and the exterior* mirrors darken (e.g. headlight shining from
behind).
Safety FirstOperating instructionsPractical TipsTechnical specifications
Page 126 of 289

125
Seats and storage
Seats and storage General notes
WARNING
The Safe driving chapter contains important information, tips, sugges-
tions and warnings that you should read and observe for your own safety
and the safety of your passengers ⇒ page 7.
Front seats Manual seat adjustment
Fig. 71 Front seats:
manual seat adjustment Adjusting the seat forward/backward: pull the lever and move the seat
forwards or backwards.
Adjusting the lumbar support* : press the button in the corresponding
position.
Backrest lower/raise: turn the hand wheel.
Raise/lower the seat: Pull/push the lever.
WARNING
● Adjust the front seats only when the vehicle is stationary. Failure to
do so could result in an accident.
● Be careful when adjusting the seat height. Careless or uncontrolled
adjustment can cause injuries.
● The front seat backrests must not be reclined for driving. Otherwise,
seat belts and the airbag system might not protect as they should, with
the subsequent danger of injury.
Front centre armrest
The centre armrest can be adjusted to various levels. Adjusting the centre armrest
– To adjust the tilt, lift the armrest from the starting position so
that it is engaged.
– To return the armrest to the starting position, remove the arm-
rest from the upper fixed position and lower it.
The armrest can be moved backwards and forwards.
1
2
34
Safety FirstOperating instructionsPractical TipsTechnical specifications
Page 128 of 289

127
Seats and storage
WARNING
If the fabric of the cushion is wet, this can adversely affect the operation
of the seat heating, increasing the risk of burns.
● Make sure the seat cushion is dry prior to using the seat heater.
● Do not sit on the seat with clothing that is wet or damp.
● Do not leave clothing that is wet or damp on the seat.
● Do not spill liquid on the seat.
CAUTION
● To avoid damaging the heating elements of the seat heating, please do
not kneel on the seat or apply sharp pressure at a single point to the seat
cushion and backrest.
● Liquids, sharps objects and insulating materials (e.g., covers or child
seats) can damage the seat heating.
● In the event of odours, switch off the seat heating immediately and have
the unit inspected by a specialised workshop.
For the sake of the environment
The seat heating should remain on only when needed. Otherwise, it is an
unnecessary fuel waste. Head restraints
Fig. 73 Front seat: ad-
justment of the head re-
straint
Adjust the head restraint so that the top of the head restraint is lev-
el with the top of your head. When this is not possible, try to get as
close as possible to this position.
– Grasp the sides of the head restraint with both hands and move
it up/down (to lower you must press button 1
) until you see it
engage.
Safety FirstOperating instructionsPractical TipsTechnical specifications
Page 130 of 289
129
Seats and storage
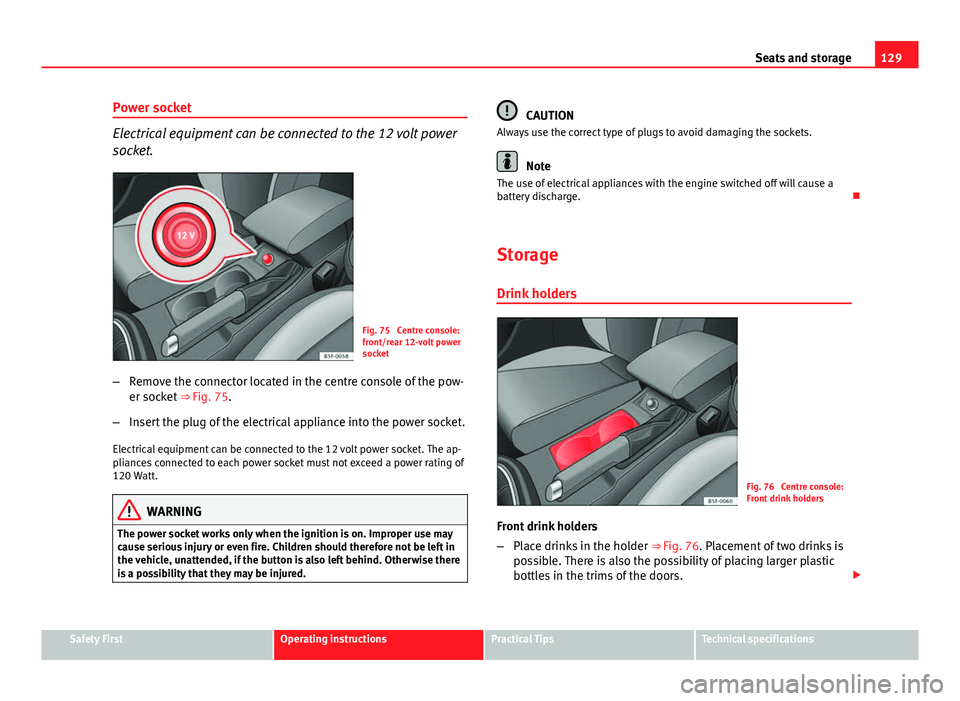
Power socket
Electrical equipment can be connected to the 12 volt power
socket.
Fig. 75 Centre console:
front/rear 12-volt power
socket
– Remove the connector located in the centre console of the pow-
er socket ⇒ Fig. 75.
– Insert the plug of the electrical appliance into the power socket.
Electrical equipment can be connected to the 12 volt power socket. The ap-
pliances connected to each power socket must not exceed a power rating of
120 Watt.
WARNING
The power socket works only when the ignition is on. Improper use may
cause serious injury or even fire. Children should therefore not be left in
the vehicle, unattended, if the button is also left behind. Otherwise there
is a possibility that they may be injured.
CAUTION
Always use the correct type of plugs to avoid damaging the sockets.
Note
The use of electrical appliances with the engine switched off will cause a
battery discharge.
Storage
Drink holders
Fig. 76 Centre console:
Front drink holders
Front drink holders
– Place drinks in the holder ⇒ Fig. 76. Placement of two drinks is
possible. There is also the possibility of placing larger plastic
bottles in the trims of the doors.
Safety FirstOperating instructionsPractical TipsTechnical specifications
Page 132 of 289
131
Seats and storage
WARNING
● Please make sure that any items of clothing hanging from the coat
hooks do not obstruct your view to the rear.
● The coat hooks should only be used for lightweight clothing. Do not
leave any heavy or sharp objects in the pockets.
● Do not use clothes hangers to hang up the clothing, as this could in-
terfere with the function of the head-protection airbags.
Roof carrier
Note the following points if you intend to carry loads on the roof:
● In your car only certain roof carriers should be used. Roof carriers are the
basis of a complete roof carrier system. To transport luggage and sports
equipment, additional structures/transport systems are needed. We recom-
mend roof carriers and structures from the SEAT accessories programme.
● When mounting the roof carrier, be sure to mount only on the points al-
ready provided on the roof. The front and rear attachment points are only
visible when the doors are open.
● The maximum permissible roof load for your vehicle is 75 kg. The load
limit applies to the combined weight of the roof carrier, the structures, and
load itself. However, check the load permitted by the specific loading sys-
tem being used. Permissible axle weight and permissible total weight for
your vehicle ⇒ page 267.
WARNING
● Take note of the mounting instructions for the roof carrier system. If
the carrier system and the roof load are not properly secured, items of
luggage could fall from the vehicle and cause an accident.
● When you use a roof carrier system the style of driving changes due
to a shift of emphasis and the larger surface area exposed to wind drag,
which could cause an accident. Therefore, it is essential to adjust your
speed and driving style accordingly, to avoid accidents.
CAUTION
Check that when the rear lid is open, it does not touch loads carried on the
roof. When a roof carrier is fitted, DO NOT open the panoramic roof*.
For the sake of the environment
Greater aerodynamic drag increases fuel consumption. For this reason you
should always take off the roof carrier when it is not in use.
Luggage compartment
General notes
WARNING
The Safe driving chapter contains important information, tips, sugges-
tions and warnings that you should read and observe for your own safety
and the safety of your passengers ⇒ page 7.
Safety FirstOperating instructionsPractical TipsTechnical specifications
Page 134 of 289
133
Seats and storage
– Fold the backrest forwards.
Returning the backrest to its upright position
– Move the backrest until it engages properly ⇒
. The red mark-
ing on the tab B should no longer be visible when the backrest
is properly secured.
WARNING
● Make sure that the rear backrest is securely locked in position so that
the seat belt can provide proper protection on the centre rear seat.
● The rear backrest must always be securely latched so that objects
stored in the luggage compartment will not fly forward through the inte-
rior during sudden braking.
CAUTION
● With the backrest inclined there is a danger of damaging the rear head
restraints when adjusting the front seats backwards.
● When returning the backrest to an upright position, make sure that the
side seat belts are not caught up and damaged in the catches for the back-
rest. Fastening rings*
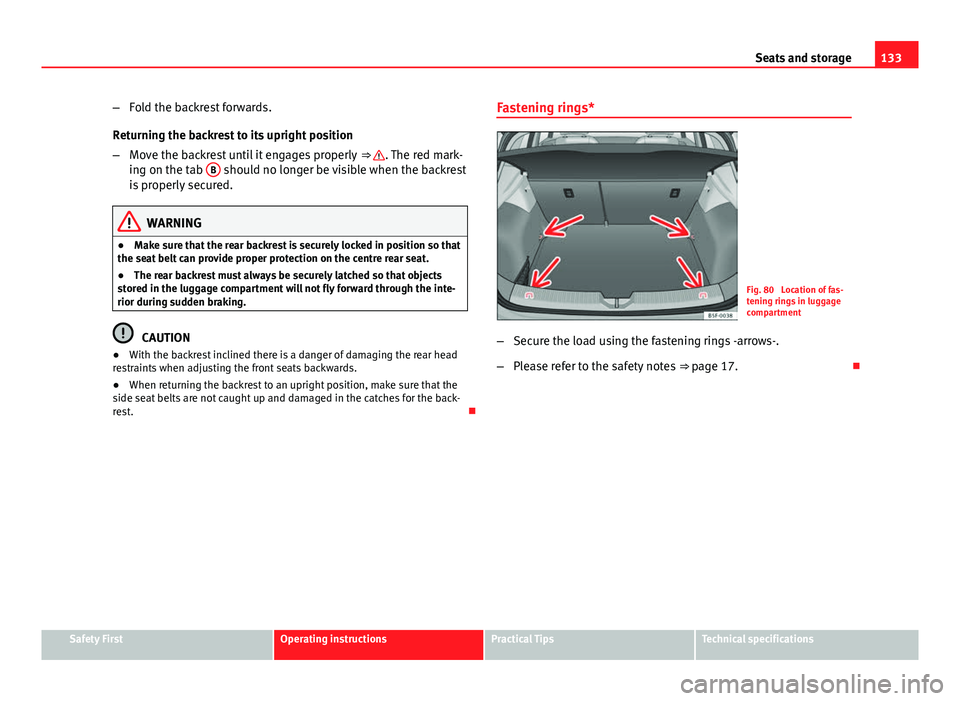
Fig. 80 Location of fas-
tening rings in luggage
compartment
– Secure the load using the fastening rings -arrows-.
– Please refer to the safety notes ⇒ page 17.
Safety FirstOperating instructionsPractical TipsTechnical specifications
Page 136 of 289

135
Air conditioning
CAUTION
● Switch the air conditioner off if you think it may be broken. This will
avoid additional damage. Have the air conditioner checked by a specialised
workshop.
● Repairs to the air conditioner require specialist knowledge and special
tools. SEAT recommends visiting a SEAT Official Service.
Note
● When the cooling system is turned off, air coming from the outside will
not be dried. To prevent fogging of the windows, SEAT recommends leaving
the cooling system (compressor) turned on. To do this, press the button
.
The button lamp should light up.
● The maximum heat output required to defrost windows as quickly as
possible is only available when the engine has reached its normal running
temperature.
● Keep the air intake slots in front of the windscreen free of snow, ice and
leaves to ensure heating and cooling are not impaired, and to prevent the
windows from misting over. Air conditioner controls
Fig. 81 In the centre console: Climatronic controls
To switch a function on or off, press the appropriate button. Press the but-
ton again to switch off the function.
The LED on each control lights up to indicate that the respective function of
a control has been switched on.
Control but- tonAdditional information. Climatronic.
1 Temper-
ature
... The left and right sides can be adjusted separately. Rotate
the control to adjust the temperature accordingly.
2 Fan
The power of the fan is automatically adjusted. The fan is al-
so adjusted manually by turning the control.
3 Air dis-
tributionThe airflow adjusts automatically for comfort. You can also
switch it on manually using the buttons 3.
Safety FirstOperating instructionsPractical TipsTechnical specifications
Page 138 of 289
137
Air conditioning
To switch a function on or off, or to select a submenu, you must press the
corresponding function button.
For more information about functions ⇒ page 79.
Function
buttonFunction
OFFSwitch off and switch on the Climatronic.
SETTINGS
The air conditioning settings submenu is opened. It is possi-
ble to make the following adjustments:
Function button Air conditioning profile.
: to adjust the level of the
fan in AUTO mode. You can choose between low, medium and
high.
Function button Automatic air recirculation
to switch on and off au-
tomatic air recirculation ⇒ page 141.
BACK
function button to close the submenu.
Operating by using the Easy Connect* system (valid for
Standard Radio)
In the Easy Connect system it is also possible to perform various adjust-
ments to the Climatronic.
Open the air conditioner menu
● Press the Setup
button
On the top of the screen you can see and change the current settings, such
as, for example, the temperature set for the driver side and for that of pas-
senger. Temperatures up to +22 ° C (+72 ° F) are shown with blue arrows,
and temperatures over +22 ° C (+72 ° F) with red arrows.
To switch a function on or off, or to select a submenu, you must press the
corresponding function button.
Function buttonFunction
Air conditioning profileAdjust the fan level in AUTO mode. You can choose be-
tween low, medium and high.
Climatronic is switched off.
Climatronic is switched on.
SETTINGS
The air conditioning settings submenu is opened. It is
possible to make the following adjustments:
Function button Air conditioning profile.
: to adjust the level
of the fan in AUTO mode. You can choose between low,
medium and high.
Function button Automatic air recirculation
to switch on and
off automatic air recirculation ⇒ page 141.
BACK
function button to close the submenu.
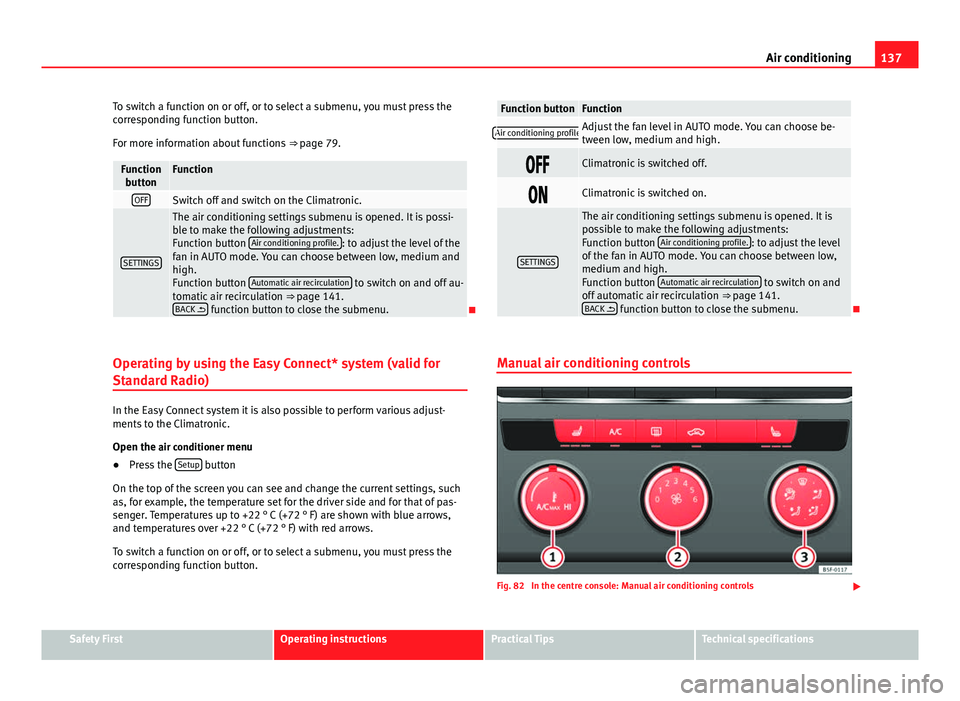
Manual air conditioning controls
Fig. 82 In the centre console: Manual air conditioning controls
Safety FirstOperating instructionsPractical TipsTechnical specifications
Page 140 of 289
139
Air conditioning
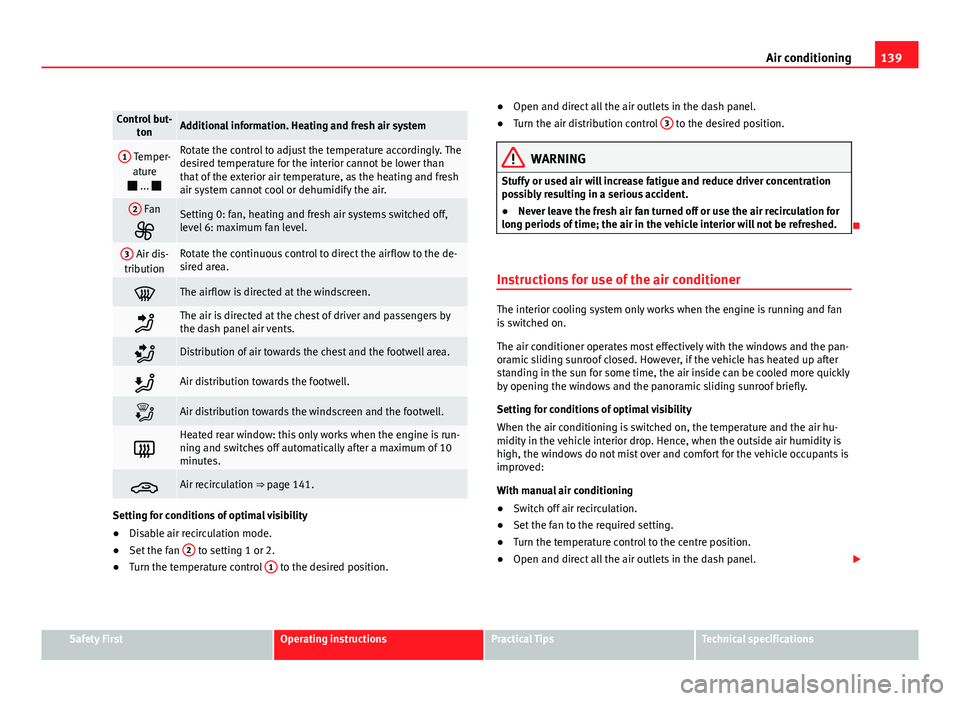
Control but-
tonAdditional information. Heating and fresh air system
1 Temper-
ature
... Rotate the control to adjust the temperature accordingly. The
desired temperature for the interior cannot be lower than
that of the exterior air temperature, as the heating and fresh
air system cannot cool or dehumidify the air.
2 Fan
Setting 0: fan, heating and fresh air systems switched off,
level 6: maximum fan level.
3 Air dis-
tributionRotate the continuous control to direct the airflow to the de-
sired area.
The airflow is directed at the windscreen.
The air is directed at the chest of driver and passengers by
the dash panel air vents.
Distribution of air towards the chest and the footwell area.
Air distribution towards the footwell.
Air distribution towards the windscreen and the footwell.
Heated rear window: this only works when the engine is run-
ning and switches off automatically after a maximum of 10
minutes.
Air recirculation ⇒ page 141.
Setting for conditions of optimal visibility
● Disable air recirculation mode.
● Set the fan 2
to setting 1 or 2.
● Turn the temperature control 1 to the desired position. ●
Open and direct all the air outlets in the dash panel.
● Turn the air distribution control 3
to the desired position.
WARNING
Stuffy or used air will increase fatigue and reduce driver concentration
possibly resulting in a serious accident.
● Never leave the fresh air fan turned off or use the air recirculation for
long periods of time; the air in the vehicle interior will not be refreshed.
Instructions for use of the air conditioner
The interior cooling system only works when the engine is running and fan
is switched on.
The air conditioner operates most effectively with the windows and the pan-
oramic sliding sunroof closed. However, if the vehicle has heated up after
standing in the sun for some time, the air inside can be cooled more quickly
by opening the windows and the panoramic sliding sunroof briefly.
Setting for conditions of optimal visibility
When the air conditioning is switched on, the temperature and the air hu-
midity in the vehicle interior drop. Hence, when the outside air humidity is
high, the windows do not mist over and comfort for the vehicle occupants is
improved:
With manual air conditioning
● Switch off air recirculation.
● Set the fan to the required setting.
● Turn the temperature control to the centre position.
● Open and direct all the air outlets in the dash panel.
Safety FirstOperating instructionsPractical TipsTechnical specifications
Page 142 of 289

141
Air conditioning
There are other additional, non-adjustable air vents in the dash panel 2
, in
the footwell and in the rear area of the interior.
Note
Never place food, medicines or other heat-sensitive objects close to the air
vents. Food, medicine and other heat or cold sensitive objects may be dam-
aged or made unsuitable for use by the air coming from the air vents.
Air recirculation
Basic points
Air recirculation:
Manual air recirculation (heating and fresh air system, manual
air conditioning).
Air recirculation mode prevents the ambient air from entering the interior.
When the outside temperature is very high, selecting manual air recircula-
tion mode for a short period refreshes the vehicle interior more quickly.
For safety reasons, air recirculation mode is switched off when the button
is pressed or the air distributor turned to .
Switching on and switching off manual air recirculation with air conditioner
(manual) or with the heating and fresh air systems
Activate: press the button until the warning lamp lights up.
Deactivate: press the button until all warning lamps switch off.
Switching on and off manual air recirculation with Climatronic
Activate: press the * button until the warning lamp lights up.
Deactivate: press the * button until all warning lamps switch off. Functioning mode of manual air recirculation (air conditioning menu)
With the automatic air recirculation mode activated, the entry of fresh air in-
to the cabin interior is enabled. If the system detects a high concentration
of hazardous substances in the ambient air, air recirculation mode is
switched on automatically. When the level of impurities drops to within a
normal range, recirculation mode is switched off.
The system is unable to detect unpleasant smells.
Air recirculation mode is
not automatically switched on in the following ca-
ses of outside temperatures and conditions:
● The cooling system is switched on (the * button lamp is on) and the am-
bient temperature is below +3 ° C (+38 ° F).
● The cooling system and the windscreen wipers are switched off and the
outside temperature is below +10 °C (+50 °F).
● The cooling system is switched on, the outside temperature is below
+15 °C (+59 °F) and the windscreen wipers are switched on.
Activation/deactivation of automatic air recirculation is done in the air con-
ditioner menu, under Configuration.
WARNING
Stuffy or used air will increase fatigue and reduce driver concentration
possibly resulting in a serious accident.
● Never use recirculation mode for long periods as it does not refresh
the air inside the vehicle.
● If the cooling system is switched off and air recirculation mode
switched on, the windows can mist over very quickly, considerably limit-
ing visibility.
● Switch air recirculation mode off when it is not required.
Safety FirstOperating instructionsPractical TipsTechnical specifications