technical specifications Seat Leon 5D 2012 Service Manual
[x] Cancel search | Manufacturer: SEAT, Model Year: 2012, Model line: Leon 5D, Model: Seat Leon 5D 2012Pages: 289, PDF Size: 3.81 MB
Page 84 of 289

83
Introduction to the Easy Connect system*
– Press the Opening and closing
function button to open the Open-
ing and closing settings menu.
When the function button check box is activated , the function is active.
Pressing the menu button
will always take you to the last menu used.
MenuSubmenuPossible settingDescription
Opening and
Closing settings
Radio-operated
remote controlConvenience open
function.⇒ page 91
Central locking
Unlocking doors, au-
tomatic locking/un-
locking, audible
confirmation.
⇒ page 86
Any changes made using the settings menus are automatically saved on
closing those menus.
WARNING
Any distraction may lead to an accident, with the risk of injury. Operating
the Easy Connect system while driving could distract you from traffic.
Multifunction Display settings menu
–Switch the ignition on.
– Switch on the Easy Connect system.
– Press the Easy Connect button
.
– Press the Setup
function button. –
Press the Multifunction Display
function button to open the Multi-
function Display settings menu.
When the function button check box is activated , the function is active.
Pressing the menu button
will always take you to the last menu used.
MenuSubmenuPossible settingDescription
Multifunction dis-
play settings–
Current consumption, aver-
age consumption, volume
to fill up, convenience
equipments, ECOAdvice,
duration of journey, dis-
tance travelled, digital
average speed display,
speed, speeding warning,
oil temperature, coolant
temperature, restore data
“from start”, restore “total
calculation” data.
⇒ page 73
Any changes made using the settings menus are automatically saved on
closing those menus.
WARNING
Any distraction may lead to an accident, with the risk of injury. Operating
the Easy Connect system while driving could distract you from traffic.
Safety FirstOperating instructionsPractical TipsTechnical specifications
Page 86 of 289
85
Introduction to the Easy Connect system*
Service information
– Switch the ignition on.
– Switch on the Easy Connect system.
– Press the Easy Connect button
.
– Press the Setup
function button.
– Press the Service
function button to display the information
about service inspections.
Pressing the menu button
will always take you to the last menu used.
MenuSubmenuPossible settingDescription
Service–
Chassis number,
date of next SEAT
service inspection,
date of next oil
change service.
⇒ page 61
WARNING
Any distraction may lead to an accident, with the risk of injury. Operating
the Easy Connect system while driving could distract you from traffic.
Restoring default settings
– Switch the ignition on.
– Switch on the Easy Connect system.
– Press the Easy Connect button
. –
Press the Setup
function button.
– Press the Factory settings
function button to open the Factory set-
tings menu.
Pressing the menu button
will always take you to the last menu used.
MenuSubmenuPossible settingDescription
Factory settings–
All settings, driver
assistance, parking
and manoeuvring,
lights, rear vision
mirrors and wind-
screen wipers, open-
ing and closing,
multifunction dis-
play.
–
Any changes made using the settings menus are automatically saved on
closing those menus.
WARNING
Any distraction may lead to an accident, with the risk of injury. Operating
the Easy Connect system while driving could distract you from traffic.
Safety FirstOperating instructionsPractical TipsTechnical specifications
Page 88 of 289
87
Opening and closing
To deactivate the alarm, press the button
on the remote control key, or
switch on the ignition. After a certain time, the alarm will automatically
switch off.
Switch off the vehicle interior monitoring and tow-away protection if you
wish to prevent the alarm from being triggered accidentally ⇒ page 95.
Turn signals
The turn signals will flash twice when the vehicle is unlocked and once
when the vehicle is locked.
If the signals do not flash, this indicates that one of the doors, the rear lid or
the bonnet is not closed correctly.
Accidental lock-out
The central locking system prevents you from being locked out of the vehi-
cle in the following situations:
● If the driver door is open, the vehicle cannot be locked with the central
locking switch ⇒ page 93.
Lock the vehicle with the remote control key, when all the doors and the rear
lid have been closed. This prevents the accidental locking of the vehicle.
WARNING
Do not leave anyone (especially children) in the vehicle if it is locked from
the outside and the anti-theft security system* is enabled, as the doors
and windows cannot then be opened from the inside. Locked doors could
delay assistance in an emergency, potentially putting lives at risk.
Note
● Never leave any valuable items in the vehicle unattended. Even a locked
vehicle is not a safe.
● If the diode on the driver door sill lights up for about 30 seconds when
the vehicle is locked, the central locking system or anti-theft alarm* is not
working properly. You should have the fault repaired at a SEAT Official Serv-
ice or specialised workshop.
● The vehicle interior monitoring of the anti-theft alarm* system will only
function as intended if the windows and the sunroof* are closed.
Safety FirstOperating instructionsPractical TipsTechnical specifications
Page 90 of 289
89
Opening and closing
CAUTION
All of the vehicle keys contain electronic components. Protect the vehicle
keys from damage, impacts and humidity.
Note
● Only use the key button when you require the corresponding function.
Pushing the button unnecessarily could accidentally unlock the vehicle or
trigger the alarm. It is also possible even when you are outside the radius of
action.
● Key operation can be greatly influenced by overlapping radio signals
close the vehicle working in the same range of frequencies, for example, ra-
dio transmitters, mobile telephones.
● Obstacles between the remote control and the vehicle, bad weather con-
ditions and discharged batteries can considerably reduce the range of the
remote control.
● If buttons ⇒ Fig. 43 or ⇒ Fig. 44 on the vehicle key, or one of the central
locking buttons ⇒ page 93 are pressed repeatedly in short succession,
the central locking is briefly switched off to protect against overloading. The
vehicle is then unlocked. Lock the vehicle if necessary. Control lamp on the vehicle key
Fig. 45 Control lamp on
the vehicle key
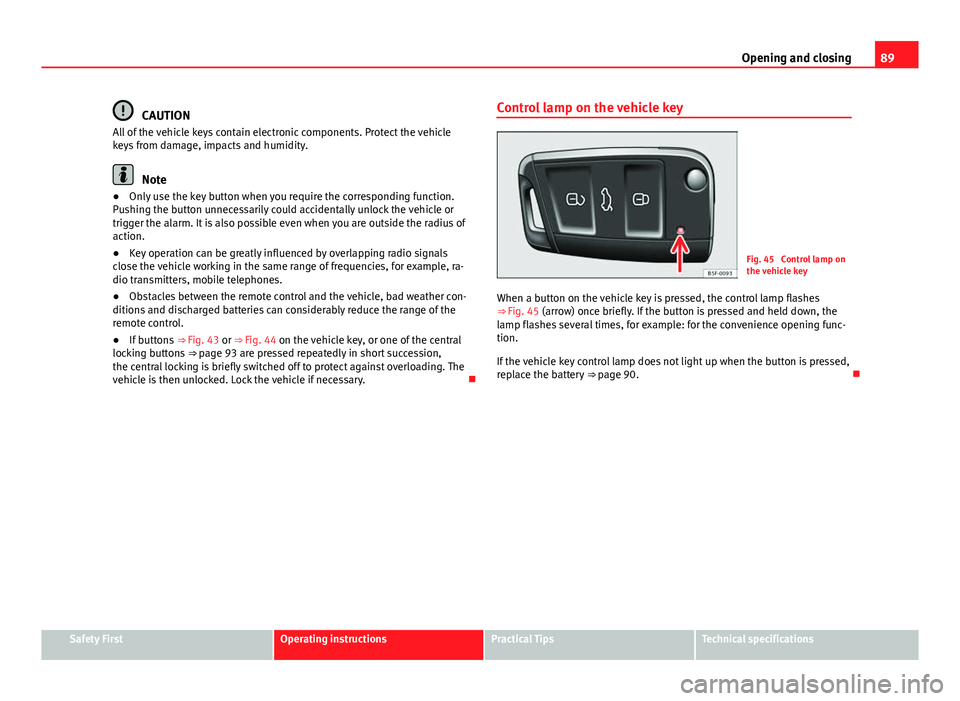
When a button on the vehicle key is pressed, the control lamp flashes
⇒ Fig. 45 (arrow) once briefly. If the button is pressed and held down, the
lamp flashes several times, for example: for the convenience opening func-
tion.
If the vehicle key control lamp does not light up when the button is pressed,
replace the battery ⇒ page 90.
Safety FirstOperating instructionsPractical TipsTechnical specifications
Page 92 of 289
91
Opening and closing
Remote unlocking/Locking
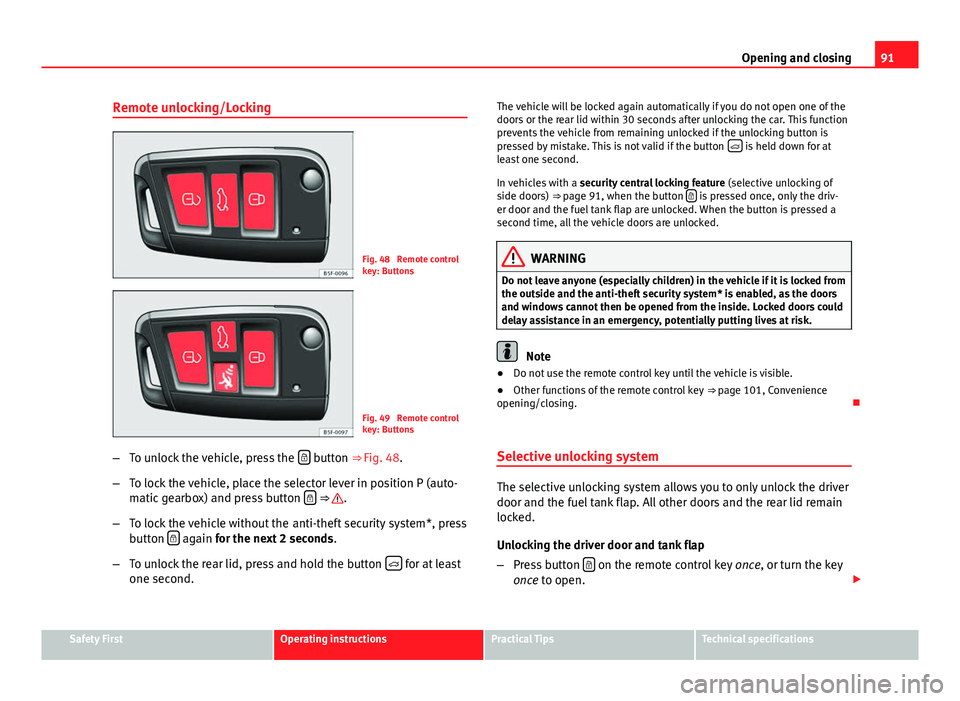
Fig. 48 Remote control
key: Buttons
Fig. 49 Remote control
key: Buttons
– To unlock the vehicle, press the
button ⇒ Fig. 48.
– To lock the vehicle, place the selector lever in position P (auto-
matic gearbox) and press button
⇒ .
– To lock the vehicle without the anti-theft security system*, press
button
again
for the next 2 seconds
.
– To unlock the rear lid, press and hold the button
for at least
one second. The vehicle will be locked again automatically if you do not open one of the
doors or the rear lid within 30 seconds after unlocking the car. This function
prevents the vehicle from remaining unlocked if the unlocking button is
pressed by mistake. This is not valid if the button
is held down for at
least one second.
In vehicles with a security central locking feature (selective unlocking of
side doors) ⇒ page 91, when the button
is pressed once, only the driv-
er door and the fuel tank flap are unlocked. When the button is pressed a
second time, all the vehicle doors are unlocked.
WARNING
Do not leave anyone (especially children) in the vehicle if it is locked from
the outside and the anti-theft security system* is enabled, as the doors
and windows cannot then be opened from the inside. Locked doors could
delay assistance in an emergency, potentially putting lives at risk.
Note
● Do not use the remote control key until the vehicle is visible.
● Other functions of the remote control key ⇒ page 101, Convenience
opening/closing.
Selective unlocking system
The selective unlocking system allows you to only unlock the driver
door and the fuel tank flap. All other doors and the rear lid remain
locked.
Unlocking the driver door and tank flap
– Press button
on the remote control key
once, or turn the key
once to open.
Safety FirstOperating instructionsPractical TipsTechnical specifications
Page 94 of 289

93
Opening and closing
Central locking switch
Fig. 50 Driver door: cen-
tral locking switch
– To lock the vehicle, press the
button ⇒ .
– To unlock the vehicle, press the
button ⇒ Fig. 50.
Please note the following when using the central locking switch to lock your
vehicle:
● It is not possible to open the doors or the rear lid from the outside (for
safety reasons, e.g. when stopped at traffic lights).
● The LED in the central locking switch lights up when all the doors are
closed and locked.
● You can open the doors individually from the inside by pulling the inside
door handle.
● In the event of an accident in which the airbags inflate, doors locked
from the inside will be automatically unlocked to facilitate access and assis-
tance.
WARNING
● The central locking switch also operates when the ignition is switch-
ed off and automatically locks all the vehicle doors when the button
is
pressed.
● The central locking switch does not operate if the vehicle is locked
from the outside and the anti-theft security system is switched on.
● Locked doors could delay assistance in an emergency, potentially
putting lives at risk. Do not leave anyone (especially children) in the vehi-
cle.
Note
The doors and the rear lid are locked automatically when the vehicle rea-
ches a speed of about 15 km/h (10 mph) (Auto Lock) ⇒ page 86. You can
unlock the vehicle again using button
on the central locking switch.
Anti-theft alarm system
Description
The anti-theft alarm makes it more difficult to break into the vehicle or steal
it.
The anti-theft alarm is automatically turned on when the vehicle is locked
with the key.
When does the system trigger an alarm?
The anti-theft alarm siren will be triggered for about 30 seconds accompa-
nied by optical warning signals for about five minutes when the vehicle is
locked and the following unauthorised actions are taken:
Safety FirstOperating instructionsPractical TipsTechnical specifications
Page 96 of 289
95
Opening and closing
The vehicle interior monitoring and anti-tow sensor (tilt sensor) are auto-
matically switched on when the anti-theft alarm is switched on. In order to
activate it, all the doors and the rear lid must be closed.
If you wish to switch off the vehicle interior monitoring and the anti-tow sys-
tem, it must be done each time that the vehicle is locked; if not, they will be
automatically switched on.
The vehicle interior monitoring and the anti-tow system should be switched
off if animals are left inside the locked vehicle (otherwise, their movements
will trigger the alarm) or when, for example, the vehicle is transported or
has to be towed with only one axle on the ground.
False alarms
The interior monitoring only operates correctly if the vehicle is completely
closed. Please observe legal requirements when doing so.
The following cases may cause a false alarm:
● opened windows (partially or fully)
● panoramic/tilting sunroof open (partially or completely).
● movement of objects inside the vehicle, such as loose papers, items
hanging from the rear vision mirror (air fresheners), etc.
Note
● If the vehicle is relocked and the alarm is activated without the volumet-
ric sensor function, relocking will activate the alarm with all its functions,
except the volumetric sensor. This function is reactivated when the alarm is
switched on again, unless it is deliberately switched off.
● If the alarm has been triggered by the volumetric sensor, this will be in-
dicated by a flashing of the warning lamp on the driver door when the vehi-
cle is opened. The flash is different to the flash indicating the alarm is acti-
vated. ●
The vibration of a mobile phone left inside the vehicle may cause the ve-
hicle interior monitoring alarm to trigger, as both sensors react to move-
ments and shakes inside the vehicle.
● If on activating the alarm, any door or the rear lid is open, only the alarm
will be activated. The vehicle interior monitoring and the anti-tow system
will only be activated once all the doors are closed (including the rear lid).
Deactivating the vehicle interior monitoring and tow-away
protection 1)
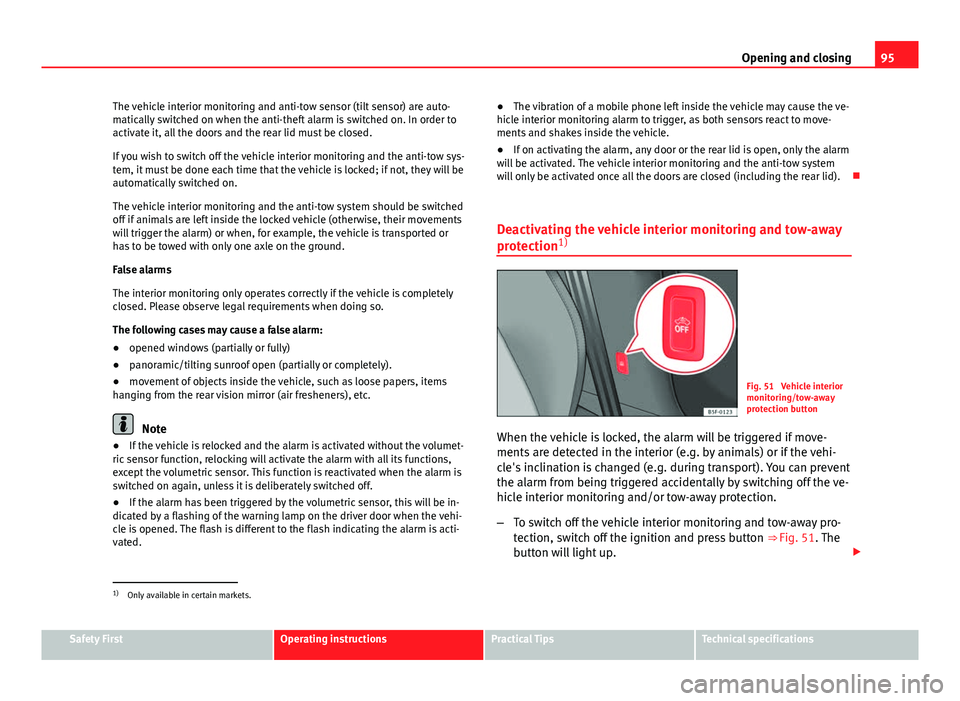
Fig. 51 Vehicle interior
monitoring/tow-away
protection button
When the vehicle is locked, the alarm will be triggered if move-
ments are detected in the interior (e.g. by animals) or if the vehi-
cle's inclination is changed (e.g. during transport). You can prevent
the alarm from being triggered accidentally by switching off the ve-
hicle interior monitoring and/or tow-away protection.
– To switch off the vehicle interior monitoring and tow-away pro-
tection, switch off the ignition and press button ⇒ Fig. 51. The
button will light up.
1)
Only available in certain markets.
Safety FirstOperating instructionsPractical TipsTechnical specifications
Page 98 of 289

97
Opening and closing
Unlocking or locking the driver door
If the central locking system should fail to operate, the driver
door can still be locked and unlocked by turning the key in
the lock.
Fig. 52 Driver door lever:
Hidden lock cylinder
As a general rule, when the driver door is locked all other doors are locked.
When the vehicle is unlocked manually, only the driver door opens. Please
observe the instructions relating to the anti-theft alarm system ⇒ page 86.
● Unfold the vehicle key shaft
⇒ page 88.
● Insert the key shaft into the opening in the cover on the driver door han-
dle from below ⇒ Fig. 52 (arrow) then remove the cover upwards.
● Insert the key shaft into the lock cylinder to unlock or lock the vehicle. Unlocking notes:
●
The anti-theft alarm will remain active when vehicles are unlocked. How-
ever, the alarm will not yet be triggered ⇒ page 86.
● After the driver door is opened, you have 15 seconds to switch on the
ignition. After 15 seconds, the alarm is triggered.
● Switch the ignition on. When the ignition is switched on, the electronic
immobiliser recognises a valid vehicle key and deactivates the anti-theft
alarm system.
Note
The anti-theft alarm is not activated when the vehicle is locked manually us-
ing the key shaft ⇒ page 86.
Manual locking of passenger door in an emergency
If the central locking system should fail to work at any time,
the passenger door will have to be locked separately.
Fig. 53 Locking the door
manually
Safety FirstOperating instructionsPractical TipsTechnical specifications
Page 100 of 289

99
Opening and closing
WARNING (Continued)
● Never drive with the rear lid open or half-closed, exhaust gases may
penetrate into the interior of the vehicle. Danger of poisoning!
● If you only open the rear lid, do not leave the key inside. The vehicle
will not be opened if the key is left inside.
Automatic rear lid locking
Where the vehicle has been locked by pressing the button on the remote
control with the rear lid open, the rear lid will lock automatically when
closed.
The automatic rear lid locking time extension function can be activated.
Where this function is activated and once the rear lid has been unlocked by
pressing the
button on the remote control key
⇒ page 91, the rear lid
can be re-opened for a certain length of time.
Where required, the automatic rear lid locking time extension function can
be activated or deactivated at a SEAT Authorised Service, which will provide
all of the necessary information.
Before the vehicle locks automatically, there is a risk of intruders getting in-
to the vehicle. Therefore, we recommend you always lock the vehicle by
pressing the
button on the remote control or by using the central locking
button. Manual release of the rear lid in an emergency
The rear lid can be unlocked manually from inside in the
event of an emergency.
Fig. 55 Luggage com-
partment: access to man-
ual release
– Insert the key in the opening in the lining of the rear lid 1
and
move the key in the direction of the arrow until the lock is re-
leased.
Safety FirstOperating instructionsPractical TipsTechnical specifications
Page 102 of 289
101
Opening and closing
WARNING (Continued)
● The electric windows will work until the ignition has been switched
off and one of the front doors has been opened.
● If necessary, use the safety switch to disable the rear electric win-
dows. Make sure that they have been disabled.
Note
If the window is not able to close because it is stiff or because of an ob-
struction, the window will automatically open again ⇒ page 102. If this
happens, check why the window could not be closed before attempting to
close it again.
Convenience opening/closing
Use the convenience opening/closing function to easily open/
close all the windows and the sliding/tilting sunroof* from the out-
side.
Convenience open function
– Press and hold button
on the remote control key until all the
windows and the sliding/tilting sunroof* have reached the de-
sired position, or
– First unlock the vehicle using button
on the remote control
key and then keep the key in the driver door lock until all the
windows and the sliding/tilting sunroof* have reached the re-
quired position.
Convenience close function
– Press and hold button
on the remote control key until all the
windows and the sliding/tilting sunroof* are closed ⇒ , or –
Keep the key in the driver door in the "lock" position until all the
windows and the sliding/tilting sunroof* are closed.
Programming convenience opening in the Easy Connect*
– Select: function button CAR
> control button
Vehicle systems* >
Vehicle settings > Central locking > Open the window by holding
button down or > Front window on/off or Sunroof on/off*
WARNING
● Take care when closing the sliding/tilting sunroof* and windows.
There is a risk of suffering injury.
● For safety reasons, you should only use the remote control open and
close functions within about 2 metres of the vehicle. To avoid injuries, al-
ways keep an eye on the windows and the sliding/tilting sunroof* when
pressing the button to close them. The windows stop moving as soon as
the button is released.
One-touch opening and closing*
One-touch opening and closing means you do not have to
hold down the button.
Buttons ⇒ Fig. 56 1
, 2, 3 and 4 have two positions for open-
ing windows and two for closing them. This makes it easier to open
and close windows to the desired position.
One-touch closing
– Pull up the window button briefly up to the second position. The
window closes fully.
Safety FirstOperating instructionsPractical TipsTechnical specifications