buttons Seat Leon 5D 2012 Owner's manual
[x] Cancel search | Manufacturer: SEAT, Model Year: 2012, Model line: Leon 5D, Model: Seat Leon 5D 2012Pages: 289, PDF Size: 3.81 MB
Page 60 of 289
59
Controls and displays
Operating instructions Controls and displays
Overview
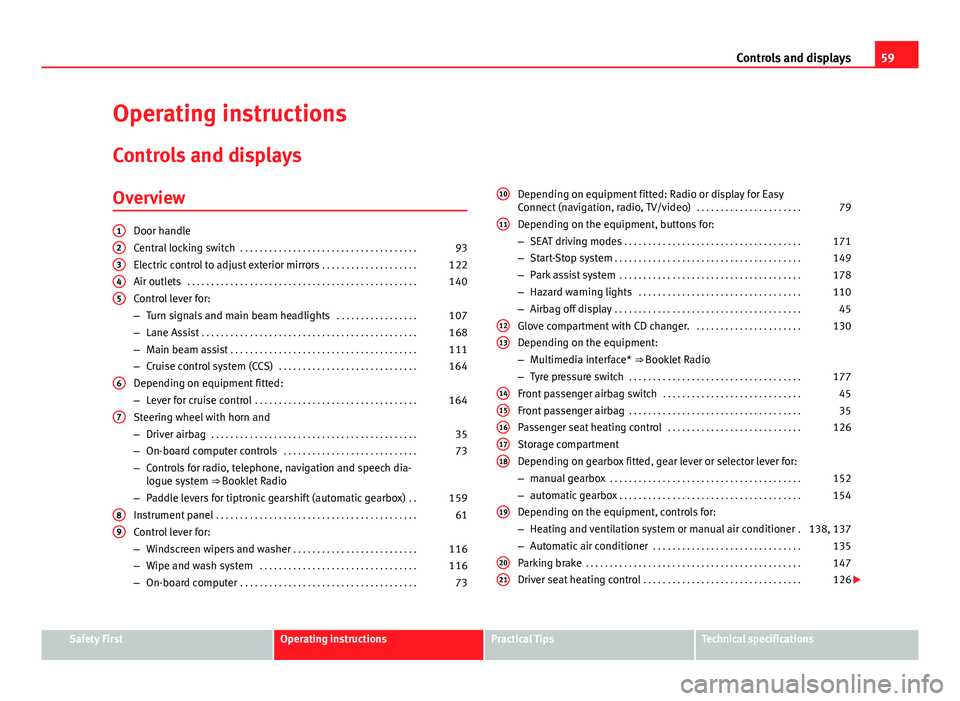
Door handle
Central locking switch . . . . . . . . . . . . . . . . . . . . . . . . . . . . . . . . . . . . . 93
Electric control to adjust exterior mirrors . . . . . . . . . . . . . . . . . . . .122
Air outlets . . . . . . . . . . . . . . . . . . . . . . . . . . . . . . . . . . . . . . . . . . . . . . . . 140
Control lever for:
– Turn signals and main beam headlights . . . . . . . . . . . . . . . . .107
– Lane Assist . . . . . . . . . . . . . . . . . . . . . . . . . . . . . . . . . . . . . . . . . . . . . 168
– Main beam assist . . . . . . . . . . . . . . . . . . . . . . . . . . . . . . . . . . . . . . . 111
– Cruise control system (CCS) . . . . . . . . . . . . . . . . . . . . . . . . . . . . . 164
Depending on equipment fitted:
– Lever for cruise control . . . . . . . . . . . . . . . . . . . . . . . . . . . . . . . . . . 164
Steering wheel with horn and
– Driver airbag . . . . . . . . . . . . . . . . . . . . . . . . . . . . . . . . . . . . . . . . . . . 35
– On-board computer controls . . . . . . . . . . . . . . . . . . . . . . . . . . . . 73
– Controls for radio, telephone, navigation and speech dia-
logue system ⇒ Booklet Radio
– Paddle levers for tiptronic gearshift (automatic gearbox) . .159
Instrument panel . . . . . . . . . . . . . . . . . . . . . . . . . . . . . . . . . . . . . . . . . . 61
Control lever for:
– Windscreen wipers and washer . . . . . . . . . . . . . . . . . . . . . . . . . . 116
– Wipe and wash system . . . . . . . . . . . . . . . . . . . . . . . . . . . . . . . . . 116
– On-board computer . . . . . . . . . . . . . . . . . . . . . . . . . . . . . . . . . . . . . 73
12345
6
7
89
Depending on equipment fitted: Radio or display for Easy
Connect (navigation, radio, TV/video)
. . . . . . . . . . . . . . . . . . . . . .79
Depending on the equipment, buttons for:
– SEAT driving modes . . . . . . . . . . . . . . . . . . . . . . . . . . . . . . . . . . . . . 171
– Start-Stop system . . . . . . . . . . . . . . . . . . . . . . . . . . . . . . . . . . . . . . . 149
– Park assist system . . . . . . . . . . . . . . . . . . . . . . . . . . . . . . . . . . . . . . 178
– Hazard warning lights . . . . . . . . . . . . . . . . . . . . . . . . . . . . . . . . . . 110
– Airbag off display . . . . . . . . . . . . . . . . . . . . . . . . . . . . . . . . . . . . . . . 45
Glove compartment with CD changer. . . . . . . . . . . . . . . . . . . . . . .130
Depending on the equipment:
– Multimedia interface* ⇒ Booklet Radio
– Tyre pressure switch . . . . . . . . . . . . . . . . . . . . . . . . . . . . . . . . . . . . 177
Front passenger airbag switch . . . . . . . . . . . . . . . . . . . . . . . . . . . . . 45
Front passenger airbag . . . . . . . . . . . . . . . . . . . . . . . . . . . . . . . . . . . . 35
Passenger seat heating control . . . . . . . . . . . . . . . . . . . . . . . . . . . . 126
Storage compartment
Depending on gearbox fitted, gear lever or selector lever for:
– manual gearbox . . . . . . . . . . . . . . . . . . . . . . . . . . . . . . . . . . . . . . . . 152
– automatic gearbox . . . . . . . . . . . . . . . . . . . . . . . . . . . . . . . . . . . . . . 154
Depending on the equipment, controls for:
– Heating and ventilation system or manual air conditioner .138, 137
– Automatic air conditioner . . . . . . . . . . . . . . . . . . . . . . . . . . . . . . . 135
Parking brake . . . . . . . . . . . . . . . . . . . . . . . . . . . . . . . . . . . . . . . . . . . . . 147
Driver seat heating control . . . . . . . . . . . . . . . . . . . . . . . . . . . . . . . . . 126
10
11
1213
1415161718
19
2021
Safety FirstOperating instructionsPractical TipsTechnical specifications
Page 74 of 289
73
Driver information system
Driver information system Information system
Introduction
With the ignition switched on, it is possible to read the different functions of
the display by scrolling through the menus.
In vehicles with multifunction steering wheel, the multifunction display can
only be operated with the multifunction steering wheel buttons.
The number of menus displayed on the instrument panel will vary according
to the vehicle electronics and equipment.
A specialised workshop will be able to programme or modify additional
functions, according to the vehicle equipment. SEAT recommends visiting a
SEAT Official Service.
Some menu options can only be read when the vehicle is at a standstill.
As long as a priority 1 warning is displayed, it will not be possible to read
the menus. Some warning messages can be confirmed and made to disap-
pear with the windscreen wiper lever button or the multifunction steering
wheel button.
Additional information and warnings:
● Easy Connect system ⇒ page 79
● Driver assistance systems ⇒ page 164
● Radio or navigation system ⇒ Booklet Radio or ⇒ Booklet Navigation
system
WARNING
Any distraction may lead to an accident, with the risk of injury.
● Do not read the instrument panel display menus when driving.
Overview of the menu structure
Driving data ⇒ page 75
■ Vehicle status
■ MFD from departure
■ MFD from refuelling
■ MFD total calculation
Assist systems ⇒ table on page 75
■ Activate/deactivate Lane Assist
■ Reverse (optional)
Navigation ⇒ Booklet Navigation system Audio ⇒ Booklet Radio or ⇒ Booklet Navigation systemTelephone ⇒ Booklet Bluetooth systemVehicle ⇒ table on page 75
Safety FirstOperating instructionsPractical TipsTechnical specifications
Page 75 of 289
74Driver information system
Operating the instrument panel menus
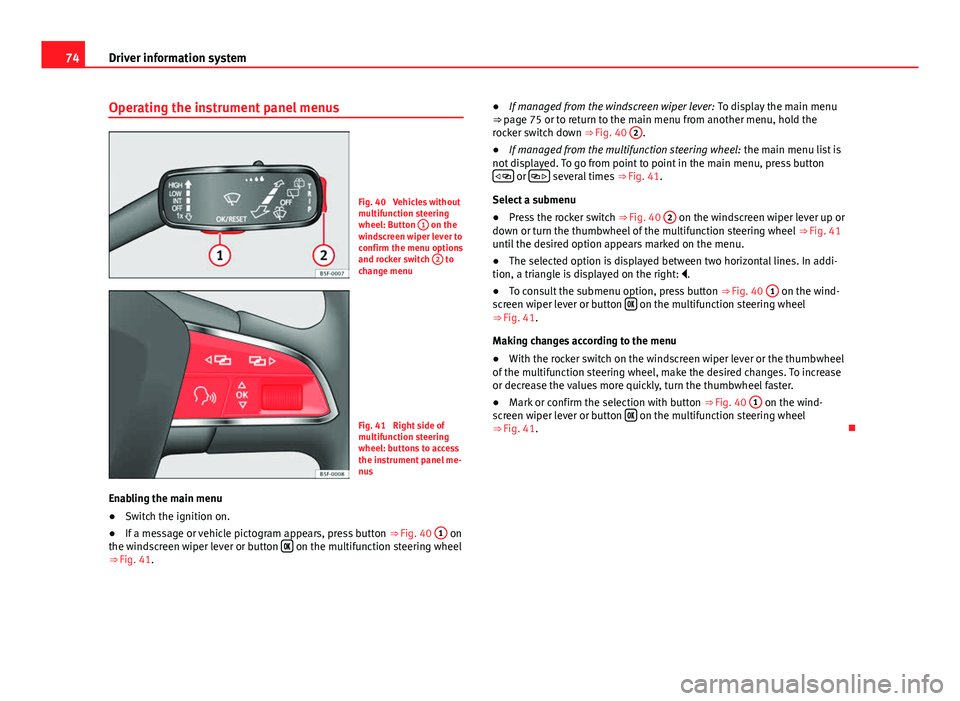
Fig. 40 Vehicles without
multifunction steering
wheel: Button 1
on the
windscreen wiper lever to
confirm the menu options
and rocker switch 2
to
change menu
Fig. 41 Right side of
multifunction steering
wheel: buttons to access
the instrument panel me-
nus
Enabling the main menu
● Switch the ignition on.
● If a message or vehicle pictogram appears, press button ⇒ Fig. 40 1
on
the windscreen wiper lever or button on the multifunction steering wheel
⇒ Fig. 41. ●
If managed from the windscreen wiper lever: To display the main menu
⇒ page 75 or to return to the main menu from another menu, hold the
rocker switch down ⇒ Fig. 40 2
.
● If managed from the multifunction steering wheel: the main menu list is
not displayed. To go from point to point in the main menu, press button
or several times
⇒ Fig. 41.
Select a submenu
● Press the rocker switch ⇒ Fig. 40 2
on the windscreen wiper lever up or
down or turn the thumbwheel of the multifunction steering wheel ⇒ Fig. 41
until the desired option appears marked on the menu.
● The selected option is displayed between two horizontal lines. In addi-
tion, a triangle is displayed on the right: .
● To consult the submenu option, press button ⇒ Fig. 40 1
on the wind-
screen wiper lever or button on the multifunction steering wheel
⇒ Fig. 41.
Making changes according to the menu
● With the rocker switch on the windscreen wiper lever or the thumbwheel
of the multifunction steering wheel, make the desired changes. To increase
or decrease the values more quickly, turn the thumbwheel faster.
● Mark or confirm the selection with button ⇒ Fig. 40 1
on the wind-
screen wiper lever or button on the multifunction steering wheel
⇒ Fig. 41.
Page 79 of 289
78Driver information system
Vehicles with multifunction steering wheel
–To display the engine oil temperature, enter the submenu Jour-
ney data and turn the thumbwheel until the oil temperature dis-
play appears.
The engine reaches its operating temperature when in normal driving condi-
tions, the oil temperature is between 80 °C (180 °F) and 120 °C (250 °F). If
the engine is required to work hard and the outside temperature is high, the
engine oil temperature can increase. This does not present any problem as
long as the warning lamps ⇒ page 69 or ⇒ page 70 do not appear on
the display.
Additional electrical appliances
– Operation with the windscreen wiper lever*: Press the rocker
switch ⇒ Fig. 40 2 until the main menu appears. Enter into the
section Journey data . With the rocker switch, move to the display
Convenience appliances.
– Operation with the multifunction steering wheel*: Move with
the buttons 1
or 2 to Journey data
and enter with OK. Turn the
thumbwheel to the right until the Convenience appliances dis-
play appears.
In addition, a scale will inform you of the current sum of all the additional
appliances.
Saving tips
Tips on how to save fuel will be displayed in certain conditions that
contribute to increased consumption. Following these tips could reduce the fuel consumption of your vehicle. The displays appear
automatically and will only be shown with the efficiency pro-
gramme. After a time, the saving tips will disappear automatically.
–
If you wish to hide a saving tip immediately after it appears,
press any button on the windscreen wiper lever*/multifunction
steering wheel*.
Note
● If you hide a saving tip, it will reappear after you switch the ignition on
again.
● The saving tips do not appear in all situations, but rather with a large
separation of time.
Page 80 of 289
79
Introduction to the Easy Connect system*
Introduction to the Easy Connect system* System settings (CAR)*Introduction
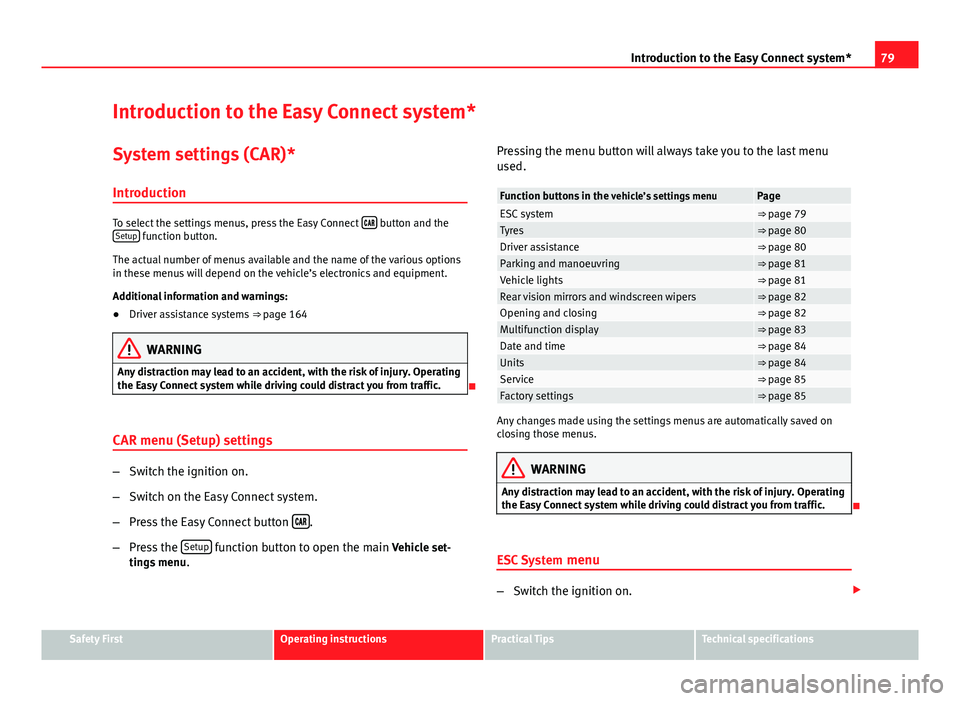
To select the settings menus, press the Easy Connect button and the
Setup function button.
The actual number of menus available and the name of the various options
in these menus will depend on the vehicle’s electronics and equipment.
Additional information and warnings:
● Driver assistance systems ⇒ page 164
WARNING
Any distraction may lead to an accident, with the risk of injury. Operating
the Easy Connect system while driving could distract you from traffic.
CAR menu (Setup) settings
– Switch the ignition on.
– Switch on the Easy Connect system.
– Press the Easy Connect button
.
– Press the Setup
function button to open the main Vehicle set-
tings menu . Pressing the menu button will always take you to the last menu
used.
Function buttons in the
vehicle’s settings menuPageESC system⇒ page 79Tyres⇒ page 80Driver assistance⇒ page 80Parking and manoeuvring⇒ page 81Vehicle lights⇒ page 81Rear vision mirrors and windscreen wipers⇒ page 82Opening and closing⇒ page 82Multifunction display⇒ page 83Date and time⇒ page 84Units⇒ page 84Service⇒ page 85Factory settings⇒ page 85
Any changes made using the settings menus are automatically saved on
closing those menus.
WARNING
Any distraction may lead to an accident, with the risk of injury. Operating
the Easy Connect system while driving could distract you from traffic.
ESC System menu
–Switch the ignition on.
Safety FirstOperating instructionsPractical TipsTechnical specifications
Page 90 of 289
89
Opening and closing
CAUTION
All of the vehicle keys contain electronic components. Protect the vehicle
keys from damage, impacts and humidity.
Note
● Only use the key button when you require the corresponding function.
Pushing the button unnecessarily could accidentally unlock the vehicle or
trigger the alarm. It is also possible even when you are outside the radius of
action.
● Key operation can be greatly influenced by overlapping radio signals
close the vehicle working in the same range of frequencies, for example, ra-
dio transmitters, mobile telephones.
● Obstacles between the remote control and the vehicle, bad weather con-
ditions and discharged batteries can considerably reduce the range of the
remote control.
● If buttons ⇒ Fig. 43 or ⇒ Fig. 44 on the vehicle key, or one of the central
locking buttons ⇒ page 93 are pressed repeatedly in short succession,
the central locking is briefly switched off to protect against overloading. The
vehicle is then unlocked. Lock the vehicle if necessary. Control lamp on the vehicle key
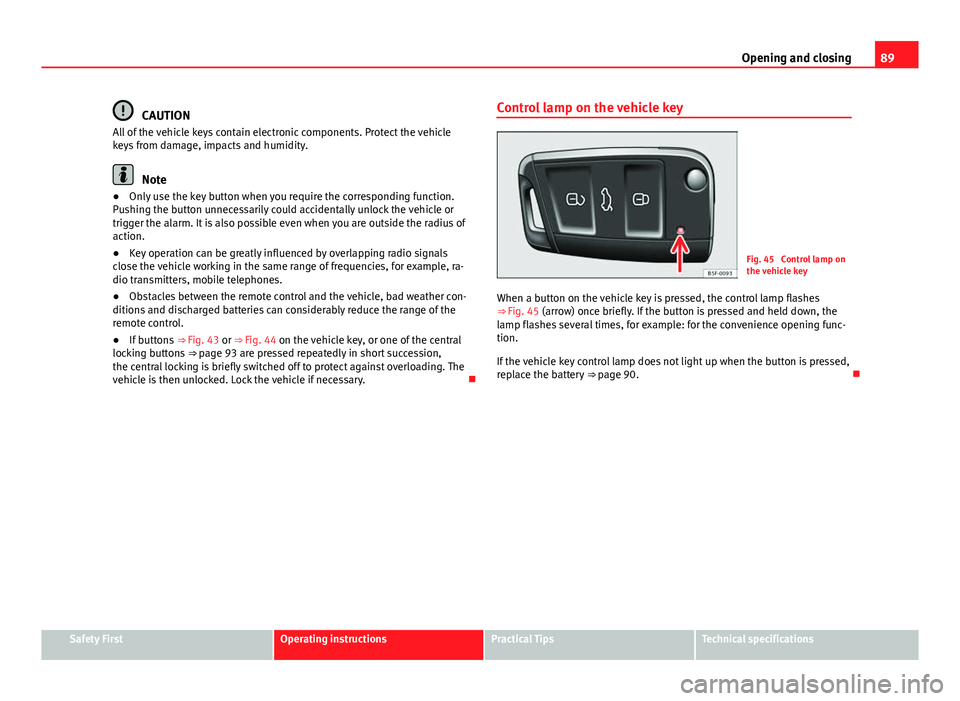
Fig. 45 Control lamp on
the vehicle key
When a button on the vehicle key is pressed, the control lamp flashes
⇒ Fig. 45 (arrow) once briefly. If the button is pressed and held down, the
lamp flashes several times, for example: for the convenience opening func-
tion.
If the vehicle key control lamp does not light up when the button is pressed,
replace the battery ⇒ page 90.
Safety FirstOperating instructionsPractical TipsTechnical specifications
Page 92 of 289
91
Opening and closing
Remote unlocking/Locking
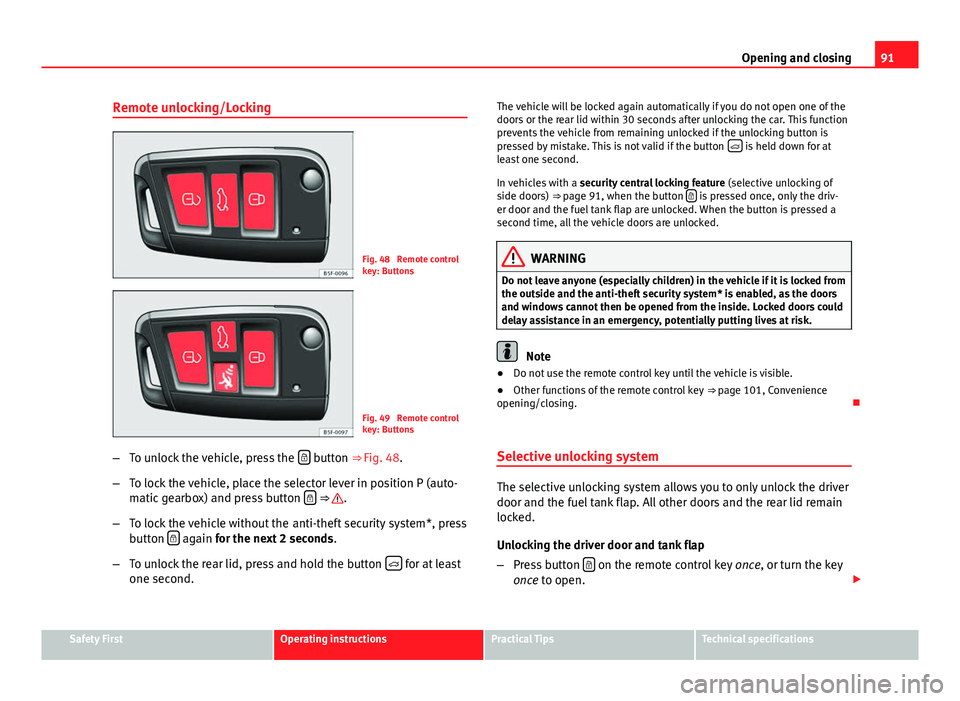
Fig. 48 Remote control
key: Buttons
Fig. 49 Remote control
key: Buttons
– To unlock the vehicle, press the
button ⇒ Fig. 48.
– To lock the vehicle, place the selector lever in position P (auto-
matic gearbox) and press button
⇒ .
– To lock the vehicle without the anti-theft security system*, press
button
again
for the next 2 seconds
.
– To unlock the rear lid, press and hold the button
for at least
one second. The vehicle will be locked again automatically if you do not open one of the
doors or the rear lid within 30 seconds after unlocking the car. This function
prevents the vehicle from remaining unlocked if the unlocking button is
pressed by mistake. This is not valid if the button
is held down for at
least one second.
In vehicles with a security central locking feature (selective unlocking of
side doors) ⇒ page 91, when the button
is pressed once, only the driv-
er door and the fuel tank flap are unlocked. When the button is pressed a
second time, all the vehicle doors are unlocked.
WARNING
Do not leave anyone (especially children) in the vehicle if it is locked from
the outside and the anti-theft security system* is enabled, as the doors
and windows cannot then be opened from the inside. Locked doors could
delay assistance in an emergency, potentially putting lives at risk.
Note
● Do not use the remote control key until the vehicle is visible.
● Other functions of the remote control key ⇒ page 101, Convenience
opening/closing.
Selective unlocking system
The selective unlocking system allows you to only unlock the driver
door and the fuel tank flap. All other doors and the rear lid remain
locked.
Unlocking the driver door and tank flap
– Press button
on the remote control key
once, or turn the key
once to open.
Safety FirstOperating instructionsPractical TipsTechnical specifications
Page 101 of 289
100Opening and closing
Electric windows
Electronic control of windows*
The front and rear electric windows can be operated by us-
ing the controls on the driver door. The other doors each
have a switch for their own window.
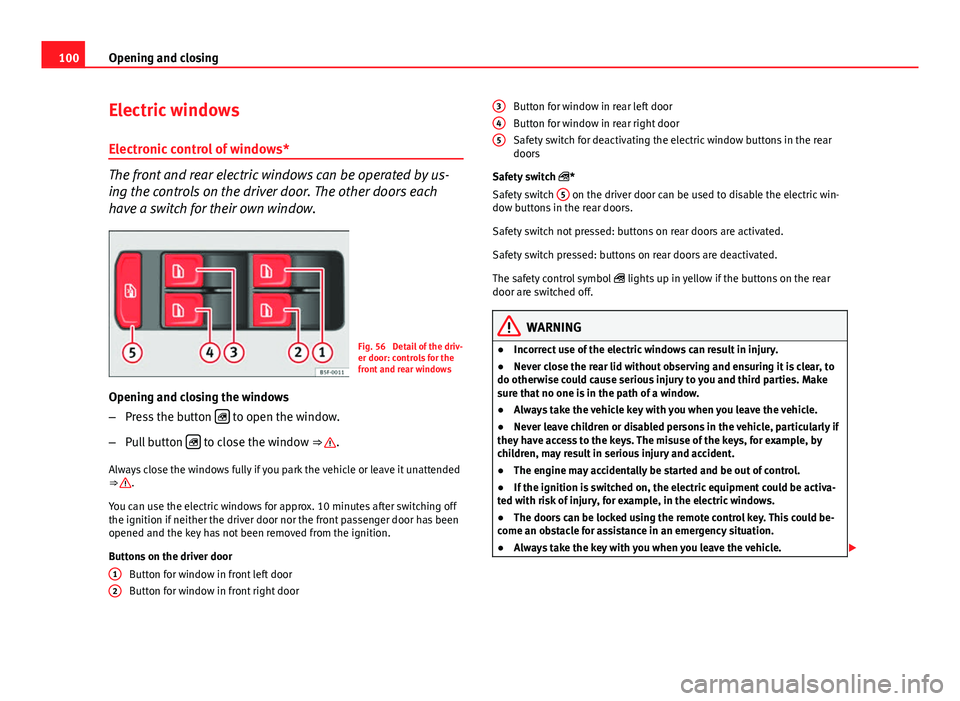
Fig. 56 Detail of the driv-
er door: controls for the
front and rear windows
Opening and closing the windows
– Press the button
to open the window.
– Pull button
to close the window ⇒ .
Always close the windows fully if you park the vehicle or leave it unattended
⇒
.
You can use the electric windows for approx. 10 minutes after switching off
the ignition if neither the driver door nor the front passenger door has been
opened and the key has not been removed from the ignition.
Buttons on the driver door Button for window in front left door
Button for window in front right door
1
2
Button for window in rear left door
Button for window in rear right door
Safety switch for deactivating the electric window buttons in the rear
doors
Safety switch *
Safety switch 5
on the driver door can be used to disable the electric win-
dow buttons in the rear doors.
Safety switch not pressed: buttons on rear doors are activated.
Safety switch pressed: buttons on rear doors are deactivated.
The safety control symbol lights up in yellow if the buttons on the rear
door are switched off.
WARNING
● Incorrect use of the electric windows can result in injury.
● Never close the rear lid without observing and ensuring it is clear, to
do otherwise could cause serious injury to you and third parties. Make
sure that no one is in the path of a window.
● Always take the vehicle key with you when you leave the vehicle.
● Never leave children or disabled persons in the vehicle, particularly if
they have access to the keys. The misuse of the keys, for example, by
children, may result in serious injury and accident.
● The engine may accidentally be started and be out of control.
● If the ignition is switched on, the electric equipment could be activa-
ted with risk of injury, for example, in the electric windows.
● The doors can be locked using the remote control key. This could be-
come an obstacle for assistance in an emergency situation.
● Always take the key with you when you leave the vehicle.
345
Page 102 of 289
101
Opening and closing
WARNING (Continued)
● The electric windows will work until the ignition has been switched
off and one of the front doors has been opened.
● If necessary, use the safety switch to disable the rear electric win-
dows. Make sure that they have been disabled.
Note
If the window is not able to close because it is stiff or because of an ob-
struction, the window will automatically open again ⇒ page 102. If this
happens, check why the window could not be closed before attempting to
close it again.
Convenience opening/closing
Use the convenience opening/closing function to easily open/
close all the windows and the sliding/tilting sunroof* from the out-
side.
Convenience open function
– Press and hold button
on the remote control key until all the
windows and the sliding/tilting sunroof* have reached the de-
sired position, or
– First unlock the vehicle using button
on the remote control
key and then keep the key in the driver door lock until all the
windows and the sliding/tilting sunroof* have reached the re-
quired position.
Convenience close function
– Press and hold button
on the remote control key until all the
windows and the sliding/tilting sunroof* are closed ⇒ , or –
Keep the key in the driver door in the "lock" position until all the
windows and the sliding/tilting sunroof* are closed.
Programming convenience opening in the Easy Connect*
– Select: function button CAR
> control button
Vehicle systems* >
Vehicle settings > Central locking > Open the window by holding
button down or > Front window on/off or Sunroof on/off*
WARNING
● Take care when closing the sliding/tilting sunroof* and windows.
There is a risk of suffering injury.
● For safety reasons, you should only use the remote control open and
close functions within about 2 metres of the vehicle. To avoid injuries, al-
ways keep an eye on the windows and the sliding/tilting sunroof* when
pressing the button to close them. The windows stop moving as soon as
the button is released.
One-touch opening and closing*
One-touch opening and closing means you do not have to
hold down the button.
Buttons ⇒ Fig. 56 1
, 2, 3 and 4 have two positions for open-
ing windows and two for closing them. This makes it easier to open
and close windows to the desired position.
One-touch closing
– Pull up the window button briefly up to the second position. The
window closes fully.
Safety FirstOperating instructionsPractical TipsTechnical specifications
Page 103 of 289
102Opening and closing
One-touch opening
–Push down the window button briefly up to the second position.
The window opens fully.
Restoring one-touch opening and closing
– The automatic open and close function will not work if the bat-
tery has been temporarily disconnected. The function can be re-
stored as follows:
– Close the window as far as it will go by lifting and holding the
electric window switch.
– Release the switch and then lift it again for one second. This
will re-enable the automatic function.
If you push (or pull) a button to the first stage, the window will open (or
close) until you release the button. If you push or lift the button briefly to
the second stage, the window will open (one-touch opening) or close (one-
touch closing) automatically. If you operate the button while the window is
opening or closing, it stops at this position.
Roll-back function
The roll-back function reduces the risk of injury when the
electric windows close.
● If a window is obstructed when closing automatically, the window stops
at this point and lowers immediately ⇒
.
● Next, check why the window does not close before attempting it again.
● If you try within the following 10 seconds and the window closes again
with difficulty or there is an obstruction, the automatic closing will stop
working for 10 seconds. ●
If the window is still obstructed, the window will stop at this point.
● If there is no obvious reason why the window cannot be closed, try to
close it again by pulling the tab within ten seconds. The window closes with
maximum force. The roll-back function is now deactivated.
If more than 10 seconds pass, the window will open fully when you operate
one of the buttons. One-touch closing is reactivated.
WARNING
● Incorrect use of the electric windows can result in injury.
● Always take the ignition key with you when leaving the vehicle, even
if you only intend to be gone for a short time. Please ensure that children
are never left alone inside the vehicle.
● The electric windows will work until the ignition has been switched
off and one of the front doors has been opened.
● Closing the windows without observing and ensuring it is clear could
cause serious injury to you and third parties. Make sure that no one is in
the path of a window.
● Never allow people to remain in the vehicle when you close the vehi-
cle from the outside. The windows cannot be opened even in an emergen-
cy.
● The roll-back function does not prevent fingers or other parts of the
body getting pinched against the window frame. Risk of accident.