bluetooth Seat Leon 5D 2014 MEDIA SYSTEM 2.2
[x] Cancel search | Manufacturer: SEAT, Model Year: 2014, Model line: Leon 5D, Model: Seat Leon 5D 2014Pages: 114, PDF Size: 2.47 MB
Page 2 of 114
Table of Contents
General information . . . . . . . . . . . . . . . . 2
Important Information . . . . . . . . . . . . . . 3
Introduction . . . . . . . . . . . . . . . . . . . . . . . . . . 4
Before using the unit for the first time . . . . . . 4
Safety instructions . . . . . . . . . . . . . . . . . . . . . . . . 4
Versions available . . . . . . . . . . . . . . . . . . . . . . . . . 5
Unit overview . . . . . . . . . . . . . . . . . . . . . . . . . . . . . 6
General information on operating the unit . . 8
Audio mode . . . . . . . . . . . . . . . . . . . . . . . . . . . 12
Radio mode . . . . . . . . . . . . . . . . . . . . . . . . . . . . . . . 12
RDS radio data and TP (Traffic Programme)
services . . . . . . . . . . . . . . . . . . . . . . . . . . . . . . . . . . . 19
DAB digital radio mode . . . . . . . . . . . . . . . . . . . . 22
Media mode . . . . . . . . . . . . . . . . . . . . . . . . . . . . . . 27
MEDIA-IN multimedia interface . . . . . . . . . . . . . 40
Navigation . . . . . . . . . . . . . . . . . . . . . . . . . . . . 44
Introduction to navigation . . . . . . . . . . . . . . . . . 44
Enter destination . . . . . . . . . . . . . . . . . . . . . . . . . . 50
Destination memory . . . . . . . . . . . . . . . . . . . . . . . 56
Route guidance . . . . . . . . . . . . . . . . . . . . . . . . . . . 61 Telephone control (Phone)
. . . . . . . . 73
Introduction . . . . . . . . . . . . . . . . . . . . . . . . . . . . . . . 73
Pairing the mobile phone with the radio
navigation system . . . . . . . . . . . . . . . . . . . . . . . . . 74
Main menu . . . . . . . . . . . . . . . . . . . . . . . . . . . . . . . . 77
Control from the navigation system . . . . . . . . . 79
Bluetooth System . . . . . . . . . . . . . . . . . . . 86
Introduction . . . . . . . . . . . . . . . . . . . . . . . . . . . . . . . 86
Getting started: pairing . . . . . . . . . . . . . . . . . . . . 89
Controlled from the steering wheel . . . . . . . . . 91
Operation via voice control . . . . . . . . . . . . . . . . . 93
Display on the dash panel . . . . . . . . . . . . . . . . . 96
Audiostreaming (Wireless communication
Interface) . . . . . . . . . . . . . . . . . . . . . . . . . . . . . . . . . 99
Settings (SETUP) . . . . . . . . . . . . . . . . . . . . 101
Sound, volume and system settings . . . . . . . . 101
Abbreviations . . . . . . . . . . . . . . . . . . . . . . . . 104
Abbreviations . . . . . . . . . . . . . . . . . . . . . . . . . . . . . 104
Index . . . . . . . . . . . . . . . . . . . . . . . . . . . . . . . . . . . 105
1
Table of Contents
Page 9 of 114
8Introduction
General information on operating the unit
Introduction
If system settings are modified, some aspects of the unit's operation may
differ from the descriptions given in this manual. For this reason, SEAT rec-
ommends that you reset the unit to its factory settings the first time you use
it ⇒ page 102.
Additional Information:
● Safety notes ⇒ page 4
● Unit overview ⇒ page 6
● Multifunction steering wheel, to change track or station ⇒ Booklet Own-
er's Manual, chapter Vehicle overview
Note
Lightly pressing the buttons or briefly pressing the touchscreen is sufficient
to operate the unit.
Note
Never press a button down for longer than 10 minutes. Otherwise the sys-
tem will interpret this as a malfunction ( button jammed).
Note
Due to country-specific legislation, certain functions cannot be selected on
the screen when the vehicle is travelling above a certain speed.
Note
Using a mobile telephone in the vehicle may cause noise from the vehicle
loudspeakers.
Note
In some vehicles equipped with a parking distance warning system, the vol-
ume of the loudspeakers is automatically lowered when reverse gear is en-
gaged. If talking on the telephone through the radio and navigation system,
the volume of the conversation is also lowered automatically when reverse
gear is engaged.
Note
Restrictions on the use of devices using Bluetooth technology may be appli-
cable in some countries. Please ask your local authority for further informa-
tion.
Switching on and off
With the ignition on, press the rotary/push knob
⇒ Fig. 1 1 briefly to
manually switch the unit on or off.
When the unit is switched on, the system starts, and the last selected audio
source is played at the last selected volume, provided this is not greater
than the “start-up volume” ⇒ page 101.
When the key is removed from the ignition, the radio and navigation unit
automatically switches off. If the unit comes on again without the ignition
being switched on, it will switch off automatically after 30 minutes (switch-
off delay).
Anti-theft coding
The anti-theft code is stored in the vehicle once it has been entered (con-
venience radio code). The anti-theft coding lock then only needs to be re-
leased manually if the unit is installed in another vehicle. In such a case, a
keypad field and a prompt to enter the code will appear when the unit is
switched on. In this case, you should contact a SEAT dealership.
Page 28 of 114
27
Audio mode
Media mode Introduction
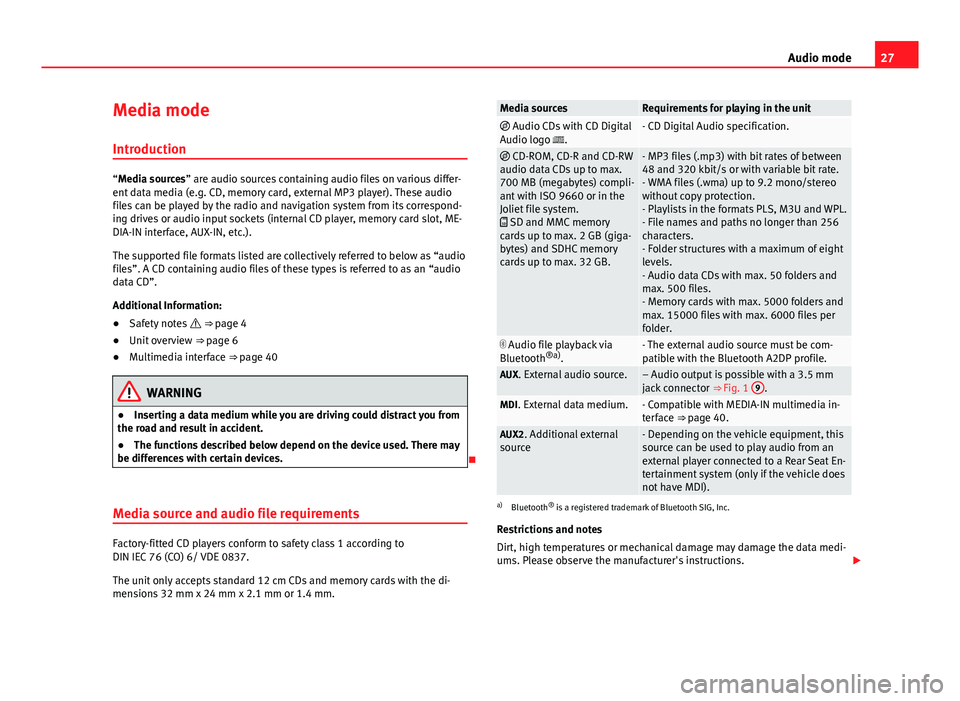
“Media sources” are audio sources containing audio files on various differ-
ent data media (e.g. CD, memory card, external MP3 player). These audio
files can be played by the radio and navigation system from its correspond-
ing drives or audio input sockets (internal CD player, memory card slot, ME-
DIA-IN interface, AUX-IN, etc.).
The supported file formats listed are collectively referred to below as “audio
files”. A CD containing audio files of these types is referred to as an “audio
data CD”.
Additional Information:
● Safety notes ⇒ page 4
● Unit overview ⇒ page 6
● Multimedia interface ⇒ page 40
WARNING
● Inserting a data medium while you are driving could distract you from
the road and result in accident.
● The functions described below depend on the device used. There may
be differences with certain devices.
Media source and audio file requirements
Factory-fitted CD players conform to safety class 1 according to
DIN IEC 76 (CO) 6/ VDE 0837.
The unit only accepts standard 12 cm CDs and memory cards with the di-
mensions 32 mm x 24 mm x 2.1 mm or 1.4 mm.
Media sourcesRequirements for playing in the unit Audio CDs with CD Digital
Audio logo .- CD Digital Audio specification.
CD-ROM, CD-R and CD-RW
audio data CDs up to max.
700 MB (megabytes) compli-
ant with ISO 9660 or in the
Joliet file system.
SD and MMC memory
cards up to max. 2 GB (giga-
bytes) and SDHC memory
cards up to max. 32 GB.- MP3 files (.mp3) with bit rates of between
48 and 320 kbit/s or with variable bit rate.
- WMA files (.wma) up to 9.2 mono/stereo
without copy protection.
- Playlists in the formats PLS, M3U and WPL.
- File names and paths no longer than 256
characters.
- Folder structures with a maximum of eight
levels.
- Audio data CDs with max. 50 folders and
max. 500 files.
- Memory cards with max. 5000 folders and
max. 15000 files with max. 6000 files per
folder.
Audio file playback via
Bluetooth ®a)
.- The external audio source must be com-
patible with the Bluetooth A2DP profile.
AUX. External audio source.– Audio output is possible with a 3.5 mm
jack connector ⇒ Fig. 1 9.MDI. External data medium.- Compatible with MEDIA-IN multimedia in-
terface ⇒ page 40.
AUX2. Additional external
source- Depending on the vehicle equipment, this
source can be used to play audio from an
external player connected to a Rear Seat En-
tertainment system (only if the vehicle does
not have MDI).
a) Bluetooth ®
is a registered trademark of Bluetooth SIG, Inc.
Restrictions and notes
Dirt, high temperatures or mechanical damage may damage the data medi-
ums. Please observe the manufacturer's instructions.
Page 36 of 114
35
Audio mode
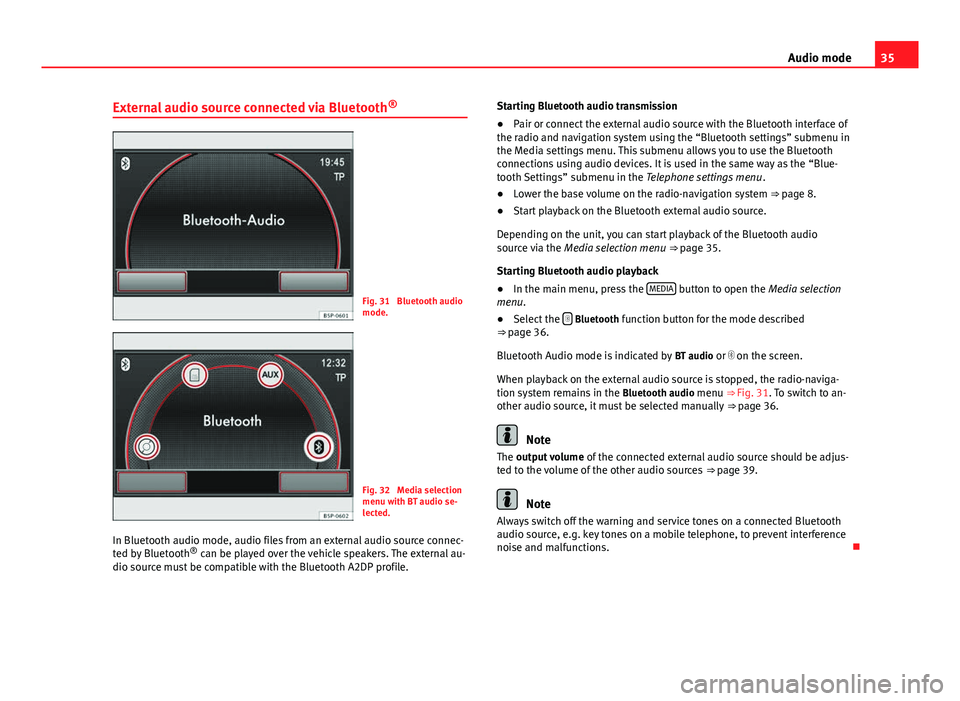
External audio source connected via Bluetooth ®
Fig. 31 Bluetooth audio
mode.
Fig. 32 Media selection
menu with BT audio se-
lected.
In Bluetooth audio mode, audio files from an external audio source connec-
ted by Bluetooth ®
can be played over the vehicle speakers. The external au-
dio source must be compatible with the Bluetooth A2DP profile. Starting Bluetooth audio transmission
●
Pair or connect the external audio source with the Bluetooth interface of
the radio and navigation system using the “Bluetooth settings” submenu in
the Media settings menu. This submenu allows you to use the Bluetooth
connections using audio devices. It is used in the same way as the “Blue-
tooth Settings” submenu in the Telephone settings menu .
● Lower the base volume on the radio-navigation system ⇒ page 8.
● Start playback on the Bluetooth external audio source.
Depending on the unit, you can start playback of the Bluetooth audio
source via the Media selection menu ⇒ page 35.
Starting Bluetooth audio playback
● In the main menu, press the MEDIA
button to open the Media selection
menu.
● Select the
Bluetooth function button for the mode described
⇒ page 36.
Bluetooth Audio mode is indicated by BT audio or on the screen.
When playback on the external audio source is stopped, the radio-naviga-
tion system remains in the Bluetooth audio menu ⇒ Fig. 31. To switch to an-
other audio source, it must be selected manually ⇒ page 36.
Note
The output volume of the connected external audio source should be adjus-
ted to the volume of the other audio sources ⇒ page 39.
Note
Always switch off the warning and service tones on a connected Bluetooth
audio source, e.g. key tones on a mobile telephone, to prevent interference
noise and malfunctions.
Page 37 of 114
36Audio mode
Selecting a Media source
Fig. 33 MEDIA main
menu.
Fig. 34 Media selection
menu.
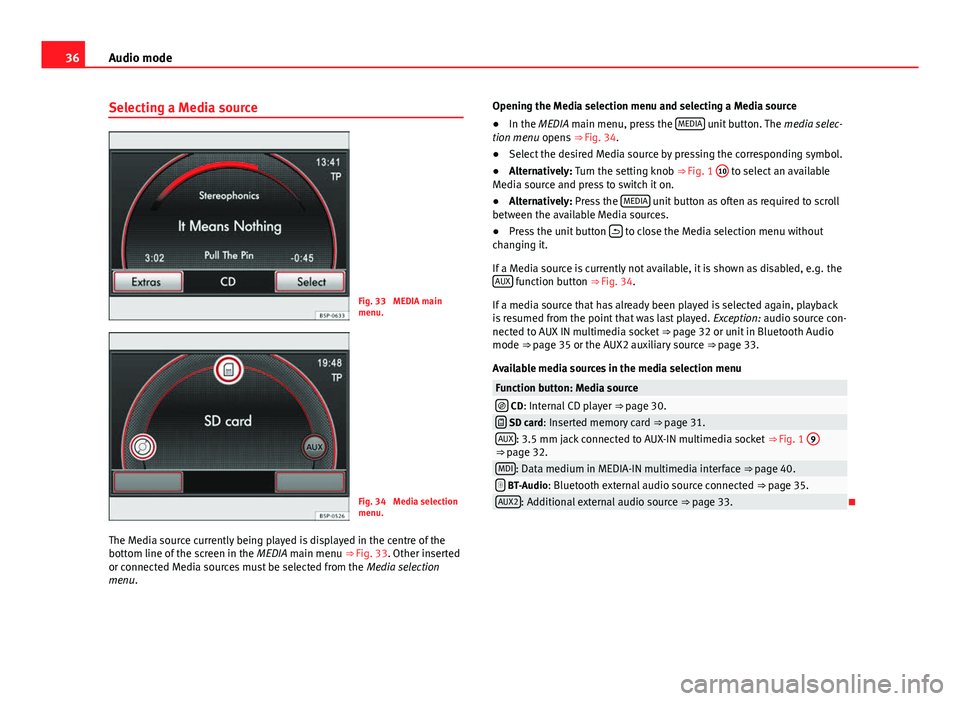
The Media source currently being played is displayed in the centre of the
bottom line of the screen in the MEDIA main menu ⇒ Fig. 33. Other inserted
or connected Media sources must be selected from the Media selection
menu. Opening the Media selection menu and selecting a Media source
● In the MEDIA main menu, press the MEDIA
unit button. The
media selec-
tion menu opens ⇒ Fig. 34.
● Select the desired Media source by pressing the corresponding symbol.
● Alternatively: Turn the setting knob ⇒ Fig. 1 10
to select an available
Media source and press to switch it on.
● Alternatively: Press the MEDIA
unit button as often as required to scroll
between the available Media sources.
● Press the unit button
to close the Media selection menu without
changing it.
If a Media source is currently not available, it is shown as disabled, e.g. the AUX
function button ⇒ Fig. 34.
If a media source that has already been played is selected again, playback
is resumed from the point that was last played. Exception: audio source con-
nected to AUX IN multimedia socket ⇒ page 32 or unit in Bluetooth Audio
mode ⇒ page 35 or the AUX2 auxiliary source ⇒ page 33.
Available media sources in the media selection menu
Function button: Media source CD: Internal CD player ⇒ page 30. SD card: Inserted memory card ⇒ page 31.AUX: 3.5 mm jack connected to AUX-IN multimedia socket ⇒ Fig. 1 9⇒ page 32.MDI: Data medium in MEDIA-IN multimedia interface ⇒ page 40. BT-Audio: Bluetooth external audio source connected
⇒ page 35.AUX2: Additional external audio source ⇒ page 33.
Page 40 of 114
39
Audio mode
The scan function can also be started and stopped by briefly pressing the
setting knob ⇒ Fig. 1 10
.
Available playback modes
Function button: EffectScan: Each track of the current folder or current Media source will be
played for 10 seconds. The scan function starts at the next track.
Mix: The tracks of the current audio CD will be played in random order.Mix folder: The tracks of the current folder will be played in random order.Mix all: The tracks of the current data medium will be played in random or-
der.
Repeat track: Repeats the currently playing title.Repeat CD: At the end of the current audio CD, its tracks will be played
again.
Repeat folder: At the end of the current folder, its tracks will be played
again.
The random play and repeat functions remain active for the corresponding
Media source until they are closed for that source.
Media setup menu (SETUP)
In Media mode, press the SETUP unit button to open the
Media setup menu.
The selection options depend on the type of unit and equipment.
Function button: EffectTraffic programme (TP): To activate or deactivate the TP function ⇒ page 19. Scan/Mix/Repeat incl. : Subfolders are included in the selected playback
mode ⇒ page 38.
This setting must be defined before the playback mode is activated.
AUX input level: Adjust the input volume for an external audio source in the
AUX-IN multimedia socket ⇒ Fig. 1 9 to the output volume
of the other
audio sources ⇒ page 32.
Function button: EffectBluetooth settings: Press to enter the BT settings menu to view the list of de-
vices connected, search for devices, etc.
BT-Audio volume: Adjust the input volume for a Bluetooth audio source to
the playback volume of the other audio sources.
Activating the AUX2 input: Press to activate the AUX2 audio input. If your ve-
hicle does not have an RSE system, or a MEDIA-IN or MDI multimedia inter-
face, this checkbox should always be left unmarked ⇒ page 33.
MDI volume: Adjust the input volume for an iPod®
or iPhone ®
or other de-
vice connected to the MEDIA-IN multimedia interface to the playback vol-
ume of the other audio sources ⇒ page 40.
AUX2 volume: Adjust the input volume for the AUX2 ⇒ table on page 39
external audio source to the playback volume of the other audio sources
⇒ page 32.
Adjusting playback volume
If you need to increase the output volume of an external audio source, first
lower the base volume on the radio-navigation system ⇒ page 9.
If the sound from the external audio source is too quiet, increase the output
volume on the external audio source if possible. If it is too low, increase the
input volume .
If the sound from the connected external audio source is too loud or distor-
ted, lower the output volume on the external audio source if possible. If it is
still too loud, lower the input volume.
WARNING
If the volume is too high, you could damage your hearing. Even if the vol-
ume is too loud for a short period only.
CAUTION
The vehicle loudspeakers may be damaged if the volume is too high or the
sound is distorted.
Page 74 of 114
73
Telephone control (Phone)
Telephone control (Phone) Introduction
General information
The telephone functions described below may be controlled using the radio
and navigation system, and by voice control, provided that there is a mobile
phone switched on and with the BT function on. In addition, the mobile
must be connected and paired via Bluetooth to the radio and navigation
system.
For the connection between the mobile phone and the radio and navigation
system, the mobile phone must have Bluetooth®
and it must be activated.
If no mobile phone is connected to the radio and navigation system, tele-
phone control from the navigator and voice control will not be available.
● Pair and connect the mobile phone to the radio and navigation system
⇒ page 74.
When the mobile phone has been paired with the navigation system, the
phone can be controlled via the navigation system and the multifunction
controls on the steering wheel using the vehicle instrument panel
⇒ page 91. Functions available include making calls in hands-free mode,
access to the mobile phone book, access to the list of calls received, missed
and recently dialled, and control of these functions using the voice recogni-
tion system ⇒ page 93.
The hands-free device means that the telephone can be used inside the ve-
hicle; the driver will not have to remove their hands from the steering wheel
nor will be distracted from traffic.
Please observe instructions concerning the use of mobile phones in vehi-
cles without an external aerial ⇒ page 89.
WARNING
Read and observe the safety warnings ⇒
in General information on
page 87.
Page 75 of 114
74Telephone control (Phone)
Pairing the mobile phone with the radio
navigation system
Link and connect the mobile
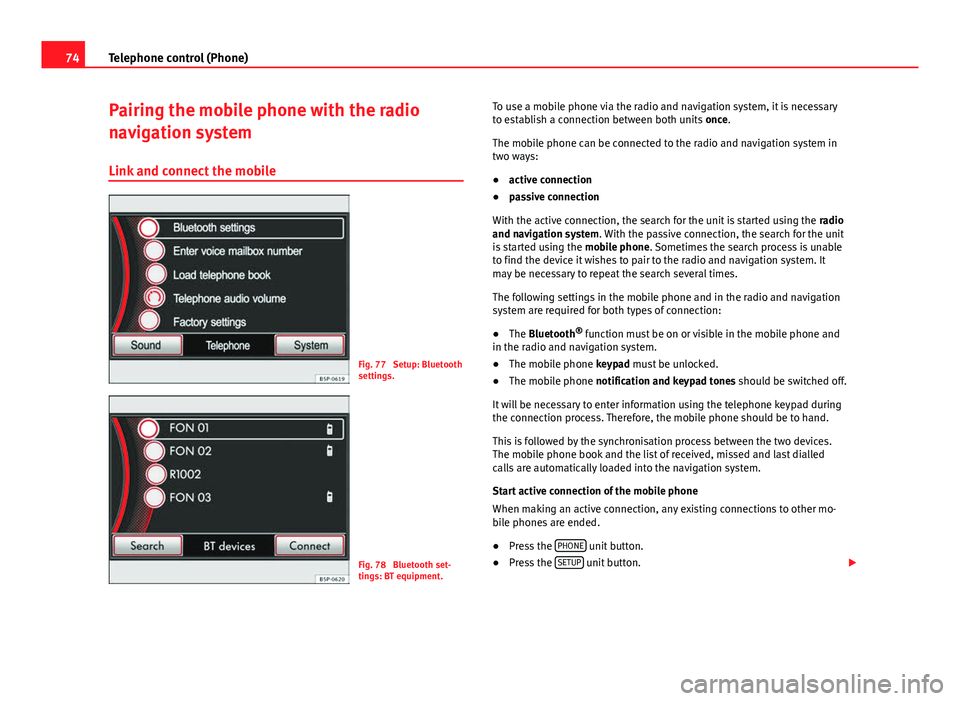
Fig. 77 Setup: Bluetooth
settings.
Fig. 78 Bluetooth set-
tings: BT equipment. To use a mobile phone via the radio and navigation system, it is necessary
to establish a connection between both units once.
The mobile phone can be connected to the radio and navigation system in
two ways:
● active connection
● passive connection
With the active connection, the search for the unit is started using the radio
and navigation system. With the passive connection, the search for the unit
is started using the mobile phone. Sometimes the search process is unable
to find the device it wishes to pair to the radio and navigation system. It
may be necessary to repeat the search several times.
The following settings in the mobile phone and in the radio and navigation
system are required for both types of connection:
● The Bluetooth ®
function must be on or visible in the mobile phone and
in the radio and navigation system.
● The mobile phone keypad must be unlocked.
● The mobile phone notification and keypad tones should be switched off.
It will be necessary to enter information using the telephone keypad during
the connection process. Therefore, the mobile phone should be to hand.
This is followed by the synchronisation process between the two devices.
The mobile phone book and the list of received, missed and last dialled
calls are automatically loaded into the navigation system.
Start active connection of the mobile phone
When making an active connection, any existing connections to other mo-
bile phones are ended.
● Press the PHONE
unit button.
● Press the SETUP unit button.
Page 76 of 114
75
Telephone control (Phone)
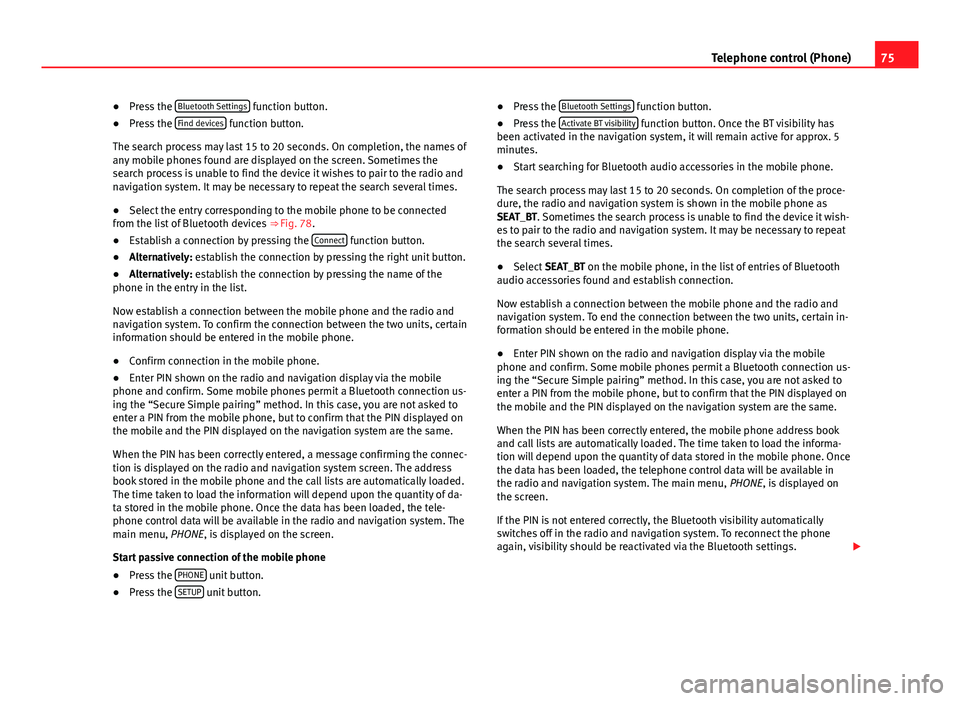
● Press the Bluetooth Settings
function button.
● Press the Find devices function button.
The search process may last 15 to 20 seconds. On completion, the names of
any mobile phones found are displayed on the screen. Sometimes the
search process is unable to find the device it wishes to pair to the radio and
navigation system. It may be necessary to repeat the search several times.
● Select the entry corresponding to the mobile phone to be connected
from the list of Bluetooth devices ⇒ Fig. 78.
● Establish a connection by pressing the Connect
function button.
● Alternatively: establish the connection by pressing the right unit button.
● Alternatively: establish the connection by pressing the name of the
phone in the entry in the list.
Now establish a connection between the mobile phone and the radio and
navigation system. To confirm the connection between the two units, certain
information should be entered in the mobile phone.
● Confirm connection in the mobile phone.
● Enter PIN shown on the radio and navigation display via the mobile
phone and confirm. Some mobile phones permit a Bluetooth connection us-
ing the “Secure Simple pairing” method. In this case, you are not asked to
enter a PIN from the mobile phone, but to confirm that the PIN displayed on
the mobile and the PIN displayed on the navigation system are the same.
When the PIN has been correctly entered, a message confirming the connec-
tion is displayed on the radio and navigation system screen. The address
book stored in the mobile phone and the call lists are automatically loaded.
The time taken to load the information will depend upon the quantity of da-
ta stored in the mobile phone. Once the data has been loaded, the tele-
phone control data will be available in the radio and navigation system. The
main menu, PHONE, is displayed on the screen.
Start passive connection of the mobile phone
● Press the PHONE
unit button.
● Press the SETUP unit button. ●
Press the Bluetooth Settings
function button.
● Press the Activate BT visibility function button. Once the BT visibility has
been activated in the navigation system, it will remain active for approx. 5
minutes.
● Start searching for Bluetooth audio accessories in the mobile phone.
The search process may last 15 to 20 seconds. On completion of the proce-
dure, the radio and navigation system is shown in the mobile phone as
SEAT_BT. Sometimes the search process is unable to find the device it wish-
es to pair to the radio and navigation system. It may be necessary to repeat
the search several times.
● Select SEAT_BT on the mobile phone, in the list of entries of Bluetooth
audio accessories found and establish connection.
Now establish a connection between the mobile phone and the radio and
navigation system. To end the connection between the two units, certain in-
formation should be entered in the mobile phone.
● Enter PIN shown on the radio and navigation display via the mobile
phone and confirm. Some mobile phones permit a Bluetooth connection us-
ing the “Secure Simple pairing” method. In this case, you are not asked to
enter a PIN from the mobile phone, but to confirm that the PIN displayed on
the mobile and the PIN displayed on the navigation system are the same.
When the PIN has been correctly entered, the mobile phone address book
and call lists are automatically loaded. The time taken to load the informa-
tion will depend upon the quantity of data stored in the mobile phone. Once
the data has been loaded, the telephone control data will be available in
the radio and navigation system. The main menu, PHONE, is displayed on
the screen.
If the PIN is not entered correctly, the Bluetooth visibility automatically
switches off in the radio and navigation system. To reconnect the phone
again, visibility should be reactivated via the Bluetooth settings.
Page 77 of 114
76Telephone control (Phone)
Changing between user profiles
When a mobile phone is connected to the radio and navigation system, a
user profile is created for that mobile.
Up to four different user profiles can be created. If four user profiles have
already been created and you wish to create a new profile, it will be neces-
sary to first delete one of the previous profiles.
It is only possible to connect one mobile phone to the hands-free profile of
the radio and navigation system at a given time.
Up to two different Bluetooth devices can be connected at the same time.
Each device will be linked to a different profile (one as hands-free and one
as multimedia). It is not possible to connect two devices under the same
profile (e.g. two mobile phones as hands-free or two multimedia players at
the same time).
To delete a user profile, proceed as follows:
● Press the SETUP
unit button.
● Press the Bluetooth Settings function button.
● Alternatively: select the Bluetooth Settings by turning the setting knob
⇒ Fig. 1 10 and press knob to confirm.
● Press the Paired devices list function button.
● OR: Select the Paired device list function button by turning the setting
knob and press knob to confirm.
● Select the mobile phone to be deleted from the list of connected units.
● Press the Delete
function button or the lower button to confirm the pro-
cedure.
After deleting the phone, there will only be three entries in the list of con-
nected units. It will now be possible to start a new connection to another
mobile phone.
Note
For the purposes of security, Bluetooth visibility in the radio and navigation
system is limited to 5 minutes.
Note
The Bluetooth connection has a maximum range of 10 metres. An existing
Bluetooth connection will be disconnected if the distance between the con-
nected units is greater than this. The connection is automatically resumed
when the units are back within the range.
Note
When a mobile phone is connected for the first time from the navigation
system telephone menu, the phone is paired as a telephone and as a media
player (for playing music stored in the phone via Bluetooth). With a mobile
phone that has already been paired with the navigation system:
● If you try to pair a second mobile phone with the telephone menu, the
first mobile phone will be completely disconnected from the navigation sys-
tem.
● If you try to pair a second mobile phone from the media menu, the first
mobile phone will only be disconnected as a media player, but will continue
to be paired as a mobile phone. This means that the first mobile phone will
operate as a telephone, while the music played will be taken from the song
list on the second mobile phone.
Automatic pairing
When the telephone has been connected and the corresponding user pro-
file created, your telephone will automatically link up with the SEAT tele-
phone system under the following conditions: