navigation Seat Leon 5D 2014 MEDIA SYSTEM PLUS - NAVI SYSTEM
[x] Cancel search | Manufacturer: SEAT, Model Year: 2014, Model line: Leon 5D, Model: Seat Leon 5D 2014Pages: 64, PDF Size: 1.71 MB
Page 3 of 64
Table of Contents
Table of Contents
Important Information . . . . . . . . . . . . . . . . . 2
Introduction . . . . . . . . . . . . . . . . . . . . . . . . . . 3
Before using the unit for the first time . . . . . . . 3
Safety notes . . . . . . . . . . . . . . . . . . . . . . . . . . . . 3
Radio / navigator unit overview . . . . . . . . . . . . 5
Diagram of the menus . . . . . . . . . . . . . . . . . . . . 6
General operating information . . . . . . . . . . . . . 6
Audio mode . . . . . . . . . . . . . . . . . . . . . . . . . . . 10
Radio mode . . . . . . . . . . . . . . . . . . . . . . . . . . . . 10
Media mode . . . . . . . . . . . . . . . . . . . . . . . . . . . . 18
Navigation . . . . . . . . . . . . . . . . . . . . . . . . . . . . 29
Introduction and operation of the navigation
system . . . . . . . . . . . . . . . . . . . . . . . . . . . . . . . . 29
CAR menu . . . . . . . . . . . . . . . . . . . . . . . . . . . . 39
Introduction to managing the CAR menu . . . . . 39
Telephone management (PHONE) . . . . . . 40
Introduction to telephone management . . . . . 40
Voice control . . . . . . . . . . . . . . . . . . . . . . . . . . . . 44
Description of the telephone manager . . . . . . . 46
Setup . . . . . . . . . . . . . . . . . . . . . . . . . . . . . . . . . 53
Menu and system setting (SETUP) . . . . . . . . . . 53
Sound and volume setup . . . . . . . . . . . . . . . . . . 54
Abbreviations . . . . . . . . . . . . . . . . . . . . . . . . . 55
Abbreviations . . . . . . . . . . . . . . . . . . . . . . . . . . . 55
Index . . . . . . . . . . . . . . . . . . . . . . . . . . . . . . . . . 57
1
Page 5 of 64
Introduction
Introduction Before using the unit for the first timeBefore using the unit for the first time, carry out
the following steps. This will enable you to use
the unit safely and make full use of the func-
tions it provides:
Please refer to the basic safety instructions
››› page 3.
Familiarise yourself with the unit overview
››› page 5.
In System setup, restart the unit to factory settings
››› page 53.
Use suitable data media for multimedia playback
(Media mode)
››› page 18. Safety notes
WARNING
Distracting the driver in any way can lead to
an accident and cause injuries. Operating the
infotainment system while driving can dis-
tract your attention from the traffic.
● Always drive carefully and responsibly.
● Select volume settings that allow you to
easily hear signals from outside the vehicle
at all times (e.g. emergency service sirens). ●
If you set the volume excessively high you
may suffer damage to your ears. This can also
happen if you are exposed to an excessively
high volume even for a short time. WARNING
The volume level may suddenly change when
you switch audio source or connect a new au-
dio source.
● Reduce the base volume before switching
audio source or connecting a new audio
source ››› page 7
. WARNING
Connecting, inserting or removing a data me-
dium while driving can distract your attention
from the traffic and cause an accident. WARNING
Connecting leads for external devices may
obstruct the driver.
● Arrange the connecting leads so that they
do not obstruct the driver. WARNING
External devices that are placed loose in the
vehicle or not properly secured could be flung
though the interior during a sudden driving
or braking manoeuvre, or in the event of an
accident. ●
Never, for any reason, fit the external units
on the doors, on the windscreen, on or near
the area marked “AIRBAG” on the steering
wheel, on the dash panel, on the seat backr-
ests or between these areas and the passen-
gers. These units may cause serious injury in
the event of an accident, especially if the air-
bag is activated. WARNING
The centre armrest may obstruct the driver's
arm movements, which could cause an acci-
dent and severe injuries.
● Always keep the armrest closed while the
vehicle is in motion. WARNING
Opening the housing of a CD player can cause
injury due to invisible laser radiation.
● Only have CD players repaired by a special-
ised workshop. WARNING
The recommendations and traffic signs
shown by the navigation system may differ
from the true traffic conditions.
● Traffic signs and traffic regulations have
priority over the recommendations and in-
structions given by the navigation system.
● Adjust your speed and driving style to visi-
bility, road, traffic and weather conditions. » 3
Page 7 of 64
Introduction
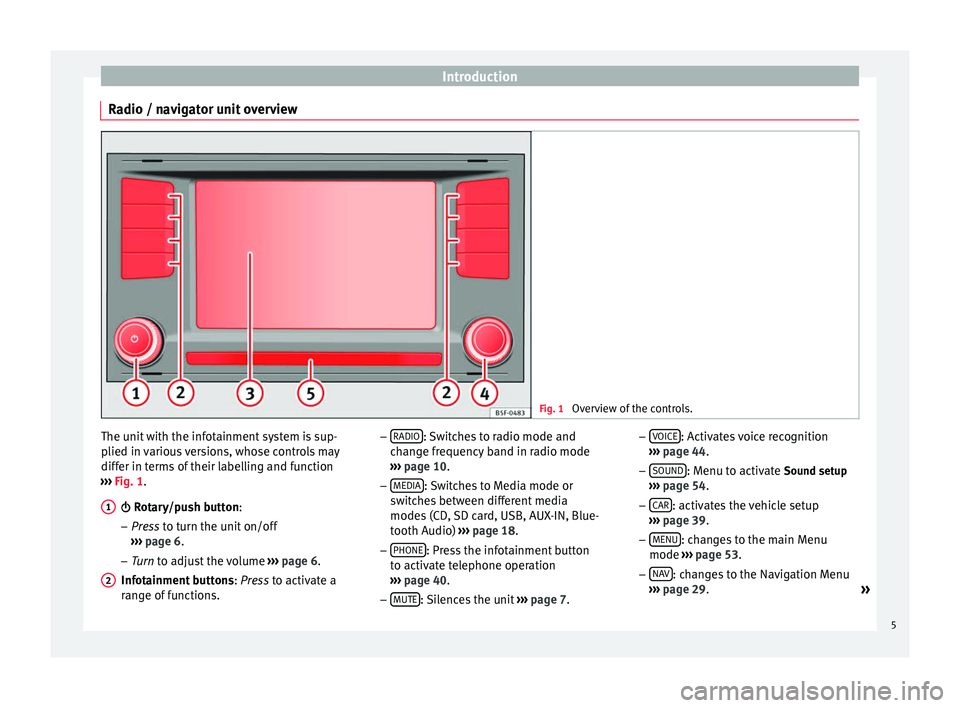
Radio / navigator unit overview Fig. 1
Overview of the controls. The unit with the infotainment system is sup-
plied in various versions, whose controls may
differ in terms of their labelling and function
››› Fig. 1
.
Rotary/push button:
– Pr
ess to turn the unit on/off
››
› page 6.
– Tur
n to adjust the volume ››
› page 6.
Infotainment buttons : Press to activate a
ran
ge of functions.
1
2 –
RADIO : Switches to radio mode and
change frequency band in radio mode
››› page 10
.
– MEDIA : Switches to Media mode or
switches between different media
modes (CD, SD card, USB, AUX-IN, Blue-
tooth Audio) ››› page 18.
– PHONE : Press the infotainment button
to activate telephone operation
››› page 40
.
– MUTE : Silences the unit
››› page 7. –
VOICE : Activates voice recognition
››› page 44
.
– SOUND : Menu to activate Sound setup
››› page 54
.
– CAR : activates the vehicle setup
››› page 39 .
– MENU : changes to the main Menu
mode ››› page 53 .
– NA
V : changes to the Navigation Menu
››› page 29
.
»
5
Page 8 of 64
Introduction
– TRAFFIC : displays traffic messages
››› page 35 .
T ouc
hscreen
.
Setting knob
: Its function depends on
the mode that is active at that time.
– In all radio modes , turn
to manually set
a station or channel and press to start
or stop the SCAN function ››› page 15.
– In media mode,
turn to change track
manually, and press to start or stop the
SCAN function.
– Turn to mark a menu option in the long
lis
ts, and press to activate the marked
option (for example, selecting a station
from a list).
– Turn to modify some settings (for exam-
pl
e, the scale of the map).
Proximity sensor: the proximity sensor
system is activated and deactivated in
the Screen settings ››› page 53 menu.
Diagram of the menus Using the touchscreen of the infotainment
system
›››
Fig. 1 3 , you can select various
main menus.
Press the infotainment button MENU to acti-
vate the main menu. 3 4
5
Function
buttons
a)Action and effect
RadioChanges to Radio mode.
MediaChanges to Media mode.
TelephoneActivates the telephone operation.
CARActivates the system and vehicle setup
››› Booklet Instruction manual, chap-
ter Introduction to the Easy Connect
system.
SoundActivates the sound settings.
SettingsActivates the system setup.
NavigationChanges to the Navigation Menu
a) Availability depends on the version.
General operating information
Introduction Note
● Lightly pressing the buttons or briefly
pressing the touchscreen is sufficient to op-
erate the unit.
● It is possible that not all the functions and
function buttons are available as the software
of the unit responds to the specific character-
istics of each market. If a function button is missing on the display this is not due to an
error in the unit.
● Due to country-specific legislation, certain
functions cannot be selected on the screen
when the vehicle is travelling above a certain
speed.
● Using a mobile phone inside the vehicle
can cause noise in the speakers.
● There may be restrictions on the use of
Bluetooth devices in some countries. Infor-
mation is available from the local authorities.
● In some vehicles equipped with a parking
distance warning system, the volume of the
audio source is automatically lowered when
the gear is engaged. Rotary knobs and buttons
Rotary/push button:
The left rotary push knob
››› Fig. 1 1 is refer-
red to as the volume control or the on/off
button.
The right rotary push knob ››› Fig. 1 4 is re-
ferred to as the setting button.
Infotainment buttons
The unit buttons are represented in this man-
ual with the word “infotainment button” and
their function is shown inside a rectangle (for
example: MEDIA infotainment button
››› Fig. 1 .
6
Page 31 of 64
Navigation
Navigation Introduction and operation of
the navigation system Introduction General information
The current position of the vehicle is deter-
mined through the GPS satellite system
(Global Positioning System). Sensors in the
vehicle measure distances driven. With the
detailed material stored in the map, and ac-
cording to the traffic news stored, all the val-
ues obtained are compared. Similarly, the
traffic reports are taken into account to calcu-
late the route (dynamic navigation
››› page 35 ). With all the data available, the
n av
igation system calculates the optimum
route to the destination.
The destination is defined by entering an ad-
dress or a point of interest, e.g. a petrol sta-
tion or hotel.
Spoken instructions and visual guidance on
the navigation unit and the combi-instrument
direct you to your destination.
Depending on the country, some infotain-
ment system functions can no longer be se-
lected when the vehicle is travelling above a
certain speed. This is not an operational er- ror; it is to comply with the legal require-
ments.
Limitations during navigation Possible errors during navigation
When the navigation system cannot receive
data from the GPS satellites (dense tree foli-
age, underground parking areas), it is possi-
ble to proceed with navigation using the sys-
tem of vehicle sensors.
For the navigator to work properly, navigation
should begin when the signal is received
from the satellite.
In areas that are not or only partially digitised
on the data medium (e.g. insufficient defini-
tion of one-way streets and road categories),
the navigation system will still attempt to
provide route guidance.
If navigation data are unavailable or incom-
plete, the navigation system may be unable
to determine the exact vehicle position. As a
result, the navigation may not be as exact as
usual.
Area of navigation and validity of the
navigation data
Roads and streets are subject to constant
change (e.g. new roads, changes to street
names and house numbers). After some
time, navigation data will no longer be up-to-date. This may lead to inaccurate or incorrect
route guidance.
Current navigation data media and versions
for other countries are available from SEAT
dealerships.
Note
The user must pay attention to the road
signs, which take precedence over those
shown on the screen. Use navigation data from a memory
card
Memory cards containing updated navigation
data can be obtained from SEAT dealerships.
●
Insert the memory card ›››
page 23 .
● Do not remove the memory card while test-
ing. Wait for the testing icon to disappear.
If the inserted memory card contains valid
navigation data, the following message ap-
pears: “The source contains a valid naviga-
tion database”. It is now possible to navigate
with the memory card data. When the memo-
ry card is no longer needed by the hardware,
it will be prepared for removal ›››
page 23.
»
29
Page 32 of 64
Navigation
Note
● Do not remove the memory card while the
navigation data is in use. This could damage
the memory card!
● The navigation memory card may not be
used as memory for other files. The infotain-
ment system will not recognise the files
saved.
● SEAT recommends only using original SEAT
memory cards to use navigation data. The
use of other memory cards could limit its op-
eration. Main menu of navigation
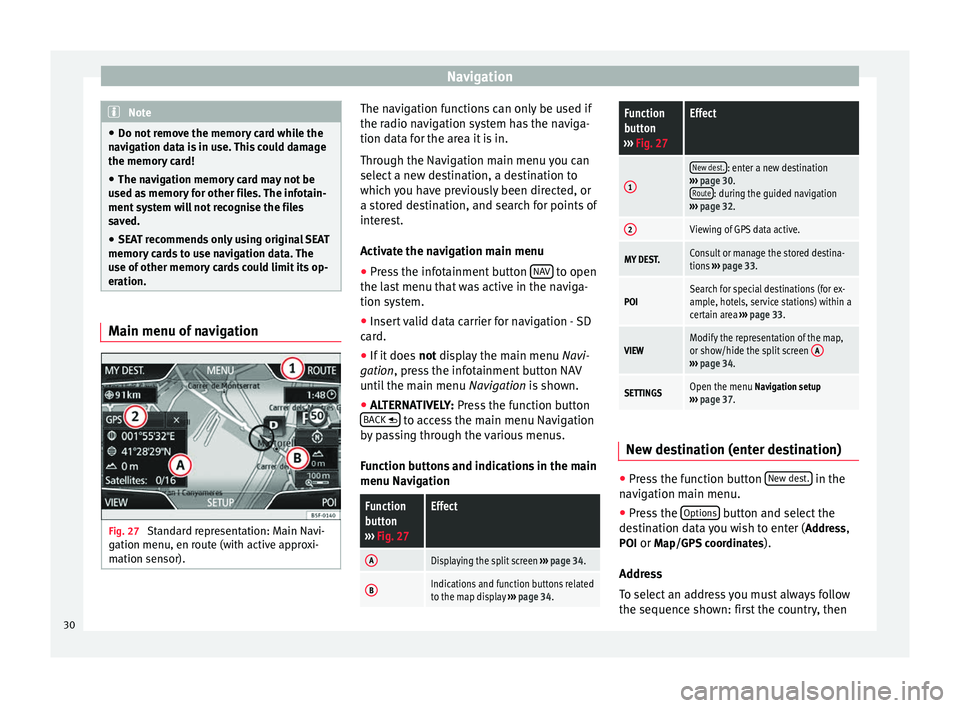
Fig. 27
Standard representation: Main Navi-
gation menu, en route (with active approxi-
mation sensor). The navigation functions can only be used if
the radio navigation system has the naviga-
tion data for the area it is in.
Through the Navigation main menu you can
select a new destination, a destination to
which you have previously been directed, or
a stored destination, and search for points of
interest.
Activate the navigation main menu
● Press the infotainment button NAV to open
the last menu that was active in the naviga-
tion system.
● Insert valid data carrier for navigation - SD
card.
● If it does not display the main menu
Na
vi-
gation, press the infotainment button NAV
until the main menu Navigation is shown.
● ALTERNATIVELY:
Press the function button
BACK to access the main menu Navigation
by passing through the various menus.
Function buttons and indications in the main
menu Navigation
Function
button
››› Fig. 27Effect
ADisplaying the split screen ››› page 34.
BIndications and function buttons related
to the map display ››› page 34.
Function
button
››› Fig. 27Effect
1
New dest.: enter a new destination
››› page 30.
Route
: during the guided navigation
››› page 32.
2Viewing of GPS data active.
MY DEST.Consult or manage the stored destina-
tions ››› page 33.
POISearch for special destinations (for ex-
ample, hotels, service stations) within a
certain area ››› page 33.
VIEWModify the representation of the map,
or show/hide the split screen A
›››
page 34.
SETTINGSOpen the menu Navigation setup
››› page 37. New destination (enter destination)
●
Press the function button New dest. in the
navigation main menu.
● Press the Options button and select the
destination data you wish to enter ( Address,
POI or Map/GPS coordinates ).
Address
To select an address you must always follow
the sequence shown: first the country, then
30
Page 33 of 64
Navigation
the town, and so on. For “town”, you can in-
dicate a town or a postcode.
After inputting the town and pressing the town centre button, the navigation systemwill guide you to the “centre” of the town in
question.
When narrowing down the destination ad-
dress, please note
that every entry restricts
the av
ailable range of subsequent selections.
If, for example, the street sought is not found
in the postcode entered previously, it will not
be in the previous option to select the street
either.
Function button: effect
Country: select the country desired.
Town: enter the town or postcode desired.
Street: enter the street desired.
House number: enter the number of the street desired.
Intersection: select an intersection of streets/roads.
Last destinations: opens the menu My destinations
››› page 33.
Start: starts guided navigation to the selected address. POI (Points of interest)
Starting guided navigation to a point of inter-
est.
Function button: effect
Search area: select the area in which you wish to search
for points of interest.
Near current location: looks for points of interest in
the area around your current location. Destination area
a) : looks for points of interest in the
area around the destination. Along the route
a) : looks for points of interest in the
area along the route. Near address
: looks for points of interest in the area
around the address entered. Select on map
: looks for points of interest in the
area around the destination selected on the map.
To select a destination on the map, press the func-
tion button Edit
.
Find categories: main category (e.g.
Car and travel), Cate-
gories (e.g. Airports) and then select the desired entry
from the list.
Save: stores the point of interest selected in the
destination memory ››› page 33.
Dial nr.
: establishes a telephone connection to the
number assigned to the point of interest. Start
: starts guided navigation at the selected
point of interest.
Find: search for a point of interest by entering its name.
a) The function button is displayed only when guided navigation
is activated.
Map/GPS coordinates
Select a destination on the map or using the
GPS coordinates and confirm by pressing
Accept .
Function button: effect
Save: stores the selected point of interest in the desti-
nation memory ››› page 33.
Edit: edits a destination, or enters another destination.
Start: starts guided navigation at the selected point of
interest. After starting navigation to the
destination
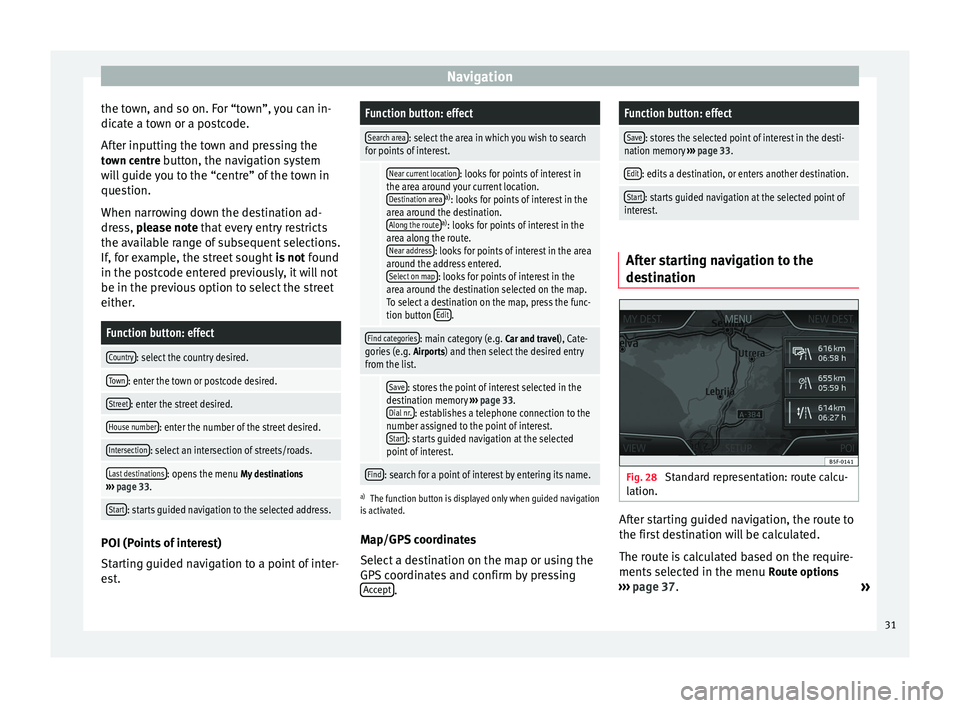
Fig. 28
Standard representation: route calcu-
lation. After starting guided navigation, the route to
the first destination will be calculated.
The route is calculated based on the require-
ments selected in the menu
Route options
››› page 37 .
»
31
Page 34 of 64
Navigation
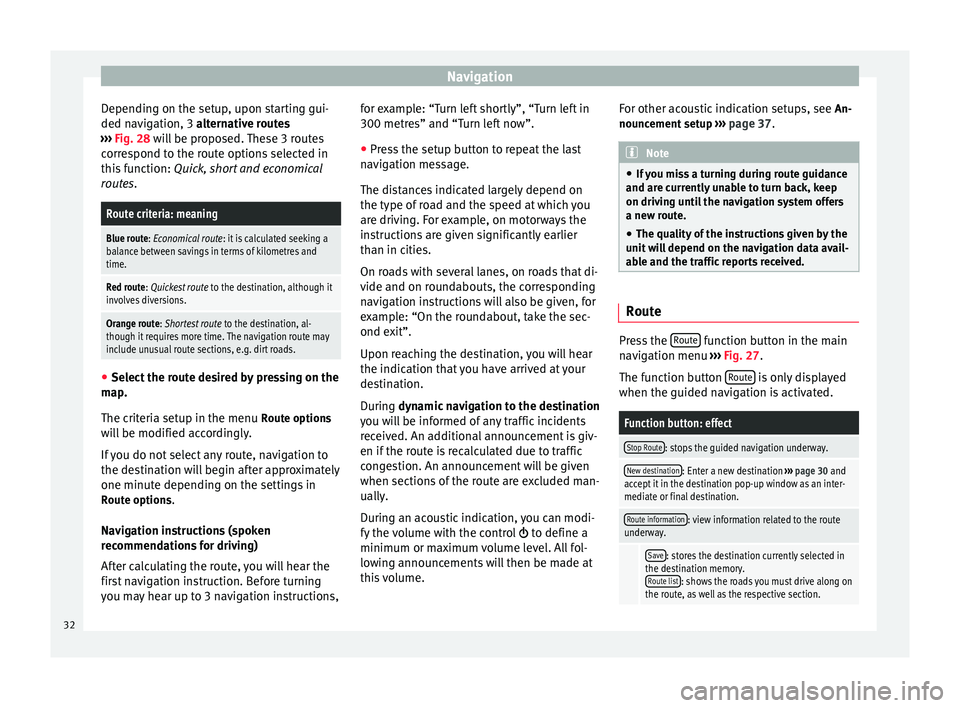
Depending on the setup, upon starting gui-
ded navigation, 3 alternative routes
› ›
› Fig. 28 will be proposed. These 3 routes
correspond to the route options selected in
this function: Quick, short and economical
routes.
Route criteria: meaning
Blue route: Economical route: it is calculated seeking a
balance between savings in terms of kilometres and
time.
Red route: Quickest route to the destination, although it
involves diversions.
Orange route: Shortest route to the destination, al-
though it requires more time. The navigation route may
include unusual route sections, e.g. dirt roads. ●
Select the route desired by pressing on the
map.
The criteria setup in the menu Route options
will be modified accordingly.
If you do not select any route, navigation to
the destination will begin after approximately
one minute depending on the settings in Route options .
Navigation instructions (spoken
recommendations for driving)
After calculating the route, you will hear the
first navigation instruction. Before turning
you may hear up to 3 navigation instructions, for example: “Turn left shortly”, “Turn left in
300 metres” and “Turn left now”.
●
Press the setup button to repeat the last
navigation message.
The distances indicated largely depend on
the type of road and the speed at which you
are driving. For example, on motorways the
instructions are given significantly earlier
than in cities.
On roads with several lanes, on roads that di-
vide and on roundabouts, the corresponding
navigation instructions will also be given, for
example: “On the roundabout, take the sec-
ond exit”.
Upon reaching the destination, you will hear
the indication that you have arrived at your
destination.
During dynamic navigation to the destination
y ou w
ill be informed of any traffic incidents
received. An additional announcement is giv-
en if the route is recalculated due to traffic
congestion. An announcement will be given
when sections of the route are excluded man-
ually.
During an acoustic indication, you can modi-
fy the volume with the control to define a
minimum or maximum volume level. All fol-
lowing announcements will then be made at
this volume. For other acoustic indication setups, see
An-
nouncement setup ››› page 37. Note
● If you miss a turning during route guidance
and are currently unable to turn back, keep
on driving until the navigation system offers
a new route.
● The quality of the instructions given by the
unit will depend on the navigation data avail-
able and the traffic reports received. Route
Press the
Route function button in the main
navigation menu ›››
Fig. 27 .
The f u
nction button Route is only displayed
when the guided navigation is activated.
Function button: effect
Stop Route: stops the guided navigation underway.
New destination: Enter a new destination ››› page 30 and
accept it in the destination pop-up window as an inter-
mediate or final destination.
Route information: view information related to the route
underway.
Save: stores the destination currently selected in
the destination memory. Route list
: shows the roads you must drive along on
the route, as well as the respective section. 32
Page 35 of 64
NavigationFunction button: effect
Congestion ahead: blocks the section ahead (from 0.2 to
10 km) of the route underway to, for example, avoid con-
gestion. To unblock, press the function button Route
and then, Cancel congestion. My destinations (destination memory)
●
Press the My destinations button in the main
navigation menu ››› Fig. 27.
● Sel ect
the desired function button ( Store
position , Destinations and contacts
or Home
address ).
1. Store current position
● Press the function button Store position , to
store the position indicated as a target flag in
the Destination memory
.
To save the stored position
permanently,
change the name of the position in the desti-
nation memory . Otherwise the stored position
will be overwritten the next time a flagged
destination is stored.
In the following data entry mask you can
modify the name. To save the destination,
press the function button .
2. Destinations and contacts
Press the function button Options in the
menu of Destinations and contacts
.
Function button: effect
Last destinations: shows the destinations for which gui-
ded navigation has already been started.
Destination memory: Display of the destinations stored
manually and imported vCards ››› page 38.
Favourites list: display of the destinations stored as fa-
vourites.
Contacts: display of the entries in the telephone book
with addresses stored. 3. Home address
Only one address or position can be stored
as the home address at any one time. The
stored home address can be edited or over-
written.
If there is a private address already stored,
the guided navigation to this address will be-
gin.
If you have not yet stored any private ad-
dress, you can assign one.
Assigning a home address for the first time:
Position: press to save your current position as a
private address. Address
: press to enter the private address man-
ually.
Editing the address
You can edit the private address in the menu Navi-
gation setup ››› page 37. Points of interest (POI)
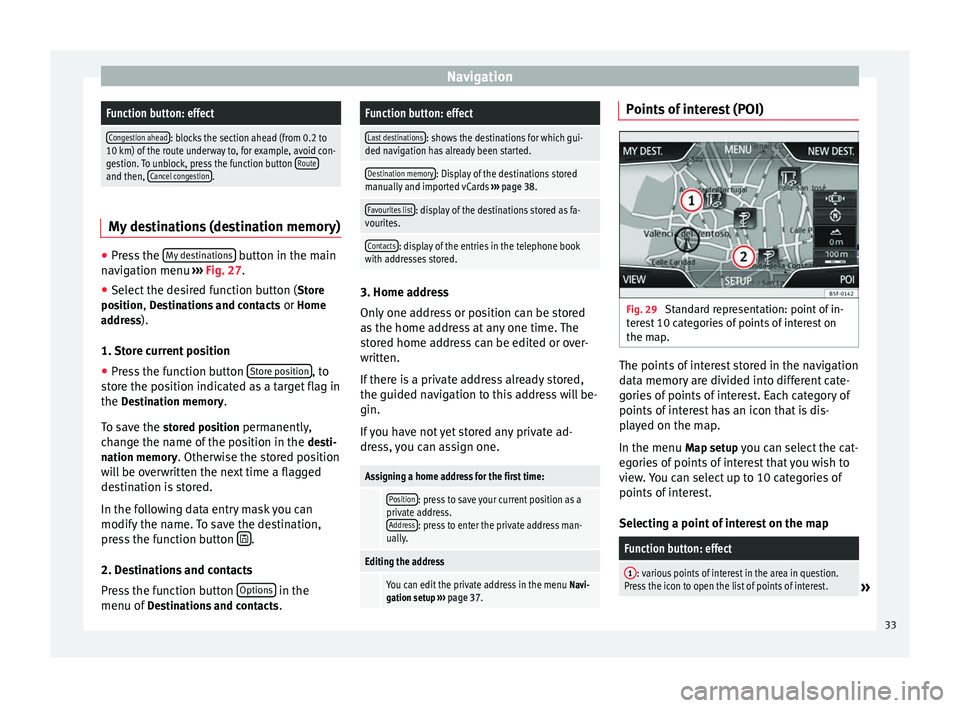
Fig. 29
Standard representation: point of in-
terest 10 categories of points of interest on
the map. The points of interest stored in the navigation
data memory are divided into different cate-
gories of points of interest. Each category of
points of interest has an icon that is dis-
played on the map.
In the menu
Map setup
you can select the cat-
egories of points of interest that you wish to
view. You can select up to 10 categories of
points of interest.
Selecting a point of interest on the map
Function button: effect
1: various points of interest in the area in question.
Press the icon to open the list of points of interest.» 33
Page 36 of 64
NavigationFunction button: effect
2: one point of interest in the area in question. Press
the icon to view the details of the point of interest. Searching for a point of interest
● In the navigation main menu, press the
function button POI .
● Press the Others function button.
Function button: effect
Search area: select the area in which you wish to search
for points of interest.
Near current location: looks for points of interest in
the area around your current location. Destination area
a) : looks for points of interest in the
area around the destination. Along the route
a) : looks for points of interest in the
area along the route. Near address
: looks for points of interest in the area
around the address entered. Select on map
: looks for points of interest in the
area around the destination selected on the map.
To select a destination on the map, press the func-
tion button Edit
.
Category: select main category (e.g.
Car and travel), cate-
gory (e.g. Airports) and finally the desired entry from the
list.
Save: stores the selected point of interest in the
destination memory. Dial nr.
b) : establishes a telephone connection to
the number assigned to the point of interest. Start
: starts guided navigation at the selected
point of interest.
Function button: effect
Find: search for a point of interest by entering its name.
a) The function button is displayed only when guided navigation
is activated.
b) The function button is only displayed when the point of inter-
est contains a telephone number.
View ●
Press the View function button in the main
navigation menu ›››
Fig. 30 .
Function button: effect
2D : two-dimensional representation of the map,
from above (conventional).
3D : three-dimensional representation of the map,
tilted from above (bird's eye view).
a)
: view the final destination on the map.
a)
: view the whole journey on the map.
Day/Night: alternate between day and night view.
Split screen: press to view the split screen ››› page 34.
The split screen can also be shown or hidden by press-
ing the infotainment button NAV
.
a)
The function button is displayed only when guided navigation
is activated.
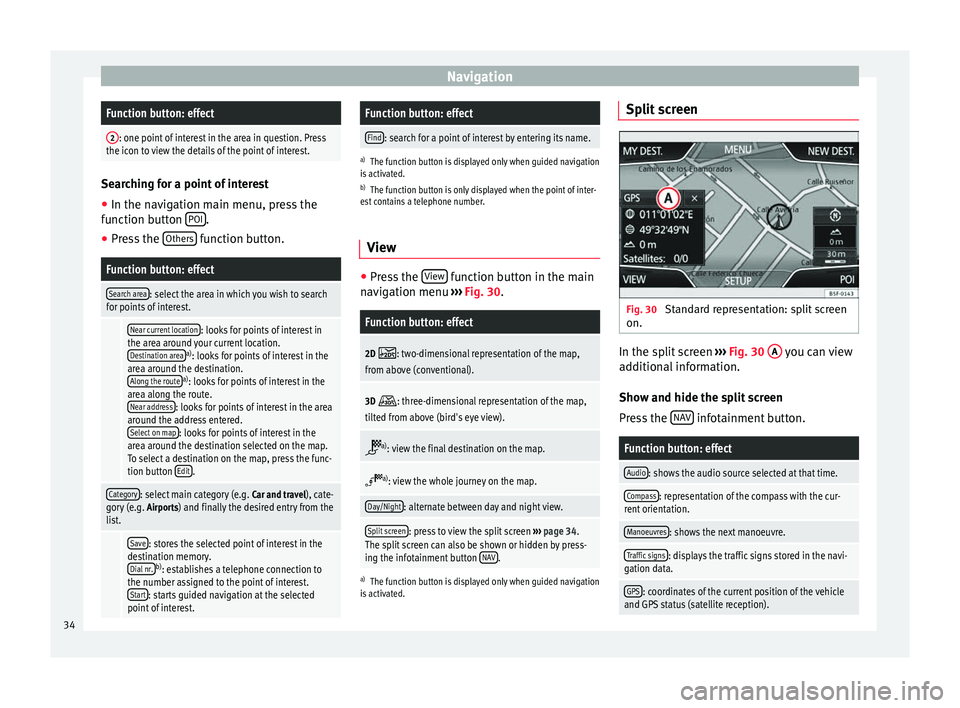
Split screen Fig. 30
Standard representation: split screen
on. In the split screen
›››
Fig. 30 A you can view
additional information.
Show and hide the split screen
Press the NAV infotainment button.
Function button: effect
Audio: shows the audio source selected at that time.
Compass: representation of the compass with the cur-
rent orientation.
Manoeuvres: shows the next manoeuvre.
Traffic signs: displays the traffic signs stored in the navi-
gation data.
GPS: coordinates of the current position of the vehicle
and GPS status (satellite reception). 34