Seat Leon SC 2013 MEDIA SYSTEM PLUS - NAVI SYSTEM
Manufacturer: SEAT, Model Year: 2013, Model line: Leon SC, Model: Seat Leon SC 2013Pages: 72, PDF Size: 3 MB
Page 11 of 72
10IntroductionThe function buttons that appear deactivated (in grey) may not be selectedat that time.Summary of the indications and function buttonsIndications and func-tionsAction and effectA ⇒ Fig. 2The title line shows the menu selected at thattime and, if applicable, other function buttons.
B ⇒ Fig. 4Press to open an additional menu.C
⇒ Fig. 3
Move the little cross around the screen pressinglightly, without resting your finger on it.Or: Press the desired destination on the screen;the cross will move to this position.
D ⇒ Fig. 2Move the control around the screen pressinglightly, without removing your finger.Briefly press to change progressively to lists atthe next level up.BACK Briefly press to return progressively to the mainmenu from a sub-menu, or to undo the changesmade.
Function activated Function deactiva-ted
Some functions or instructions appear to bemarked with a checkbox, and are activated or de-activated by touching them briefly.
OKBriefly press to confirm the data entered or to se-lect.XBriefly press to close a pop-up window or a dataentry screen.+ and -Briefly press to modify the setup progressively.
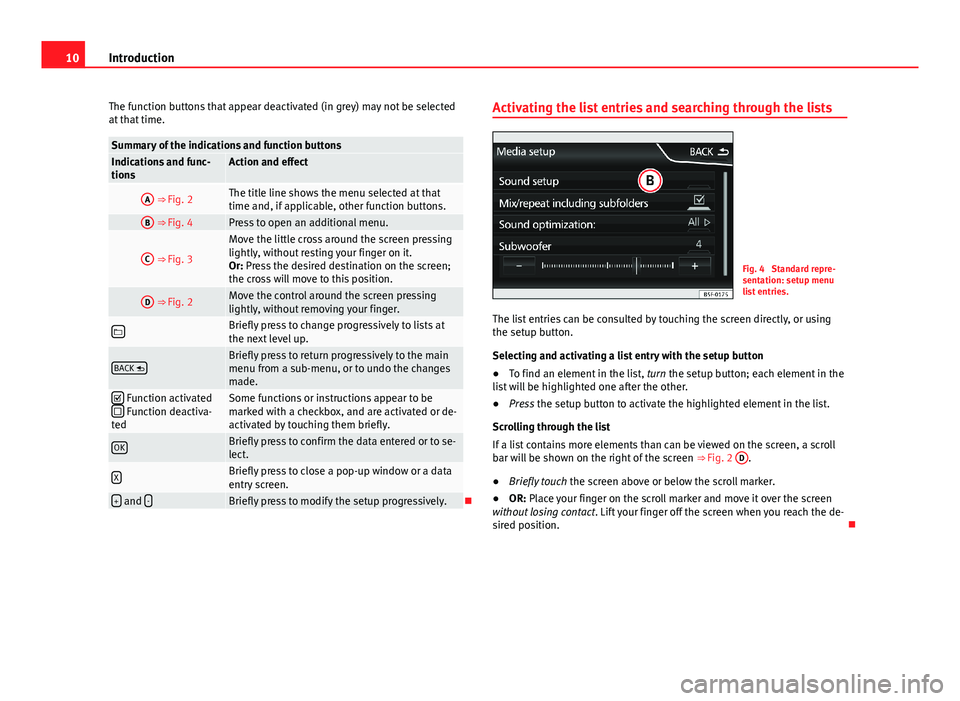
Activating the list entries and searching through the listsFig. 4
Standard repre-sentation: setup menulist entries.
The list entries can be consulted by touching the screen directly, or usingthe setup button.
Selecting and activating a list entry with the setup button
●
To find an element in the list, turn the setup button; each element in thelist will be highlighted one after the other.
●
Press the setup button to activate the highlighted element in the list.
Scrolling through the list
If a list contains more elements than can be viewed on the screen, a scrollbar will be shown on the right of the screen ⇒ Fig. 2
D
.
●
Briefly touch the screen above or below the scroll marker.
●
OR: Place your finger on the scroll marker and move it over the screenwithout losing contact. Lift your finger off the screen when you reach the de-sired position.
Page 12 of 72
11IntroductionAdditional information and display options
The information on the screen can vary depending on the settings and maydiffer from the descriptions shown here.
The main screens show the current time and outdoor temperature. They alsoshow information such as the TP status, signal and battery.
All information is displayed just after fully starting up the infotainment sys-tem.
Page 13 of 72
12Audio modeAudio modeRadio mode
Introduction
Note
●Multi-storey car parks, tunnels, high buildings and mountains can im-pair radio signals.●
Foil or metal-coated stickers attached to the windows may affect recep-tion on vehicles with a window aerial.
RADIO main menu
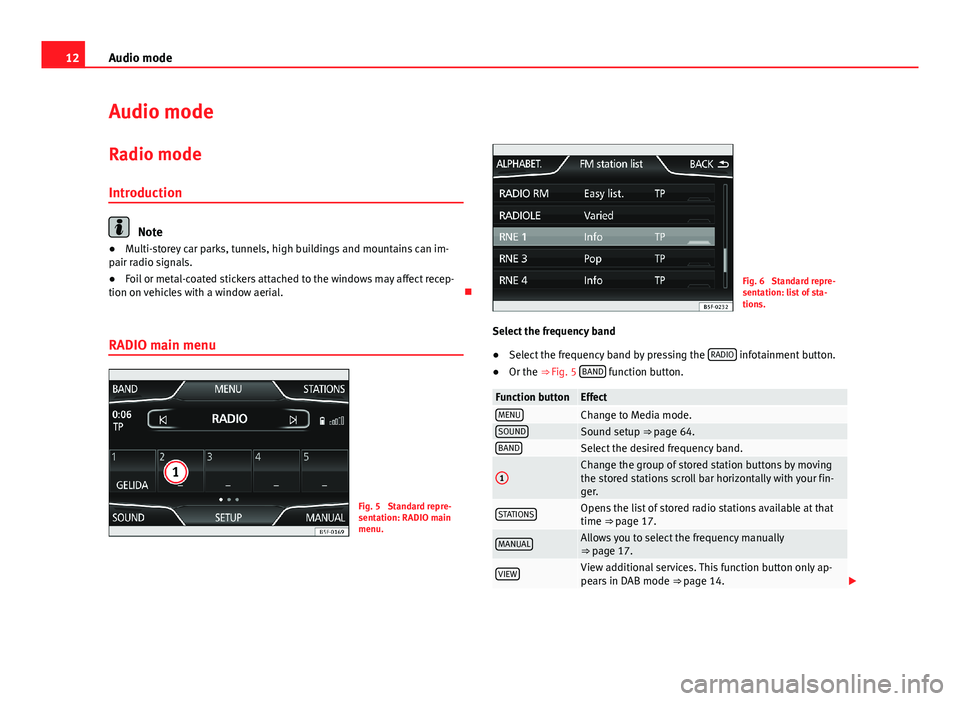
Fig. 5
Standard repre-sentation: RADIO mainmenu.
Fig. 6
Standard repre-sentation: list of sta-tions.
Select the frequency band
●
Select the frequency band by pressing the RADIO infotainment button.
●
Or the ⇒ Fig. 5 BAND function button.
Function buttonEffectMENUChange to Media mode.SOUNDSound setup ⇒ page 64.BANDSelect the desired frequency band.1Change the group of stored station buttons by movingthe stored stations scroll bar horizontally with your fin-ger.
STATIONSOpens the list of stored radio stations available at thattime ⇒ page 17.MANUALAllows you to select the frequency manually⇒ page 17.VIEWView additional services. This function button only ap-pears in DAB mode ⇒ page 14.
Page 14 of 72
13Audio modeFunction buttonEffectSETTINGSOpens the setup menu of the active frequency band(FM, AM or DAB) ⇒ page 20. or Changes between stored stations or between availablestations. Setup of the research buttons in the menu Set-up (FM, AM) ⇒ page 20.
SCANThe function button is displayed only when the SCANfunction is in operation ⇒ page 18.1... to 15...Stored station buttons, for storing stations ⇒ page 15.
Information and possible icons
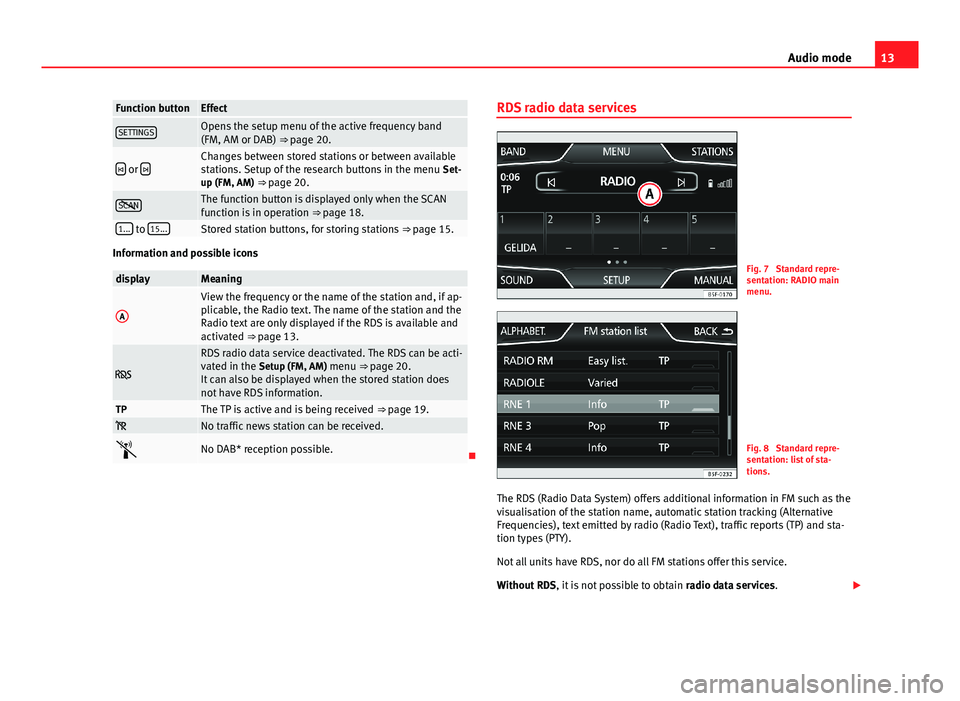
displayMeaningAView the frequency or the name of the station and, if ap-plicable, the Radio text. The name of the station and theRadio text are only displayed if the RDS is available andactivated ⇒ page 13.
RDS radio data service deactivated. The RDS can be acti-vated in the Setup (FM, AM) menu ⇒ page 20.It can also be displayed when the stored station doesnot have RDS information.
TPThe TP is active and is being received ⇒ page 19. No traffic news station can be received.No DAB* reception possible.
RDS radio data servicesFig. 7
Standard repre-sentation: RADIO mainmenu.
Fig. 8
Standard repre-sentation: list of sta-tions.
The RDS (Radio Data System) offers additional information in FM such as thevisualisation of the station name, automatic station tracking (AlternativeFrequencies), text emitted by radio (Radio Text), traffic reports (TP) and sta-tion types (PTY).
Not all units have RDS, nor do all FM stations offer this service.
Without RDS, it is not possible to obtain radio data services.
Page 15 of 72
14Audio modeName of the station and automatic station tracking
When the RDS is available, you can view the station names in the RADIOmain menu and in the list of FM stations.
The FM stations send different content under one name (for example, Radio2) in various regional frequencies, provisionally or permanently.
When driving, the automatic station tracking automatically changes to thefrequency that provides the best reception of the currently-selected station.As a result, you may lose the regional programme you are listening to.
The automatic change of frequencies and automatic station tracking can belinked through the FM setup ⇒ page 20.
Radio text
Some RDS-compatible stations also broadcast additional text informationknown as radio text.
The radio text is displayed in the top half of the screen, above the storedstation buttons.
The radio text display can be linked through the FM setup ⇒ page 20.
Note
●The radio stations are responsible for the content broadcast.●
Due to infrastructure issues, RDS functions may be limited in certaincountries, and you may not be able to use traffic reports, automatic stationtracking (AF) or programme types (PTY).
●
In some cases the name of the station is too long. This text may beblocked/unblocked by pressing on the station name for 3 seconds (a dotwill appear on the left and right of the station name).
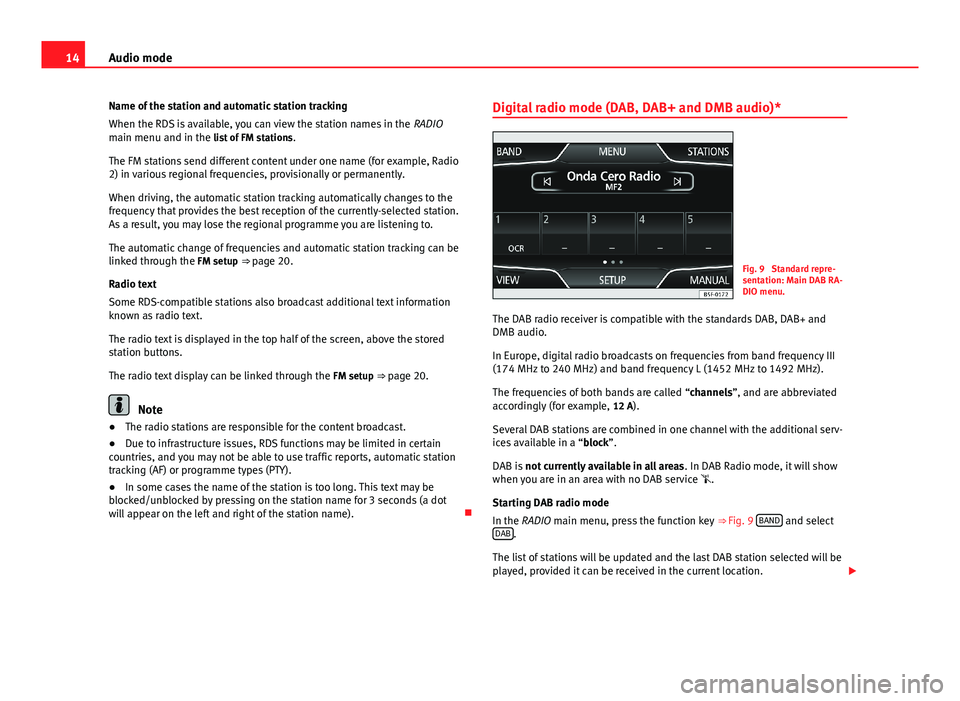
Digital radio mode (DAB, DAB+ and DMB audio)*Fig. 9
Standard repre-sentation: Main DAB RA-DIO menu.
The DAB radio receiver is compatible with the standards DAB, DAB+ andDMB audio.
In Europe, digital radio broadcasts on frequencies from band frequency III(174 MHz to 240 MHz) and band frequency L (1452 MHz to 1492 MHz).
The frequencies of both bands are called “channels”, and are abbreviatedaccordingly (for example, 12 A).
Several DAB stations are combined in one channel with the additional serv-ices available in a “block”.
DAB is not currently available in all areas. In DAB Radio mode, it will showwhen you are in an area with no DAB service .
Starting DAB radio mode
In the RADIO main menu, press the function key ⇒ Fig. 9 BAND and selectDAB.
The list of stations will be updated and the last DAB station selected will beplayed, provided it can be received in the current location.
Page 16 of 72
15Audio modeThe station selected at that time is shown on the top line of the screen. Theblock selected is shown underneath it ⇒ Fig. 9.
Additional DAB stations
Some DAB stations temporarily or permanently offer additional pro-grammes, (for example, for broadcasting sports events). Additional stationsare selected in the same way as the conventional DAB stations. The DABmain menu shows the name of the additional station set under the name ofthe main DAB station. The additional stations cannot be stored.
Automatic station tracking: change from DAB to FM
In DAB setup/Advanced setup you can change to the FM frequency band forautomatic station tracking.
When the DAB station you are listening to can no longer be received (for ex-ample, due to DAB no longer being available), the unit will try to locate andtune in this station in the FM band frequency.
For station tracking across various frequencies, the DAB station and the FMstation must broadcast the same station code, or the station in FM that cor-responds to the equivalent in DAB, must be indicated through the DAB.
When a corresponding FM station is found, it will show FM after the stationname. When its DAB equivalent can be received again, it will change to DABmode after a certain time. The FM indication will disappear.
When the signal of a DAB station is very weak and its FM equivalent cannotbe found, the radio will be muted.
DAB displays
Press the function button View ⇒ Fig. 9 and select the additional service de-sired.
Function button View: effectPreset list: shows the stored station buttons.Station info: The radio text and slide show are displayed instead of the stor-ed station buttons in the lower half of the screen.Function button View: effectRadio text: The Radio text is displayed instead of the stored station buttonsin the lower half of the screen.Presentation: The slide show is displayed instead of the station buttons inthe lower half of the screen. Function known as Slideshow; the icon⇒ Fig. 13 will appear in the list of DAB stations.
Note
The radio stations are responsible for the content broadcast.
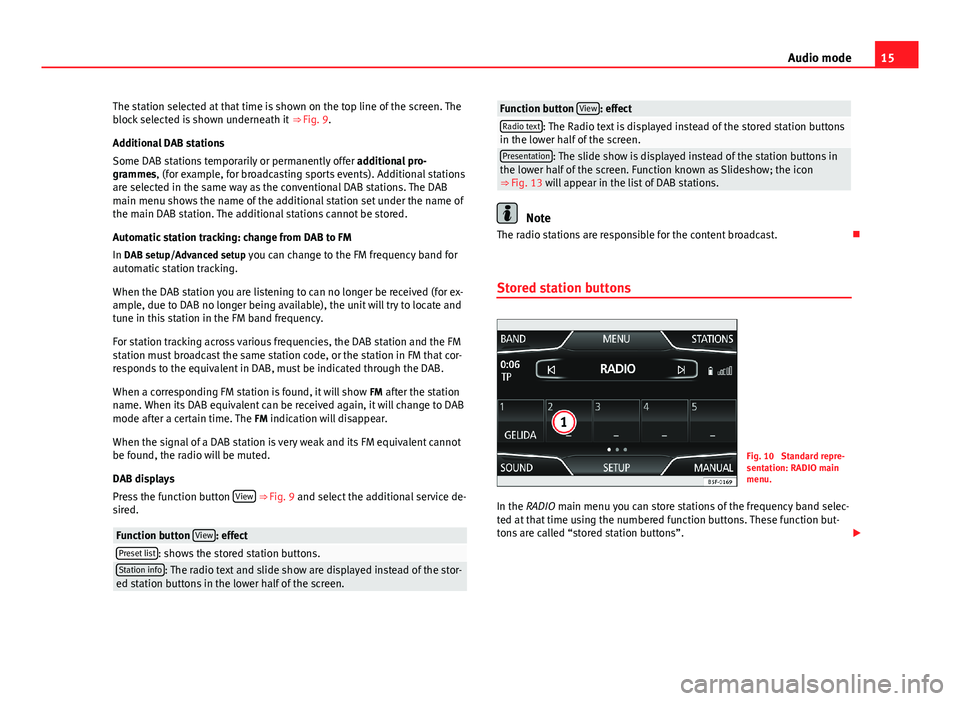
Stored station buttons
Fig. 10
Standard repre-sentation: RADIO mainmenu.
In the RADIO main menu you can store stations of the frequency band selec-ted at that time using the numbered function buttons. These function but-tons are called “stored station buttons”.
Page 17 of 72
16Audio modeActivating a stationusing the stored sta-tion buttons
Press the stored station button corresponding tothe desired station.A stored station can be activated by pressing itsstored station button only if it can still be receivedin your current location.
Change the group ofstored station but-tons by sliding yourfinger gently
Press lightly on the station area and slide your fin-ger horizontally to access the next/previous group⇒ Fig. 10
1
.The stored station buttons are shown in groups of5 function buttons.
Storing stations instored station but-tons
See: storing stations ⇒ page 17.Storing station logosin stored station but-tons
It is possible to assign the logo of the stations stor-ed. The logos will be shown in the stored stationbuttons ⇒ page 16.
Manually save station logos in the saved station buttons
The station logos can be imported from a compatible data medium (for ex-ample, memory card or memories with USB port).
●
Press the Setup function button, then Manage logos.
●
Press the station button where you wish to store the logo of a station.
●
Select the source where the logo is stored (for example, SD 1). We rec-ommend saving logos in the memory unit’s root directory.
●
Select the station logo.
●
Repeat the process to assign other logos; press the infotainment buttonRADIO to return to the RADIO main menu.
Automatically save station logos in the saved station
buttons (only in FM and DAB modes)
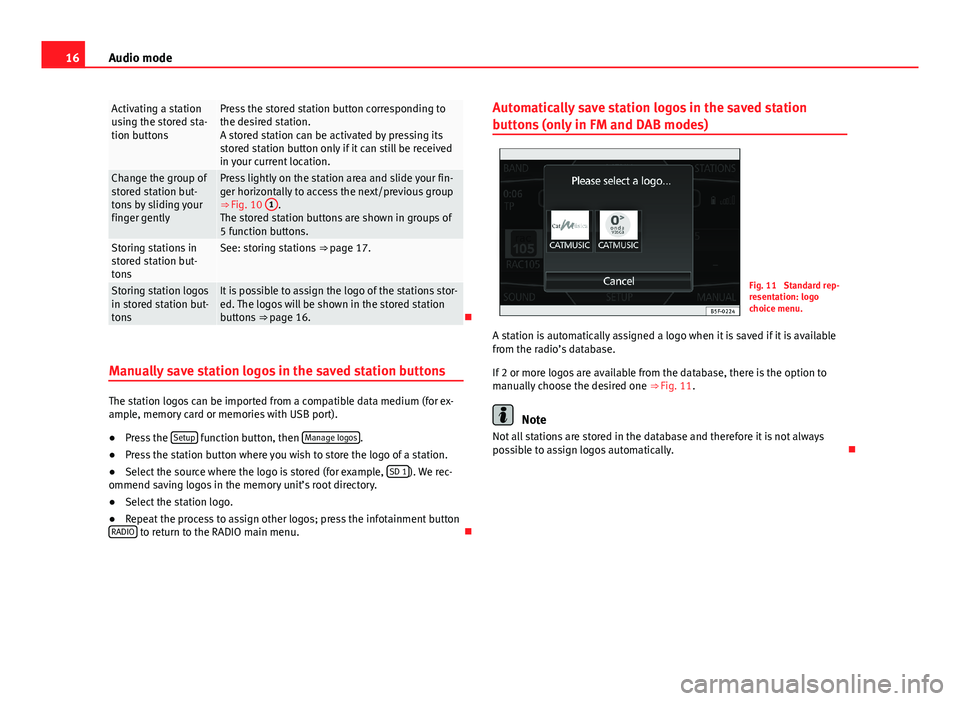
Fig. 11
Standard rep-resentation: logochoice menu.
A station is automatically assigned a logo when it is saved if it is availablefrom the radio’s database.
If 2 or more logos are available from the database, there is the option tomanually choose the desired one ⇒ Fig. 11.
Note
Not all stations are stored in the database and therefore it is not alwayspossible to assign logos automatically.
Page 18 of 72
17Audio modeSelecting, adjusting and storing a stationFig. 12
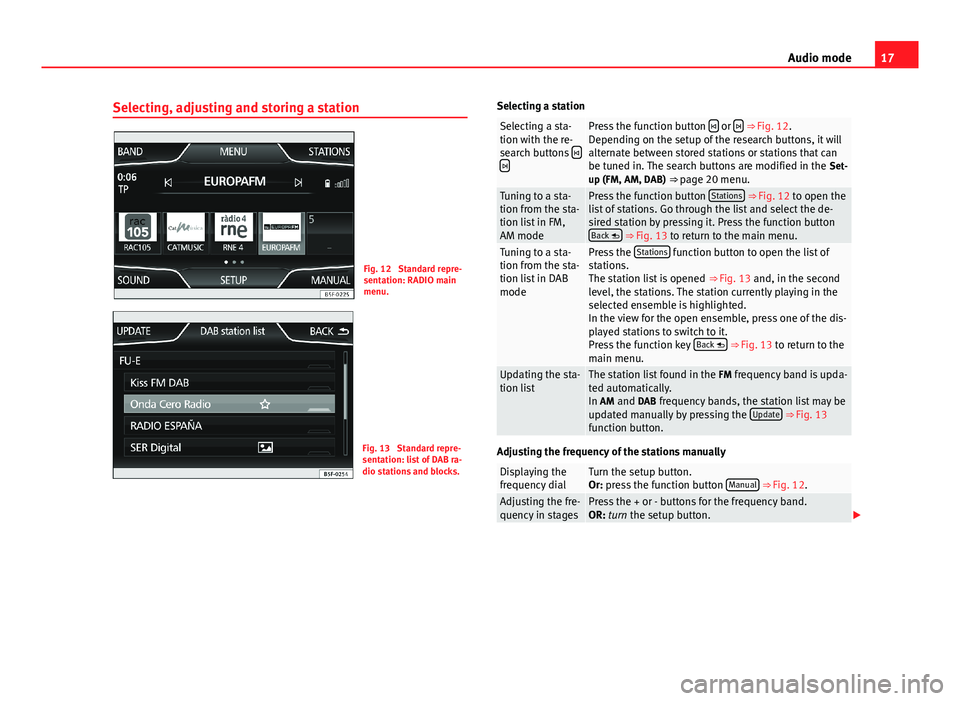
Standard repre-sentation: RADIO mainmenu.
Fig. 13
Standard repre-sentation: list of DAB ra-dio stations and blocks.
Selecting a stationSelecting a sta-tion with the re-search buttons
Press the function button or ⇒ Fig. 12.Depending on the setup of the research buttons, it willalternate between stored stations or stations that canbe tuned in. The search buttons are modified in the Set-up (FM, AM, DAB) ⇒ page 20 menu.
Tuning to a sta-tion from the sta-tion list in FM,AM mode
Press the function button Stations ⇒ Fig. 12 to open thelist of stations. Go through the list and select the de-sired station by pressing it. Press the function buttonBack ⇒ Fig. 13 to return to the main menu.
Tuning to a sta-tion from the sta-tion list in DABmode
Press the Stations function button to open the list ofstations.The station list is opened ⇒ Fig. 13 and, in the secondlevel, the stations. The station currently playing in theselected ensemble is highlighted.In the view for the open ensemble, press one of the dis-played stations to switch to it.Press the function key Back ⇒ Fig. 13 to return to themain menu.
Updating the sta-tion listThe station list found in the FM frequency band is upda-ted automatically.In AM and DAB frequency bands, the station list may beupdated manually by pressing the Update ⇒ Fig. 13function button.
Adjusting the frequency of the stations manually
Displaying thefrequency dialTurn the setup button.Or: press the function button Manual ⇒ Fig. 12.Adjusting the fre-quency in stagesPress the + or - buttons for the frequency band.OR: turn the setup button.
Page 19 of 72
18Audio modeBrowsing the fre-quency bandquickly
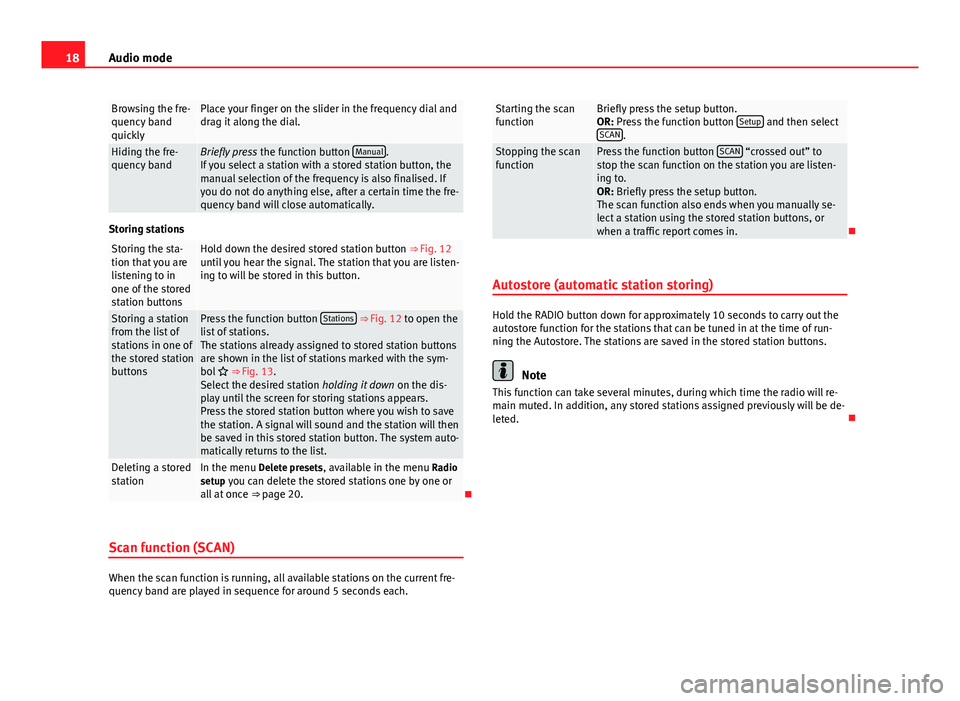
Place your finger on the slider in the frequency dial anddrag it along the dial.Hiding the fre-quency bandBriefly press the function button Manual.If you select a station with a stored station button, themanual selection of the frequency is also finalised. Ifyou do not do anything else, after a certain time the fre-quency band will close automatically.
Storing stations
Storing the sta-tion that you arelistening to inone of the storedstation buttons
Hold down the desired stored station button ⇒ Fig. 12until you hear the signal. The station that you are listen-ing to will be stored in this button.
Storing a stationfrom the list ofstations in one ofthe stored stationbuttons
Press the function button Stations ⇒ Fig. 12 to open thelist of stations.The stations already assigned to stored station buttonsare shown in the list of stations marked with the sym-bol ⇒ Fig. 13.Select the desired station holding it down on the dis-play until the screen for storing stations appears.Press the stored station button where you wish to savethe station. A signal will sound and the station will thenbe saved in this stored station button. The system auto-matically returns to the list.
Deleting a storedstationIn the menu Delete presets, available in the menu Radiosetup you can delete the stored stations one by one orall at once ⇒ page 20.
Scan function (SCAN)
When the scan function is running, all available stations on the current fre-quency band are played in sequence for around 5 seconds each.
Starting the scanfunctionBriefly press the setup button.OR: Press the function button Setup and then selectSCAN.
Stopping the scanfunctionPress the function button SCAN “crossed out” tostop the scan function on the station you are listen-ing to.OR: Briefly press the setup button.The scan function also ends when you manually se-lect a station using the stored station buttons, orwhen a traffic report comes in.
Autostore (automatic station storing)
Hold the RADIO button down for approximately 10 seconds to carry out theautostore function for the stations that can be tuned in at the time of run-ning the Autostore. The stations are saved in the stored station buttons.
Note
This function can take several minutes, during which time the radio will re-main muted. In addition, any stored stations assigned previously will be de-leted.
Page 20 of 72
19Audio modeStation list (only in FM mode)Fig. 14
Standard repre-sentation: FM station listmenu
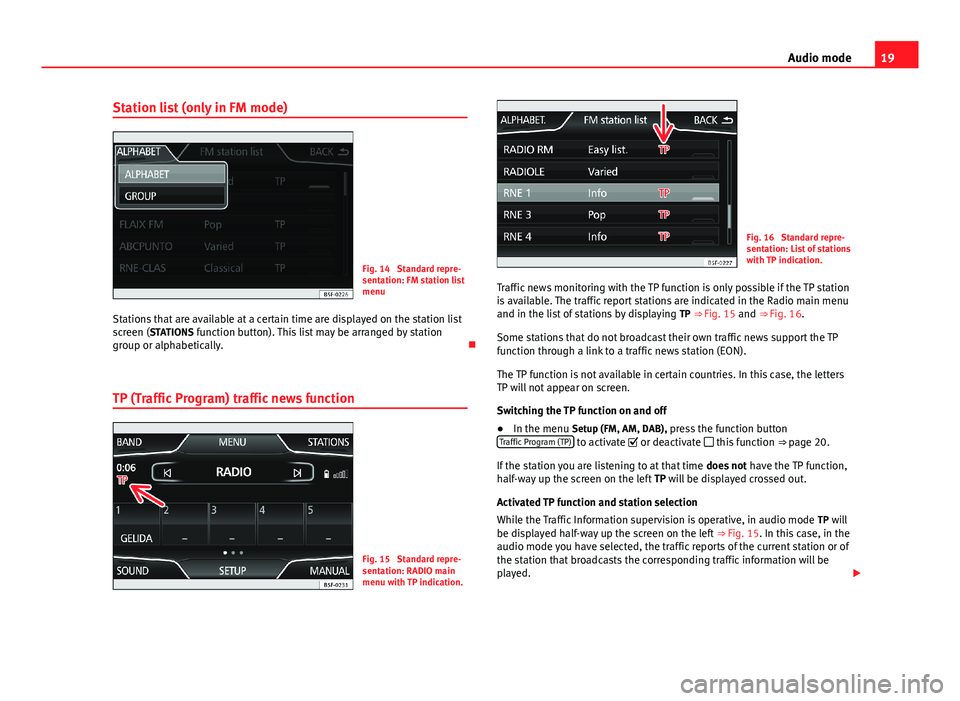
Stations that are available at a certain time are displayed on the station listscreen (STATIONS function button). This list may be arranged by stationgroup or alphabetically.
TP (Traffic Program) traffic news function
Fig. 15
Standard repre-sentation: RADIO mainmenu with TP indication.
Fig. 16
Standard repre-sentation: List of stationswith TP indication.
Traffic news monitoring with the TP function is only possible if the TP stationis available. The traffic report stations are indicated in the Radio main menuand in the list of stations by displaying TP ⇒ Fig. 15 and ⇒ Fig. 16.
Some stations that do not broadcast their own traffic news support the TPfunction through a link to a traffic news station (EON).
The TP function is not available in certain countries. In this case, the lettersTP will not appear on screen.
Switching the TP function on and off
●
In the menu Setup (FM, AM, DAB), press the function buttonTraffic Program (TP) to activate or deactivate this function ⇒ page 20.
If the station you are listening to at that time does not have the TP function,half-way up the screen on the left TP will be displayed crossed out.
Activated TP function and station selection
While the Traffic Information supervision is operative, in audio mode TP willbe displayed half-way up the screen on the left ⇒ Fig. 15. In this case, in theaudio mode you have selected, the traffic reports of the current station or ofthe station that broadcasts the corresponding traffic information will beplayed.