Seat Leon SC 2014 MEDIA SYSTEM TOUCH - COLOUR
Manufacturer: SEAT, Model Year: 2014, Model line: Leon SC, Model: Seat Leon SC 2014Pages: 44, PDF Size: 1.45 MB
Page 31 of 44
PHONE mode*
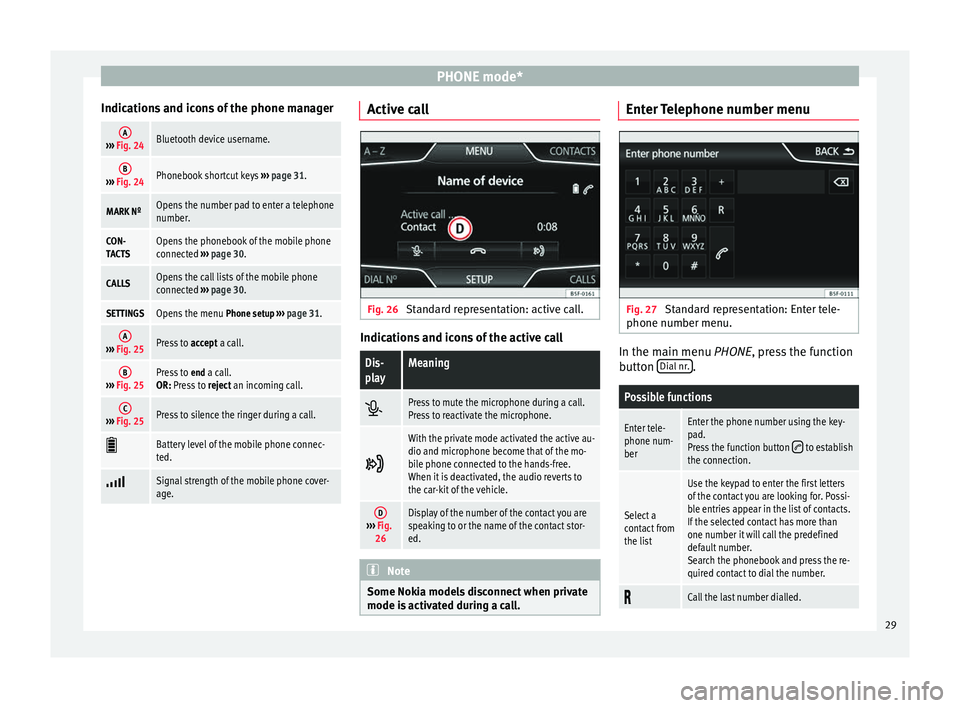
Indications and icons of the phone managerA››› Fig. 24Bluetooth device username.
B››› Fig. 24Phonebook shortcut keys ››› page 31.
MARK NºOpens the number pad to enter a telephone
number.
CON-
TACTSOpens the phonebook of the mobile phone
connected ››› page 30.
CALLSOpens the call lists of the mobile phone
connected ››› page 30.
SETTINGSOpens the menu Phone setup ››› page 31.
A››› Fig. 25Press to accept a call.
B››› Fig. 25Press to end a call.
OR: Press to reject an incoming call.
C››› Fig. 25Press to silence the ringer during a call.
Battery level of the mobile phone connec-
ted.
Signal strength of the mobile phone cover-
age. Active call
Fig. 26
Standard representation: active call. Indications and icons of the active call
Dis-
playMeaning
Press to mute the microphone during a call.
Press to reactivate the microphone.
With the private mode activated the active au-
dio and microphone become that of the mo-
bile phone connected to the hands-free.
When it is deactivated, the audio reverts to
the car-kit of the vehicle.
D›››
Fig.
26Display of the number of the contact you are
speaking to or the name of the contact stor-
ed. Note
Some Nokia models disconnect when private
mode is activated during a call. Enter Telephone number menu
Fig. 27
Standard representation: Enter tele-
phone number menu. In the main menu
PHONE
, press the function
b
utton Dial nr. .
Possible functions
Enter tele-
phone num-
berEnter the phone number using the key-
pad.
Press the function button
to establish
the connection.
Select a
contact from
the list
Use the keypad to enter the first letters
of the contact you are looking for. Possi-
ble entries appear in the list of contacts.
If the selected contact has more than
one number it will call the predefined
default number.
Search the phonebook and press the re-
quired contact to dial the number.
Call the last number dialled.
29
Page 32 of 44
PHONE mode*
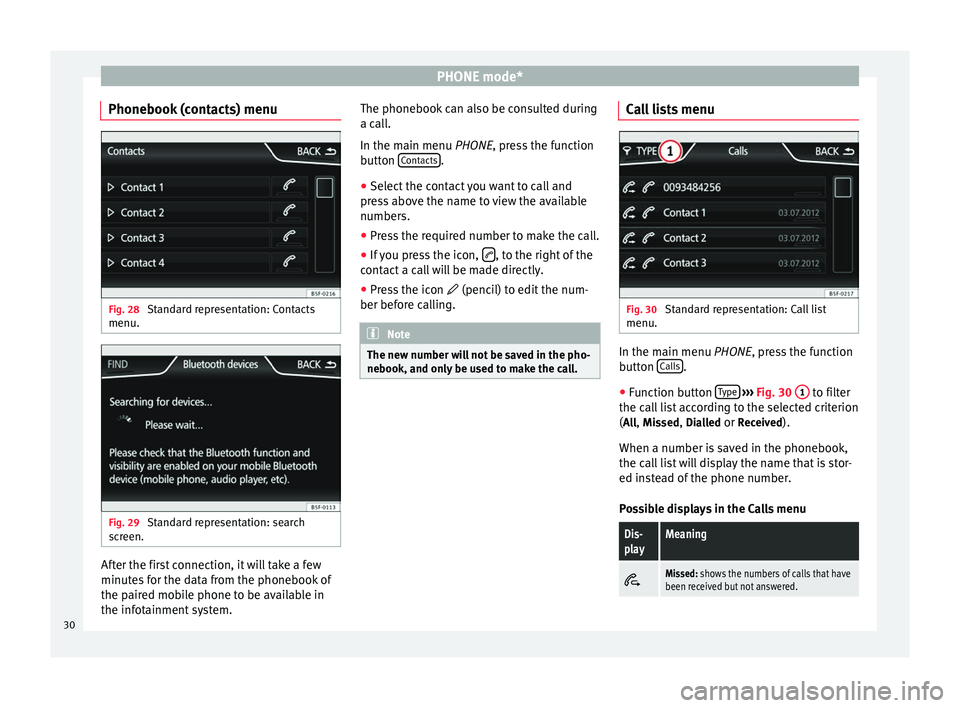
Phonebook (contacts) menu Fig. 28
Standard representation: Contacts
menu. Fig. 29
Standard representation: search
screen. After the first connection, it will take a few
minutes for the data from the phonebook of
the paired mobile phone to be available in
the infotainment system. The phonebook can also be consulted during
a call.
In the main menu
PHONE
, press the function
b
utton Contacts .
● Select the contact you want to call and
press above the name to view the available
numbers.
● Press the required number to make the call.
● If you press the icon, , to the right of the
contact a call will be made directly.
● Press the icon (pencil) to edit the num-
ber before calling. Note
The new number will not be saved in the pho-
nebook, and only be used to make the call. Call lists menu
Fig. 30
Standard representation: Call list
menu. In the main menu
PHONE
, press the function
b
utton Calls .
● Function button Type
›››
Fig. 30 1 to filter
the call list according to the selected criterion
( All
, Missed
, Dialled
or Received
).
When a number is saved in the phonebook,
the call list will display the name that is stor-
ed instead of the phone number.
Possible displays in the Calls menu
Dis-
playMeaning
Missed: shows the numbers of calls that have
been received but not answered. 30
Page 33 of 44
PHONE mode*Dis-
playMeaning
Dialled: shows the numbers that have been
dialled using the mobile phone and phone
manager of the infotainment system.
Received: shows the numbers of the calls re-
ceived by the mobile phone and telephone
manager of the infotainment system and that
have been answered.
Note
The call list display will depend on the mobile
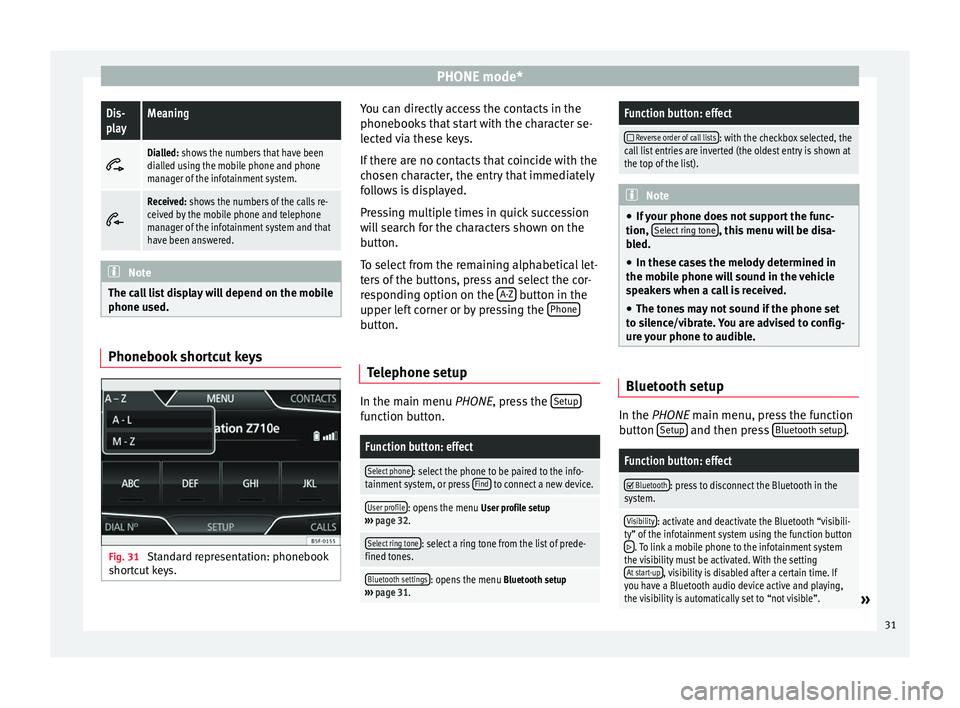
phone used. Phonebook shortcut keys
Fig. 31
Standard representation: phonebook
shortcut keys. You can directly access the contacts in the
phonebooks that start with the character se-
lected via these keys.
If there are no contacts that coincide with the
chosen character, the entry that immediately
follows is displayed.
Pressing multiple times in quick succession
will search for the characters shown on the
button.
To select from the remaining alphabetical let-
ters of the buttons, press and select the cor-
responding option on the
A-Z button in the
upper left corner or by pressing the Phone button.
Telephone setup In the main menu
PHONE
, press the Set
up function button.
Function button: effect
Select phone: select the phone to be paired to the info-
tainment system, or press Find to connect a new device.
User profile: opens the menu
User profile setup
››› page 32.
Select ring tone: select a ring tone from the list of prede-
fined tones.
Bluetooth settings: opens the menu Bluetooth setup
››› page 31.
Function button: effect
Reverse order of call lists: with the checkbox selected, the
call list entries are inverted (the oldest entry is shown at
the top of the list). Note
● If your phone does not support the func-
tion, Select ring tone , this menu will be disa-
bled.
● In these cases the melody determined in
the mobile phone will sound in the vehicle
speakers when a call is received.
● The tones may not sound if the phone set
to silence/vibrate. You are advised to config-
ure your phone to audible. Bluetooth setup
In the
PHONE
main menu, press the function
b
utton Setup and then press
Bluetooth setup .
Function button: effect
Bluetooth: press to disconnect the Bluetooth in the
system.
Visibility: activate and deactivate the Bluetooth “visibili-
ty” of the infotainment system using the function button
. To link a mobile phone to the infotainment system
the visibility must be activated. With the setting At start-up
, visibility is disabled after a certain time. If
you have a Bluetooth audio device active and playing,
the visibility is automatically set to “not visible”.
» 31
Page 34 of 44
PHONE mode*Function button: effect
Name: when you open this option it opens a keyboard,
with which you can modify the default name of the de-
vice.
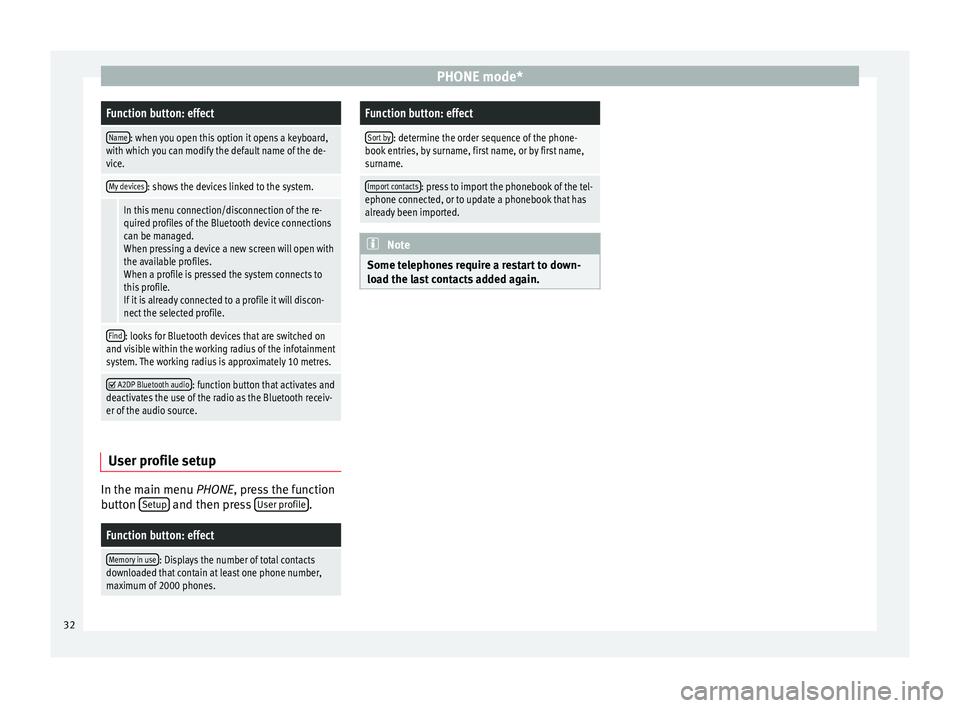
My devices: shows the devices linked to the system.
In this menu connection/disconnection of the re-
quired profiles of the Bluetooth device connections
can be managed.
When pressing a device a new screen will open with
the available profiles.
When a profile is pressed the system connects to
this profile.
If it is already connected to a profile it will discon-
nect the selected profile.
Find: looks for Bluetooth devices that are switched on
and visible within the working radius of the infotainment
system. The working radius is approximately 10 metres.
A2DP Bluetooth audio: function button that activates and
deactivates the use of the radio as the Bluetooth receiv-
er of the audio source. User profile setup
In the main menu
PHONE
, press the function
b
utton Setup and then press
User profile .
Function button: effect
Memory in use: Displays the number of total contacts
downloaded that contain at least one phone number,
maximum of 2000 phones.
Function button: effect
Sort by: determine the order sequence of the phone-
book entries, by surname, first name, or by first name,
surname.
Import contacts: press to import the phonebook of the tel-
ephone connected, or to update a phonebook that has
already been imported. Note
Some telephones require a restart to down-
load the last contacts added again. 32
Page 35 of 44
CAR menu
CAR menu Introduction to managing the
CAR menu CAR menu Press the Infotainment button,
CAR , to ac-
cess the following options, described below:
● JOURNEY
● STATUS
● TYRES
● ECO
● SETUP ›››
Booklet Instruction Manual,
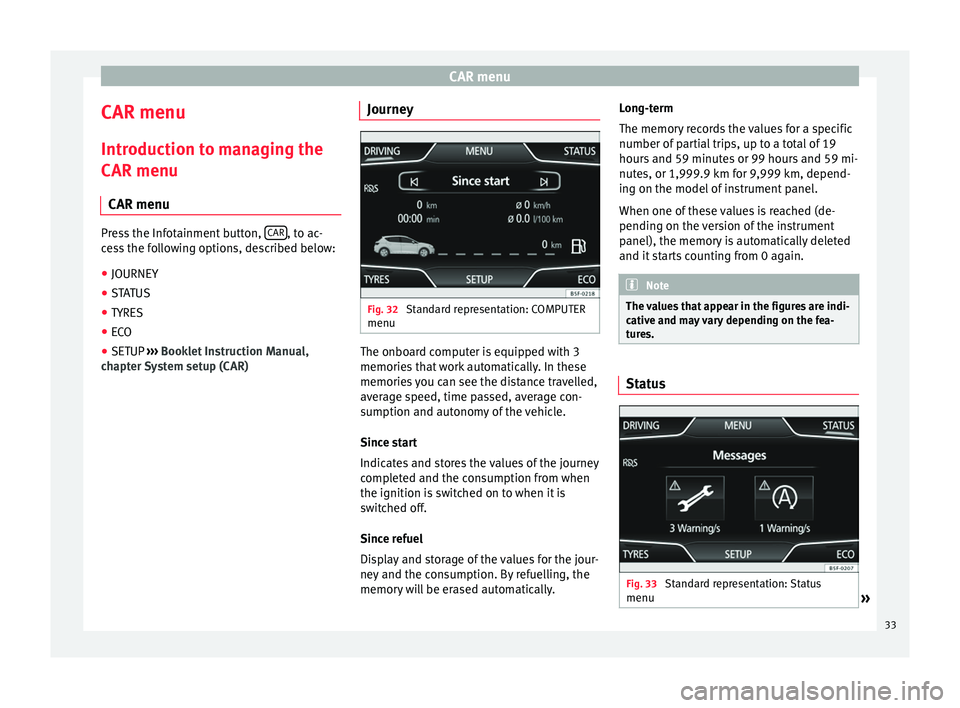
chapter System setup (CAR) Journey Fig. 32
Standard representation: COMPUTER
menu The onboard computer is equipped with 3
memories that work automatically. In these
memories you can see the distance travelled,
average speed, time passed, average con-
sumption and autonomy of the vehicle.
Since start
Indicates and stores the values of the journey
completed and the consumption from when
the ignition is switched on to when it is
switched off.
Since refuel
Display and storage of the values for the jour-
ney and the consumption. By refuelling, the
memory will be erased automatically.Long-term
The memory records the values for a specific
number of partial trips, up to a total of 19
hours and 59 minutes or 99 hours and 59 mi-
nutes, or 1,999.9 km for 9,999 km, depend-
ing on the model of instrument panel.
When one of these values is reached (de-
pending on the version of the instrument
panel), the memory is automatically deleted
and it starts counting from 0 again.
Note
The values that appear in the figures are indi-
cative and may vary depending on the fea-
tures. Status
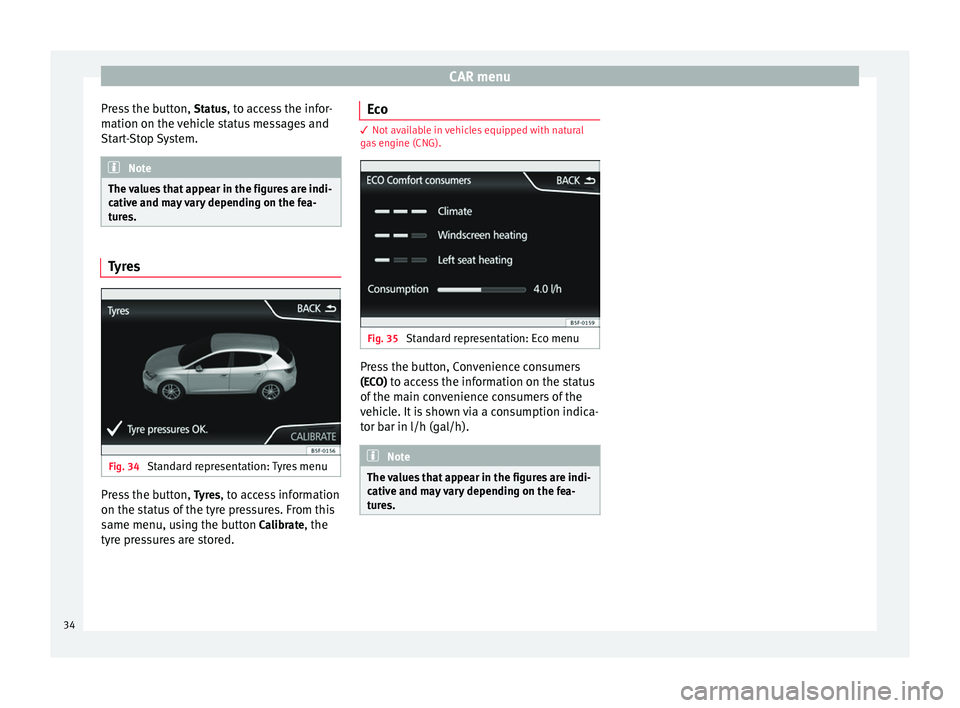
Fig. 33
Standard representation: Status
menu » 33
Page 36 of 44
CAR menu
Press the button, Status, to access the infor-
mation on the vehicle status messages and
Start-Stop System. Note
The values that appear in the figures are indi-
cative and may vary depending on the fea-
tures. Tyres
Fig. 34
Standard representation: Tyres menu Press the button,
Tyres
, to access information
on the status of the tyre pressures. From this
same menu, using the button Calibrate
, the
tyre pressures are stored. Eco 3
Not available in vehicles equipped with natural
gas engine (CNG). Fig. 35
Standard representation: Eco menu Press the button, Convenience consumers
(ECO) to access the information on the status
of the main convenience consumers of the
vehicle. It is shown via a consumption indica-
tor bar in l/h (gal/h). Note
The values that appear in the figures are indi-
cative and may vary depending on the fea-
tures. 34
Page 37 of 44
Air Conditioning Menu
Air Conditioning Menu
Air conditioning Adjust using the Easy Connect
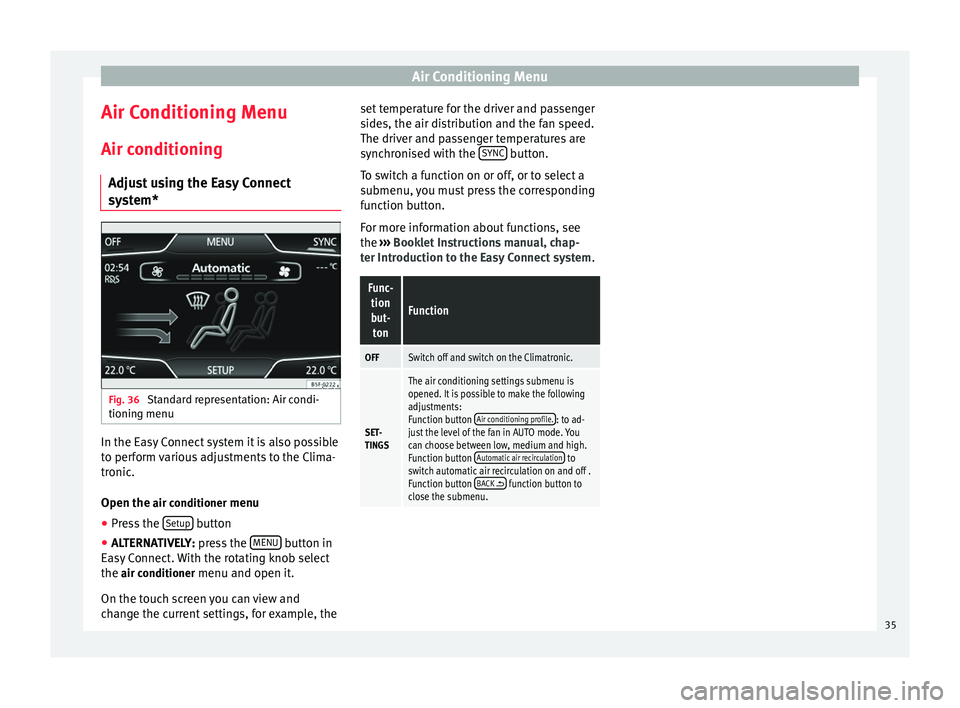
system* Fig. 36
Standard representation: Air condi-
tioning menu In the Easy Connect system it is also possible
to perform various adjustments to the Clima-
tronic.
Open the
air conditioner
menu
● Press the Setup button
● ALTERNATIVELY: press the MENU button in
Easy Connect. With the rotating knob select
the air conditioner
menu and open it.
On the touch screen you can view and
change the current settings, for example, the set temperature for the driver and passenger
sides, the air distribution and the fan speed.
The driver and passenger temperatures are
synchronised with the
SYNC button.
To switch a function on or off, or to select a
submenu, you must press the corresponding
function button.
For more information about functions, see
the ››› Booklet Instructions manual, chap-
ter Introduction to the Easy Connect system .Func-
tion
but- ton
Function
OFFSwitch off and switch on the Climatronic.
SET-
TINGS
The air conditioning settings submenu is
opened. It is possible to make the following
adjustments:
Function button Air conditioning profile.
: to ad-
just the level of the fan in AUTO mode. You
can choose between low, medium and high.
Function button Automatic air recirculation
to
switch automatic air recirculation on and off .
Function button BACK
function button to
close the submenu. 35
Page 38 of 44
Setup
Setup
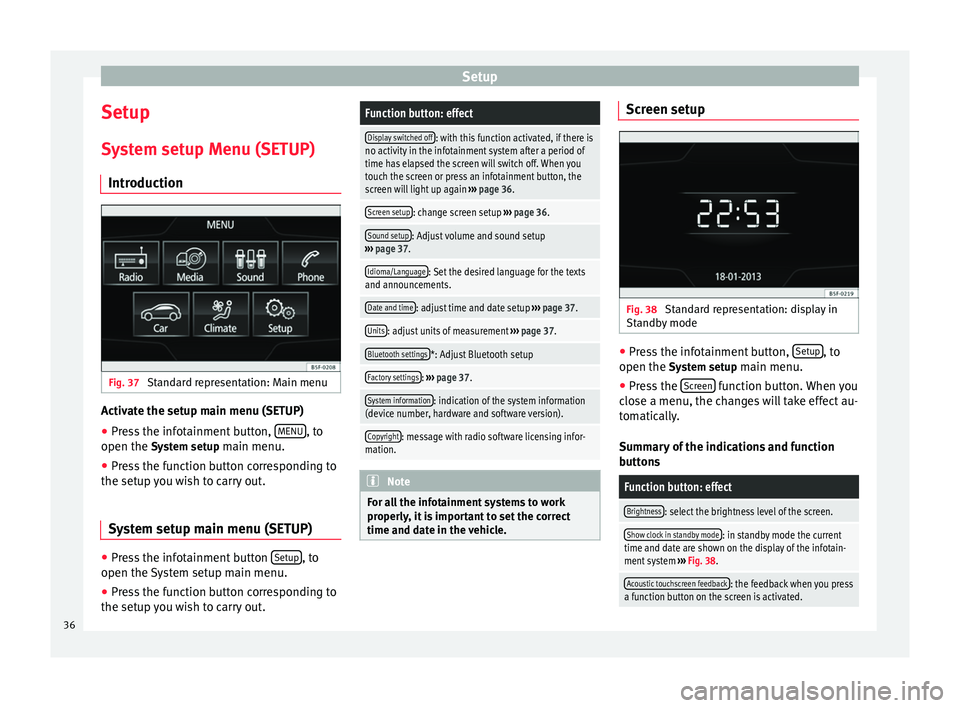
System setup Menu (SETUP) Introduction Fig. 37
Standard representation: Main menu Activate the setup main menu (SETUP)
● Press the infotainment button, MENU , to
open the System setup
main menu.
● Press the function button corresponding to
the setup you wish to carry out.
System setup main menu (SETUP) ●
Press the infotainment button Setup , to
open the System setup main menu.
● Press the function button corresponding to
the setup you wish to carry out.Function button: effect
Display switched off: with this function activated, if there is
no activity in the infotainment system after a period of
time has elapsed the screen will switch off. When you
touch the screen or press an infotainment button, the
screen will light up again ››› page 36.
Screen setup: change screen setup ››› page 36.
Sound setup: Adjust volume and sound setup
››› page 37.
Idioma/Language: Set the desired language for the texts
and announcements.
Date and time: adjust time and date setup ››› page 37.
Units: adjust units of measurement ››› page 37.
Bluetooth settings*: Adjust Bluetooth setup
Factory settings: ››› page 37.
System information: indication of the system information
(device number, hardware and software version).
Copyright: message with radio software licensing infor-
mation. Note
For all the infotainment systems to work
properly, it is important to set the correct
time and date in the vehicle. Screen setup
Fig. 38
Standard representation: display in
Standby mode ●
Press the infotainment button, Setup , to
open the System setup
main menu.
● Press the Screen function button. When you
close a menu, the changes will take effect au-
tomatically.
Summary of the indications and function
buttons
Function button: effect
Brightness: select the brightness level of the screen.
Show clock in standby mode: in standby mode the current
time and date are shown on the display of the infotain-
ment system ››› Fig. 38.
Acoustic touchscreen feedback: the feedback when you press
a function button on the screen is activated. 36
Page 39 of 44
Setup
Setting the menu language The screen language can be adjusted.
● Press the infotainment button, Setup to
open the System setup main menu.
● Pr e
ss the function button, Idioma/Language .
● Press to select the required language from
the list.
Date and time ●
Press the infotainment button, Setup to
open the System setup
main menu.
● Press the function button, Time and Date.
Summary of the indications and function
buttons
Function button: effect
Time: set the time by pressing the arrow buttons or.
Time format: select the time format (12 or 24 hour clock).
Automatic summer time: Summer (DST) is automatically
adjusted.
Date: set the time by pressing the arrow buttons or.
Date format: select the date format. Units
1) ●
Press the infotainment button, Setup to
open the System setup main menu.
● Pr e
ss the function button, Units.
Factory settings Restoring default settings
When you reset the settings to the vehicle's
default setup, all the data entered is deleted
accordingly,
in addition to the setup config-
ur ed
.
● Scroll through the list below and press the
lower function button, Factory settings .
● Select the required setting or the option
All .
● Confirm the safety question that appears
by pressing the function button Reset .
Note
The music files stored on the unit's hard disk
must be manually deleted. Sound and volume setup
Introduction Depending on the country, the unit and the
vehicle equipment, there may be differences
in the variety of settings.
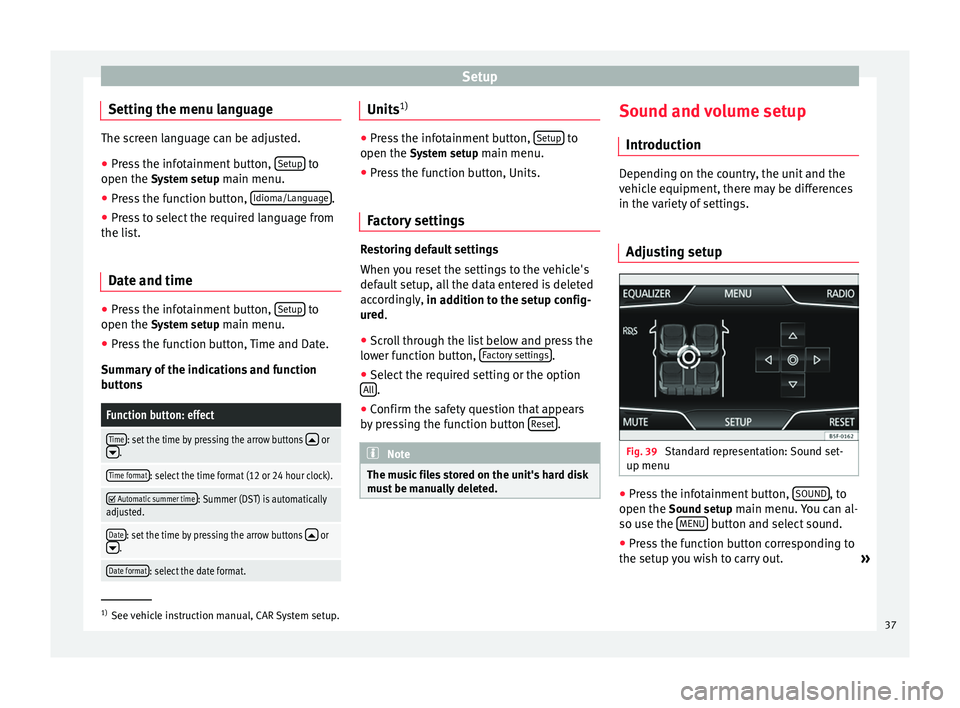
Adjusting setup Fig. 39
Standard representation: Sound set-
up menu ●
Press the infotainment button, SOUND , to
open the Sound setup
main menu. You can al-
so use the MENU button and select sound.
● Press the function button corresponding to
the setup you wish to carry out. »1)
See vehicle instruction manual, CAR System setup.
37
Page 40 of 44
Abbreviations
When you close a menu, the changes will
take effect automatically.Summary of the indications and function but-
tons
Function button: effect
Balance - Fader: adjust the orientation of the sound (bal-
ance/fader). The circle displays the current orientation
of the sound inside the vehicle. To centre the orientation
of the sound in the passenger compartment, press the
button represented by two circles, located between the
arrows, or adjust progressively using the arrow buttons.
Alternatively, to centre the orientation of the sound in
the passenger compartment, press the function button
located between the arrows, or press reset. This function
can be modified in the SOUND
menu.
Equalizer: adjust sound setting characteristics (bass,
mid-range and treble). Press reset to lower the equalizer
level to 0.
Mute: function button to activate MUTE.
Miniplayer: displays the active audio source (Radio or
Media).
Setup: opens the Sound setup menu
Summary of the indications and function but-
tons
Function button: effect
Maximum switch-on volume: set the unit maximum vol-
ume when switching on. Traffic announcements
: set the playback volume of the
incoming messages (for example, traffic reports). Volume according to speed
: determine the volume setting
depending on the speed. The audio volume increases
automatically as the speed increases.
Acoustic touchscreen feedback: the feedback when you
press a function button on the screen is activated. Volume AUX
: determines the playback volume of the
audio sources connected via AUX. Bluetooth audio
: configure Bluetooth audio volume. Abbreviations
Abbreviations
Abbrevi-
ationMeaning
AMAmplitude modulation (medium wave, MW).
AUX-INAUX IN multimedia socket (auxiliary input).
FMFrequency modulation (very high frequency,
VHF).
RDSRadio data system.
TPTraffic Programme. 38