display Seat Leon SC 2014 Workshop Manual
[x] Cancel search | Manufacturer: SEAT, Model Year: 2014, Model line: Leon SC, Model: Seat Leon SC 2014Pages: 284, PDF Size: 5.85 MB
Page 165 of 284
Driver assistance systems
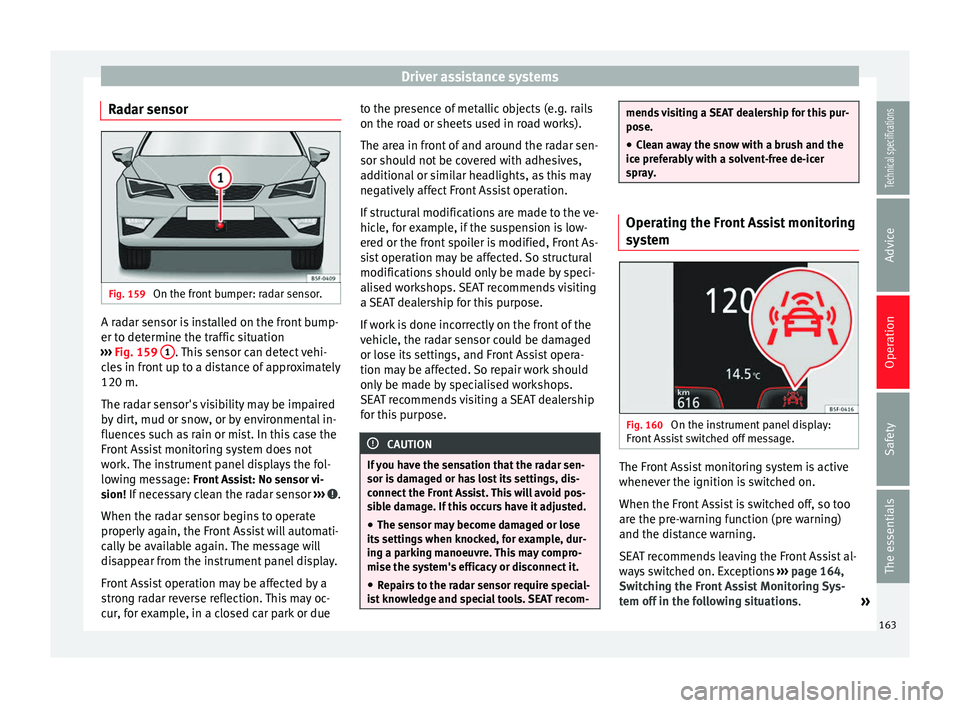
Radar sensor Fig. 159
On the front bumper: radar sensor. A radar sensor is installed on the front bump-
er to determine the traffic situation
››› Fig. 159 1 . This sensor can detect vehi-
cles in front up to a distance of approximately
120 m.
The radar sensor's visibility may be impaired
by dirt, mud or snow, or by environmental in-
fluences such as rain or mist. In this case the
Front Assist monitoring system does not
work. The instrument panel displays the fol-
lowing message: Front Assist: No sensor vi- sion! If necessary clean the radar sensor ››› .
When the radar sensor begins to operate
properly again, the Front Assist will automati-
cally be available again. The message will
disappear from the instrument panel display.
Front Assist operation may be affected by a
strong radar reverse reflection. This may oc-
cur, for example, in a closed car park or due to the presence of metallic objects (e.g. rails
on the road or sheets used in road works).
The area in front of and around the radar sen-
sor should not be covered with adhesives,
additional or similar headlights, as this may
negatively affect Front Assist operation.
If structural modifications are made to the ve-
hicle, for example, if the suspension is low-
ered or the front spoiler is modified, Front As-
sist operation may be affected. So structural
modifications should only be made by speci-
alised workshops. SEAT recommends visiting
a SEAT dealership for this purpose.
If work is done incorrectly on the front of the
vehicle, the radar sensor could be damaged
or lose its settings, and Front Assist opera-
tion may be affected. So repair work should
only be made by specialised workshops.
SEAT recommends visiting a SEAT dealership
for this purpose.
CAUTION
If you have the sensation that the radar sen-
sor is damaged or has lost its settings, dis-
connect the Front Assist. This will avoid pos-
sible damage. If this occurs have it adjusted. ● The sensor may become damaged or lose
its settings when knocked, for example, dur-
ing a parking manoeuvre. This may compro-
mise the system's efficacy or disconnect it.
● Repairs to the radar sensor require special-
ist knowledge and special tools. SEAT recom- mends visiting a SEAT dealership for this pur-
pose.
● Clean away the snow with a brush and the
ice preferably with a solvent-free de-icer
spray. Operating the Front Assist monitoring
system
Fig. 160
On the instrument panel display:
Front Assist switched off message. The Front Assist monitoring system is active
whenever the ignition is switched on.
When the Front Assist is switched off, so too
are the pre-warning function (pre warning)
and the distance warning.
SEAT recommends leaving the Front Assist al-
ways switched on. Exceptions
››› page 164,
Switching the Front Assist Monitoring Sys-
tem off in the following situations .
»
163Technical specifications
Advice
Operation
Safety
The essentials
Page 166 of 284
Operation
Switching the Front Assist monitoring
system on and off
With the ignition switched on, the Front As-
sist can be switched on and off as follows:
● Select the corresponding menu option us-
ing the button for the driver assist systems
››› page 73 .
● OR: switch the system on or off in the Easy
C onnect
system with the button and the
function buttons and
Driver Assist ›››
page 17
.
When the Fr ont
Assist monitoring system is
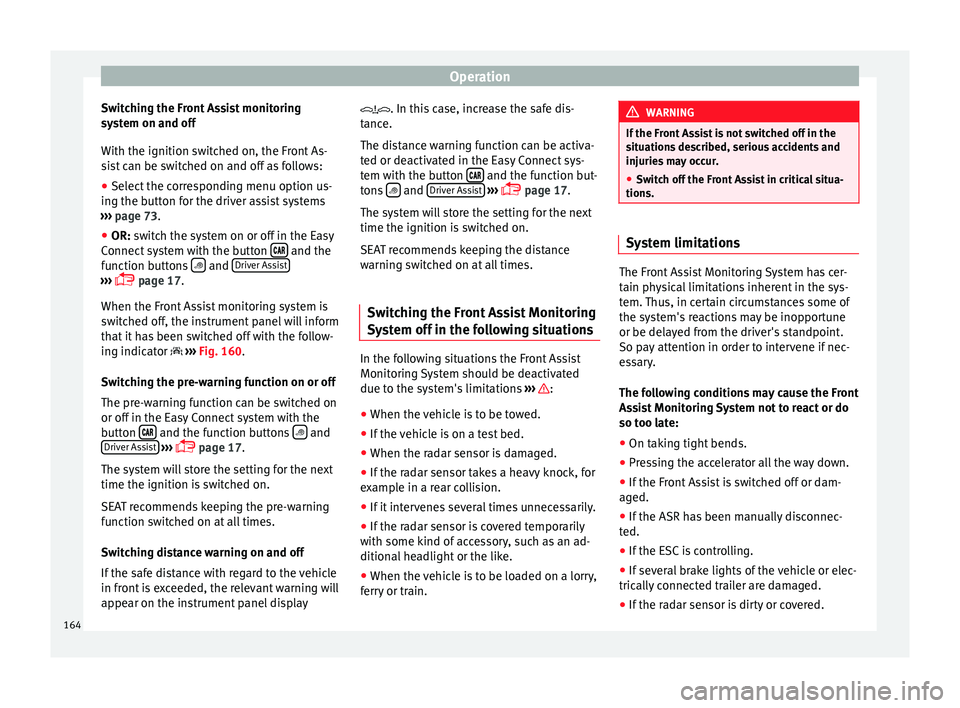
switched off, the instrument panel will inform
that it has been switched off with the follow-
ing indicator ››› Fig. 160
.
Switching the pre-warning function on or off
The pre-warning function can be switched on
or off in the Easy Connect system with the
button and the function buttons
and
Driver Assist
›››
page 17.
The system will store the setting for the next
time the ignition is switched on.
SEAT recommends keeping the pre-warning
function switched on at all times.
Switching distance warning on and off
If the safe distance with regard to the vehicle
in front is exceeded, the relevant warning will
appear on the instrument panel display . In this case, increase the safe dis-
tance.
The distance warning function can be activa-
ted or deactivated in the Easy Connect sys-
tem with the button
and the function but-
tons and
Driver Assist
›››
page 17.
The system will store the setting for the next
time the ignition is switched on.
SEAT recommends keeping the distance
warning switched on at all times.
Switching the Front Assist Monitoring
System off in the following situations In the following situations the Front Assist
Monitoring System should be deactivated
due to the system's limitations
››› :
● When the vehicle is to be towed.
● If the vehicle is on a test bed.
● When the radar sensor is damaged.
● If the radar sensor takes a heavy knock, for
example in a rear collision.
● If it intervenes several times unnecessarily.
● If the radar sensor is covered temporarily
with some kind of accessory, such as an ad-
ditional headlight or the like.
● When the vehicle is to be loaded on a lorry,
ferry or train. WARNING
If the Front Assist is not switched off in the
situations described, serious accidents and
injuries may occur.
● Switch off the Front Assist in critical situa-
tions. System limitations
The Front Assist Monitoring System has cer-
tain physical limitations inherent in the sys-
tem. Thus, in certain circumstances some of
the system's reactions may be inopportune
or be delayed from the driver's standpoint.
So pay attention in order to intervene if nec-
essary.
The following conditions may cause the Front
Assist Monitoring System not to react or do
so too late:
● On taking tight bends.
● Pressing the accelerator all the way down.
● If the Front Assist is switched off or dam-
aged.
● If the ASR has been manually disconnec-
ted.
● If the ESC is controlling.
● If several brake lights of the vehicle or elec-
trically connected trailer are damaged.
● If the radar sensor is dirty or covered.
164
Page 167 of 284
Driver assistance systems
● If there are metal objects, e.g. rails on the
road or sheets used in road works.
● If the vehicle is reversing.
● If the vehicle over-accelerates.
● In case of snow or heavy rain.
● In case of narrow vehicles, such as motor-
bikes.
● Misaligned vehicles.
● Vehicles crossing the other's path.
● Vehicles approaching in the opposite direc-
tion.
● Special loads and accessories of other ve-
hicles that jut out over the sides, backwards
or over the top. City Emergency braking function Fig. 161
On the instrument panel display:
pre-warning message The City Emergency braking function is part
of the Front Assist monitoring and is active
whenever the system is switched on.
Depending on the equipment, the pre-warn-
ing function can be switched on or off in the
Easy Connect system with the button
and
the function buttons and
Driver Assist ›››
page 17
.
The C ity
Emergency braking function picks
up, at speeds between 5 km/h (3 mph) and
30 km/h (19 mph) approximately, the traffic
situation in front of the vehicle up to a dis-
tance of about 10 m. If the system detects a possible collision with
a vehicle in front of it, the vehicle prepares
for a possible emergency braking
››› .
If the driver fails to react to a possible colli-
sion, the system may brake the vehicle auto-
matically, by progressively increasing braking
effect driving to reduce speed in the event of
a collision. The system can thus help to re-
duce the consequences of an accident.
Status display
Automatic deceleration by means of the City
Emergency braking function is displayed on
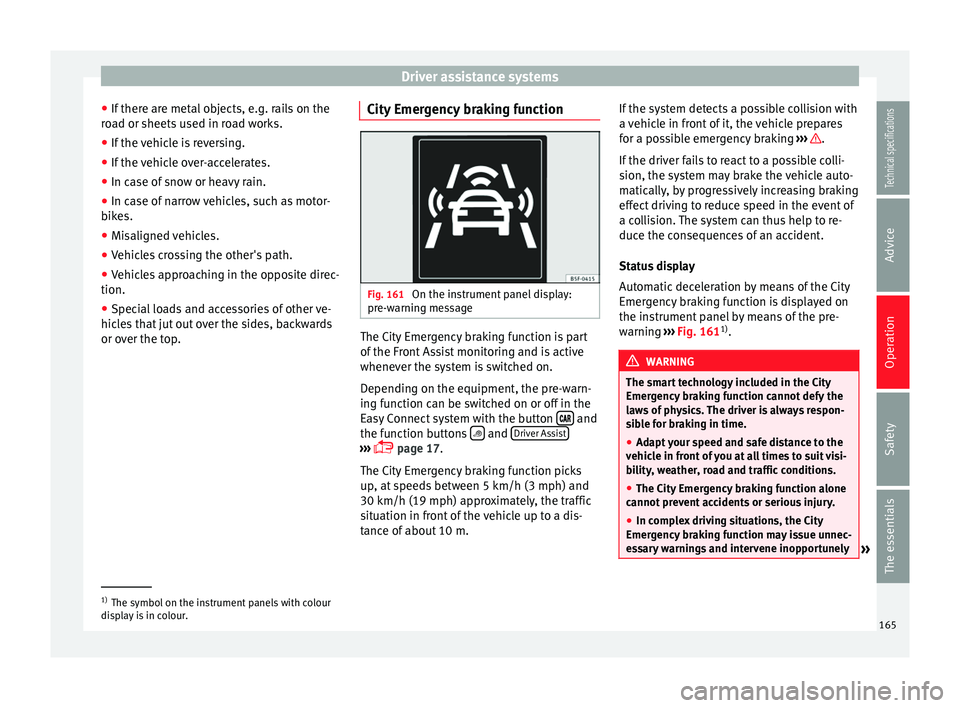
the instrument panel by means of the pre-
warning ››› Fig. 161 1)
. WARNING
The smart technology included in the City
Emergency braking function cannot defy the
laws of physics. The driver is always respon-
sible for braking in time.
● Adapt your speed and safe distance to the
vehicle in front of you at all times to suit visi-
bility, weather, road and traffic conditions.
● The City Emergency braking function alone
cannot prevent accidents or serious injury.
● In complex driving situations, the City
Emergency braking function may issue unnec-
essary warnings and intervene inopportunely »1)
The symbol on the instrument panels with colour
display is in colour. 165
Technical specifications
Advice
Operation
Safety
The essentials
Page 169 of 284
Driver assistance systems
Indication on the display and warning
lamps Fig. 162
On the instrument panel display: In-
dication on the Lane Assist system display
(example 1). Fig. 163
On the instrument panel display: In-
dication on the Lane Assist system display
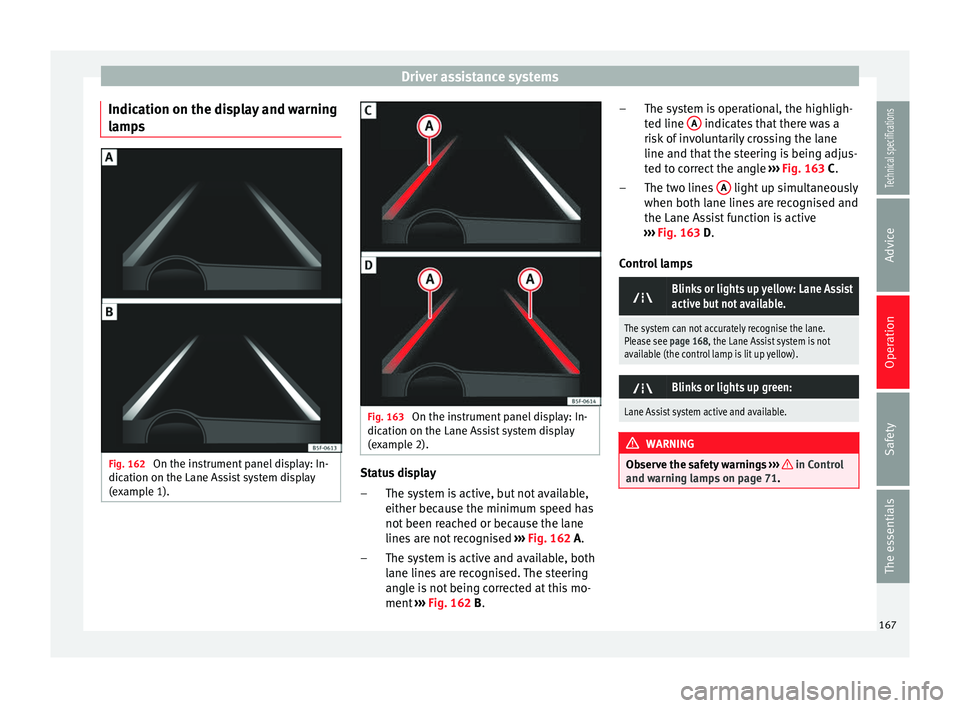
(example 2). Status display
The system is active, but not available,
either because the minimum speed has
not been reached or because the lane
lines are not recognised ››› Fig. 162
A.
The system is active and available, both
lane lines are recognised. The steering
angle is not being corrected at this mo-
ment ››› Fig. 162 B
.
–
– The system is operational, the highligh-
ted line
A indicates that there was a
risk of involuntarily crossing the lane
line and that the steering is being adjus-
ted to correct the angle ››› Fig. 163
C
.
The two lines A light up simultaneously
when both lane lines are recognised and
the Lane Assist function is active
››› Fig. 163
D
.
Control lamps
Blinks or lights up yellow: Lane Assist
active but not available.
The system can not accurately recognise the lane.
Please see page 168, the Lane Assist system is not
available (the control lamp is lit up yellow).
Blinks or lights up green:
Lane Assist system active and available.
WARNING
Observe the safety warnings ››› in Control
and warning lamps on page 71. –
–
167
Technical specifications
Advice
Operation
Safety
The essentials
Page 171 of 284
Driver assistance systems
Switching off the Lane Assist system
in the following situations Due to the limits of the Lane Assist system,
switch it off in the following situations:
● When more attention is required of the
driver
● When driving in a sporty style
● In unfavourable weather conditions
● On roads in poor condition
● In areas of road works Note
The Lane Assist system deactivates when
driving below 60 km/h (40 mph). SEAT driving modes (SEAT Drive
Profile)*
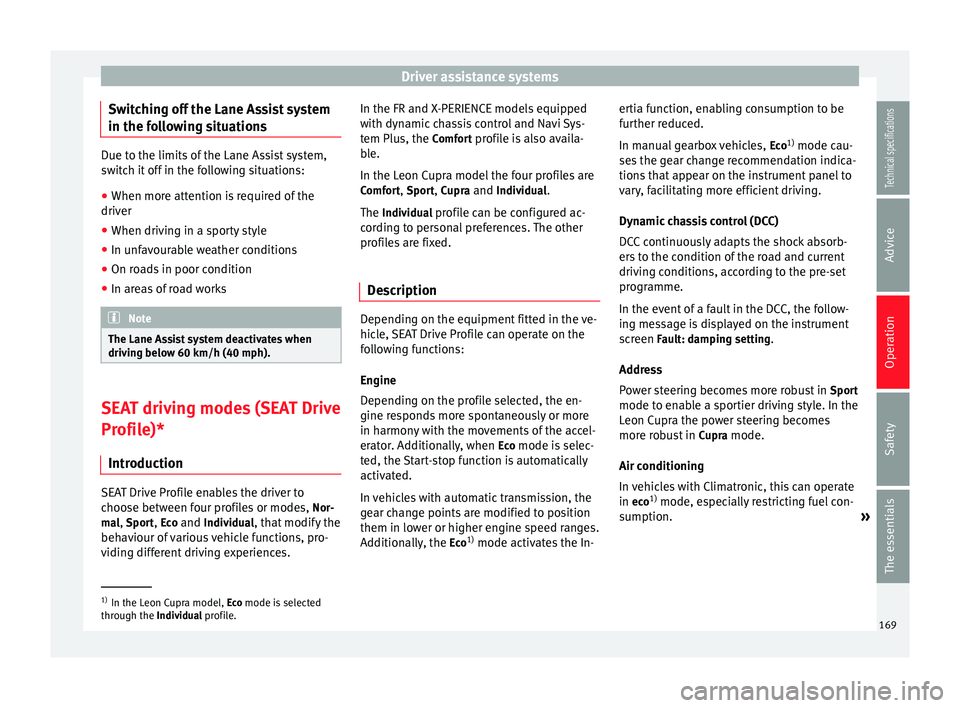
Introduction SEAT Drive Profile enables the driver to
choose between four profiles or modes,
Nor-
mal , Sport
, Eco
and Individual
, that modify the
behaviour of various vehicle functions, pro-
viding different driving experiences. In the FR and X-PERIENCE models equipped
with dynamic chassis control and Navi Sys-
tem Plus, the
Comfort profile is also availa-
b l
e.
In the Leon Cupra model the four profiles are Comfort, Sport, Cupra and Individual.
The Individual profile can be configured ac-
cor
ding to personal preferences. The other
profiles are fixed.
Description Depending on the equipment fitted in the ve-
hicle, SEAT Drive Profile can operate on the
following functions:
Engine
Depending on the profile selected, the en-
gine responds more spontaneously or more
in harmony with the movements of the accel-
erator. Additionally, when
Eco
mode is selec-
ted, the Start-stop function is automatically
activated.
In vehicles with automatic transmission, the
gear change points are modified to position
them in lower or higher engine speed ranges.
Additionally, the Eco1)
mode activates the In- ertia function, enabling consumption to be
further reduced.
In manual gearbox vehicles,
Eco1)
mode cau-
ses the gear change recommendation indica-
tions that appear on the instrument panel to
vary, facilitating more efficient driving.
Dynamic chassis control (DCC)
DCC continuously adapts the shock absorb-
ers to the condition of the road and current
driving conditions, according to the pre-set
programme.
In the event of a fault in the DCC, the follow-
ing message is displayed on the instrument
screen Fault: damping setting.
Address
Power steering becomes more robust in Sport
mode to enable a sportier driving style. In the
Leon Cupra the power steering becomes
more robust in Cupra mode.
Air conditioning
In vehicles with Climatronic, this can operate
in eco 1)
mode, especially restricting fuel con-
sumption. »1)
In the Leon Cupra model, Eco mode is selected
through the Individual profile.
169
Technical specifications
Advice
Operation
Safety
The essentials
Page 172 of 284
Operation
Ambient lighting
The ambient lighting guides located in the in-
terior front door panels of the Leon FR and
the Leon Cupra change colour from white to
red depending on the driving mode selected.
Adaptive Cruise Control (ACC) 1)
According to the active driving profile, the ac-
celeration gradient of the adaptive cruise
control varies.
Electronic self-locking differential 1)
The self-locking differential adapts its behav-
iour depending on the driving profile chosen.
Normal mode or Cupra mode can be selected
to prioritise improved traction in sport driv-
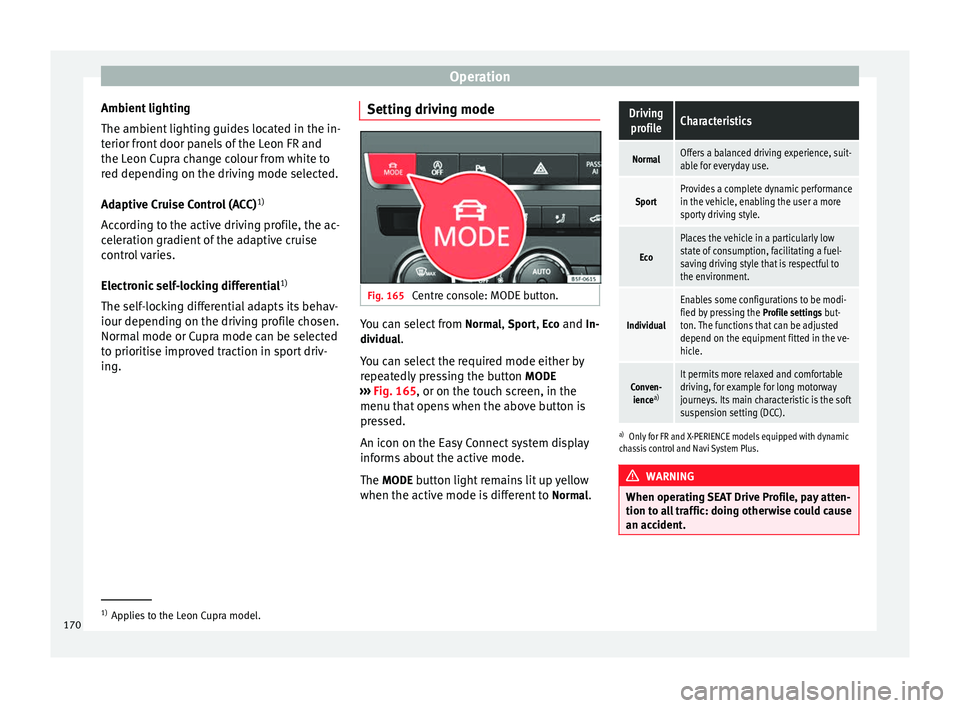
ing. Setting driving mode Fig. 165
Centre console: MODE button. You can select from
Normal
, Sport
, Eco
and In-
dividual .
You can select the required mode either by
repeatedly pressing the button MODE
››› Fig. 165 , or on the touch screen, in the
menu th at
opens when the above button is
pressed.
An icon on the Easy Connect system display
informs about the active mode.
The MODE
button light remains lit up yellow
when the active mode is different to Normal
.
Driving
profileCharacteristics
NormalOffers a balanced driving experience, suit-
able for everyday use.
SportProvides a complete dynamic performance
in the vehicle, enabling the user a more
sporty driving style.
Eco
Places the vehicle in a particularly low
state of consumption, facilitating a fuel-
saving driving style that is respectful to
the environment.
Individual
Enables some configurations to be modi-
fied by pressing the Profile settings but-
ton. The functions that can be adjusted
depend on the equipment fitted in the ve-
hicle.
Conven- ience a)It permits more relaxed and comfortable
driving, for example for long motorway
journeys. Its main characteristic is the soft
suspension setting (DCC).
a)
Only for FR and X-PERIENCE models equipped with dynamic
chassis control and Navi System Plus. WARNING
When operating SEAT Drive Profile, pay atten-
tion to all traffic: doing otherwise could cause
an accident. 1)
Applies to the Leon Cupra model.
170
Page 173 of 284
Driver assistance systems
Note
● When the vehicle is switched off it will al-
ways store the driving profile that was selec-
ted when the ignition key was removed. Nev-
ertheless, when the engine is restarted the
engine and the gear will not restart in its
sportier mode in order to save fuel. For en-
gine and gear to revert to a sportier mode,
select the corresponding driving profile again
on the Easy Connect system screen.
● Your speed and driving style must always
be adjusted to visibility, weather, and traffic
conditions.
● The eco mode is not available when towing
a tr ai
ler. Setting driving mode
3 Applies to the model: Leon Cupra
Fig. 166
Centre console: Cupra Drive Profile
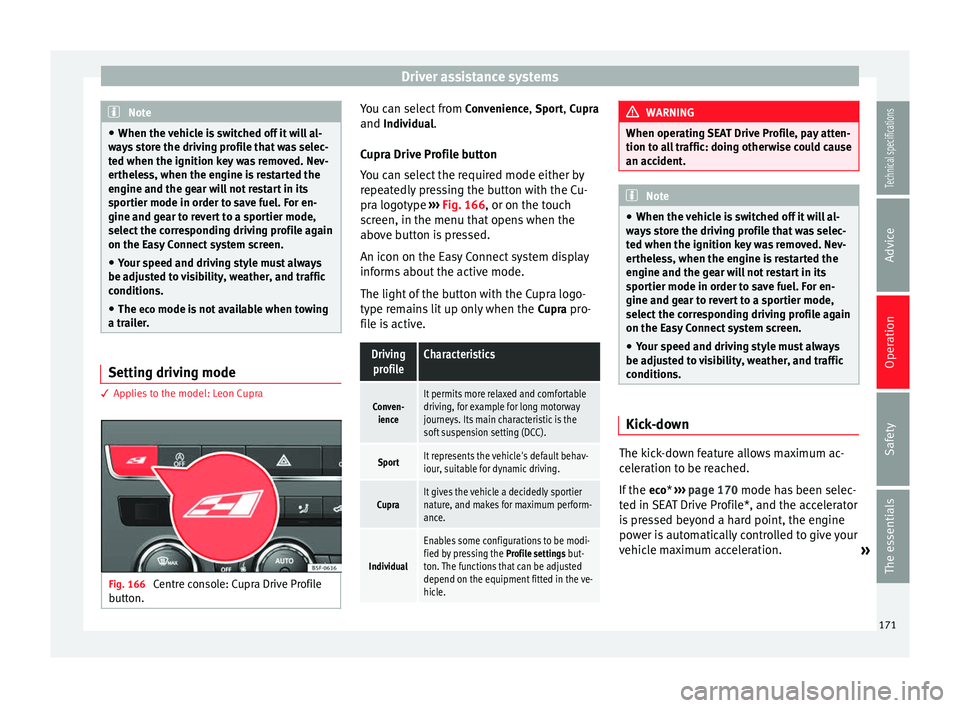
button. You can select from
Convenience, Sport,
Cupra
and
Individual.
Cupr a Drive Profile button
You can select the required mode either by
repeatedly pressing the button with the Cu-
pra logotype ››› Fig. 166, or on the touch
screen, in the menu that opens when the
above button is pressed.
An icon on the Easy Connect system display
informs about the active mode.
The light of the button with the Cupra logo-
type remains lit up only when the Cupra pro-
file is active.
Driving profileCharacteristics
Conven- ienceIt permits more relaxed and comfortable
driving, for example for long motorway
journeys. Its main characteristic is the
soft suspension setting (DCC).
SportIt represents the vehicle's default behav-
iour, suitable for dynamic driving.
CupraIt gives the vehicle a decidedly sportier
nature, and makes for maximum perform-
ance.
Individual
Enables some configurations to be modi-
fied by pressing the Profile settings but-
ton. The functions that can be adjusted
depend on the equipment fitted in the ve-
hicle. WARNING
When operating SEAT Drive Profile, pay atten-
tion to all traffic: doing otherwise could cause
an accident. Note
● When the vehicle is switched off it will al-
ways store the driving profile that was selec-
ted when the ignition key was removed. Nev-
ertheless, when the engine is restarted the
engine and the gear will not restart in its
sportier mode in order to save fuel. For en-
gine and gear to revert to a sportier mode,
select the corresponding driving profile again
on the Easy Connect system screen.
● Your speed and driving style must always
be adjusted to visibility, weather, and traffic
conditions. Kick-down
The kick-down feature allows maximum ac-
celeration to be reached.
If the
eco
* ›››
page 170 mode has been selec-
t ed in S
EAT Drive Profile*, and the accelerator
is pressed beyond a hard point, the engine
power is automatically controlled to give your
vehicle maximum acceleration. »
171
Technical specifications
Advice
Operation
Safety
The essentials
Page 174 of 284
Operation
WARNING
Please note that if the road surface is slip-
pery or wet, the kick-down feature could
cause the driving wheels to spin, which could
result in skidding. Tiredness detection (break
recommendation)*
Introduction The Tiredness detection informs the driver
when their driving behaviour shows signs of
fatigue.
WARNING
Do not let the comfort afforded by the Tired-
ness detection system tempt you into taking
any risks when driving. Take regular breaks,
sufficient in length when making long jour-
neys.
● The driver always assumes the responsibil-
ity of driving to their full capacity.
● Never drive if you are tired.
● The system does not detect the tiredness of
the driver in all circumstances. Consult the in-
formation in the section ››› page 172, System
limitations.
● In some s it
uations, the system may incor-
rectly interpret an intended driving manoeu-
vre as driver tiredness. ●
No warning is given in the event of the ef-
fect called microsleep!
● Please observe the indications on the in-
strument panel and act as is necessary. Note
● Tiredness detection has been developed for
driving on motorways and well paved roads
only.
● If there is a fault in the system, have it
checked by a specialised workshop. Function and operation
Fig. 167
On the instrument panel display:
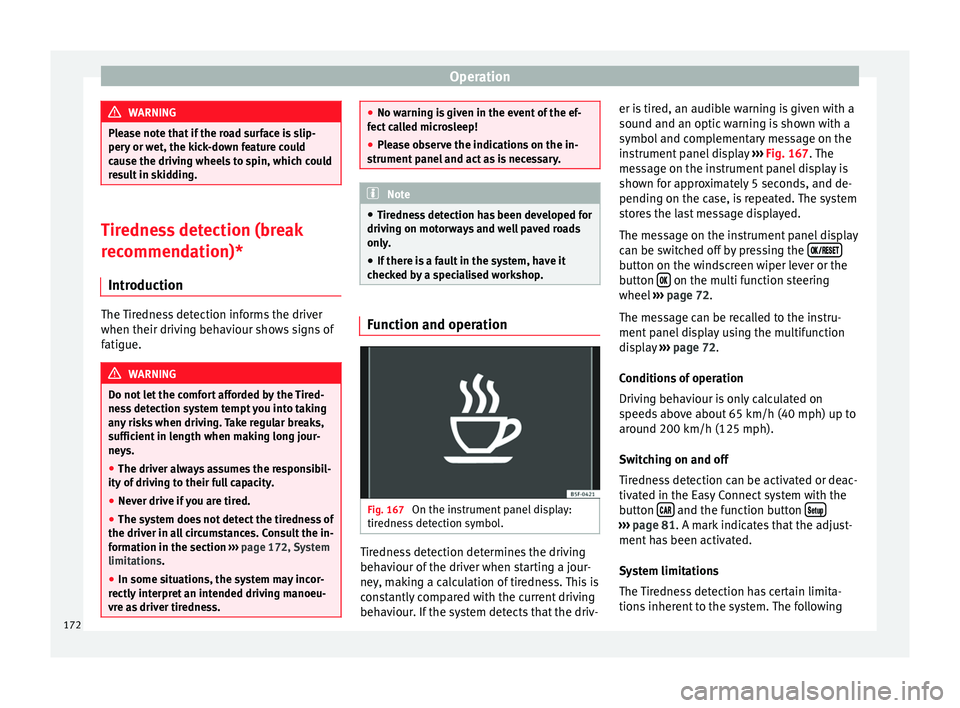
tiredness detection symbol. Tiredness detection determines the driving
behaviour of the driver when starting a jour-
ney, making a calculation of tiredness. This is
constantly compared with the current driving
behaviour. If the system detects that the driv-er is tired, an audible warning is given with a
sound and an optic warning is shown with a
symbol and complementary message on the
instrument panel display
››› Fig. 167 . The
me s
sage on the instrument panel display is
shown for approximately 5 seconds, and de-
pending on the case, is repeated. The system
stores the last message displayed.
The message on the instrument panel display
can be switched off by pressing the button on the windscreen wiper lever or the
button
on the multi function steering
wheel ››› page 72 .
The me s
sage can be recalled to the instru-
ment panel display using the multifunction
display ››› page 72.
Condition
s of operation
Driving behaviour is only calculated on
speeds above about 65 km/h (40 mph) up to
around 200 km/h (125 mph).
Switching on and off
Tiredness detection can be activated or deac-
tivated in the Easy Connect system with the
button and the function button
›››
page 81 . A mark indicates that the adjust-
ment h
as been activated.
System limitations
The Tiredness detection has certain limita-
tions inherent to the system. The following
172
Page 175 of 284
Driver assistance systems
conditions can limit the Tiredness detection
or prevent it from functioning.
● At speeds below 65 km/h (40 mph)
● At speeds above 200 km/h (125 mph)
● When cornering
● On roads in poor condition
● In unfavourable weather conditions
● When a sporty driving style is employed
● In the event of a serious distraction to the
driver
Tiredness detection will be restored when the
vehicle is stopped for more than 15 minutes,
when the ignition is switched off or when the
driver has unbuckled their seat belt and
opened the door.
In the event of slow driving during a long pe-
riod of time (below 65 km/h (40 mph) the
system automatically re-establishes the tired-
ness calculation. When driving at a faster
speed the driving behaviour will be recalcula-
ted.
Parking aid
General information Various systems are available to help you
when parking or manoeuvring in tight spaces, depending on the equipment fitted
on your vehicle.
The
rear parking aid
is an audible assistant
th
at warns about obstacles located behind
the vehicle ››› page 174.
Durin
g parking, the
parking system plus as-
sists you visually and audibly about obsta-
cles detected in front and behind
the vehicle
››› page 174. WARNING
● Always pay attention, also when looking
straight ahead, to traffic and the vehicle sur-
roundings. The assistance systems are not a
replacement for driver awareness. When in-
serting or removing the vehicle from a park-
ing space, or when performing similar ma-
noeuvres the driver always assumes the re-
sponsibility.
● Take into account that the system is not al-
ways in conditions to recognise or represent
certain surfaces, such as dress fabric: Risk of
causing an accident!
● The sensors and cameras have blind spots,
making the detection of people and objects
impossible. Pay special attention to children
and animals: Risk of causing an accident!
● Always keep visual control of the vehicle
surroundings: use the rear vision mirrors for
additional help. CAUTION
● Under certain circumstances, the system
does not detect or display certain objects:
– Objects such as snow chains, trailer draw
bars, bars or fences.
– Objects that are located above the sen-
sors, such as protrusions in a wall.
– Objects with certain surfaces or struc-
tures, such as wire mesh fences or pow-
der snow.
● Please note that low obstacles detected by
the system may no longer be registered by
the sensors as the car moves closer, so the
system will not give any further warning. In
certain circumstances, objects such as high kerbs that could damage the bottom of the
vehicle are not detected either.
● If the first warning from the Park Pilot is ig-
nored, the vehicle could suffer considerable
damage.
● The knocks or damage on the radiator
grille, bumper, wheel arch and vehicle under-
body can adjust the orientation of the sen-
sors. This can affect the parking aid function.
Have the function checked by a specialised
workshop. Note
● In certain situations, the system can give a
warning even though there is no obstacle in
the detected area, e.g: » 173
Technical specifications
Advice
Operation
Safety
The essentials
Page 177 of 284
Driver assistance systems
As you approach the obstacle, the time inter-
val between the audible warnings will be re-
duced.
If you maintain separation from the obstacle,
the volume of the warning begins to reduce
after four seconds (does not affect the tone
of the constant warning).
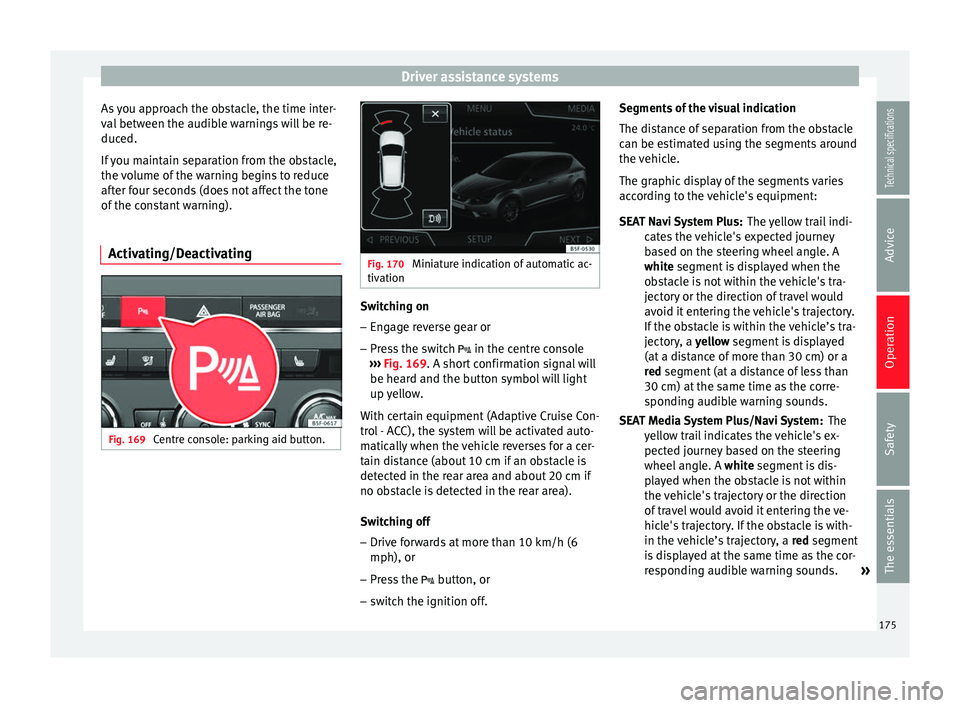
Activating/Deactivating Fig. 169
Centre console: parking aid button. Fig. 170
Miniature indication of automatic ac-
tivation Switching on
– Engage reverse gear or
– Press the switch in the centre console
››› Fig. 169 . A short confirmation signal will
be he ar
d and the button symbol will light
up yellow.
With certain equipment (Adaptive Cruise Con-
trol - ACC), the system will be activated auto-
matically when the vehicle reverses for a cer-
tain distance (about 10 cm if an obstacle is
detected in the rear area and about 20 cm if
no obstacle is detected in the rear area).
Switching off
– Drive forwards at more than 10 km/h (6
mph), or
– Press the button, or
– switch the ignition off. Segments of the visual indication
The distance of separation from the obstacle
can be estimated using the segments around
the vehicle.
The graphic display of the segments varies
according to the vehicle's equipment:
The yellow trail indi-
cates the vehicle's expected journey
based on the steering wheel angle. A
white
segment is displayed when the
obstacle is not within the vehicle's tra-
jectory or the direction of travel would
avoid it entering the vehicle's trajectory.
If the obstacle is within the vehicle’s tra-
jectory, a yellow segment is displayed
(at
a distance of more than 30 cm) or a
red
segment (at a distance of less than
30 cm) at the same time as the corre-
sponding audible warning sounds.
The
yellow trail indicates the vehicle's ex-
pected journey based on the steering
wheel angle. A white segment is dis-
pl
ayed when the obstacle is not within
the vehicle's trajectory or the direction
of travel would avoid it entering the ve-
hicle's trajectory. If the obstacle is with-
in the vehicle’s trajectory, a red
segment
is displayed at the same time as the cor-
responding audible warning sounds. »
SEAT Navi System Plus:
SEAT Media System Plus/Navi System:
175
Technical specifications
Advice
Operation
Safety
The essentials