Seat Mii 2013 Workshop Manual
Manufacturer: SEAT, Model Year: 2013, Model line: Mii, Model: Seat Mii 2013Pages: 306, PDF Size: 4.3 MB
Page 51 of 306
49
Ensuring you are correctly and safely seated
Correct sitting position
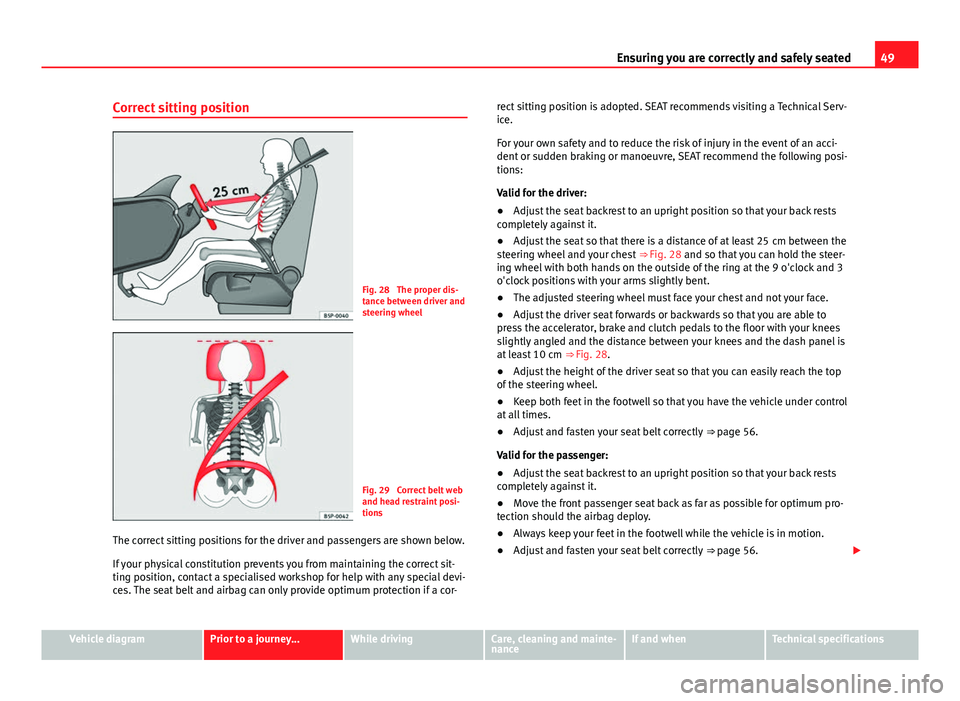
Fig. 28 The proper dis-
tance between driver and
steering wheel
Fig. 29 Correct belt web
and head restraint posi-
tions
The correct sitting positions for the driver and passengers are shown below.
If your physical constitution prevents you from maintaining the correct sit-
ting position, contact a specialised workshop for help with any special devi-
ces. The seat belt and airbag can only provide optimum protection if a cor- rect sitting position is adopted. SEAT recommends visiting a Technical Serv-
ice.
For your own safety and to reduce the risk of injury in the event of an acci-
dent or sudden braking or manoeuvre, SEAT recommend the following posi-
tions:
Valid for the driver:
●
Adjust the seat backrest to an upright position so that your back rests
completely against it.
● Adjust the seat so that there is a distance of at least 25 cm between the
steering wheel and your chest ⇒ Fig. 28 and so that you can hold the steer-
ing wheel with both hands on the outside of the ring at the 9 o'clock and 3
o'clock positions with your arms slightly bent.
● The adjusted steering wheel must face your chest and not your face.
● Adjust the driver seat forwards or backwards so that you are able to
press the accelerator, brake and clutch pedals to the floor with your knees
slightly angled and the distance between your knees and the dash panel is
at least 10 cm ⇒ Fig. 28.
● Adjust the height of the driver seat so that you can easily reach the top
of the steering wheel.
● Keep both feet in the footwell so that you have the vehicle under control
at all times.
● Adjust and fasten your seat belt correctly ⇒ page 56.
Valid for the passenger:
● Adjust the seat backrest to an upright position so that your back rests
completely against it.
● Move the front passenger seat back as far as possible for optimum pro-
tection should the airbag deploy.
● Always keep your feet in the footwell while the vehicle is in motion.
● Adjust and fasten your seat belt correctly ⇒ page 56.
Vehicle diagramPrior to a journey...While drivingCare, cleaning and mainte-
nanceIf and whenTechnical specifications
Page 52 of 306
50Ensuring you are correctly and safely seated
Valid for the passengers in the rear section:
● Adjust the head restraint so that its upper edge is at the same level as
the top of your head, or as close as possible to the same level as the top of
your head and under no circumstances below eye level. Keep the back of
your neck as close as possible to the head restraint ⇒ Fig. 28 and ⇒ Fig. 29.
● Short people must lower the head restraint to the first anchorage posi-
tion, even if your head is below its upper edge.
● Tall people must raise the head restraint completely.
● Always keep your feet in the footwell while the vehicle is in motion.
● Adjust and fasten your seat belt correctly ⇒ page 56.
Controls on the front seat
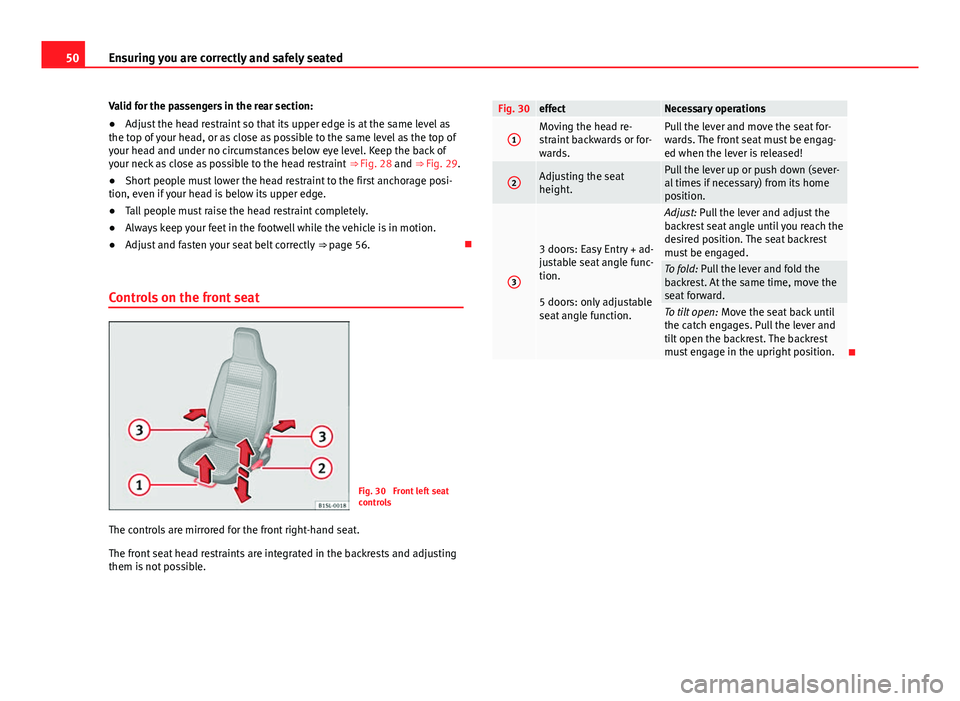
Fig. 30 Front left seat
controls
The controls are mirrored for the front right-hand seat.
The front seat head restraints are integrated in the backrests and adjusting
them is not possible.
Fig. 30effectNecessary operations
1Moving the head re-
straint backwards or for-
wards.Pull the lever and move the seat for-
wards. The front seat must be engag-
ed when the lever is released!
2Adjusting the seat
height.Pull the lever up or push down (sever-
al times if necessary) from its home
position.
3
3 doors: Easy Entry + ad-
justable seat angle func-
tion.
5 doors: only adjustable
seat angle function.
Adjust: Pull the lever and adjust the
backrest seat angle until you reach the
desired position. The seat backrest
must be engaged.
To fold: Pull the lever and fold the
backrest. At the same time, move the
seat forward.
To tilt open: Move the seat back until
the catch engages. Pull the lever and
tilt open the backrest. The backrest
must engage in the upright position.
Page 53 of 306
51
Ensuring you are correctly and safely seated
Adjust the rear head restraints
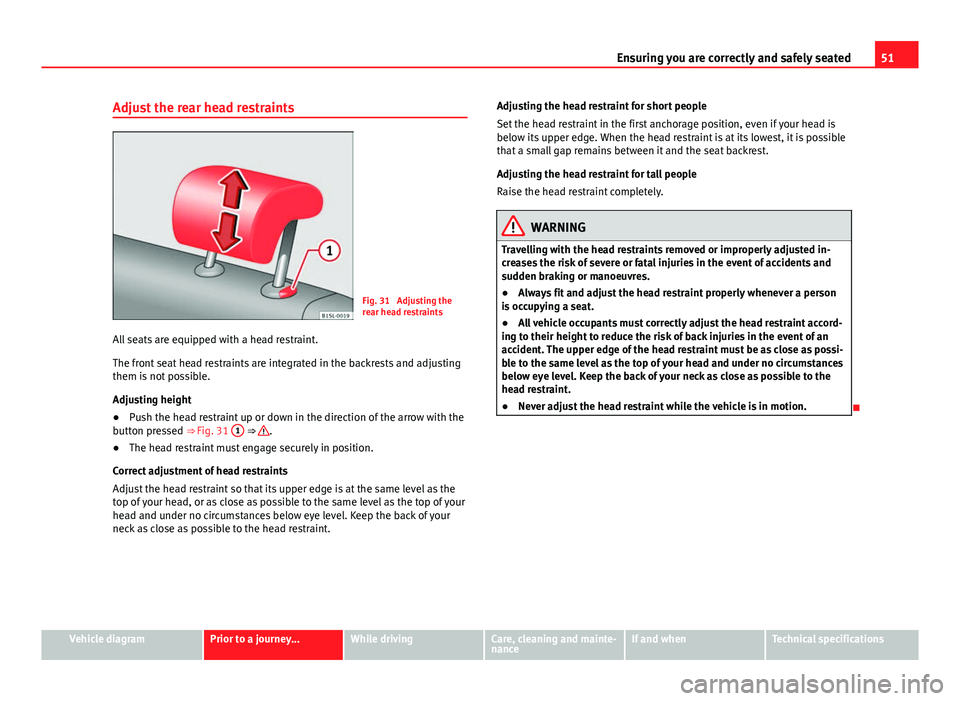
Fig. 31 Adjusting the
rear head restraints
All seats are equipped with a head restraint.
The front seat head restraints are integrated in the backrests and adjusting
them is not possible.
Adjusting height
● Push the head restraint up or down in the direction of the arrow with the
button pressed ⇒ Fig. 31 1
⇒ .
● The head restraint must engage securely in position.
Correct adjustment of head restraints
Adjust the head restraint so that its upper edge is at the same level as the
top of your head, or as close as possible to the same level as the top of your
head and under no circumstances below eye level. Keep the back of your
neck as close as possible to the head restraint. Adjusting the head restraint for short people
Set the head restraint in the first anchorage position, even if your head is
below its upper edge. When the head restraint is at its lowest, it is possible
that a small gap remains between it and the seat backrest.
Adjusting the head restraint for tall people
Raise the head restraint completely.
WARNING
Travelling with the head restraints removed or improperly adjusted in-
creases the risk of severe or fatal injuries in the event of accidents and
sudden braking or manoeuvres.
● Always fit and adjust the head restraint properly whenever a person
is occupying a seat.
● All vehicle occupants must correctly adjust the head restraint accord-
ing to their height to reduce the risk of back injuries in the event of an
accident. The upper edge of the head restraint must be as close as possi-
ble to the same level as the top of your head and under no circumstances
below eye level. Keep the back of your neck as close as possible to the
head restraint.
● Never adjust the head restraint while the vehicle is in motion.
Vehicle diagramPrior to a journey...While drivingCare, cleaning and mainte-
nanceIf and whenTechnical specifications
Page 54 of 306
52Ensuring you are correctly and safely seated
Removing and installing the rear head restraints
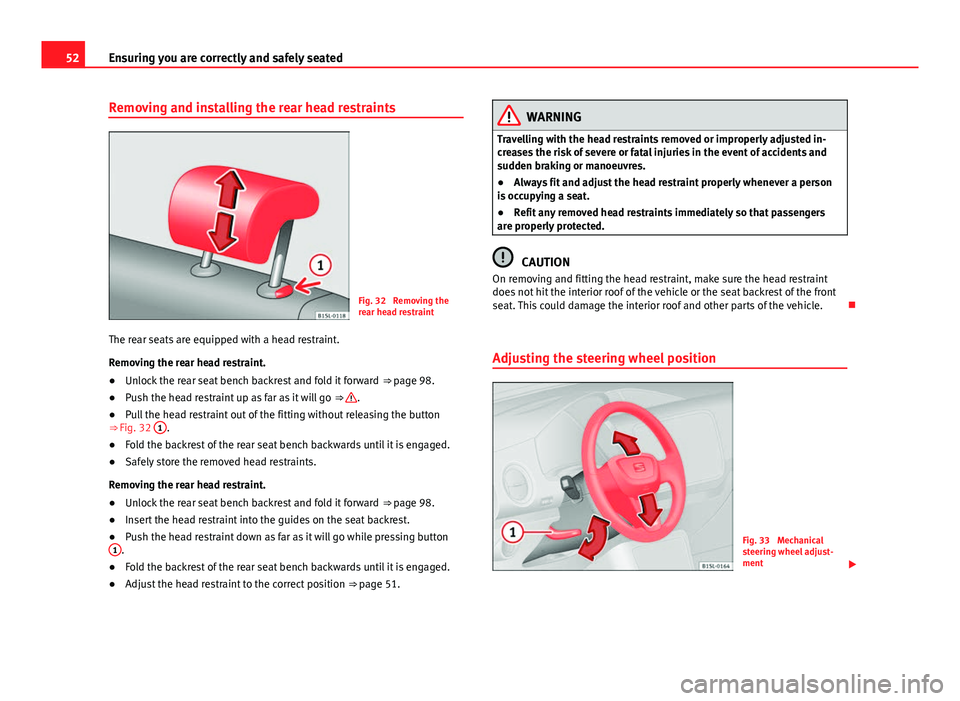
Fig. 32 Removing the
rear head restraint
The rear seats are equipped with a head restraint.
Removing the rear head restraint.
● Unlock the rear seat bench backrest and fold it forward ⇒ page 98.
● Push the head restraint up as far as it will go ⇒
.
● Pull the head restraint out of the fitting without releasing the button
⇒ Fig. 32 1
.
● Fold the backrest of the rear seat bench backwards until it is engaged.
● Safely store the removed head restraints.
Removing the rear head restraint.
● Unlock the rear seat bench backrest and fold it forward ⇒ page 98.
● Insert the head restraint into the guides on the seat backrest.
● Push the head restraint down as far as it will go while pressing button
1
.
● Fold the backrest of the rear seat bench backwards until it is engaged.
● Adjust the head restraint to the correct position ⇒ page 51.
WARNING
Travelling with the head restraints removed or improperly adjusted in-
creases the risk of severe or fatal injuries in the event of accidents and
sudden braking or manoeuvres.
● Always fit and adjust the head restraint properly whenever a person
is occupying a seat.
● Refit any removed head restraints immediately so that passengers
are properly protected.
CAUTION
On removing and fitting the head restraint, make sure the head restraint
does not hit the interior roof of the vehicle or the seat backrest of the front
seat. This could damage the interior roof and other parts of the vehicle.
Adjusting the steering wheel position
Fig. 33 Mechanical
steering wheel adjust-
ment
Page 55 of 306
53
Ensuring you are correctly and safely seated
Adjust the steering wheel before your trip and only when the vehicle is sta-
tionary.
● Push the lever ⇒ Fig. 33 1
downwards.
● Adjust the steering wheel so that you can hold onto the steering wheel
with both hands on the outside of the ring at the 9 o'clock and 3 o'clock
positions and your arms slightly bent.
● Push the lever firmly upwards until it is flush to the steering column
⇒
.
Adjust the correct distance between the driver and the steering wheel
⇒ Fig. 28 using the controls on the driver seat ⇒ page 50.
WARNING
Incorrect use of the steering wheel adjustment function and an incorrect
adjustment of the steering wheel can result in severe or fatal injury.
● After adjusting the steering column, push the lever ⇒ Fig. 33 1
firm-
ly upwards to ensure the steering wheel does not accidentally change po-
sition while driving.
● Never adjust the steering wheel while the vehicle is in motion. If you
need to adjust the steering wheel while the vehicle is in motion, stop
safely and make the proper adjustment.
● The adjusted steering wheel should be facing your chest and not your
face so as not to hinder the driver's front airbag protection in the event of
an accident.
● When driving, always hold the steering wheel with both hands on the
outside of the ring at the 9 o'clock and 3 o'clock positions to reduce inju-
ries when the driver's front airbag deploys.
● Never hold the steering wheel at the 12 o'clock position or in any oth-
er manner (e.g. in the centre of the steering wheel). In such cases, if the
driver's airbag deploys, you may sustain injuries to your arms, hands and
head.
Vehicle diagramPrior to a journey...While drivingCare, cleaning and mainte-
nanceIf and whenTechnical specifications
Page 56 of 306
54Ensuring you are correctly and safely seated
Seat functions
Introduction
Additional information and warnings:
● Adjust the seat position ⇒ page 47
● Seat belts ⇒ page 56
● Airbag system ⇒ page 65
● Child seats (accessories) ⇒ page 74
● Exterior mirrors ⇒ page 93
WARNING
Inappropriate use of the seat functions can cause severe injuries.
● Assume the proper sitting position before your trip and remain in it
throughout. This also applies to the other occupants.
● Keep hands, fingers, feet and other limbs away from the seat operat-
ing and adjustment radius.
Seat heating*
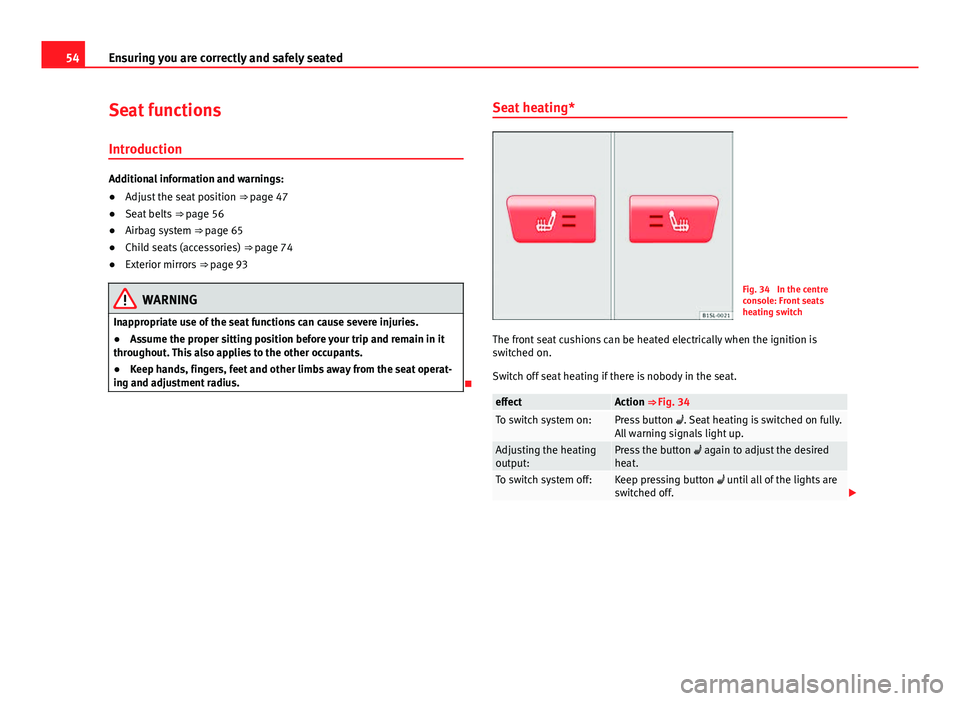
Fig. 34 In the centre
console: Front seats
heating switch
The front seat cushions can be heated electrically when the ignition is
switched on.
Switch off seat heating if there is nobody in the seat.
effectAction ⇒ Fig. 34To switch system on:Press button . Seat heating is switched on fully.
All warning signals light up.
Adjusting the heating
output:Press the button again to adjust the desired
heat.
To switch system off:Keep pressing button until all of the lights are
switched off.
Page 57 of 306
55
Ensuring you are correctly and safely seated
WARNING
People whose pain and temperature threshold has been affected by some
kind of medicine, paraplegia or chronic illness (e.g. diabetes) may sus-
tain burns to the back, buttocks and legs from use of the seat heating
that may lead to a long healing process or that may never completely
heal. Seek medical advice if you have doubts regarding your health.
● People with a limit pain and temperature threshold must never use
seat heating.
CAUTION
● To avoid damaging the heating elements of the seat heating, please do
not kneel on the seat or apply sharp pressure at a single point to the seat
cushion and backrest.
● Liquids, sharp objects and insulating materials on the seat could dam-
age the seat heating.
● In the event of smells, switch off the seat heating immediately and have
the unit inspected by a specialised workshop.
For the sake of the environment
The seat heating should remain on only when needed. Otherwise, it is an
unnecessary fuel waste.
Vehicle diagramPrior to a journey...While drivingCare, cleaning and mainte-
nanceIf and whenTechnical specifications
Page 58 of 306
56Ensuring you are correctly and safely seated
Seat belts
Introduction
Check the condition of all the seat belts at regular intervals. If you notice
that the belt webbing, fittings, retractor mechanism or buckle of any of the
belts is damaged, the belt must be replaced immediately by a specialised
workshop ⇒
. The specialised workshop must use the appropriate spare
parts corresponding to the vehicle, the equipment and the model year. SEAT
recommends visiting a Technical Service.
Additional information and warnings:
● Adjust the seat position ⇒ page 47
● Airbag system ⇒ page 65
● Child seats (accessories) ⇒ page 74
● Accessories, parts replacement, repairs and modifications ⇒ page 222
WARNING
Unbuckled or badly buckled seat belts increase the risk of severe or even
fatal injuries. The seat belt cannot offer its full protection if it is not fas-
tened and used correctly.
● Seats belts are the most effective ways of reducing the risk of sus-
taining severe or fatal injuries In the event of an accident. Seat belts
must be correctly fastened when the vehicle is in motion to protect the
driver and all vehicle occupants.
● Before each trip, every occupant in the vehicle occupants must sit
properly, correctly fasten the seat belt belonging to his or her seat and
keep it fastened throughout the trip. This also applies to other vehicle
occupants when driving in town.
WARNING (Continued)
● When travelling, children must be secured in the vehicle with a child
restraint system suitable for their weight and height and with the seat
belts correctly fastened ⇒ page 74.
● Instruct your passengers to fasten their seat belts properly before
driving off.
● Insert the latch plate into the buckle for the appropriate seat and en-
sure it is engaged. Using the latch plate in the buckle of another seat will
not protect you properly and may cause severe injuries.
● Do not allow liquids or foreign bodies to enter the buckle fastenings.
This could damage the buckles and seat belts.
● Never unbuckle your seat belt when the vehicle is moving.
● Never allow more than one passenger to share the same seat belt.
● Never hold children or babies on your lap sharing the same seat belt.
● Loose, bulky clothing (such as a jacket) impairs the proper fit and
function of the seat belt.
WARNING
It is extremely dangerous to drive using damaged seat belts and could re-
sult in serious injury or loss of life.
● Avoid damaging the seat belt by jamming it in the door or the seat
mechanism.
● If the fabric or other parts of the seat belt are damaged, the seat belts
could break in the event of an accident or sudden braking.
● Always have damaged seatbelts replaced immediately by seat belts
approved for the vehicle in question by SEAT. Seat belts which have been
worn in an accident and stretched must be replaced by a specialised
workshop. Renewal may be necessary even if there is no apparent dam-
age. The belt anchorage should also be checked.
● Never attempt to repair, modify or remove a seat belt yourself. All re-
pairs to seat belts, retractors and buckles must be carried out by a speci-
alised workshop.
Page 59 of 306
57
Ensuring you are correctly and safely seated
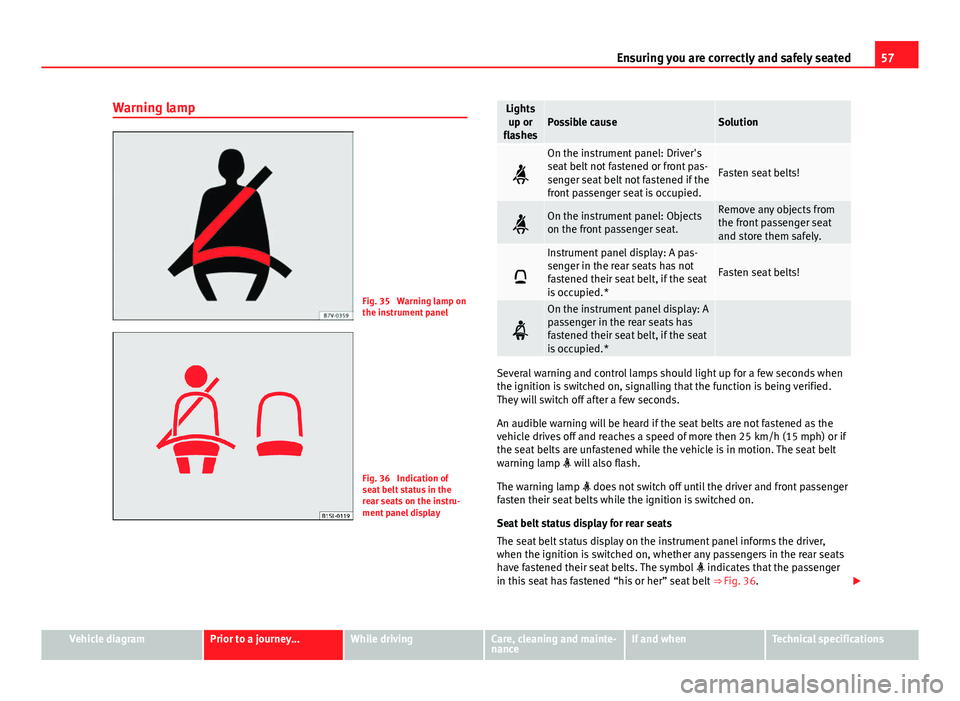
Warning lamp
Fig. 35 Warning lamp on
the instrument panel
Fig. 36 Indication of
seat belt status in the
rear seats on the instru-
ment panel display
Lights up or
flashesPossible causeSolution
On the instrument panel: Driver's
seat belt not fastened or front pas-
senger seat belt not fastened if the
front passenger seat is occupied.
Fasten seat belts!
On the instrument panel: Objects
on the front passenger seat.Remove any objects from
the front passenger seat
and store them safely.
Instrument panel display: A pas-
senger in the rear seats has not
fastened their seat belt, if the seat
is occupied.*
Fasten seat belts!
On the instrument panel display: A
passenger in the rear seats has
fastened their seat belt, if the seat
is occupied.*
Several warning and control lamps should light up for a few seconds when
the ignition is switched on, signalling that the function is being verified.
They will switch off after a few seconds.
An audible warning will be heard if the seat belts are not fastened as the
vehicle drives off and reaches a speed of more then 25 km/h (15 mph) or if
the seat belts are unfastened while the vehicle is in motion. The seat belt
warning lamp will also flash.
The warning lamp does not switch off until the driver and front passenger
fasten their seat belts while the ignition is switched on.
Seat belt status display for rear seats
The seat belt status display on the instrument panel informs the driver,
when the ignition is switched on, whether any passengers in the rear seats
have fastened their seat belts. The symbol indicates that the passenger
in this seat has fastened “his or her” seat belt ⇒ Fig. 36.
Vehicle diagramPrior to a journey...While drivingCare, cleaning and mainte-
nanceIf and whenTechnical specifications
Page 60 of 306

58Ensuring you are correctly and safely seated
The seat belt status is displayed for around 30 seconds when a seat belt in
the rear seats is fastened or unfastened. You can switch off this display by
pressing the 0.0 / SET
button.
The seat belt status flashes for a maximum of 30 seconds when a seat belt
in the rear seats is unfastened while the vehicle is in motion. An audible
warning will also be heard if the vehicle is travelling at over 25 km/h
(15 mph).
WARNING
Unbuckled or badly buckled seat belts increase the risk of severe or even
fatal injuries. The optimal protection from seat belts can be achieved only
if you use them properly.
Frontal collisions and the laws of physics
Fig. 37 Vehicle about to
hit a wall: the vehicle oc-
cupants are not wearing
seat belts
Fig. 38 The vehicle hits
the wall: the vehicle oc-
cupants are not wearing
seat belts
It is easy to explain how the laws of physics work in the case of a head-on
collision: when a vehicle starts moving ⇒ Fig. 37 it generates a certain
amount of energy known as “kinetic energy” both in the vehicle and in the
vehicle occupants.
The higher the speed and the greater the weight of the vehicle, the more
energy there is to be absorbed in an accident.
The most significant factor, however, is the speed of the vehicle. If the
speed doubles from 25 km/h (15 mph) to 50 km/h (30 mph), for example,
the kinetic energy is multiplied by four.
The amount of kinetic energy depends on the speed of the vehicle and the
weight of the vehicle and its passengers. The higher the speed and the
greater the weight of the vehicle and the vehicle occupants, the more ener-
gy there is to be absorbed in an accident.
Vehicle occupants not wearing seat belts are not “attached” to the vehicle.
As a result, in a frontal collision they will continue to move forward at the
speed their vehicle was travelling just before the impact until something
stops them! Because the vehicle occupants in our example are not restrain-
ed by seat belts, all of the occupants' kinetic energy has to be absorbed at
the point of impact ⇒ Fig. 38.