technical specifications Seat Mii 2014 Owner's Guide
[x] Cancel search | Manufacturer: SEAT, Model Year: 2014, Model line: Mii, Model: Seat Mii 2014Pages: 219, PDF Size: 4.19 MB
Page 45 of 219
Opening and closing
Opening and closing Vehicle key set Remote control vehicle key* Fig. 27
Remote control key Remote control key
With the vehicle key the vehicle may be
locked or unlocked remotely
››› page 45.
The vehicle key includes an emitter and bat-
tery. The receiver is in the interior of the vehi-
cle. The range of the vehicle key with remote
control and new battery is several metres
around the vehicle.
If it is not possible to open or close the vehi-
cle using the remote control key, this should
be re-synchronised ››› page 45 or the bat-
tery changed ››› page 44. Different keys belonging to the vehicle may
be used.
Folding the key shaft in and out
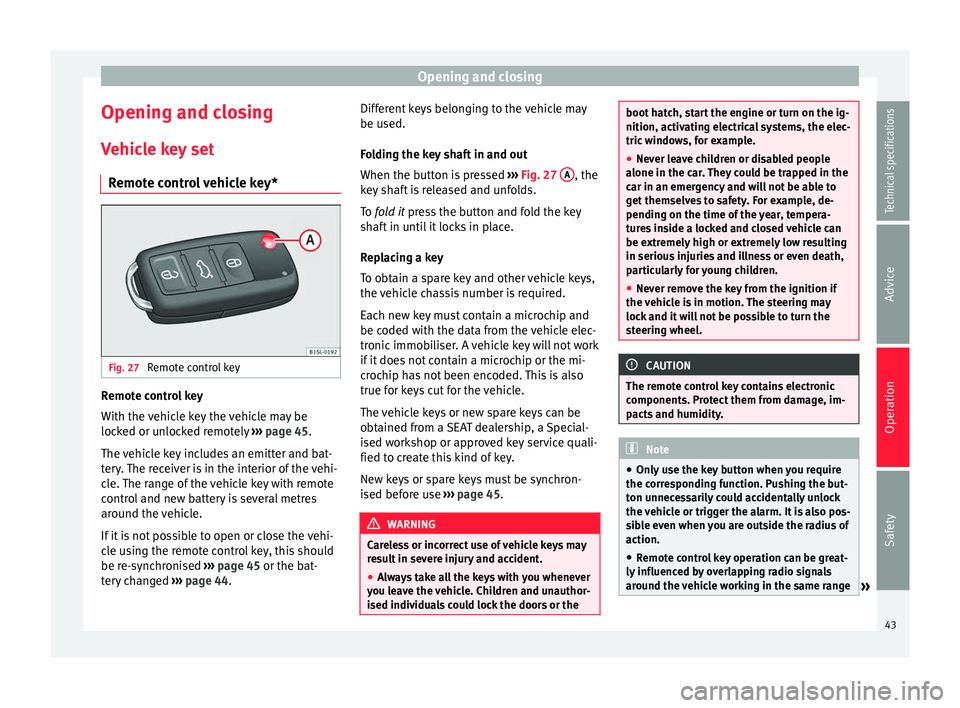
When the button is pressed
››› Fig. 27 A , the
key shaft is released and unfolds.
To fold it
press the button and fold the key
sh
aft in until it locks in place.
Replacing a key
To obtain a spare key and other vehicle keys,
the vehicle chassis number is required.
Each new key must contain a microchip and
be coded with the data from the vehicle elec-
tronic immobiliser. A vehicle key will not work
if it does not contain a microchip or the mi-
crochip has not been encoded. This is also
true for keys cut for the vehicle.
The vehicle keys or new spare keys can be
obtained from a SEAT dealership, a Special-
ised workshop or approved key service quali-
fied to create this kind of key.
New keys or spare keys must be synchron-
ised before use ››› page 45. WARNING
Careless or incorrect use of vehicle keys may
result in severe injury and accident.
● Always take all the keys with you whenever
you leave the vehicle. Children and unauthor-
ised individuals could lock the doors or the boot hatch, start the engine or turn on the ig-
nition, activating electrical systems, the elec-
tric windows, for example.
●
Never leave children or disabled people
alone in the car. They could be trapped in the
car in an emergency and will not be able to
get themselves to safety. For example, de-
pending on the time of the year, tempera-
tures inside a locked and closed vehicle can
be extremely high or extremely low resulting
in serious injuries and illness or even death,
particularly for young children.
● Never remove the key from the ignition if
the vehicle is in motion. The steering may
lock and it will not be possible to turn the
steering wheel. CAUTION
The remote control key contains electronic
components. Protect them from damage, im-
pacts and humidity. Note
● Only use the key button when you require
the corresponding function. Pushing the but-
ton unnecessarily could accidentally unlock
the vehicle or trigger the alarm. It is also pos-
sible even when you are outside the radius of
action.
● Remote control key operation can be great-
ly influenced by overlapping radio signals
around the vehicle working in the same range » 43Technical specifications
Advice
Operation
Safety
Page 47 of 219
Opening and closing
SEAT recommend having the batteries
changed in a specialised workshop.
The battery is located to the rear of the vehi-
cle key, under a cover.
Changing the battery
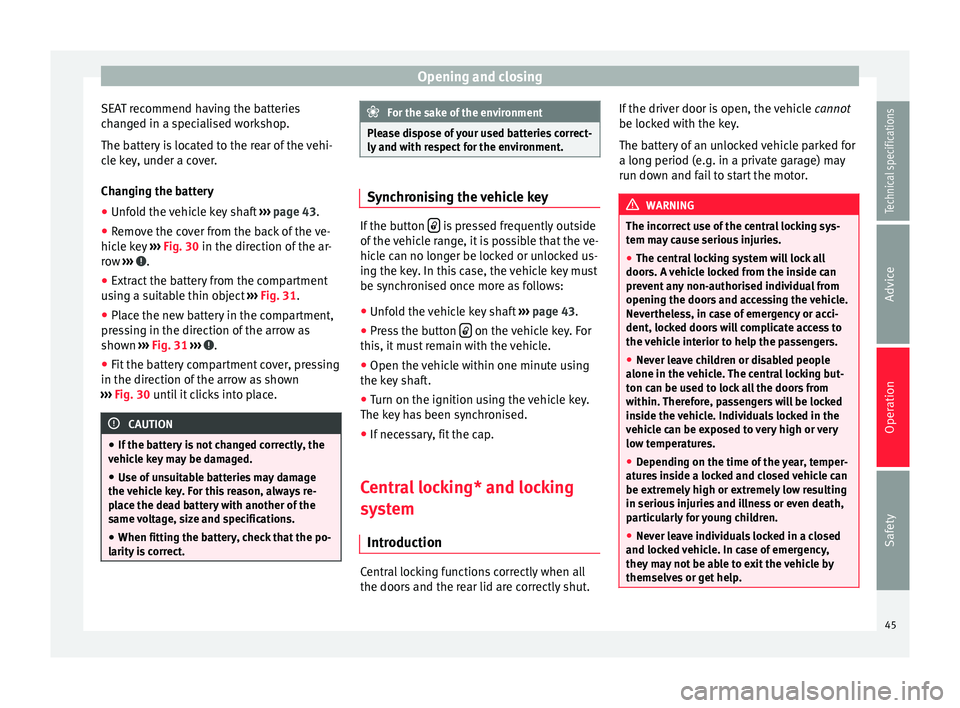
● Unfold the vehicle key shaft ››› page 43.
● Remove the cover from the back of the ve-
hicle key ››› Fig. 30 in the direction of the ar-
r o
w ››› .
● Extract the battery from the compartment
using a suitable thin object ››› Fig. 31 .
● Plac
e the new battery in the compartment,
pressing in the direction of the arrow as
shown ››› Fig. 31 ››› .
● Fit the battery compartment cover, pressing
in the direction of the arrow as shown
››› Fig. 30 until it clicks into place. CAUTION
● If the battery is not changed correctly, the
vehicle key may be damaged.
● Use of unsuitable batteries may damage
the vehicle key. For this reason, always re-
place the dead battery with another of the
same voltage, size and specifications.
● When fitting the battery, check that the po-
larity is correct. For the sake of the environment
Please dispose of your used batteries correct-
ly and with respect for the environment. Synchronising the vehicle key
If the button
is pressed frequently outside
of the vehicle range, it is possible that the ve-
hicle can no longer be locked or unlocked us-
ing the key. In this case, the vehicle key must
be synchronised once more as follows:
● Unfold the vehicle key shaft ›››
page 43.
● Press the button on the vehicle key. For
this, it must remain with the vehicle.
● Open the vehicle within one minute using
the key shaft.
● Turn on the ignition using the vehicle key.
The key has been synchronised.
● If necessary, fit the cap.
Central locking* and locking
system Introduction Central locking functions correctly when all
the doors and the rear lid are correctly shut.If the driver door is open, the vehicle
cannot
be locked with the key.
The battery of an unlocked vehicle parked for
a long period (e.g. in a private garage) may
run down and fail to start the motor. WARNING
The incorrect use of the central locking sys-
tem may cause serious injuries.
● The central locking system will lock all
doors. A vehicle locked from the inside can
prevent any non-authorised individual from
opening the doors and accessing the vehicle.
Nevertheless, in case of emergency or acci-
dent, locked doors will complicate access to
the vehicle interior to help the passengers.
● Never leave children or disabled people
alone in the vehicle. The central locking but-
ton can be used to lock all the doors from
within. Therefore, passengers will be locked
inside the vehicle. Individuals locked in the
vehicle can be exposed to very high or very
low temperatures.
● Depending on the time of the year, temper-
atures inside a locked and closed vehicle can
be extremely high or extremely low resulting
in serious injuries and illness or even death,
particularly for young children.
● Never leave individuals locked in a closed
and locked vehicle. In case of emergency,
they may not be able to exit the vehicle by
themselves or get help. 45
Technical specifications
Advice
Operation
Safety
Page 49 of 219

Opening and closing
Central lockingFunctionHandling
the buttons
on the vehi-
cle ››› Fig. 32Handling the vehicle
key ››› Fig. 32 in the
lock cylinder or with
the vehicle mechani-
cal key ››› Fig. 33.
Unlocking
the vehi-
cle.Press button.Insert the vehicle key in-
to the lock cylinder of
the driver door and turn
the key in an anticlock-
wise direction.
Lock the
vehicle.Press button.Insert the vehicle key in-
to the lock cylinder of
the driver door and turn
the key in a clockwise
direction.
Unlocking
the rear lid.Press button.Insert the vehicle key in-
to the lock cylinder of
the driver door and turn
the key in an anticlock-
wise direction.
Locking
the rear lid.Press button.Insert the vehicle key in-
to the lock cylinder of
the driver door and turn
the key in a clockwise
direction. Please note:
depending on the operation of
the c entr
al locking feature set by a special-
ised workshop, in order to unlock all the
doors and the rear lid, press the button twice. The vehicle key only locks and unlocks the
vehicle if it is within range of the vehicle and
if the battery has enough power.
● Upon locking the vehicle, all turn signals
will flash once in confirmation.
● Upon u
nlocking the vehicle, all turn signals
will flash twice
in confirmation.
If the turn signals do not
flash in confirma-
tion, at least one of the doors or the rear lid
has been left unlocked.
If the driver door is open, the vehicle cannot
be locked with the key. If you unlock the vehi-
cle without opening any doors or the rear lid,
it will lock again automatically after a few
seconds. This function prevents the vehicle
from remaining unlocked if the unlocking
button is pressed by mistake.
Mechanical locking
FunctionUsing the vehicle's mechani-
cal key ››› Fig. 33 in the lock
cylinder
Locking the driv-
er door manually.
To unlock, insert the vehicle key in-
to the lock cylinder of the driver
door and turn the key in an anti-
clockwise direction.
To lock, insert the vehicle key into
the lock cylinder of the driver door
and turn the key in a clockwise di-
rection.
FunctionUsing the vehicle's mechani-
cal key ››› Fig. 33 in the lock
cylinder
Locking and un-
locking the rear
lid.
To unlock, insert the vehicle key in-
to the lock cylinder of the driver
door and turn the key in an anti-
clockwise direction.
To lock, insert the vehicle key into
the lock cylinder of the driver door
and turn the key in a clockwise di-
rection. If the driver's door is open, it cannot be
locked with the vehicle key.
47
Technical specifications
Advice
Operation
Safety
Page 51 of 219

Opening and closingFunctionNecessary operations
Locks the vehicle with-
out the "Safe" security
system.
Press the button twice on
the vehicle key.
Press the central locking but-
ton on the driver door
once. When the vehicle is locked, the "Safe" securi-
ty system deactivates the door handles, mak-
ing the vehicle difficult to open. The doors
cannot be opened from inside
››› .
Upon switching off the ignition, the instru-
ment panel display will show that the “dead-
lock” is activated or ( SAFELOCK
or SAFELOCK
).
When the deadlock is switched off:
● The vehicle can be opened and unlocked
from the inside using an inside door handle.
Control lamp on the driver door
When the vehicle is
locked:Meaning
The red LED flashes for ap-
proximately 2 seconds at
short intervals and then more
slowly.The "Safe" security
system is switched on.
The red LED flashes for about
two seconds then turns off. Af-
ter 30 seconds, the LED flash-
es again.The "Safe" security
system is switched off.
When the vehicle is
locked:Meaning
The red LED flashes for about
two seconds at short inter-
vals. Subsequently, the light
will remain switched on for
about. 30 seconds.There is a fault in the
locking system. Con-
tact a specialised
workshop. WARNING
Careless use of the "Safe" security system
can cause serious injury.
● Never leave anybody inside the vehicle if it
has been locked using the key. When the
"Safe" security system is activated, doors
cannot be opened from the inside!
● When the doors are locked, it is difficult to
get to passengers in the vehicle interior in
case of an emergency. Passengers could re-
main trapped inside and unable to unlock the
doors in case of an emergency. Doors
Introduction WARNING
If a door is not correctly closed, it could open
unexpectedly when driving and cause serious
injuries. ●
Always stop immediately and close the
door.
● When closing, ensure that the door has
closed correctly. A closed door should be
flush with the corresponding parts of the
bodywork.
● Open and close doors only when nobody is
in the way of the door. WARNING
A door held open by its retainer could be
blown closed by the wind or close if the vehi-
cle is on a hill, causing injury.
● When opening and closing doors, always
use the door handle. Note
On the display of the SEAT Portable System
(supplied by SEAT), ››› page 123 can be seen
if at least one vehicle door has been left open
or is not correctly closed. 49
Technical specifications
Advice
Operation
Safety
Page 53 of 219

Opening and closing
central locking button is used, they may be
locked in the vehicle.
CAUTION
Before opening the rear lid, ensure that there
is sufficient free space to open and close it,
for example if you are in a garage. Note
On the display of the Portable Navigation
System (supplied by SEAT) ››› page 123 can
be seen if the rear lid has been left open or is
not correctly shut. Opening the rear lid
Fig. 37
On the vehicle key: button to unlock
and open the boot hatch. If bicycles are attached to a rack on the boot
hatch, for example, in some cases, it may not open automatically
››› . Remove the load
from the carrier and support the open rear
lid.
Opening with central locking
● Press the button on the vehicle key
››› Fig. 37 for about one second to unlock the
boot h
atch.
● OR: Press the button on the vehicle key
until the rear lid opens automatically several
centimetres.
● Opening the rear lid with the button.
Opening with the vehicle mechanical key
● Insert the vehicle key into the lock cylinder
of the driver door and turn the key in an anti-
clockwise direction
›
›› p
age 45.
● Opening the rear lid with the button. WARNING
Unsuitable or careless unlocking and opening
of the rear lid could cause serious injuries.
● If there is a loaded luggage carrier on the
rear lid, it could be unlocked or open but not
recognised as such. An unlocked or open rear
lid could open unexpectedly while driving. Note
At outside temperatures of less than 0 °C
(+32 °F), the pressurised gas struts cannot
always automatically lift the rear lid. In this
case, open the rear lid manually. Closing the rear lid
Fig. 38
Rear lid open: hand grip Closing the rear lid
● Grab the handgrip inside the rear lid
››› Fig. 38 (arrow).
● Push the rear lid downwards until it locks
into place in the lock.
● Ensure that it is correctly closed by pulling
on it firmly.
Locking the rear lid with central locking*
If you unlock the vehicle without opening any
doors or the rear lid, it will lock again auto-
matically after about 30 seconds. This func-
tion prevents the vehicle from remaining un-
locked if the unlocking button is pressed by
mistake.
Locking is only possible when the rear lid is
correctly and fully closed. »
51
Technical specifications
Advice
Operation
Safety
Page 55 of 219
Opening and closing
Side-opening rear windows Fig. 40
Lever to open and close the rear win-
dow Opening
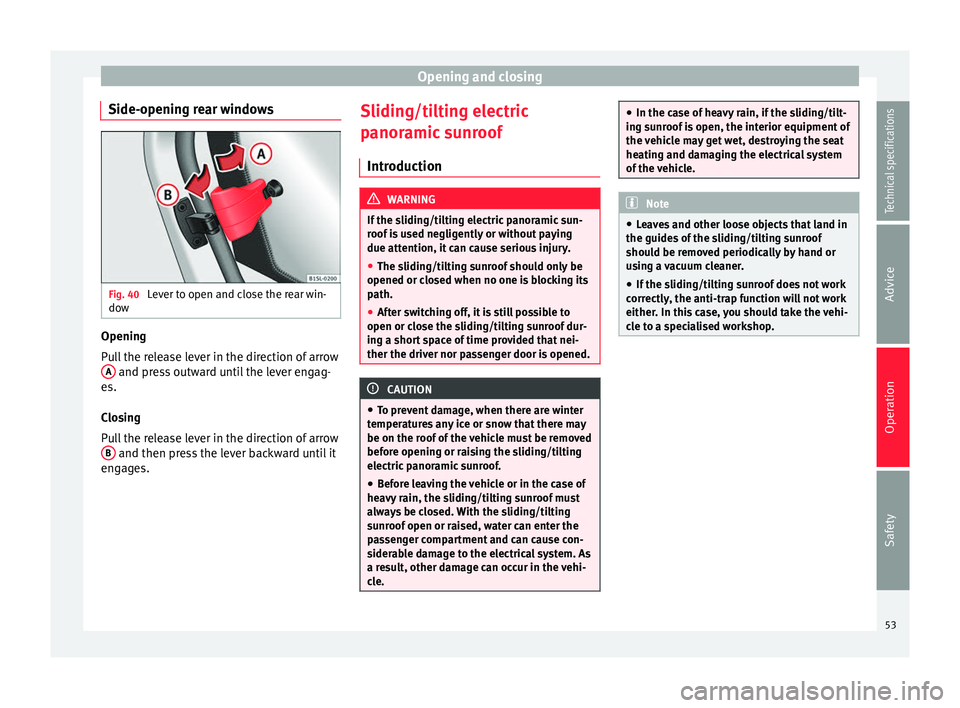
Pull the release lever in the direction of arrow
A and press outward until the lever engag-
es.
Closing
Pull the release lever in the direction of arrow B and then press the lever backward until it
engages. Sliding/tilting electric
panoramic sunroof
Introduction WARNING
If the sliding/tilting electric panoramic sun-
roof is used negligently or without paying
due attention, it can cause serious injury.
● The sliding/tilting sunroof should only be
opened or closed when no one is blocking its
path.
● After switching off, it is still possible to
open or close the sliding/tilting sunroof dur-
ing a short space of time provided that nei-
ther the driver nor passenger door is opened. CAUTION
● To prevent damage, when there are winter
temperatures any ice or snow that there may
be on the roof of the vehicle must be removed
before opening or raising the sliding/tilting
electric panoramic sunroof.
● Before leaving the vehicle or in the case of
heavy rain, the sliding/tilting sunroof must
always be closed. With the sliding/tilting
sunroof open or raised, water can enter the
passenger compartment and can cause con-
siderable damage to the electrical system. As
a result, other damage can occur in the vehi-
cle. ●
In the case of heavy rain, if the sliding/tilt-
ing sunroof is open, the interior equipment of
the vehicle may get wet, destroying the seat
heating and damaging the electrical system
of the vehicle. Note
● Leaves and other loose objects that land in
the guides of the sliding/tilting sunroof
should be removed periodically by hand or
using a vacuum cleaner.
● If the sliding/tilting sunroof does not work
correctly, the anti-trap function will not work
either. In this case, you should take the vehi-
cle to a specialised workshop. 53Technical specifications
Advice
Operation
Safety
Page 57 of 219
Lights and visibility
sunroof encounters resistance or an obstacle
when closing, it will immediately reopen.
● Check why the sliding/tilting sunroof has
not closed.
● Try to close it again.
● If it is still not possible to close it due to an
obstacle or resistance, it will remain in the
corresponding position. Close it without the
anti-trap function.
Closing the sliding/tilting electric panoramic
sunroof without the anti-trap function
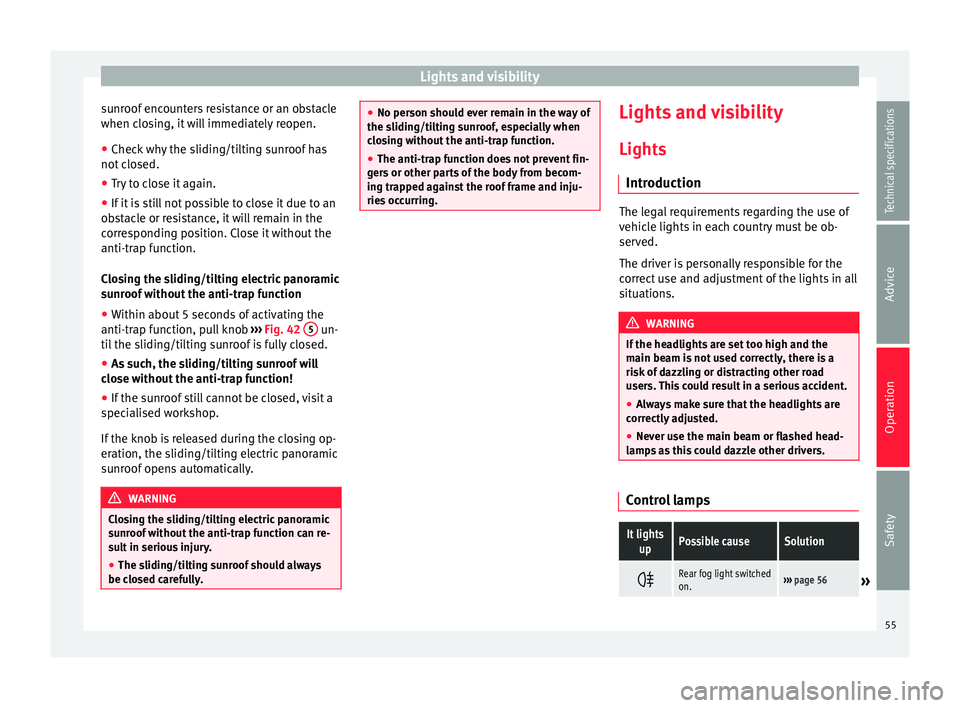
● Within about 5 seconds of activating the
anti-trap function, pull knob ››› Fig. 42 5 un-
til the sliding/tilting sunroof is fully closed.
● As such, the sliding/tilting sunroof will
close without the anti-trap function!
● If the sunroof still cannot be closed, visit a
specialised workshop.
If the knob is released during the closing op-
eration, the sliding/tilting electric panoramic
sunroof opens automatically. WARNING
Closing the sliding/tilting electric panoramic
sunroof without the anti-trap function can re-
sult in serious injury.
● The sliding/tilting sunroof should always
be closed carefully. ●
No person should ever remain in the way of
the sliding/tilting sunroof, especially when
closing without the anti-trap function.
● The anti-trap function does not prevent fin-
gers or other parts of the body from becom-
ing trapped against the roof frame and inju-
ries occurring. Lights and visibility
Lights Introduction The legal requirements regarding the use of
vehicle lights in each country must be ob-
served.
The driver is personally responsible for the
correct use and adjustment of the lights in all
situations.
WARNING
If the headlights are set too high and the
main beam is not used correctly, there is a
risk of dazzling or distracting other road
users. This could result in a serious accident.
● Always make sure that the headlights are
correctly adjusted.
● Never use the main beam or flashed head-
lamps as this could dazzle other drivers. Control lampsIt lights
upPossible causeSolution
Rear fog light switched
on.›››
page 56» 55
Technical specifications
Advice
Operation
Safety
Page 59 of 219
Lights and visibility
Lights and visibility: functions Parking light remains on both sides
If when switching off the ignition, the light
control remains in the position
and the ve-
hic
le is closed from outside, both headlights,
in addition to the side lights and the rear
lights will light up.
Daytime driving light
The daytime driving light consists of individu-
al lights in the front headlamps.
When the daytime driving light is switched
on, only the individual lights come on ››› .
The daytime lights are switched on each time
the ignition is turned on if the light switch is
in position .
Switching the daytime driving light on and
off
To switch the daytime driving light on or off,
it is necessary to fit or remove the corre-
sponding fuse. Ask for professional assis-
tance for this. WARNING
If the road is not well-lit and the vehicle is
not clearly visible to other drivers, an acci-
dent may occur.
● Never use the daytime driving light if the
road is not well-lit as a result of the weather conditions and poor visibility. The daytime
driving lights are not bright enough to illumi-
nate the road ahead and to ensure that other
road users are able to see you.
●
The rear lights do not come on with the
daytime driving light. A vehicle which does
not have the rear lights on may not be visible
to other drivers in the darkness, if it is rain-
ing or in conditions of poor visibility. Note
The headlights, rear lights and turn signals
may mist up temporarily on the inside in cool
or damp weather. This is normal and in no
way effects the useful life of the vehicle light-
ing system. Turn signal and main beam lever
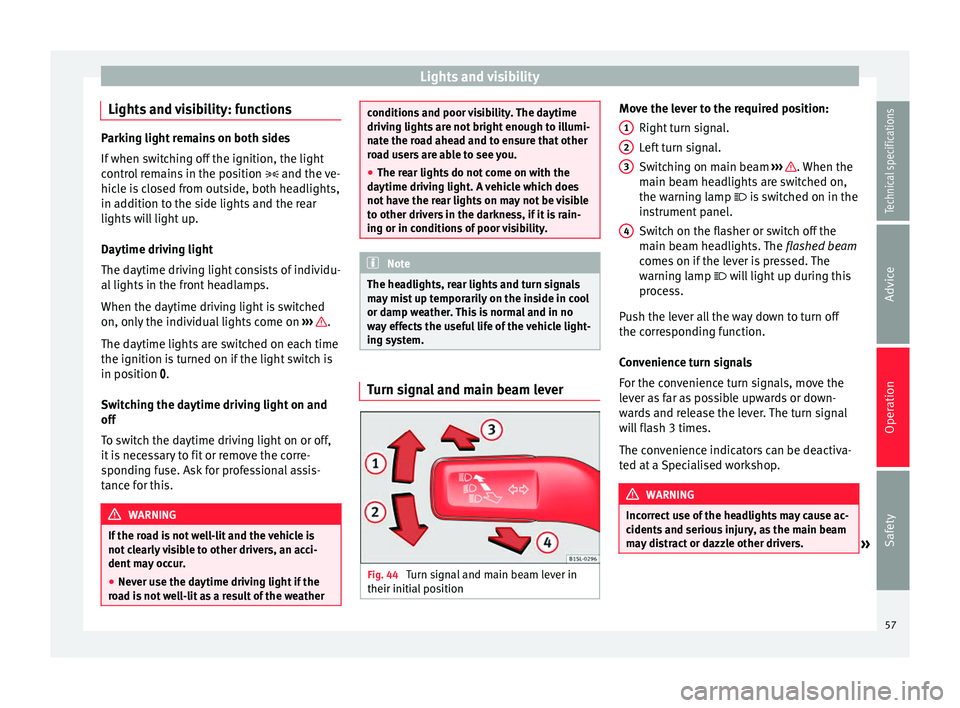
Fig. 44
Turn signal and main beam lever in
their initial position Move the lever to the required position:
Right turn signal.
Left turn signal.
Switching on main beam ››› . When the
main beam headlights are switched on,
the warning lamp is switched on in the
instrument panel.
Switch on the flasher or switch off the
main beam headlights. The flashed beam
comes on if the lever is pressed. The
warning lamp
will light up during this
pr
ocess.
Push the lever all the way down to turn off
the corresponding function.
Convenience turn signals
For the convenience turn signals, move the
lever as far as possible upwards or down-
wards and release the lever. The turn signal
will flash 3 times.
The convenience indicators can be deactiva-
ted at a Specialised workshop. WARNING
Incorrect use of the headlights may cause ac-
cidents and serious injury, as the main beam
may distract or dazzle other drivers. » 1
2
3
4
57
Technical specifications
Advice
Operation
Safety
Page 61 of 219
Lights and visibilityBut-
ton/SwitchFunction
Switching on the reading light.
Switches door contact control on (cen-
tral position).
The reading light comes on automati-
cally when the vehicle is unlocked, a
door is opened or the key is removed
from the ignition.
The light goes off a few seconds after
all the doors are closed, the vehicle is
locked or the ignition is switched on.
Note
The reading lights go out when the vehicle is
locked, or a few minutes after the key is re-
moved from the ignition. This prevents the
vehicle's battery from discharging. Visibility
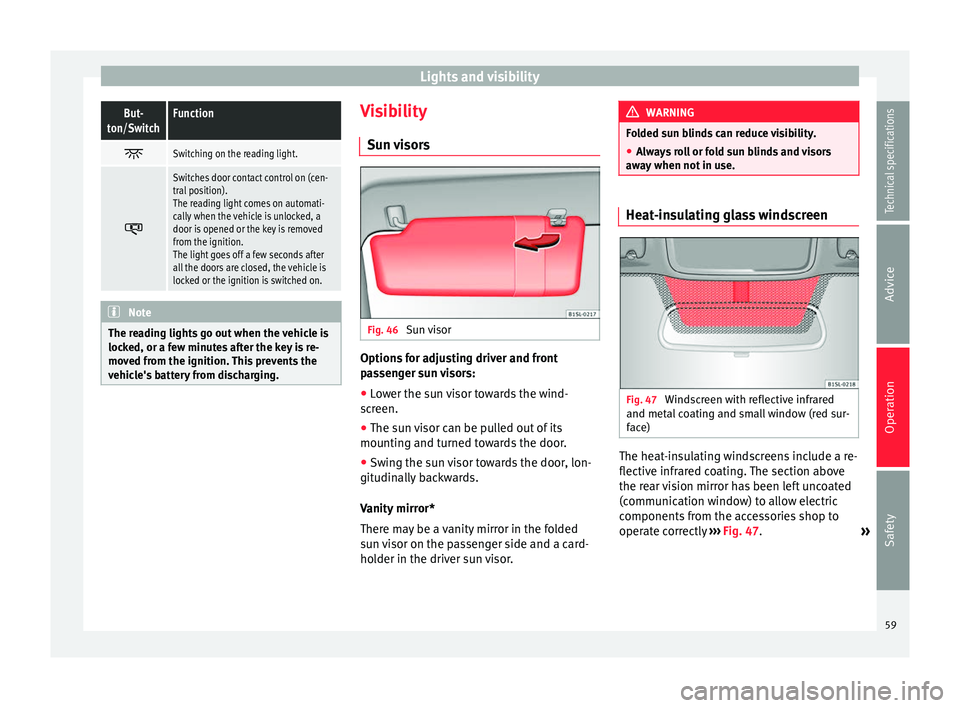
Sun visors Fig. 46
Sun visor Options for adjusting driver and front
passenger sun visors:
● Lower the sun visor towards the wind-
screen.
● The sun visor can be pulled out of its
mounting and turned towards the door.
● Swing the sun visor towards the door, lon-
gitudinally backwards.
Vanity mirror*
There may be a vanity mirror in the folded
sun visor on the passenger side and a card-
holder in the driver sun visor. WARNING
Folded sun blinds can reduce visibility.
● Always roll or fold sun blinds and visors
away when not in use. Heat-insulating glass windscreen
Fig. 47
Windscreen with reflective infrared
and metal coating and small window (red sur-
face) The heat-insulating windscreens include a re-
flective infrared coating. The section above
the rear vision mirror has been left uncoated
(communication window) to allow electric
components from the accessories shop to
operate correctly
›››
Fig. 47 .
»
59
Technical specifications
Advice
Operation
Safety
Page 63 of 219
Lights and visibility
Note
● The windscreen wipers will only work when
the ignition is switched on.
● The interval wipe speed varies according to
the vehicle speed. The faster the vehicle is
moving, the more often the windscreen is
cleaned.
● The rear wiper is automatically switched on
when the windscreen wiper is on and the car
is in reverse gear. Windscreen wiper functionsWindscreen wiper performance in different sit-
uations
If the vehicle is at a
standstillThe activated position provision-
ally changes to the previous posi-
tion.
For intermittent wip-
ersIntervals between wipes depend
on the vehicle's speed. The high-
er the vehicle speed the shorter
the intervals.
Note
The wiper will try to wipe away any obstacles
that are on the windscreen. The wiper will
stop moving if the obstacle blocks its path.
Remove the obstacle and switch the wiper
back on again. Windscreen wipers service position
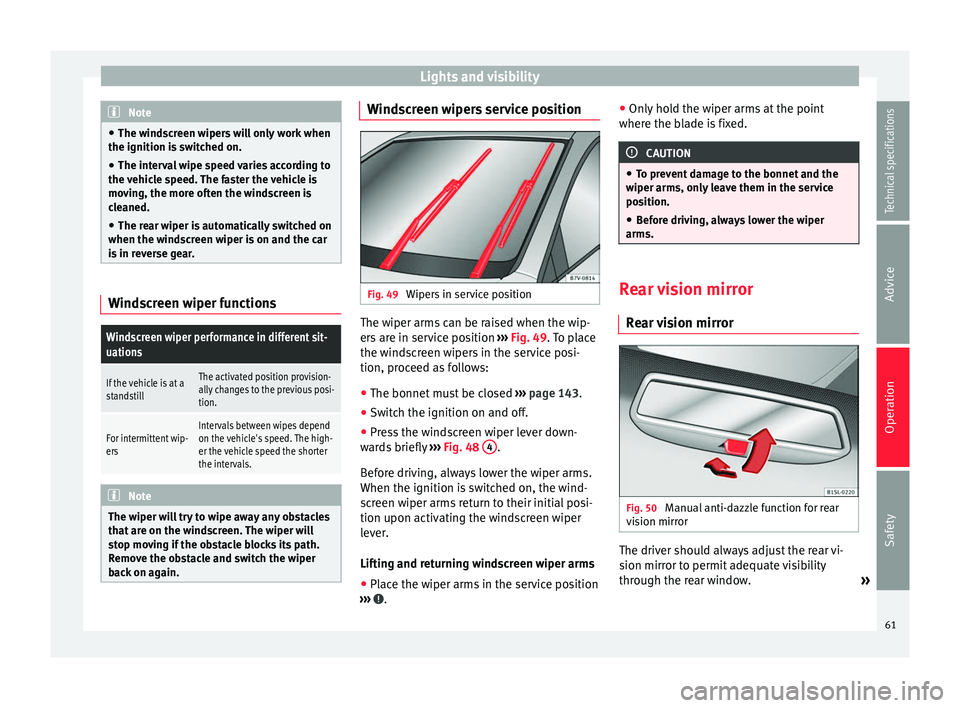
Fig. 49
Wipers in service position The wiper arms can be raised when the wip-
ers are in service position
››› Fig. 49 . To place
the w ind
screen wipers in the service posi-
tion, proceed as follows:
● The bonnet must be closed ››› page 143.
● Switch the ignition on and off.
● Press the windscreen wiper lever down-
wards briefly ››› Fig. 48 4 .
Before driving, always lower the wiper arms.
When the ignition is switched on, the wind-
screen wiper arms return to their initial posi-
tion upon activating the windscreen wiper
lever.
Lifting and returning windscreen wiper arms
● Place the wiper arms in the service position
››› .●
Only hold the wiper arms at the point
where the blade is fixed. CAUTION
● To prevent damage to the bonnet and the
wiper arms, only leave them in the service
position.
● Before driving, always lower the wiper
arms. Rear vision mirror
Rear vision mirror Fig. 50
Manual anti-dazzle function for rear
vision mirror The driver should always adjust the rear vi-
sion mirror to permit adequate visibility
through the rear window.
»
61
Technical specifications
Advice
Operation
Safety