technical specifications Seat Mii 2014 User Guide
[x] Cancel search | Manufacturer: SEAT, Model Year: 2014, Model line: Mii, Model: Seat Mii 2014Pages: 219, PDF Size: 4.19 MB
Page 25 of 219
Airbag system
In the event of a side-on collision, the side
airbag will deploy in the side of the vehicle
affected ››› Fig. 15 , thus reducing the risk of
injurie s
to passengers on the side of the
body and the head facing the accident side. WARNING
The airbag is deployed at high speed in frac-
tions of a second.
● Always keep the deployment areas of the
side airbags vacant.
● The deployment space between the front
passengers and the airbags must not in any
case be occupied by other passenger, pets
and objects.
● Do not mount accessories on the doors.
● Only used protective covers for the seats
that are approved for the vehicle. Otherwise,
the side airbag would be obstructed when de-
ployed. WARNING
Incorrect handling of the driver's and front
passenger seat could prevent the side airbag
from deploying properly and cause severe in-
juries.
● Never remove the front seats of the vehicle
or modify any of their components.
● Great forces must not be exerted on the
seat backrest bolsters because the side air-
bags might not deploy correctly, might not
deploy at all or might deploy unexpectedly. ●
Any damage to the original seat upholstery
or around the seams of the side airbag units
must be repaired immediately by a special-
ised workshop. Deactivating airbags
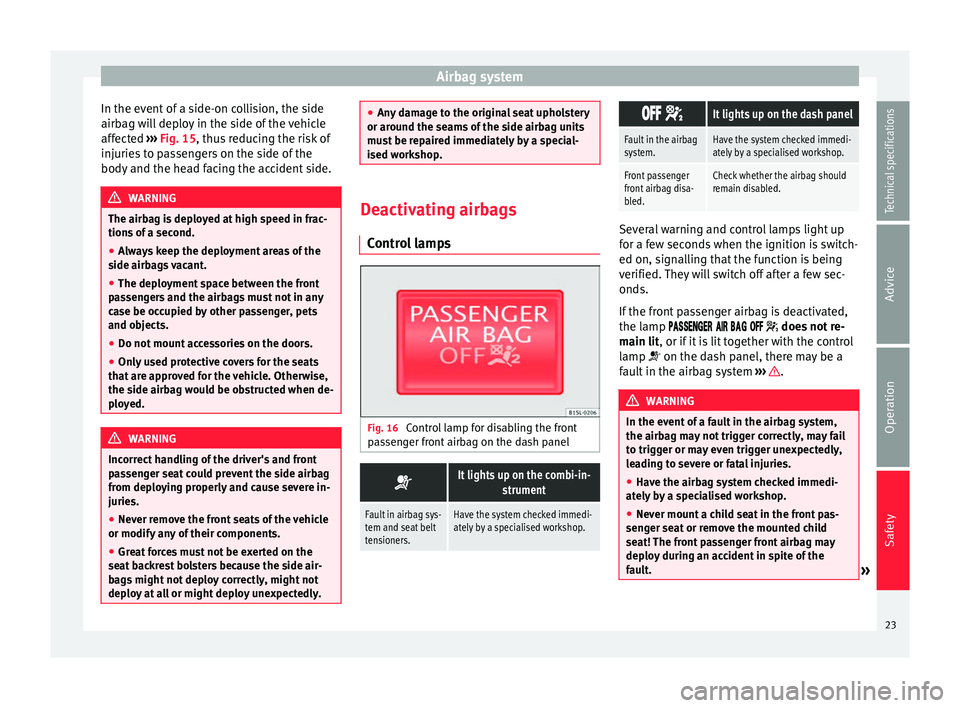
Control lamps Fig. 16
Control lamp for disabling the front
passenger front airbag on the dash panel
It lights up on the combi-in-
strument
Fault in airbag sys-
tem and seat belt
tensioners.Have the system checked immedi-
ately by a specialised workshop.
It lights up on the dash panel
Fault in the airbag
system.Have the system checked immedi-
ately by a specialised workshop.
Front passenger
front airbag disa-
bled.Check whether the airbag should
remain disabled. Several warning and control lamps light up
for a few seconds when the ignition is switch-
ed on, signalling that the function is being
verified. They will switch off after a few sec-
onds.
If the front passenger airbag is deactivated,
the lamp
does not re-
m ain lit
, or if it is lit together with the control
lamp on the dash panel, there may be a
fault in the airbag system ››› .
WARNING
In the event of a fault in the airbag system,
the airbag may not trigger correctly, may fail
to trigger or may even trigger unexpectedly,
leading to severe or fatal injuries.
● Have the airbag system checked immedi-
ately by a specialised workshop.
● Never mount a child seat in the front pas-
senger seat or remove the mounted child
seat! The front passenger front airbag may
deploy during an accident in spite of the
fault. » 23
Technical specifications
Advice
Operation
Safety
Page 27 of 219
Transporting children safely
Transporting children safely Child safety Introduction Before transporting babies and children in a
child seat placed in the front passenger seat,
first completely read the information regard-
ing the airbag system.
This information is extremely important for
driver and passenger safety, particularly that
of babies and children.
SEAT recommends the use of child seats from
the SEAT accessory programme. These child
seats have been designed and tested for use
in SEAT vehicles. You can purchase child
seats with different mountings from a SEAT
dealership.
WARNING
Make sure children are properly belted in and
correctly secured to avoid severe or fatal inju-
ries while the vehicle is in motion.
● Never use a rear-facing child seat in the
front passenger seat if the front passenger
front airbag is enabled.
● Children up to 12 years old should always
travel on the rear seat. ●
Children must always be protected with an
approved child restraint system suited to
their height and weight.
● Children must assume the proper sitting
position and be properly belted in while trav-
elling.
● Ensure the seat backrest is upright when a
child seat is being used on it.
● Do not allow the child's head or other part
of his or her body to enter the deployment
area of the side airbags.
● Make sure the belt webbing is correctly
positioned.
● Never hold children or babies on your lap or
in your arms.
● Only one child may occupy a child seat.
● Please read and observe the child seat
manufacturer's handling instructions. WARNING
An empty or loose child seat could fly uncon-
trollably around the vehicle interior and
cause injuries in the event of an accident or
sudden braking.
● When not in use while the vehicle is in mo-
tion, always safely secure the child seat or
store it in the luggage compartment. Note
Replace the child seat after an accident, as it
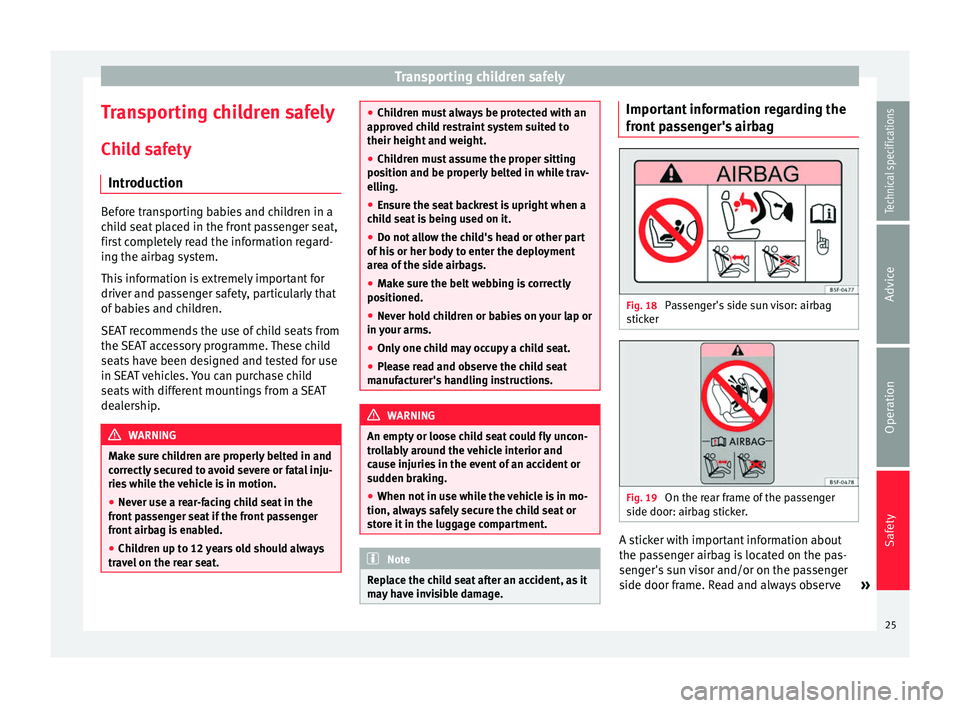
may have invisible damage. Important information regarding the
front passenger's airbag
Fig. 18
Passenger's side sun visor: airbag
sticker Fig. 19
On the rear frame of the passenger
side door: airbag sticker. A sticker with important information about
the passenger airbag is located on the pas-
senger's sun visor and/or on the passenger
side door frame. Read and always observe
»
25Technical specifications
Advice
Operation
Safety
Page 29 of 219
Transporting children safely
General information on transporting
children in the vehicle Legal regulations and provisions will always
take priority over the descriptions of this in-
struction manual. There are different regula-
tions and provisions for the use of child seats
and their mountings (
››› table on page 27).
In some countries, for example, the use of
child seats on certain seats in the vehicle
may be forbidden.
The physical principles and the forces acting
on the vehicle in the event of a collision or
other type of accidents also apply to children
››› page 11
. However, unlike adults and
y ou
ngsters, children do not have fully devel-
oped muscle and bone structures. In the
event of an accident, children are subject to a
greater risk than adults of sustaining severe
injuries.
Given that children's bodies are not yet fully
developed, child restraint systems must be
used that are especially adapted to their
height, weight and constitution. There are
laws in force in many countries that indicate the use of approved seat systems for trans-
porting babies and children.
Only used authorised, approved child seats
that are suitable for the vehicle. Always con-
sult with a SEAT dealership or a Specialised
workshop should you have any doubts.
Specific child seat regulations for each
country (selection)
Child seats must comply with the ECE-R 44
1)
regulation. You can consult additional infor-
mation at your SEAT dealership at the inter-
net address www.seat.es.
Categorisation of child seats according to
ECE-R 44
Weight cat- egoryWeight ofthe childAge
Group 0up to 10 kgup to approximately. 9 months
Group 0+up to 13 kgup to approximately.18 months
Group 19 to 18 kgapprox. 8 months to 31
/ 2 years
Group 215 to 25 kgapprox. 3 to 7 years
Group 322 to 36 kgapprox. 6 to 12 years Not all children fit in the seat of their weight
group. Nor do all seats adapt to the vehicle.
Therefore, always check whether the child fits
properly in the child seat and whether the
seat can be installed safely in the vehicle.
Child seats approved under the ECE-R 44 reg-
ulation are fitted with the corresponding ap-
proval symbol. The sign is an upper-case E in
a circle with the identification number below
it.
WARNING
In general, the rear seat is always the safest
place for children, who are belted correctly, in
the event of an accident.
● A suitable child seat that is correctly instal-
led and used on one of the rear seats offer
the most protection possible for babies and
children up to 12 years in most accidents. 1)
ECE-R: E conomic C
omission for Europe Regulation.
27
Technical specifications
Advice
Operation
Safety
Page 31 of 219
Transporting children safely
yellow
››› page 17 con-
trol lamp on the dash panel will be lit. If you
cannot disable the front passenger front air-
bag and it remains activated, it is forbidden
to transport children on the front passenger
seat
››› .
Things to note if using a child seat on the
front passenger seat:
● The front passenger front airbag must be
disabled
when using a rear-facing child
se
at ››› page 17.
● The seat
backrest of the front passenger
seat must be upright.
● The front passenger seat must be moved as
far back as possible.
● The seat backrest of the front passenger
seat must be upright.
Suitable child seats
The child seat must be authorised by the
manufacturer especially for use on a front
passenger seat with a front or side airbag.
Universal seats for children can be fitted in
the front passenger seat, in groups 0, 0+, 1,
2 or 3 according to the ECE-R 44 regulation. WARNING
If a child seat is mounted on the front passen-
ger seat, the risk of the child sustaining se-
vere or fatal injuries in the event of an acci- dent increases. Rear-facing child seats must
never be mounted on the front passenger
seat when the front passenger front airbag is
enabled. This is life-threatening to the child
should the front airbag deploy, as the child
seat would be struck by the inflated airbag
and thrown against the seat backrest.
WARNING
If, in exceptional circumstances, a child must
be transported in a rear-facing child seat on
the front passenger seat, strictly observe the
following:
● Always disable the front passenger front
airbag and leave it disabled.
● The child seat must be approved by the
manufacturer for use on a front passenger
seat with front and side airbag.
● Follow the installation instructions of the
child seat manufacturer and observe the
warnings.
● Move the front passenger seat as far back
as possible and adjust it to its highest posi-
tion to keep as far away as possible from the
front airbag.
● Move the seat backrest to the upright posi-
tion.
● Children must always be protected with an
approved child restraint system suited to
their height and weight. Use of the child seat on the rear seat
If a child seat is mounted on the rear seat,
adapt the position of the front passenger
seat so that the child has enough space.
Therefore, adapt the front passenger seat to
the size of the child seat and the height of
the child. Ensure the passenger is in the cor-
rect position
››› page 6.
Suitable child seats
The manufacturer must authorise the child
seat for use in the rear seats with side air-
bags.
Universal seats for children can be fitted in
the passenger seat, in groups 0, 0+, 1, 2 or 3
according to the ECE-R 44 regulation.
The rear seats are suitable for child seats
with the ISOFIX system spec
ially designed
for this type of vehicle in accordance with
regulation ECE-R 44.
ISOFIX child seats approved for rear seats
ISOFIX child seats are divided into the follow-
ing certified categories: “universal”, “semi-
universal” or “specific categories for the ve-
hicle”.
● If the ISOFIX child seat is certified “univer-
sal”, it must be supported by the lower an-
chor points and the Top Tether retaining
strap. »
29
Technical specifications
Advice
Operation
Safety
Page 33 of 219
Transporting children safely
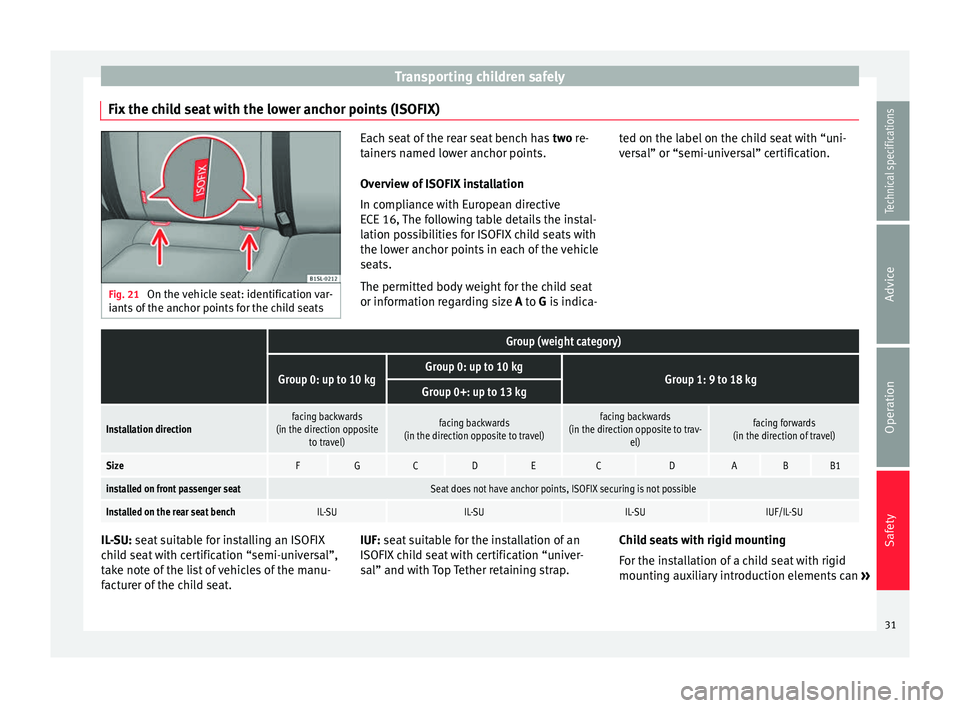
Fix the child seat with the lower anchor points (ISOFIX) Fig. 21
On the vehicle seat: identification var-
iants of the anchor points for the child seats Each seat of the rear seat bench has
two re-
t ainer
s named lower anchor points.
Overview of ISOFIX installation
In compliance with European directive
ECE 16, The following table details the instal-
lation possibilities for ISOFIX child seats with
the lower anchor points in each of the vehicle
seats.
The permitted body weight for the child seat
or information regarding size A to G is indica- ted on the label on the child seat with “uni-
versal” or “semi-universal” certification.
Group (weight category)
Group 0: up to 10 kgGroup 0: up to 10 kgGroup 1: 9 to 18 kgGroup 0+: up to 13 kg
Installation directionfacing backwards
(in the direction opposite to travel)facing backwards
(in the direction opposite to travel)facing backwards
(in the direction opposite to trav- el)facing forwards
(in the direction of travel)
SizeFGCDECDABB1
installed on front passenger seatSeat does not have anchor points, ISOFIX securing is not possible
Installed on the rear seat benchIL-SUIL-SUIL-SUIUF/IL-SU IL-SU:
seat suitable for installing an ISOFIX
c hi
ld seat with certification “semi-universal”,
take note of the list of vehicles of the manu-
facturer of the child seat. IUF: seat suitable for the installation of an
ISOFIX child seat with certification “univer-
sal” and with Top Tether retaining strap. Child seats with rigid mounting
For the installation of a child seat with rigid
mounting auxiliary introduction elements can
»
31
Technical specifications
Advice
Operation
Safety
Page 35 of 219
Transporting children safely
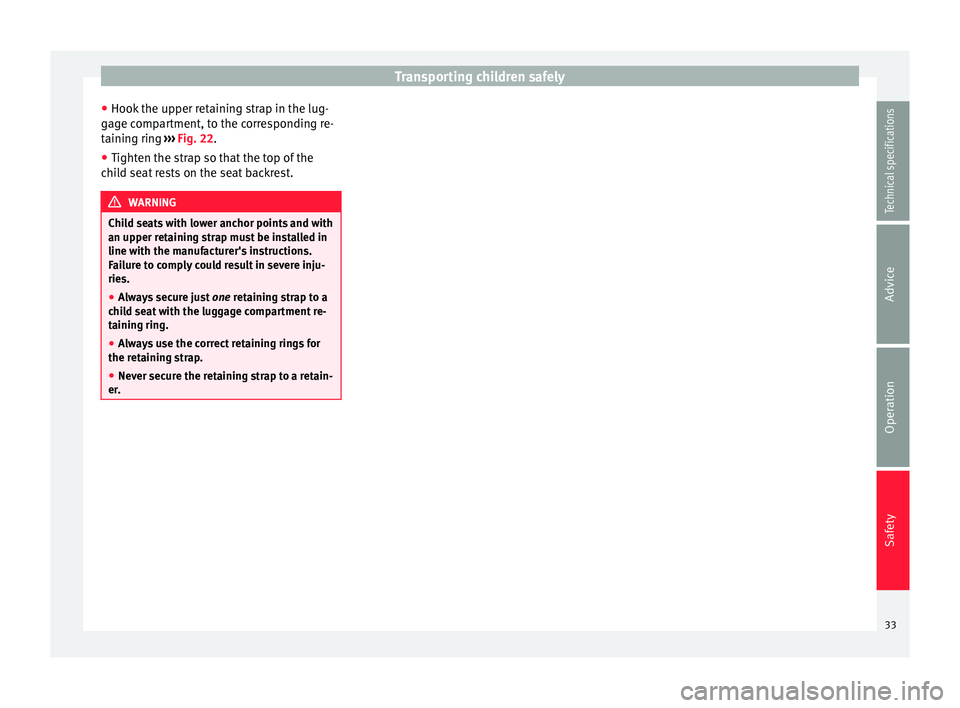
● Hook the upper retaining strap in the lug-
gage compartment, to the corresponding re-
taining ring ››› Fig. 22 .
● Tight en the s
trap so that the top of the
child seat rests on the seat backrest. WARNING
Child seats with lower anchor points and with
an upper retaining strap must be installed in
line with the manufacturer's instructions.
Failure to comply could result in severe inju-
ries.
● Always secure just one retaining strap to a
c hi
ld seat with the luggage compartment re-
taining ring.
● Always use the correct retaining rings for
the retaining strap.
● Never secure the retaining strap to a retain-
er. 33
Technical specifications
Advice
Operation
Safety
Page 37 of 219

Cockpit
Operation
Cockpit Overview Legend for the Fig. 23
:
Int
erior door release lever . . . . . . . . .49
Turn switch for adjusting the exteri-
or mirrors . . . . . . . . . . . . . . . . . . . . . . . . 61
– Exterior mirror adjustment
– Heated exterior mirrors
Air outlets . . . . . . . . . . . . . . . . . . . . . . . . 80
Lever for . . . . . . . . . . . . . . . . . . . . . . . . . 55
– Turn signals and main beam
headlights
– Cruise control system (CCS) –
– – /+ – /- . . . . . . .107
Steering wheel with horn and
– Driver airbag . . . . . . . . . . . . . . . . . . . 21
Dash panel . . . . . . . . . . . . . . . . . . . . . . . 36, 39
Windscreen wiper/ windscreen
wash lever . . . . . . . . . . . . . . . . . . . . . . . 60
– Windscreen wipers
– Rear window wiper
1 2
3
4
5
6
7 –
Lever with buttons for controlling
the SEAT information system - ,
/
. . . . . . . . . . . . . . . . . . . . . . . . . 40
C ontr
ols for:
– Start-Stop system button . . .115
– Rear window heating button . .80
– Left seat heating controls . . . . . 64
Switches for: – Heating and ventilation system .80
– Air conditioner . . . . . . . . . . . . . . . . . . 80
SEAT Portable System (supplied by
SEAT) . . . . . . . . . . . . . . . . . . . . . . . . . . . . 123
Radio (factory fitted) ››› Booklet Ra-
dio
Controls for:
– Hazard warning lights switch . 170
– Passenger front airbag off warn-
ing lamp . .17
– Right seat heating controls
or rear window heating button
(alternative position) . . . . . . . . . . .64, 80
Storage compartment with drink
holder in the centre console . . . . . . .71
Handle of the storage compartment
or storage compartment open 1)
. . . 67
8 9
10
11
12
13
14 In the side of the dash panel: Key
switch for switching off the front
passenger airbag
1)
. . . . . . . . . . . . . . . 17
Position of passenger front airbag
on the dash panel . . . . . . . . . . . . . . . . 17
Ashtray* . . . . . . . . . . . . . . . . . . . . . . . . . 71
12 volt socket or cigarette lighter* .72, 72
Lever for:
– Manual gearbox . . . . . . . . . . . . . . . . 94
– Automatic gearbox . . . . . . . . . . . . .95
Handbrake . . . . . . . . . . . . . . . . . . . . . . . 89
Button for:
– City Safety Assist function . 110
Ignition lock . . . . . . . . . . . . . . . . . . . . . . 86
Pedals . . . . . . . . . . . . . . . . . . . . . . . . . . . 93
Storage compartment . . . . . . . . . . . . .67
Steering column adjustment lever .6
Open bonnet lever . . . . . . . . . . . . . . . . 143
Headlamp range adjustment . . . 55
Light switch . . . . . . . . . . . . . . . . . . . 55
Central lock button . . . . . . . . . .45
Button for operating the electric
windows of the driver door . . . . .52
15 16
17
18
19
20
21
22
23
24
25
26
27
28
29
30
1)
According to version
35
Technical specifications
Advice
Operation
Safety
Page 39 of 219

Cockpit
Display messages A variety of information can be viewed on the
instrument panel display
››› Fig. 24 and
› ›
› Fig. 25 2 , depending on the vehicle
equipment:
● Warning and information messages.
● Odometer.
● Time.
● Outside temperature.
● Selector lever positions ››› page 93.
● Recommended gear (manual gearbox)
››› page 93 .
● Mu
ltifunction display (MFI) ›››
page 40
● Service interval display ›››
page 38 .
● Start-Stop system status display
››› page 115.
● Fuel
gauge ›››
page 139.
● Seat
belt status display for rear seats
››› page 11.
Warnin
g and information messages
The system runs a check on certain compo-
nents and functions when the ignition is
switched on and while the vehicle is moving.
Faults in the operation are displayed on the
screen using red and yellow symbols on the
instrument panel display ( ›››
page 39) and,
in some cases, with audible warnings. The display may vary according to the type of in-
strument panel fitted.
Type of
mes-
sageSymbol
colourDescription
Priority 1
warning.Red
Symbol flashing or lit; partly
combined with audible warn-
ings.
Stop the vehicle! It is dan-
gerous ››› !
Check the function that is faul-
ty and repair it. If necessary, re-
quest assistance from special-
ised personnel.
Priority 2
warning.Yellow
Symbol flashing or lit; partly
combined with audible warn-
ings.
A faulty function, or fluids
which are below the correct
levels may cause damage to
the vehicle! ›››
Check the faulty function as
soon as possible. If necessary,
request assistance from speci-
alised personnel. Odometer
The
odometer
registers the total distance
tr
avelled by the car.
The
odometer ( trip
) shows the distance trav-
elled since the last odometer reset. The last
figure indicates 100 m. Outside temperature indicator
When the outside temperature is below +4 °C
(+39 °F), the symbol “ice crystal” (warning of
risk of freezing) is also displayed next to the
temperature. At first this symbol flashes and
then it remains lit until the outside tempera-
ture rises above +6 °C (+43 °F)
››› .
When the vehicle is stationary or travelling at
very low speeds, the temperature displayed
may be slightly higher than the actual out-
side temperature as a result of heat coming
from the engine.
The temperatures measured range from
-40 °C to +50 °C (-40 °F to +122 °F).
Selector lever positions
The range of engaged gears of the selector
lever is shown on the side of the lever, and
on the instrument panel display. In positions
D and
M
, and with the Tiptronic, the corre-
sponding gear is also indicated on the dis-
play.
Recommended gear* (manual gearbox)
The recommended gear to save fuel can be
displayed on the instrument panel display
while you are driving ››› page 93.
Seat belt status display for rear seats*
The seat belt status display on the instru-
ment panel display informs the driver, when
the ignition is switched on, whether any »
37
Technical specifications
Advice
Operation
Safety
Page 41 of 219
Cockpit
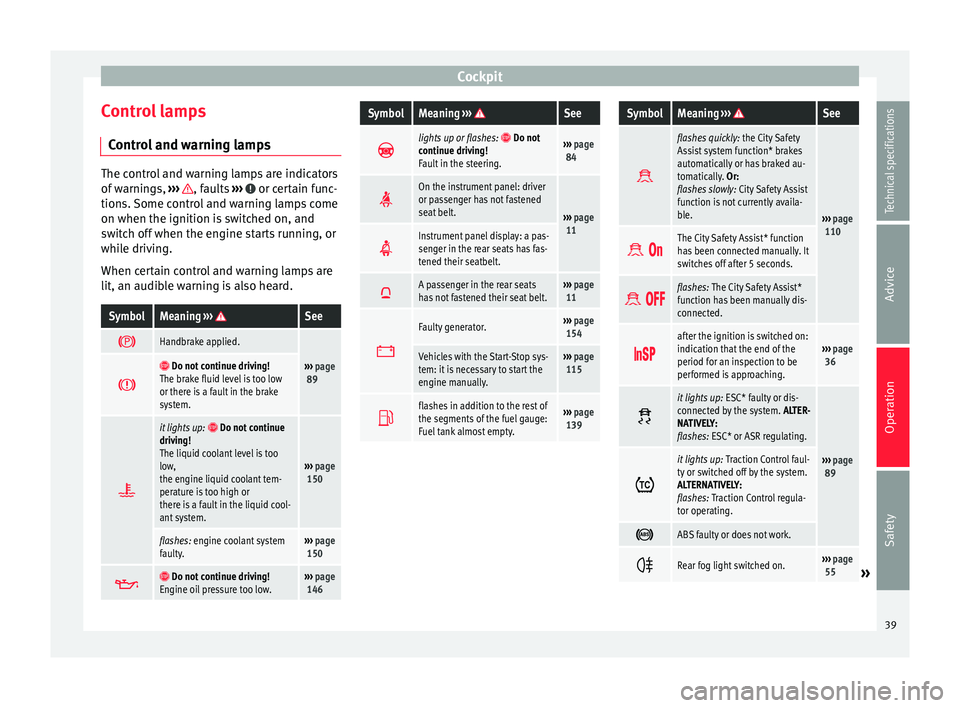
Control lamps Control and warning lamps The control and warning lamps are indicators
of warnings,
››› , faults
››› or certain func-
tions. Some control and warning lamps come
on when the ignition is switched on, and
switch off when the engine starts running, or
while driving.
When certain control and warning lamps are
lit, an audible warning is also heard.SymbolMeaning ››› See
Handbrake applied.
›››
page
89 Do not continue driving!
The brake fluid level is too low
or there is a fault in the brake
system.
it lights up:
Do not continue
driving!
The liquid coolant level is too
low,
the engine liquid coolant tem-
perature is too high or
there is a fault in the liquid cool-
ant system.
››› page
150
flashes: engine coolant system
faulty.››› page
150
Do not continue driving!
Engine oil pressure too low.››› page
146
SymbolMeaning ››› See
lights up or flashes:
Do not
continue driving!
Fault in the steering.››› page
84
On the instrument panel: driver
or passenger has not fastened
seat belt.
›››
page
11
Instrument panel display: a pas-
senger in the rear seats has fas-
tened their seatbelt.
A passenger in the rear seats
has not fastened their seat belt.›››
page
11
Faulty generator.›››
page
154
Vehicles with the Start-Stop sys-
tem: it is necessary to start the
engine manually.››› page
115
flashes in addition to the rest of
the segments of the fuel gauge:
Fuel tank almost empty.›››
page
139
SymbolMeaning ››› See
flashes quickly:
the City Safety
Assist system function* brakes
automatically or has braked au-
tomatically. Or:
flashes slowly: City Safety Assist
function is not currently availa-
ble.
››› page
110
The City Safety Assist* function
has been connected manually. It
switches off after 5 seconds.
flashes: The City Safety Assist*
function has been manually dis-
connected.
after the ignition is switched on:
indication that the end of the
period for an inspection to be
performed is approaching.››› page
36
it lights up:
ESC* faulty or dis-
connected by the system. ALTER-
NATIVELY:
flashes: ESC* or ASR regulating.
››› page
89 it lights up:
Traction Control faul-
ty or switched off by the system.
ALTERNATIVELY:
flashes: Traction Control regula-
tor operating.
ABS faulty or does not work.
Rear fog light switched on.›››
page
55» 39
Technical specifications
Advice
Operation
Safety
Page 43 of 219
Cockpit
Control functions of the instrument
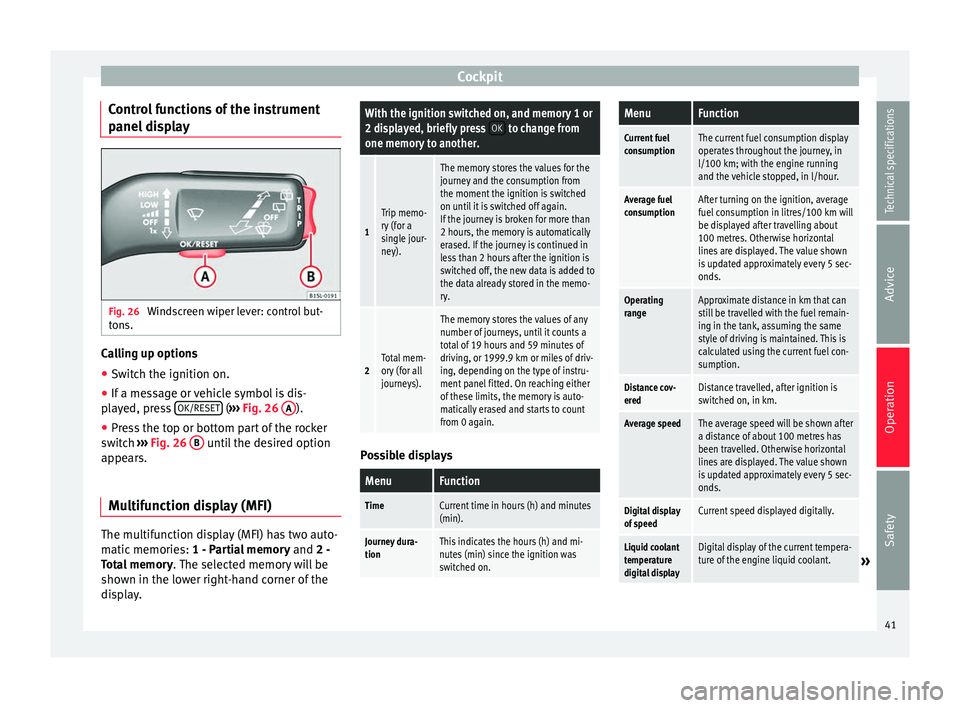
panel display Fig. 26
Windscreen wiper lever: control but-
tons. Calling up options
● Switch the ignition on.
● If a message or vehicle symbol is dis-
played, press OK/RESET (
››› Fig. 26 A ).
● Press the top or bottom part of the rocker
switch ››› Fig. 26 B until the desired option
appears.
Multifunction display (MFI) The multifunction display (MFI) has two auto-
matic memories:
1 - Partial memory and 2 -
Total memory . The selected memory will be
shown in the lower right-hand corner of the
display.With the ignition switched on, and memory 1 or
2 displayed, briefly press OK to change from
one memory to another.
1
Trip memo-
ry (for a
single jour-
ney).
The memory stores the values for the
journey and the consumption from
the moment the ignition is switched
on until it is switched off again.
If the journey is broken for more than
2 hours, the memory is automatically
erased. If the journey is continued in
less than 2 hours after the ignition is
switched off, the new data is added to
the data already stored in the memo-
ry.
2Total mem-
ory (for all
journeys).
The memory stores the values of any
number of journeys, until it counts a
total of 19 hours and 59 minutes of
driving, or 1999.9 km or miles of driv-
ing, depending on the type of instru-
ment panel fitted. On reaching either
of these limits, the memory is auto-
matically erased and starts to count
from 0 again. Possible displays
MenuFunction
TimeCurrent time in hours (h) and minutes
(min).
Journey dura-
tionThis indicates the hours (h) and mi-
nutes (min) since the ignition was
switched on.
MenuFunction
Current fuel
consumptionThe current fuel consumption display
operates throughout the journey, in
l/100 km; with the engine running
and the vehicle stopped, in l/hour.
Average fuel
consumptionAfter turning on the ignition, average
fuel consumption in litres/100 km will
be displayed after travelling about
100 metres. Otherwise horizontal
lines are displayed. The value shown
is updated approximately every 5 sec-
onds.
Operating
rangeApproximate distance in km that can
still be travelled with the fuel remain-
ing in the tank, assuming the same
style of driving is maintained. This is
calculated using the current fuel con-
sumption.
Distance cov-
eredDistance travelled, after ignition is
switched on, in km.
Average speedThe average speed will be shown after
a distance of about 100 metres has
been travelled. Otherwise horizontal
lines are displayed. The value shown
is updated approximately every 5 sec-
onds.
Digital display
of speedCurrent speed displayed digitally.
Liquid coolant
temperature
digital displayDigital display of the current tempera-
ture of the engine liquid coolant.»
41
Technical specifications
Advice
Operation
Safety