key Seat Mii 2016 Owner's Guide
[x] Cancel search | Manufacturer: SEAT, Model Year: 2016, Model line: Mii, Model: Seat Mii 2016Pages: 232, PDF Size: 4.9 MB
Page 96 of 232
Operation
SEAT recommend having the batteries
c h
an
ged in a specialised workshop.
The battery is located to the rear of the vehi-
cle key, under a cover.
Changing the battery
● Unfold the vehicle key blade ›››
page 92.
● Remove the cover from the back of the ve-
hicle k
ey ››› Fig. 99 in the direction of the ar-
row ››› .
● Extract the battery from the compartment
u s
in
g a suitable thin object ››› Fig. 100.
● Place the new battery in the compartment,
pres
sing in the direction of the arrow as
shown ››› Fig. 100 ››› .
● Fit the battery compartment cover, pressing
in the dir ection of
the arr
ow as shown
››› Fig. 99 until it clicks into place. CAUTION
● If the b att
ery is not changed correctly, the
vehicle key may be damaged.
● Use of unsuitable batteries may damage
the vehic
le key. For this reason, always re-
place the dead battery with another of the
same voltage, size and specifications.
● When fitting the battery, check that the po-
larity i
s correct. For the sake of the environment
Please dispose of your used batteries correct-
ly and w ith r
espect for the environment. Synchronising the vehicle key
If the button
is pressed frequently outside
of the v
ehicle range, it is possible that the ve-
hicle can no longer be locked or unlocked us-
ing the key. In this case, the vehicle key must
be synchronised once more as follows:
● Unfold the vehicle key blade ››
›
page 92.
● Press the button on the vehicle key. For
thi s, it
mu
st remain with the vehicle.
● Open the vehicle within one minute using
the key sh
aft.
● Turn on the ignition using the vehicle key.
The key h
as been synchronised.
● If necessary, fit the cap.
Central locking* and locking
syst
em
Introduction Read the additional information carefully
› ›
›
page 8 Central locking functions correctly when all
the doors and the r
ear lid are correctly shut.
If the driver door is open, the vehicle cannot
be locked with the key.
The battery of an unlocked vehicle parked for
a long period (e.g. in a private garage) may
run down and fail to start the motor. WARNING
The incorrect use of the central locking sys-
tem m a
y cause serious injuries.
● The central locking system will lock all
doors. A v
ehicle locked from the inside can
prevent any non-authorised individual from
opening the doors and accessing the vehicle.
Nevertheless, in case of emergency or acci-
dent, locked doors will complicate access to
the vehicle interior to help the passengers.
● Never leave children or disabled people
alone in the v
ehicle. The central locking but-
ton can be used to lock all the doors from
within. Therefore, passengers will be locked
inside the vehicle. Individuals locked in the
vehicle can be exposed to very high or very
low temperatures.
● Depending on the time of the year, temper-
ature
s inside a locked and closed vehicle can
be extremely high or extremely low resulting
in serious injuries and illness or even death,
particularly for young children.
● Never leave individuals locked in a closed
and locked
vehicle. In case of emergency,
they may not be able to exit the vehicle by
themselves or get help. 94
Page 97 of 232
Opening and closing
Description of the central locking sys-
t em The central locking system allows all doors
and the re
ar lid t
o be locked and unlocked
centrally.
● From outside, using the vehicle key.
● From inside, by pushing the central locking
button ›
›› page 97.
The central locking system can be activated
or deactivated at a specialised workshop.
In case of a vehicle key fault or central lock-
ing system fault, all doors can be locked or
unlocked manually.
Locking the vehicle after the airbags have
been deployed
If the airbags are deployed due to an acci-
dent, the vehicle will be automatically and
completely unlocked. Depending on the
amount of damage, it can be locked follow-
ing an accident in the following ways:
FunctionNecessary operations
Lock the vehicle,
by pushing the
central locking
button:– Turn off the ignition and turn it on
again.
– Push the central locking button
.
FunctionNecessary operations
Use the key to lock the vehicle:– Turn off the ignition and turn it on
again.
OR: Remove the key from the igni-
tion.
– Open any door just once.
– Lock the vehicle with the key. Note
If the buttons of the vehicle key are pressed
›› ›
page 92 or one of the central locking but-
tons ››› Fig. 103 is pressed repeatedly in
short succession, the central locking briefly
disconnects as protection against overload-
ing. In this case, the vehicle remains un-
locked for about 30 seconds. If neither the
door or the boot is opened during this time,
the vehicle will then automatically lock. Unlocking and locking the vehicle
fr
om out
s
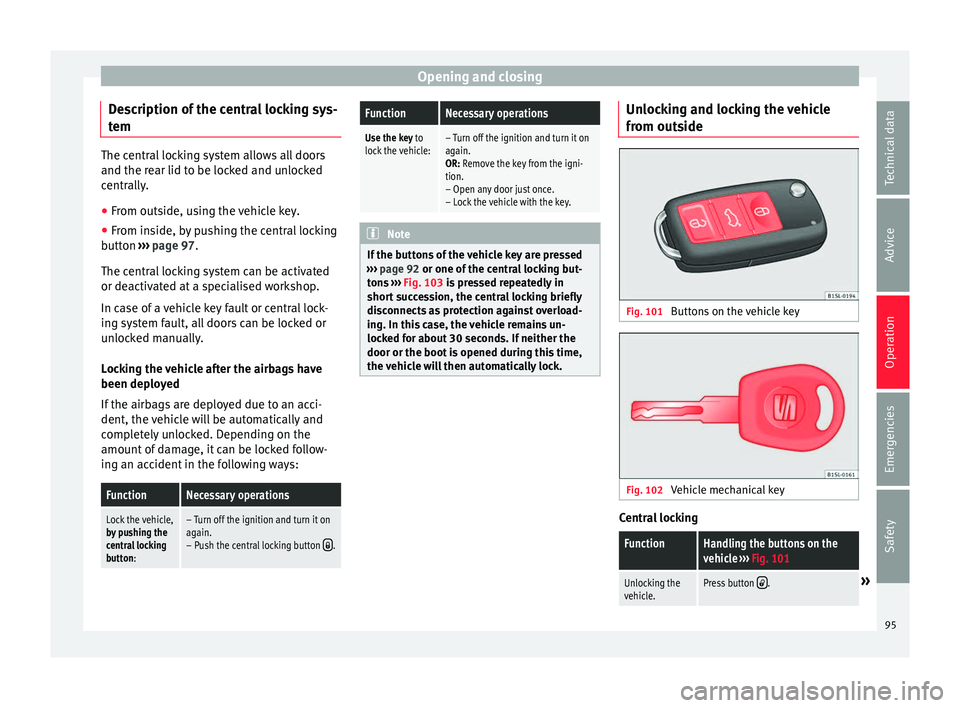
ide Fig. 101
Buttons on the vehicle key Fig. 102
Vehicle mechanical key Central locking
FunctionHandling the buttons on the
vehicle
››› Fig. 101
Unlocking the
vehicle.Press button .» 95
Technical data
Advice
Operation
Emergencies
Safety
Page 98 of 232
OperationFunctionHandling the buttons on the
vehicle
››› Fig. 101
Lock the vehi-
cle.Press button .
Unlocking the
rear lid.Press button .
Locking the rear
lid.Press button .
FunctionHandling the vehicle key
››› Fig. 101 in the lock cylinder
or with the vehicle mechanical
key ››› Fig. 102.
Unlocking the
vehicle.Insert the vehicle key into the lock
cylinder of the driver door and turn
the key in an anticlockwise direc-
tion.
Lock the vehicle.Insert the vehicle key into the lock
cylinder of the driver door and turn
the key in a clockwise direction.
Unlocking the
rear lid.Insert the vehicle key into the lock
cylinder of the driver door and turn
the key in an anticlockwise direc-
tion.
Locking the rear
lid.Insert the vehicle key into the lock
cylinder of the driver door and turn
the key in a clockwise direction. Please note: dependin
g on the oper
ation of
the c
entral locking feature set by a special-
ised workshop, in order to unlock all the doors and the rear lid, press the button
twice.
The
v
ehic
le key only locks and unlocks the
vehicle if it is within range of the vehicle and
if the battery has enough power.
● Upon locking the vehicle, all turn signals
wil
l flash once in confirmation.
● Upon unlocking the vehicle, all turn signals
wil
l flash twice in confirmation.
If the turn signals do not flash in confirma-
tion, at least one of the doors or the rear lid
has been left unlocked.
If the driver door is open, the vehicle cannot
be locked with the key. If you unlock the vehi-
cle without opening any doors or the rear lid,
it will lock again automatically after a few
seconds. This function prevents the vehicle
from remaining unlocked if the unlocking
button is pressed by mistake. Mechanical locking
FunctionUsing the vehicle's mechani-
cal key
››› Fig. 102 in the lock
cylinder
Locking the driv-
er door manually.
To unlock, insert the vehicle key in-
to the lock cylinder of the driver
door and turn the key in an anti-
clockwise direction.
To lock, insert the vehicle key into
the lock cylinder of the driver door
and turn the key in a clockwise di-
rection.
Locking and un-
locking the rear
lid.
To unlock, insert the vehicle key in-
to the lock cylinder of the driver
door and turn the key in an anti-
clockwise direction.
To lock, insert the vehicle key into
the lock cylinder of the driver door
and turn the key in a clockwise di-
rection. If the driver's door is open, it cannot be
loc
k
ed w
ith the vehicle key.
96
Page 99 of 232
Opening and closing
Locking or unlocking the vehicle from
the in s
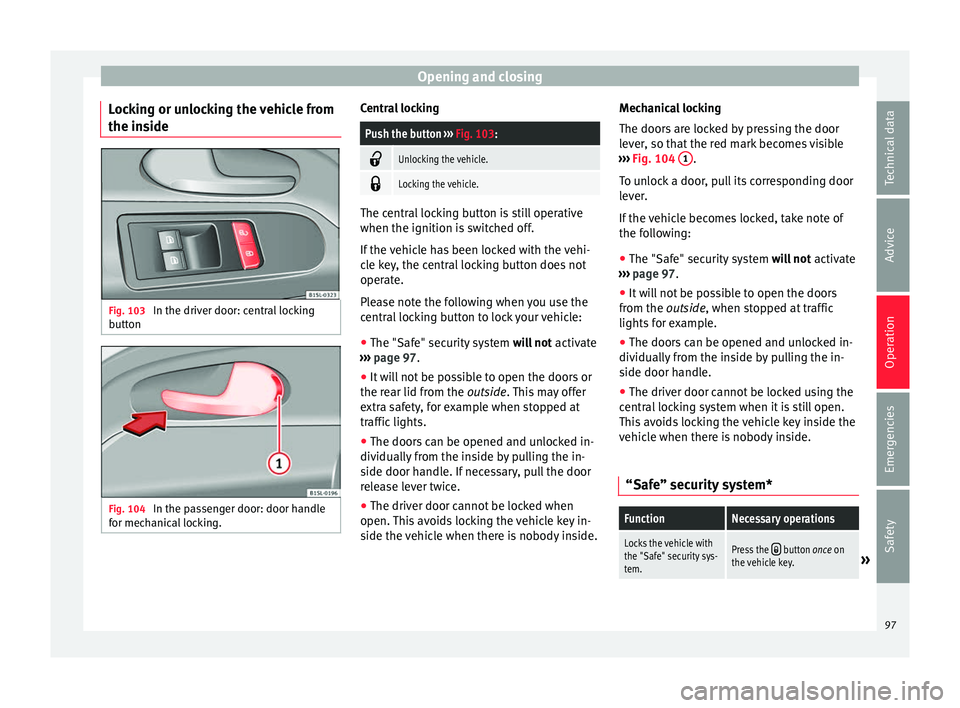
ide Fig. 103
In the driver door: central locking
b utt
on Fig. 104
In the passenger door: door handle
f or mec
h
anical locking. Central locking
Push the button
››› Fig. 103:
Unlocking the vehicle.
Locking the vehicle.
The central locking button is still operative
when the ignition is
sw
itched off.
If the vehicle has been locked with the vehi-
cle key, the central locking button does not
operate.
Please note the following when you use the
central locking button to lock your vehicle:
● The "Safe" security system wil
l not activate
››› page 97.
● It will not be possible to open the doors or
the rear lid fr
om the outside. This may offer
extra safety, for example when stopped at
traffic lights.
● The doors can be opened and unlocked in-
dividually
from the inside by pulling the in-
side door handle. If necessary, pull the door
release lever twice.
● The driver door cannot be locked when
open. This
avoids locking the vehicle key in-
side the vehicle when there is nobody inside. Mechanical locking
The doors ar
e locked by pressing the door
lever, so that the red mark becomes visible
››› Fig. 104 1 .
T o u
n
lock a door, pull its corresponding door
lever.
If the vehicle becomes locked, take note of
the following:
● The "Safe" security system wil
l not activate
››› page 97.
● It will not be possible to open the doors
from the out
side, when stopped at traffic
lights for example.
● The doors can be opened and unlocked in-
dividually
from the inside by pulling the in-
side door handle.
● The driver door cannot be locked using the
central
locking system when it is still open.
This avoids locking the vehicle key inside the
vehicle when there is nobody inside.
“Safe” security system*
FunctionNecessary operations
Locks the vehicle with
the "Safe" security sys-
tem.Press the button once on
the vehicle key.» 97
Technical data
Advice
Operation
Emergencies
Safety
Page 100 of 232
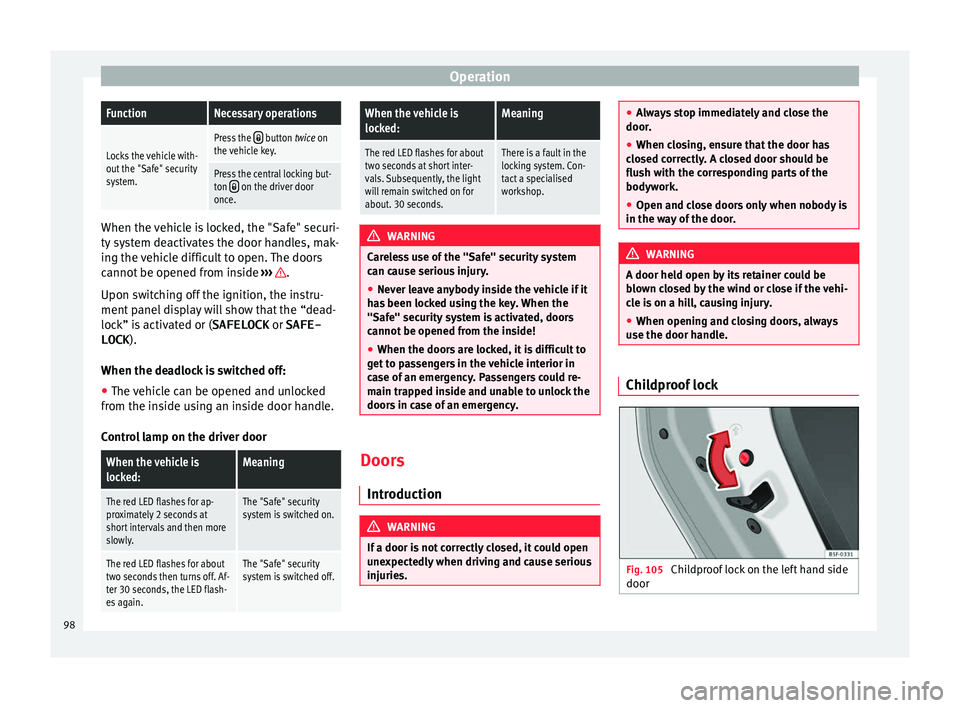
OperationFunctionNecessary operations
Locks the vehicle with-
out the "Safe" security
system.
Press the button twice on
the vehicle key.
Press the central locking but-
ton on the driver door
once. When the vehicle is locked, the "Safe" securi-
ty sy
s
tem deactivates the door handles, mak-
ing the vehicle difficult to open. The doors
cannot be opened from inside ››› .
Upon sw it
ching off the ignition, the instru-
ment panel display will show that the “dead-
lock” is activated or (SAFELOCK or SAFE-
LOCK ).
When the deadlock is switched off: ● The vehicle can be opened and unlocked
from the in s
ide using an inside door handle.
Control lamp on the driver door
When the vehicle is
locked:Meaning
The red LED flashes for ap-
proximately 2 seconds at
short intervals and then more
slowly.The "Safe" security
system is switched on.
The red LED flashes for about
two seconds then turns off. Af-
ter 30 seconds, the LED flash-
es again.The "Safe" security
system is switched off.
When the vehicle is
locked:Meaning
The red LED flashes for about
two seconds at short inter-
vals. Subsequently, the light
will remain switched on for
about. 30 seconds.There is a fault in the
locking system. Con-
tact a specialised
workshop. WARNING
Careless use of the "Safe" security system
can c au
se serious injury.
● Never leave anybody inside the vehicle if it
has
been locked using the key. When the
"Safe" security system is activated, doors
cannot be opened from the inside!
● When the doors are locked, it is difficult to
get t
o passengers in the vehicle interior in
case of an emergency. Passengers could re-
main trapped inside and unable to unlock the
doors in case of an emergency. Doors
Intr oduction WARNING
If a door is not correctly closed, it could open
une xpect
edly when driving and cause serious
injuries. ●
Alw a
ys stop immediately and close the
door.
● When closing, ensure that the door has
closed c
orrectly. A closed door should be
flush with the corresponding parts of the
bodywork.
● Open and close doors only when nobody is
in the way
of the door. WARNING
A door held open by its retainer could be
b lo wn c
losed by the wind or close if the vehi-
cle is on a hill, causing injury.
● When opening and closing doors, always
use the door handl
e. Childproof lock
Fig. 105
Childproof lock on the left hand side
door 98
Page 101 of 232
Opening and closing
The childproof lock prevents the rear doors
fr om bein
g opened fr
om the inside. This sys-
tem prevents minors from opening a door ac-
cidentally while the vehicle is running.
This function is independent of the vehicle
electronic opening and locking systems. It
only affects rear doors. It can only be activa-
ted and deactivated manually, as described
below:
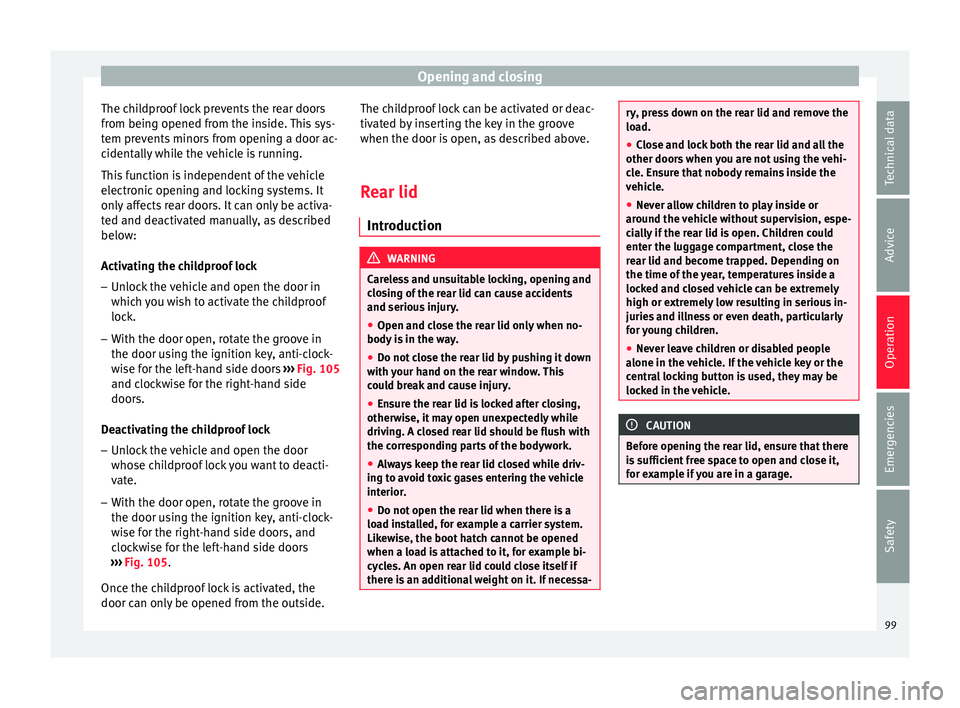
Activating the childproof lock
– Unlock the vehicle and open the door in
which y
ou wish to activate the childproof
lock.
– With the door open, rotate the groove in
the door usin
g the ignition key, anti-clock-
wise for the left-hand side doors ››› Fig. 105
and clockwise for the right-hand side
doors.
Deactivating the childproof lock – Unlock the vehicle and open the door
whose chi
ldproof lock you want to deacti-
vate.
– With the door open, rotate the groove in
the door usin
g the ignition key, anti-clock-
wise for the right-hand side doors, and
clockwise for the left-hand side doors
››› Fig. 105.
Once the childproof lock is activated, the
door can only be opened from the outside. The childproof lock can be activated or deac-
tivated b
y inserting the key in the groove
when the door is open, as described above.
Rear lid Introduction WARNING
Careless and unsuitable locking, opening and
clo s
ing of the rear lid can cause accidents
and serious injury.
● Open and close the rear lid only when no-
body is
in the way.
● Do not close the rear lid by pushing it down
with y
our hand on the rear window. This
could break and cause injury.
● Ensure the rear lid is locked after closing,
otherwi
se, it may open unexpectedly while
driving. A closed rear lid should be flush with
the corresponding parts of the bodywork.
● Always keep the rear lid closed while driv-
ing to av
oid toxic gases entering the vehicle
interior.
● Do not open the rear lid when there is a
load in
stalled, for example a carrier system.
Likewise, the boot hatch cannot be opened
when a load is attached to it, for example bi-
cycles. An open rear lid could close itself if
there is an additional weight on it. If necessa- ry, press down on the rear lid and remove the
loa
d.
● C
lose and lock both the rear lid and all the
other doors when
you are not using the vehi-
cle. Ensure that nobody remains inside the
vehicle.
● Never allow children to play inside or
around the
vehicle without supervision, espe-
cially if the rear lid is open. Children could
enter the luggage compartment, close the
rear lid and become trapped. Depending on
the time of the year, temperatures inside a
locked and closed vehicle can be extremely
high or extremely low resulting in serious in-
juries and illness or even death, particularly
for young children.
● Never leave children or disabled people
alone in the v
ehicle. If the vehicle key or the
central locking button is used, they may be
locked in the vehicle. CAUTION
Before opening the rear lid, ensure that there
is s
ufficient free space to open and close it,
for example if you are in a garage. 99
Technical data
Advice
Operation
Emergencies
Safety
Page 102 of 232

Operation
Opening the rear lid Fig. 106
On the vehicle key: button to unlock
and open the boot h
at
ch.Read the additional information carefully
› ›
›
page 9
If bicycles are attached to a rack on the boot
hatch, for example, in some cases, it may not
open automatically ››› . Remove the load
fr om the c
arrier and s
upport the open rear
lid.
Opening with central locking
● Press the button on the vehicle key
› ›
›
Fig. 106 for about one second to unlock
the boot hatch.
● OR: Press the button on the vehicle key
u nti
l
the rear lid opens automatically several
centimetres.
● Opening the rear lid with the button. Opening with the vehicle mechanical key
●
Insert the vehicle key into the lock cylinder
of the driver door and t
urn the key in an anti-
clockwise direction ››› page 94.
● Opening the rear lid with the button. WARNING
Unsuitable or careless unlocking and opening
of the r e
ar lid could cause serious injuries.
● If there is a loaded luggage carrier on the
rear lid, it
could be unlocked or open but not
recognised as such. An unlocked or open rear
lid could open unexpectedly while driving. Note
At outside temperatures of less than 0 °C
(+32 °F), the pre s
surised gas struts cannot
always automatically lift the rear lid. In this
case, open the rear lid manually. Closing the rear lid
Fig. 107
Rear lid open: hand grip Closing the rear lid
● Grab the handgrip inside the rear lid
› ›
›
Fig. 107 (arrow).
● Push the rear lid downwards until it locks
into pl
ace in the lock.
● Ensure that it is correctly closed by pulling
on it firmly
.
Locking the rear lid with central locking*
If you unlock the vehicle without opening any
doors or the rear lid, it will lock again auto-
matically after about 30 seconds. This func-
tion prevents the vehicle from remaining un-
locked if the unlocking button is pressed by
mistake.
Locking is only possible when the rear lid is
correctly and fully closed.
100
Page 103 of 232
Opening and closing
● The r e
ar lid i
s also locked by a central lock-
ing.
● If the vehicle rear lid is locked or unlocked
usin
g the button, when it is closed once
mor e it
w
ill lock automatically.
● A closed but not locked rear lid will lock au-
tomatic
ally at a speed above about 9 km/h
(6 mph).
Locking the rear lid with the vehicle mechan-
ical key
Locking is only possible when the rear lid is
correctly and fully closed.
● Insert the vehicle key into the lock cylinder
of the driver door and t
urn the key in a clock-
wise direction ››› page 94. WARNING
Unsuitable or careless closing and locking of
the re ar lid c
ould cause serious injuries.
● Never leave the vehicle unattended, or al-
low chi
ldren to play inside or around the vehi-
cle without supervision, especially if the rear
lid is open. Children could enter the luggage
compartment, close the rear lid and become
trapped. A locked vehicle can be subjected to
extremely high and low temperatures, de-
pending on the time of year, thus causing se-
rious injuries/illness and even death. Note
Before closing the rear lid, make sure that the
key h
as not been left inside the luggage com-
partment. Electric windows
Opening and c lo
sing the electric win-
dows Read the additional information carefully
› ›
›
page 11 WARNING
Careless use of the electric windows can
cau se seriou
s injury.
● Only operate the electric windows when
nobody i
s in the way.
● Never leave children or disabled people
alone in the v
ehicle if the doors are to be
locked. The windows cannot be opened in
case of an emergency.
● Always take all the keys with you whenever
you le
ave the vehicle. After turning off the ig-
nition, the windows can be opened and
closed for a short time using the buttons on
the door as long as the driver door or passen-
ger side door is not open. CAUTION
When the windows are open, rain can enter
the v ehic
le, dampening the interior equip-
ment and causing damage to the vehicle. Side-opening rear windows
Fig. 108
Lever to open and close the rear win-
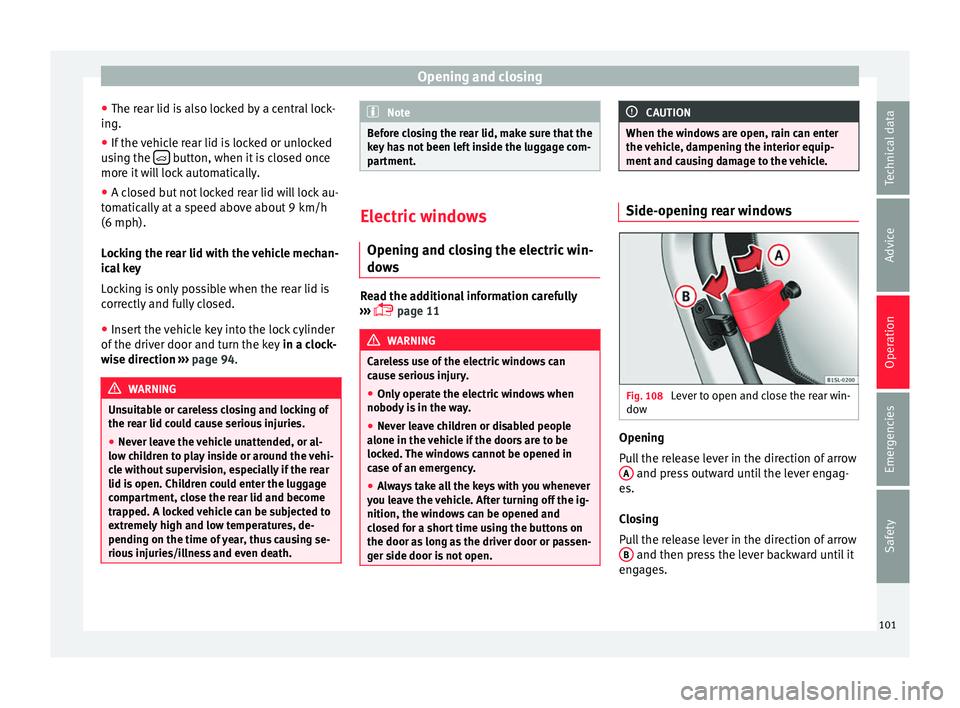
do w Opening
P
u
l
l the release lever in the direction of arrow
A and press outward until the lever engag-
e s.
C lo
sing
Pull the release lever in the direction of arrow B and then press the lever backward until it
en gag
es.
101
Technical data
Advice
Operation
Emergencies
Safety
Page 106 of 232
Operation
Audible warnings to advise the driver that
the light s
h
ave not been switched off
If the key is not in the ignition and the driver
door is open, an audible warning signal is
heard in the following cases: this is a remind-
er to turn off the lights.
● When the light switch is in position .
● When the light switch is in position .WARNING
The side lights or daytime running lights are
not bright enough t
o illuminate the road
ahead and to ensure that other road users are
able to see you.
● Always use your dipped beam head lights if
it is
raining or if visibility is poor. WARNING
If the headlights are set too high and not
used c orr
ectly, there is a risk of dazzling or
distracting other road users. This could result
in a serious accident.
● Always make sure that the headlights are
correctly
adjusted. Lights and visibility: functions
Parking light remains on both sides
If
when sw
it
ching off the ignition, the light
control remains in the position and the ve- hicle is closed from outside, both headlights,
in addition t
o the side lights and the rear
lights will light up.
Daytime running lights
The daytime driving light consists of individu-
al lights in the front headlamps.
When the daytime driving light is switched
on, only the individual lights come on ››› .
The d a
ytime lights
are turned on each time
the ignition is connected if the light switch
is in position o. . WARNING
If the road is not well-lit and the vehicle is
not c l
early visible to other drivers, an acci-
dent may occur.
● Never use the daytime driving light if the
roa
d is not well-lit as a result of the weather
conditions and poor visibility. The daytime
driving lights are not bright enough to illumi-
nate the road ahead and to ensure that other
road users are able to see you.
● The rear lights do not come on with the
daytime driv
ing light. A vehicle which does
not have the rear lights on may not be visible
to other drivers in the darkness, if it is rain-
ing or in conditions of poor visibility. Note
The headlights, rear lights and turn signals
ma y
mist up temporarily on the inside in cool or damp weather. This is normal and in no
wa
y
effects the useful life of the vehicle light-
ing system. Automatic dipped beam control
* The automatic dipped beam control is merely
intended a
s
an aid and is not able to recog-
nise all driving situations.
When the light switch is in position , the
vehicle lights and the instrument panel and
switch lighting switch on and off automatical-
ly in the following situations ››› in Lights
and v
i
sibility: functions on page 104:
Automatic switching
onAutomatic switching
off
The photo sensor detects
darkness, for example,
when driving through a
tunnel.When adequate lighting is
detected.
The rain sensor detects
rain and activates the
windscreen wipers.When the windscreen wip-
ers have been inactive for
a few minutes. WARNING
If the road is not well lit and other road users
cannot see the
vehicle well enough or at all,
accidents may occur.
● The automatic dipped beam control ( )
only sw
itches on the dipped beam when104
Page 108 of 232
Operation
●
The main beam he adligh
ts can only be
switched on if the dipped beam headlights
are already on. Hazard warning lights
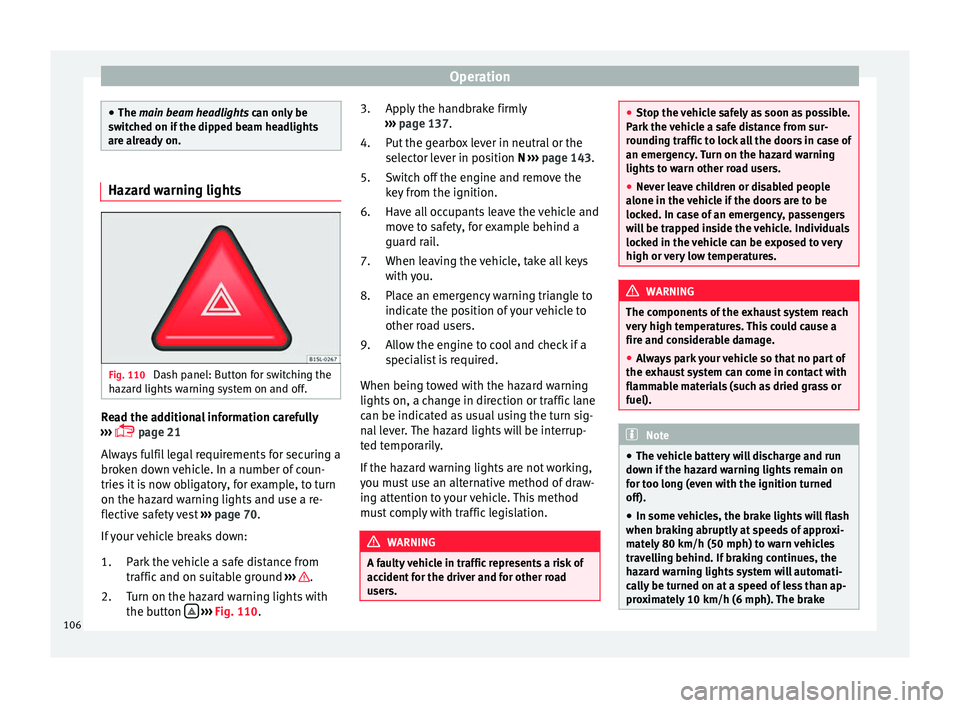
Fig. 110
Dash panel: Button for switching the
h az
ar
d lights warning system on and off. Read the additional information carefully
› ›
›
page 21
Always fulfil legal requirements for securing a
broken down vehicle. In a number of coun-
tries it is now obligatory, for example, to turn
on the hazard warning lights and use a re-
flective safety vest ››› page 70.
If your vehicle breaks down:
Park the vehicle a safe distance from
traffic and on suitable ground ››› .
T urn on the h
az
ard warning lights with
the button
› ›
› Fig. 110
.
1.
2. Apply the handbrake firmly
›››
page 137.
Put the gearbox lever in neutral or the
selector lever in position N ››› page 143.
Switch off the engine and remove the
key from the ignition.
Have all occupants leave the vehicle and
move to safety, for example behind a
guard rail.
When leaving the vehicle, take all keys
with you.
Place an emergency warning triangle to
indicate the position of your vehicle to
other road users.
Allow the engine to cool and check if a
specialist is required.
When being towed with the hazard warning
lights on, a change in direction or traffic lane
can be indicated as usual using the turn sig-
nal lever. The hazard lights will be interrup-
ted temporarily.
If the hazard warning lights are not working,
you must use an alternative method of draw-
ing attention to your vehicle. This method
must comply with traffic legislation. WARNING
A faulty vehicle in traffic represents a risk of
acc ident
for the driver and for other road
users. 3.
4.
5.
6.
7.
8.
9.
●
Stop the v
ehicle safely as soon as possible.
Park the vehicle a safe distance from sur-
rounding traffic to lock all the doors in case of
an emergency. Turn on the hazard warning
lights to warn other road users.
● Never leave children or disabled people
alone in the v
ehicle if the doors are to be
locked. In case of an emergency, passengers
will be trapped inside the vehicle. Individuals
locked in the vehicle can be exposed to very
high or very low temperatures. WARNING
The components of the exhaust system reach
ver y
high temperatures. This could cause a
fire and considerable damage.
● Always park your vehicle so that no part of
the exhau
st system can come in contact with
flammable materials (such as dried grass or
fuel). Note
● The v ehic
le battery will discharge and run
down if the hazard warning lights remain on
for too long (even with the ignition turned
off).
● In some vehicles, the brake lights will flash
when brakin
g abruptly at speeds of approxi-
mately 80 km/h (50 mph) to warn vehicles
travelling behind. If braking continues, the
hazard warning lights system will automati-
cally be turned on at a speed of less than ap-
proximately 10 km/h (6 mph). The brake 106