ESP Seat Toledo 2006 Service Manual
[x] Cancel search | Manufacturer: SEAT, Model Year: 2006, Model line: Toledo, Model: Seat Toledo 2006Pages: 298, PDF Size: 9.04 MB
Page 203 of 298
Accessories, parts replacement and modifications201
Safety First
Operating instructions
Tips and Maintenance
Te c h n i c a l D a t a
Accessories, parts replacement and modificationsAccessories and partsAlways consult an Authorised Service Centre before
purchasing accessories and parts.Your vehicle is designed to offer a high standard of active and passive safety.
Before purchasing accessories and parts, and before making technical
changes to your car, we recommend that you consult your Authorised Service
Centre.
SEAT dealerships will be happy to provide you with the latest information
about the use, legal requirements and recommendations from the manufac-
turer regarding accessories and parts.
We recommend you use only SEAT Approved Accessories
® and SEAT
Approved Spare Parts
®. This way, SEAT can guarantee that the product in
question is suitable, reliable and safe. Authorised Service Centres have the
necessary experience and facilities to ensure that parts are installed correctly
and professionally.
Despite continuous observation of the market, SEAT is not able to assess the
reliability, safety and suitability of parts not approved by SEAT. For this reason
SEAT cannot assume responsibility for any non-genuine parts used, even if
these parts have been approved by an official testing agency or are covered
by an official approval certificate.
Any equipment subsequently installed which has a direct effect on the
vehicle and/or the way it is driven (e.g. cruise control system or electronically-
controlled suspension) must be approved by SEAT for use in your vehicle and
bear the e mark (the European Union's authorisation symbol).
If any additional electrical components are fitted which do not serve to
control the vehicle itself (for instance a refrigerator box, laptop or ventilator fan, etc.), these must bear the
CE mark (European Union manufacturer
conformity declaration).
WARNING
Accessories, for example telephone holders or drink holders, should never
be fitted on the covers of, or within the working range of, the airbags. If
they are, there is a danger of resulting injury if the airbag is triggered in an
accident.ModificationsModifications must always be carried out according to our
specifications.Unauthorised modifications to the electr onic components or software in the
vehicle may cause malfunctions. Due to the way the electronic components
are linked together in networks, other systems may be affected by the faults.
This can seriously impair safety, lead to excessive wear of components, and
also invalidate your vehicle registration documents.
SEAT Authorised Service Centres cannot be held liable for any damage
caused by modifications and/or work performed incorrectly.
For this reason, we recommend that all work should be performed by an
Authorised Service Centre using genuine and SEAT
® approved parts and
accessories .
toledo_angles_0706 Seite 201 Dienstag, 5. September 2006 10:32 10
Page 208 of 298

Checking and refilling levels
206
− Insert the fuel nozzle into the mouth of the canister as far as
possible.
− If the spare fuel canister is made of metal, the filling nozzle must be
in contact with the canister during filling. This helps prevent an electro-
static charge building up.
− Never spill fuel in the vehicle or in the luggage compartment. Fuel
vapours are explosive. Danger of death.Caution
•
Fuel spills should be removed from the paintwork immediately.
•
Never run the tank completely dry. An irregular fuel supply could cause
misfiring. As a result, unburnt fuel could enter the catalytic converter and
cause damage.For the sake of the environment
Do not try to put in more fuel after the automatic filler nozzle has switched off;
this may cause the fuel to overflow if it becomes warm.PetrolPetrol types
The correct petrol types are listed on a sticker inside the fuel
tank flap.Only unleaded petrol, corresponding to the standard DIN EN 228 , may be
used for vehicles with catalytic converters (EN = “European Norm”). Petrol types are categorised according to their
octane number, e. g. 91, 95,
98 RON (RON = “research octane number”). You may use petrol with a higher
octane number than the one recommended for your engine. However, this
has no advantage in terms of fuel consumption and engine power.
Caution
•
Even one full tank of leaded fuel would permanently impair the efficiency
of the catalytic converter.
•
High engine speed and full throttle can damage the engine when using
petrol with an octane rating lower than the correct grade for the engine.For the sake of the environment
Just one full tank of leaded fuel would seriously impair the efficiency of the
catalytic converter.Petrol additives
Petrol additives improve the quality of the petrol.The quality of the petrol influences running behaviour, performance and
service life of the engine. For this reason you should use good quality petrol
containing additives. These additives will help to prevent corrosion, keep the
fuel system clean and prevent deposits from building up in the engine.
If good quality petrol with additives is not available or engine problems occur,
the required additives must be added during refuelling.
WARNING (continued)
toledo_angles_0706 Seite 206 Dienstag, 5. September 2006 10:32 10
Page 209 of 298
Checking and refilling levels207
Safety First
Operating instructions
Tips and Maintenance
Te c h n i c a l D a t a
DieselDiesel*Diesel fuel must correspond to DIN EN 590 (EN = “European standard”). It
must have a cetane number (CN) of at least 51. The cetane number indicates
the ignition quality of the diesel fuel.
Notes on filling with fuel ⇒page 205.RME fuel*
Only those vehicles fitted with special equipment (number PR
2G0 for biodiesel use) may use biodiesel corresponding to
the standard DIN EN 14214.The biodiesel fuel must comply wit h the DIN EN 14.214 (FAME) Standard.•
Biodiesel is a methylester obtained from rapeseed oil.
•
DIN is a German abbreviation for “Deutsches Institut für Normung e.V.”,
the German standards institute.
•
EN means European Norm.
•
FAME is the English abbreviation “ Fatty Acid Methyl Ester”
If the date sticker of the vehicle includes the number PR 2G0 optional equip-
ment) this means that the vehicle has been prepared for biodiesel use.
Your Authorised Service Centre or au tomobile association will be able to
advise on where you can obtain RME biodiesel fuel.
Your Authorised Service Centre can also be consulted to know if the vehicle
has been prepared for biodiesel use. Things to note about RME fuel (biodiesel)
•
The performance of a vehicle using biodiesel maybe somewhat reduced.
•
Fuel consumption of a vehicle using biodiesel may be slightly higher.
•
RME fuel can be used in winter at
temperatures down to approx. -10°C.
•
At outside temperatures below -10°C, we recommend using winter diesel
fuel.Caution
•
RME fuel can damage the fuel system in vehicles that are not suitably
adjusted.
•
If you decide to use biodiesel in your vehicle, please use only RME fuel
which is DIN E 14,214 compliant.
•
If you use biodiesel that does not me et the required standard, the fuel
filter could become clogged.Note
•
In case of low exterior temperatures and a biodiesel fuel percentage of
higher than 50%, an increase in gas emission may occur during operation of
the independent heating.
•
The fuel filter may become clogged when fuel is changed to biodiesel. For
this reason, we recommend that, about every 300 or 400 km, following a fuel
change, also change the fuel filter. Also. note the instructions in the inspec-
tion and maintenance plan.
•
If the vehicle is to remain parked for more than about two weeks, we
recommend filling the fuel tank with biodiesel and driving about 50 km in
order to avoid damage to the injection system.
toledo_angles_0706 Seite 207 Dienstag, 5. September 2006 10:32 10
Page 215 of 298
Checking and refilling levels213
Safety First
Operating instructions
Tips and Maintenance
Te c h n i c a l D a t a
Note
Before a long trip, we recommend finding an engine oil that conforms to the
corresponding VW specifications and keeping it in the vehicle. This way, the
correct engine oil will always be available for a top-up if needed.Checking the engine oil level
The engine oil dipstick indicates the level of the oil.Before opening the bonnet, read and observe the warnings ⇒ in
“Safety instructions on working in the engine compartment” on
page 208.
– Park the vehicle on an even surface.
– After stopping the engine, wait a few minutes for the oil to drain back into the sump. – Raise the bonnet
⇒page 210.
– Pull out the dipstick.
– Wipe the dipstick with a cloth and insert it again, pushing it in as far as it will go.
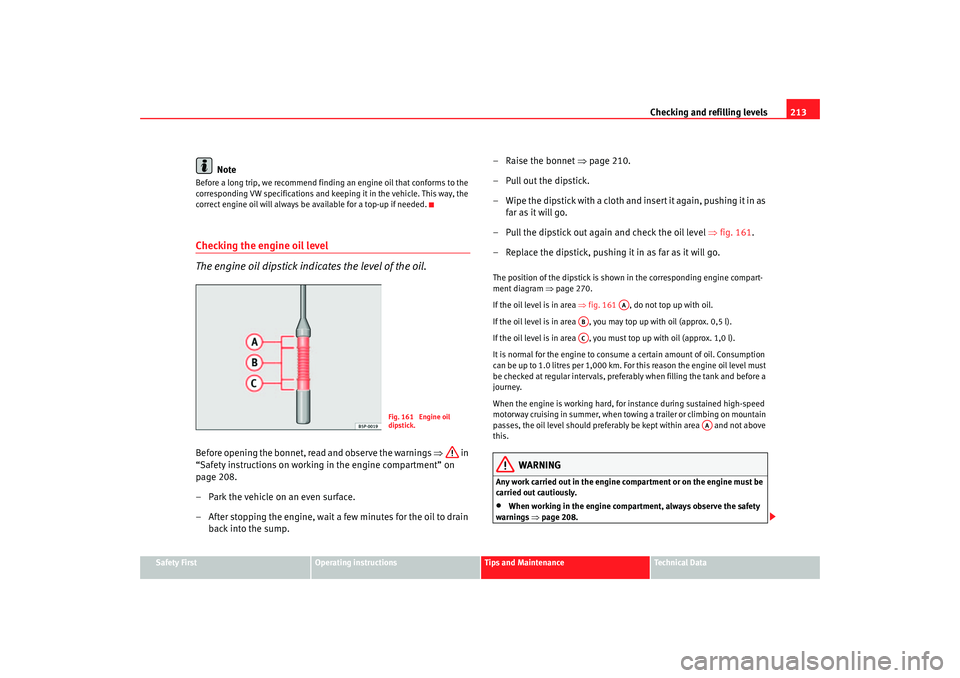
– Pull the dipstick out again and check the oil level ⇒fig. 161.
– Replace the dipstick, pushing it in as far as it will go.
The position of the dipstick is shown in the corresponding engine compart-
ment diagram ⇒page 270.
If the oil level is in area ⇒fig. 161 , do not top up with oil.
If the oil level is in area , you may top up with oil (approx. 0,5 l).
If the oil level is in area , you must top up with oil (approx. 1,0 l).
It is normal for the engine to consum e a certain amount of oil. Consumption
can be up to 1.0 litres per 1,000 km. For this reason the engine oil level must
be checked at regular intervals, preferably when filling the tank and before a
journey.
When the engine is working hard, for instance during sustained high-speed
motorway cruising in summer, when towing a trailer or climbing on mountain
passes, the oil level should preferably be kept within area and not above
this.
WARNING
Any work carried out in the engine compartment or on the engine must be
carried out cautiously.•
When working in the engine compartm ent, always observe the safety
warnings ⇒page 208.
Fig. 161 Engine oil
dipstick.
AA
ABAC
AA
toledo_angles_0706 Seite 213 Dienstag, 5. September 2006 10:32 10
Page 216 of 298
Checking and refilling levels
214
CautionIf the oil level is above the area do not start the engine. This could result
in damage to the engine and catalytic converter. Contact an Authorised
Service Centre.Topping up engine oil
Top up gradually with small quantities of oil.Before opening the bonnet, read and observe the warnings ⇒ in
“Safety instructions on working in the engine compartment” on
page 208.
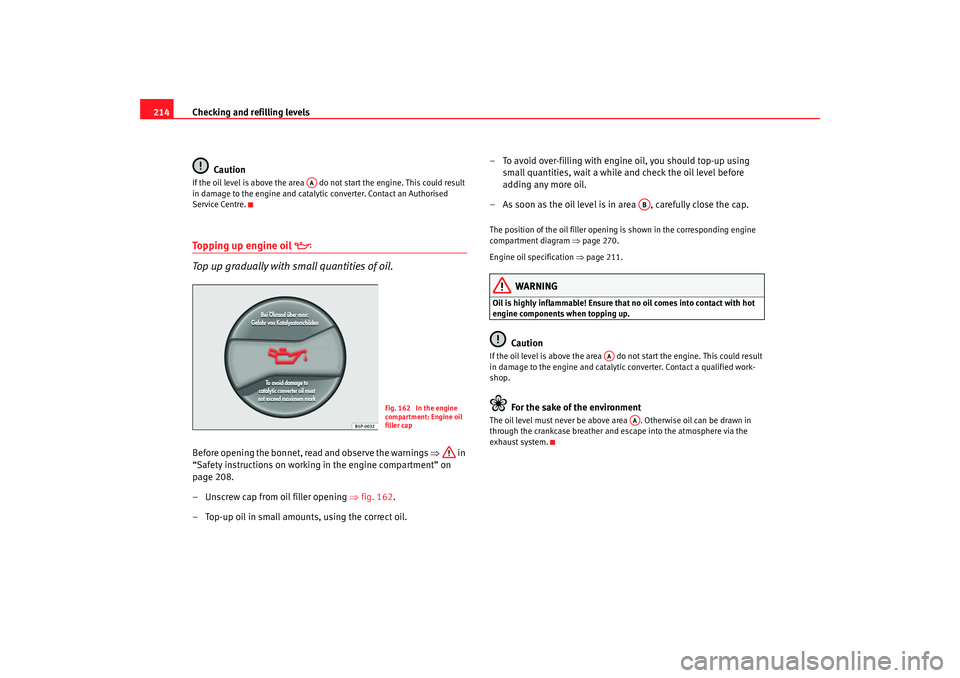
– Unscrew cap from oil filler opening ⇒ fig. 162.
– Top-up oil in small amounts, using the correct oil. – To avoid over-filling with engine oil, you should top-up using
small quantities, wait a while and check the oil level before
adding any more oil.
– As soon as the oil level is in area , carefully close the cap.
The position of the oil filler opening is shown in the corresponding engine
compartment diagram ⇒ page 270.
Engine oil specification ⇒page 211.
WARNING
Oil is highly inflammable! Ensure that no oil comes into contact with hot
engine components when topping up.
Caution
If the oil level is above the area do not start the engine. This could result
in damage to the engine and catalytic converter. Contact a qualified work-
shop.
For the sake of the environment
The oil level must never be above area . Otherwise oil can be drawn in
through the crankcase breather and escape into the atmosphere via the
exhaust system.
AA
Fig. 162 In the engine
compartment: Engine oil
filler cap
AB
AA
AA
toledo_angles_0706 Seite 214 Dienstag, 5. September 2006 10:32 10
Page 219 of 298
Checking and refilling levels217
Safety First
Operating instructions
Tips and Maintenance
Te c h n i c a l D a t a
– If the level is underneath the “MIN” mark, top up with coolant.
To p p i n g u p c o o l a n t
–Only use new coolant.
– Do not fill above the “MAX” mark.
Closing the coolant expansion tank
–Screw the cap on again tightly .The position of the coolant expansion reservoir is shown in the corresponding
engine compartment diagram ⇒page 270.
Make sure that the coolant meets the required specifications ⇒page 215.
Do not use a different type of additive if coolant additive G 12+ is not avail-
able. In this case use only water and bring the coolant concentration back up
to the correct level as soon as possible by putting in the specified additive
⇒ page 215.
Always top up with new coolant.
Do not fill above the “MAX” mark. Otherwise the excess coolant will be forced
out of the cooling system when the engine is hot.
The coolant additive G 12+ (dyed purple) may be mixed with G 12 (dyed red)
and also with G 11.
WARNING
Any work carried out in the engine compartment or on the engine must be
carried out cautiously.•
When working in the engine compartment, always observe the safety
warnings ⇒ page 208.
•
When the engine is warm or hot, th e cooling system is pressurised! Do
not unscrew the cap on the expansion tank when the engine is hot. This is
a burn injury risk.Caution
•
When mixed with other additives the col our of G 12 will change to brown.
If this occurs you should have the coolant changed immediately. Failure to do
so will result in engine damage!
•
If a lot of coolant has been lost, wait for the engine to cool down before
putting in cold coolant. This avoid s damaging the engine. Large coolant
losses are an indication of leaks in the cooling system. See a specialised
workshop immediately and have the cooling system checked. Otherwise,
there is a risk of engine damage.WARNING (continued)
toledo_angles_0706 Seite 217 Dienstag, 5. September 2006 10:32 10
Page 223 of 298
Checking and refilling levels221
Safety First
Operating instructions
Tips and Maintenance
Te c h n i c a l D a t a
If this is not sufficient, refer to a qualified workshop.
WARNING
Do not drive unless you have good visibility through all windows!•
Clean the windscreen wiper blades and all windows regularly.
•
The wiper blades should be changed once or twice a year.Caution
•
A damaged or dirty window wiper could scratch the rear window.
•
Never use fuel, nail varnish remover, paint thinner or similar products to
clean the window.
•
Never move the windscreen wiper by hand. This could cause damage.
Brake fluidChecking the brake fluid level
The brake fluid is checked at the intervals given in the service
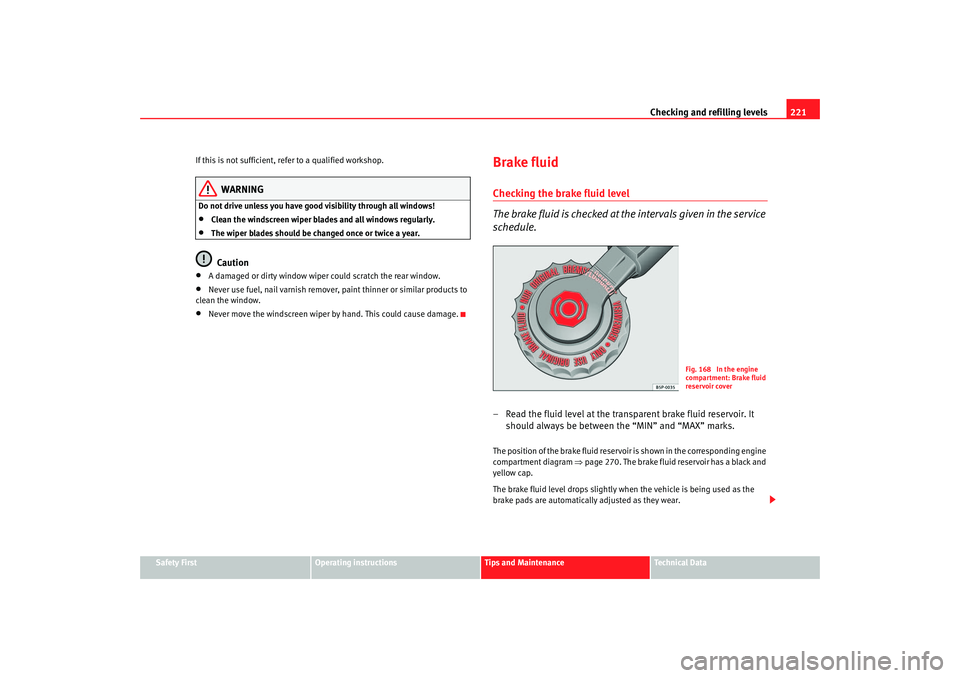
schedule.– Read the fluid level at the transparent brake fluid reservoir. It should always be between the “MIN” and “MAX” marks.The position of the brake fluid reservoir is shown in the corresponding engine
compartment diagram ⇒page 270. The brake fluid reservoir has a black and
yellow cap.
The brake fluid level drops slightly when the vehicle is being used as the
brake pads are automatically adjusted as they wear.
Fig. 168 In the engine
compartment: Brake fluid
reservoir cover
toledo_angles_0706 Seite 221 Dienstag, 5. September 2006 10:32 10
Page 226 of 298
Checking and refilling levels
224•
If the vehicle is left standing in cold conditions for a long period, protect
the battery from frost. If it “freezes” it will be damaged.
Checking the electrolyte level
The electrolyte level should be checked regularly in high-
mileage vehicles, in hot countries and in older batteries.– Open the bonnet and open the battery cover at the front ⇒ in
“Safety instructions on working in the engine compartment” on
page 208 ⇒ in “Warnings on handling the battery” on
page 223.
– Check the colour display in the "magic eye" on the top of the battery.
– If there are air bubbles in the window, tap the window gently until they disperse.The position of the battery is shown in the corresponding engine compart-
ment diagram ⇒page 270.
The round window (“magic eye”) on the top of the battery changes colour,
depending on the charge level and electrolyte level of the battery.
If the colour in the window is colourless or bright yellow, the electrolyte level
of the battery is too low. Have the battery checked by a qualified workshop.
The colours green and black are used by the workshops for diagnostic
purposes.
Charging and changing the vehicle battery
The battery is maintenance-free and is checked during the
inspection service. All work on the vehicle battery requires
specialist knowledge.If you often drive short distances or if the vehicle is not driven for long
periods, the battery should be checked by a qualified workshop between the
scheduled services.
If the battery has discharged and you have problems starting the vehicle, the
battery might be damaged. If this happens, we recommend you have the
vehicle battery checked by an Authorised Service Centre where it will be re-
charged or replaced.
Charging the battery
The vehicle battery should be charged by a qualified workshop only, as
batteries using special technology have been installed and they must be
charged in a controlled environment.
Replacing a vehicle battery
The battery has been developed to suit the conditions of its location and has
special safety features.
Genuine SEAT batteries fulfil the maintenance, performance and safety spec-
ifications of your vehicle.
WARNING
•
We recommend you use only maintenance-free or cycle free leak-proof
batteries that comply with the standards T 825 06 and VW 7 50 73. This
standard applies as of 2001.
•
Before starting any work on the batteries, you must read and observe
the warnings ⇒ in “Warnings on handling the battery” on page 223.
toledo_angles_0706 Seite 224 Dienstag, 5. September 2006 10:32 10
Page 228 of 298
Checking and refilling levels
226Checking tyre pressure
The correct tyre pressure can be seen on the sticker on the
inside of the tank flap.1. Read the required tyre inflation pressure from the sticker. The
values refer to Summer tyres. For Winter tyres, you must add 0.2
bar to the values given on the sticker.
2. The tyre pressures should only be checked when the tyres are cold. The slightly raised pressures of warm tyres must not be
reduced.
3. Adjust the tyre pressure to the load you are carrying.Tyre pressure
The correct tyre pressure is especially important at high speeds. The pressure
should therefore be checked at least once a month and before starting a
journey.
WARNING
A tyre can easily burst if the pressure is too low, causing an accident!•
At continuously high speeds, a tyre with insufficient pressure flexes
more. In this way it becomes too hot, and this can cause tread separation
and tyre blow-out. Always observ e the recommended tyre pressures.
•
If the tyre pressure is too low or too high, the tyres will wear prema-
turely and the vehicle will not h andle well. Risk of accident!For the sake of the environment
Under-inflated tyres will increase fuel consumption.
Tyre service life
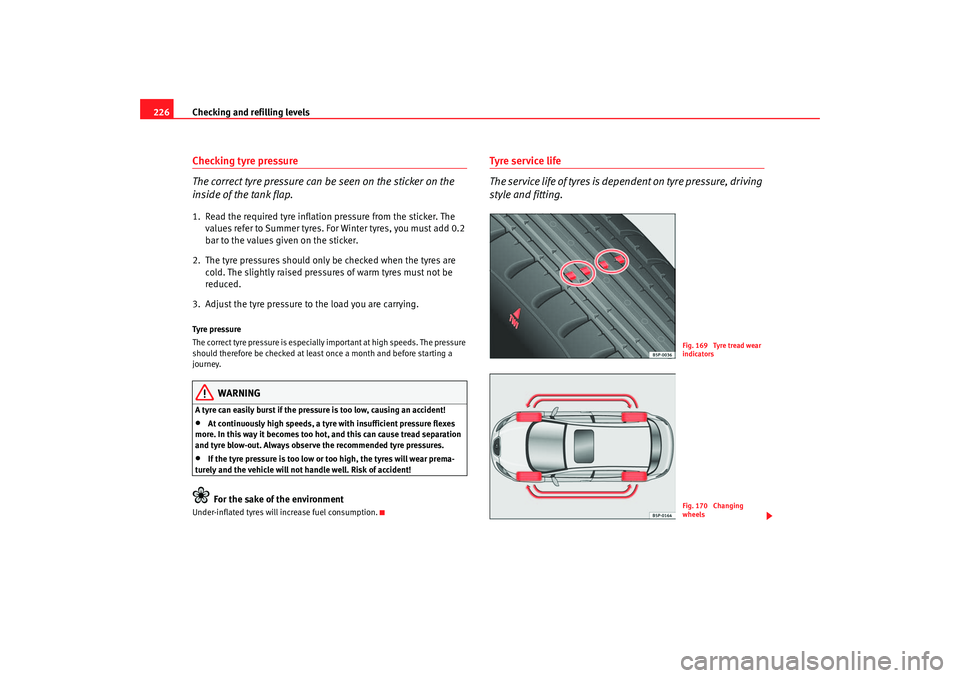
The service life of tyres is dependent on tyre pressure, driving
style and fitting.
Fig. 169 Tyre tread wear
indicatorsFig. 170 Changing
wheels
toledo_angles_0706 Seite 226 Dienstag, 5. September 2006 10:32 10
Page 230 of 298
Checking and refilling levels
228
Driving with puncture-proof tyres (emergency operation)
– Ensure that the ESP/TCS is operating (electronic stabilization program) ⇒page 181.
– Drive carefully and at moderate speed (80 km/h maximum).
– Avoid sudden manoeuvers.
– Avoid driving over obstacles (for example, kerbs) or potholes.
– Continuously check for smoke, the smell of burning rubber, vehicle vibrations or clattering if the ESP/TCS intervenes
frequently. If this occurs, stop the vehicle.Puncture-proof tyres have the following identification markings on the tyre
wall: “DSST”, “Eufonia”, “RFT”, “ROF”, “RSC”, “SSR” o “ZP”.
The tyre walls of this type of tyre are reinforced. When a tyre loses air, the tyre
walls support the weight(emergency operation).
The instrument panel will indicate a loss of tyre pressure. The vehicle may still
be driven at 80 kmh and, under ideal conditions (for example, no load)
higher.
The damaged tyre must be replaced as quickly as possible. The tyre rim
should be examined by an expert for possible damage and replaced if neces-
sary. We recommend that you contact your Technical Service. If more than one
tyre is damaged then the distance that may be driven is reduced.
Beginning of emergency operation
As soon as a loss in pressure is indicated on the instrument panel then at
least 1 tyre is operating in emergency mode ⇒.
End of emergency operation
Do not continue driving if:•
smoke is coming from one of the tyres;
•
there is a smell of burning rubber;
•
the vehicle vibrates;
•
there is a rattling noise.
WARNING
When driving in emergency conditions, the driving quality of the vehicle is
considerably impaired.•
Drive carefully and at moderate speed (80 km/h maximum).
•
Avoid sharp turns and rapid manoeuvres, and brake earlier than usual.
•
Avoid driving over obstacles (for example, kerbs) or potholes.
•
If one or more tyres is operating in emergency mode then the vehicle
performance is reduced and the accident risk is increased.Note
•
The puncture-proof tyres do not “deflate” when pressure is lost; they are
supported on the tyre walls. For this reason, it is difficult to see a tyre
problem.
•
Do not fit snow chains to front wheels operating in emergency mode.
New tyres and wheels
New tyres and wheels have to be run-in.The tyres and wheel rims are an essenti al part of the vehicle's design. The
tyres and rims approved by SEAT are specially matched to the characteristics
of the vehicle and make a major contribution to good road holding and safe
handling ⇒.
Tyres should be replaced at least in pairs and not individually (i.e. both front
tyres or both rear tyres together). A knowledge of tyre designations makes it
toledo_angles_0706 Seite 228 Dienstag, 5. September 2006 10:32 10