open bonnet Seat Toledo 2012 Owner's manual
[x] Cancel search | Manufacturer: SEAT, Model Year: 2012, Model line: Toledo, Model: Seat Toledo 2012Pages: 249, PDF Size: 3.6 MB
Page 65 of 249

64Controls and displays
When exceeding the maximum speed the following is shown on the display: Winter tyres max speed … km/h … (mph)
Units
The units of measure for temperature, consumption and journey distances
can be set here.
Second speed
The second speed can be activated/deactivated in mph or km/h respective-
ly here.
Inspection Service
Here you can choose to display the kilometres (miles) and days remaining
until the next service, and reset the service interval display.
Factory settings
Select Factory setting to reset the values of the informative display to their
factory settings.
Door, rear lid or bonnet open indicator
If at least one of the doors, rear lid or bonnet is open, a symbol is shown on
the informative display indicating that the door, rear lid or bonnet con-
cerned is open.
An audible warning is also given simultaneously if the vehicle is being driv-
en at a speed of above 6 km/h (4 mph). Auto-check system
Vehicle status
When the ignition is switched on, some vehicle functions such as the condi-
tion of its systems are automatically checked.
The warning messages about eventual faults in addition to other informa-
tion is displayed on the informative display. This information is displayed
together with their respective symbols on the informative display or by
warning lamps that light up on the general instrument panel
⇒ page 65.
The option, Vehicle status, appears in the menu when at least one warning
message is present. The first of the warnings given is displayed upon se-
lecting this option. If there is more than one message present, this is dis-
played on the screen, i.e. 1/3. This means that the warning currently dis- played is the first of a total of three.
Warning symbols
The engine oil pressure is too low⇒ page 67
Automatic gearbox overheated clutches⇒ page 64
Engine oil level,
engine oil sensor faulty⇒ page 67
Engine oil pressure fault⇒ page 65
Automatic gearbox overheated clutches
If the symbol appears on the informative display, the temperature of the
automatic gearbox clutches has reached an unacceptable level.
The informative display indicates:
Gearbox overheated. Stop! Instruction Manual!
Page 68 of 249
67
Controls and displays
WARNING (Continued)
● If the warning lamp lights up together with the warning lamp
⇒ page 70, Anti-lock system (ABS) , , Stop the vehicle! Seek pro-
fessional help.
● A fault in the brake system or in the Anti-lock brake system (ABS) can
lead to longer braking distances – Risk of accident!
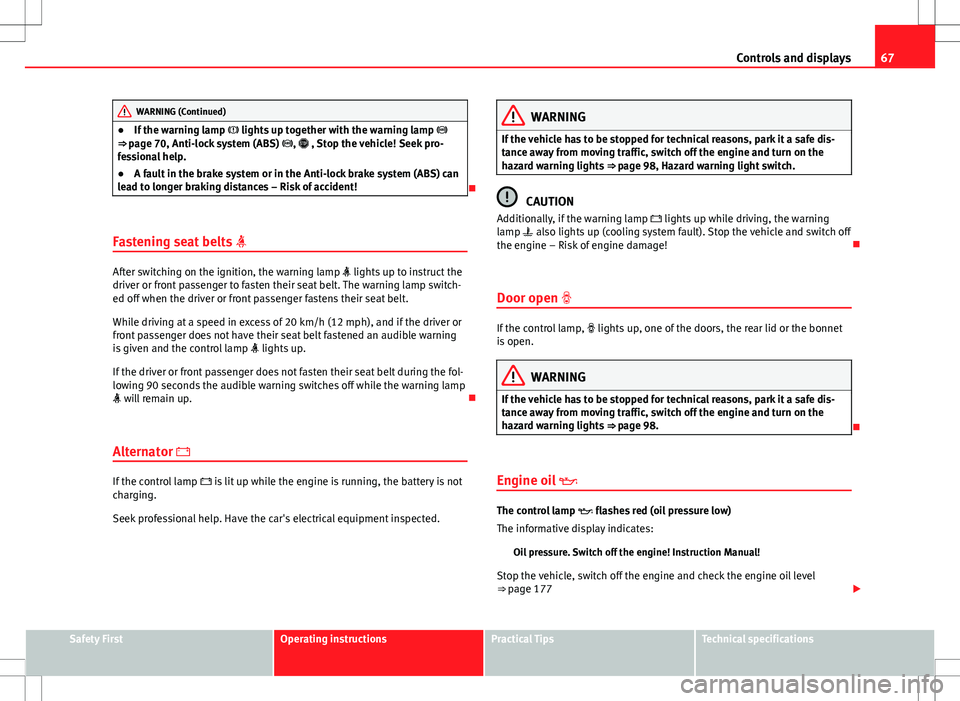
Fastening seat belts
After switching on the ignition, the warning lamp lights up to instruct the
driver or front passenger to fasten their seat belt. The warning lamp switch-
ed off when the driver or front passenger fastens their seat belt.
While driving at a speed in excess of 20 km/h (12 mph), and if the driver or
front passenger does not have their seat belt fastened an audible warning
is given and the control lamp lights up.
If the driver or front passenger does not fasten their seat belt during the fol-
lowing 90 seconds the audible warning switches off while the warning lamp
will remain up.
Alternator
If the control lamp is lit up while the engine is running, the battery is not
charging.
Seek professional help. Have the car's electrical equipment inspected.
WARNING
If the vehicle has to be stopped for technical reasons, park it a safe dis-
tance away from moving traffic, switch off the engine and turn on the
hazard warning lights ⇒ page 98, Hazard warning light switch.
CAUTION
Additionally, if the warning lamp lights up while driving, the warning
lamp also lights up (cooling system fault). Stop the vehicle and switch off
the engine – Risk of engine damage!
Door open
If the control lamp, lights up, one of the doors, the rear lid or the bonnet
is open.
WARNING
If the vehicle has to be stopped for technical reasons, park it a safe dis-
tance away from moving traffic, switch off the engine and turn on the
hazard warning lights ⇒ page 98.
Engine oil
The control lamp
flashes red (oil pressure low)
The informative display indicates:
Oil pressure. Switch off the engine! Instruction Manual!
Stop the vehicle, switch off the engine and check the engine oil level
⇒ page 177
Safety FirstOperating instructionsPractical TipsTechnical specifications
Page 69 of 249
68Controls and displays
If the symbol flashes although the oil level is correct, do not drive on. Do
not even run the engine at idle speed!
Seek professional help.
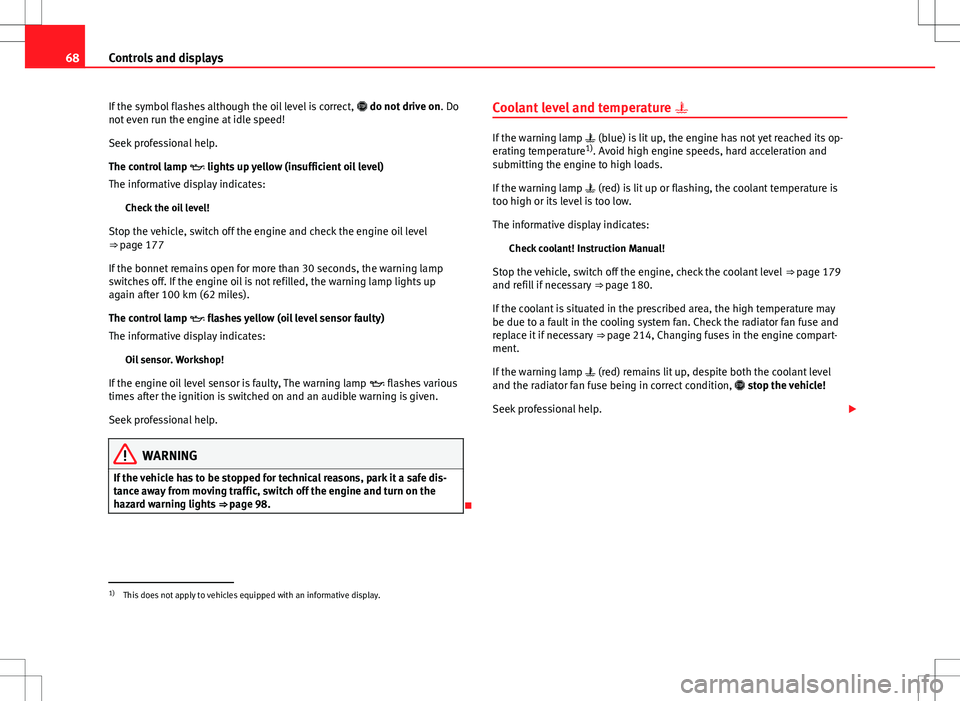
The control lamp lights up yellow (insufficient oil level)
The informative display indicates:
Check the oil level!
Stop the vehicle, switch off the engine and check the engine oil level
⇒ page 177
If the bonnet remains open for more than 30 seconds, the warning lamp
switches off. If the engine oil is not refilled, the warning lamp lights up
again after 100 km (62 miles).
The control lamp flashes yellow (oil level sensor faulty)
The informative display indicates:
Oil sensor. Workshop!
If the engine oil level sensor is faulty, The warning lamp flashes various
times after the ignition is switched on and an audible warning is given.
Seek professional help.
WARNING
If the vehicle has to be stopped for technical reasons, park it a safe dis-
tance away from moving traffic, switch off the engine and turn on the
hazard warning lights ⇒ page 98.
Coolant level and temperature
If the warning lamp (blue) is lit up, the engine has not yet reached its op-
erating temperature 1)
. Avoid high engine speeds, hard acceleration and
submitting the engine to high loads.
If the warning lamp (red) is lit up or flashing, the coolant temperature is
too high or its level is too low.
The informative display indicates:
Check coolant! Instruction Manual!
Stop the vehicle, switch off the engine, check the coolant level ⇒ page 179
and refill if necessary ⇒ page 180.
If the coolant is situated in the prescribed area, the high temperature may
be due to a fault in the cooling system fan. Check the radiator fan fuse and
replace it if necessary ⇒ page 214, Changing fuses in the engine compart-
ment.
If the warning lamp (red) remains lit up, despite both the coolant level
and the radiator fan fuse being in correct condition, stop the vehicle!
Seek professional help.
1)
This does not apply to vehicles equipped with an informative display.
Page 89 of 249
88Opening and closing
Remote control synchronisation
If the vehicle cannot be locked or unlocked using the remote control, the
code of the key might not match that of the control unit. This can occur
when the remote control buttons are frequently pressed outside the range
of the system or if the remote control battery has been replaced.
In this case, it must be synchronised as follows:
●Press any key on the remote control key.
● Open the door using the key within the next minute.
Anti-theft alarm system
General notes
The anti-theft alarm system increases vehicle protection from intruders. If
the anti-theft alarm system senses interference with the vehicle it triggers
an audible and visible alarm.
Activating the alarm system
The anti-theft alarm switches on automatically when the vehicle is locked
using the remote control key or inserting the key in the driver door. The
alarm is activated around 30 seconds after the vehicle is locked.
Deactivating the alarm system
The anti-theft alarm system is deactivated when the remote control unlock
button is pressed. If the vehicle is not opened within 30 seconds after emit-
ting the radiofrequency signal, the system will be reactivated.
If the vehicle is unlocked using by inserting the key in the driver door, the
ignition must be switched on within 15 seconds. This deactivates the alarm system. If, during these 15 seconds, the vehicle is not started
, the alarm is
triggered.
When does the system trigger an alarm?
The following areas of the vehicle are monitored:
● Bonnet
● Rear lid
● Doors
● Ignition
● Tilt angle ⇒ page 89, Vehicle interior monitoring and tow-away protec-
tion system
● The interior ⇒ page 89, Vehicle interior monitoring and tow-away pro-
tection system
● Drop in voltage in the car systems
● The factory-fitted towing bracket
The alarm is triggered immediately if one of the battery cables is disconnec-
ted while the alarm system is active.
How to turn off the alarm
To deactivate the alarm, press the unlock button on the remote control key
or switch on the ignition.
Note
● The alarm horn power supply has a 5-year useful life. Contact an Official
Service for more detailed information.
● To make sure that the anti-theft alarm is fully operative when leaving the
vehicle, check that all the doors and windows are closed.
● Remote control and receiver unit coding means that the remote control
cannot be used on other vehicles.
Page 144 of 249

143
Driving
Engage reverse gear only when the vehicle is stopped. On engaging reverse
gear while the engine is running, first wait a moment with the clutch pedal
pressed down fully to limit gear shift noise.
The reverse lights switch on when the reverse gear is selected and the igni-
tion is on.
WARNING
Never engage reverse gear when moving forwards. Risk of accident!
Note
Do not rest your hand on the gear lever while driving. The pressure of your
hand could lead to premature wear of the gear system.
Automatic gearbox Introduction
WARNING
● Never press the accelerator when selecting the operating mode of the
automatic gearbox when the vehicle is stationary. Risk of accident!
● Never move the selector lever to positions R or P when driving. Risk of
accident!
● If the vehicle is to be stopped with a gear selected and the engine
idling (e.g. waiting or moving slowly at traffic lights), press down on the
brake pedal because the transmission is not entirely interrupted when
the engine is idling and the vehicle will tend to start moving.
WARNING (Continued)
● Apply the handbrake firmly and put the selector lever in position P
before opening the bonnet and working on the vehicle with the engine
running. Risk of accident! Strictly follow the safety instructions
⇒ page 173, Engine compartment.
● When stopping on a slope (hill), try not to stop the vehicle from mov-
ing by pressing the “accelerator” with a gear selected. This could over-
heat the clutch. If the clutch risks being burnt due to this force, it would
switch off and the vehicle could move backwards. Risk of accident!
● If you have to stop on a hill, press down on the brake pedal to stop
the vehicle from moving.
● The drive wheels could lose traction on a slippery road surface when
the kick-down function is activated. Risk of sliding!
CAUTION
● In DSG automatic gearboxes, the double clutch is protected from over-
loads. If the hill hold control is used, the clutches are subjected to greater
force if the vehicle is at a standstill on a slope or suddenly accelerating on a
slope.
● Should the clutches overheat, the symbol is shown on the informative
display with a warning message Gear overheated. Stop! Instruction Manual!
An audible warning is also heard. Stop the vehicle in this case, stop the en-
gine and wait until the symbol has switched off. Danger of damage to the
gearbox! You can continue driving once the symbol is switched off.
Basic information
The gearbox changes up and down automatically. The gearbox can be set to
Tiptronic mode. The gears can be changed manually in this mode
⇒ page 145.
Safety FirstOperating instructionsPractical TipsTechnical specifications
Page 175 of 249
174Checking and refilling levels
WARNING
● Never open the bonnet if you see steam, smoke or coolant escaping
from the engine compartment. Risk of scalding! Wait until no steam or
coolant can be seen before opening the bonnet.
● Switch off the engine and remove the key from the ignition.
● Engage neutral in vehicles with manual gearbox and move the selec-
tor lever to position P in vehicles with automatic gearbox.
● Apply the handbrake firmly.
● Wait for the engine to cool down.
● For safety reasons, the bonnet must always be closed when the vehi-
cle is moving. Therefore, after closing the bonnet always check that it is
properly secured.
● Should you notice that the bonnet is not safely secured when the ve-
hicle is moving, stop the vehicle immediately and close the bonnet prop-
erly. Risk of accident!
● Keep children away from the engine compartment.
● Do not touch hot engine parts. Risk of burns!
● Never spill fluids on hot engine compartments. These fluids can
cause a fire (e.g. antifreeze in coolant).
● Take care not to cause short circuits in the electrical system, especial-
ly when working on the battery.
● Never touch the radiator fan when the engine is hot. The fan may start
running suddenly!
● Do not unscrew the cap on the coolant expansion tank when the en-
gine is hot. The cooling system is under pressure!
● Protect face, hands and arms from any hot steam or hot coolant re-
leased by covering the cap with a large, thick rag when opening the ex-
pansion tank.
● Do not leave any objects, such as cloths and tools, in the engine com-
partment.WARNING (Continued)
● When working underneath the vehicle, secure it so that it cannot roll
away and support it safely on suitable supports. The hydraulic jack is not
sufficient for this purpose. Risk of injuries!
● If any tests have to be performed with the engine running, there is an
extra safety risk from rotating parts, such as the drive belt, alternator
and radiator fan, etc., and from the high-voltage ignition system. You
should also note the following:
–Never touch the electrical wiring of the ignition system.
– Keep away from moving engine parts when wearing jewellery,
loose clothing or long hair. Risk of fatal injuries! All jewellery must be
removed, hair tied back and close-fitting clothing worn.
● Observe the following additional warnings if work on the fuel system
or the electrical system is necessary.
–Always disconnect the battery from the onboard network.
– Do not smoke.
– Never work near naked flames.
– Always keep an approved fire extinguisher immediately available.
CAUTION
● When topping up fluids, make sure the correct fluid is put into the cor-
rect filler opening. Otherwise this can cause serious malfunctions or engine
damage!
● Never open the bonnet using the release catch. Risk of damage.
For the sake of the environment
Due to the environment-friendly disposal of fluids, the equipment necessary
and the knowledge required, fluids must be changed by an authorised SEAT
dealer during the service inspections of the vehicle.
Page 176 of 249

175
Checking and refilling levels
Note
● Please contact an authorised SEAT dealer with any doubts regarding flu-
ids.
● Fluids of the correct specifications can be acquired from the selection of
SEAT Original Accessories.
Opening and closing the bonnet
Fig. 116 Releasing bonnet
Fig. 117 Securing the bonnet Opening the bonnet
–
Open the front left door.
– Pull the lever 1
⇒ Fig. 116 under the dash panel in the direc-
tion indicated by the arrow.
Before opening the bonnet, make sure that the windscreen wiper
arms are not lifted away from the glass. Otherwise the paintwork
may be damaged.
– Pull the release catch in the direction of the arrow 2
⇒ Fig. 116
and the bonnet will be released.
– Hold and lift the bonnet.
– Remove the support strut 3
⇒ Fig. 117 from its fastening in the
direction of the arrow and secure the raised bonnet so that the
end of the strut hooks onto the opening in the bonnet 4
.
Closing the bonnet
– Lift the bonnet slightly and unhook the support strut keeping
the bonnet open and insert it into its fastening 3
.
– Let the bonnet drop from a height of around 20 cm into the
catch Do not press down afterwards!
– Check that the bonnet is correctly closed.
Safety FirstOperating instructionsPractical TipsTechnical specifications
Page 178 of 249

177
Checking and refilling levels
Oil properties
Engine typeSpecificationPetrol without flexible service in-
tervalVW 502 00/VW 504 00
Petrol with flexible service inter-
val (LongLife)VW 504 00
Diesel. Engines with no Particu-
late Filter (DPF)VW 505 01/VW 506 01/VW 507 00
Diesel. Particulate Filter Engines
(DPF).
With or without flexible service in-
terval (with and without Long-
life) a)VW 507 00
a)
Only use recommended oils, otherwise you may damage the engine.
Engine oil additives
No type of additive should be mixed with the engine oil. The deterioration
caused by these additives is not covered by the warranty.
Note
Before a long trip, we recommend finding an engine oil that conforms to the
corresponding VW specifications and keeping it in the vehicle. This way, the
correct engine oil will always be available for a top-up if needed. Checking the engine oil level
Fig. 118 Engine oil dip-
sticks
The dipstick shows the engine oil level. ⇒ Fig. 118.
Checking oil level
– Park the vehicle on a level surface and ensure the engine is at
operating temperature.
– Switch the ignition off.
– Open the bonnet.
– Wait a few minutes for the engine oil to flow back to the sump
and remove the dipstick.
– Wipe the dipstick with a clean cloth and insert it again as far as
it will go.
– Then pull the dipstick out again and check the oil level.
Safety FirstOperating instructionsPractical TipsTechnical specifications
Page 180 of 249
179
Checking and refilling levels
Coolant
General notes
The cooling system is factory-filled with an anti-freeze product.
Coolant consists of a mixture of water and 40% anti-freeze additive. This
mixture gives the required anti-freeze protection at temperatures down to
-25 °C (-13 °F) and protects the cooling and heating system against corro-
sion. It also prevents scaling and raises the boiling point of the coolant con-
siderably.
The coolant concentration must not be reduced by adding water, even in
warmer seasons or in warm countries. The concentration of the anti-freeze
additive in the coolant must be at least 40 %.
If greater anti-freeze protection is required in very cold climates, the propor-
tion of the anti-freeze additive can be increased, but only up to 60 % (anti-
freeze protection down to approx. -40 °C (-40 °F)). Any excess in this propor-
tion would reduce the anti-freeze protection and affect the cooling effect.
Vehicles in countries with a cold climate are supplied with coolant protec-
tion down to around -35 °C (-31 °F). The proportion of anti-freeze additive in
these countries should always be at least 50 %.
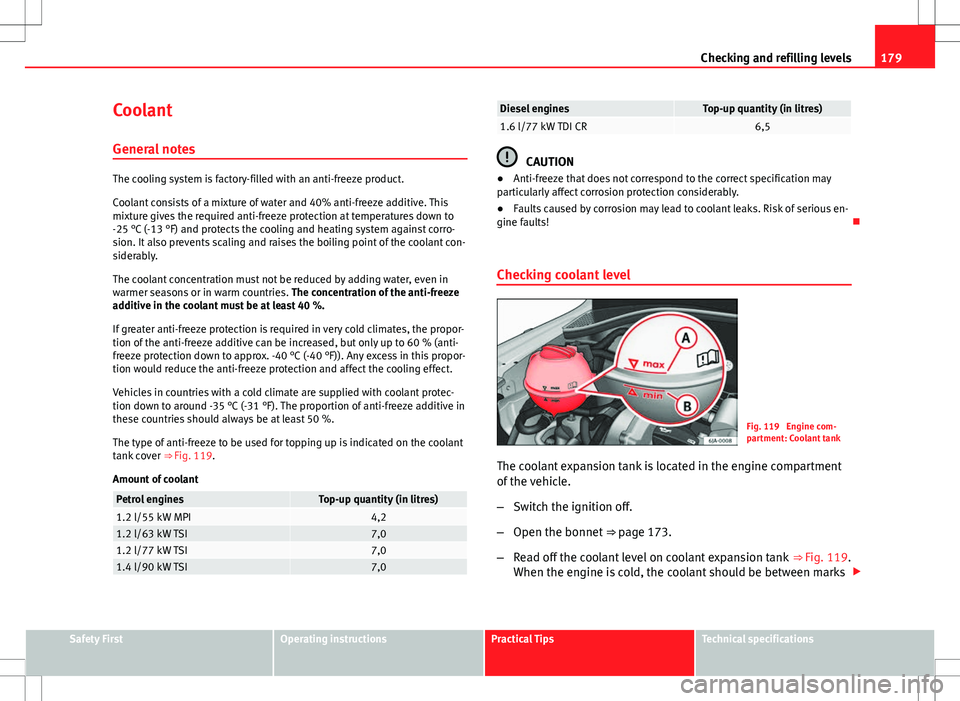
The type of anti-freeze to be used for topping up is indicated on the coolant
tank cover ⇒ Fig. 119.
Amount of coolant
Petrol enginesTop-up quantity (in litres)1.2 l/55 kW MPI4,21.2 l/63 kW TSI7,01.2 l/77 kW TSI7,01.4 l/90 kW TSI7,0
Diesel enginesTop-up quantity (in litres)1.6 l/77 kW TDI CR6,5
CAUTION
● Anti-freeze that does not correspond to the correct specification may
particularly affect corrosion protection considerably.
● Faults caused by corrosion may lead to coolant leaks. Risk of serious en-
gine faults!
Checking coolant level
Fig. 119 Engine com-
partment: Coolant tank
The coolant expansion tank is located in the engine compartment
of the vehicle.
– Switch the ignition off.
– Open the bonnet ⇒ page 173.
– Read off the coolant level on coolant expansion tank ⇒
Fig. 119.
When the engine is cold, the coolant should be between marks
Safety FirstOperating instructionsPractical TipsTechnical specifications
Page 182 of 249

181
Checking and refilling levels
Brake fluid Checking brake fluid level
Fig. 120 Engine com-
partment: Brake fluid res-
ervoir
The brake fluid reservoir is located in the engine compartment of
the vehicle.
– Switch the ignition off.
– Open the bonnet ⇒ page 173.
– Check the brake fluid level in the reservoir ⇒ Fig. 120. It should
be between the “MIN” and “MAX” marks.
The fluid level drops slightly after a period of time due to automatic com-
pensation for brake pad wear. This is quite normal.
However, if the level goes down noticeably in a short time, or drops below
the “MIN” mark, there may be a leak in the brake system. If the brake fluid
level in the reservoir is too low, this will be indicated by the warning lamp in
the instrument panel
⇒ page 66, Brake system .
WARNING
If the fluid level has dropped below the MIN mark, do not drive on.
Risk of accident! Seek professional help.
Changing brake fluid
Brake fluid absorbs moisture. Therefore, it gradually absorbs moisture from
the atmosphere. If the water content in the brake fluid is too high, the brake
system could corrode. The water content also reduces the boiling point of
the brake fluid.
The brake fluid must comply with one of the following standards or specifi-
cations:
● VW 50114
● FMVSS 116 DOT4
WARNING
Heavy use of the brakes may cause a vapour lock if the brake fluid is left
in the brake system for too long. This would seriously affect the efficien-
cy of the brakes and the safety of the vehicle.
CAUTION
Brake fluid damages the vehicle paintwork.
Safety FirstOperating instructionsPractical TipsTechnical specifications