Steering wheel Seat Toledo 2013 Owner's Guide
[x] Cancel search | Manufacturer: SEAT, Model Year: 2013, Model line: Toledo, Model: Seat Toledo 2013Pages: 258, PDF Size: 3.94 MB
Page 142 of 258
140Driving
● Do not tow-start the engine. Risk of engine damage! In vehicles with a
catalytic converter, unburnt fuel could reach the catalytic converter and
catch fire in it. This would lead to a fault in the catalytic converter. Use the
battery from another vehicle for help in starting the engine ⇒ page 214,
Jump-starting.
● After the engine has been working hard for a long time, leave the engine
idling for about one minute before switching it off at the end of a journey.
This will stop the engine from overheating.
For the sake of the environment
Do not warm up the engine when the vehicle is stationary. If possible, move
off immediately after starting the engine. This will help the engine reach op-
erating temperature more quickly, reducing the quantity of emissions.
Note
● The engine can only be started with the original SEAT key.
● Loud running noises may be heard briefly after cold-starting the engine.
This is normal and is no cause for concern.
● After the engine has been stopped and the ignition switched off, the ra-
diator fan may continue running for around 10 minutes.
● If the engine still does not start after a second attempt, the fuel pump
fuse might have blown. Check the fuse and replace if necessary
⇒ page 219 or contact your Specialised Service.
● You should always engage the steering lock when you leave the vehicle.
This will hinder any attempts at theft. Adjusting the steering wheel position
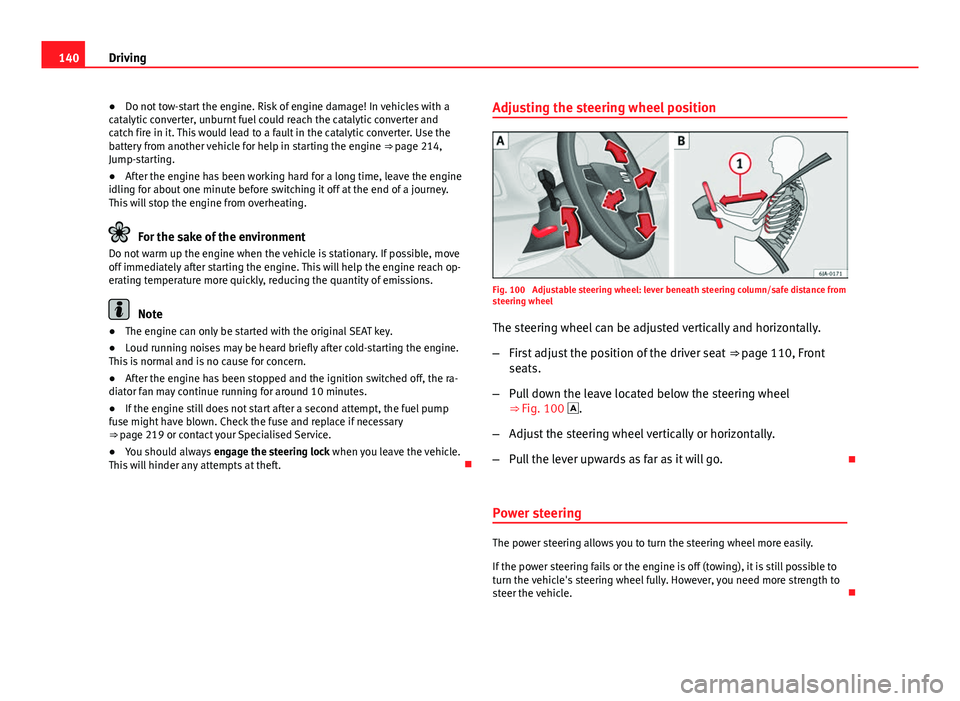
Fig. 100 Adjustable steering wheel: lever beneath steering column/safe distance from
steering wheel
The steering wheel can be adjusted vertically and horizontally.
– First adjust the position of the driver seat ⇒ page 110, Front
seats.
– Pull down the leave located below the steering wheel
⇒ Fig. 100 .
– Adjust the steering wheel vertically or horizontally.
– Pull the lever upwards as far as it will go.
Power steering
The power steering allows you to turn the steering wheel more easily.
If the power steering fails or the engine is off (towing), it is still possible to
turn the vehicle's steering wheel fully. However, you need more strength to
steer the vehicle.
Page 143 of 258

141
Driving
Start-up lock security system (immobiliser)
There is an electronic chip in the key. The electronic immobiliser is deactiva-
ted when the key is inserted into the ignition. The electronic immobiliser is
automatically activated when the key is removed from the ignition.
The engine will not start if an unauthorised key is used.
The informative display indicates: Immobiliser active!
Ignition lock
Fig. 101 Ignition key po-
sitions
Petrol engines 1
– Ignition switched off, engine stopped, steering can be locked
2
– Ignition switched on
3
– Starting Diesel engines
1
– Fuel supply stopped, ignition switched off, engine stopped,
steering can be locked
2
– Engine pre-heating, ignition switched on
3
– Starting
To engage the Steering lock without the key in the ignition, turn the steer-
ing wheel slightly until it engages
If the steering lock is engaged and it is difficult or impossible to turn the key
to position 2
, release the lock by turning the steering wheel slightly in
both directions.
Starting the engine
Vehicles with a diesel engine are equipped with a glow plug system. When
you switch on the ignition, the glow plug warning lamp will light up. The
engine can be started straight away when the lamp switches off.
Do not connect electrical appliances during preheating so as not the drain
the vehicle battery unnecessarily.
Starting the engine
● Move the gearbox lever into neutral or move the selector lever to posi-
tion P or N and pull firmly on the handbrake.
● Press the clutch pedal all the way down 2
⇒ Fig. 101 ⇒ page 141 and
start the engine 3 – without pressing the accelerator. Keep the clutch ped-
al pressed down until the engine starts.
● Release the ignition key as soon as the engine starts. The key returns to
position 2
.
Safety FirstOperating instructionsPractical TipsTechnical specifications
Page 146 of 258
144Driving
The warning lamp lights up when the handbrake is applied with the ignition
on .
Stability system (ESC)
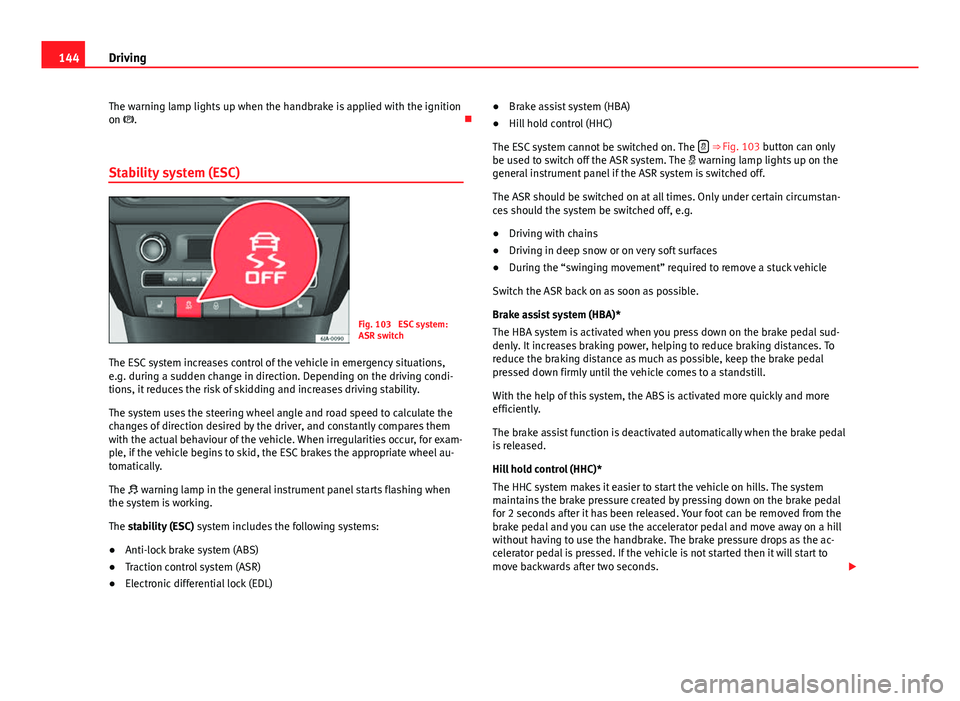
Fig. 103 ESC system:
ASR switch
The ESC system increases control of the vehicle in emergency situations,
e.g. during a sudden change in direction. Depending on the driving condi-
tions, it reduces the risk of skidding and increases driving stability.
The system uses the steering wheel angle and road speed to calculate the
changes of direction desired by the driver, and constantly compares them
with the actual behaviour of the vehicle. When irregularities occur, for exam-
ple, if the vehicle begins to skid, the ESC brakes the appropriate wheel au-
tomatically.
The warning lamp in the general instrument panel starts flashing when
the system is working.
The stability (ESC) system includes the following systems:
● Anti-lock brake system (ABS)
● Traction control system (ASR)
● Electronic differential lock (EDL) ●
Brake assist system (HBA)
● Hill hold control (HHC)
The ESC system cannot be switched on. The
⇒ Fig. 103 button can only
be used to switch off the ASR system. The warning lamp lights up on the
general instrument panel if the ASR system is switched off.
The ASR should be switched on at all times. Only under certain circumstan-
ces should the system be switched off, e.g.
● Driving with chains
● Driving in deep snow or on very soft surfaces
● During the “swinging movement” required to remove a stuck vehicle
Switch the ASR back on as soon as possible.
Brake assist system (HBA)*
The HBA system is activated when you press down on the brake pedal sud-
denly. It increases braking power, helping to reduce braking distances. To
reduce the braking distance as much as possible, keep the brake pedal
pressed down firmly until the vehicle comes to a standstill.
With the help of this system, the ABS is activated more quickly and more
efficiently.
The brake assist function is deactivated automatically when the brake pedal
is released.
Hill hold control (HHC)*
The HHC system makes it easier to start the vehicle on hills. The system
maintains the brake pressure created by pressing down on the brake pedal
for 2 seconds after it has been released. Your foot can be removed from the
brake pedal and you can use the accelerator pedal and move away on a hill
without having to use the handbrake. The brake pressure drops as the ac-
celerator pedal is pressed. If the vehicle is not started then it will start to
move backwards after two seconds.
Page 157 of 258
155
Driving
● Engine at operating temperature
● Vehicle's battery sufficiently charged
● Vehicle not on a very steep slope
● Engine speed below 1200 rpm
● Vehicle's battery temperature is neither too high nor too low
● Sufficient brake system pressure
● Difference between outside temperature and set interior temperature
not too great
● Vehicle speed since last time the engine started was above 3 km/h (2
mph)
● Particulate filter ⇒ page 74 not being cleaned
● Front wheels not overly turned (steering wheel turned less than three
quarters of a turn)
Conditions for engine start up (Start phase)
● Clutch pedal pressed
● Max./min. temperature set
● Windscreen defrost function switched on
● High blower speed
● START-STOP button pressed
Conditions for automatic engine start up without driver involvement
● Vehicle moving at a speed of over 3 km/h (2 mph)
● Difference between outside temperature and interior temperature is too
great
● Vehicle's battery insufficiently charged
● Insufficient brake system pressure
If the driver seat belt is unfastened for more than 30 seconds in Stop phase,
the engine must be started using the ignition key. Please observe the mes-
sages on the general instrument panel display. Warnings on the instrument panel display (valid for vehicles not fitted with
an informative display)
FAULT: START-STOPFault in the START-STOP systemSTART-STOP IMPOSSIBLEEngine cannot be automatically shut
down
START-STOP ACTIVEAutomatic engine shut down (Stop
phase)
SWITCH OFF IGNITIONSwitch the ignition offSTART MANUALLYStart the engine manually
WARNING
● If the engine is switched off, neither the brake servo or the power
steering will work.
● Do not move the vehicle when the engine is switched off.
CAUTION
Switch off the START-STOP system ⇒ page 162 before driving through a
pool of water on the road.
Note
● The battery temperature may reflect the changes in outside temperature
after several hours. If the vehicle has been stopped outside at temperatures
below zero or in direct sunlight, for example, the battery temperature may
take several hours to reach the values required for the correct operating of
the START-STOP system.
● If the Climatronic system is operating automatically, this could impair
automatic engine shut down in certain conditions.
Safety FirstOperating instructionsPractical TipsTechnical specifications
Page 178 of 258
176Care of the vehicle and cleaning
Note
● Make sure, when washing the vehicle, that the least amount of water
possible enters the lock cylinders.
● We recommend the use of products from the selection of SEAT Original
Accessories to care for the door lock cylinder.
Wheels
Wheel trims
If you wash the vehicle regularly, you must also thoroughly wash the wheel
trims. Regularly remove any brake abrasion residue and road salt from the
wheels, otherwise the wheel material could be damaged. Repair any dam-
age to the wheel paintwork immediately.
Alloy wheels
After thorough washing, treat the wheels with a protective product for alloy
wheels. Do not use abrasive products to care for the wheels.
WARNING
Moisture, ice and road salt may affect braking efficiency. Risk of acci-
dent!
CAUTION
Heavy dirt on the wheels could lead to their misalignment. This could result
in vibrations being transmitted to the steering wheel that under certain con-
ditions may cause premature steering wear. This dirt must be removed.
Note
We recommend you leave paint damage repairs to a SEAT Authorised Serv-
ice. Underbody sealant
The underside of the vehicle is coated to permanently protect it from chemi-
cal and mechanical agents.
Given that damage to the
protective coating during driving cannot be com-
pletely ruled out, we recommend you check the condition of the protective
coating on the underbody and suspension at regular intervals, preferably
before the start and end of the coldest season of the year.
Authorised SEAT dealers have suitable special products and the necessary
facilities and are aware of the techniques required for their application. We
therefore recommend all touch-up work or additional anti-corrosion meas-
ures be performed by an authorised SEAT dealer.
WARNING
Do not apply underseal or anti-corrosion coatings to the exhaust pipes,
catalytic converter, particulate filter or heat shields on the exhaust sys-
tem. Once the engine has reached operating temperature, these substan-
ces could catch fire. Risk of fire!
Cavity waxing
All cavities on the vehicle exposed to corrosion are permanently factory-pro-
tected by a wax solution .
This wax solution does not need to be checked or touched up. Should wax
run out of the cavities at high ambient temperatures, remove it using a plas-
tic scraper and clean away any stains using lighter fluid.
Page 180 of 258
178Care of the vehicle and cleaning
CAUTION
● Avoid exposing leather to direct sunlight for long periods so that it does
not lose its colour. If the car is left for a prolonged period outdoors, cover
the leather so that it does not lose its colour.
● Sharp-edged objects on clothing, such as zips, rivets or belts can leave
permanent scratches and rough marks on the surface of the leather.
● Use of the mechanical steering wheel lock can damage the leather sur-
face of the steering wheel.
Note
● Use a suitable impregnating cream with ultra-violet protection at regular
intervals and after cleaning. The cream will nourish and moisturise the
leather, keep it supple and able to breathe. In addition, it will also help to
protect the surface of the leather.
● Clean the leather every 2 to 3 months and remove fresh dirt as necessa-
ry.
● Preserve the colour of the leather. A special coloured cream for leather
will renew the colour of more heavily worn areas as required.
● Leather is a natural material with specific properties. During vehicle use,
parts of the leather covers may change in appearance, such as folds or wrin-
kles, as a result of their use.
Seat belts
Keep the seat belts clean!
Wash soiled seat belts with mild, soapy water, removing any heavier dirt
with a soft brush.
Check the condition of all seat belts at regular intervals.
Very soiled belts may not retract properly.
WARNING
● The seat belts should never be removed from the vehicle for cleaning.
● Never clean using chemical products, as chemical detergents destroy
the fabric. Ensure that the seat belts do not come into contact with corro-
sive fluids such as acids, etc.
● If you find any damage to the belt webbing, belt fittings, the belt re-
tractor or the buckle, the belt in question must be replaced by an Official
Service.
● Make sure that the inertia reel seat belts are completely dry before
allowing them to retract.
Page 199 of 258
197
Wheels and tyres
Note
● We recommend having all work on tyres and wheels carried out by an
authorised SEAT dealer.
● We recommend using wheels, tyres, hub caps and snow chains from the
SEAT Original Accessories programme.
Tyre useful life
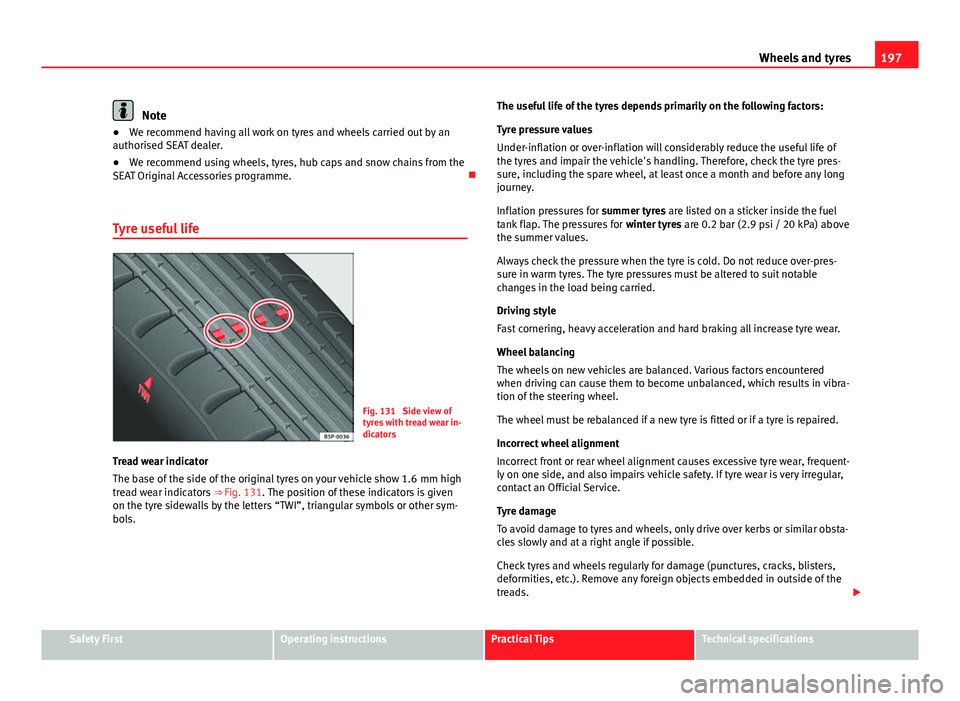
Fig. 131 Side view of
tyres with tread wear in-
dicators
Tread wear indicator
The base of the side of the original tyres on your vehicle show 1.6 mm high
tread wear indicators ⇒ Fig. 131. The position of these indicators is given
on the tyre sidewalls by the letters “TWI”, triangular symbols or other sym-
bols. The useful life of the tyres depends primarily on the following factors:
Tyre pressure values
Under-inflation or over-inflation will considerably reduce the useful life of
the tyres and impair the vehicle's handling. Therefore, check the tyre pres-
sure, including the spare wheel, at least once a month and before any long
journey.
Inflation pressures for
summer tyres are listed on a sticker inside the fuel
tank flap. The pressures for winter tyres are 0.2 bar (2.9 psi / 20 kPa) above
the summer values.
Always check the pressure when the tyre is cold. Do not reduce over-pres-
sure in warm tyres. The tyre pressures must be altered to suit notable
changes in the load being carried.
Driving style
Fast cornering, heavy acceleration and hard braking all increase tyre wear.
Wheel balancing
The wheels on new vehicles are balanced. Various factors encountered
when driving can cause them to become unbalanced, which results in vibra-
tion of the steering wheel.
The wheel must be rebalanced if a new tyre is fitted or if a tyre is repaired.
Incorrect wheel alignment
Incorrect front or rear wheel alignment causes excessive tyre wear, frequent-
ly on one side, and also impairs vehicle safety. If tyre wear is very irregular,
contact an Official Service.
Tyre damage
To avoid damage to tyres and wheels, only drive over kerbs or similar obsta-
cles slowly and at a right angle if possible.
Check tyres and wheels regularly for damage (punctures, cracks, blisters,
deformities, etc.). Remove any foreign objects embedded in outside of the
treads.
Safety FirstOperating instructionsPractical TipsTechnical specifications
Page 204 of 258

202Wheels and tyres
WARNING
● If the warning lamp lights up, slow down immediately and avoid
any severe braking or steering manoeuvres. Stop and check the tyres and
their pressure as soon as possible.
● Under certain conditions (e.g. sporty driving style, driving on loose
surfaces or in the winter) the warning lamp may take a while to light
up or may remain switched off.
● Despite the tyre pressure monitoring system, the driver remains re-
sponsible for maintaining the correct tyre pressure. You must therefore
check the tyre pressure often.
Note
● The tyre pressure monitoring system is not a replacement for regularly
checking the tyre pressure, as it is unable to recognise an even drop in pres-
sure.
● The tyre pressure monitoring system is unable to warn of a sudden drop
in tyre pressure, e.g. a puncture. In this case, try to stop the vehicle carefully
with no severe braking or steering manoeuvres.
● To ensure the tyre pressure monitoring system works correctly, the basic
setting must be performed every 10 000 km (6000 miles) or once a year.
Wheel bolts
The wheel bolts are matched to the rims. When installing different wheels,
e.g. to fit light alloy wheels or wheels with winter tyres, it is important to use
the correct wheel bolts with the right length and correctly shaped bolt
heads. The is essential for the secure fit of the wheels and for the proper
function of the brake system. Winter tyres
Winter tyres will significantly improve handling of the vehicle in winter road
conditions. The design of summer tyres (width, rubber compound, tread
pattern) gives less grip at temperatures below +7 °C (45 °F), on ice and
snow. This applies particularly to vehicles equipped with
wide section tyres
or high speed tyres (code letters H or V on the sidewall).
In order to preserve the performance of the vehicle as much as possible,
winter tyres must be fitted on all four wheels, the minimum depth of the
tread must be 4 mm and the maximum age must be 4 years.
You can use winter tyres of a lower speed rating if the maximum speed limit
of these tyres will not be exceeded, even if the maximum speed limit for the
vehicle is higher.
For the sake of the environment
Summer tyres should be fitted again in time, as they give better handling on
roads free of snow and ice and at temperatures over +7 °C (45 °F). Summer
tyres have a shorter braking distance, produce less rolling noise and do not
wear down as quickly. They also reduce fuel consumption.
Snow chains
Snow chains must only be used on the front wheels.
In winter road conditions, snow chains not only help to improve grip but al-
so improve the braking capacity.
For technical reasons snow chains may only be used on tyres with the fol-
lowing wheel rim/tyre combinations.
Page 219 of 258

217
Self-help
road. If the vehicle is towed with the rear wheels lifted off the road
the automatic gearbox will be damaged!
It is easier and safer to tow a vehicle with a towbar. A towrope
should only be used if you do not have a towbar.
Follow the instructions below when towing a vehicle:
Notes for the driver of the towing vehicle
– Engage the clutch very gently when starting to move or on vehi-
cles with automatic gearbox press the accelerator carefully.
– On vehicles with manual gearbox, the towrope must be taut be-
fore driving off.
The maximum towing speed is 50 km/h (31 mph).
Notes for the driver of the towed vehicle
– The ignition should be switched on so that the steering wheel
lock is not engaged and the turn signals, horn and windscreen
wipers and washers can be used.
– Put the gear lever in neutral or move the selector lever to posi-
tion N (automatic gearbox).
The brake servo and power steering only work when the engine is
running. Considerably more effort is required on the brake pedal
and steering wheel when the engine is switched off.
Ensure the towrope remains taut at all times when towing.
CAUTION
● Do not tow-start the engine. Risk of engine damage! In vehicles with a
catalytic converter, unburnt fuel could reach the catalytic converter and
catch fire in it. This could damage and destroy the catalytic converter. Use
the battery from another vehicle for help in starting the engine ⇒ page 215,
Starting the engine.
● If, due to a fault, there is no oil in the gearbox, the car may only be tow-
ed with the driven wheels lifted clear of the road and transported on a spe-
cial vehicle transporter or trailer.
● If normal towing is not possible or if the vehicle is to be towed for further
than 50 km (31 miles), the vehicle must be transported on a special vehicle
transporter or trailer.
● The towrope should be slightly elastic to reduce the loading on both ve-
hicles during towing. It is advisable to use a towrope made of synthetic fibre
or similar material only.
● Do not pull too hard with the towing vehicle and always take care to
avoid jerking the towrope. When towing on a loose surface there is always a
risk of overloading and damaging the anchorage points.
● Attach the towrope or towbar only to the towline anchorages or to the
removable towing bracket ⇒ page 164, or ⇒ page 218.
Note
● We recommend you use the towrope or towbar available in the SEAT
Original Accessories programme from authorised SEAT dealers.
● Towing a vehicle requires some experience. Both drivers should be fa-
miliar with the technique required for towing. Inexperienced drivers should
not attempt to tow away another vehicle or to have their vehicle towed.
● Note the legal regulations concerning towing, particularly those regard-
ing the signalling of the towed and towing vehicle.
● The towrope must not be twisted, as under certain circumstances this
could unscrew the front towline anchorage.
Safety FirstOperating instructionsPractical TipsTechnical specifications
Page 222 of 258
220Fuses and bulbs
Fuses in the dash panel
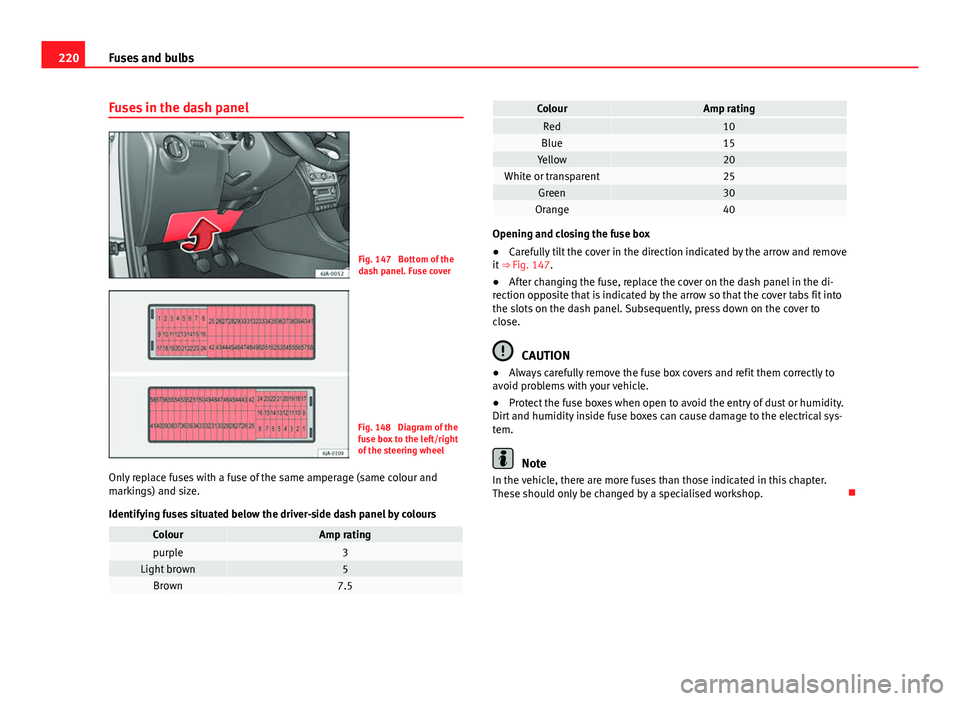
Fig. 147 Bottom of the
dash panel. Fuse cover
Fig. 148 Diagram of the
fuse box to the left/right
of the steering wheel
Only replace fuses with a fuse of the same amperage (same colour and
markings) and size.
Identifying fuses situated below the driver-side dash panel by colours
ColourAmp ratingpurple3Light brown5Brown7.5
ColourAmp ratingRed10Blue15Yellow20White or transparent25Green30Orange40
Opening and closing the fuse box
● Carefully tilt the cover in the direction indicated by the arrow and remove
it ⇒ Fig. 147.
● After changing the fuse, replace the cover on the dash panel in the di-
rection opposite that is indicated by the arrow so that the cover tabs fit into
the slots on the dash panel. Subsequently, press down on the cover to
close.
CAUTION
● Always carefully remove the fuse box covers and refit them correctly to
avoid problems with your vehicle.
● Protect the fuse boxes when open to avoid the entry of dust or humidity.
Dirt and humidity inside fuse boxes can cause damage to the electrical sys-
tem.
Note
In the vehicle, there are more fuses than those indicated in this chapter.
These should only be changed by a specialised workshop.