Steering wheel Seat Toledo 2013 User Guide
[x] Cancel search | Manufacturer: SEAT, Model Year: 2013, Model line: Toledo, Model: Seat Toledo 2013Pages: 258, PDF Size: 3.94 MB
Page 45 of 258
43
Airbag system
WARNING (Continued)
● Do not attempt to modify components of the airbag system in any
way.
● The side and head airbags are managed through sensors located in
the interior of the front doors. To ensure the correct operation of the side
and head airbags neither the doors nor the door panels should be modi-
fied in any way (e.g. fitting loudspeakers). If the front door is damaged,
the airbag system may not work correctly. All work carried out on the
front door must be done in a specialised workshop.
Deactivating airbags Deactivating airbags
The deactivation of airbags corresponds only to certain cases, i.e. if:
● a child seat is required in the front passenger seat with the child facing
in the opposite direction to the direction of travel (in some countries, due to
divergent legal requirements, facing in the direction of travel) ⇒ page 48;
● despite the driver seat being in the correct position, a minimum dis-
tance of 25 cm cannot be maintained between the centre of the steering
wheel and the driver's torso.
● installation of special devices is required in the steering wheel area due
to a physical disability.
● if you have special seats installed (e.g. an orthopaedic seat without side
airbag).
The front passenger front airbag can be disabled using the switch
⇒ page 44.
We recommend that you contact an authorised SEAT dealer for the disabling
of other airbags. Airbag system control
The airbag system availability is controlled electronically, regardless of
whether an airbag is disabled.
If an airbag was disabled using a diagnostics system:
●
the airbag system warning lamp lights up after switching on the igni-
tion for about 4 seconds, and then flashes for about 12 seconds
If the airbag has been disabled with the airbag switch on the side of the
dash panel:
● the airbag control lamp will light up for about 4 seconds after the ig-
nition is switched on.
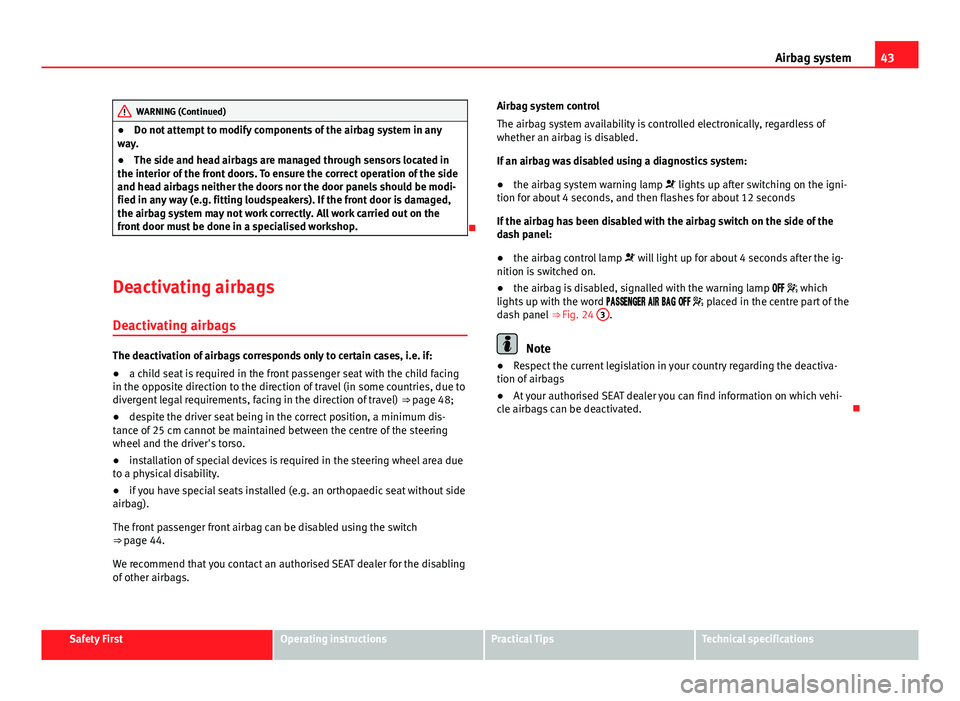
● the airbag is disabled, signalled with the warning lamp which
lights up with the word placed in the centre part of the
dash panel ⇒ Fig. 24 3
.
Note
● Respect the current legislation in your country regarding the deactiva-
tion of airbags
● At your authorised SEAT dealer you can find information on which vehi-
cle airbags can be deactivated.
Safety FirstOperating instructionsPractical TipsTechnical specifications
Page 57 of 258
55
Controls and displays
Operating instructions Controls and displays
Overview
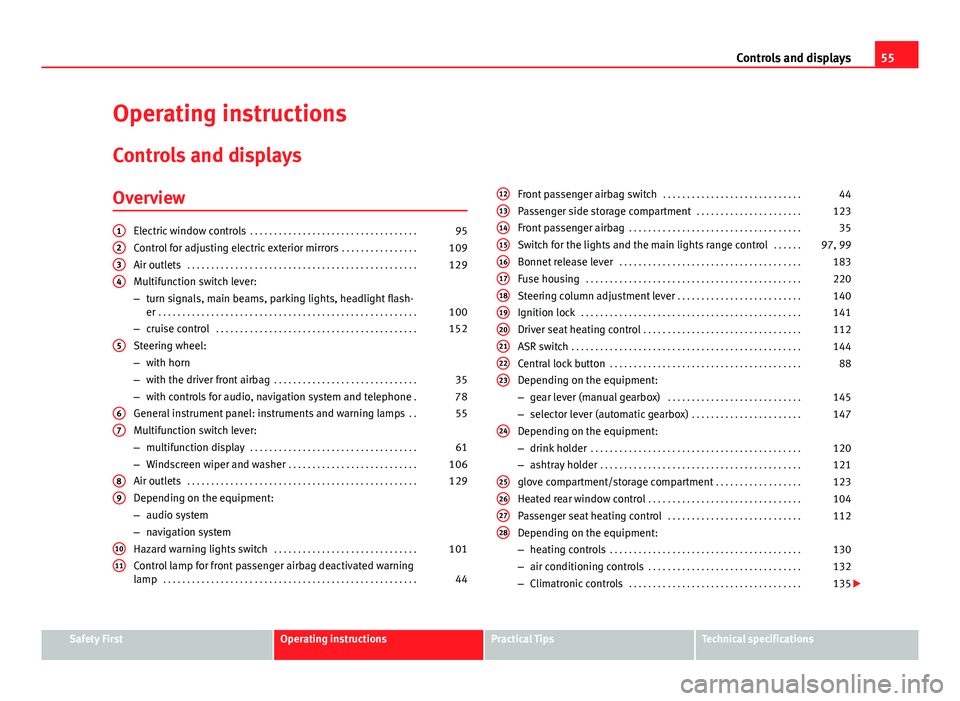
Electric window controls . . . . . . . . . . . . . . . . . . . . . . . . . . . . . . . . . . . 95
Control for adjusting electric exterior mirrors . . . . . . . . . . . . . . . .109
Air outlets . . . . . . . . . . . . . . . . . . . . . . . . . . . . . . . . . . . . . . . . . . . . . . . . 129
Multifunction switch lever:
– turn signals, main beams, parking lights, headlight flash-
er . . . . . . . . . . . . . . . . . . . . . . . . . . . . . . . . . . . . . . . . . . . . . . . . . . . . . . 100
– cruise control . . . . . . . . . . . . . . . . . . . . . . . . . . . . . . . . . . . . . . . . . . 152
Steering wheel:
– with horn
– with the driver front airbag . . . . . . . . . . . . . . . . . . . . . . . . . . . . . . 35
– with controls for audio, navigation system and telephone .78
General instrument panel: instruments and warning lamps . .55
Multifunction switch lever:
– multifunction display . . . . . . . . . . . . . . . . . . . . . . . . . . . . . . . . . . . 61
– Windscreen wiper and washer . . . . . . . . . . . . . . . . . . . . . . . . . . . 106
Air outlets . . . . . . . . . . . . . . . . . . . . . . . . . . . . . . . . . . . . . . . . . . . . . . . . 129
Depending on the equipment:
– audio system
– navigation system
Hazard warning lights switch . . . . . . . . . . . . . . . . . . . . . . . . . . . . . . 101
Control lamp for front passenger airbag deactivated warning
lamp . . . . . . . . . . . . . . . . . . . . . . . . . . . . . . . . . . . . . . . . . . . . . . . . . . . . . 44
1234
5
67
89
1011
Front passenger airbag switch
. . . . . . . . . . . . . . . . . . . . . . . . . . . . . 44
Passenger side storage compartment . . . . . . . . . . . . . . . . . . . . . .123
Front passenger airbag . . . . . . . . . . . . . . . . . . . . . . . . . . . . . . . . . . . . 35
Switch for the lights and the main lights range control . . . . . .97, 99
Bonnet release lever . . . . . . . . . . . . . . . . . . . . . . . . . . . . . . . . . . . . . . 183
Fuse housing . . . . . . . . . . . . . . . . . . . . . . . . . . . . . . . . . . . . . . . . . . . . . 220
Steering column adjustment lever . . . . . . . . . . . . . . . . . . . . . . . . . . 140
Ignition lock . . . . . . . . . . . . . . . . . . . . . . . . . . . . . . . . . . . . . . . . . . . . . . 141
Driver seat heating control . . . . . . . . . . . . . . . . . . . . . . . . . . . . . . . . . 112
ASR switch . . . . . . . . . . . . . . . . . . . . . . . . . . . . . . . . . . . . . . . . . . . . . . . . 144
Central lock button . . . . . . . . . . . . . . . . . . . . . . . . . . . . . . . . . . . . . . . . 88
Depending on the equipment:
– gear lever (manual gearbox) . . . . . . . . . . . . . . . . . . . . . . . . . . . . 145
– selector lever (automatic gearbox) . . . . . . . . . . . . . . . . . . . . . . .147
Depending on the equipment:
– drink holder . . . . . . . . . . . . . . . . . . . . . . . . . . . . . . . . . . . . . . . . . . . . 120
– ashtray holder . . . . . . . . . . . . . . . . . . . . . . . . . . . . . . . . . . . . . . . . . . 121
glove compartment/storage compartment . . . . . . . . . . . . . . . . . .123
Heated rear window control . . . . . . . . . . . . . . . . . . . . . . . . . . . . . . . . 104
Passenger seat heating control . . . . . . . . . . . . . . . . . . . . . . . . . . . . 112
Depending on the equipment:
– heating controls . . . . . . . . . . . . . . . . . . . . . . . . . . . . . . . . . . . . . . . . 130
– air conditioning controls . . . . . . . . . . . . . . . . . . . . . . . . . . . . . . . . 132
– Climatronic controls . . . . . . . . . . . . . . . . . . . . . . . . . . . . . . . . . . . . 135
121314151617181920212223
24
25262728
Safety FirstOperating instructionsPractical TipsTechnical specifications
Page 63 of 258

61
Controls and displays
Multi-function display* (on board computer)
Introduction
The multifunction display can only be operated when the ignition is switch-
ed on. When the ignition is switched on the last function selected before it
was switched off is displayed.
The multifunction display data is shown on the screen ⇒ Fig. 33
⇒ page 61.
In vehicles fitted with an informative display ⇒ page 66 the system can be
adjusted so that certain data is not shown.
WARNING
● Always keep your attention on driving! As the driver, you have the full
responsibility for the safety of traffic.
● Do not rely only on the outside temperature indicator to verify wheth-
er the road surface is frozen. This is because with an outside temperature
of +4 °C (+39 °F) ice can generate on the road - Warning of frozen road
surface!
Note
● Models for certain countries can show the values in imperial units.
● If the second speed in mph (km/h) is displayed, the current speed in
km/h (mph) is not displayed on the screen. Memory
Fig. 33 Multifunction
display
The multifunction display has two automatic memories. The selected mem-
ory is displayed on the screen ⇒ Fig. 33.
The current journey data (memory 1) is always displayed when the number
1 appears on the display. When number 2 appears on the display, the total
distance travelled is shown (memory 2).
The memory is selected depending on the equipment:
● by pressing the lever's B
button briefly
⇒ Fig. 34 ⇒ page 62, or else
● briefly pressing the right thumbwheel of the multifunction steering
wheel 1
⇒
Fig. 35.
Current journey memory (memory 1)
The current journey memory collects data from the moment the ignition is
switched on until it is switched off. If the journey is continued within two
hours of switching off the ignition, the new values will be added to the ex-
isting trip recorder memory. The memory will automatically be deleted if the
journey is interrupted for more than two hours.
Total distance travelled memory (memory 2)
The total distance travelled memory collects journey data from any number
of individual journeys up to a maximum of 19 hours and 59 minutes and
Safety FirstOperating instructionsPractical TipsTechnical specifications
Page 64 of 258
62Controls and displays
1999 km (miles) or until 99 hours and 59 minutes and 9999 km (miles) in
cars with an informative display. The memory will automatically be deleted
if one of the named values is reached, resetting the data collected.
Unlike the current journey memory, this memory is not deleted, even when
the ignition is switched off for more than two hours.
Note
After disconnecting the battery, all the values stored in the memories 1 and
2 are deleted.
Operation
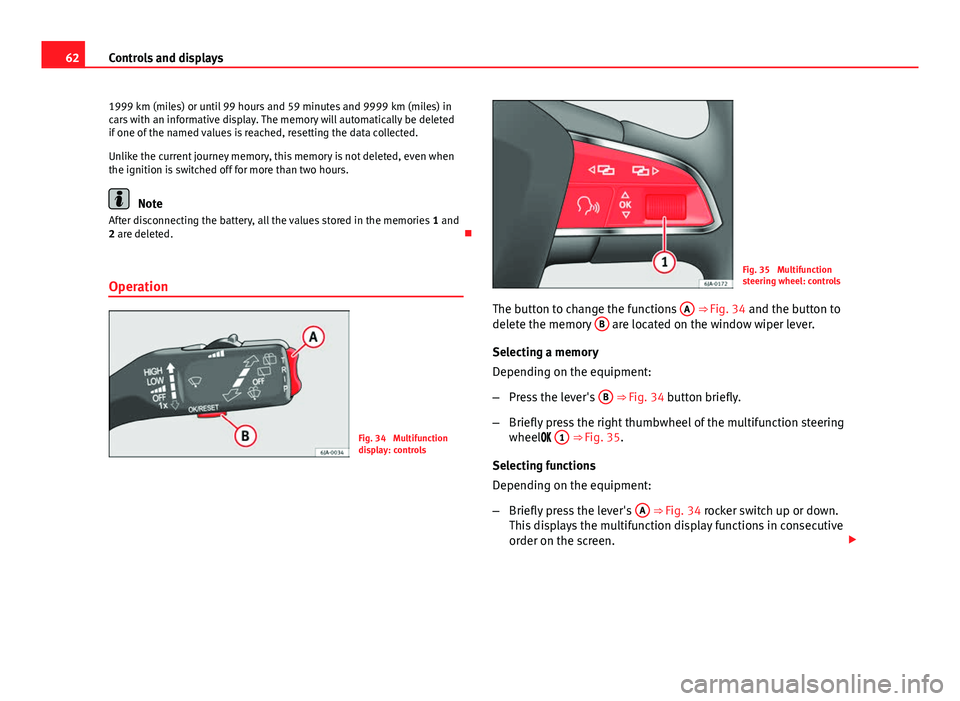
Fig. 34 Multifunction
display: controls
Fig. 35 Multifunction
steering wheel: controls
The button to change the functions A
⇒ Fig. 34 and the button to
delete the memory B are located on the window wiper lever.
Selecting a memory
Depending on the equipment:
– Press the lever's B
⇒ Fig. 34 button briefly.
– Briefly press the right thumbwheel of the multifunction steering
wheel 1
⇒
Fig. 35.
Selecting functions
Depending on the equipment:
– Briefly press the lever's A
⇒ Fig. 34 rocker switch up or down.
This displays the multifunction display functions in consecutive
order on the screen.
Page 65 of 258

63
Controls and displays
– Turn the right thumbwheel of the multifunction steering wheel
1
⇒ Fig. 35. This displays the multifunction display functions
in consecutive order on the screen.
Resetting
– Select the required memory.
Depending on the equipment:
– Press and hold the lever's B
⇒ Fig. 34 button.
– Press and hold the right thumbwheel of the multifunction steer-
ing wheel 1
⇒
Fig. 35.
This will reset the following values of the selected memory:
● the average fuel consumption
● journey distance covered
● average speed
● duration of the journey
Multifunction display data
Outside temperature
The display indicates the outside temperature.
At temperatures below +4 °C (+39 °F), the snowflake symbol is also dis-
played (frozen road surface warning symbol) and an audible warning is giv-
en. Pressing the lever's rocker switch A
⇒ Fig. 34 or turning the right thumbwheel of the steering wheel
1
⇒ Fig. 35 shows the last displayed
function.
Journey duration
The display shows the time you have covered since the memory was last re-
set. If you wish to measure the duration of a journey from a specific mo-
ment, the memory must be deleted ⇒ page 62.
The maximum time indicated by the two memories is 19 hours 59 minutes
or 99 hours and 59 minutes for vehicles fitted with an informative display.
The memory is reset if this value is exceeded.
Current fuel consumption
The current fuel consumption is indicated on the display in litres/100km
(miles) 1)
. You can adapt your driving style to the required consumption with
the assistance of this indicator.
The consumption is displayed in litres per hour while the vehicle is stopped
or at idling speed 2)
.
Average fuel consumption
The display shows the average fuel consumption in litres/100km (miles) 1)
calculated since the memory was last reset ⇒ page 61.
If you wish to measure the average fuel consumption from a specific period,
the memory must first be deleted ⇒ page 62. While driving the first 300 m
after deleting the memory this value is not shown on the display.
The value is updated regularly while the vehicle is in motion.
1)
The indication of consumption is given in kms (miles)/litres in models for certain countries.
2) The indication of the consumption when the vehicle is stationary is given in - -.- kms/litre
in models for certain countries.
Safety FirstOperating instructionsPractical TipsTechnical specifications
Page 66 of 258
64Controls and displays
Operating range
The approximate operating range is indicated in kilometres (miles) on the
display. It shows how far the vehicle can travel with the available fuel using
the same driving conditions as a reference.
The operating range is calculated in sections of 10 kilometres (miles). When
the fuel gauge enters the reserve zone, the operating range is displayed in
sections of 5 kilometres (miles).
The operating range is calculated based on the fuel consumption during the
last 50 kilometres (miles). The operating range increases when driving in a
more economical manner.
When the memory is reset (after disconnecting the battery), the operating
range is calculated with a 10 litres per 100 km (miles) consumption and ad-
justs to represent the current driving style.
Distance
The display shows the distance you have covered since the memory was last
reset ⇒ page 61. If you wish to measure the duration of a journey from a
specific moment, the memory must be deleted ⇒ page 62.
The maximum value for both memories is 1999 km (miles), or 9999 km
(miles) in vehicles fitted with an informative display. The memory is reset if
this value is exceeded.
Average speed
The display shows the average speed in km/h (mph) calculated from the
last time the memory was reset ⇒ page 61. If you wish to measure the aver-
age speed from a specific period, the memory must first be deleted
⇒ page 62.
While driving the first 300 m after deleting the memory this value is not
shown on the display.
The value is updated regularly while the vehicle is in motion. Driving speed
The current driving speed, the same as indicated on the speedometer, is
shown on the display
3
⇒ Fig. 31 ⇒
page 57.
Oil temperature
If the oil temperature is lower than +50 °C (+122 °F) or if a fault appears on
the oil temperature control, in place of the temperature indication, the – –.–
sign is shown.
Speed warning
Adjust the speed limit while the vehicle is stopped
Depending on the equipment:
– Press the lever's button A
⇒ Fig. 34 to select
Speed warning.
– Press the lever's button B
to activate the possibility of adjust-
ing the speed limit.
– Press the lever's button A
to select the required speed limit,
e.g. 50 km/h. The speed can be adjusted in 5 km/h intervals.
– Press the lever's button B
to confirm the selected speed limit
or wait several seconds until the adjustment is automatically
stored.
or
– Turn the right thumbwheel of the multifunction steering wheel
1
⇒ Fig. 35 and select Speed warning.
– Press the thumbwheel of the multifunction steering wheel to ac-
tivate the possibility of adjusting the speed limit.
Page 67 of 258

65
Controls and displays
– Turn the thumbwheel of the multifunction steering wheel to set
the required speed, for example 50 km/h. The speed can be ad-
justed in 5 km/h intervals.
– Press the thumbwheel of the multifunction steering wheel to
confirm the selected speed limit or wait several seconds until
the adjustment is automatically stored.
Adjust the speed limit while driving
Depending on the equipment:
– Press the lever's button A
⇒ Fig. 34 to select
Speed warning.
– Drive to the required speed, e.g. 50 km/h.
– Press the lever's button B
to set the current driving speed as
the speed limit. If you want to change the speed limit, this will
be regulated in 5 km/h (mph) intervals (e.g. the speed set at 47
km/h increases to 50 km/h or decreases to 45 km/h).
– Press the lever's button B
again to confirm the selected speed
limit or wait several seconds until the adjustment is automati-
cally stored.
or
– Turn the right thumbwheel of the multifunction steering wheel
1
⇒ Fig. 35 and select Speed warning.
– Drive to the required speed, e.g. 50 km/h.
– Press the thumbwheel of the multifunction steering wheel to
set the current driving speed as the speed limit. If you want to
change the speed limit, this will be regulated in 5 km/h (mph) intervals (e.g. the speed set at 47 km/h increases to 50 km/h
or decreases to 45 km/h).
– Press the thumbwheel of the multifunction steering wheel
again to confirm the selected speed limit or wait several sec-
onds until the adjustment is automatically stored.
Changing or resetting the speed limit
Depending on the equipment:
– Press the lever's button A
⇒ Fig. 34 to select
Speed warning.
– Press and hold the button B
to reset the speed limit.
– Press the button, B
again to activate the possibility of adjust-
ing the speed limit.
or
– Turn the right thumbwheel of the multifunction steering wheel
1
⇒ Fig. 35 and select Speed warning.
– Press and hold the thumbwheel of the multifunction steering
wheel to reset the speed limit.
– Press the thumbwheel of the multifunction steering wheel
again to activate the possibility of adjusting the speed limit.
If the indicated speed is exceeded at any time, an audible warning is given.
The message Speed warning appears simultaneously on the display with
the imputed speed limit.
The speed limit stays in the memory even after switching the ignition off
and on.
Safety FirstOperating instructionsPractical TipsTechnical specifications
Page 68 of 258
66Controls and displays
MAXI DOT* (Informative display)
Introduction
The informative display informs about the current operational status of your
vehicle. Additionally, the screen also displays the information for the radio,
the multifunction display, the telephone, the navigation system, the devices
connected to the MDI input and the automatic gearbox ⇒ page 146.
WARNING
Always keep your attention on driving! As the driver, you have the full re-
sponsibility for the safety of traffic.
Main menu
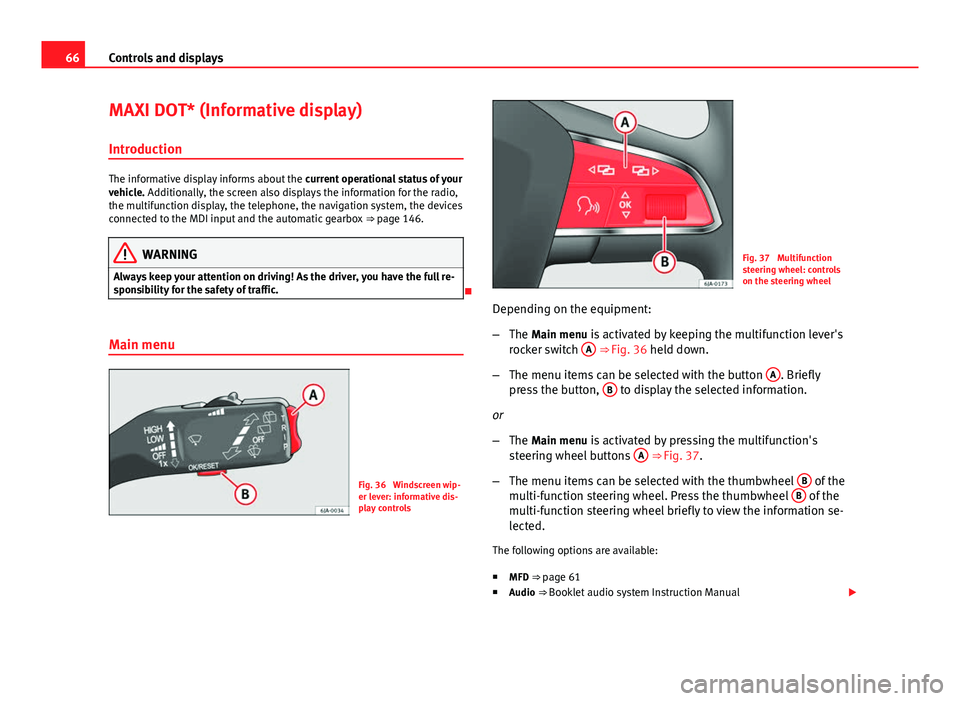
Fig. 36 Windscreen wip-
er lever: informative dis-
play controls
Fig. 37 Multifunction
steering wheel: controls
on the steering wheel
Depending on the equipment:
– The Main menu is activated by keeping the multifunction lever's
rocker switch A
⇒ Fig. 36 held down.
– The menu items can be selected with the button A
. Briefly
press the button, B to display the selected information.
or
– The Main menu is activated by pressing the multifunction's
steering wheel buttons A
⇒ Fig. 37.
– The menu items can be selected with the thumbwheel B
of the
multi-function steering wheel. Press the thumbwheel B of the
multi-function steering wheel briefly to view the information se-
lected.
The following options are available:
■ MFD ⇒ page 61
■ Audio ⇒ Booklet audio system Instruction Manual
Page 80 of 258
78Communication
Communication
Steering wheel controls* General information
The vehicle includes a multifunction module from where it is possible to
control the audio, telephone and radio/navigation functions without need-
ing to distract the driver.
There are two versions of the multifunction module:
● Audio version, to control the available audio functions from the steering
wheel (Radio, CD audio, MP3 CD, iPod ®1)
, USB 1)
).
● Audio version + telephone, to control the available audio functions from
the steering wheel (Radio, CD audio, MP3 CD, iPod ®1)
, USB 1)
, SD 1)
) and the
Bluetooth system.
1)
Depending on the vehicle equipment.
Page 81 of 258

79
Communication
Audio system adjustment
Fig. 38 Controls on the steering wheel
ButtonRadioMedia (except AUX)AUXA TurnIncrease/lower volumeIncrease/lower volumeIncrease/lower volumeA PressNo functionNo functionNo functionBMutePauseMute
CSearch for last stationShort press: Switch to previous song
Long press: RewindNo function
DSearch for next stationShort press: Change to next song
Long press: Fast forwardNo function
EPrevious presetPrevious folderNo functionFNext presetNext folderNo functionGChange sourceChange sourceChange sourceH TurnSwitch MFA functionSwitch MFA functionSwitch MFA functionH PressOperates on MFAOperates on MFAOperates on MFA
Safety FirstOperating instructionsPractical TipsTechnical specifications