ECO mode Seat Toledo 2014 SOUND SYSTEM 1.X
[x] Cancel search | Manufacturer: SEAT, Model Year: 2014, Model line: Toledo, Model: Seat Toledo 2014Pages: 37, PDF Size: 0.78 MB
Page 3 of 37
2General information
General information
This manual contains information, recommendations, advice and warnings
related to your radio system. The other publications in the vehicle documen-
tation contain further information of which you should be aware for your
own safety and for that of your passengers.
Ensure that the onboard documentation is kept in the vehicle at all times.
This is especially important when lending or selling the vehicle to another
person.
This manual contains a description of the equipment supplied with the ve-
hicle at the time of press. Some of the units described herein will not be
available until a later date or is only available in certain markets.
The illustrations are intended as a general guide and may vary from the
equipment fitted in your vehicle in some details.
The screen colour and the colour of the information displayed on it can vary
according to vehicle model.
Directions and positions of components (e.g. right, left, front, rear) are al-
ways relative to the direction of travel of the vehicle unless otherwise sta-
ted.
The equipment marked with an asterisk is only supplied as standard in
certain model versions, is optional in others or is only available in spe-
cific countries.
Registered trademarks are marked ®. The absence of this symbol does
not constitute a waiver of the rights concerning any proprietary name.
The section is continued on the following page.
Marks the end of a section .
®
WARNING
Texts preceded by this symbol contain information on safety. They warn
you about possible dangers of accident or injury.
CAUTION
Texts with this symbol draw your attention to potential sources of damage
to your vehicle.
For the sake of the environment
Texts preceded by this symbol contain relevant information concerning envi-
ronmental protection.
Note
Texts preceded by this symbol contain additional information.
Page 11 of 37
10Audio mode
Audio mode
Radio mode Introduction
The various versions of the radio system will be distributed depending on
the country and the unit. In the unit overview the possible variations of the
unit are described ⇒ page 6.
Additional information and warnings:
● Safety notes ⇒ page 4
● Unit overview ⇒ page 6
● Basic information on use ⇒ page 8
● System and function settings (SETUP) ⇒ page 30
Note
Multi-storey car parks, tunnels, high buildings and mountains can impair ra-
dio signals.
Note
Foil or metal-coated stickers attached to the windows may affect reception
on vehicles with a window aerial. RADIO main menu
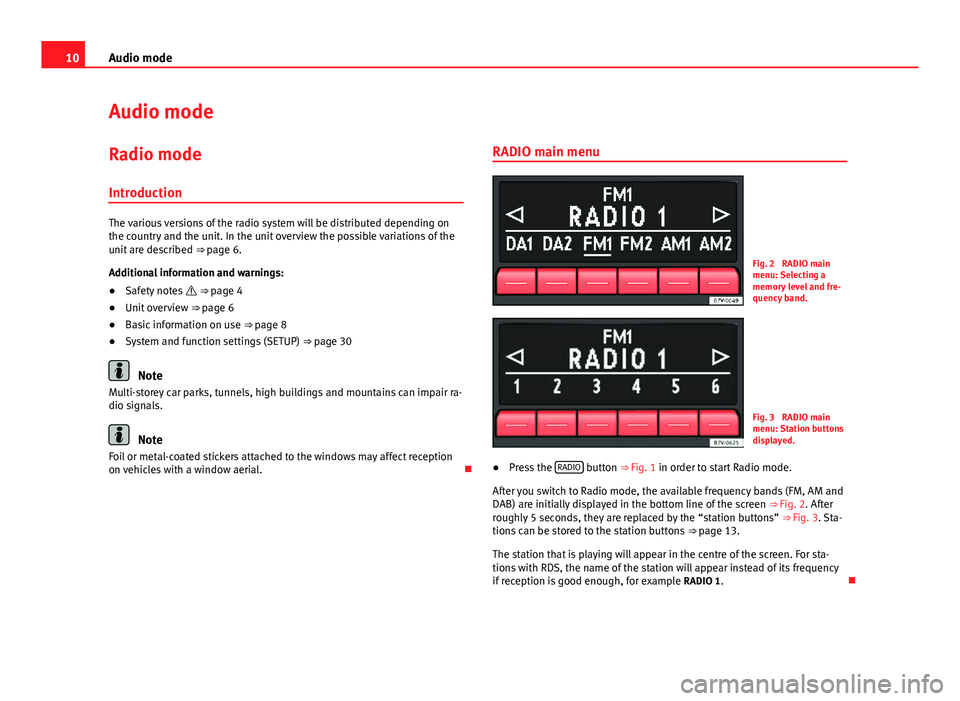
Fig. 2 RADIO main
menu: Selecting a
memory level and fre-
quency band.
Fig. 3 RADIO main
menu: Station buttons
displayed.
● Press the RADIO
button
⇒ Fig. 1 in order to start Radio mode.
After you switch to Radio mode, the available frequency bands (FM, AM and
DAB) are initially displayed in the bottom line of the screen ⇒ Fig. 2. After
roughly 5 seconds, they are replaced by the “station buttons” ⇒ Fig. 3. Sta-
tions can be stored to the station buttons ⇒ page 13.
The station that is playing will appear in the centre of the screen. For sta-
tions with RDS, the name of the station will appear instead of its frequency
if reception is good enough, for example RADIO 1.
Page 13 of 37
12Audio mode
StatusEffectRadio mode with ... displayed in
the centre line of the screen
⇒ Fig. 4.Switches to the next available station
on the current frequency band.
Radio mode with ... displayed in
the bottom line of the screen
⇒ Fig. 5.Switches to the next stored station
⇒ page 13.
Radio mode with ... displayed in
the centre line of the screen and TP
indication.Switches to the next available TP traf-
fic news station ⇒ page 17.
Tuning to a station frequency manually in FM and AM mode
● Select the desired frequency band ⇒ page 10.
● Turn the setting knob ⇒ Fig. 1 8
until the desired station frequency
(e.g. 89.9 MHz) is displayed on the screen.
Scan function (SCN)
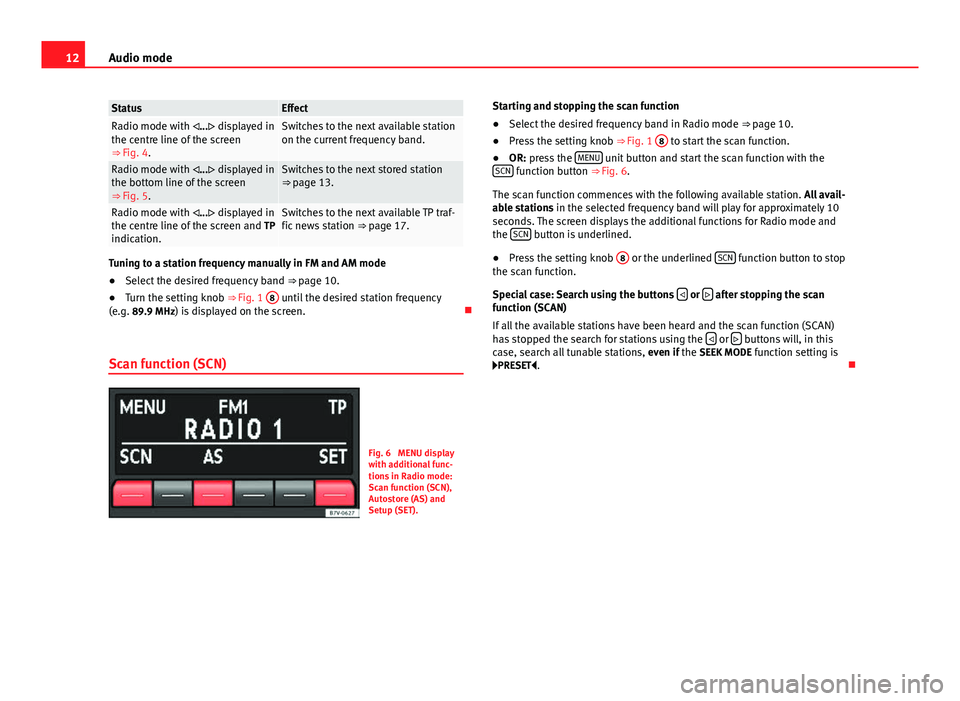
Fig. 6 MENU display
with additional func-
tions in Radio mode:
Scan function (SCN),
Autostore (AS) and
Setup (SET). Starting and stopping the scan function
●
Select the desired frequency band in Radio mode ⇒ page 10.
● Press the setting knob ⇒ Fig. 1 8
to start the scan function.
● OR: press the MENU unit button and start the scan function with the
SCN function button ⇒ Fig. 6.
The scan function commences with the following available station. All avail-
able stations in the selected frequency band will play for approximately 10
seconds. The screen displays the additional functions for Radio mode and
the SCN
button is underlined.
● Press the setting knob 8
or the underlined SCN function button to stop
the scan function.
Special case: Search using the buttons
or after stopping the scan
function (SCAN)
If all the available stations have been heard and the scan function (SCAN)
has stopped the search for stations using the
or buttons will, in this
case, search all tunable stations, even if the SEEK MODE function setting is
PRESET .
Page 14 of 37
13
Audio mode
Memory levels and displaying of station buttons
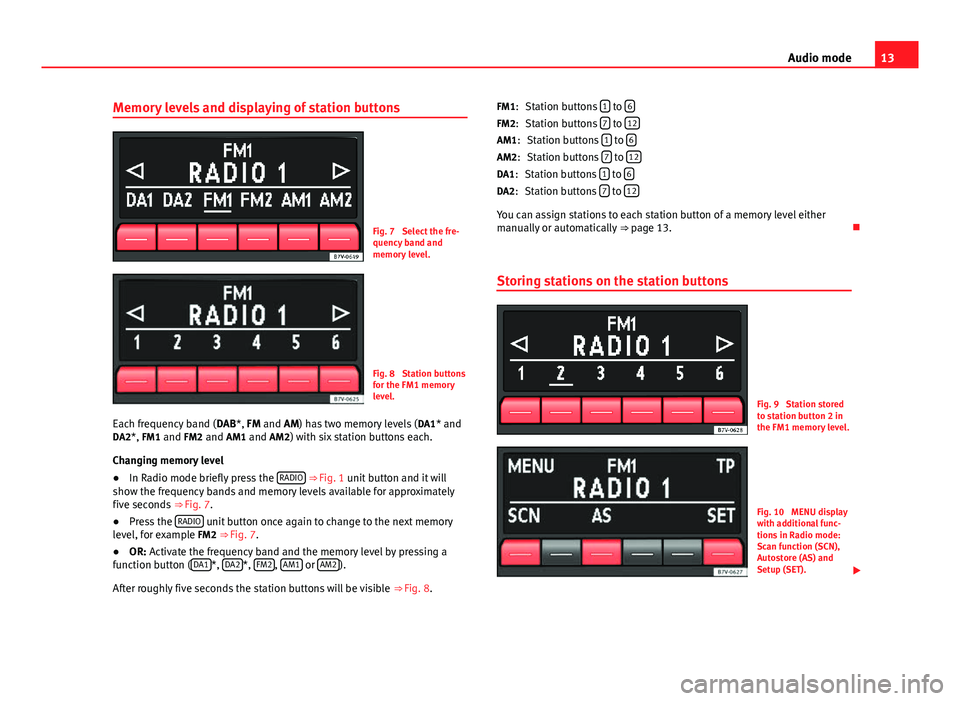
Fig. 7 Select the fre-
quency band and
memory level.
Fig. 8 Station buttons
for the FM1 memory
level.
Each frequency band ( DAB*, FM and AM) has two memory levels ( DA1* and
DA2*, FM1 and FM2 and AM1 and AM2) with six station buttons each.
Changing memory level
● In Radio mode briefly press the RADIO
⇒ Fig. 1 unit button and it will
show the frequency bands and memory levels available for approximately
five seconds ⇒ Fig. 7.
● Press the RADIO
unit button once again to change to the next memory
level, for example FM2 ⇒ Fig. 7.
● OR: Activate the frequency band and the memory level by pressing a
function button ( DA1
*, DA2*, FM2, AM1 or AM2).
After roughly five seconds the station buttons will be visible ⇒ Fig. 8. Station buttons
1
to 6Station buttons 7 to 12Station buttons 1 to 6Station buttons 7 to 12Station buttons 1 to 6Station buttons 7 to 12
You can assign stations to each station button of a memory level either
manually or automatically
⇒ page 13.
Storing stations on the station buttons
Fig. 9 Station stored
to station button 2 in
the FM1 memory level.
Fig. 10 MENU display
with additional func-
tions in Radio mode:
Scan function (SCN),
Autostore (AS) and
Setup (SET).
FM1:
FM2:
AM1: AM2:
DA1: DA2:
Page 15 of 37
14Audio mode
When storing a station to a station button, any station already stored to the
same station button in the same memory level will be overwritten.
Manually assigning station buttons individually
● Select the frequency band and memory level.
● Select the station.
● Press and hold the desired station button until you hear a tone.
● The station currently playing ( RADIO 1) will then be stored to that station
button.
The station button to which the station currently playing is assigned is dis-
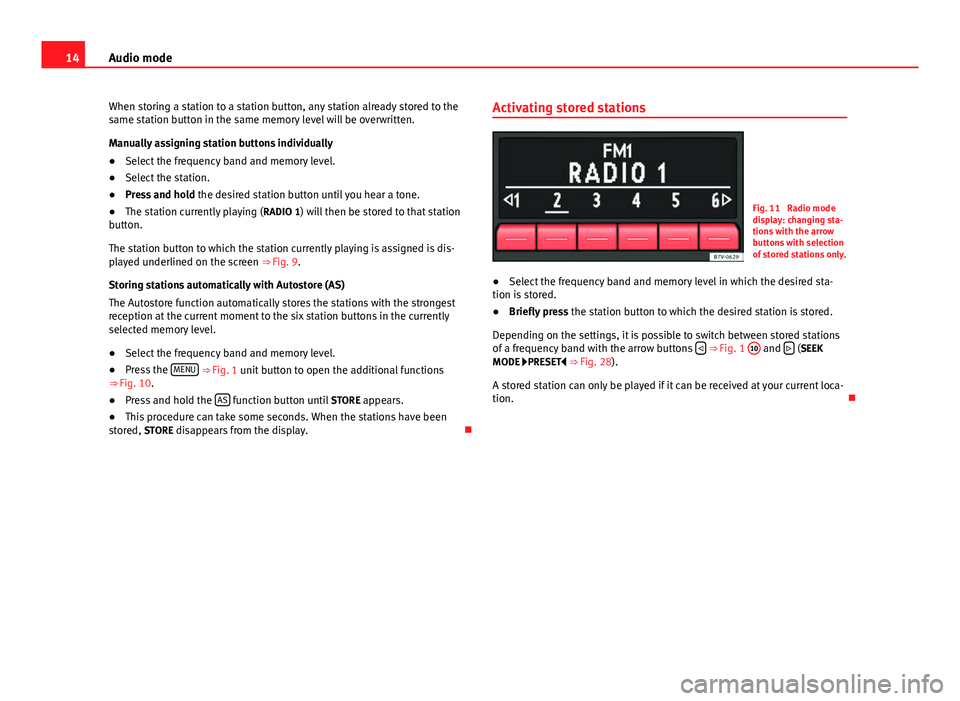
played underlined on the screen ⇒ Fig. 9.
Storing stations automatically with Autostore (AS)
The Autostore function automatically stores the stations with the strongest
reception at the current moment to the six station buttons in the currently
selected memory level.
● Select the frequency band and memory level.
● Press the MENU
⇒ Fig. 1 unit button to open the additional functions
⇒ Fig. 10.
● Press and hold the AS
function button until
STORE appears.
● This procedure can take some seconds. When the stations have been
stored, STORE disappears from the display. Activating stored stations
Fig. 11 Radio mode
display: changing sta-
tions with the arrow
buttons with selection
of stored stations only.
● Select the frequency band and memory level in which the desired sta-
tion is stored.
● Briefly press the station button to which the desired station is stored.
Depending on the settings, it is possible to switch between stored stations
of a frequency band with the arrow buttons
⇒ Fig. 1 10 and
(SEEK
MODE PRESET
⇒ Fig. 28).
A stored station can only be played if it can be received at your current loca-
tion.
Page 17 of 37
16Audio mode
If the reception of the selected DAB station is lost and the station cannot be
found on the FM frequency band, the radio will be muted.
Starting station update (UPDATE)
During the station update, the unit scans the groups of stations currently
available in the location and saves their position to make it easier to switch
among available groups using the arrow buttons
or .
● Press the MENU
⇒ Fig. 1 unit button in Radio mode.
● Press the UPD unit button to update the stations. The top line of the dis-
play will show UPDATE as the channel, whereas the international IDs are
shown in the centre line (e.g. “11B”).
● The station update ends when UPDATE is no longer shown in the top line
of the display.
The radio will be muted during station update. The update can take a few
seconds.
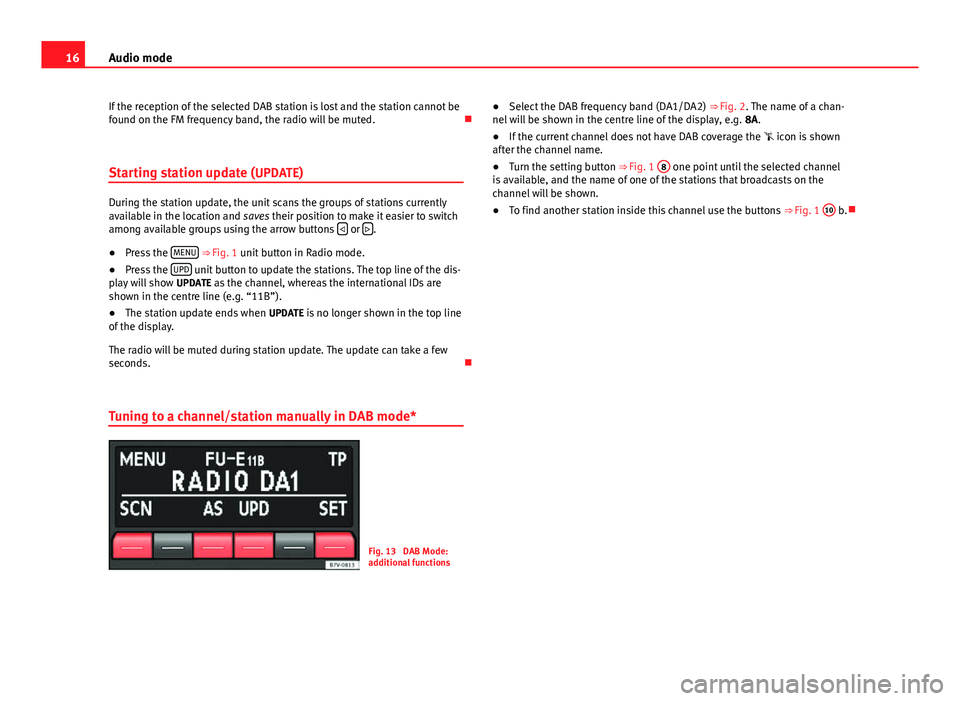
Tuning to a channel/station manually in DAB mode*
Fig. 13 DAB Mode:
additional functions ●
Select the DAB frequency band (DA1/DA2) ⇒ Fig. 2. The name of a chan-
nel will be shown in the centre line of the display, e.g. 8A.
● If the current channel does not have DAB coverage the icon is shown
after the channel name.
● Turn the setting button ⇒ Fig. 1 8
one point until the selected channel
is available, and the name of one of the stations that broadcasts on the
channel will be shown.
● To find another station inside this channel use the buttons ⇒ Fig. 1 10
b.
Page 20 of 37
19
Audio mode
Media mode Introduction
“Media sources” are audio sources containing audio files on various differ-
ent data media (e.g. CD, external MP3 player). These audio files can be
played by the respective data media or by the radio input sockets.
Additional information and warnings:
● Safety notes ⇒ page 4
● Unit overview ⇒ page 6
● Basic information on use ⇒ page 8
Requirements for media sources and audio files
Factory-fitted CD players conform to safety class 1 according to
DIN IEC 76 (CO) 6/ VDE 0837.
The unit only accepts 12-cm standard CDs.
Media sourceRequirements for playing in the unit Audio CDs (up to 80 min).– CD Digital Audio specification . CD-ROM, CD-R, CD-RW up
to max. 700 MB (megabyte)
according to ISO 9660 or on
the Joliet data system.MP3 files (.mp3) with bitrates of between
48 and 320 kbit/s or with variable bitrates
– Playlists in formats PLS and M3U
– Playlists no larger than 20 KB and con-
taining no more than 250 links.
– Max. 32 playlists on a data medium.
– File names no longer than 64 characters.
– Folder structures with a maximum of ten
levels.
– Max.120 folders and max. 500 files on a
data medium.
AUX: External audio source.– A 3.5 mm jack plug can be used for audio
output ⇒ page 25.
Restrictions and notes
Contamination, exposure to high temperatures and mechanical damage can
render a data medium unusable. Observe the manufacturer's instructions
on the data medium.
Variations in the quality of data media produced by different manufacturers
may lead to problems during playback.
Please observe copyright laws.
CDs recorded in UDF or Direct CD format cannot be played. Under Windows
Vista ®
ensure that the correct format is selected.
The unit may be unable to read individual tracks or the entire data medium
due to the data medium configuration or the devices and programs used for
recording. Compatibility with all encoding/recording software, recording de-
vices and recording media cannot be guaranteed. Information can be found
on the internet regarding the best ways to create audio files and data media
(compression rate, ID3 tag etc.).
Page 21 of 37
20Audio mode
Due to the larger quantity of data, the unit takes longer to read a data medi-
um containing compressed audio files (MP3) than a “normal” audio CD.
Complex folder structures can also slow down the reading of a data medi-
um.
Playlists only determine a certain playing order. There are no files stored in
a playlist. The unit will not play a playlist if the files are not stored on the
data medium at the locations referred to by the playlist (relative file paths).
Playing order of files and folders
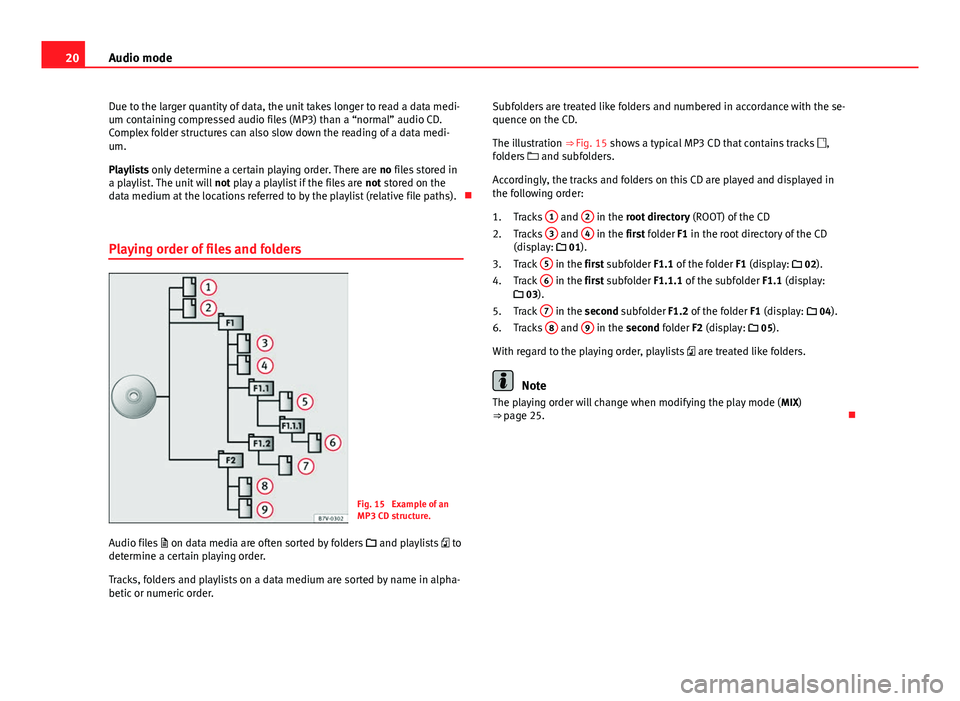
Fig. 15 Example of an
MP3 CD structure.
Audio files on data media are often sorted by folders and playlists to
determine a certain playing order.
Tracks, folders and playlists on a data medium are sorted by name in alpha-
betic or numeric order. Subfolders are treated like folders and numbered in accordance with the se-
quence on the CD.
The illustration ⇒ Fig. 15 shows a typical MP3 CD that contains tracks
,
folders and subfolders.
Accordingly, the tracks and folders on this CD are played and displayed in
the following order: Tracks 1
and 2 in the root directory
(ROOT) of the CD
Tracks 3 and 4 in the first folder F1 in the root directory of the CD
(display: 01).
Track 5
in the first subfolder F1.1 of the folder
F1 (display: 02).
Track 6 in the first subfolder F1.1.1 of the subfolder
F1.1 (display:
03).
Track 7
in the second subfolder F1.2 of the folder
F1 (display: 04).
Tracks 8 and 9 in the second folder F2 (display:
05).
With regard to the playing order, playlists are treated like folders.
Note
The playing order will change when modifying the play mode ( MIX)
⇒ page 25.
1.
2.
3.
4.
5.
6.
Page 22 of 37
21
Audio mode
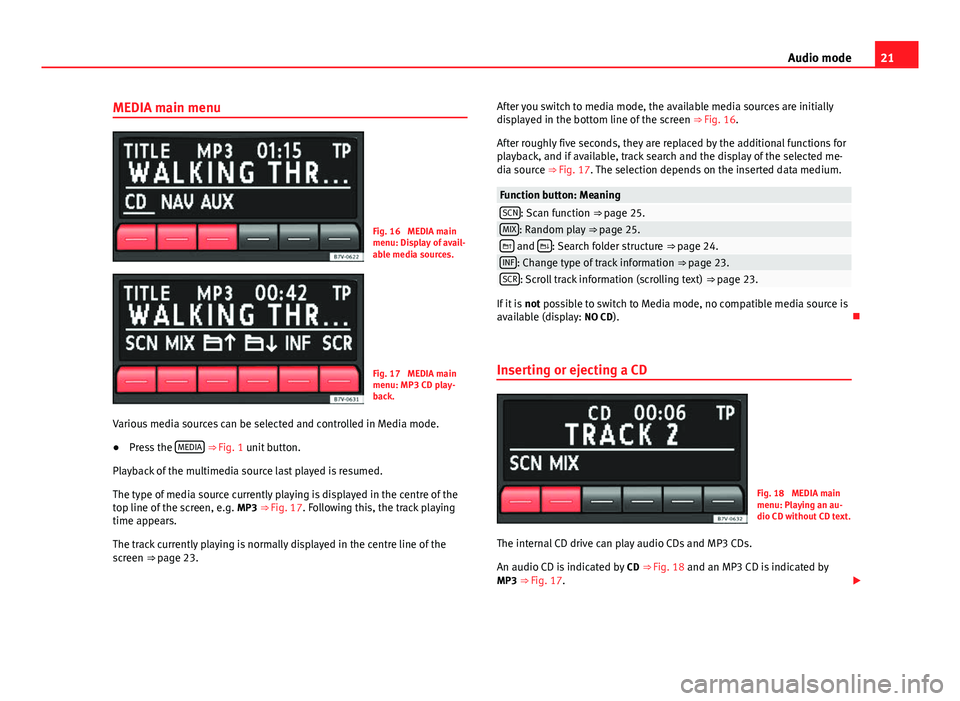
MEDIA main menu
Fig. 16 MEDIA main
menu: Display of avail-
able media sources.
Fig. 17 MEDIA main
menu: MP3 CD play-
back.
Various media sources can be selected and controlled in Media mode.
● Press the MEDIA
⇒ Fig. 1 unit button.
Playback of the multimedia source last played is resumed.
The type of media source currently playing is displayed in the centre of the
top line of the screen, e.g. MP3 ⇒ Fig. 17. Following this, the track playing
time appears.
The track currently playing is normally displayed in the centre line of the
screen ⇒ page 23. After you switch to media mode, the available media sources are initially
displayed in the bottom line of the screen
⇒ Fig. 16.
After roughly five seconds, they are replaced by the additional functions for
playback, and if available, track search and the display of the selected me-
dia source ⇒ Fig. 17. The selection depends on the inserted data medium.
Function button: MeaningSCN: Scan function ⇒ page 25.MIX: Random play ⇒ page 25. and : Search folder structure
⇒ page 24.INF: Change type of track information ⇒ page 23.SCR: Scroll track information (scrolling text) ⇒ page 23.
If it is not possible to switch to Media mode, no compatible media source is
available (display: NO CD).
Inserting or ejecting a CD
Fig. 18 MEDIA main
menu: Playing an au-
dio CD without CD text.
The internal CD drive can play audio CDs and MP3 CDs.
An audio CD is indicated by CD
⇒ Fig. 18 and an MP3 CD is indicated by
MP3 ⇒ Fig. 17.
Page 23 of 37
22Audio mode
Inserting a CD
● Keep the printed side of the CD facing upwards.
● Push the CD into the CD slot 4
⇒ page 6 only to the point where it is
drawn in automatically.
● When the CD is inserted, playback will start automatically.
When other functions are selected, CD-IN is displayed at the top left of the
screen if a CD is inserted in the internal CD drive.
Ejecting CDs
● Press the setting knob ⇒ Fig. 1 6
.
● The CD in the drive will be ejected and must be removed within 10 sec-
onds.
If the CD is not removed within approximately 10 seconds, it is retracted
again for safety reasons.
Error messages on the screen
A reading error is indicated by ERROR in the title bar.
An error message in the bottom line of the screen indicates the possible
cause of the error.
NO CD: Illegible data medium. It is not possible to switch to Media mode. CD ROM: Inserted data CD. The CD will be returned.
CHECK CD: The inserted CD cannot be read. The CD will be returned. Check
for damage.
TEMPERATURE: The CD drive is overheated. No more CDs can be inserted.Another audio source will be played.
SERVICE: The CD drive has a mechanical anomaly. Visit the specialised work- shop.
Note
Uneven road surfaces and strong vibrations may cause the CD to jump.
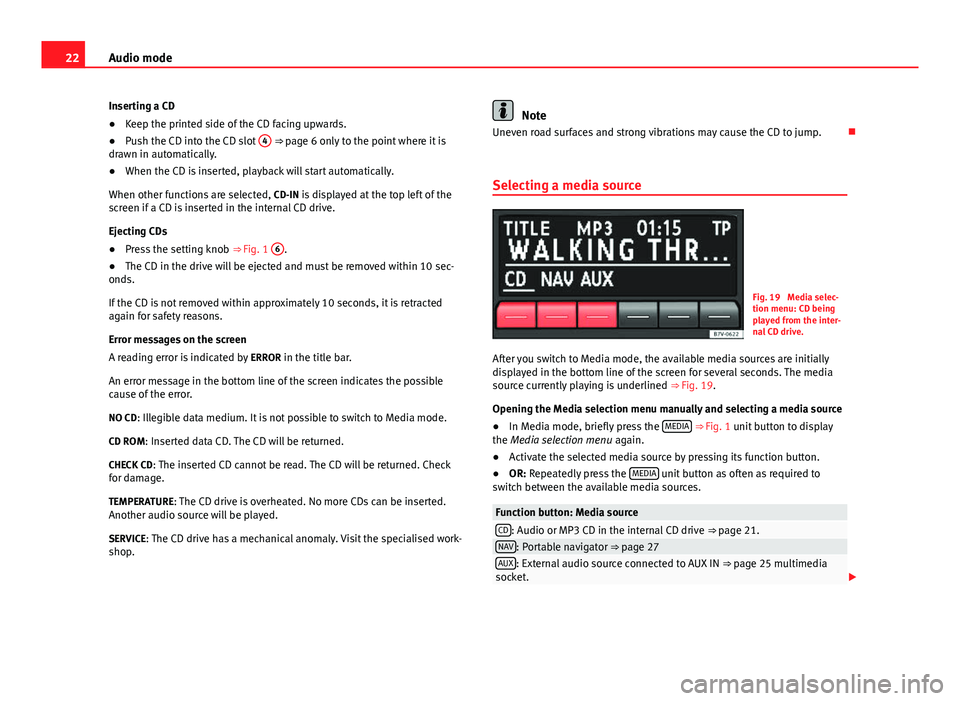
Selecting a media source
Fig. 19 Media selec-
tion menu: CD being
played from the inter-
nal CD drive.
After you switch to Media mode, the available media sources are initially
displayed in the bottom line of the screen for several seconds. The media
source currently playing is underlined ⇒ Fig. 19.
Opening the Media selection menu manually and selecting a media source
● In Media mode, briefly press the MEDIA
⇒ Fig. 1 unit button to display
the Media selection menu again.
● Activate the selected media source by pressing its function button.
● OR: Repeatedly press the MEDIA
unit button as often as required to
switch between the available media sources.
Function button: Media sourceCD: Audio or MP3 CD in the internal CD drive ⇒ page 21.NAV: Portable navigator ⇒ page 27AUX: External audio source connected to AUX IN ⇒ page 25 multimedia
socket.