stop start Seat Toledo 2015 Owner's Guide
[x] Cancel search | Manufacturer: SEAT, Model Year: 2015, Model line: Toledo, Model: Seat Toledo 2015Pages: 248, PDF Size: 5.06 MB
Page 160 of 248
Operation
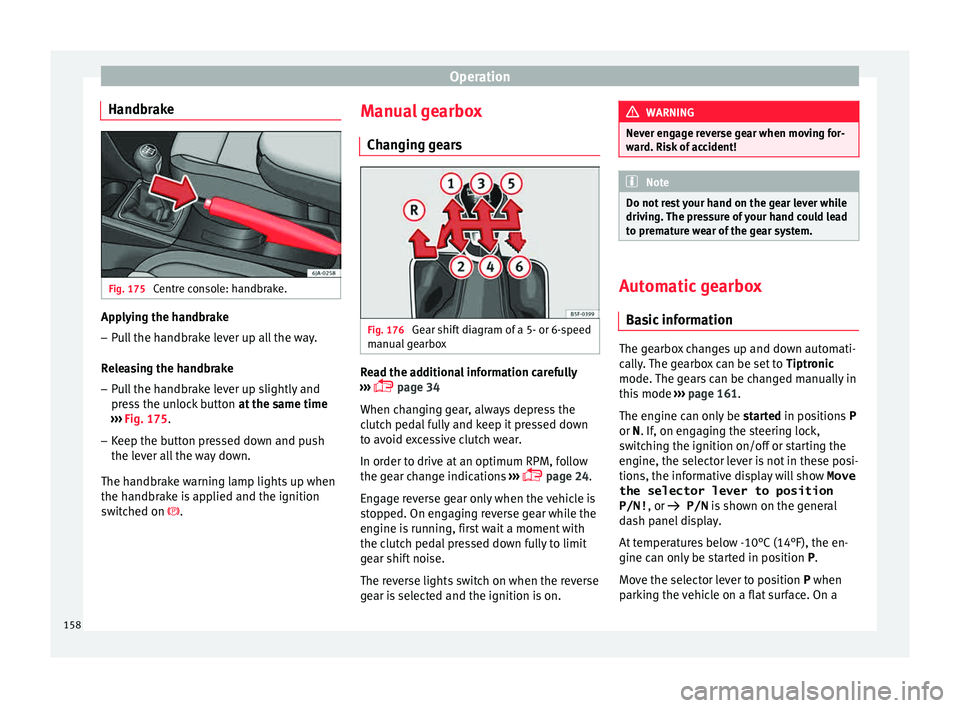
Handbrake Fig. 175
Centre console: handbrake. Applying the handbrake
– Pull the handbrake lever up all the way.
R el
e
asing the handbrake
– Pull the handbrake lever up slightly and
pres
s the unlock button at the same time
››› Fig. 175.
– Keep the button pressed down and push
the lever al
l the way down.
The handbrake warning lamp lights up when
the handbrake is applied and the ignition
switched on . Manual gearbox
Changin
g gears Fig. 176
Gear shift diagram of a 5- or 6-speed
m anual
g
earbox Read the additional information carefully
› ›
›
page 34
When changing gear, always depress the
clutch pedal fully and keep it pressed down
to avoid excessive clutch wear.
In order to drive at an optimum RPM, follow
the gear change indications ›››
page 24.
Engage reverse gear only when the vehicle is
stopped. On engaging reverse gear while the
engine is running, first wait a moment with
the clutch pedal pressed down fully to limit
gear shift noise.
The reverse lights switch on when the reverse
gear is selected and the ignition is on. WARNING
Never engage reverse gear when moving for-
war d. Ri
sk of accident! Note
Do not rest your hand on the gear lever while
drivin g.
The pressure of your hand could lead
to premature wear of the gear system. Automatic gearbox
Ba s
ic information The gearbox changes up and down automati-
c
al
ly
. The gearbox can be set to Tiptronic
mode. The gears can be changed manually in
this mode ›››
page 161.
The engine can only be started in positions P
or N. If, on engaging the steering lock,
switching the ignition on/off or starting the
engine, the selector lever is not in these posi-
tions, the informative display will show Move
the selector lever to position
P/N! , or
P/N is shown on the general
dash panel display.
At temperatures below -10°C (14°F), the en-
gine can only be started in position P.
Move the selector lever to position P when
parking the vehicle on a flat surface. On a
158
Page 161 of 248
Driving
slope, the handbrake should be firmly ap-
p lied bef
or
e moving the selector lever to the
park position. This reduces the load on the
lock mechanism while making it easier to
move the selector lever from position P.
If, while the vehicle is moving, the selector
lever is accidentally moved to position N, re-
lease the accelerator and wait for the engine
to idle before moving it back into position. WARNING
● Never pr e
ss the accelerator when selecting
the automatic gearbox operating mode when
the vehicle is stationary. Risk of accident!
● Never move the selector lever to positions
R or P when driving. Ri
sk of accident!
● If the vehicle is to be stopped with a gear
selected and the en
gine idling (e.g. waiting
or moving slowly at traffic lights), press down
on the brake pedal because the transmission
is not entirely interrupted when the engine is
idling and the vehicle will tend to start mov-
ing.
● Apply the handbrake firmly and put the se-
lector l
ever in position P before opening the
bonnet and working on the vehicle with the
engine running. Risk of accident! Strictly fol-
low the safety instructions ››› page 203, En-
gine compartment.
● When stopping on a slope (hill), try not to
stop the
vehicle from moving by pressing the
“accelerator” with a gear selected. This could
overheat the clutch. If the clutch risks being burnt due to this force, it would switch off
and the v
ehic
le could move backwards. Risk
of accident!
● If you have to stop on a hill, press down on
the brake ped
al to stop the vehicle from mov-
ing.
● The drive wheels could lose traction on a
slipper
y road surface when the kick-down
function is activated. Risk of sliding! CAUTION
● In D SG aut om
atic gearboxes, the double
clutch is protected from overloads. If the hill
hold control is used, the clutches are subjec-
ted to greater force if the vehicle is at a
standstill on a slope or suddenly accelerating
on a slope.
● Should the clutches overheat, the sym-
bol i
s shown on the informative display with
a warning message Gear overheated.
Stop! Instruction Manual! An audible
warning is also heard. Stop the vehicle in this
case, stop the engine and wait until the sym-
bol has switched off. Danger of damage to
the gearbox! You can continue driving once
the symbol is switched off. Starting and driving
Starting
– Press and hold the brake pedal. –
Pr e
s
s and hold the interlock button on the
selector lever knob and move the selector
lever to position ››› page 160 before releas-
ing the interlock button.
– Release the brake and press the accelera-
tor.
St
opping
– The selector lever does not have to be
moved t
o position N if the vehicle is stop-
ped for a short period, e.g. at intersections.
Applying the brake is enough. However, the
engine must remain idling.
Parking
– Press the brake pedal.
– Apply the handbrake.
– Press the interlock button, move the selec-
tor lev
er to position P and release the but-
ton.
Kick-down feature
The kick-down feature allows maximum ac-
celeration to be reached.
In any gear programme, press down fully on
the accelerator for the automatic gearbox to
activate the kick-down feature. This function
takes priority over the gear programmes with-
out taking into account the position of the se-
lector lever (D, S or Tiptronic) and is used to
reach maximum acceleration, using full »
159
Technical data
Advice
Operation
Emergencies
Safety
Page 165 of 248

Driving
displayed when the gearbox has cooled
ag ain.
R u
n-in and economical driving
The first
1,500 kmOver the first 1,500 kilometres the engine
mus
t
be run in.
Up to 1000 kilometres
– Do not drive at more than 3/4 of the maxi-
mum speed c orr
esponding to the engaged
gear, i.e. up to 3/4 of the maximum permit-
ted engine speed.
– Do not drive at full speed.
– Avoid high engine speeds.
– Do not tow a trailer.
From 1000 to 1500 k
ilometres (600 to 900
miles)
– Slowly increase the engine speed until
re
aching the maximum permitted speed of
the engaged gear, i.e. the maximum per-
mitted engine speed.
During its first few hours of running, the in-
ternal friction in the engine is greater than
later on, when all the moving parts have bed-
ded in. How the vehicle is driven over approx-
imately the first 1,500 kilometres (900 miles), determines the success of the proc-
ess
of running in the engine.
Even after running in, the vehicle should not
be unnecessarily driven at high engine
speeds. The maximum permitted engine
speed is marked at the start of the red zone
on the rev counter dial. The gear must be
changed up when the red area is reached in
vehicles with a manual gearbox. Extremely
high engine speeds when accelerating are
automatically limited, however the engine is
not protected against high engine speeds
produced by incorrectly changing to a lower
gear, which could cause the engine to run at
revs above the maximum permitted amount,
and consequently result in damage to the en-
gine.
Additionally, vehicles with a manual gearbox
must also bear the following in mind: do not
drive with the engine speed too low. Change
down to a lower gear when the engine no
longer runs smoothly. Observe the recom-
mendations for changing gear
››› page 24.
New tyres
New tyres must be submitted to “running in”,
given that initially their grip is not yet at the
maximum level. During the first 500 km (120
miles) drive very carefully. New brake pads
New brake p
ads do not yet provide maximum
friction capacity. First they must be “run in”.
During the first 200 km (120 miles) drive very
carefully. CAUTION
All the information for speed and engine
speed r ef
ers to an engine that operates at op-
erating temperature. Do not run the engine at
high engine speeds, neither when stopped or
while driving. For the sake of the environment
Do not drive at unnecessarily high engine
speed s; c
hanging to a higher gear sooner
contributes to saving fuel, reduces operating
noise and protects the environment. Environmental compatibility
Environmental protection is a top priority in
the de
s
ign, c
hoice of materials and manufac-
ture of your new SEAT.
Constructive measures to encourage recy-
cling
● Joints and connections designed for easy
dismantlin
g
● Modular construction to facilitate disman-
tling »
163
Technical data
Advice
Operation
Emergencies
Safety
Page 168 of 248
Operation
Save electricity
The en gine activ
at
es the alternator, which
produces electricity. With the need for elec-
tricity, fuel consumption also increases. Be-
cause of this, always turn off electrical devi-
ces when you do not need them. Examples of
devices that use a lot of electricity are: the
fan at high speeds, the rear window heating
and the seat heaters*. Note
● If y
ou vehicle has Start-Stop, it is not rec-
ommended to switch this function off.
● It is recommended to close
the windows
when driving at more than 60 km/h
● Do not drive with your foot resting on the
clutc
h pedal,, as the pressure can make the
plate spin, more fuel will be used and it can
burn the clutch plate lining, causing a serious
fault.
● Do not hold the vehicle on a hill with the
clutc
h, use the foot brake or hand brake, us-
ing the latter to start. The fuel consumption
will be lower and you will prevent the clutch
plate from being damaged.
● On descents, use the engine brake, chang-
ing to the g
ear that is more suitable for the
slope. Fuel consumption will be “zero” and
the brakes will not suffer. Wading and driving off-road
Driv in
g thr
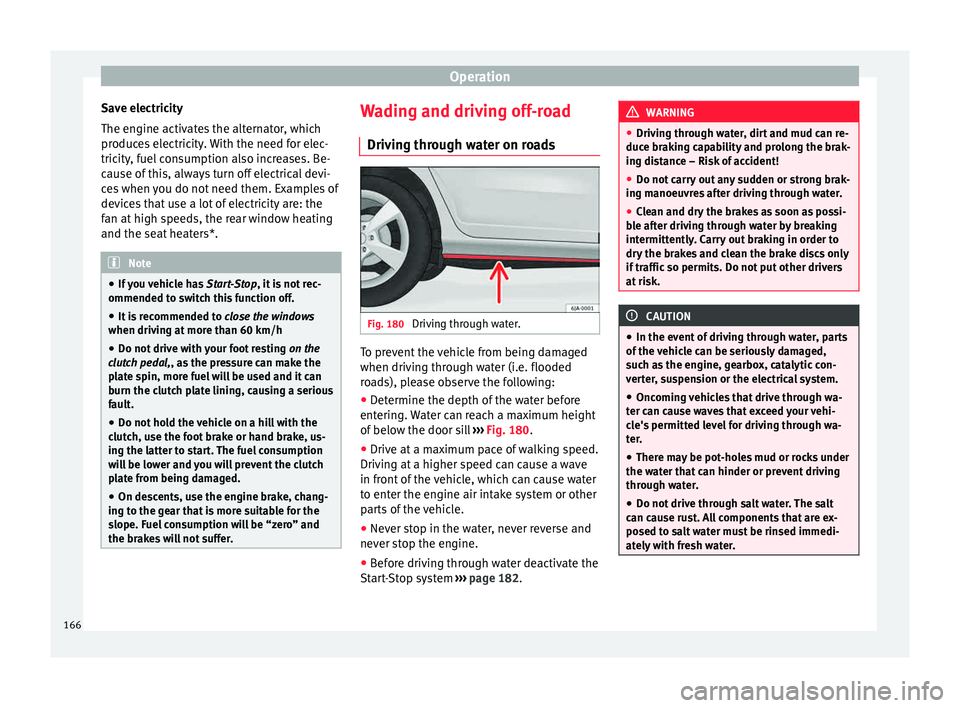
ough water on roads Fig. 180
Driving through water. To prevent the vehicle from being damaged
when driv
in
g thr
ough water (i.e. flooded
roads), please observe the following:
● Determine the depth of the water before
entering.
Water can reach a maximum height
of below the door sill ››› Fig. 180.
● Drive at a maximum pace of walking speed.
Driving at
a higher speed can cause a wave
in front of the vehicle, which can cause water
to enter the engine air intake system or other
parts of the vehicle.
● Never stop in the water, never reverse and
never st
op the engine.
● Before driving through water deactivate the
Start
-Stop system ››› page 182. WARNING
● Drivin g thr
ough water, dirt and mud can re-
duce braking capability and prolong the brak-
ing distance – Risk of accident!
● Do not carry out any sudden or strong brak-
ing manoeu
vres after driving through water.
● Clean and dry the brakes as soon as possi-
ble af
ter driving through water by breaking
intermittently. Carry out braking in order to
dry the brakes and clean the brake discs only
if traffic so permits. Do not put other drivers
at risk. CAUTION
● In the event of
driving through water, parts
of the vehicle can be seriously damaged,
such as the engine, gearbox, catalytic con-
verter, suspension or the electrical system.
● Oncoming vehicles that drive through wa-
ter can c
ause waves that exceed your vehi-
cle's permitted level for driving through wa-
ter.
● There may be pot-holes mud or rocks under
the water th
at can hinder or prevent driving
through water.
● Do not drive through salt water. The salt
can cau
se rust. All components that are ex-
posed to salt water must be rinsed immedi-
ately with fresh water. 166
Page 184 of 248
Operation
If the driver fails to react to a possible colli-
s ion, the sy
s
tem may brake the vehicle auto-
matically, by progressively increasing braking
effect driving to reduce speed in the event of
a collision. The system can thus help to re-
duce the consequences of an accident.
Status display
Automatic deceleration by means of the City
Emergency braking function is displayed on
the instrument panel by means of the pre-
warning ››› Fig. 192 1)
. WARNING
The smart technology included in the City
Emerg ency
braking function cannot defy the
laws of physics. The driver is always respon-
sible for braking in time.
● Adapt your speed and safe distance to the
vehicl
e in front of you at all times to suit visi-
bility, weather, road and traffic conditions.
● The City Emergency braking function alone
cannot pr
event accidents or serious injury.
● In complex driving situations, the City
Emergency
braking function may issue unnec-
essary warnings and intervene inopportunely
in braking, such as in work areas or if there
are metal rails. ●
If the oper ation of
the City Emergency brak-
ing function is impaired, for example, by dirt
or because the radar sensor has lost its set-
tings, the system may issue unnecessary
warnings and intervene inopportunely in the
braking.
● During driving, the City Emergency braking
function doe
s not react to people or animals
or vehicles crossing your path or which ap-
proach you head-on in the same lane. Note
● When the C ity Emer
gency braking function
causes a braking, the brake pedal is “hard-
er”.
● Automatic interventions on the brakes by
the City Emer
gency braking function may be
interrupted by pressing the clutch, accelera-
tor or moving the wheel.
● The City Emergency braking function can
brake the
vehicle until it stops completely.
However, the brake system does not halt the
vehicle permanently. Use the foot brake!
● If several inopportune intervenes occur,
switc
h off the Front Assist and with it the City
Emergency braking function. Take it to a spe-
cialised workshop, SEAT recommends visiting
a SEAT dealership. ●
If numer ou
s unnecessary interventions oc-
cur, the City Emergency braking function may
switch off automatically. Start-Stop System*
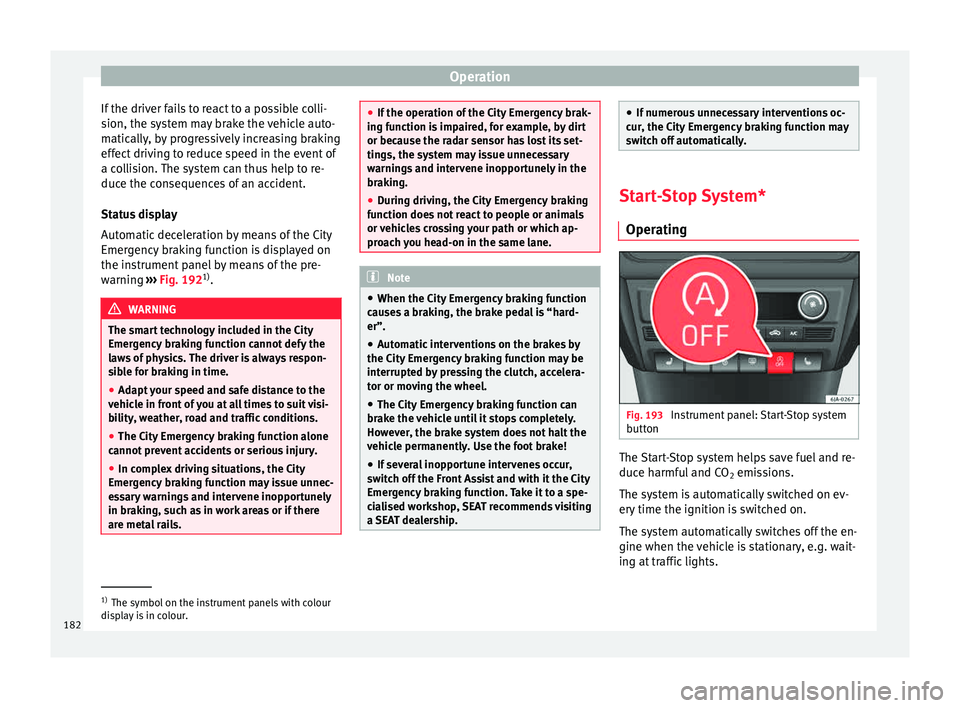
Operatin g Fig. 193
Instrument panel: Start-Stop system
b utt
on The Start-Stop system helps save fuel and re-
duc
e h
armf
ul and CO2 emissions.
The system is automatically switched on ev-
ery time the ignition is switched on.
The system automatically switches off the en-
gine when the vehicle is stationary, e.g. wait-
ing at traffic lights. 1)
The symbol on the instrument panels with colour
dis p
lay is in colour.
182
Page 185 of 248
Driver assistance systems
The current status of the Start-Stop system is
di s
p
layed on the general instrument panel
display.
Automatic engine shut down (Stop phase)
– Stop the vehicle (if necessary using the
handbrak
e).
– Shift to neutral.
– Release the clutch pedal.
Automatic
engine start up (Start phase)
– Press the clutch.
Switc
hing the Start-Stop system on and off
The Start-Stop system can be switched on
and off by pressing the
› ›
› Fig. 193
but-
ton.
The warning lamp in the button will light up
when the system is switched off.
If the vehicle is in Stop phase when the but-
ton is pressed, the engine will start immedi-
ately.
The Start-Stop system works under complex
driving conditions that are difficult to detect
without specialist technology. The set of nec-
essary conditions for the correct operating of
the Start-Stop system are indicated below. Conditions for automatic engine shut down
(Stop pha
se)
● Selector lever in neutral.
● Clutch pedal not pressed.
● Driver with seat belt fastened.
● Driver door closed.
● The bonnet closed.
● Vehicle stationary.
● The factory-fitted towing bracket is not elec-
trically
connected to a trailer.
● Engine at operating temperature.
● Vehicle's battery sufficiently charged.
● Vehicle not on a very steep slope
● Engine speed below 1,200 rpm.
● Vehicle battery temperature is neither too
high nor too low
.
● Sufficient brake system pressure.
● Difference between outside temperature
and set interior t
emperature not too great
● Vehicle speed since the last time the en-
gine star
ted was above 3 km/h (2 mph).
● Particulate filter not being cleaned
›››
page 102.
● Front wheels not overly turned (steering
wheel turned l
ess than three quarters of a
turn)
Conditions for engine start up (Start phase)
● Clutch pedal pressed. ●
Max./min. temper
ature set.
● Windscreen defrost function switched on.
● High blower speed.
● Start-Stop button pressed.
Conditions
for automatic engine start up
without driver involvement
● Vehicle moving at a speed of over 3 km/h
(2 mph).
● Difference between outside temperature
and interior temper
ature is too great
● Vehicle's battery insufficiently charged.
● Insufficient brake system pressure.
If the driver se
at belt is unfastened for more
than 30 seconds in Stop phase, the engine
must be started using the ignition key.
Please observe the messages on the general
instrument panel display.
Warnings on the instrument panel display
(valid for vehicles not fitted with an informa-
tive display)
FAULT: Start-StopFault in the Start-Stop sys-
tem
START-STOP IMPOSSI-
BLEEngine cannot be auto-
matically shut down
START-STOP ACTIVEAutomatic engine shut
down (Stop phase)
SWITCH OFF IGNITIONSwitch the ignition off» 183
Technical data
Advice
Operation
Emergencies
Safety
Page 186 of 248
OperationSTART MANUALLYStart the engine manually
WARNING
● If the en gine i
s switched off, neither the
brake servo nor the power steering will work.
● Do not move the vehicle when the engine is
switc
hed off. CAUTION
Switch off the Start-Stop system ›››
page 166
before driving through a pool of water on the
road. Note
● The batt er
y temperature may reflect
changes in outside temperature after several
hours. If the vehicle has been stopped out-
side at temperatures below zero or in direct
sunlight, for example, the battery tempera-
ture may take several hours to reach the val-
ues required for the correct operating of the
Start-Stop system.
● If the Climatronic system is operating auto-
matica
lly, this could impair automatic engine
shut down under certain conditions. Tiredness detection (break rec-
ommend
ation)*
Intr oduction The Tiredness detection informs the driver
when their drivin
g beh
aviour shows signs of
fatigue. WARNING
Do not let the comfort afforded by the Tired-
nes s
detection system tempt you into taking
any risks when driving. Take regular breaks,
sufficient in length when making long jour-
neys.
● The driver always assumes the responsibil-
ity of driv
ing to their full capacity.
● Never drive if you are tired.
● The system does not detect the tiredness of
the driver in al
l circumstances. Consult the in-
formation in the section ››› page 185, System
limitations.
● In some situations, the system may incor-
rectly int
erpret an intended driving manoeu-
vre as driver tiredness.
● No warning is given in the event of the ef-
fect c
alled microsleep!
● Please observe the indications on the in-
strument p
anel and act as is necessary. Note
● Tiredne s
s detection has been developed for
driving on motorways and well paved roads
only.
● If there is a fault in the system, have it
check
ed by a specialised workshop. Function and operation
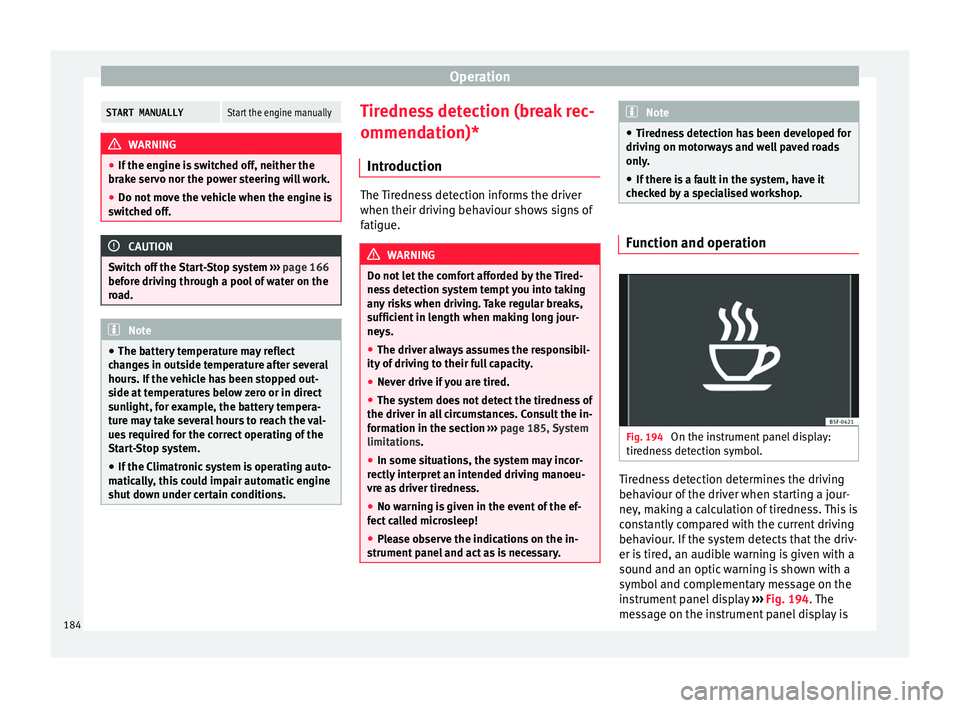
Fig. 194
On the instrument panel display:
tir edne
s
s detection symbol. Tiredness detection determines the driving
beh
av
iour of
the driver when starting a jour-
ney, making a calculation of tiredness. This is
constantly compared with the current driving
behaviour. If the system detects that the driv-
er is tired, an audible warning is given with a
sound and an optic warning is shown with a
symbol and complementary message on the
instrument panel display ››› Fig. 194. The
message on the instrument panel display is
184
Page 205 of 248
Checking and refilling levels
Water in the fuel filter 1)
If
y
our vehicle has a diesel engine and is
equipped with a fuel filter with a water sepa-
rator, the instrument panel may display the
following warning: Water in the
fuel filter. If this is the case, take the
vehicle to a specialised workshop so that
they can drain the fuel filter.
Preheating the fuel filter
The vehicle is fitted with a glow plug system
for the fuel filter. Therefore, the reliability of
the diesel is ensured at ambient tempera-
tures of down to approximately -25°C (-13°F).
Fuel additives
Fuel additives, known as “thinners” (petrol or
similar substances) should not be mixed with
the diesel fuel. CAUTION
● Ev en one t
ankful of diesel fuel that does
not comply with the standard could damage
engine parts, the fuel system and the ex-
haust system!
● Your vehicle is not designed to use biodie-
sel fuel
. Never, under any circumstances re-
fuel with biodiesel. The use of biodiesel fuel
could damage the engine and the fuel sys-
tem. The addition of biodiesel to diesel fuel by the diesel manufacturer in accordance
with s
t
andard EN 590 or DIN 51628 is author-
ised and will not cause damage.
● The diesel engine has been designed to be
used ex
clusively with diesel fuel conforming
to standard EN 590. Never refuel or use pet-
rol, kerosene, fuel oil or any other type of
fuel. If you accidentally fill up the vehicle
with the wrong type of fuel, do not start the
engine. Seek assistance from specialised per-
sonnel. The composition of these fuels may
severely damage the fuel system and the en-
gine. Water allowed to collect in the fuel filter
can cause engine faults. Engine compartment
Intr oduction Read the additional information carefully
› ›
›
page 11
Always be aware of the danger of injury and
scalding as well as the risk of accident or fire
when working in the engine compartment,
e.g. when checking and refilling fluids.
Therefore, always observe the warnings and
follow all general safety precautions. The en-
gine compartment is a dangerous area . WARNING
● Never open the bonnet if
you see steam,
smoke or coolant escaping from the engine
compartment. Risk of scalding! Wait until no
steam or coolant can be seen before opening
the bonnet.
● Switch off the engine and remove the key
from the ignition.
● Eng
age neutral in vehicles with manual
gearbo
x and move the selector lever to posi-
tion P in vehicles with automatic gearbox.
● Apply the handbrake firmly.
● Wait for the engine to cool down.
● For safety reasons, the bonnet must always
be closed when the
vehicle is moving. There-
fore, after closing the bonnet always check
that it is properly secured.
● Should you notice that the bonnet is not
safely
secured when the vehicle is moving,
stop the vehicle immediately and close the
bonnet properly. Risk of accident!
● Keep children away from the engine com-
partment
.
● Do not touch hot engine parts. Risk of
burns!
● Nev
er spill fluids on hot engine compart-
ments. The
se fluids can cause a fire (e.g. anti-
freeze in coolant)! »1)
Valid for the market: Algeria.
203
Technical data
Advice
Operation
Emergencies
Safety
Page 215 of 248
Checking and refilling levels
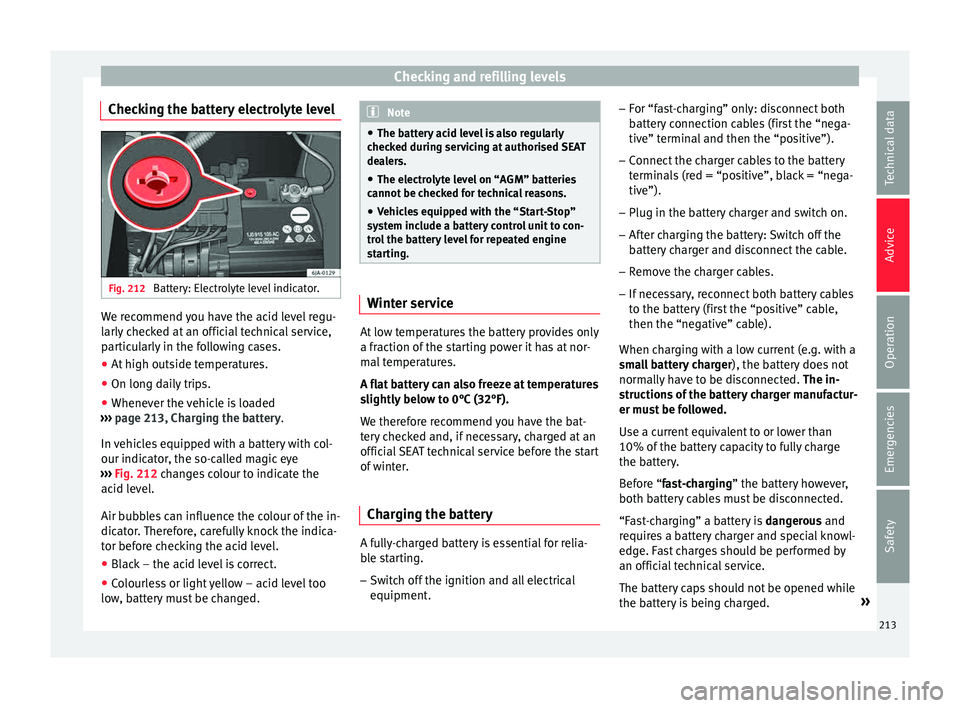
Checking the battery electrolyte level Fig. 212
Battery: Electrolyte level indicator. We recommend you have the acid level regu-
l
arly
c
hecked at an official technical service,
particularly in the following cases.
● At high outside temperatures.
● On long daily trips.
● Whenever the vehicle is loaded
›››
page 213, Charging the battery.
In vehicles equipped with a battery with col-
our indicator, the so-called magic eye
››› Fig. 212 changes colour to indicate the
acid level.
Air bubbles can influence the colour of the in-
dicator. Therefore, carefully knock the indica-
tor before checking the acid level.
● Black – the acid level is correct.
● Colourless or light yellow – acid level too
low , b
attery must be changed. Note
● The batt er
y acid level is also regularly
checked during servicing at authorised SEAT
dealers.
● The electrolyte level on “AGM” batteries
cannot be c
hecked for technical reasons.
● Vehicles equipped with the “Start-Stop”
syst
em include a battery control unit to con-
trol the battery level for repeated engine
starting. Winter service
At low temperatures the battery provides only
a fr
action of
the s
tarting power it has at nor-
mal temperatures.
A flat battery can also freeze at temperatures
slightly below to 0°C (32°F).
We therefore recommend you have the bat-
tery checked and, if necessary, charged at an
official SEAT technical service before the start
of winter.
Charging the battery A fully-charged battery is essential for relia-
b
l
e s
tarting.
– Switch off the ignition and all electrical
equipment. –
For “fa
st-charging” only: disconnect both
battery connection cables (first the “nega-
tive” terminal and then the “positive”).
– Connect the charger cables to the battery
terminal
s (red = “positive”, black = “nega-
tive”).
– Plug in the battery charger and switch on.
– After charging the battery: Switch off the
batter
y charger and disconnect the cable.
– Remove the charger cables.
– If necessary, reconnect both battery cables
to the batt
ery (first the “positive” cable,
then the “negative” cable).
When charging with a low current (e.g. with a
small battery charger ), the battery does not
normally have to be disconnected. The in-
structions of the battery charger manufactur-
er must be followed.
Use a current equivalent to or lower than
10% of the battery capacity to fully charge
the battery.
Before “fast-charging” the battery however,
both battery cables must be disconnected.
“Fast-charging” a battery is dangerous and
requires a battery charger and special knowl-
edge. Fast charges should be performed by
an official technical service.
The battery caps should not be opened while
the battery is being charged. »
213
Technical data
Advice
Operation
Emergencies
Safety
Page 216 of 248
Advice
CAUTION
In vehicles fitted with the “Start-Stop” sys-
tem, the c h
arger cable cannot be directly con-
nected to the negative terminal of the vehicle
battery but must be attached to the engine
ground point ›››
page 52. Disconnecting and connecting the
batt
er
y The following functions will either be inoper-
ative or w
i
ll not work properly after discon-
necting and reconnecting the battery:
FunctionInstallation
Setting the clock››› page 95
The multifunction display data
is deleted››› page 97 Note
We recommend having the vehicle checked by
an authorised S EA
T dealer to guarantee the
correct working order of all electrical sys-
tems. Replacing the battery
A replacement battery must have the same
c
ap
ac
ity, voltage, current rating and size as
the original. The appropriate types of battery can be acquired from authorised SEAT deal-
ers.
We r
ecommend having the battery changed
by an authorised SEAT dealer, where the new
battery will be correctly installed and the
original disposed of in line with regulations.
Automatic disconnection of electrical
equipment When heavily-charging a battery, the pro-
gr
amme sel
ect
ed by the electrical system
control unit prevents the battery from auto-
matically discharging. This may result in the
following:
● Increase in idling speed so that the alterna-
tor can s
upply more current to the electrical
system.
● The performance of certain electrical com-
ponents cou
ld be limited or some may switch
off temporarily, e.g. the heated seats, the
heated rear window, the 12 V power socket. Note
Despite any measures taken by the control
unit, the b att
ery could drain. e.g. with the en-
gine is switched off, the key is turned in the
ignition for a long period or the side lights or
parking lights are switched on. The switching
off of certain electrical components does not impair driving comfort and often the driver
wi
l
l not even notice.214