interior lights Seat Toledo 2016 Owner's manual
[x] Cancel search | Manufacturer: SEAT, Model Year: 2016, Model line: Toledo, Model: Seat Toledo 2016Pages: 248, PDF Size: 5.82 MB
Page 5 of 248
Table of Contents
Table of Contents
The e s
senti
als . . . . . . . . . . . . . . . . . . . . . . . . 5
Exterior view . . . . . . . . . . . . . . . . . . . . . . . . . . . . 5
Exterior view . . . . . . . . . . . . . . . . . . . . . . . . . . . . 6
Interior view (left-hand drive) . . . . . . . . . . . . . . 7
Interior view (right-hand drive) . . . . . . . . . . . . . 8
How it works . . . . . . . . . . . . . . . . . . . . . . . . . . . . 9
Unlocking and locking . . . . . . . . . . . . . . . . . . . . 9
Before driving . . . . . . . . . . . . . . . . . . . . . . . . . . . 11
Airbags . . . . . . . . . . . . . . . . . . . . . . . . . . . . . . . . 14
Child seats . . . . . . . . . . . . . . . . . . . . . . . . . . . . . 16
Starting the vehicle . . . . . . . . . . . . . . . . . . . . . . 18
Lights and visibility . . . . . . . . . . . . . . . . . . . . . . 18
Easy Connect . . . . . . . . . . . . . . . . . . . . . . . . . . . 21
Driver information system . . . . . . . . . . . . . . . . . 23
Driving data . . . . . . . . . . . . . . . . . . . . . . . . . . . . 26
Cruise control . . . . . . . . . . . . . . . . . . . . . . . . . . . 31
Warning lamps . . . . . . . . . . . . . . . . . . . . . . . . . . 32
Gearbox lever . . . . . . . . . . . . . . . . . . . . . . . . . . . 34
Air conditioning . . . . . . . . . . . . . . . . . . . . . . . . . 36
Fluid Level control . . . . . . . . . . . . . . . . . . . . . . . 39
Emergencies . . . . . . . . . . . . . . . . . . . . . . . . . . . . 43
Fuses . . . . . . . . . . . . . . . . . . . . . . . . . . . . . . . . . . 43
Bulbs . . . . . . . . . . . . . . . . . . . . . . . . . . . . . . . . . . 44
Action in the event of a puncture . . . . . . . . . . . 44
Changing a wheel . . . . . . . . . . . . . . . . . . . . . . . 46
Snow chains . . . . . . . . . . . . . . . . . . . . . . . . . . . . 49
Emergency towing of the vehicle . . . . . . . . . . . 50
How to jump start . . . . . . . . . . . . . . . . . . . . . . . . 51
Changing the windscreen wiper blades . . . . . . 53
Safety . . . . . . . . . . . . . . . . . . . . . . . . . . . . . . . . 55
Safe driving . . . . . . . . . . . . . . . . . . . . . . . . . . . . 55
Safety first! . . . . . . . . . . . . . . . . . . . . . . . . . . . . . 55
Advice about driving . . . . . . . . . . . . . . . . . . . . . 55 Correct position for passengers . . . . . . . . . . . . 56
Pedal area . . . . . . . . . . . . . . . . . . . . . . . . . . . . . . 60
Seat belts
. . . . . . . . . . . . . . . . . . . . . . . . . . . . . . 61
The whys and wherefores of seat belts . . . . . . . 61
How to properly adjust your seatbelt . . . . . . . . 64
Seat belt tensioners . . . . . . . . . . . . . . . . . . . . . . 65
Airbag system . . . . . . . . . . . . . . . . . . . . . . . . . . 66
Brief introduction . . . . . . . . . . . . . . . . . . . . . . . . 66
Airbag safety instructions . . . . . . . . . . . . . . . . . 69
Deactivating airbags . . . . . . . . . . . . . . . . . . . . . 71
Transporting children safely . . . . . . . . . . . . . . . 72
Safety for children . . . . . . . . . . . . . . . . . . . . . . . 72
Child seats . . . . . . . . . . . . . . . . . . . . . . . . . . . . . 74
Emergencies . . . . . . . . . . . . . . . . . . . . . . . . . . 75
Self-help . . . . . . . . . . . . . . . . . . . . . . . . . . . . . . . 75
Emergency equipment . . . . . . . . . . . . . . . . . . . . 75
Changing a wheel . . . . . . . . . . . . . . . . . . . . . . . 75
Tyre repairs . . . . . . . . . . . . . . . . . . . . . . . . . . . . . 76
Towing the vehicle . . . . . . . . . . . . . . . . . . . . . . . 78
Fuses and bulbs . . . . . . . . . . . . . . . . . . . . . . . . . 80
Fuses . . . . . . . . . . . . . . . . . . . . . . . . . . . . . . . . . . 80
Changing bulbs . . . . . . . . . . . . . . . . . . . . . . . . . 83
Changing the fog light bulbs . . . . . . . . . . . . . . . 86
Changing the rear lights (on the side panel) . . 87
Changing tail lights (on the rear lid) . . . . . . . . . 89
Changing the bulb on the number plate . . . . . . 91
Operation . . . . . . . . . . . . . . . . . . . . . . . . . . . . . 93
Controls and displays . . . . . . . . . . . . . . . . . . . . 93
General instrument panel . . . . . . . . . . . . . . . . . 92
Instruments and warning lamps . . . . . . . . . . . . 94
Instruments . . . . . . . . . . . . . . . . . . . . . . . . . . . . 94
Control lamps . . . . . . . . . . . . . . . . . . . . . . . . . . . 98
Introduction to the Easy Connect system* . . . . 99
System settings (CAR)* . . . . . . . . . . . . . . . . . . . 99 Communications and multimedia
. . . . . . . . . . . 100
Steering wheel controls* . . . . . . . . . . . . . . . . . . 100
Multimedia . . . . . . . . . . . . . . . . . . . . . . . . . . . . . 104
Opening and closing . . . . . . . . . . . . . . . . . . . . . 104
Remote control . . . . . . . . . . . . . . . . . . . . . . . . . . 104
Keys . . . . . . . . . . . . . . . . . . . . . . . . . . . . . . . . . . . 105
Central locking system . . . . . . . . . . . . . . . . . . . . 107
Anti-theft alarm system* . . . . . . . . . . . . . . . . . . 112
Rear lid . . . . . . . . . . . . . . . . . . . . . . . . . . . . . . . . 113
Opening and closing of electric windows . . . . . 115
Lights and visibility . . . . . . . . . . . . . . . . . . . . . . 116
Lights . . . . . . . . . . . . . . . . . . . . . . . . . . . . . . . . . 116
Interior lights . . . . . . . . . . . . . . . . . . . . . . . . . . . 122
Visibility . . . . . . . . . . . . . . . . . . . . . . . . . . . . . . . 123
Windscreen wipers and windscreen wash-
ers . . . . . . . . . . . . . . . . . . . . . . . . . . . . . . . . . . . . 124
Mirr
ors . . . . . . . . . . . . . . . . . . . . . . . . . . . . . . . . . 126
Seats and head restraints . . . . . . . . . . . . . . . . . 127
Adjusting seats and head restraints . . . . . . . . . 127
Seat functions . . . . . . . . . . . . . . . . . . . . . . . . . . 128
Transport and practical equipment . . . . . . . . . 131
Practical equipment . . . . . . . . . . . . . . . . . . . . . . 131
Storing objects . . . . . . . . . . . . . . . . . . . . . . . . . . 137
Luggage compartment . . . . . . . . . . . . . . . . . . . . 138
Roof rack* . . . . . . . . . . . . . . . . . . . . . . . . . . . . . . 141
Air conditioning . . . . . . . . . . . . . . . . . . . . . . . . . 142
Heating and air conditioning . . . . . . . . . . . . . . . 142
Heating and fresh air . . . . . . . . . . . . . . . . . . . . . 144
Air conditioning (manual)* . . . . . . . . . . . . . . . . 145
Climatronic* (automatic air conditioning) . . . . 147
Driving . . . . . . . . . . . . . . . . . . . . . . . . . . . . . . . . 149
Starting and stopping the engine . . . . . . . . . . . 149
Brakes and brake servo systems . . . . . . . . . . . . 152
Braking and stability systems . . . . . . . . . . . . . . 154
Manual gearbox . . . . . . . . . . . . . . . . . . . . . . . . . 156
Automatic gearbox . . . . . . . . . . . . . . . . . . . . . . . 157
Run-in and economical driving . . . . . . . . . . . . . 161
3
Page 22 of 248
The essentials
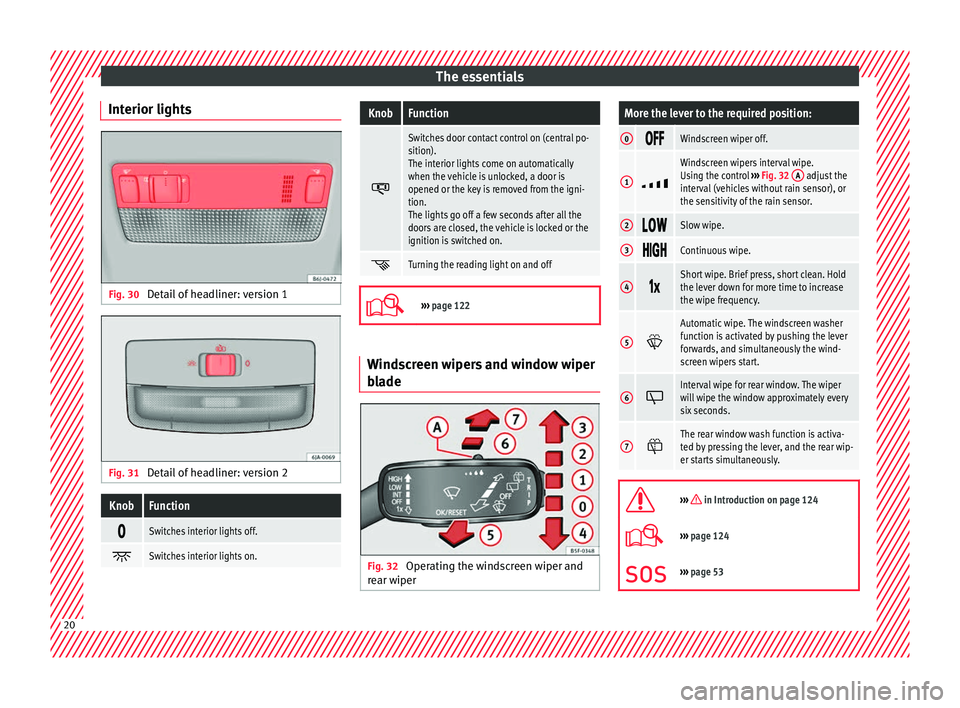
Interior lights Fig. 30
Detail of headliner: version 1 Fig. 31
Detail of headliner: version 2KnobFunction
Switches interior lights off.
Switches interior lights on.
KnobFunction
Switches door contact control on (central po-
sition).
The interior lights come on automatically
when the vehicle is unlocked, a door is
opened or the key is removed from the igni-
tion.
The lights go off a few seconds after all the
doors are closed, the vehicle is locked or the
ignition is switched on.
Turning the reading light on and off
›››
page 122 Windscreen wipers and window wiper
b
l
a
de Fig. 32
Operating the windscreen wiper and
r e ar w
iper
More the lever to the required position:
0 Windscreen wiper off.
1
Windscreen wipers interval wipe.
Using the control
››› Fig. 32 A adjust the
interval (vehicles without rain sensor), or
the sensitivity of the rain sensor.
2 Slow wipe.
3
Continuous wipe.
4
Short wipe. Brief press, short clean. Hold
the lever down for more time to increase
the wipe frequency.
5
Automatic wipe. The windscreen washer
function is activated by pushing the lever
forwards, and simultaneously the wind-
screen wipers start.
6
Interval wipe for rear window. The wiper
will wipe the window approximately every
six seconds.
7
The rear window wash function is activa-
ted by pressing the lever, and the rear wip-
er starts simultaneously.
››› in Introduction on page 124
›››
page 124
››› page 53 20
Page 24 of 248
The essentialsMenuSubmenuPossible settingDescription
Driver assistance
Front Assist (ambient traffic
monitoring system)Activation/deactivation: monitoring system, advance warning, distance warning display›››
page 176
City emergency braking func-
tionActivation/deactivation of the City emergency braking function.››› page 180
Fatigue detectionActivation/deactivation››› page 182
Parking and ma-
noeuvringParkPilotAutomatically activate, front volume, front sound settings, rear volume, rear sound settings,
adjust volume››› page 167
Vehicle lights
Vehicle interior lightingInstrument and switch lighting, footrest lighting››› page 122
Coming home/Leaving home
functionStart time for “Coming home” function, start time for “Leaving home” function››› page 121
Daytime driving lightActivation/deactivation››› page 118
Mirrors/wind‐
screen wipersMirrorsSynchronised regulation, lower the rear-view mirror when reversing, fold in after parking››› page 126
Windscreen wipersAutomatic windscreen wipers, wipe when reversing››› page 124
Opening and clos-
ingRadio-operated remote controlConvenience open function››› page 104
Central locking systemUnlocking doors, automatic locking/unlocking, audible confirmation››› page 107
Multifunction
display–
Current consumption, average consumption, volume to fill up, convenience consumers,
ECOAdvice, travelling time, distance travelled, digital speed display, average speed, speed-
ing warning, oil temperature, coolant temperature, restore data “from start”, restore data
“total calculation”
››› page 23
Date and time–Time source, set the time, automatic summer time (DST) setting, select time zone, time for-
mat, set the date, date format–
Measurement units–Distance, speed, temperature, volume, consumption–
Service–Chassis number, date of next SEAT service inspection, date of next oil change service››› page 30
Factory settings–All settings can be reset: driver assistance, parking and manoeuvring, lights, rear view mir-
rors and windscreen wipers, opening and closing, multi-function display– 22
Page 70 of 248
Safety
frontal collision the system might not trigger
corr
ectly
or may fail to trigger at all. Airbag activation
The airbags deploy extremely rapidly, within
thous
andths
of a second, to provide addi-
tional protection in the event of an accident.
A fine dust may develop when the airbag de-
ploys. This is normal and it is not an indica-
tion of fire in the vehicle.
The airbag system is only ready to function
when the ignition is on.
In special accidents instances, several air-
bags may activate at the same time.
In the event of minor head-on and side colli-
sions, rear-end collisions, overturning or roll-
over of the vehicle, airbags do not activate.
Activation factors
The conditions that lead to the airbag system
activating in each situation cannot be gener-
alised. Some factors play an important role,
such as the properties of the object the vehi-
cle hits (hard/soft), angle of impact, vehicle
speed, etc.
Deceleration trajectory is key for airbag acti-
vation. The control unit analyses the collision trajec-
tor
y
and activates the respective restraint
system.
If the deceleration rate is below the prede-
fined reference value in the control unit the
airbags will not be triggered, even though
the accident may cause extensive damage to
the car.
The following airbags are triggered in seri-
ous head-on collisions
● Driver airbag.
● Front passenger front airbag
The fol
lowing airbags are triggered in seri-
ous side-on collisions
● Front side airbag on the side of the acci-
dent.
● Re
ar side airbag on the side of the acci-
dent.
● Cur
tain (head) airbag on the side of the ac-
cident.
In an ac
cident with airbag activation:
● the interior lights switch on (if the interior
light swit
ch is in the courtesy light position);
● the hazard warning lights switch on;
● all doors are unlocked;
● the fuel supply to the engine is cut. Airbag and seat belt tensioner control
lamp The control lamp monitors all airbags and
seat
belt
tensioners in the vehicle, including
control units and wiring connections.
Monitoring of airbag and belt tensioner sys-
tem
Both the airbag and belt tensioner systems
operation is constantly monitored electroni-
cally. Each time the ignition is switched on,
the control lamp illuminates for several
seconds (self-diagnosis) and the instrument
panel display* shows AIRBAG/TENSIONER.
The system must be checked when the con-
trol lamp :
● does not light up when the ignition is
swit c
hed on,
● turns off after 4 seconds after the ignition
is sw
itched on
● turns off and then lights up again after the
ignition is sw
itched on
● illuminates or flashes while the vehicle is
movin
g.
In the event of a malfunction, the warning
lamp stays on continuously. In addition, de-
pending on the malfunction, a fault message
appears on the instrument panel display for
approximately 10 seconds and a short audi-
ble warning is given. In this event, you
68
Page 73 of 248

Airbag system
●
The side and he a
d airbags are managed
through sensors located in the interior of the
front doors. To ensure the correct operation of
the side and curtain airbags neither the
doors nor the door panels should be modified
in any way (e.g. fitting loudspeakers). If the
front door is damaged, the airbag system
may not work correctly. All work carried out
on the front door must be done in a special-
ised workshop. Deactivating airbags
D e
activ
ation of the front airbagThe disabling of airbags is only carried out in
c
er
t
ain cases, i.e. if:
● a child seat is required in the front passen-
ger seat
with the child facing in the opposite
direction to the direction of travel (in some
countries, due to divergent legal require-
ments, facing in the direction of travel)
››› page 74;
● despite the driver's seat being in the cor-
rect po
sition, a minimum distance of 25 cm
cannot be maintained between the centre of
the steering wheel and the driver's torso,
● installation of special devices is required in
the steerin
g wheel area due to a physical dis-
ability, ●
if y
ou have special seats installed (e.g. an
orthopaedic seat without side airbags).
The front passenger front airbag can be disa-
bled using the switch ››› page 71.
We recommend that you contact an author-
ised SEAT dealer for the disabling of other air-
bags.
Airbag system control
The airbag system availability is controlled
electronically, regardless of whether an air-
bag is disabled.
If an airbag was disabled using a diagnostics
system: ● the airbag system warning lamp illumi-
n
ates after switching on the ignition for
about 4 seconds, and then flashes for about
12 seconds.
If the airbag has been disabled with the air-
bag switch on the side of the dash panel:
● the airbag control lamp wil
l illuminate
for about 4 seconds after the ignition is
switched on,
● the airbag is disabled, signalled with the
warning l
amp which lights up with the
word placed in the cen-
tre part of the dash panel ›››
Fig. 81 3 . Note
● Fo l
low the current legislation in your coun-
try regarding the disabling of airbags.
● At your authorised SEAT dealer you can find
information on whic
h vehicle airbags can be
disabled. Front passenger front airbag switch
Fig. 81
Front passenger front airbag
sw it
c
h/warning lamp for disabling the front
passenger airbag. » 71
Technical data
Advice
Operation
Emergencies
Safety
Page 83 of 248

Fuses and bulbs
●
Prot ect
the fuse boxes when open to pre-
vent the entry of dust or humidity as they can
damage the electrical system.
● Always carefully remove the fuse box cov-
ers and r
efit them correctly to avoid problems
with your vehicle. Note
● One c omponent m
ay have more than one
fuse.
● Several components may run on a single
fuse.
● In the
vehicle, there are more fuses than
those indicat
ed in this chapter. These should
only be changed by a specialised workshop.
● Positions not containing a fuse do not ap-
pear in the fo
llowing tables.
● Some of the equipment listed in the tables
below pert
ain only to certain versions of the
model or are optional extras.
● Please note that the above lists, while cor-
rect at
the time of printing, are subject to
change. Fuses in the dash panel
Fig. 85
Diagram of the fuse box to the
l ef
t/right
of the steering wheel Read the additional information carefully
› ›
›
page 43
Only replace fuses with a fuse of the same
amperage (same colour and markings) and
size.
Fuse placement
No.Consumer
1Left light
2Central locking, windscreen wipers, with Keyless
Access
3Ignition system relay
4Right light
5Electric windows - Driver
No.Consumer
6Central control unit - Interior lights
7Horn
8Towing bracket - Left light
9
Controls on steering column (without Keyless Ac-
cess only), engine control unit (without Keyless
Access only), automatic gearbox control unit
(without Keyless Access only), automatic gear-
box lever (without Keyless Access only), ESP
control unit (without Keyless Access only), trailer
hook control unit (without Keyless Access only),
electric power steering (without Keyless Access
only)
10Rear left window
11Headlight washer unit
12Radio and navigation display
13Preparation as taxi
14
Control lever under steering wheel, light switch,
traction locking with ignition key (automatic
transmission), headlight flasher, SmartGate con-
trol device, rain/light sensor, rear camera
15Air conditioning system control unit, automatic
gearbox selector lever, diagnostics connection
16Instrument panel
17Alarm sensor, horn
22Windscreen washer system (without Keyless Ac-
cess)
23Heated front seats» 81
Technical data
Advice
Operation
Emergencies
Safety
Page 84 of 248
EmergenciesNo.Consumer
24Air conditioning fan, heating, control unit for air
conditioning, heating
26Front seat heating switch.
27Rear window wiper
29Airbag
30
Electric windows, reversing light switch, air con-
ditioning control unit, Park Assist control unit,
exterior mirror, power supply for middle button
bar, power supply for the side button bar, interi-
or mirror
31Fuel pump, radiator fan control unit, cruise con-
trol, relay coil for the windscreen and rear win-
dow washer system, switch for the lights
32Diagnostics socket, headlight range regulator,
control lever under the steering wheel, ambient
lighting regulator
33Ignition relay coil, clutch pedal switch
34Heatable washer jets of windscreen washer
36USB charging socket
37Radar
39Additional electric heating
41Rear window heater
42Electric windows - passenger
43Towing bracket - Connector contact
No.Consumer
4412 V connection in the interior, 12 V connection
in the boot
45Rear right window
46Windshield and front window washing system,
control lever under the steering wheel
47Towing bracket - Connector contact
48Towing bracket - Right hand light
49Fuel pump control unit
50Radio
51Heat for exterior mirrors
52Keyless Access
53Steering lock (Keyless Access)
54ABS/ESC control unit
56Diagnosis
59Full LED
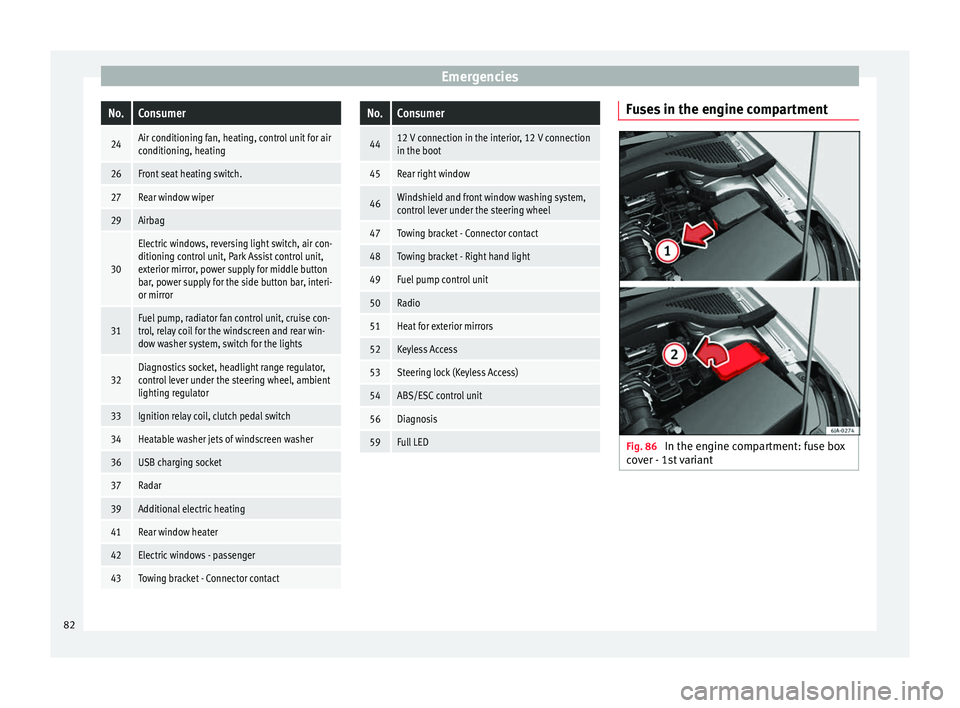
Fuses in the engine compartment
Fig. 86
In the engine compartment: fuse box
c o
v
er - 1st variant 82
Page 124 of 248
Operation
Note
● The park in
g lights can only be activated
with the ignition disconnected.
● The parking light will not come on automat-
ical
ly after switching off the ignition if the
left- or right-hand turn signal is left on. Adjusting the headlights
The light beam of the dipped beam lights is
asymmetric: the s
ide of
the road on which
you are driving is lit more intensely.
When a car that is manufactured in a country
that drives on the right travels to a country
that drives on the left (or vice versa), it is nor-
mally necessary to cover part of the headlight
bulbs with stickers or to change the adjust-
ment of the headlights to avoid dazzling oth-
er drivers.
In such cases, the regulations specify certain
light values that must be complied with for
designated points of the light distribution.
This is known as “Tourist light”.
The light distribution of the halogen and full-
LED headlights of the SEAT Toledo allows the
specific “tourist light” values to be met with-
out the need for stickers or changes in the
settings. Note
“Tourist light” is only allowed temporarily. If
you ar e p
lanning a long stay in a country that
drives on the other side, you should take the
vehicle to an Authorised Technical Service to
change the headlights. Interior lights
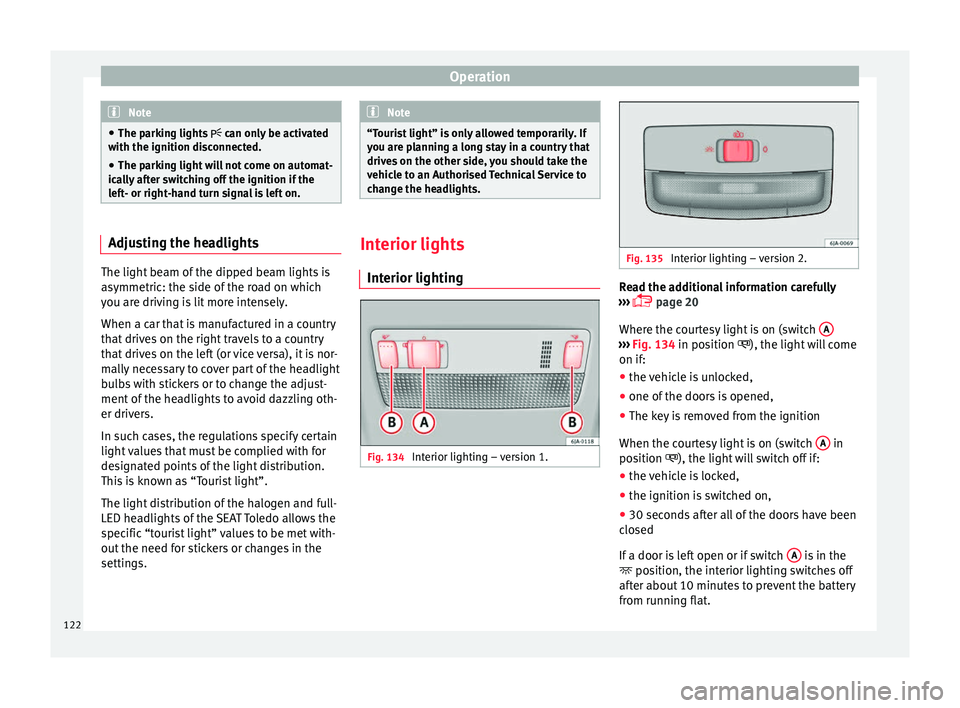
Interior lightin g Fig. 134
Interior lighting – version 1. Fig. 135
Interior lighting – version 2. Read the additional information carefully
› ›
›
page 20
Where the courtesy light is on (switch A ›››
Fig. 134 in pos ition
), the light will come
on if:
● the vehicle is unlocked,
● one of the doors is opened,
● The key is removed from the ignition
When the cour t
esy light is on (switch A in
po s
ition
), the light will switch off if:
● the vehicle is locked,
● the ignition is switched on,
● 30 seconds after all of the doors have been
closed
If
a door is left open or if switch A is in the
po s
ition, the int
erior lighting switches off
after about 10 minutes to prevent the battery
from running flat.
122
Page 125 of 248
Lights and visibility
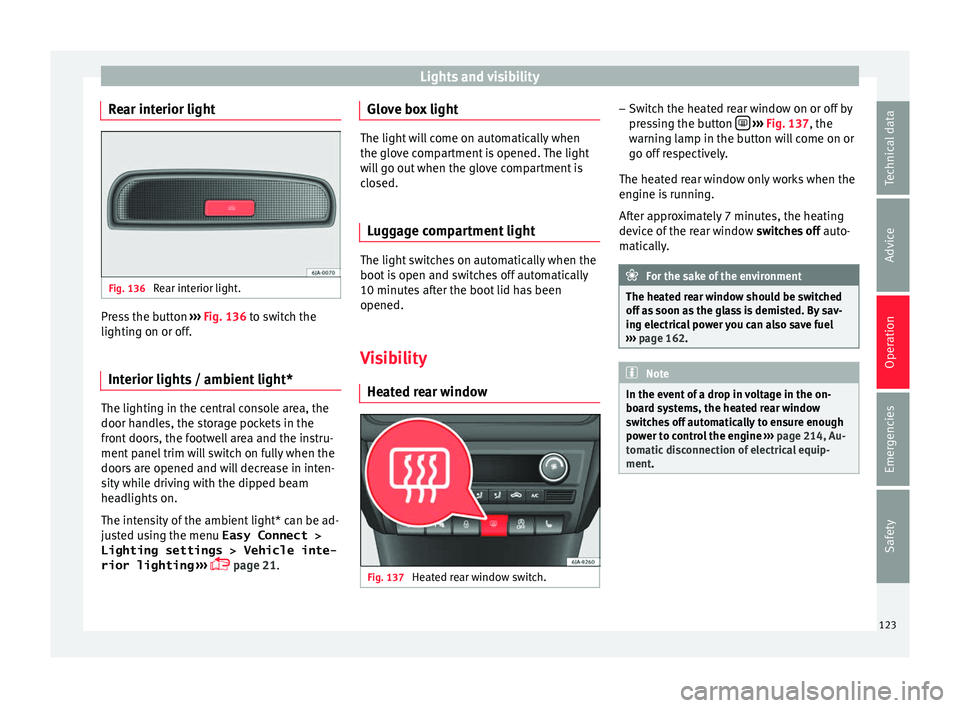
Rear interior light Fig. 136
Rear interior light. Press the button
››
› Fig. 136 to switch the
lighting on or off.
Interior lights / ambient light* The lighting in the central console area, the
door h
andl
e
s, the storage pockets in the
front doors, the footwell area and the instru-
ment panel trim will switch on fully when the
doors are opened and will decrease in inten-
sity while driving with the dipped beam
headlights on.
The intensity of the ambient light* can be ad-
justed using the menu Easy Connect > Lighting settings > Vehicle inte-
rior lighting ›››
page 21. Glove box light The light will come on automatically when
the glov
e c
ompartment is opened. The light
will go out when the glove compartment is
closed.
Luggage compartment light The light switches on automatically when the
boot i
s
open and switches off automatically
10 minutes after the boot lid has been
opened.
Visibility Heat ed r
ear window Fig. 137
Heated rear window switch. –
Sw it
c
h the heated rear window on or off by
pressing the button
› ››
Fig. 137
, the
w
arning lamp in the button will come on or
go off respectively.
The heated rear window only works when the
engine is running.
After approximately 7 minutes, the heating
device of the rear window switches off auto-
matically. For the sake of the environment
The heated rear window should be switched
off a s
soon as the glass is demisted. By sav-
ing electrical power you can also save fuel
››› page 162. Note
In the event of a drop in voltage in the on-
boar d sy
stems, the heated rear window
switches off automatically to ensure enough
power to control the engine ››› page 214, Au-
tomatic disconnection of electrical equip-
ment. 123
Technical data
Advice
Operation
Emergencies
Safety
Page 128 of 248

Operation
Note
Do not put stickers on the windscreen in front
of the r
ain sensor*. This may cause sensor
disruption or faults. Headlight washers*
The headlight washers operate briefly if the
dipped he
a
dlights or headlights are on and
the lever is moved to position 5
››› Fig. 140 .
The he
adlight washer system also operates
every 10 windscreen wash cycles.
Clean off stubborn dirt (insects, etc.) from the
headlights at regular intervals, for instance
when filling the fuel tank. Please observe the
following indications ›››
page 196, Head-
lights.
To ensure the system works properly in win-
ter, keep the nozzle holders free of snow and
remove any ice with a de-icer spray. CAUTION
Never pull on the nozzle holders. Risk of
dam ag
e to the system! Mirrors
R e
ar
view mirror with manual anti-
dazzle device Basic settings
– Push the lever at the bottom of the mirror
for w
ard.
Rear vision mirror anti-dazzle setting – Pull the lever at the bottom of the mirror to-
ward
s you.
Exterior mirrors Read the additional information carefully
› ›
›
page 13
Before beginning any journey, adjust the rear
view mirrors for a good rear visibility. WARNING
● Con v
ex (wide-angle) rear vision mirrors give
a larger field of vision. However, they make
objects appear smaller and further away than
they really are. For this reason, you should
not rely on these rear vision mirrors for judg-
ing the distance of vehicle behind.
● If possible, use the interior rear vision mir-
ror to e
stimate distances to vehicles behind
you. Note
● Exterior mirr or
s are only heated when the
engine is running.
● Do not touch the exterior mirrors when the
heating sy
stem is running.
● If the electrical adjustment should ever fail
to operat
e, the rear vision mirrors can be ad-
justed by hand by pressing the edge of the
mirror glass.
● Visit the technical service in the event of a
fault
in the electrical rear vision mirror ad-
justment system. 126