headlights Seat Toledo 2017 User Guide
[x] Cancel search | Manufacturer: SEAT, Model Year: 2017, Model line: Toledo, Model: Seat Toledo 2017Pages: 248, PDF Size: 5.86 MB
Page 127 of 248

Lights and visibility
Rear fog light Switching on the rear fog light
– First turn the light switch ››› Fig. 134
››› page 124 to position , or .
– Pull on the light switch to position 2 .
If the v
ehicle is not equipped with front fog
lights ››› page 124, the rear fog light is
switched on by turning the switch to position
or and pulling it to position 2 . This
type of sw it
ch only has one position.
The ››› page 100 warning lamp lights up on
the general instrument panel if the rear fog
lights are switched on.
If you are towing a trailer or caravan equip-
ped with a rear fog light on a vehicle with a
factory-fitted towing bracket or one installed
using parts from the original SEAT parts
catalogue, only the rear fog light on the trail-
er or caravan will light up.
Function “Coming Home”/“Leaving
Home”* This function makes it possible, under poor
v
i
s
ibility conditions, to automatically turn on
the lights for a brief period of time after the
vehicle has been parked or when approach-
ing the vehicle. The function is automatically turned on if the
fol
lowing conditions are met:
● The light switch is in position
››
› page 123.
● The visibility around the vehicle is reduced.
● The ignition is switched off.
To turn on thi
s function, switch on the head-
light flasher prior to exiting the vehicle.
The light is adjusted according to the data re-
corded by the light sensor that is installed
between the windscreen and the inside rear
view mirror.
The function automatically turns on the side
lights and headlights, the lighting for the en-
try area on the exterior mirrors and the num-
ber plate light.
“Coming Home” function
The light is automatically switched on when
the driver door is opened (for 60 seconds af-
ter the ignition is switched off).
The light is switched off when all the doors
and the rear lid are closed.
If a door or the rear lid remains open, the
light will switch off after 60 seconds.
“Leaving Home” function
The light is automatically switched on when
the vehicle is unlocked using the remote con-
trol. The light is switched off after 10 seconds or
when the vehic
le is locked.
Hazard warning lights switch Fig. 135
Instrument panel: switch for hazard
w arnin
g lights. –
Press the button ››
›
Fig. 135 to switch
the hazard warning lights on or off.
The warning lamps on the instrument panel
and the warning lamp on the switch will flash
at the same time as the turn signals when
the hazard warning lights are switched on.
The hazard warning lights also work when
the ignition is switched off.
The hazard warning lights come on automati-
cally in the event of an accident in which an
airbag is triggered. »
125
Technical data
Advice
Operation
Emergencies
Safety
Page 128 of 248
Operation
Note
Switch on the hazard warning lights to warn
other ro a
d users, for example:
● When reaching the tail end of a traffic jam
● if the vehicle has a technical fault or you
are inv
olved in an emergency situation. Parking lights*
Parking lights
– Switch the ignition off.
– Move the turn signal lever ›
››
Fig. 133
››› page 123 up or down to turn on the right
or left-hand parking lights respectively.
Parking light on both sides
– Turn the light switch ›››
Fig. 131
››› page 121 to position and engage the
steering lock. Note
● The park in
g lights can only be activated
with the ignition disconnected.
● The parking light will not come on automat-
ical
ly after switching off the ignition if the
left- or right-hand turn signal is left on. Adjusting the headlights
The light beam of the dipped beam lights is
asymmetric: the s
ide of
the road on which
you are driving is lit more intensely.
When a car that is manufactured in a country
that drives on the right travels to a country
that drives on the left (or vice versa), it is nor-
mally necessary to cover part of the headlight
bulbs with stickers or to change the adjust-
ment of the headlights to avoid dazzling oth-
er drivers.
In such cases, the regulations specify certain
light values that must be complied with for
designated points of the light distribution.
This is known as “Tourist light”.
The light distribution of the halogen and full-
LED headlights of the SEAT Toledo allows the
specific “tourist light” values to be met with-
out the need for stickers or changes in the
settings. Note
“Tourist light” is only allowed temporarily. If
you ar e p
lanning a long stay in a country that
drives on the other side, you should take the
vehicle to an Authorised Technical Service to
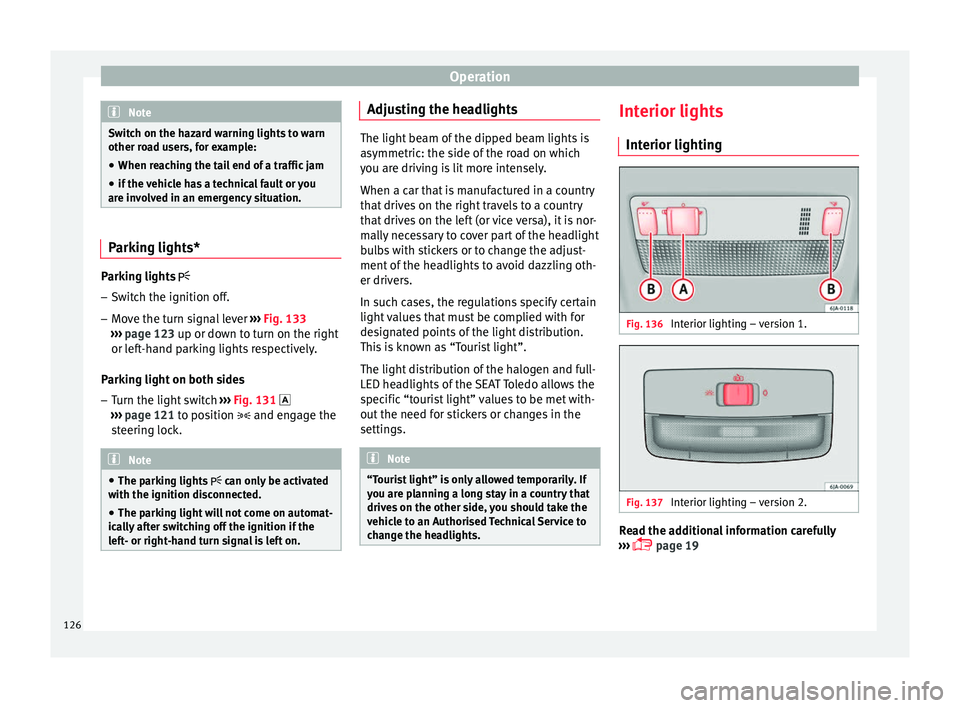
change the headlights. Interior lights
Int erior lightin
g Fig. 136
Interior lighting – version 1. Fig. 137
Interior lighting – version 2. Read the additional information carefully
› ›
›
page 19
126
Page 129 of 248
Lights and visibility
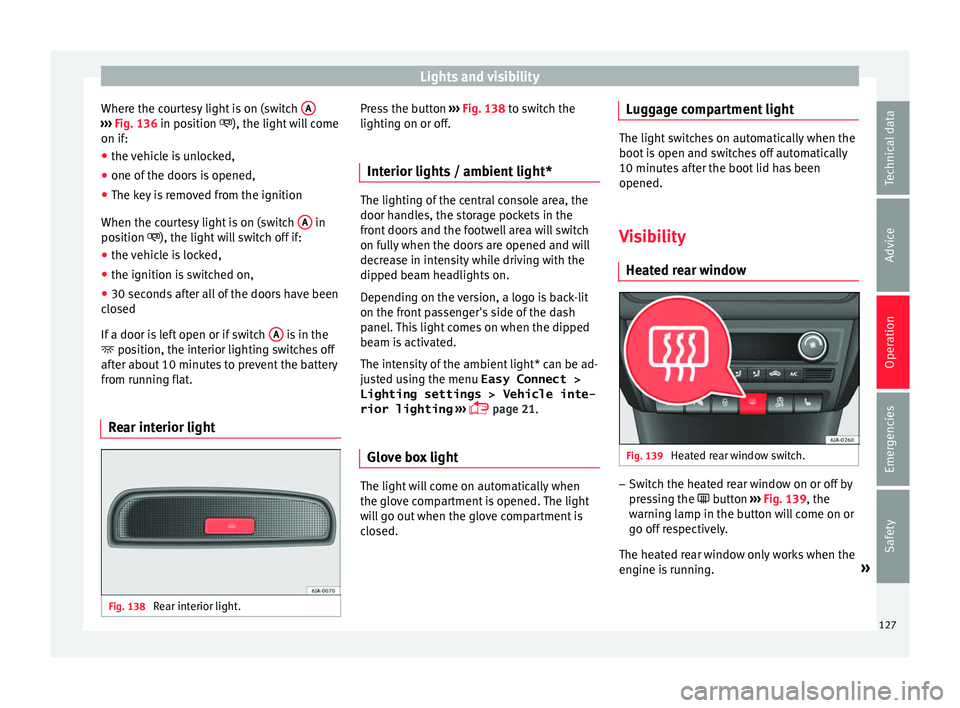
Where the courtesy light is on (switch A›››
Fig. 136 in po s
ition ), the light will come
on if:
● the vehicle is unlocked,
● one of the doors is opened,
● The key is removed from the ignition
When the court
esy light is on (switch A in
po s
ition
), the light will switch off if:
● the vehicle is locked,
● the ignition is switched on,
● 30 seconds after all of the doors have been
closed
If
a door is left open or if switch A is in the
po s
ition, the int
erior lighting switches off
after about 10 minutes to prevent the battery
from running flat.
Rear interior light Fig. 138
Rear interior light. Press the button
››
›
Fig. 138 to switch the
lighting on or off.
Interior lights / ambient light* The lighting of the central console area, the
door handl
e
s, the storage pockets in the
front doors and the footwell area will switch
on fully when the doors are opened and will
decrease in intensity while driving with the
dipped beam headlights on.
Depending on the version, a logo is back-lit
on the front passenger's side of the dash
panel. This light comes on when the dipped
beam is activated.
The intensity of the ambient light* can be ad-
justed using the menu Easy Connect > Lighting settings > Vehicle inte-
rior lighting ›››
page 21.
Glove box light The light will come on automatically when
the glo
v
e c
ompartment is opened. The light
will go out when the glove compartment is
closed. Luggage compartment light The light switches on automatically when the
boot i
s
open and switches off automatically
10 minutes after the boot lid has been
opened.
Visibility Heated r
ear window Fig. 139
Heated rear window switch. –
Switch the heated rear window on or off by
pr e
s
sing the button ›››
Fig. 139, the
warning lamp in the button will come on or
go off respectively.
The heated rear window only works when the
engine is running. »
127
Technical data
Advice
Operation
Emergencies
Safety
Page 132 of 248
Operation
Switching off the wipers – Move the lever to position 0
› ››
Fig. 142
. WARNING
The rain sensor may not detect enough rain
to sw it
ch on the wipers.
● If necessary, switch on the wipers manually
when water on the w
indscreen obstructs visi-
bility. Note
Do not put stickers on the windscreen in front
of the r
ain sensor*. This may cause sensor
disruption or faults. Headlight washers*
The headlight washers operate briefly if the
dip
ped he
a
dlights or headlights are on and
the lever is moved to position 5
› ›
›
Fig. 142.
The headlight washer system also operates
every 10 windscreen wash cycles.
Clean off stubborn dirt (insects, etc.) from the
headlights at regular intervals, for instance
when filling the fuel tank. Please observe the
following indications ›››
page 198, Head-
lights.
To ensure the system works properly in win-
ter, keep the nozzle holders free of snow and
remove any ice with a de-icer spray. CAUTION
Never pull on the nozzle holders. Risk of
dam ag
e to the system! Mirrors
Re ar
view mirror with manual anti-
dazzle device Basic settings
– Push the lever at the bottom of the mirror
for w
ard.
Rear vision mirror anti-dazzle setting – Pull the lever at the bottom of the mirror to-
ward
s you.
Exterior mirrors Read the additional information carefully
› ›
›
page 13
Before beginning any journey, adjust the rear
view mirrors for a good rear visibility. WARNING
● Con v
ex (wide-angle) rear vision mirrors give
a larger field of vision. However, they make
objects appear smaller and further away than
they really are. For this reason, you should not rely on these rear vision mirrors for judg-
ing the di
s
tance of vehicle behind.
● If possible, use the interior rear vision mir-
ror to e
stimate distances to vehicles behind
you. Note
● Ext erior mirr or
s are only heated when the
engine is running.
● Do not touch the exterior mirrors when the
heating sy
stem is running.
● If the electrical adjustment should ever fail
to operat
e, the rear vision mirrors can be ad-
justed by hand by pressing the edge of the
mirror glass.
● Visit the technical service in the event of a
fault
in the electrical rear vision mirror ad-
justment system. 130
Page 183 of 248
Driver assistance systems
●
The Front As
sist does not react to animals
or vehicles crossing your path or approaching
head-on down the same lane.
● The Front Assist does not react to pedes-
trians
walking in the same direction or ap-
proaching head-on down the same lane.
● The driver must always be ready to take
over the c
ontrol of the vehicle.
● When the Front Assist causes a braking,
the brake ped
al is “harder”.
● Automatic interventions by the Front Assist
on the brake
s may be interrupted by pressing
the clutch, accelerator or moving the wheel. Note
● When the Front As
sist is connected, the in-
dications on the instrument panel screen may
be concealed by warnings from other func-
tions, such as an incoming call.
● When the Front Assist causes a braking,
the brake ped
al is “harder”.
● Automatic interventions by the Front Assist
on the brake
s may be interrupted by pressing
the clutch, accelerator or moving the wheel.
● The Front Assist may brake the vehicle until
it st
ops completely. However, the brake sys-
tem does not halt the vehicle permanently.
Use the foot brake!
● If the Front Assist does not work as descri-
bed in this c
hapter (e.g. in intervenes several
times unnecessarily), switch it off. Have the
system checked by a specialised workshop.
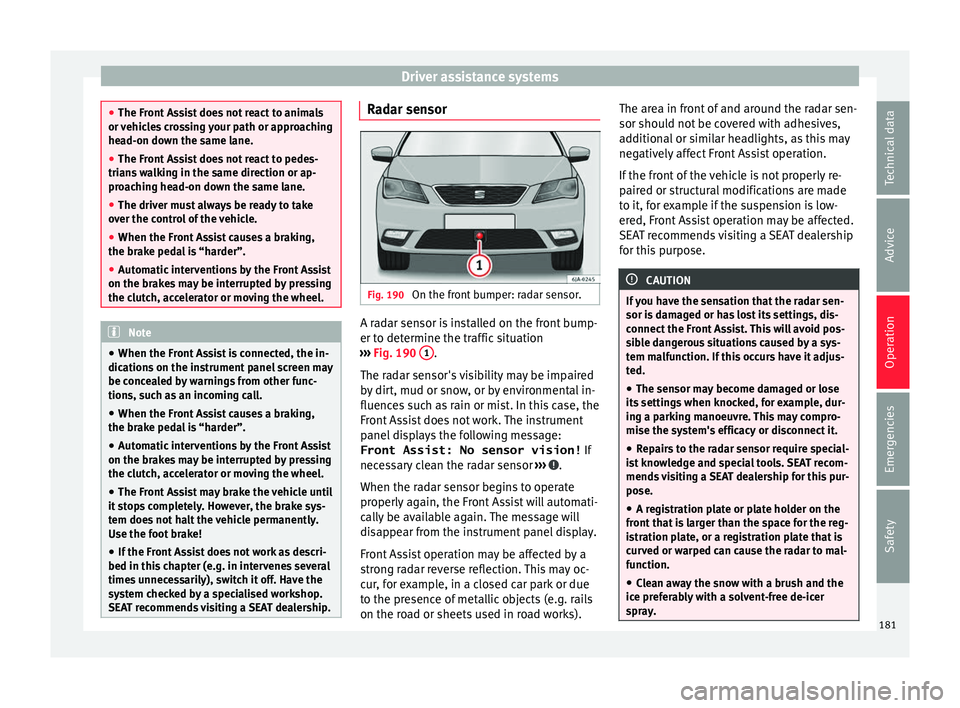
SEAT recommends visiting a SEAT dealership. Radar sensor
Fig. 190
On the front bumper: radar sensor. A radar sensor is installed on the front bump-
er t
o det
ermine the tr
affic situation
››› Fig. 190 1 .
The r a
d
ar sensor's visibility may be impaired
by dirt, mud or snow, or by environmental in-
fluences such as rain or mist. In this case, the
Front Assist does not work. The instrument
panel displays the following message:
Front Assist: No sensor vision! If
necessary clean the radar sensor ››› .
When the r a
d
ar sensor begins to operate
properly again, the Front Assist will automati-
cally be available again. The message will
disappear from the instrument panel display.
Front Assist operation may be affected by a
strong radar reverse reflection. This may oc-
cur, for example, in a closed car park or due
to the presence of metallic objects (e.g. rails
on the road or sheets used in road works). The area in front of and around the radar sen-
sor should not
be covered with adhesives,
additional or similar headlights, as this may
negatively affect Front Assist operation.
If the front of the vehicle is not properly re-
paired or structural modifications are made
to it, for example if the suspension is low-
ered, Front Assist operation may be affected.
SEAT recommends visiting a SEAT dealership
for this purpose. CAUTION
If you have the sensation that the radar sen-
sor is d
amaged or has lost its settings, dis-
connect the Front Assist. This will avoid pos-
sible dangerous situations caused by a sys-
tem malfunction. If this occurs have it adjus-
ted.
● The sensor may become damaged or lose
its settin
gs when knocked, for example, dur-
ing a parking manoeuvre. This may compro-
mise the system's efficacy or disconnect it.
● Repairs to the radar sensor require special-
ist
knowledge and special tools. SEAT recom-
mends visiting a SEAT dealership for this pur-
pose.
● A registration plate or plate holder on the
front th
at is larger than the space for the reg-
istration plate, or a registration plate that is
curved or warped can cause the radar to mal-
function.
● Clean away the snow with a brush and the
ice pref
erably with a solvent-free de-icer
spray. 181
Technical data
Advice
Operation
Emergencies
Safety
Page 189 of 248
Towing bracket device
Trailer weight Trailer weight
The comb
ined
vehicle and trailer must be
balanced. To do so use the maximum permit-
ted towing bracket load. An insufficient
weight exerted by the trailer drawbar on the
ball joint of the towing bracket will have a
negative impact upon the response of the ve-
hicle-trailer assembly on the road.
Weight distribution
Distribute loads in the trailer so that heavy
objects are as near to the axle as possible.
Ensure that the objects do not move.
If the towing vehicle is empty and the trailer
loaded then the load distribution is incorrect.
However, if these conditions cannot be avoi-
ded, drive very slowly.
Tyre pressure values
Correct the tyre pressure in your vehicle to
“total load” ›››
page 218, Service life of
tyres.
Trailer weight
Never exceed the authorised trailer weight
under any circumstances ›››
page 223, Tech-
nical specifications .
The trailer weights listed are only applicable
for altitudes up to 1000 m above sea level.
Due to lower air density, engine power de- creases depending on the increase in alti-
tude, thi
s
also reduces climbing ability,
which requires a reduction of the weight of
the vehicle with a trailer by 10% for every
1000 m increase in altitude. The weight of
the assembly is calculated by adding the ve-
hicle weight (loaded) to the trailer weight
(loaded). Always drive with special care when
towing a trailer.
The towed load and support load information
that is displayed on the towing bracket man-
ufacturers label are only values for the verifi-
cation of the device. The correct figures for
your specific vehicle, which are usually lower
than these figures, are given in the documen-
tation of your vehicle. WARNING
● Exc eedin
g the maximum established load
per axle and the maximum towing bracket
load in addition to the maximum permitted
load or the load of the vehicle + trailer as-
sembly can cause accidents and serious inju-
ries.
● A sliding load can considerably affect the
stab
ility and safety of the vehicle + trailer as-
sembly, resulting in accidents and serious in-
juries. Driving with a trailer
Exterior mirrors
Check
whether
you can see enough of the
road behind the trailer with the standard rear
vision mirrors. If this is not the case, you
should have additional exterior mirrors fitted.
Observe the relevant statutory requirements
of the country you are in.
Headlights
Before starting a journey, also check the
headlight beam settings with the trailer
hitched up. Adjust the headlight range set-
tings if necessary ›››
page 122, Headlight
range control.
Driving speed
For your own safety do not drive faster than
the maximum permitted speed indicated on
the trailer.
At all times, immediately reduce speed if you
detect the slightest swaying movement of the
trailer. Never try to “return the trailer to a
straight position” by accelerating.
Brakes
Brake in due course! If the trailer has an over-
run brake, apply the brakes gently at first and
then, firmly. This will prevent the jerking that
can be caused by locking of trailer wheels.
Change to a lower gear in good time before »
187
Technical data
Advice
Operation
Emergencies
Safety
Page 200 of 248
Advice
Paint damage Minor damage to the paint, such as scratches
or st
one c
hips, should be touched up without
delay using paint.
Suitable touch-up brushes or sprays for the
colour of your vehicle can be purchased from
authorised SEAT dealers. Note
We recommend you leave paint damage re-
pair s
to a SEAT Authorised Service. Plastic parts
Exterior plastic parts will come clean using a
d
amp c
loth. If
this is not sufficient, plastic
parts can also be treated with special sol-
vent-free plastic cleaning detergents .
Do not use paint cleaners, polishes or wax on
plastic parts.
Windows and mirrors Remove snow and ice from windows and rear
v
i
s
ion mirrors with a plastic scraper only. To
avoid damaging the surface of the glass, the
scraper should only be pushed in one direc-
tion and not moved to and fro. The windows should also be cleaned on the
inside at
regular intervals.
Use a separate cloth or chamois to dry the
windows and rear vision mirrors.
Do not use the chamois used to polish the
bodywork to dry the windows. Waxing and
polishing residues could cause smears on
the glass and hinder visibility. CAUTION
● Never u se hot
or boiling water to remove
snow and ice from the windows. Risk of crack-
ing glass!
● Make sure you do not damage the paint-
work on the
vehicle on removing snow and
ice from the windows and rear vision mirrors.
● Do not remove the snow or ice dirty with
thick p
articles, e.g. gravel, sand or road salt,
from windows and mirrors. Risk of damage to
the glass and mirror surfaces. Headlights
Use soap and clean, hot water to clean the
fr
ont
he
adlights. CAUTION
● Never rub the he a
dlights to dry them and
do not use sharp objects to clean the plastic
glass material. These could damage the pro- tective paint and cause the headlights to
cr
ac
k.
● Do not use aggressive cleaning products or
chemica
l solvents to clean the glass. This
could damage the headlights. Caring for rubber seals
The weatherstrips on doors and windows will
rem
ain p
liable and last longer if they are oc-
casionally treated with a suitable rubber care
product. This will prevent premature ageing
and leaks. If they are properly cared for, the
seals will be less likely to freeze up in the
winter.
Door lock cylinder Special products must be used to defrost
loc
k
cylinder
s. Note
● Mak e s
ure, when washing the vehicle, that
the least amount of water possible enters the
lock cylinders.
● We recommend the use of products from
the selection of
SEAT Original Accessories to
care for the door lock cylinder. 198
Page 214 of 248
Advice
The brake fluid reservoir is located in the en-
gine c omp
ar
tment of the vehicle.
– Switch the ignition off.
– Open the bonnet ›››
page 204.
– Check the brake fluid level in the reservoir
›››
Fig. 208. It should be between the “MIN”
and “MAX” marks.
The fluid level drops slightly after a period of
time due to automatic compensation for
brake pad wear. This is quite normal.
However, if the level goes down noticeably in
a short time, or drops below the “MIN” mark,
there may be a leak in the brake system. If
the brake fluid level in the reservoir is too
low, this will be indicated by the warning
lamp illuminating on the instrument panel
››› page 157, Control lamp .WARNING
● If the fluid l ev
el has dropped below the MIN
mark, do not continue driving. Risk of acci-
dent! Go to a technical service.
● Heavy use of the brakes may cause a va-
pour lock if
the brake fluid is left in the brake
system for too long. This would seriously af-
fect the efficiency of the brakes and the safe-
ty of the vehicle. Changing the brake fluid
Brake fluid absorbs moisture. Therefore, it
gra
dual
ly absorbs moisture from the atmos-
phere. If the water content in the brake fluid
is too high, the brake system could corrode.
The water content also reduces the boiling
point of the brake fluid.
The brake fluid must comply with one of the
following standards or specifications:
● VW 50114
● FMVSS 116 DOT4 CAUTION
Brake fluid damages the vehicle paintwork. Window washer system
Top
pin
g up windscreen washer fluid Fig. 209
Engine compartment: windscreen
w a
sher r
eservoir. Read the additional information carefully
› ›
›
page 43
The container for the windscreen washer con-
tains the cleaning fluid for the windscreen or
rear window and the headlight washer sys-
tem. The container is located in the engine
compartment.
The capacity of the reservoir is approximately
3.5 litres; in vehicles with a headlight washer
system, it is approximately 5.4 litres 1)
.
Plain water on its own is not enough to clean
the glass and the headlights properly. We 1)
Valid only for certain countries. 5.4 litres for both
ver s
ions.
212
Page 238 of 248
Index
Brakes brak
e fluid
. . . . . . . . . . . . . . . . . . . . . . . . . . . . . 211
control lamp . . . . . . . . . . . . . . . . . . . . . . . . . . . 157
handbrake . . . . . . . . . . . . . . . . . . . . . . . . . . . . . 158
running in . . . . . . . . . . . . . . . . . . . . . . . . . . . . . 165
Brake servo . . . . . . . . . . . . . . . . . . . . . . . . . . . . . . 157
Braking brake assist . . . . . . . . . . . . . . . . . . . . . . . . . . . . 158
Bulb failure control lamp . . . . . . . . . . . . . . . . . . . . . . . . . . . 121
C Capacities . . . . . . . . . . . . . . . . . . . . . . . . . . . . . . . . 40
Car-care products . . . . . . . . . . . . . . . . . . . . . . . . . 195
Care of vehicle door lock cylinder . . . . . . . . . . . . . . . . . . . . . . . 198
leatherette . . . . . . . . . . . . . . . . . . . . . . . . . . . . . 199
upholstery . . . . . . . . . . . . . . . . . . . . . . . . . . . . . 199
Carrier system . . . . . . . . . . . . . . . . . . . . . . . . . . . . 144
Catalytic converter . . . . . . . . . . . . . . . . . . . . . . . . 168 malfunction . . . . . . . . . . . . . . . . . . . . . . . . . . . . 168
CCS . . . . . . . . . . . . . . . . . . . . . . . . . . . . . . . . 32, 178 see also Cruise control . . . . . . . . . . . . . . . . . . . 178
Central locking . . . . . . . . . . . . . . . . . . . . . . . . . . . 108 anti-theft alarm . . . . . . . . . . . . . . . . . . . . . . . . . 116
central locking button . . . . . . . . . . . . . . . . . . . 113
closing . . . . . . . . . . . . . . . . . . . . . . . . . . . . . . . . 112
individualised settings . . . . . . . . . . . . . . . . . . 111
keyless Access . . . . . . . . . . . . . . . . . . . . . . . . . 114
locking . . . . . . . . . . . . . . . . . . . . . . . . . . . . . . . . 112
locking manually . . . . . . . . . . . . . . . . . . . . . . . . 10
opening . . . . . . . . . . . . . . . . . . . . . . . . . . . . . . . 112
unlocking . . . . . . . . . . . . . . . . . . . . . . . . . . . . . 112
Central locking system . . . . . . . . . . . . . . . . . . . . . 111
Cetane number (diesel fuel) . . . . . . . . . . . . . . . . 203 Changing a bulb . . . . . . . . . . . . . . . . . . . . . . . . . . . 84
daytime driv ing light . . . . . . . . . . . . . . . . . . . . . 87
dipped beam . . . . . . . . . . . . . . . . . . . . . . . . . . . 86
double headlight bulbs . . . . . . . . . . . . . . . . . . . 85
fog light . . . . . . . . . . . . . . . . . . . . . . . . . . . . . . . . 88
main beam headlight . . . . . . . . . . . . . . . . . . . . . 86
side light . . . . . . . . . . . . . . . . . . . . . . . . . . . . . . . 86
turn signal . . . . . . . . . . . . . . . . . . . . . . . . . . . . . . 87
Changing a wheel . . . . . . . . . . . . . . . . . . . . . . 47, 76 subsequent work . . . . . . . . . . . . . . . . . . . . . . . . 50
Changing bulbs on the number plate . . . . . . . . . . 92 removing the bulb holder . . . . . . . . . . . . . . . . . 92
Changing bulbs on the side panel . . . . . . . . . . . . 89 fitting the rear light . . . . . . . . . . . . . . . . . . . . . . 90
removing the bulb holder . . . . . . . . . . . . . . . . . 89
removing the rear light . . . . . . . . . . . . . . . . . . . . 88
Changing lights on the side panel . . . . . . . . . . . . 88
Changing rear lights on the rear lid changing bulbs . . . . . . . . . . . . . . . . . . . . . . . . . . 91
fitting the bulb-holder . . . . . . . . . . . . . . . . . . . . 91
Changing settings CAR menu . . . . . . . . . . . . . . . . . . . . . . . . . . . . . . 21
Changing the rear lights on the rear lid removing the bulb holder . . . . . . . . . . . . . . . . . 90
Charging the battery . . . . . . . . . . . . . . . . . . . . . . . 52
Checking levels engine compartment . . . . . . . . . . . . . . . . . . . . 207
Child-proof locking . . . . . . . . . . . . . . . . . . . . . . . . 116 electric windows . . . . . . . . . . . . . . . . . . . . . . . . 119
Child seats . . . . . . . . . . . . . . . . . . . . . . . . . . . . 16, 75 categorisation into groups . . . . . . . . . . . . . . . . . 75
ISOFIX system . . . . . . . . . . . . . . . . . . . . . . . . . . . 17
safety instructions . . . . . . . . . . . . . . . . . . . . 16, 74
securing with the seat belt . . . . . . . . . . . . . . . . 16Top Tether system . . . . . . . . . . . . . . . . . . . . . . . . 17
Cigarette lighter . . . . . . . . . . . . . . . . . . . . . . . . . . 137 Cleaning . . . . . . . . . . . . . . . . . . . . . . . . . . . . . . . . 195
chromed p arts . . . . . . . . . . . . . . . . . . . . . . . . . 197
headlights . . . . . . . . . . . . . . . . . . . . . . . . . . . . . 198
leatherette . . . . . . . . . . . . . . . . . . . . . . . . . . . . . 199
natural leather . . . . . . . . . . . . . . . . . . . . . . . . . 200
plastic parts . . . . . . . . . . . . . . . . . . . . . . . . . . . 198
upholstery . . . . . . . . . . . . . . . . . . . . . . . . 199, 200
washing the vehicle . . . . . . . . . . . . . . . . . . . . . 196
wheels . . . . . . . . . . . . . . . . . . . . . . . . . . . . . . . . 199
windows . . . . . . . . . . . . . . . . . . . . . . . . . . . . . . 198
Cleaning and thawing windows . . . . . . . . . . . . . 198
Climatronic . . . . . . . . . . . . . . . . . . . . . . . . . . . . . . . 37 adjusting the temperature . . . . . . . . . . . . . . . . 151
air recirculation . . . . . . . . . . . . . . . . . . . . . . . . . 152automatic mode . . . . . . . . . . . . . . . . . . . . . . . . 151
blower selection . . . . . . . . . . . . . . . . . . . . . . . . 152
windscreen defrost . . . . . . . . . . . . . . . . . . . . . . 152
Close . . . . . . . . . . . . . . . . . . . . . . . . . . . . . . . . . . . 108
Closing central locking . . . . . . . . . . . . . . . . . . . . . . . . . 112
vehicle with Keyless Access . . . . . . . . . . . . . . . 114
windows . . . . . . . . . . . . . . . . . . . . . . . . . . . . . . 119
Coat hooks . . . . . . . . . . . . . . . . . . . . . . . . . . . . . . 139
Coming Home and Leaving Home . . . . . . . . . . . . 125
Coming Home and Leaving Home Function . . . . 125
Compartments . . . . . . . . . . . . . . . . . . . . . . . . . . . 135
Control and warning lamps . . . . . . . . . . . . . 33, 100 ABS . . . . . . . . . . . . . . . . . . . . . . . . . . . . . . . . . . 159
airbags . . . . . . . . . . . . . . . . . . . . . . . . . . . . . . . . 69
alternator . . . . . . . . . . . . . . . . . . . . . . . . . . . . . 214
ASR . . . . . . . . . . . . . . . . . . . . . . . . . . . . . . . . . . 159
audible signal . . . . . . . . . . . . . . . . . . . . . . . . . . 100
brakes . . . . . . . . . . . . . . . . . . . . . . . . . . . . . . . . 157
break recommendation . . . . . . . . . . . . . . . . . . 185
coolant temperature . . . . . . . . . . . . . . . . . 99, 210
deactivating the airbag . . . . . . . . . . . . . . . . . . . 14
236
Page 239 of 248
Index
depress the brake . . . . . . . . . . . . . . . . . . . . . . . 179
die sel
p
articulate filter . . . . . . . . . . . . . . . . . . . 168
disabling airbag . . . . . . . . . . . . . . . . . . . . . . . . . 72
emission control . . . . . . . . . . . . . . . . . . . . . . . . 169
engine management . . . . . . . . . . . . . . . . . . . . 169
engine oil . . . . . . . . . . . . . . . . . . . . . . . . . . . . . 208
engine pre-heating/fault system . . . . . . . . . . . 169
ESC . . . . . . . . . . . . . . . . . . . . . . . . . . . . . . . . . . 158
fuel level . . . . . . . . . . . . . . . . . . . . . . . . . . . . . . 100
gearbox malfunctions . . . . . . . . . . . . . . . . . . . 164
hand brake . . . . . . . . . . . . . . . . . . . . . . . . . . . . 158
instrument panel . . . . . . . . . . . . . . . . . . . . . 33, 35
instrument panel display . . . . . . . . . . . . . . . . . . 34
lights . . . . . . . . . . . . . . . . . . . . . . . . . . . . . . . . . 121
power steering . . . . . . . . . . . . . . . . . . . . . . . . . 153
seat belt . . . . . . . . . . . . . . . . . . . . . . . . . . . . . . . 62
Start-Stop . . . . . . . . . . . . . . . . . . . . . . . . . . . . . 183
tyre pressure . . . . . . . . . . . . . . . . . . . . . . . . . . . 221
Controls and displays general instrument panel . . . . . . . . . . . . . . . . . . 95
Controls for the windows . . . . . . . . . . . . . . . 11, 119
Controls on the steering wheel without voice control . . . . . . . . . . . . . . . . . . . . 106
with voice control . . . . . . . . . . . . . . . . . . . . . . . 104
Cooling coolant temperature gauge . . . . . . . . . . . . . . . . 99
Cooling system checking coolant . . . . . . . . . . . . . . . . . . . . . . . 210
topping up coolant . . . . . . . . . . . . . . . . . . . . . . 210
Correct sitting position . . . . . . . . . . . . . . . . . . . . . 57 driver . . . . . . . . . . . . . . . . . . . . . . . . . . . . . . . . . . 57
front passenger . . . . . . . . . . . . . . . . . . . . . . . . . 58
rear seat passengers . . . . . . . . . . . . . . . . . . . . . 59
Cruise control . . . . . . . . . . . . . . . . . . . . . . . . 32, 178 adjusting the stored speed . . . . . . . . . . . . . . . 179
setting the speed . . . . . . . . . . . . . . . . . . . . . . . 178 temporary deactivation . . . . . . . . . . . . . . . . . . 179
turning off
the cruise control system . . . . . . . 179
D Damage to the vehicle . . . . . . . . . . . . . . . . . . . . . 170
Dash panel . . . . . . . . . . . . . . . . . . . . . . . . . . . . . . . 33
Data label . . . . . . . . . . . . . . . . . . . . . . . . . . . . . . . 223
Deactivating the front passenger front airbag . . . 14
Deactivation of front airbag . . . . . . . . . . . . . . . 69, 72
Defective bulbs changing a bulb . . . . . . . . . . . . . . . . . . . . . . . . . 84
Defrosting rear window . . . . . . . . . . . . . . . . . . . . 127
Diesel diesel particulate filter . . . . . . . . . . . . . . . . . . . 168
engine oil . . . . . . . . . . . . . . . . . . . . . . . . . . . . . 207
preheating . . . . . . . . . . . . . . . . . . . . . . . . . . . . 152
refuelling . . . . . . . . . . . . . . . . . . . . . . . . . . . . . . 203
Diesel particulate filter . . . . . . . . . . . . . . . . . . . . 168 control lamp . . . . . . . . . . . . . . . . . . . . . . . . . . . 168
malfunction . . . . . . . . . . . . . . . . . . . . . . . . . . . . 168
Digital clock . . . . . . . . . . . . . . . . . . . . . . . . . . . . . . 98
Dimensions . . . . . . . . . . . . . . . . . . . . . . . . . . . . . . 233
Direction of rotation tyres . . . . . . . . . . . . . . . . . . . . . . . . . . . . . . . . . . . 50
Display . . . . . . . . . . . . . . . . . . . . . . . . . . . . . . . 96, 97
Disposal belt tensioners . . . . . . . . . . . . . . . . . . . . . . . . . . 67
Door cylinder . . . . . . . . . . . . . . . . . . . . . . . . . . . . . . 9
Door handle . . . . . . . . . . . . . . . . . . . . . . . . . . . . . . . 9
Door lock . . . . . . . . . . . . . . . . . . . . . . . . . . . . . . . . . . 9
Doors child-proof locking . . . . . . . . . . . . . . . . . . . . . . 116
opening and closing . . . . . . . . . . . . . . . . . . . . . . 9
Drink holder centre console . . . . . . . . . . . . . . . . . . . . . . . . . 136
rear seat armrest . . . . . . . . . . . . . . . . . . . . . . . 137 Driver
see Correct sitting position . . . . . . . . . 57, 58, 59
Driver information system engine oil temperature display . . . . . . . . . . . . . 29
operation through the windscreen wiper lever . 23
Driving economical . . . . . . . . . . . . . . . . . . . . . . . . . . . . 166
safe . . . . . . . . . . . . . . . . . . . . . . . . . . . . . . . . . . . 56
Driving abroad headlights . . . . . . . . . . . . . . . . . . . . . . . . . . . . . 126
Driving data data summary . . . . . . . . . . . . . . . . . . . . . . . . . . . 26
memory . . . . . . . . . . . . . . . . . . . . . . . . . . . . . . . . 25
Driving through water . . . . . . . . . . . . . . . . . . . . . 169
Driving with a trailer . . . . . . . . . . . . . . . . . . 186, 225
Dynamic headlight range control . . . . . . . . . . . . 122
E
E10 see Ethanol (fuel) . . . . . . . . . . . . . . . . . . . . . . . 202
Easy Connect . . . . . . . . . . . . . . . . . . . . . . . . 21, 101
EDL see Electronic differential lock . . . . . . . . 158, 160
Efficiency program saving tips . . . . . . . . . . . . . . . . . . . . . . . . . . . . . . 30
Efficiency Program additional consumers . . . . . . . . . . . . . . . . . . . . 30
Electric windows . . . . . . . . . . . . . . . . . . . . . . 11, 119
Electronic differential lock . . . . . . . . . . . . . 158, 160
Electronic immobiliser . . . . . . . . . . . . . . . . . . . . . . . 9
Electronic Stability Control (ESC) . . . . . . . . . . . . 158
Emergencies . . . . . . . . . . . . . . . . . . . . . . . . . . . . . . 76 automatic gearbox emergency program . . . . . 164
bulbs . . . . . . . . . . . . . . . . . . . . . . . . . . . . . . . . . . 45
changing a wheel . . . . . . . . . . . . . . . . . . . . . 47, 76
emergency towing of the vehicle . . . . . . . . . . . . 51
hazard warning lights . . . . . . . . . . . . . . . . . . . 125
237