display SKODA FABIA 2005 1.G / 6Y Sat Compass Navigation System Manual
[x] Cancel search | Manufacturer: SKODA, Model Year: 2005, Model line: FABIA, Model: SKODA FABIA 2005 1.G / 6YPages: 71, PDF Size: 2.81 MB
Page 3 of 71
2RADIO NAVIGATION SYSTEM
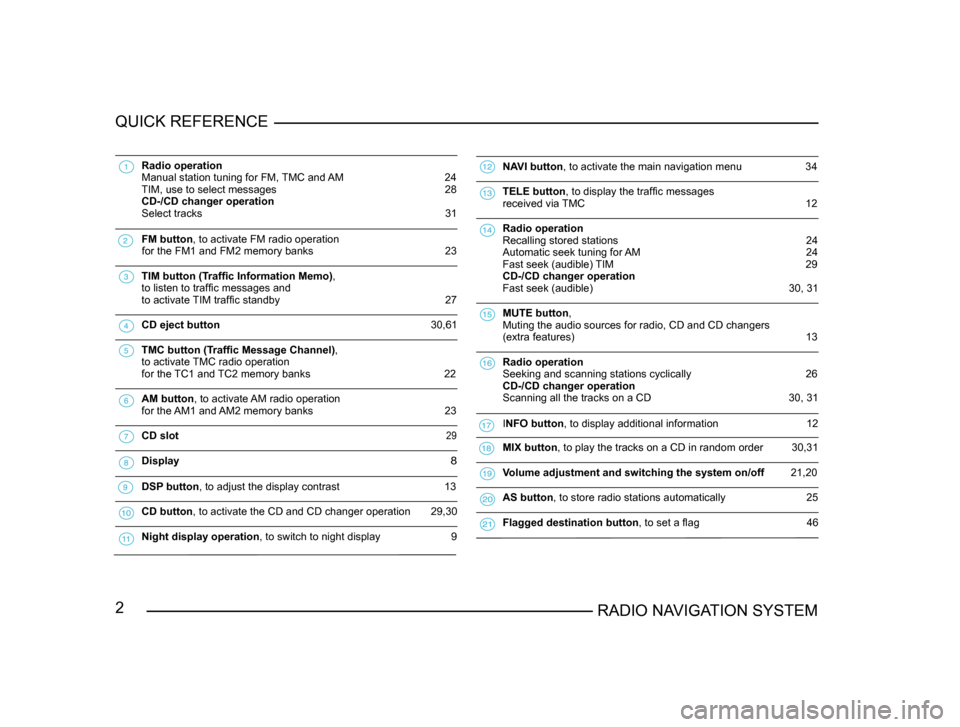
QUICK REFERENCE
Radio operation
Manual station tuning for FM, TMC and AM 24
TIM, use to select messages 28
CD-/CD changer operation
Select tracks
31
FM button , to activate FM radio operation
for the FM1 and FM2 memory banks 23
TIM button (Traffic Information Memo),
to listen to traffic messages and
to activate
TIM traffic standby 27
CD eject button 30,61
TMC button (Traffic Message Channel),
to activate
TMC radio operation
for the TC1 and TC2 memory banks
22
AM button , to activate AM radio operation
for the AM1 and AM2 memory banks 23
CD slot 29
Display 8
DSP button , to adjust the display contrast 13
CD button, to activate the CD and CD changer operation 29,30
Night display operation , to switch to night display 9
NAVI button , to activate the main navigation menu 34
TELE button , to display the traffic messages
received via TMC 12
Radio operation
Recalling stored stations 24
Automatic seek tuning for AM 24
Fast seek (audible) TIM 29
CD-/CD changer operation
Fast seek (audible)
30, 31
MUTE button ,
Muting the audio sources for radio, CD and CD changers
(extra features)
13
Radio operation
Seeking and scanning stations cyclically
26
CD-/CD changer operation
Scanning all the tracks on a CD
30, 31
INFO button , to display additional information 12
MIX button , to play the tracks on a CD in random order 30,31
Volume adjustment and switching the system on/off 21,20
AS button , to store radio stations automatically 25
Flagged destination button , to set a flag 46
Page 5 of 71
4RADIO NAVIGATION SYSTEM
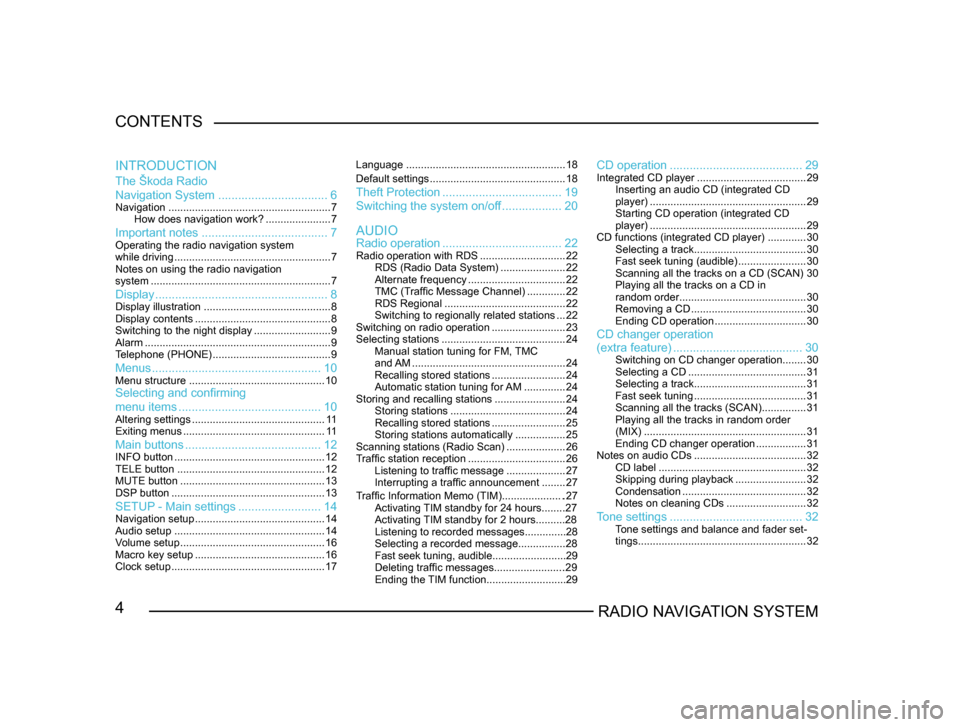
CONTENTS
The Škoda Radio
Navigation System
................................. 6
Navigation....................................................... 7
How does navigation work? ......................7
Important notes ...................................... 7Operating the radio navigation system
while driving..................................................... 7
Notes on using the radio navigation
system ............................................................. 7
Display.................................................... 8Display illustration........................................... 8
Display contents .............................................. 8
Switching to the night display ..........................9
Alarm ............................................................... 9
T
elephone (PHONE) ........................................ 9
Menus................................................... 10Menu structure.............................................. 10Selecting and confirming
menu items........................................... 10
Altering settings............................................. 1 1
Exiting menus ................................................ 1 1
Main buttons......................................... 12INFO button................................................... 12
TELE button .................................................. 12
MUTE button ................................................. 13
DSP
button .................................................... 13
SETUP - Main settings.........................14Navigation setup ............................................ 14
Audio setup ................................................... 14
V
olume setup ................................................. 16
Macro key setup ............................................ 16
Clock setup .................................................... 17Language
...................................................... 18
Default settings .............................................. 18
Theft Protection.................................... 19
Switching the system on/of
f .................. 20
Radio operation .................................... 22
Radio operation with RDS .............................22
RDS (Radio Data System) ......................22
Alternate frequency ................................. 22
TMC (T
raffic Message Channel) .............22
RDS Regional ......................................... 22
Switching to regionally related sta
tions ...22
Switching on radio operation .........................23
Selecting stations .......................................... 24
Manual station tuning for FM,
TMC
and AM .................................................... 24
Recalling stored stations .........................24
Automatic station tuning for
AM .............. 24
Storing and recalling stations ........................24
Storing stations ....................................... 24
Recalling stored stations .........................25
Storing stations automatically .................25
Scanning stations (Radio Scan) ....................26
T
raffic station reception .................................26
Listening to traffic message ....................27
Interrupting a traffic announcement ........27
AUDIO
INTRODUCTION
CD operation
........................................ 29Integrated CD player.....................................29
Inserting an audio CD (integrated CD
player) ..................................................... 29
Starting CD operation (integrated CD
player) ..................................................... 29
CD functions (integrated CD player) .............30
Selecting a track ...................................... 30
Fast seek tuning (audible) .......................30
Scanning all the tracks on a CD (SCAN) 30
Playing all the tracks on a CD in
random order ........................................... 30
Removing a CD ....................................... 30
Ending CD operation ...............................30
CD changer operation
Traffic Information Memo (TIM).....................27
Activating TIM standby for 24 hours........27
Activating TIM standby for 2 hours..........28
Listening to recorded messages..............28
Selecting a recorded message...............
.28
Fast seek tuning, audible.........................29
Deleting traffic messages.......................
.29
Ending the TIM function...........................29
(extra feature) ....................................... 30Switching on CD changer operation ........30
Selecting a CD ........................................ 31
Selecting a track ...................................... 31
Fast seek tuning ...................................... 31
Scanning all the tracks (SCAN) ...............31
Playing all the tracks in random order
(MIX) ....................................................... 31
Ending CD changer operation .................31
Notes on audio CDs ...................................... 32
CD label .................................................. 32
Skipping during playback ........................32
Condensation .......................................... 32
Notes on cleaning CDs ...........................32
Tone settings........................................ 32Tone settings and balance and fader set -
tings ......................................................... 32
Page 6 of 71
5RADIO NAVIGATION SYSTEMCONTENTS
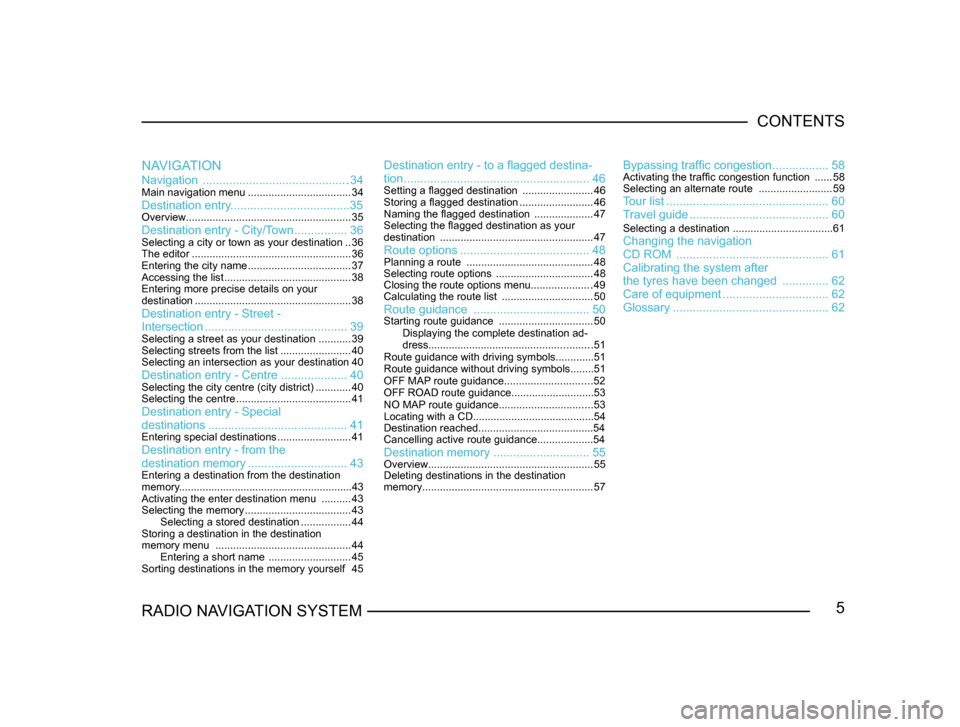
NAVIGATION
Navigation ............................................34Main navigation menu
...................................34Destination entry....................................35Overview........................................................ 35Destination entry - City/Town................36Selecting a city or town as your destination ..36
The editor ...................................................... 36
Entering the city name ...................................37
Accessing the list ........................................... 38
Entering more precise details on your
destination ..................................................... 38
Destination entry - Street -
Intersection........................................... 39
Selecting a street as your destination ...........39
Selecting streets from the list ........................40
Selecting an intersection as your destination 40
Destination entry - Centre....................40Selecting the city centre (city district) ............40
Selecting the centre ....................................... 41
Destination entry - Special
destinations.......................................... 41
Entering special destinations .........................41Destination entry - from the
destination memory ..............................43
Entering a destination from the destination
memory...........................................................43
Activating the enter destination menu ..........43
Selecting the memory .................................... 43
Selecting a stored destination .................44
Storing a destination in the destination
memory menu .............................................. 44
Entering a short name ............................45
Sorting destinations in the memory yourself 45
Destination entry - to a flagged destina-
tion ........................................................ 46
Setting a flagged destination ........................46
Storing a flagged destination .........................46
Naming the fl
agged destination ....................47
Selecting the fl
agged destination as your
destination .................................................... 47
Route options....................................... 48Planning a route ........................................... 48
Selecting route options .................................48
Closing the route options menu....................
.49
Calculating the route list ...............................50
Route guidance ................................... 50Starting route guidance ................................50
Displaying the complete destination ad -
d
ress........................................................51
Route guidance with driving symbols.............51
Route guidance without driving symbols........51
OFF MAP route guidance..........................
....52
OFF ROAD route guidance............................53
NO MAP route guidance...........................
.....53
Locating with a CD.........................................54
Destination reached.......................................54
Cancelling active route guidance...................54
Destination memory .............................55Overview........................................................ 55
Deleting destinations in the des
tination
memory .......................................................... 57
Bypassing traffic congestion.................58Activating the traffic congestion function ......58
Selecting an alternate route .........................59
Tour list................................................. 60
T
ravel guide .......................................... 60
Selecting a destination ..................................61Changing the navigation
CD ROM .............................................. 61
Calibrating the system after
the tyres have been changed ..............62
Care of equipment ................................ 62
Glossary ............................................... 62
Page 8 of 71
7RADIO NAVIGATION SYSTEMINTRODUCTION
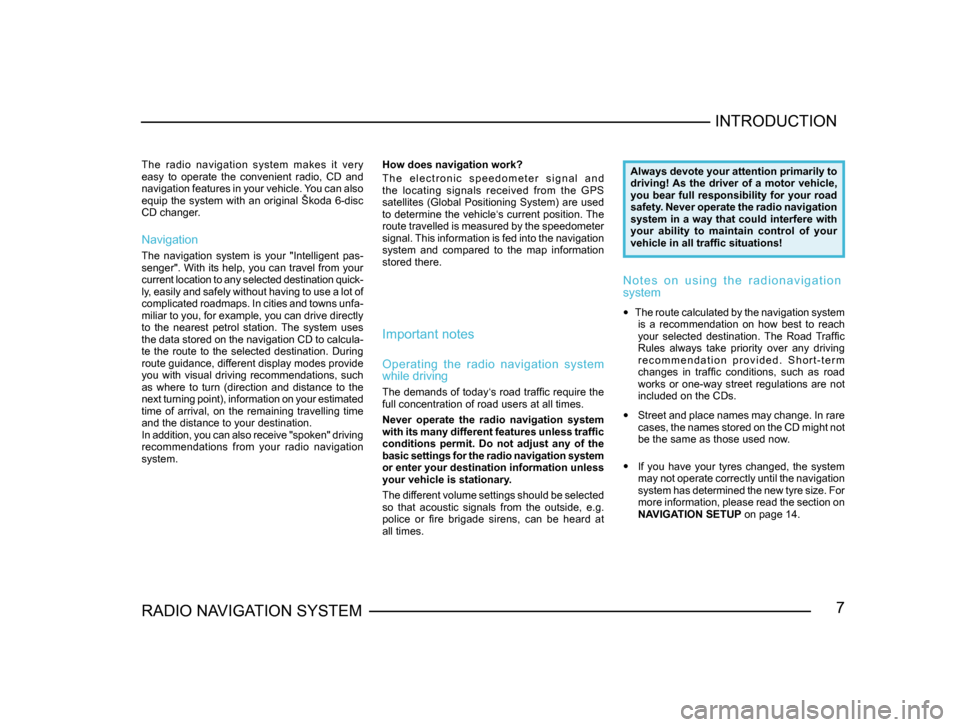
The radio navigation system makes it very
easy to operate the convenient radio, CD and
navigation features in your vehicle. You can also
equip the system with an original Škoda 6-disc
CD changer.
Navigation
The navigation system is your "Intelligent pas
-
senger". With its help, you can travel from your
current location to any selected destination quick -
ly, easily and safely without having to use a lot of
complicated roadmaps. In cities and towns unfa -
miliar to you, for example, you can drive directly
to the nearest petrol station. The system uses
the data stored on the navigation CD to calcula -
te the route to the selected destination. During
route guidance, different display modes provide
you with visual driving recommendations, such
as where to turn (direction and distance to the
next turning point), information on your estimated
time of arrival, on the remaining travelling time
and the distance to your destination.
In addition, you can also receive "spoken" driving
recommendations from your radio navigation
system. How does navigation work?
T h e e l e c t r o n i c s p e e d o m e t e r s i g n a l a n d
the locating signals received from the GPS
satellites (Global Positioning System) are used
to determine the vehicle‘s current position. The
route travelled is measured by the speedometer
signal. This information is fed into the navigation
system and compared to the map information
stored there.
Important notes
Operating the radio navigation system
while driving
The demands of today‘s road traffic require the
full concentration of road users at all times.
Never operate the radio navigation system
with its many different features unless traffic
conditions permit. Do not adjust any of the
basic settings for the radio navigation system
or enter your destination information unless
your vehicle is stationary.
The different volume settings should be selected
so that acoustic signals from the outside, e.g.
police or fire brigade sirens, can be heard at
all times.
Always devote your attention primarily to
driving! As the driver of a motor vehicle,
you bear full responsibility for your road
safety. Never operate the radio navigation
system in a way that could interfere with
your ability to maintain control of your
vehicle in all traffic situations!
N o t e s o n u s i n g t h e r a d i o n a v i g a t i o n
system
• The route calculated by the navigation system
is a recommendation on how best to reach
your selected destination. The Road Traffic
Rules always take priority over any driving
r e c o m m e n d a t i o n p r o v i d e d . S h o r t - t e r m
changes in traffic conditions, such as road
works or one-way street regulations are not
included on the CDs.
• Street and place names may change. In rare
cases, the names stored on the CD might not
be the same as those used now.
• If you have your tyres changed, the system
may not operate correctly until the navigation
system has determined the new tyre size. For
more information, please read the section on
NAVIGATION SETUP on page 14.
Page 9 of 71
8RADIO NAVIGATION SYSTEM
INTRODUCTION
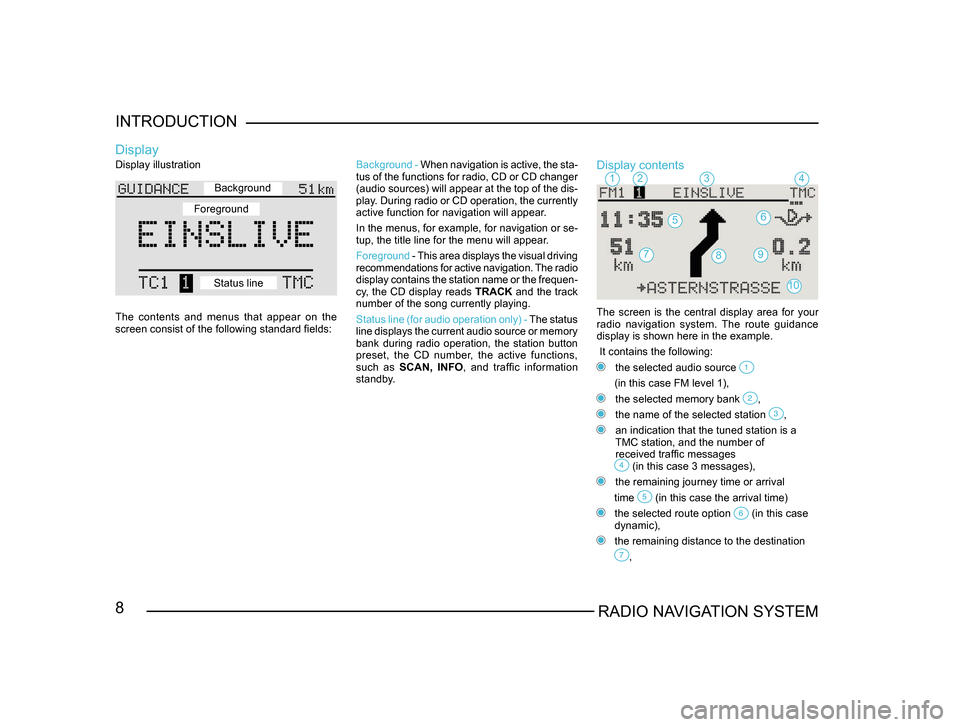
Display illustration
The contents and menus that appear on the
screen consist of the following standard fields:
Display
Background -
When navigation is active, the sta -
tus of the functions for radio, CD or CD changer
(audio sources) will appear at the top of the dis-
play. During radio or CD operation, the currently
active function for navigation will appear.
In the menus, for example, for navigation or se -
tup, the title line for the menu will appear.
Foreground - This area displays the visual driving
recommendations for active navigation. The radio
display contains the station name or the frequen -
cy, the CD display reads TRACK and the track
number of the song currently playing.
Status line (for audio operation only) - The status
line displays the current audio source or memory
bank during radio operation, the station button
preset, the CD number, the active functions,
such as SCAN, INFO , and traffic information
standby.Display contents
The screen is the central display area for your radio navigation system. The route guidance
display is shown here in the example.
It contains the following:
the selected audio source
(in this case FM level 1),
the selected memory bank ,
the name of the selected station ,
an indication that the tuned station is a
TMC station, and the number of
received traffic messages
(in this case 3 messages),
the remaining journey time or arrival
time
(in this case the arrival time)
the selected route option (in this case
dynamic),
the remaining distance to the destination
,
1234
56
79
10
8
Background
Foreground
Status line
Page 10 of 71
9RADIO NAVIGATION SYSTEMINTRODUCTION
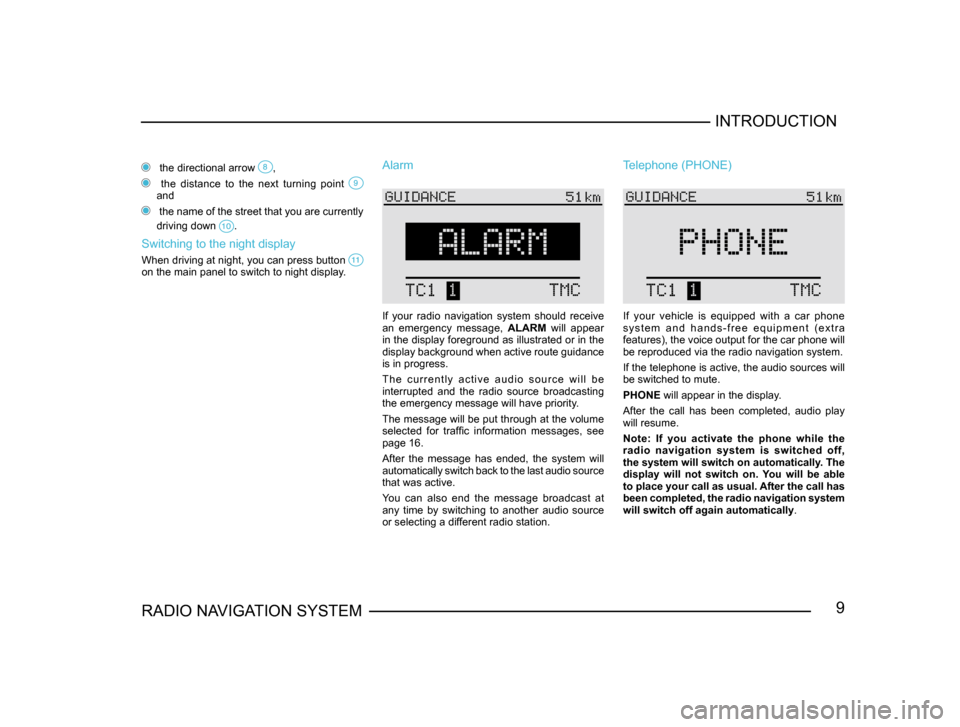
the directional arrow ,
the distance to the next turning point and
the name of the street that you are currently
driving down
.
Switching to the night display
When driving at night, you can press button on the main panel to switch to night display.
Alarm
If your radio navigation system should receive
an emergency message,
ALARM will appear
in the display foreground as illustrated or in the
display background when active route guidance
is in progress.
T h e c u r r e n t l y a c t i v e a u d i o s o u r c e w i l l b e
interrupted and the radio source broadcasting
the emergency message will have priority.
The message will be put through at the volume
selected for traffic information messages, see
page 16.
After the message has ended, the system will
automatically switch back to the last audio source
that was active.
You can also end the message broadcast at
any time by switching to another audio source
or selecting a different radio station.
Telephone (PHONE)
If your vehicle is equipped with a car phone
s y s t e m a n d h a n d s - f r e e e q u i p m e n t ( e x t r a
features), the voice output for the car phone will
be reproduced via the radio navigation system.
If the telephone is active, the audio sources will
be switched to mute.
PHONE will appear in the display.
After the call has been completed, audio play
will resume.
Note: If you activate the phone while the
radio navigation system is switched off,
the system will switch on automatically. The
display will not switch on. You will be able
to place your call as usual. After the call has
been completed, the radio navigation system
will switch off again automatically .
Page 11 of 71
10RADIO NAVIGATION SYSTEM
INTRODUCTION
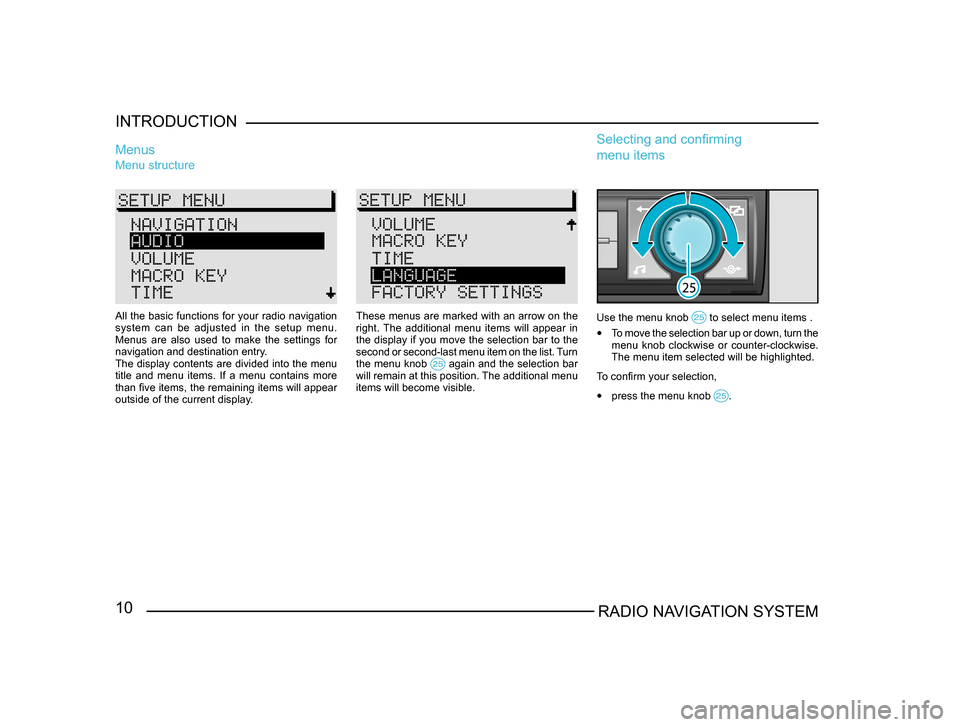
Menu structure
Menus
These menus are marked with an arrow on the
right. The additional menu items will appear in
the display if you move the selection bar to the
second or second-last menu item on the list. Turn
the menu knob
again and the selection bar will remain at this position. The additional menu
items will become visible.
Use the menu knob to select menu items .
•
To move the selection bar up or down, turn the
menu knob clockwise or counter-clockwise.
The menu item selected will be highlighted.
To confirm your selection,
• press the menu knob .
Selecting and confirming
menu items
All the basic functions for your radio navigation
system can be adjusted in the setup menu.
Menus are also used to make the settings for
navigation and destination entry.
The display contents are divided into the menu
title and menu items. If a menu contains more
than five items, the remaining items will appear
outside of the current display.
Page 13 of 71
12RADIO NAVIGATION SYSTEM
INTRODUCTION
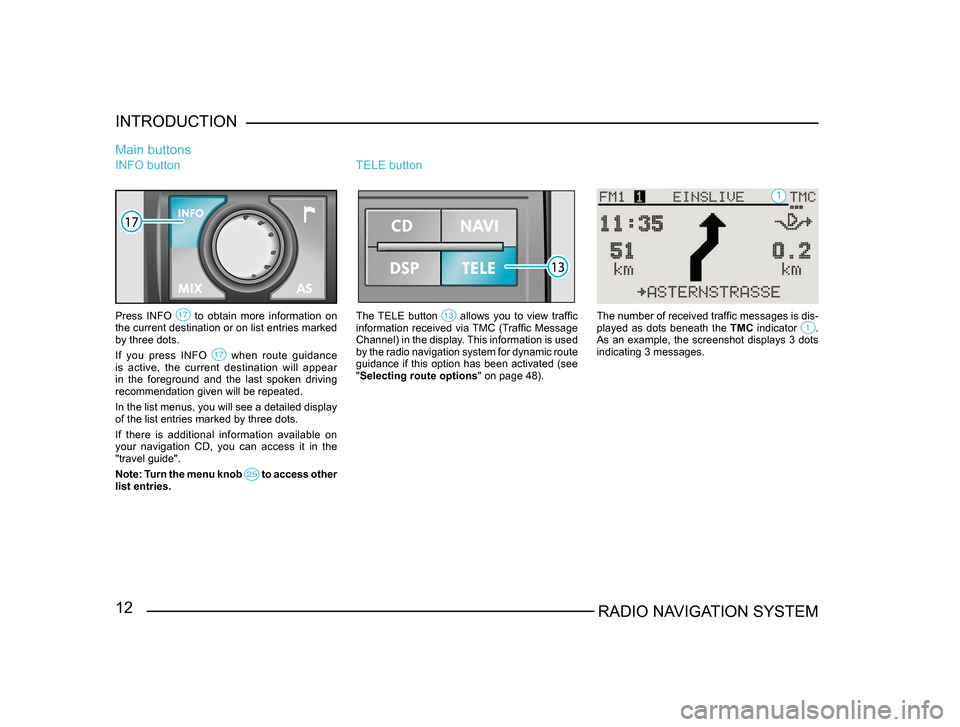
INFO button
Press INFO to obtain more information on the current destination or on list entries marked
by three dots.
If you press INFO
when route guidance is active, the current destination will appear
in the foreground and the last spoken driving
recommendation given will be repeated.
In the list menus, you will see a detailed display
of the list entries marked by three dots.
If there is additional information available on
your navigation CD, you can access it in the
"travel guide".
Note: Turn the menu knob
to access other list entries.
Main buttons
TELE button
The TELE button allows you to view traffic information received via TMC (Traffic Message
Channel) in the display. This information is used
by the radio navigation system for dynamic route
guidance if this option has been activated (see
"Selecting route options
" on page 48). The number of received traffic messages is dis -
played as dots beneath the TMC indicator . As an example, the screenshot displays 3 dots
indicating 3 messages.
1
Page 14 of 71
13RADIO NAVIGATION SYSTEMINTRODUCTION
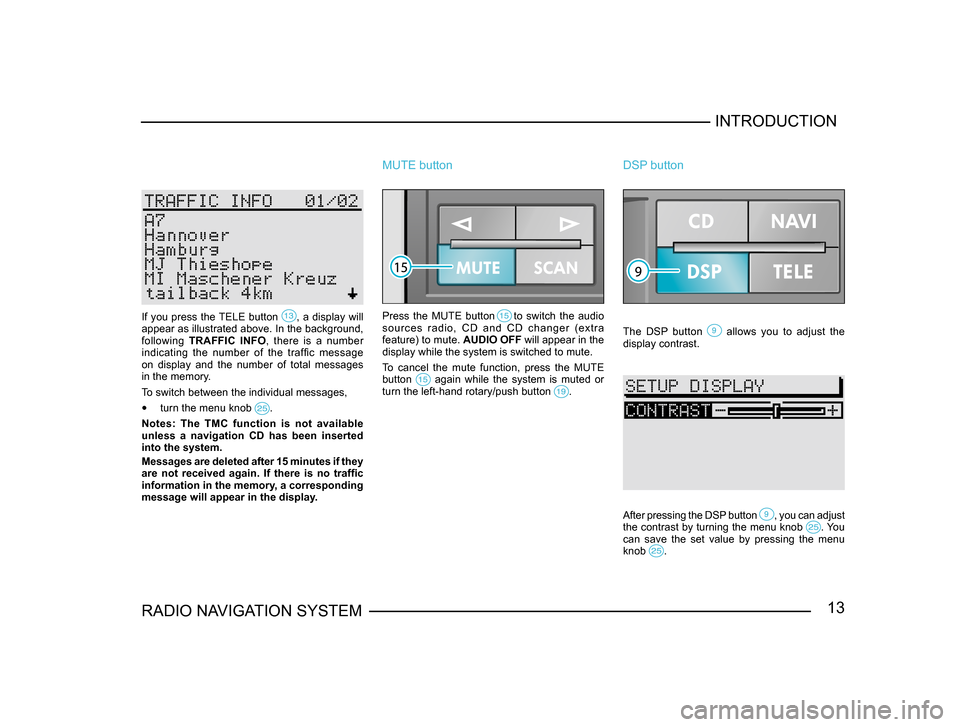
If you press the TELE button , a display will appear as illustrated above. In the background,
following
TRAFFIC INFO , there is a number
indicating the number of the traffic message
on display and the number of total messages
in the memory.
To switch between the individual messages,
• turn the menu knob .
Notes: The TMC function is not available
unless a navigation CD has been inserted
into the system.
Messages are deleted after 15 minutes if they
are not received again. If there is no traffic
information in the memory, a corresponding
message will appear in the display.
MUTE button
Press the MUTE button to switch the audio
sources radio, CD and CD changer (extra
feature) to mute. AUDIO OFF will appear in the
display while the system is switched to mute.
To cancel the mute function, press the MUTE
button
again while the system is muted or turn the left-hand rotary/push button .
DSP button
The DSP button allows you to adjust the display contrast.
After pressing the DSP button , you can adjust the contrast by turning the menu knob . You can save the set value by pressing the menu
knob .
Page 15 of 71
14RADIO NAVIGATION SYSTEM
INTRODUCTION
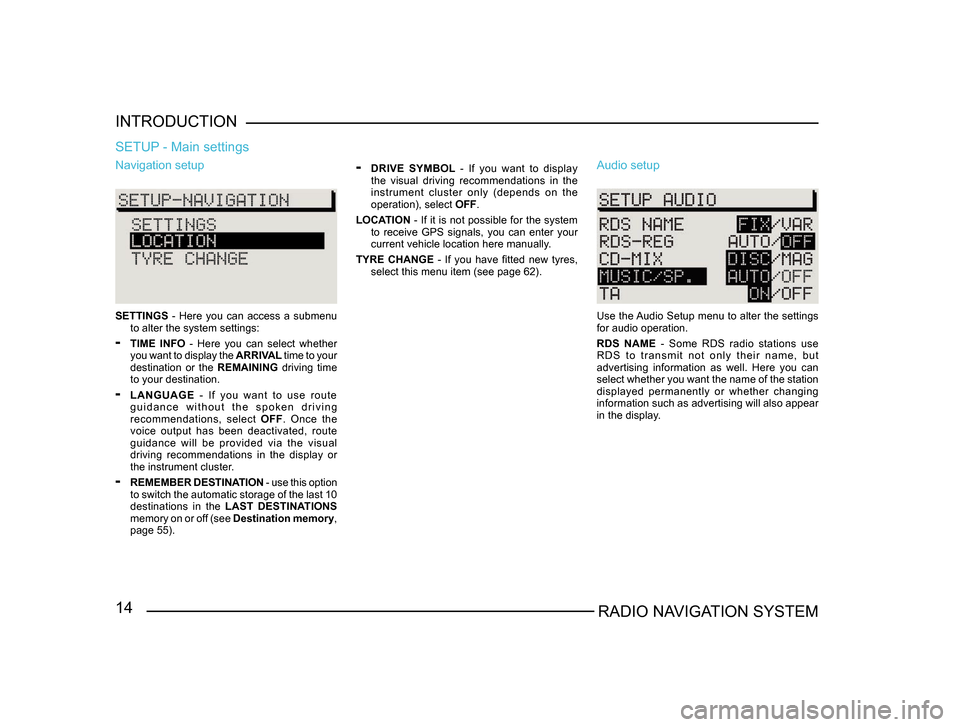
Navigation setup
SETTINGS
- Here you can access a submenu
to alter the system settings:
- TIME INFO - Here you can select whether
you want to display the ARRIVAL time to your
destination or the REMAINING driving time
to your destination.
- LANGUAGE - If you want to use route
g u i d a n c e w i t h o u t t h e s p o k e n d r i v i n g
recommendations, select OFF. Once the
voice output has been deactivated, route
guidance will be provided via the visual
driving recommendations in the display or
the instrument cluster.
- REMEMBER DESTINATION - use this option
to switch the automatic storage of the last 10
destinations in the LAST DESTINATIONS
memory on or off (see Destination memory,
page 55).
SETUP - Main settings
- DRIVE SYMBOL - If you want to display
the visual driving recommendations in the
instrument cluster only (depends on the
operation), select OFF.
LOCATION - If it is not possible for the system
to receive GPS signals, you can enter your
current vehicle location here manually.
TYRE CHANGE - If you have fitted new tyres, select this menu item (see page 62). Audio setup
Use the Audio Setup menu to alter the settings
for audio operation.
RDS NAME - Some RDS radio stations use
R D S t o t r a n s m i t n o t o n l y t h e i r n a m e , b u t
advertising information as well. Here you can
select whether you want the name of the station
displayed permanently or whether changing
information such as advertising will also appear
in the display.