light switch SKODA FABIA 2008 2.G / 5J Owner's Guide
[x] Cancel search | Manufacturer: SKODA, Model Year: 2008, Model line: FABIA, Model: SKODA FABIA 2008 2.G / 5JPages: 252, PDF Size: 40.88 MB
Page 29 of 252
Instruments and Indicator/Warning Lights28
Brake system
The warning light flashes or comes on if the brake fluid level is too low, if there is a fault in the ABS or if the handbrake is applied.
If the warning light flashes (handbrake is not applied), stop and check the brake fluid level ⇒.
The following text will be displayed in the information display*:
STOP BRAKE FLUID SERVICE MANUAL
If there is a fault in the ABS which also influences the function of the normal brake system (e.g. distribution of brake pressure), the ABS warning light comes on together with the brake system warning light . Be aware that not only the ABS but also another part of th brake system is defective ⇒.
3 peeps sound as an additional warning signal.
One should get used to high pedal forces, long braking distances and long free play of the brake pedal when driving to the next specialist garage.
The following text will be displayed in the information display*:
STOP BRAKE FAULT OWNER'S MANUAL!
For further information on the brake system ⇒page 154, “Brakes”.
Handbrake applied
The warning light also comes on if the handbrake is applied. An audible warning is also given if you drive the vehicle for at least 3 seconds at a speed of more than 6 km/h.
The following text will be displayed in the information display*:
HANDBRAKE ON
WARNING
•Pay attention to the following instructions ⇒page 181, “Working in the engine compartment” before checking the brake fluid level and opening the bonnet.
•If the brake system warning light does not go out a few seconds after switching on the ignition or comes on when driving, stop immediately and check the brake fluid in the reservoir ⇒page 188, “Brake fluid”. If the fluid level has dropped below the MIN marking, do not drive any further - risk of accident! Contact a Škoda dealer to obtain professional assistance.
Airbag system
Monitoring the airbag system
The warning light comes on for a few seconds when the ignition is switched on.
There is a fault in the system if the warning light does not go out or comes on or flashes while driving ⇒. This also applies if the warning light does not come on after the ignition is switched on.
The following text will be displayed in the information display*:
AIRBAG FAULT
The functionality of the airbag system is also monitored electronically, when one airbag has been switched off
The passenger front airbag and also possibly the passenger side airbag which have been switched off using the vehicle system tester:
•The warning light lights up for 3 seconds after switching on the ignition and then flashes for 12 seconds afterwards in 2 second intervals.
The passenger front airbag and also possibly the passenger side airbag which have been switched off using the switch (for switching off airbags)* in the end face of the dash panel on the front passenger side:
•The warning light comes on for 3 seconds after the ignition has been switched on.
•Switching off airbags is indicated in the middle of the dash panel by the lighting up of the indicator light (airbag switched off) ⇒page 140.
WARNING (continued)
NKO A05F 20.book Page 28 Wednesday, April 2, 2008 1:02 PM
Page 30 of 252
Instruments and Indicator/Warning Lights29
Using the systemSafetyDriving TipsGeneral MaintenanceBreakdown assistanceTechnical Data
WARNING
Have the airbag system checked immediately by a specialist garage if a fault exists. Otherwise, there is a risk of the airbag not being activated in the event of an accident.
Note
Further information about switching off airbags ⇒page 139, “Deactivating an airbag”.
Diesel particle filter* (diesel engine)
If the warning light comes on, this means that soot has accumulated in the diesel particle filter because of the frequent short distances.
In order to clean the diesel particle filter, the vehicle should be driven at an even speed of at least 60 km/h at engine speeds of 1 800 - 2 500 rpm for 15 minutes with the 4th or 5th gear engaged (automatic gearbox: position S) when the traffic situa-tion permits it.
Always pay attention to the valid speed limits ⇒.
The warning light goes out after the successful cleaning of the diesel particle filter.
If the filter is not properly cleaned, the warning light does not go out and the warning light begins to flash. ENGINE FAULT WORKSHOP! is shown in the information display*. Afterwards the engine control unit shifts the engine into the emergency mode, which only has a reduced power output. After switching the igni-tion off and on again the warning light comes on.
Have the vehicle inspected without delay by your specialist garage.
WARNING
•If you do not pay attention to the warning light coming on and the corre-sponding descriptions and warning notes, this may result in injuries or major vehicle damage.
•Always adjust your speed to suit weather, road, region and traffic condi-tions. The route indicated by the warning light must not tempt you to disre-gard the national regulations for road traffic.
Caution
•As long as the warning light lights up, one must take into account an increased fuel consumption and in certain circumstances a power reduction of the engine.
Note
Further information about diesel particle filter ⇒page 158, “Diesel particle filter* (diesel engine)”.
Seat belt warning light*
The warning light comes on after the ignition is switched on as a reminder to fasten the seat belt.
If the seat belts are not fastened when the speed of the car increases to more than 25km/h, the warning light flashes and an acoustic warning signal sounds for approx. 90 seconds.
The following text will be displayed in the information display*:
FASTEN SEAT BELT
In case of a load on the front passenger seat e.g. a bag (this is not recommended for safety reasons) the warning light indicates that the seat belt is not fastened.
Further information on the seat belts ⇒page 126, “Why seat belts?”.
WARNING (continued)
NKO A05F 20.book Page 29 Wednesday, April 2, 2008 1:02 PM
Page 35 of 252
Unlocking and locking34
Safe securing
The central locking system is equipped with a safe securing system. Locking the vehicle from the outside causes the door locks to be automatically blocked. The indicator light in the driver's door flashes. It is not possible to open the doors with the door handle either from the inside or from the outside. This acts as an effective deterrent for attempts to break into your vehicle.
You can deactivate the safe securing system. This is done by locking the vehicle with the key or radio-operated key twice within 2 seconds.
The safe securing system is again activated the next time the vehicle is unlocked and locked again.
The doors can be opened from the inside if the vehicle is locked and the safe securing system is deactivated:
•The door is unlocked by actuating the door-opening lever.
•The door opens upon actuating the door-opening lever again.
WARNING
If the vehicle is locked from the outside and the safe securing system is acti-vated, there must not be any person and animals in the vehicle as it is then not possible to open either a door or a window from the inside. The locked doors make it more difficult for rescuers to get into the vehicle in an emer-gency - hazard!
Unlocking the vehicle using the key
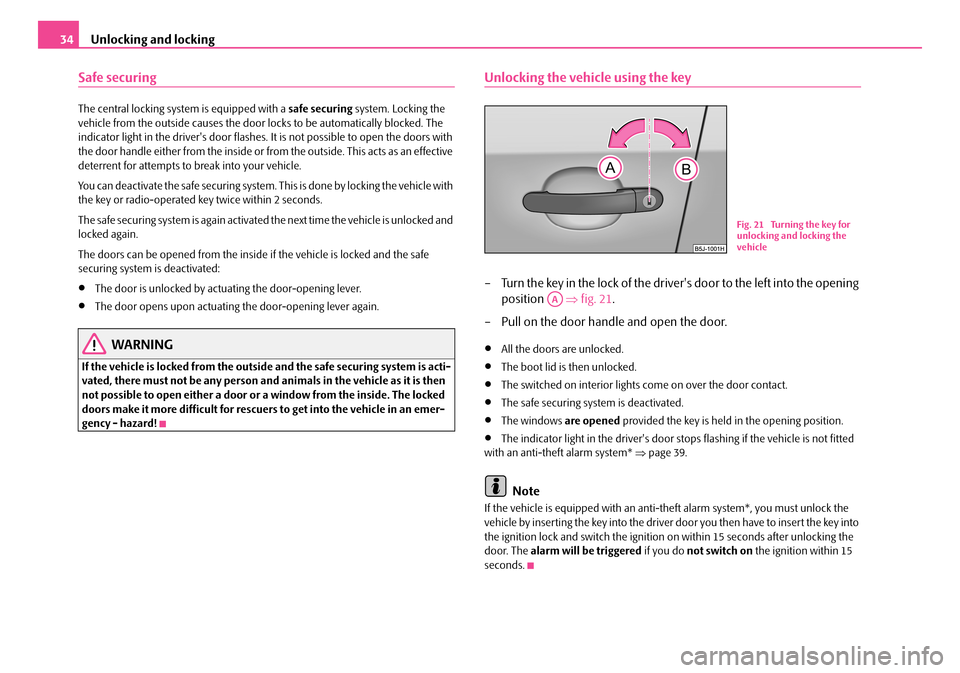
– Turn the key in the lock of the driver's door to the left into the opening
position ⇒fig. 21.
– Pull on the door handle and open the door.
•All the doors are unlocked.
•The boot lid is then unlocked.
•The switched on interior lights come on over the door contact.
•The safe securing system is deactivated.
•The windows are opened provided the key is held in the opening position.
•The indicator light in the driver's door stops flashing if the vehicle is not fitted with an anti-theft alarm system* ⇒page 39.
Note
If the vehicle is equipped with an anti-theft alarm system*, you must unlock the vehicle by inserting the key into the driver door you then have to insert the key into the ignition lock and switch the ignition on within 15 seconds after unlocking the door. The alarm will be triggered if you do not switch on the ignition within 15 seconds.
Fig. 21 Turning the key for unlocking and locking the vehicle
AA
NKO A05F 20.book Page 34 Wednesday, April 2, 2008 1:02 PM
Page 36 of 252
Unlocking and locking35
Using the systemSafetyDriving TipsGeneral MaintenanceBreakdown assistanceTechnical Data
Closing the vehicle with the key
– Turn the key in the lock of the driver door to the right into the closing
position ⇒page 34, fig. 21.
•All the doors and the boot lid are locked.
•The switched on interior lights go out over the door contact.
•The windows and the electric sliding/tilting roof* are closed provided the key is held in the locking position.
•The safe securing system is activated immediately.
•The indicator light in the driver door begins flashing.
Note
The opened front doors cannot be unlocked. It must be locked separately after closing it.
Button for the central locking system*
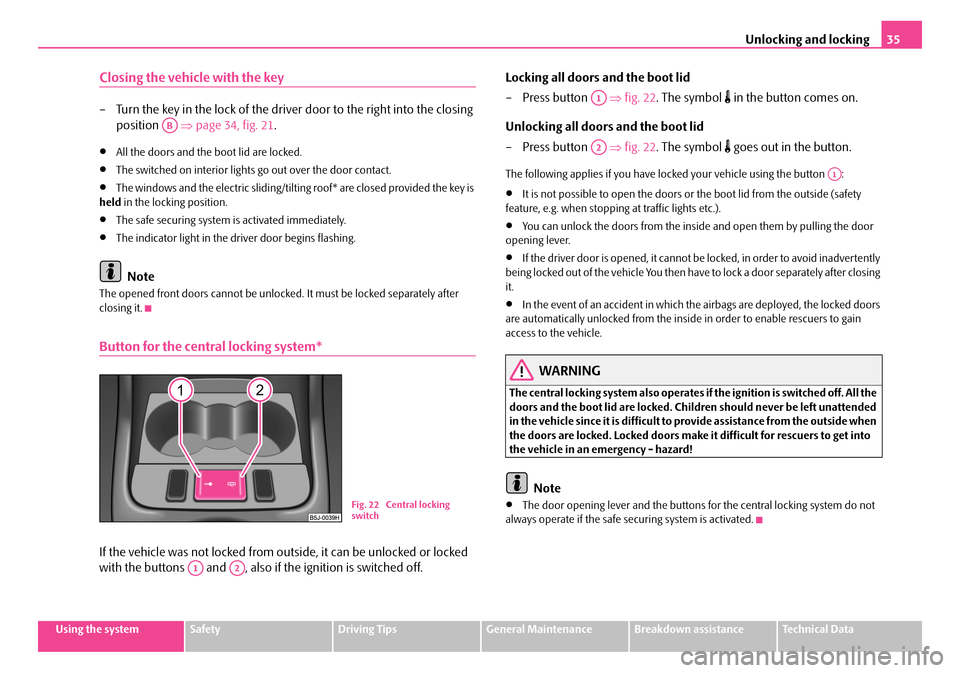
If the vehicle was not locked from outside, it can be unlocked or locked
with the buttons and , also if the ignition is switched off.
Locking all doors and the boot lid
–Press button ⇒fig. 22. The symbol in the button comes on.
Unlocking all doors and the boot lid
–Press button ⇒fig. 22. The symbol goes out in the button.
The following applies if you have locked your vehicle using the button :
•It is not possible to open the doors or the boot lid from the outside (safety feature, e.g. when stopping at traffic lights etc.).
•You can unlock the doors from the inside and open them by pulling the door opening lever.
•If the driver door is opened, it cannot be locked, in order to avoid inadvertently being locked out of the vehicle You then have to lock a door separately after closing it.
•In the event of an accident in which the airbags are deployed, the locked doors are automatically unlocked from the inside in order to enable rescuers to gain access to the vehicle.
WARNING
The central locking system also operates if the ignition is switched off. All the doors and the boot lid are locked. Children should never be left unattended in the vehicle since it is difficult to provide assistance from the outside when the doors are locked. Locked doors make it difficult for rescuers to get into the vehicle in an emergency - hazard!
Note
•The door opening lever and the buttons for the central locking system do not always operate if the safe securing system is activated.
AB
Fig. 22 Central locking switch
A1A2
A1
A2
A1
NKO A05F 20.book Page 35 Wednesday, April 2, 2008 1:02 PM
Page 37 of 252
Unlocking and locking36
Emergency locking of the doors
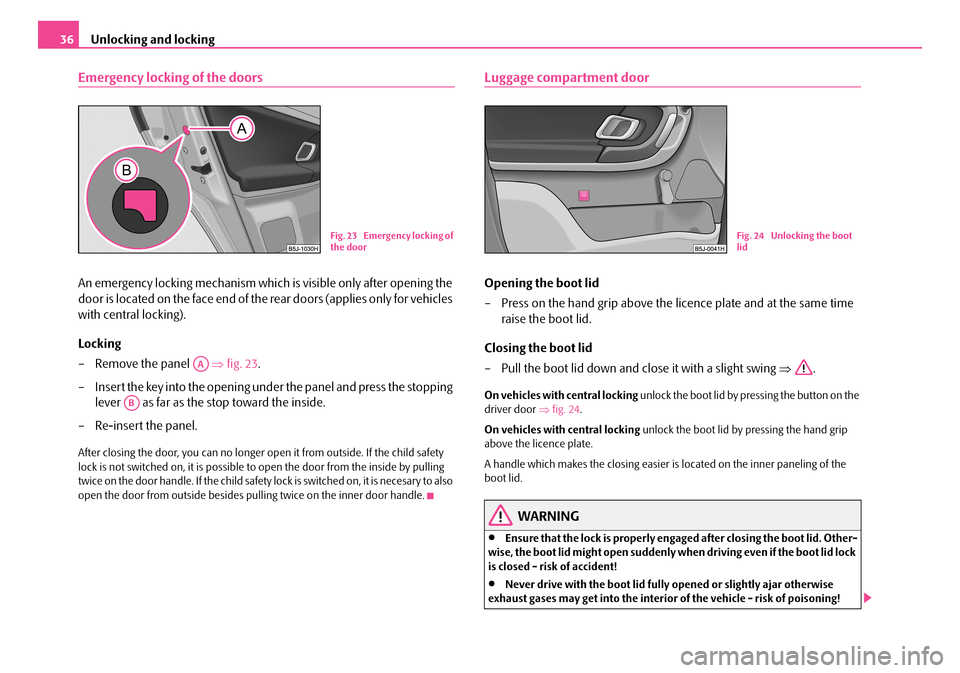
An emergency locking mechanism which is visible only after opening the
door is located on the face end of the rear doors (applies only for vehicles
with central locking).
Locking
– Remove the panel ⇒fig. 23.
– Insert the key into the opening under the panel and press the stopping
lever as far as the stop toward the inside.
– Re-insert the panel.
After closing the door, you can no longer open it from outside. If the child safety lock is not switched on, it is possible to open the door from the inside by pulling twice on the door handle. If the child safety lock is switched on, it is necesary to also open the door from outside besides pulling twice on the inner door handle.
Luggage compartment door
Opening the boot lid
– Press on the hand grip above the licence plate and at the same time
raise the boot lid.
Closing the boot lid
– Pull the boot lid down and close it with a slight swing ⇒.
On vehicles with central locking unlock the boot lid by pressing the button on the driver door ⇒fig. 24.
On vehicles with central locking unlock the boot lid by pressing the hand grip above the licence plate.
A handle which makes the closing easier is located on the inner paneling of the boot lid.
WARNING
•Ensure that the lock is properly engaged after closing the boot lid. Other-wise, the boot lid might open suddenly when driving even if the boot lid lock is closed - risk of accident!
•Never drive with the boot lid fully opened or slightly ajar otherwise exhaust gases may get into the interior of the vehicle - risk of poisoning!
Fig. 23 Emergency locking of the door
AA
AB
Fig. 24 Unlocking the boot lid
NKO A05F 20.book Page 36 Wednesday, April 2, 2008 1:02 PM
Page 39 of 252
Unlocking and locking38
Unlocking and locking car
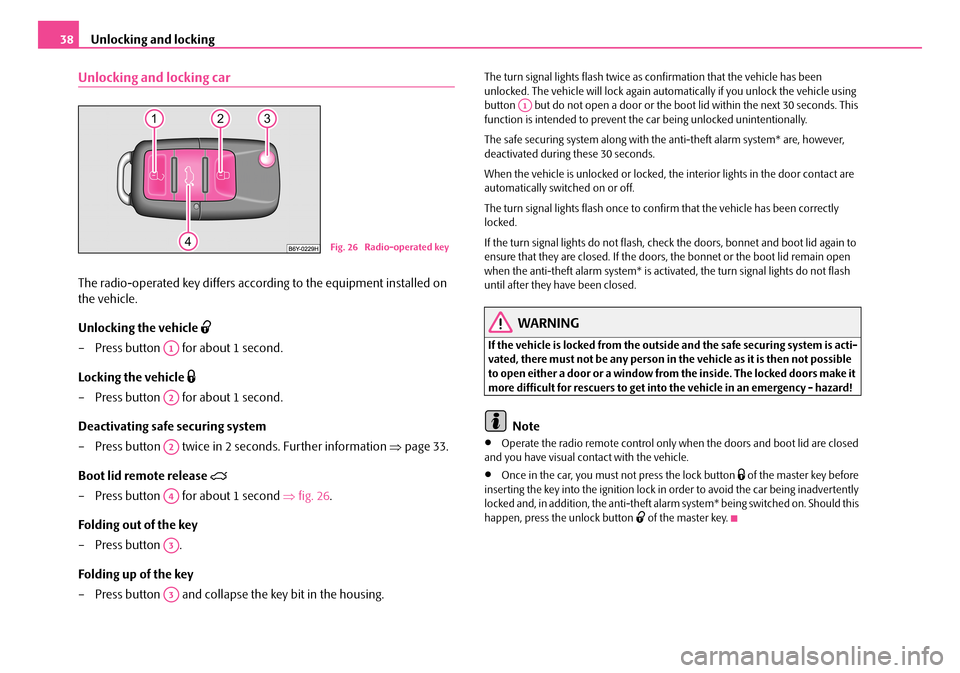
The radio-operated key differs according to the equipment installed on
the vehicle.
Unlocking the vehicle
– Press button for about 1 second.
Locking the vehicle
– Press button for about 1 second.
Deactivating safe securing system
– Press button twice in 2 seconds. Further information ⇒page 33.
Boot lid remote release
– Press button for about 1 second ⇒fig. 26.
Folding out of the key
– Press button .
Folding up of the key
– Press button and collapse the key bit in the housing.
The turn signal lights flash twice as confirmation that the vehicle has been unlocked. The vehicle will lock again automatically if you unlock the vehicle using button but do not open a door or the boot lid within the next 30 seconds. This function is intended to prevent the car being unlocked unintentionally.
The safe securing system along with the anti-theft alarm system* are, however, deactivated during these 30 seconds.
When the vehicle is unlocked or locked, the interior lights in the door contact are automatically switched on or off.
The turn signal lights flash once to confirm that the vehicle has been correctly locked.
If the turn signal lights do not flash, check the doors, bonnet and boot lid again to ensure that they are closed. If the doors, the bonnet or the boot lid remain open when the anti-theft alarm system* is activated, the turn signal lights do not flash until after they have been closed.
WARNING
If the vehicle is locked from the outside and the safe securing system is acti-vated, there must not be any person in the vehicle as it is then not possible to open either a door or a window from the inside. The locked doors make it more difficult for rescuers to get into the vehicle in an emergency - hazard!
Note
•Operate the radio remote control only when the doors and boot lid are closed and you have visual contact with the vehicle.
•Once in the car, you must not press the lock button of the master key before inserting the key into the ignition lock in order to avoid the car being inadvertently locked and, in addition, the anti-theft alarm system* being switched on. Should this happen, press the unlock button of the master key.
Fig. 26 Radio-operated key
A1
A2
A2
A4
A3
A3
A1
NKO A05F 20.book Page 38 Wednesday, April 2, 2008 1:02 PM
Page 41 of 252
Unlocking and locking40
Interior monitor* and towing protection
monitoring*
The interior monitor and the towing protection monitoring detect
movements inside the vehicle interior and then trigger the alarm.
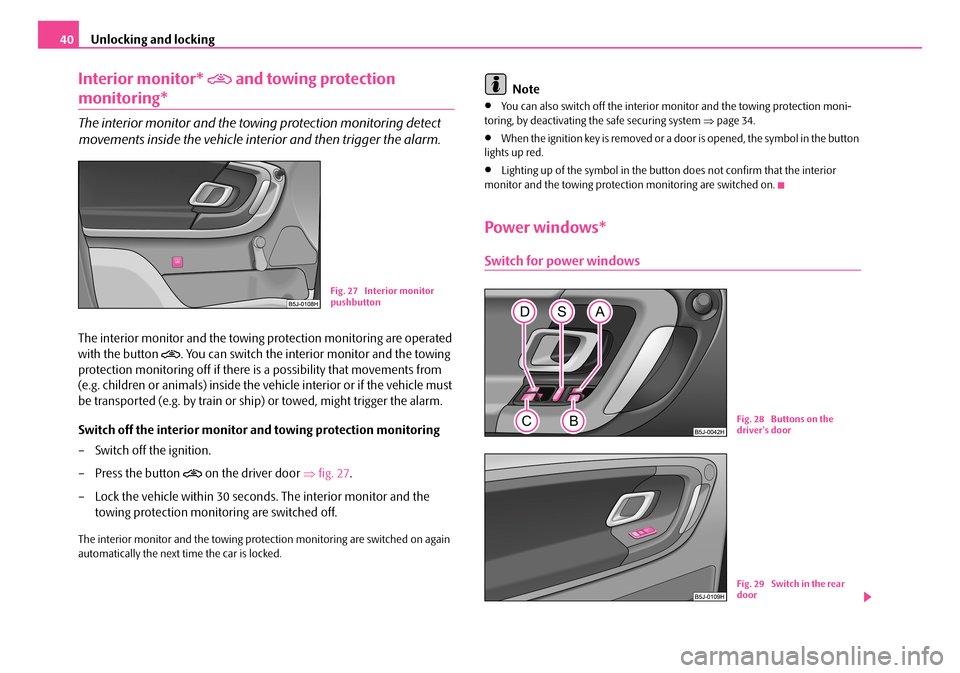
The interior monitor and the towing protection monitoring are operated
with the button . You can switch the interior monitor and the towing
protection monitoring off if there is a possibility that movements from
(e.g. children or animals) inside the vehicle interior or if the vehicle must
be transported (e.g. by train or ship) or towed, might trigger the alarm.
Switch off the interior monitor and towing protection monitoring
– Switch off the ignition.
– Press the button on the driver door ⇒fig. 27.
– Lock the vehicle within 30 seconds. The interior monitor and the
towing protection monitoring are switched off.
The interior monitor and the towing protection monitoring are switched on again automatically the next time the car is locked.
Note
•You can also switch off the interior monitor and the towing protection moni-toring, by deactivating the safe securing system ⇒page 34.
•When the ignition key is removed or a door is opened, the symbol in the button lights up red.
•Lighting up of the symbol in the button does not confirm that the interior monitor and the towing protection monitoring are switched on.
Power windows*
Switch for power windows
Fig. 27 Interior monitor pushbutton
Fig. 28 Buttons on the driver's door
Fig. 29 Switch in the rear door
NKO A05F 20.book Page 40 Wednesday, April 2, 2008 1:02 PM
Page 42 of 252
Unlocking and locking41
Using the systemSafetyDriving TipsGeneral MaintenanceBreakdown assistanceTechnical Data
The power windows operate only when ignition is switched on.
Opening a window
– A window is opened by pres sing lightly on the respective butto n in the
door. The process stops when one releases the button.
– Additionally you can open the window automatically (fully opened) by
pressing the button up to the stop. Renewed pressing of the button
causes the window to stop immediately.
Closing a window
– A window is closed through pulling lightly on the respective button in
the door. The closing process stops when one releases the button.
– Additionally you can close the window automatically (fully closed) by
pulling the button up to the stop. Renewed pulling of the button
causes the window to stop immediately.
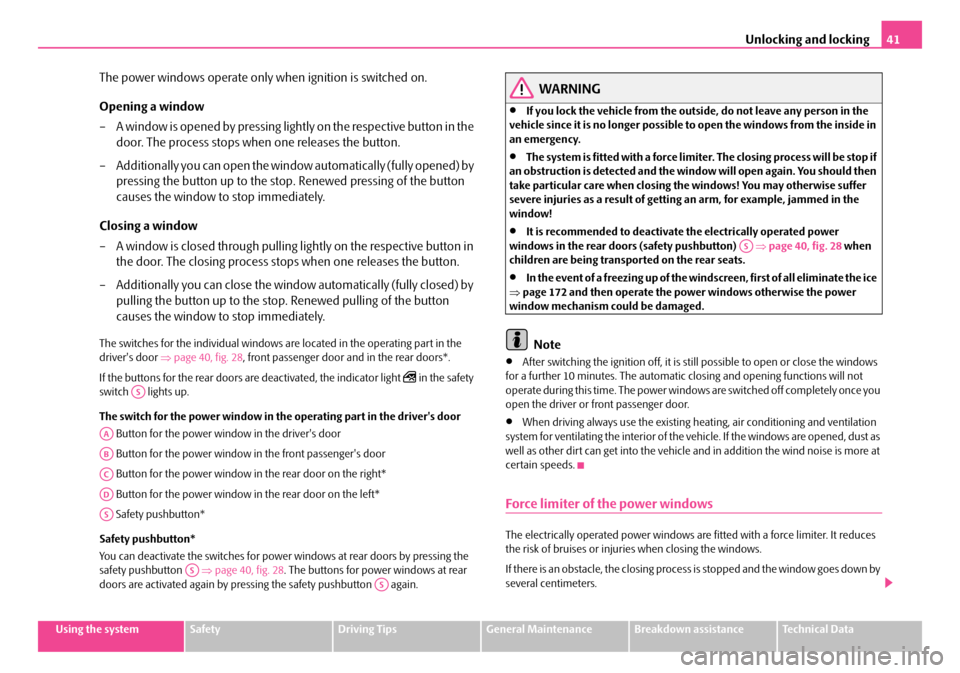
The switches for the individual windows are located in the operating part in the driver's door ⇒page 40, fig. 28, front passenger door and in the rear doors*.
If the buttons for the rear doors are deactivated, the indicator light in the safety switch lights up.
The switch for the power window in the operating part in the driver's door
Button for the power window in the driver's door
Button for the power window in the front passenger's door
Button for the power window in the rear door on the right*
Button for the power window in the rear door on the left*
Safety pushbutton*
Safety pushbutton*
You can deactivate the switches for power windows at rear doors by pressing the safety pushbutton ⇒page 40, fig. 28. The buttons for power windows at rear doors are activated again by pressing the safety pushbutton again.
WARNING
•If you lock the vehicle from the outside, do not leave any person in the vehicle since it is no longer possible to open the windows from the inside in an emergency.
•The system is fitted with a force limiter. The closing process will be stop if an obstruction is detected and the window will open again. You should then take particular care when closing the windows! You may otherwise suffer severe injuries as a result of getting an arm, for example, jammed in the window!
•It is recommended to deactivate the electrically operated power windows in the rear doors (safety pushbutton) ⇒page 40, fig. 28 when children are being transported on the rear seats.
•In the event of a freezing up of the windscreen, first of all eliminate the ice ⇒page 172 and then operate the power windows otherwise the power window mechanism could be damaged.
Note
•After switching the ignition off, it is still possible to open or close the windows for a further 10 minutes. The automatic closing and opening functions will not operate during this time. The power windows are switched off completely once you open the driver or front passenger door.
•When driving always use the existing heating, air conditioning and ventilation system for ventilating the interior of the vehicle. If the windows are opened, dust as well as other dirt can get into the vehicle and in addition the wind noise is more at certain speeds.
Force limiter of the power windows
The electrically operated power windows are fitted with a force limiter. It reduces the risk of bruises or injuries when closing the windows.
If there is an obstacle, the closing process is stopped and the window goes down by several centimeters.
AS
AA
AB
AC
AD
AS
ASAS
AS
NKO A05F 20.book Page 41 Wednesday, April 2, 2008 1:02 PM
Page 46 of 252
Lights and Visibility45
Using the systemSafetyDriving TipsGeneral MaintenanceBreakdown assistanceTechnical Data
Lights and Visibility
Lights
Switching lights on and off
Switching on side lights
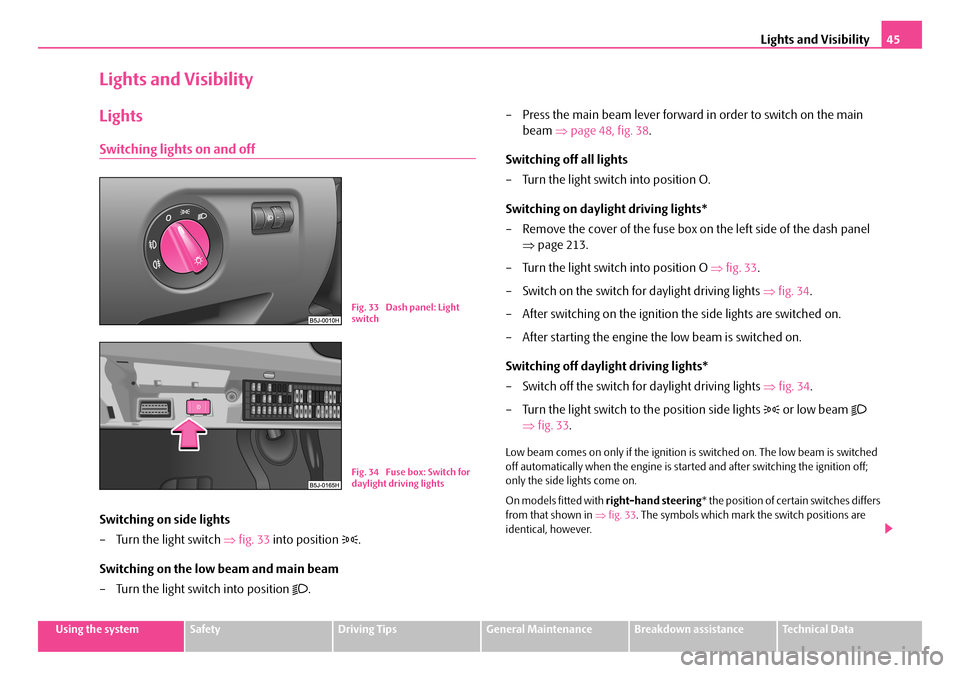
– Turn the light switch ⇒fig. 33 into position .
Switching on the low beam and main beam
– Turn the light switch into position .
– Press the main beam lever forward in order to switch on the main
beam ⇒page 48, fig. 38.
Switching off all lights
– Turn the light switch into position O.
Switching on daylight driving lights*
– Remove the cover of the fuse box on the left side of the dash panel
⇒page 213.
– Turn the light switch into position O ⇒fig. 33.
– Switch on the switch for daylight driving lights ⇒fig. 34.
– After switching on the ignition the side lights are switched on.
– After starting the engine the low beam is switched on.
Switching off daylight driving lights*
– Switch off the switch for daylight driving lights ⇒fig. 34.
– Turn the light switch to the position side lights or low beam
⇒fig. 33.
Low beam comes on only if the ignition is switched on. The low beam is switched off automatically when the engine is started and after switching the ignition off; only the side lights come on.
On models fitted with right-hand steering* the position of certain switches differs from that shown in ⇒fig. 33. The symbols which mark the switch positions are identical, however.
Fig. 33 Dash panel: Light switch
Fig. 34 Fuse box: Switch for daylight driving lights
NKO A05F 20.book Page 45 Wednesday, April 2, 2008 1:02 PM
Page 47 of 252
Lights and Visibility46
WARNING
Never drive with side lights on - risk of accident! The side lights are not bright enough to light up the road sufficiently in front of you or to be seen by other oncoming traffic. In this case, always switch on the low beam when it is dark or if visibility is poor.
Note
•An audible warning will sound if you withdraw the ignition key and open the driver's door when the vehicle lights are still on.
•The acoustic warning signal is switched off over the door contact when the driver's door is closed (ignition off). The vehicle can be parked with the side lights on.
•If the car is parked for a lengthy period, we recommend switching off all lights, or leaving only the parking lights switched on.
•The switching on of the described lights should only be undertaken in accord-ance with the legal requirements.
•In the event of cool or humid weather conditions, the headlights can be misted up from inside.
−The temperature difference between interior and external area of the head-light lenses is decisive.
−When the driving lights are switched on, the light outlet surfaces are free from mist after a short period. The headlight lenses can possibly mist up at the border areas.
−It also concerns reverse light and turn signal lights.
−This mist has no influence on the life of the lighting system.
Cornering lights*
For a better cornering illumination the cornering lights are controlled in the optimal position in line with the vehicle speed and the steering angle.
If the warning light flashes for 1 minute while driving or after switching on the ignition and a warning signal sounds, a fault is confirmed.
WARNING
If there is a fault in the cornering lights, the warning light flashes in the instrument cluster. The cornering lights are automatically lowered to the emergency position, which prevents a possible dazzling of oncoming traffic. Thus the illuminated length of the road is shortened. Drive carefully and have the car inspected immediately by a specialist garage.
Fog lights*
Switching on the fog lights
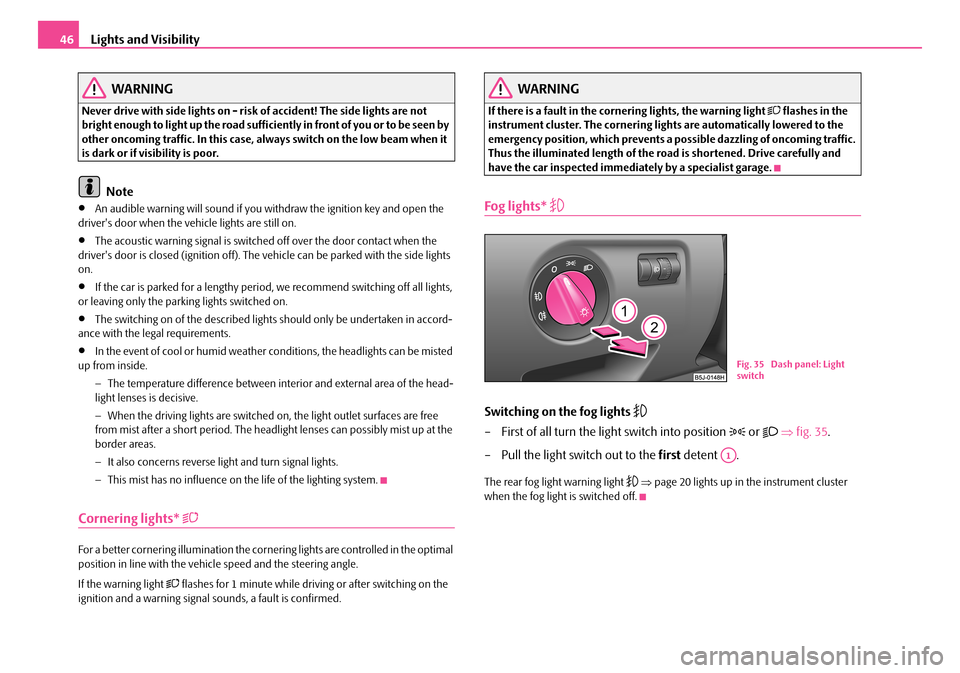
– First of all turn the light switch into position or ⇒fig. 35.
– Pull the light switch out to the first detent .
The rear fog light warning light ⇒page 20 lights up in the instrument cluster when the fog light is switched off.
Fig. 35 Dash panel: Light switch
A1
NKO A05F 20.book Page 46 Wednesday, April 2, 2008 1:02 PM