park assist SKODA FABIA 2009 2.G / 5J Owner's Manual
[x] Cancel search | Manufacturer: SKODA, Model Year: 2009, Model line: FABIA, Model: SKODA FABIA 2009 2.G / 5JPages: 259, PDF Size: 31.99 MB
Page 4 of 259
Contents3
Using the system
Safety
Driving Tips
General Maintenance
Breakdown assistance
Technical Data
ContentsLayout of this Owner's Manual
(explanations)
. . . . . . . . . . . . . . . . . . . . . . . . . .
Using the system
. . . . . . . . . . . . . . . . . . . . . .
Cockpit
. . . . . . . . . . . . . . . . . . . . . . . . . . . . . . . . . . . . . . . .
General view . . . . . . . . . . . . . . . . . . . . . . . . . . . . . . . . .
The brief instruction
. . . . . . . . . . . . . . . . . . . . . . . . . .
Basic functions and important information . . . . .
Instruments and Indicator/Warning Lights
. . .
General view of the instrument cluster . . . . . . . . .
Engine revolutions counter . . . . . . . . . . . . . . . . . . . .
Coolant temperature gauge* . . . . . . . . . . . . . . . . . .
Fuel gauge . . . . . . . . . . . . . . . . . . . . . . . . . . . . . . . . . . .
Counter for distance driven . . . . . . . . . . . . . . . . . . .
Service Interval Display . . . . . . . . . . . . . . . . . . . . . . .
Digital clock . . . . . . . . . . . . . . . . . . . . . . . . . . . . . . . . . .
Multi-functional indicator (onboard computer)*
Information display* . . . . . . . . . . . . . . . . . . . . . . . . . .
Auto Check Control . . . . . . . . . . . . . . . . . . . . . . . . . . .
Warning lights . . . . . . . . . . . . . . . . . . . . . . . . . . . . . . . .
Unlocking and locking
. . . . . . . . . . . . . . . . . . . . . . . .
Key . . . . . . . . . . . . . . . . . . . . . . . . . . . . . . . . . . . . . . . . . .
Locking . . . . . . . . . . . . . . . . . . . . . . . . . . . . . . . . . . . . . .
Child safety lock . . . . . . . . . . . . . . . . . . . . . . . . . . . . . .
Central locking system* . . . . . . . . . . . . . . . . . . . . . . .
Remote control* . . . . . . . . . . . . . . . . . . . . . . . . . . . . . .
Anti-theft alarm system* . . . . . . . . . . . . . . . . . . . . . .
Interior monitor* and towing protection
monitoring* . . . . . . . . . . . . . . . . . . . . . . . . . . . . . . . . . .
Electrical power windows* . . . . . . . . . . . . . . . . . . . .
Electric sliding/tilting roof* . . . . . . . . . . . . . . . . . . . .
Lights and Visibility
. . . . . . . . . . . . . . . . . . . . . . . . . . .
Lights . . . . . . . . . . . . . . . . . . . . . . . . . . . . . . . . . . . . . . . .
Interior lighting . . . . . . . . . . . . . . . . . . . . . . . . . . . . . . .
Visibility . . . . . . . . . . . . . . . . . . . . . . . . . . . . . . . . . . . . .
Windshield wiper and wash system . . . . . . . . . . . .
Rear mirror . . . . . . . . . . . . . . . . . . . . . . . . . . . . . . . . . .
Seats and Storage
. . . . . . . . . . . . . . . . . . . . . . . . . . . . .
Front seats . . . . . . . . . . . . . . . . . . . . . . . . . . . . . . . . . . .
Head restraints . . . . . . . . . . . . . . . . . . . . . . . . . . . . . . .
Heating the front seats* . . . . . . . . . . . . . . . . . . . . . . .
Rear seats . . . . . . . . . . . . . . . . . . . . . . . . . . . . . . . . . . . .
Pedals . . . . . . . . . . . . . . . . . . . . . . . . . . . . . . . . . . . . . . .
luggage compartment . . . . . . . . . . . . . . . . . . . . . . . .
Variable loading floor* (Combi) . . . . . . . . . . . . . . . .
Net partition* (Combi) . . . . . . . . . . . . . . . . . . . . . . . .
Bicycle carrier* . . . . . . . . . . . . . . . . . . . . . . . . . . . . . . .
The roof rack* . . . . . . . . . . . . . . . . . . . . . . . . . . . . . . . .
Front cup holder . . . . . . . . . . . . . . . . . . . . . . . . . . . . .
Rear cup holder* . . . . . . . . . . . . . . . . . . . . . . . . . . . . .
Note holder . . . . . . . . . . . . . . . . . . . . . . . . . . . . . . . . . .
Ashtray* . . . . . . . . . . . . . . . . . . . . . . . . . . . . . . . . . . . . .
Cigarette lighter* and power sockets* . . . . . . . . . .
Storage compartments . . . . . . . . . . . . . . . . . . . . . . . .
Heating and air conditioning system
. . . . . . . . .
Air outlet vents . . . . . . . . . . . . . . . . . . . . . . . . . . . . . . .
Recirculated air mode . . . . . . . . . . . . . . . . . . . . . . . .
Heating . . . . . . . . . . . . . . . . . . . . . . . . . . . . . . . . . . . . . .
Climatic (semi-automatic air conditioning
system)* . . . . . . . . . . . . . . . . . . . . . . . . . . . . . . . . . . . . .
Climatronic (automatic air conditioning)* . . . . . .
Starting-off and Driving
. . . . . . . . . . . . . . . . . . . . . . .
Setting steering wheel position* . . . . . . . . . . . . . . .
Ignition lock . . . . . . . . . . . . . . . . . . . . . . . . . . . . . . . . . . Starting the engine . . . . . . . . . . . . . . . . . . . . . . . . . . .
Switching off the engine . . . . . . . . . . . . . . . . . . . . . .
Shifting (manual gearbox) . . . . . . . . . . . . . . . . . . . . .
Handbrake . . . . . . . . . . . . . . . . . . . . . . . . . . . . . . . . . . .
Parking aid* . . . . . . . . . . . . . . . . . . . . . . . . . . . . . . . . . .
Cruise control system (CCS)* . . . . . . . . . . . . . . . . . .
Automatic gearbox
. . . . . . . . . . . . . . . . . . . . . . . . . . .
6-speed automatic gearbox* . . . . . . . . . . . . . . . . . .
Communication
. . . . . . . . . . . . . . . . . . . . . . . . . . . . . .
Operating the radio . . . . . . . . . . . . . . . . . . . . . . . . . . .
Radio and mobile phone operation . . . . . . . . . . . .
Universal telephone preinstallation with voice
control* . . . . . . . . . . . . . . . . . . . . . . . . . . . . . . . . . . . . .
Inserting the mobile phone with the adapter* . .
Mobile phone operation . . . . . . . . . . . . . . . . . . . . . .
Voice commands . . . . . . . . . . . . . . . . . . . . . . . . . . . . .
Enter PIN code . . . . . . . . . . . . . . . . . . . . . . . . . . . . . . .
Dial number . . . . . . . . . . . . . . . . . . . . . . . . . . . . . . . . .
Repeat last call . . . . . . . . . . . . . . . . . . . . . . . . . . . . . . .
Phone voice phonebook* . . . . . . . . . . . . . . . . . . . . .
Bluetooth®* . . . . . . . . . . . . . . . . . . . . . . . . . . . . . . . . .
Mobile phones and two-way radio system . . . . .
Input AUX-IN* . . . . . . . . . . . . . . . . . . . . . . . . . . . . . . .
CD changer* . . . . . . . . . . . . . . . . . . . . . . . . . . . . . . . . .
Safety
. . . . . . . . . . . . . . . . . . . . . . . . . . . . . . . . . . . . . .
Passive Safety
. . . . . . . . . . . . . . . . . . . . . . . . . . . . . . . . .
Basic information . . . . . . . . . . . . . . . . . . . . . . . . . . . .
Correct seated position . . . . . . . . . . . . . . . . . . . . . . .
Seat belts
. . . . . . . . . . . . . . . . . . . . . . . . . . . . . . . . . . . . . .
Why seat belts? . . . . . . . . . . . . . . . . . . . . . . . . . . . . . .
The physical principle of a frontal collision . . . . . 6
7
8
8
9
9
15
15
15
16
16
17
17
19
19
22
24
26
36
36
38
38
39
43
45
46
46
4951
51
55
57
58
60
62
62
63
64
65
67
67
72
74
76
79
80
81
81
81
82
83
89
89
89
90
92
95
99
99
100100
102
102
103
104
104
107
107
112
112
113
114
115
116
117
117
118
118
119
121
122
123
123
127
127
127
128
132
132
133
s3f4.1.book Page 3 Thursday, June 18, 2009 11:07 AM
Page 31 of 259
Instruments and Indicator/Warning Lights 30
WARNING
•
If you must stop for technical reasons, then park the vehicle at a safe
distance from the traffic and switch off the engine and switch on the hazard
warning light system ⇒page 54, “Switch for hazard warning lights ”.
•
Pay attention to the following instructions ⇒page 185, “Working in the
engine compartment” before checking the coolant fluid level and opening
the bonnet.
•
Take care when opening the coolant expansion bottle. If the engine is hot,
the cooling system is pressurized - risk of scalding. It is best to allow the
engine to cool down before removing the cap.
•
Do not touch the coolant fan! The coolant fan may switch on automati-
cally even if the ignition is off.
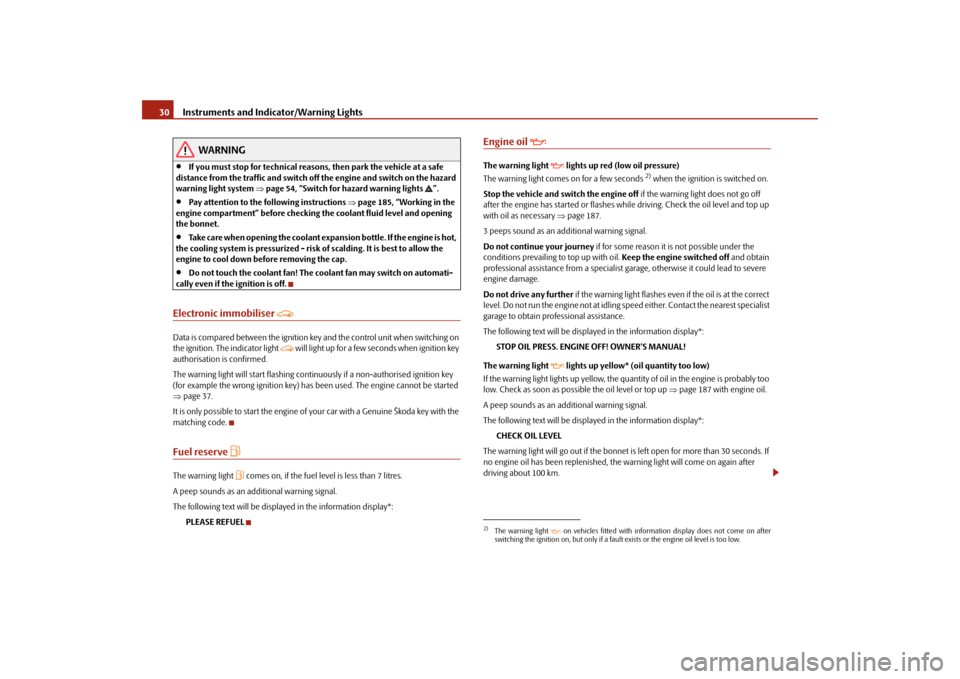
Electronic immobiliser
Data is compared between the ignition key and the control unit when switching on
the ignition. The indicator light
will light up for a few seconds when ignition key
authorisation is confirmed.
The warning light will start flashing continuously if a non-authorised ignition key
(for example the wrong ignition key) has been used. The engine cannot be started
⇒page 37.
It is only possible to start the engine of your car with a Genuine Škoda key with the
matching code.
Fuel reserve
The warning light
comes on, if the fuel level is less than 7 litres.
A peep sounds as an additional warning signal.
The following text will be displayed in the information display*:
PLEASE REFUEL
Engine oil
The warning light
lights up red (low oil pressure)
The warning light comes on for a few seconds
2) when the ignition is switched on.
Stop the vehicle and switch the engine off if the warning light does not go off
after the engine has started or flashes while driving. Check the oil level and top up
with oil as necessary ⇒page 187.
3 peeps sound as an additional warning signal.
Do not continue your journey if for some reason it is not possible under the
conditions prevailing to top up with oil. Keep the engine switched off and obtain
professional assistance from a specialist garage, otherwise it could lead to severe
engine damage.
Do not drive any further if the warning light flashes even if the oil is at the correct
level. Do not run the engine not at idling speed either. Contact the nearest specialist
garage to obtain professional assistance.
The following text will be displayed in the information display*:
STOP OIL PRESS. ENGINE OFF! OWNER'S MANUAL!
The warning light
lights up yellow* (oil quantity too low)
If the warning light lights up yellow, the quantity of oil in the engine is probably too
low. Check as soon as possible the oil level or top up ⇒page 187 with engine oil.
A peep sounds as an additional warning signal.
The following text will be displayed in the information display*:
CHECK OIL LEVEL
The warning light will go out if the bonnet is left open for more than 30 seconds. If
no engine oil has been replenished, the warning light will come on again after
driving about 100 km.
2)The warning light on vehicles fitted with information display does not come on after
switching the ignition on, but only if a fault exists or the engine oil level is too low.
s3f4.1.book Page 30 Thursday, June 18, 2009 11:07 AM
Page 32 of 259
Instruments and Indicator/Warning Lights31
Using the system
Safety
Driving Tips
General Maintenance
Breakdown assistance
Technical Data The warning light
flashes yellow* (engine oil level sensor faulty)
A fault on the engine oil level sensor is indicated additionally by an audible signal
and the warning light coming on several times after the ignition has been switched
on.
In this case have the engine inspected without delay by a specialist garage.
The following text will be displayed in the information display*:
OIL SENSOR WORKSHOP!
WARNING
•
If you must stop for technical reasons, then park the vehicle at a safe
distance from the traffic and switch off the engine and switch on the hazard
warning light system ⇒page 54.
•
The red oil pressure light
is not an oil level indicator! One should
therefore check the oil level at regular intervals, preferably after every refu-
eling stop.
•
Pay attention to the following instructions ⇒page 185, “Working in the
engine compartment” before checking the coolant fluid level and opening
the bonnet.
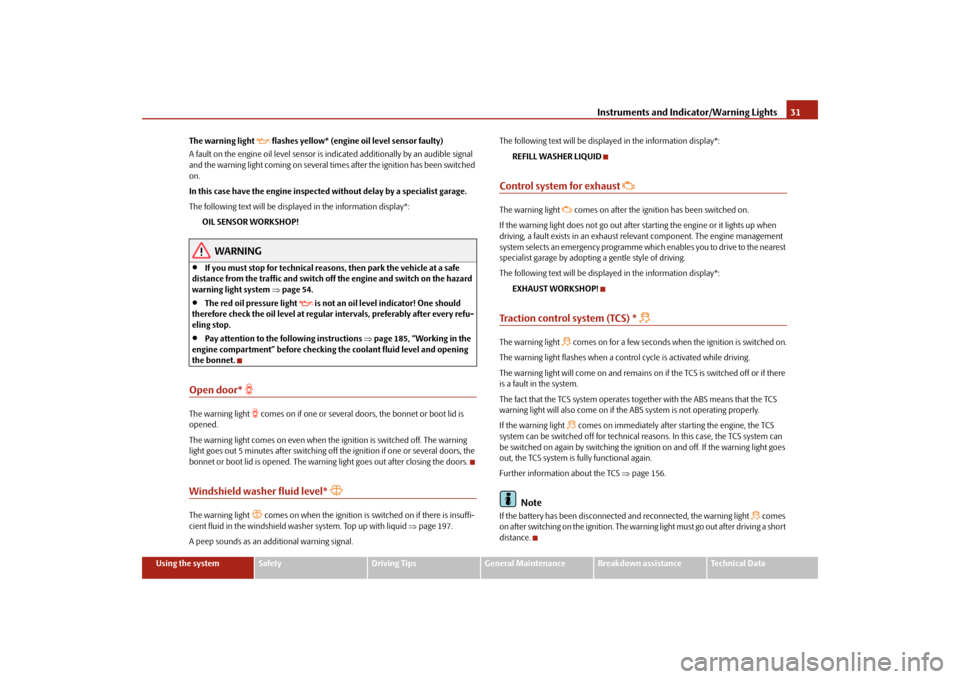
Open door*
The warning light
comes on if one or several doors, the bonnet or boot lid is
opened.
The warning light comes on even when the ignition is switched off. The warning
light goes out 5 minutes after switching off the ignition if one or several doors, the
bonnet or boot lid is opened. The warning light goes out after closing the doors.
Windshield washer fluid level*
The warning light
comes on when the ignition is switched on if there is insuffi-
cient fluid in the windshield washer system. Top up with liquid ⇒page 197.
A peep sounds as an additional warning signal.The following text will be displayed in the information display*:
REFILL WASHER LIQUID
Control system for exhaust
The warning light
comes on after the ignition has been switched on.
If the warning light does not go out after starting the engine or it lights up when
driving, a fault exists in an exhaust relevant component. The engine management
system selects an emergency programme which enables you to drive to the nearest
specialist garage by adopting a gentle style of driving.
The following text will be displayed in the information display*:
EXHAUST WORKSHOP!
Traction control system (TCS) *
The warning light
comes on for a few seconds when the ignition is switched on.
The warning light flashes when a control cycle is activated while driving.
The warning light will come on and remains on if the TCS is switched off or if there
is a fault in the system.
The fact that the TCS system operates together with the ABS means that the TCS
warning light will also come on if the ABS system is not operating properly.
If the warning light comes on immediately after starting the engine, the TCS
system can be switched off for technical reasons. In this case, the TCS system can
be switched on again by switching the ignition on and off. If the warning light goes
out, the TCS system is fully functional again.
Further information about the TCS ⇒page 156.
Note
If the battery has been disconnected and reconnected, the warning light
comes
on after switching on the ignition. The warning light must go out after driving a short
distance.
s3f4.1.book Page 31 Thursday, June 18, 2009 11:07 AM
Page 52 of 259
Lights and Visibility51
Using the system
Safety
Driving Tips
General Maintenance
Breakdown assistance
Technical Data
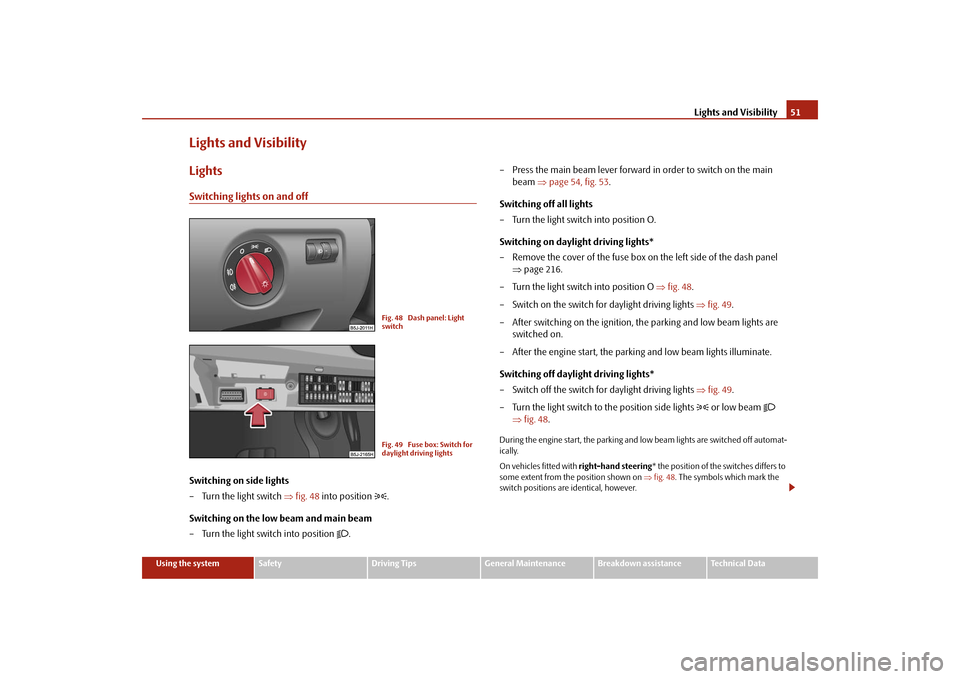
Lights and VisibilityLightsSwitching lights on and offSwitching on side lights
– Turn the light switch ⇒fig. 48 into position
.
Switching on the low beam and main beam
– Turn the light switch into position
.– Press the main beam lever forward in order to switch on the main
beam ⇒page 54, fig. 53.
Switching off all lights
– Turn the light switch into position O.
Switching on daylight driving lights*
– Remove the cover of the fuse box on the left side of the dash panel
⇒page 216.
– Turn the light switch into position O ⇒fig. 48.
– Switch on the switch for daylight driving lights ⇒fig. 49.
– After switching on the ignition, the parking and low beam lights are
switched on.
– After the engine start, the parking and low beam lights illuminate.
Switching off daylight driving lights*
– Switch off the switch for daylight driving lights ⇒fig. 49.
– Turn the light switch to the position side lights
or low beam
⇒fig. 48.
During the engine start, the parking and low beam lights are switched off automat-
ically.
On vehicles fitted with right-hand steering* the position of the switches differs to
some extent from the position shown on ⇒fig. 48. The symbols which mark the
switch positions are identical, however.
Fig. 48 Dash panel: Light
switchFig. 49 Fuse box: Switch for
daylight driving lights
s3f4.1.book Page 51 Thursday, June 18, 2009 11:07 AM
Page 54 of 259
Lights and Visibility53
Using the system
Safety
Driving Tips
General Maintenance
Breakdown assistance
Technical Data
Fog lights with the function “Corner”*
The fog lights with the function “Corner” improve the illumination of
areas close to the vehicle when turning, parking etc.The fog lights with the function “Corner” are regulated according to the steering
angle or after switching on the turn signal light
4) in the following circumstances:
•
the vehicle is stationary and the engine is running or it moves with a speed of
maximum 40 km/h;
•
the daylight driving lights are not switched on
•
low beam switched on;
•
no reverse gear engaged;
•
no hazard warning light system switched on.
A fault in the system of the fog lights with the function “Corner” is confirmed by the
warning light lighting up or flashing
.
Note
If the fog lights are switched on, the function of the lights “Corner” is not active.Rear fog light
Switching on the rear fog light
– First of all turn the light switch into position
or
⇒page 52,
fig. 50.
– Pull the light switch out to the second detent . The fog lights* light
up at the same time.
If the vehicle is not fitted with fog lights*, the rear fog light is switched on by turning
the light switch to the position
and is pulled out directly to the position . This
switch does not have two positions, but only one position.The rear fog light warning light
⇒page 26 lights up in the instrument cluster
when the fog light is switched off.
Only the rear fog light of the trailer lights up if the vehicle is fitted with a towing
device from Škoda original accessoriesand when you are towing a trailer which
is fitted with the rear fog light.
Caution
The rear fog light should only be switched on if visibility is particularly poor
(conform with any varying legal provisions) to avoid dazzling vehicles behind your
vehicle.Headlamp range adjustment
Once the low beam is switched on you can then adapt the range of
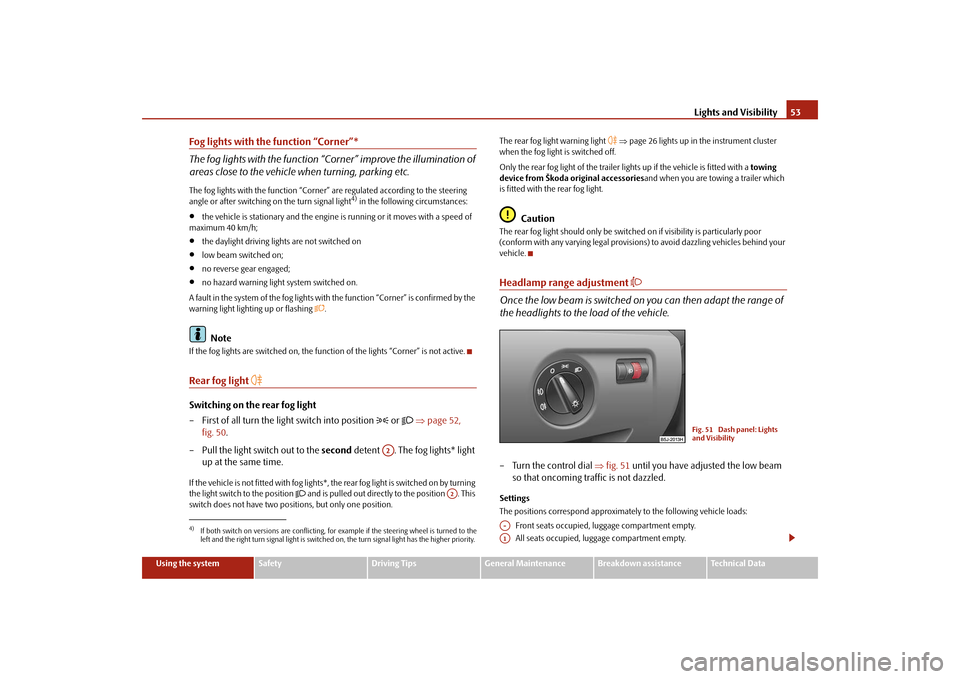
the headlights to the load of the vehicle.– Turn the control dial ⇒fig. 51 until you have adjusted the low beam
so that oncoming traffic is not dazzled.Settings
The positions correspond approximately to the following vehicle loads:
Front seats occupied, luggage compartment empty.
All seats occupied, luggage compartment empty.
4)If both switch on versions are conflicting, for example if the steering wheel is turned to the
left and the right turn signal light is switched on, the turn signal light has the higher priority.
A2
A2
Fig. 51 Dash panel: Lights
and Visibility
A-A1
s3f4.1.book Page 53 Thursday, June 18, 2009 11:07 AM
Page 56 of 259
Lights and Visibility55
Using the system
Safety
Driving Tips
General Maintenance
Breakdown assistance
Technical Data
– Push the lever forwards - the main beam and warning light in the
instrument cluster come on.
– Pull the lever back into the initial position in order to switch the main
beam off again.
Headlight flasher
– Pull on the lever of the steering wheel (sprung position) - the main
beam and warning light in the instrument cluster come on.
Parking light
– Switch off the ignition.
– Push the lever up or down - the right-hand or left-hand parking light
is switched on.Information concerning the function of the lights.•
The turn signal system only operates when the ignition is switched on. The
corresponding indicator light
or in the instrument cluster also flashes.
•
The turn signal is automatically cancelled after negotiating a curve.
•
The side light and rear light on the appropriate side of the vehicle are switched
on when the parking light is selected. The parking light function only operates if
the ignition is switched off.
•
An acoustic warning signal will sound when the driver's door is opened if the
lever is not in the middle position after removing the ignition key. The acoustic
warning signal will stop just as soon as the driver's door is closed.Caution
Use main beam or the headlight flasher only if this does not risk dazzling other road
users.
Note
Use only in accordance with the legal requirements the described lighting and
signal systems.
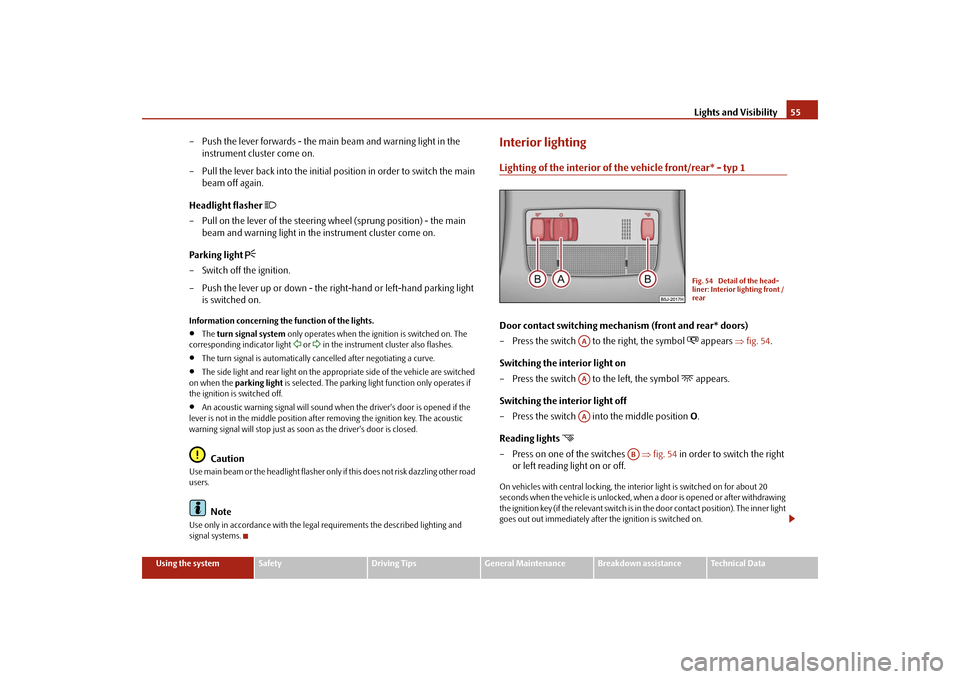
Interior lightingLighting of the interior of the vehicle front/rear* - typ 1Door contact switching mechanism (front and rear* doors)
– Press the switch to the right, the symbol
appears ⇒fig. 54.
Switching the interior light on
– Press the switch to the left, the symbol
appears.
Switching the interior light off
– Press the switch into the middle position O.
Reading lights
– Press on one of the switches ⇒fig. 54 in order to switch the right
or left reading light on or off.On vehicles with central locking, the interior light is switched on for about 20
seconds when the vehicle is unlocked, when a door is opened or after withdrawing
the ignition key (if the relevant switch is in the door contact position). The inner light
goes out out immediately after the ignition is switched on.
Fig. 54 Detail of the head-
liner: Interior lighting front /
rear
AAAAAA
AB
s3f4.1.book Page 55 Thursday, June 18, 2009 11:07 AM
Page 82 of 259
Seats and Storage81
Using the system
Safety
Driving Tips
General Maintenance
Breakdown assistance
Technical Data
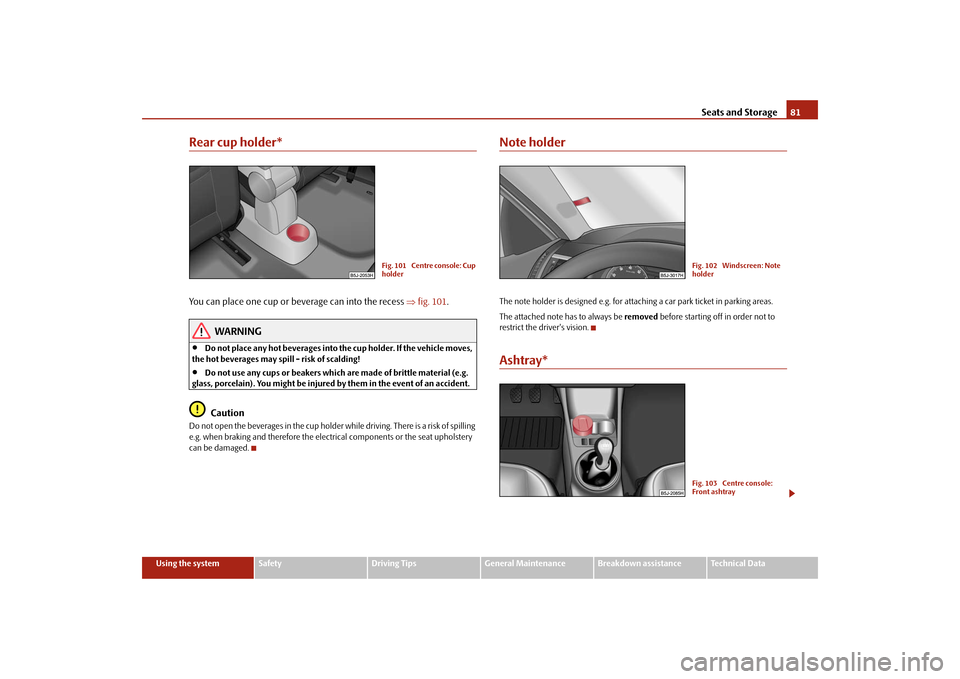
Rear cup holder*You can place one cup or beverage can into the recess ⇒fig. 101.
WARNING
•
Do not place any hot beverages into the cup holder. If the vehicle moves,
the hot beverages may spill - risk of scalding!
•
Do not use any cups or beakers which are made of brittle material (e.g.
glass, porcelain). You might be injured by them in the event of an accident.Caution
Do not open the beverages in the cup holder while driving. There is a risk of spilling
e.g. when braking and therefore the electrical components or the seat upholstery
can be damaged.
Note holderThe note holder is designed e.g. for attaching a car park ticket in parking areas.
The attached note has to always be removed before starting off in order not to
restrict the driver's vision.Ashtray*
Fig. 101 Centre console: Cup
holder
Fig. 102 Windscreen: Note
holderFig. 103 Centre console:
Front ashtray
s3f4.1.book Page 81 Thursday, June 18, 2009 11:07 AM
Page 108 of 259
Automatic gearbox107
Using the system
Safety
Driving Tips
General Maintenance
Breakdown assistance
Technical Data
Automatic gearbox6-speed automatic gearbox*IntroductionYour car is equipped with an electronically controlled 6-speed automatic gearbox.
Shifting up and also down through the gears is performed automatically.
At the same time this is a conventional automatic gearbox. The maximum speed is
reached in the 5th gear. The 6th gear serves as an economic driving programme,
which is intended to reduce the fuel consumption.Information for driving with an automatic gearbox
Shifting up and down through the gears is performed automatically.You can also, however, switch the gearbox over into the Tiptronic mode.
This mode makes it possible for you to also shift gears manually
⇒page 110.
Starting-off and Driving
– Depress the brake pedal and hold it depressed.
– Press the Shiftlock button (button in handle of the selector lever),
move the selector lever into the desired position, e.g. D ⇒page 108,
and then release the Shiftlock button.
– Wait a moment until the gearbox has shifted (a slight engagement
nudge can be felt).
– Release the brake pedal and depress the accelerator ⇒.Stopping for a short time
– The selector lever position N does not have to be selected when stop-
ping just for a short time, such as at a cross roads. It is sufficient to hold
the vehicle stationary using the foot brake. The engine can, however,
be allowed just to idle.
Parking
– Depress the brake pedal and hold it depressed.
– Apply the handbrake firmly.
– Press and Shiftlock button in the selector lever, move the selector
lever to P and then release the Shiftlock button.
The engine can only be started when the selector lever is in position P or N
⇒page 100.
It is sufficient to engage selector lever position P when parking on a flat surface.
When parking on a slope you should first apply the handbrake firmly and then
move the selector lever into position P. This is to ensure that there is no excessive
pressure acting on the lock mechanism and that it is easier to subsequently move
the selector lever out of position P.
If the selector lever position N is selected by accident while driving it is first neces-
sary to release pressure on the accelerator pedal and wait for idling speed of the
engine to be reached before engaging a drive position in the selector lever.
WARNING
•
Do not depress the accelerator when changing the position of the
selector lever if the car is stationary and the engine is running - risk of acci-
dent!
•
Never move the selector lever into position R or P when driving - risk of
an accident!
s3f4.1.book Page 107 Thursday, June 18, 2009 11:07 AM
Page 163 of 259
Intelligent Technology 162Diesel particle filter* (diesel engine)In the diesel particle filter the resulting soot particles are collected
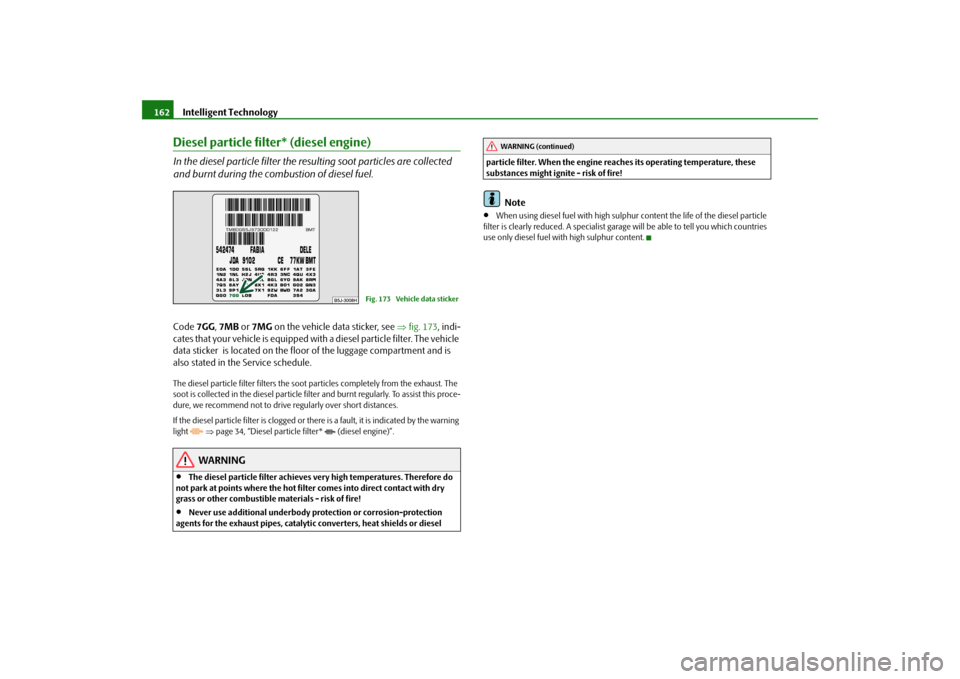
and burnt during the combustion of diesel fuel.Code 7GG, 7MB or 7MG on the vehicle data sticker, see ⇒fig. 173, indi-
cates that your vehicle is equipped with a diesel particle filter. The vehicle
data sticker is located on the floor of the luggage compartment and is
also stated in the Service schedule.The diesel particle filter filters the soot particles completely from the exhaust. The
soot is collected in the diesel particle filter and burnt regularly. To assist this proce-
dure, we recommend not to drive regularly over short distances.
If the diesel particle filter is clogged or there is a fault, it is indicated by the warning
light
⇒page 34, “Diesel particle filter* (diesel engine)”.WARNING
•
The diesel particle filter achieves very high temperatures. Therefore do
not park at points where the hot filter comes into direct contact with dry
grass or other combustible materials - risk of fire!
•
Never use additional underbody protection or corrosion-protection
agents for the exhaust pipes, catalytic converters, heat shields or diesel particle filter. When the engine reaches its operating temperature, these
substances might ignite - risk of fire!
Note
•
When using diesel fuel with high sulphur content the life of the diesel particle
filter is clearly reduced. A specialist garage will be able to tell you which countries
use only diesel fuel with high sulphur content.
Fig. 173 Vehicle data sticker
WARNING (continued)
s3f4.1.book Page 162 Thursday, June 18, 2009 11:07 AM
Page 174 of 259
Taking care of your vehicle and cleaning the vehicle173
Using the system
Safety
Driving Tips
General Maintenance
Breakdown assistance
Technical Data
General MaintenanceTaking care of your vehicle and cleaning the vehicleGeneralProper care retains the value of your vehicle.Regular and proper care retains the value of your vehicle. It may also be one of the
requirements for the acceptance of warranty claims relating to corrosion damage
and paint defects on the bodywork.
We recommend using a preservative from Škoda genuine accessories offered by
your Škoda dealer. Please follow the instructions for use on the package.
WARNING
•
Care products may be harmful to your health if not used according to the
instructions.
•
Always store care products in a safe place, out of the reach of children -
risk of poisoning!For the sake of the environment
•
Always select environmentally-friendly products when purchasing vehicle care
products.
•
Do not dispose of residues of care products in domestic waste.
Care of the exterior of vehicleWashing the vehicle
Frequent washing protects your vehicle.The best protection for your vehicle against harmful environmental influences is
frequent washing and wax treatment. How often you should wash your vehicle
depends on a wide range of factors, such as:•
Frequency of use;
•
The parking situation (garage, below trees etc.);
•
Season of the year;
•
Weather conditions;
•
Environmental influences.
The longer insect residues, bird droppings, tree sap, road and industrial dust, tar,
soot particles, road salt and other aggressive deposits remain adhering to the paint-
work of your vehicle, the more detrimental their destructive effect can be. High
temperatures, such as those caused by intensive sun's rays, accentuate this caustic
effect.
It may therefore be necessary, in certain circumstances, to wash the car once a
week. It may also be sufficient, however, to wash the car once a month followed
by appropriate wax treatment.
It is essential to also thoroughly wash the underside of your vehicle at the end of
the winter road salting and gritting period.
WARNING
When washing your vehicle in the winter: Water and ice in the brake system
can affect the braking efficiency - risk of accident!
s3f4.1.book Page 173 Thursday, June 18, 2009 11:07 AM