airbag off SKODA FABIA 2010 2.G / 5J Owner's Manual
[x] Cancel search | Manufacturer: SKODA, Model Year: 2010, Model line: FABIA, Model: SKODA FABIA 2010 2.G / 5JPages: 244, PDF Size: 29.53 MB
Page 4 of 244
Contents3
Using the system
Safety
Driving Tips
General Maintenance
Breakdown assistance
Technical Data
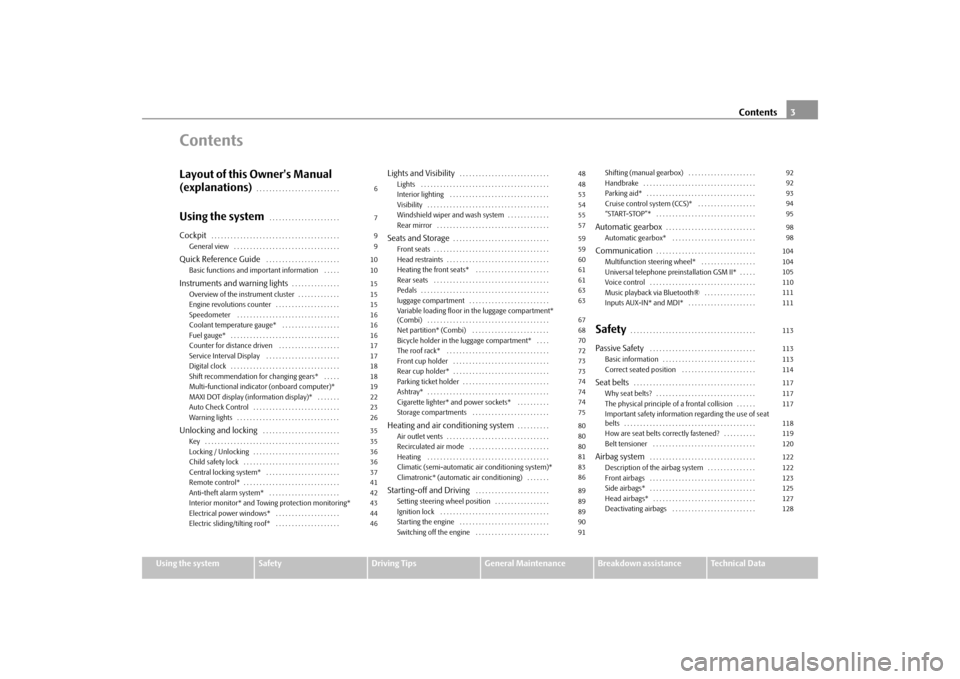
ContentsLayout of this Owner's Manual
(explanations)
. . . . . . . . . . . . . . . . . . . . . . . . . .
Using the system
. . . . . . . . . . . . . . . . . . . . . .
Cockpit
. . . . . . . . . . . . . . . . . . . . . . . . . . . . . . . . . . . . . . . .
General view . . . . . . . . . . . . . . . . . . . . . . . . . . . . . . . . .
Quick Reference Guide
. . . . . . . . . . . . . . . . . . . . . . .
Basic functions and important information . . . . .
Instruments and warning lights
. . . . . . . . . . . . . . .
Overview of the instrument cluster . . . . . . . . . . . . .
Engine revolutions counter . . . . . . . . . . . . . . . . . . . .
Speedometer . . . . . . . . . . . . . . . . . . . . . . . . . . . . . . . .
Coolant temperature gauge* . . . . . . . . . . . . . . . . . .
Fuel gauge* . . . . . . . . . . . . . . . . . . . . . . . . . . . . . . . . . .
Counter for distance driven . . . . . . . . . . . . . . . . . . .
Service Interval Display . . . . . . . . . . . . . . . . . . . . . . .
Digital clock . . . . . . . . . . . . . . . . . . . . . . . . . . . . . . . . . .
Shift recommendation for changing gears* . . . . .
Multi-functional indicator (onboard computer)*
MAXI DOT display (information display)* . . . . . . .
Auto Check Control . . . . . . . . . . . . . . . . . . . . . . . . . . .
Warning lights . . . . . . . . . . . . . . . . . . . . . . . . . . . . . . . .
Unlocking and locking
. . . . . . . . . . . . . . . . . . . . . . . .
Key . . . . . . . . . . . . . . . . . . . . . . . . . . . . . . . . . . . . . . . . . .
Locking / Unlocking . . . . . . . . . . . . . . . . . . . . . . . . . . .
Child safety lock . . . . . . . . . . . . . . . . . . . . . . . . . . . . . .
Central locking system* . . . . . . . . . . . . . . . . . . . . . . .
Remote control* . . . . . . . . . . . . . . . . . . . . . . . . . . . . . .
Anti-theft alarm system* . . . . . . . . . . . . . . . . . . . . . .
Interior monitor* and Towing protection monitoring*
Electrical power windows* . . . . . . . . . . . . . . . . . . . .
Electric sliding/tilting roof* . . . . . . . . . . . . . . . . . . . .
Lights and Visibility
. . . . . . . . . . . . . . . . . . . . . . . . . . . .
Lights . . . . . . . . . . . . . . . . . . . . . . . . . . . . . . . . . . . . . . . .
Interior lighting . . . . . . . . . . . . . . . . . . . . . . . . . . . . . . .
Visibility . . . . . . . . . . . . . . . . . . . . . . . . . . . . . . . . . . . . . .
Windshield wiper and wash system . . . . . . . . . . . . .
Rear mirror . . . . . . . . . . . . . . . . . . . . . . . . . . . . . . . . . . .
Seats and Storage
. . . . . . . . . . . . . . . . . . . . . . . . . . . . . .
Front seats . . . . . . . . . . . . . . . . . . . . . . . . . . . . . . . . . . . .
Head restraints . . . . . . . . . . . . . . . . . . . . . . . . . . . . . . . .
Heating the front seats* . . . . . . . . . . . . . . . . . . . . . . .
Rear seats . . . . . . . . . . . . . . . . . . . . . . . . . . . . . . . . . . . .
Pedals . . . . . . . . . . . . . . . . . . . . . . . . . . . . . . . . . . . . . . . .
luggage compartment . . . . . . . . . . . . . . . . . . . . . . . . .
Variable loading floor in the luggage compartment*
(Combi) . . . . . . . . . . . . . . . . . . . . . . . . . . . . . . . . . . . . . .
Net partition* (Combi) . . . . . . . . . . . . . . . . . . . . . . . .
Bicycle holder in the luggage compartment* . . . .
The roof rack* . . . . . . . . . . . . . . . . . . . . . . . . . . . . . . . .
Front cup holder . . . . . . . . . . . . . . . . . . . . . . . . . . . . . .
Rear cup holder* . . . . . . . . . . . . . . . . . . . . . . . . . . . . . .
Parking ticket holder . . . . . . . . . . . . . . . . . . . . . . . . . . .
Ashtray* . . . . . . . . . . . . . . . . . . . . . . . . . . . . . . . . . . . . . .
Cigarette lighter* and power sockets* . . . . . . . . . .
Storage compartments . . . . . . . . . . . . . . . . . . . . . . . .
Heating and air conditioning system
. . . . . . . . . .
Air outlet vents . . . . . . . . . . . . . . . . . . . . . . . . . . . . . . . .
Recirculated air mode . . . . . . . . . . . . . . . . . . . . . . . . .
Heating . . . . . . . . . . . . . . . . . . . . . . . . . . . . . . . . . . . . . .
Climatic (semi-automatic air conditioning system)*
Climatronic* (automatic air conditioning) . . . . . . .
Starting-off and Driving
. . . . . . . . . . . . . . . . . . . . . . .
Setting steering wheel position . . . . . . . . . . . . . . . . .
Ignition lock . . . . . . . . . . . . . . . . . . . . . . . . . . . . . . . . . .
Starting the engine . . . . . . . . . . . . . . . . . . . . . . . . . . . .
Switching off the engine . . . . . . . . . . . . . . . . . . . . . . .Shifting (manual gearbox) . . . . . . . . . . . . . . . . . . . . .
Handbrake . . . . . . . . . . . . . . . . . . . . . . . . . . . . . . . . . . .
Parking aid* . . . . . . . . . . . . . . . . . . . . . . . . . . . . . . . . . .
Cruise control system (CCS)* . . . . . . . . . . . . . . . . . .
“START-STOP”* . . . . . . . . . . . . . . . . . . . . . . . . . . . . . . .
Automatic gearbox
. . . . . . . . . . . . . . . . . . . . . . . . . . . .
Automatic gearbox* . . . . . . . . . . . . . . . . . . . . . . . . . .
Communication
. . . . . . . . . . . . . . . . . . . . . . . . . . . . . . .
Multifunction steering wheel* . . . . . . . . . . . . . . . . .
Universal telephone preinstallation GSM II* . . . . .
Voice control . . . . . . . . . . . . . . . . . . . . . . . . . . . . . . . . .
Music playback via Bluetooth® . . . . . . . . . . . . . . . .
Inputs AUX-IN* and MDI* . . . . . . . . . . . . . . . . . . . . .
Safety
. . . . . . . . . . . . . . . . . . . . . . . . . . . . . . . . . . . . . . .
Passive Safety
. . . . . . . . . . . . . . . . . . . . . . . . . . . . . . . . .
Basic information . . . . . . . . . . . . . . . . . . . . . . . . . . . . .
Correct seated position . . . . . . . . . . . . . . . . . . . . . . .
Seat belts
. . . . . . . . . . . . . . . . . . . . . . . . . . . . . . . . . . . . . .
Why seat belts? . . . . . . . . . . . . . . . . . . . . . . . . . . . . . . .
The physical principle of a frontal collision . . . . . .
Important safety information regarding the use of seat
belts . . . . . . . . . . . . . . . . . . . . . . . . . . . . . . . . . . . . . . . . .
How are seat belts correctly fastened? . . . . . . . . . .
Belt tensioner . . . . . . . . . . . . . . . . . . . . . . . . . . . . . . . .
Airbag system
. . . . . . . . . . . . . . . . . . . . . . . . . . . . . . . . .
Description of the airbag system . . . . . . . . . . . . . . .
Front airbags . . . . . . . . . . . . . . . . . . . . . . . . . . . . . . . . .
Side airbags* . . . . . . . . . . . . . . . . . . . . . . . . . . . . . . . . .
Head airbags* . . . . . . . . . . . . . . . . . . . . . . . . . . . . . . . .
Deactivating airbags . . . . . . . . . . . . . . . . . . . . . . . . . .
67991010151515161616171718181922232635353636374142434446
48485354555759596061616363676870727373747474758080808183868989899091
92929394959898104104105110111111113113113114117117117118119120122122123125127128
s3j8.a.book Page 3 Tuesday, April 20, 2010 1:10 PM
Page 10 of 244
Cockpit
9
Using the system
Safety
Driving Tips
General Maintenance
Breakdown assistance
Technical Data
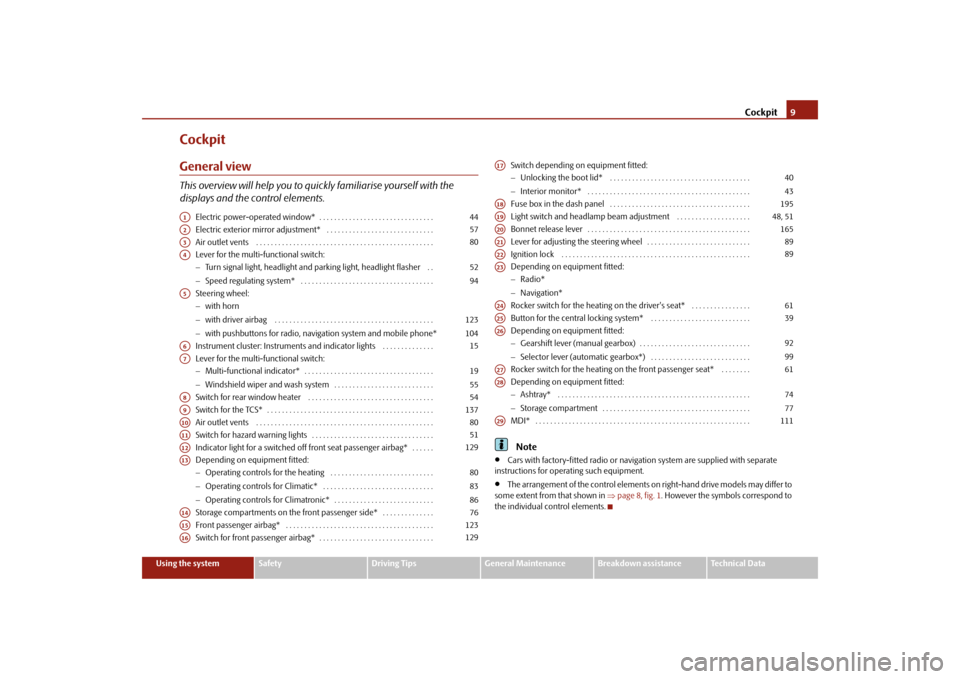
CockpitGeneral viewThis overview will help you to quic
kly familiarise yourself with the
displays and the control elements.
Electric power-operated window* . . . . . . . . . . . . . . . . . . . . . . . . . . . . . . . Electric exterior mirror adjustment* . . . . . . . . . . . . . . . . . . . . . . . . . . . . . Air outlet vents . . . . . . . . . . . . . . . . . . . . . . . . . . . . . . . . . . . . . . . . . . . . . . . . Lever for the multi-functional switch: Turn signal light, headlight and parking light, headlight flasher . . Speed regulating system* . . . . . . . . . . . . . . . . . . . . . . . . . . . . . . . . . . . . Steering wheel: with horn with driver airbag . . . . . . . . . . . . . . . . . . . . . . . . . . . . . . . . . . . . . . . . . . . with pushbuttons for radio, navi
gation system and mobile phone*
Instrument cluster: Instruments and indicator lights . . . . . . . . . . . . . . Lever for the multi-functional switch: Multi-functional indicator* . . . . . . . . . . . . . . . . . . . . . . . . . . . . . . . . . . . Windshield wiper and wash system . . . . . . . . . . . . . . . . . . . . . . . . . . . Switch for rear window heater . . . . . . . . . . . . . . . . . . . . . . . . . . . . . . . . . . Switch for the TCS* . . . . . . . . . . . . . . . . . . . . . . . . . . . . . . . . . . . . . . . . . . . . . Air outlet vents . . . . . . . . . . . . . . . . . . . . . . . . . . . . . . . . . . . . . . . . . . . . . . . .Switch for hazard warning lights . . . . . . . . . . . . . . . . . . . . . . . . . . . . . . . . . Indicator light for a switched off front seat passenger airbag* . . . . . . Depending on equipment fitted: Operating controls for the heating . . . . . . . . . . . . . . . . . . . . . . . . . . . . Operating controls for Climatic* . . . . . . . . . . . . . . . . . . . . . . . . . . . . . . Operating controls for Climatronic* . . . . . . . . . . . . . . . . . . . . . . . . . . . Storage compartments on the front passenger side* . . . . . . . . . . . . . .Front passenger airbag* . . . . . . . . . . . . . . . . . . . . . . . . . . . . . . . . . . . . . . . . Switch for front passenger airbag* . . . . . . . . . . . . . . . . . . . . . . . . . . . . . . .
Switch depending on equipment fitted: Unlocking the boot lid* . . . . . . . . . . . . . . . . . . . . . . . . . . . . . . . . . . . . . . Interior monitor* . . . . . . . . . . . . . . . . . . . . . . . . . . . . . . . . . . . . . . . . . . . . Fuse box in the dash panel . . . . . . . . . . . . . . . . . . . . . . . . . . . . . . . . . . . . . . Light switch and headlamp beam adjustment . . . . . . . . . . . . . . . . . . . .Bonnet release lever . . . . . . . . . . . . . . . . . . . . . . . . . . . . . . . . . . . . . . . . . . . . Lever for adjusting the steering wheel . . . . . . . . . . . . . . . . . . . . . . . . . . . . Ignition lock . . . . . . . . . . . . . . . . . . . . . . . . . . . . . . . . . . . . . . . . . . . . . . . . . . .Depending on equipment fitted: Radio* Navigation* Rocker switch for the heating on the driver's seat* . . . . . . . . . . . . . . . .Button for the central locking system* . . . . . . . . . . . . . . . . . . . . . . . . . . . Depending on equipment fitted: Gearshift lever (manual gearbox) . . . . . . . . . . . . . . . . . . . . . . . . . . . . . . Selector lever (automatic gearbox*) . . . . . . . . . . . . . . . . . . . . . . . . . . . Rocker switch for the heating on the front passenger seat* . . . . . . . . Depending on equipment fitted: Ashtray* . . . . . . . . . . . . . . . . . . . . . . . . . . . . . . . . . . . . . . . . . . . . . . . . . . . . Storage compartment . . . . . . . . . . . . . . . . . . . . . . . . . . . . . . . . . . . . . . . . MDI* . . . . . . . . . . . . . . . . . . . . . . . . . . . . . . . . . . . . . . . . . . . . . . . . . . . . . . . . . .Note
Cars with factory-fitted radio or naviga
tion system are supplied with separate
instructions for operating such equipment.
The arrangement of the control elements on right-hand drive models may differ to
some extent from that shown in
page 8, fig. 1
. However the symbols correspond to
the individual control elements.
A1
44
A2
57
A3
80
A4
5294
A5
123104
A6
15
A7
1955
A8
54
A9
137
A10
80
A11
51
A12
129
A13
808386
A14
76
A15
123
A16
129
A17
4043
A18
195
A19
48, 51
A20
165
A21
89
A22
89
A23A24
61
A25
39
A26
9299
A27
61
A28
7477
A29
111
s3j8.a.book Page 9 Tuesday, April 20, 2010 1:10 PM
Page 28 of 244

Instruments and warning lights
27
Using the system
Safety
Driving Tips
General Maintenance
Breakdown assistance
Technical Data
WARNING
If you do not pay attention to the warning lights coming on and the corre-
sponding descriptions and warning notes, this may result in severe body inju- ries or major vehicle damage.
The engine compartment of your car is
a hazardous area. There is a risk of
injuries, scalding, accidents and fire wh
en working in the engine compartment,
e.g. inspecting and replenishing oil and
other fluids. It is also essential to
observe all warnings
page 166, “Working in the engine compartment”.
Note
Arrangement of the indicator lights depends on the model and model version.
Operational faults are shown in the instrument cluster as red symbols (priority 1 -
danger) or yellow symbol
s (priority 2 - warning).
Turn signal system
Either the left
or right
indicator light flashes depending on the position of the turn
signal lever. The indicator light flashes at twice its normal rate if a turn signal light fails.Switching off the hazard warning light system is switched on will cause all of the turn signal lights as well as both indicator lights to flash. Further information about the turn signal system
page 52.
Main beam
The indicator light
comes on when the main beam is selected or also when the
headlight flasher is operated. Further information about the main beam
page 52.
Low beam
The warning light
comes on when low beam is selected
page 48.
Engine oil
page 29
Open door
page 30
Fluid level in windshield washer system*
page 30
Control system for exhaust
page 30
Traction control system (TCS)*
page 31
Tyre pressure monitoring system*
page 31
Selector lever lock*
page 31
Traction control system (TCS)*
page 31
Electronic stability programme (ESP)*
page 31
Antilock brake system (ABS)
page 32
Brake system
page 32
Cruise control system*
page 33
Airbag system
page 33
Diesel particle filter* (diesel engine)
page 33
Seat belt warning light
page 34
s3j8.a.book Page 27 Tuesday, April 20, 2010 1:10 PM
Page 34 of 244

Instruments and warning lights
33
Using the system
Safety
Driving Tips
General Maintenance
Breakdown assistance
Technical Data
WARNING
Pay attention to the following instruct
ions before checking the brake fluid
level and opening the bonnet
page 166, “Working in the engine compart-
ment”.
If the brake system warning light
does not go out a few seconds after
switching on the ignition or comes on when driving, stop immediately and check the brake fluid in the reservoir
page 171, “Brake fluid”. If the fluid level
has dropped below the MIN marking, do no
t drive any further - risk of accident!
Obtain professional assistance.Cruise control system*
The warning light
lights up, when operating the speed regulating system.
Airbag system
Monitoring the airbag system The warning light
comes on for a few seconds when the ignition is switched on.
There is a fault in the system if the warning
light does not go out or comes on or flashes
while driving
. This also applies if the warning
light does not come on after the
ignition is switched on. The following text will be displayed in the information display*:
Airbag fault!
The functionality of the airbag system is also monitored electronically when one airbag has been switched off. The following situation applies if the fr
ont, side and head airbags or belt
tensioner have been switched off
using the vehicle system tester:
The warning light
lights up for 3 seconds after switching on the ignition and then
flashes for 12 seconds afterwards in 2 second intervals. The following text will be displayed in the information display*:
Airbag/belt tensioner deactivated!
If the passenger front airbag has been
switched off using the switch (for
switching off airbags)* in the end face of
the dash panel on the front passenger
side:
The warning light
comes on for 4 seconds after the ignition has been switched
on.
switching off the airbag is indicated in the middle of the dash panel by the lighting
up of the yellow indicator light in display
page 129.
WARNING
Have the airbag system checked immediat
ely by a specialist
garage if a fault
exists. Otherwise, there is a
risk of the airbag not bein
g activated in the event of
an accident.
Note
Further information about switching off airbags
page 128, “Deactivating airbags”.
Diesel particle filter*
(diesel engine)
If the warning light
comes on, this means that soot
has accumulated in the diesel
particle filter because of the frequent short distances. In order to clean the diesel particle filter, the vehicle should be driven at an even speed of at least 60 km/h at engine speeds of 1
800 - 2 500 rpm for at least 15 minutes or until
the warning light goes out with the 4th or
5th gear engaged (automatic gearbox: posi-
tion S) when the traffic situation permits it. This increases the exhaust temperature and the soot deposited in the diesel particle filter is burnt. Always pay attention to the valid speed limits
.
The warning light
goes out after the successful cleaning of the diesel particle filter.
If the filter is not properly
cleaned, the warning light
does not go out and the
warning light
begins to flash. In the in
formation display* appears
Diesel-particle
filter! Owner's manual
. Afterwards the engine control unit shifts the engine into the
emergency mode, which only has a reduced po
wer output. After switching the ignition
off and on again the warning light
comes on.
Have the vehicle inspected without
delay by your specialist garage.
s3j8.a.book Page 33 Tuesday, April 20, 2010 1:10 PM
Page 38 of 244

Unlocking and locking
37
Using the system
Safety
Driving Tips
General Maintenance
Breakdown assistance
Technical Data
Switching child safety lock on– On vehicles without central locking system,
turn the slot of the safety lock on the
left door to the left
page 36, fig. 25
, on the right door turn it to the right.
– On vehicles with central locking system, turn
the slot of the safety lock on the left
door to the right, on the right door turn it to the left
page 36, fig. 25
.
Switching child safety lock off– On vehicles without central locking system,
turn the slot of the safety lock on the
left door to the right, on the right door turn it to the left.
– On vehicles with central locking system, turn
the slot of the safety lock on the left
door to the left, on the right door turn it to the right.
So long as the child safety lock is switched
on it is not possible to open the door from
the inside with the door opening lever. In th
is case the door can be opened only from
the outside.Central locking system*DescriptionUnlocking or locking the vehicle causes
all doors to be unlocked or locked at the same
time by the central locking system. The boot lid is unlocked when opening. It can be opened by pressing the hand grip above the licence plate. Operation of the central locking system is possible:
from the outside using the vehicle key
page 38;
using the buttons for the
central locking system
page 39;
by using the remote control
page 41.
Indicator light in the driver's door After locking the vehicle the indicator light fl
ashes for 2 seconds fast, then more slowly.
If the vehicle is locked and the safe securing system
page 38 is not operating, the
indicator light in the driver door flashes for
about 2 seconds fast, goes out and starts to
flash slowly after about 30 seconds.
If the indicator light first of all flashes fast for about 2 seconds, afterwards lights up for about 30 seconds and then flashes slowly, there is a fault in the system of the central locking or the interior monitor*
page 43. Visit a specialist garage to obtain assist-
ance. Convenience operation of the windows One can open and close the electrically
powered windows when unlocking and
locking the vehicle
page 45.
Opening a single door* This function makes it possible to only unlock the driver's door. The other doors remain locked and are only unlocked when
the command is repeated. The single door
opening function can be first activated by recoding the control unit of the central locking system. This work is undertaken by a specialist garage which can give you more information. Automatic locking* All the doors and the boot lid are locked au
tomatically once the car reaches a speed of
about 15 km/h. If the ignition key is withdrawn, the car is
then automatically unlocked again. The driver
can also unlock the vehicle
by pressing the button
of the central locking system.
If you wish, you can have a specialist gara
ge activate the automatic locking function.
WARNING
Locking the doors prevents involuntary op
ening in an exceptional situation (an
accident). Locked doors prevent unwanted entry into the vehicle from outside, for example at road crossings. Locked do
ors do, however, make it more difficult
for rescuers to get into the vehicle
in an emergency - danger to life!
Note
In the event of an accident in which the airbags are deployed, the locked doors are
automatically unlocked in order to enable
rescuers to gain access to the vehicle.
Only the front door which is fitted with
a locking cylinder can be unlocked and
locked using the key if the central locking sy
stem fails. You can operate the rear doors
manually.
s3j8.a.book Page 37 Tuesday, April 20, 2010 1:10 PM
Page 40 of 244
Unlocking and locking
39
Using the system
Safety
Driving Tips
General Maintenance
Breakdown assistance
Technical Data
All the doors and the boot lid are locked.
The switched on interior lights go out over the door contact.
The windows and the electric sliding/tilting roof* close provided the key is
held
in
the lock position.
The safe securing system is activated immediately.
The indicator light in the driver door begins flashing.Note
The opened front doors cannot be unlocked. It
must be locked separately after closing
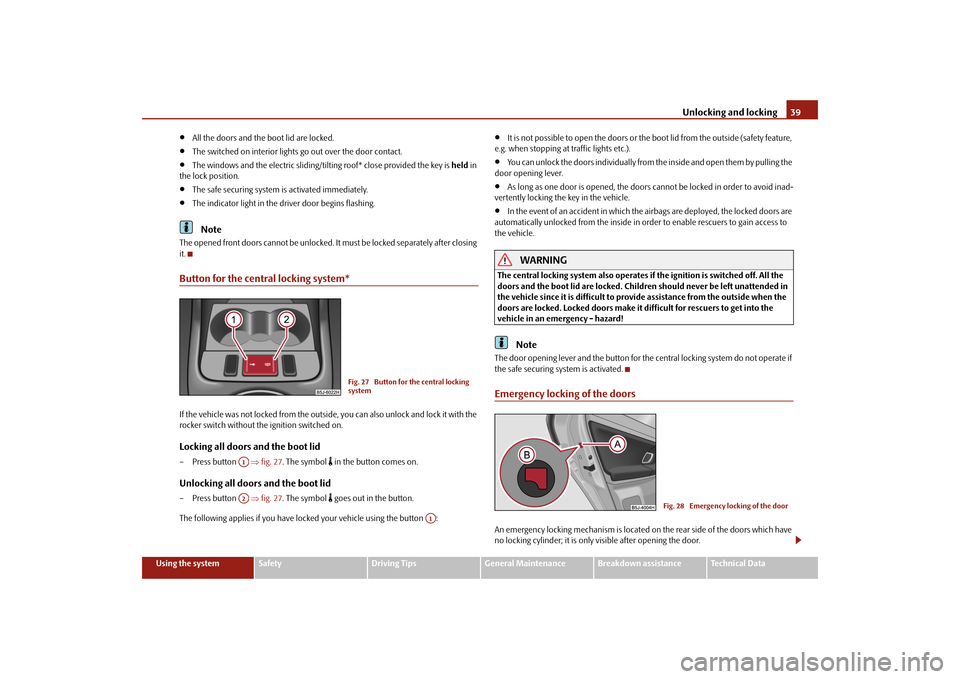
it.Button for the central locking system*If the vehicle was not locked from the outsid
e, you can also unlock and lock it with the
rocker switch without th
e ignition switched on.
Locking all doors and the boot lid– Press button
fig. 27
. The symbol
in the button comes on.
Unlocking all doors and the boot lid– Press button
fig. 27
. The symbol
goes out in the button.
The following applies if
you have locked your vehicle using the button :
It is not possible to open the doors or the boot lid from the outside (safety feature,
e.g. when stopping at
traffic lights etc.).
You can unlock the doors individually from
the inside and open them by pulling the
door opening lever.
As long as one door is opened, the doors cannot be locked in order to avoid inad-
vertently locking the key in the vehicle.
In the event of an accident in which the airbags are deployed, the locked doors are
automatically unlocked from the inside in orde
r to enable rescuers to gain access to
the vehicle.
WARNING
The central locking system al
so operates if the ignition is switched off. All the
doors and the boot lid are locked. Children should never be left unattended in the vehicle since it is difficult to prov
ide assistance from the outside when the
doors are locked. Locked doors make it difficult for rescuers to get into the vehicle in an emergency - hazard!
Note
The door opening lever and the button for the central locking system do not operate if the safe securing system is activated.Emergency locking of the doorsAn emergency locking mechanism is located on
the rear side of the doors which have
no locking cylinder; it is only
visible after opening the door.
Fig. 27 Button for the central locking system
A1A2
A1
Fig. 28 Emergency locking of the door
s3j8.a.book Page 39 Tuesday, April 20, 2010 1:10 PM
Page 52 of 244
Lights and Visibility
51
Using the system
Safety
Driving Tips
General Maintenance
Breakdown assistance
Technical Data
If the vehicle is not fitted with fog lights*, the rear fog light is switched on by turning the light switch to the position
and is pulled out directly to the position . This switch
does not have two position
s, but only one position.
The warning light
lights up in the instrument cluster when the rear fog light is
switched on
page 26.
Only the rear fog light of the trailer lights up if the vehicle is fitted with a
towing device
from Škoda original accessories
and when you are towing a trailer which is fitted
with the rear fog light.
Caution
The rear fog light should only be switched on
if visibility is particularly poor (conform
with any varying legal provisions) to avoi
d dazzling vehicles be
hind your vehicle.
Headlamp range adjustment
Once the low beam is switched on
you can then adapt the range of the
headlights to the lo
ad of the vehicle.
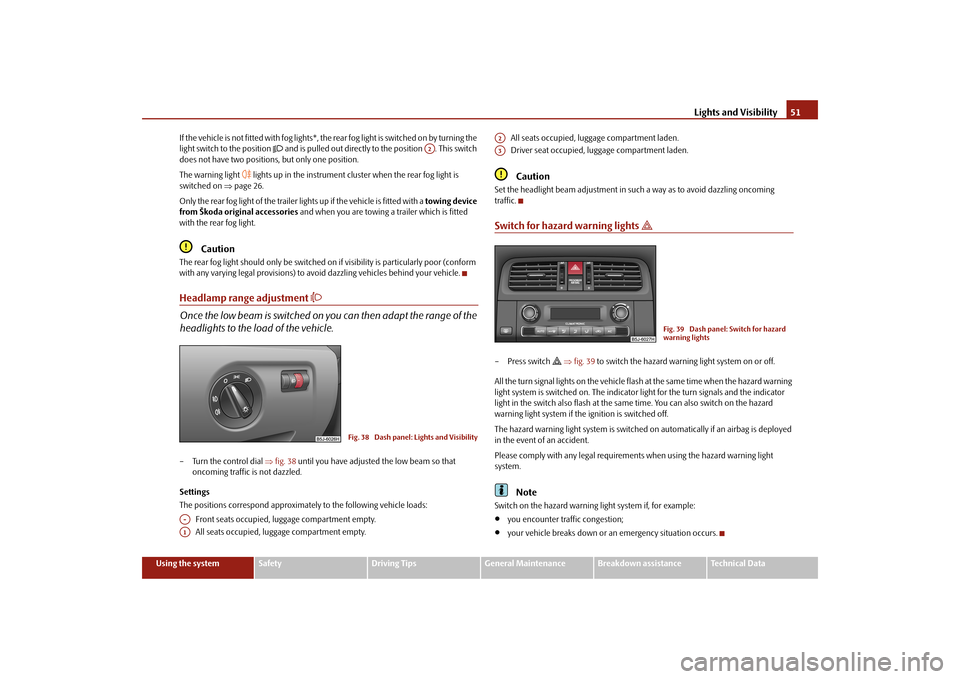
– Turn the control dial
fig. 38
until you have adjusted the low beam so that
oncoming traffic is not dazzled.
Settings The positions correspond
approximately to the
following vehicle loads:
Front seats occupied, luggage compartment empty. All seats occupied, luggage compartment empty.
All seats occupied, luggage compartment laden. Driver seat occupied, luggage compartment laden.Caution
Set the headlight beam adjustment in su
ch a way as to avoid dazzling oncoming
traffic.Switch for hazard warning lights
– Press switch
fig. 39
to switch the hazard warning light system on or off.
All the turn signal lights on the vehicle flas
h at the same time when the hazard warning
light system is switched on. The indicator
light for the turn signals and the indicator
light in the switch also flash at the same time. You can also switch on the hazard warning light system if the ignition is switched off. The hazard warning light system is switched on automatically if an airbag is deployed in the event of an accident. Please comply with any legal requirements when using the hazard warning light system.
Note
Switch on the hazard warning light system if, for example:
you encounter traffic congestion;
your vehicle breaks down or an emergency situation occurs.
A2
Fig. 38 Dash panel:
Lights and Visibility
A-A1
A2A3
Fig. 39 Dash panel: Switch for hazard warning lights
s3j8.a.book Page 51 Tuesday, April 20, 2010 1:10 PM
Page 55 of 244
Lights and Visibility
54The rear interior lighting is op
erated by pressi
ng the button
page 53, fig. 43
.
The button has two positions for the interior li
ghting at the rear. In the first position, the
interior lighting is switched on permanently, in the second position (after pressing) it is switched via the door contacts.
Note
We recommend having the bulb replaced by a specialist garage.Luggage compartment lightThe lighting comes on automatically when th
e boot lid is opened. If the lid remains
open for more than about 10
minutes, the luggage compartment lighting switches off
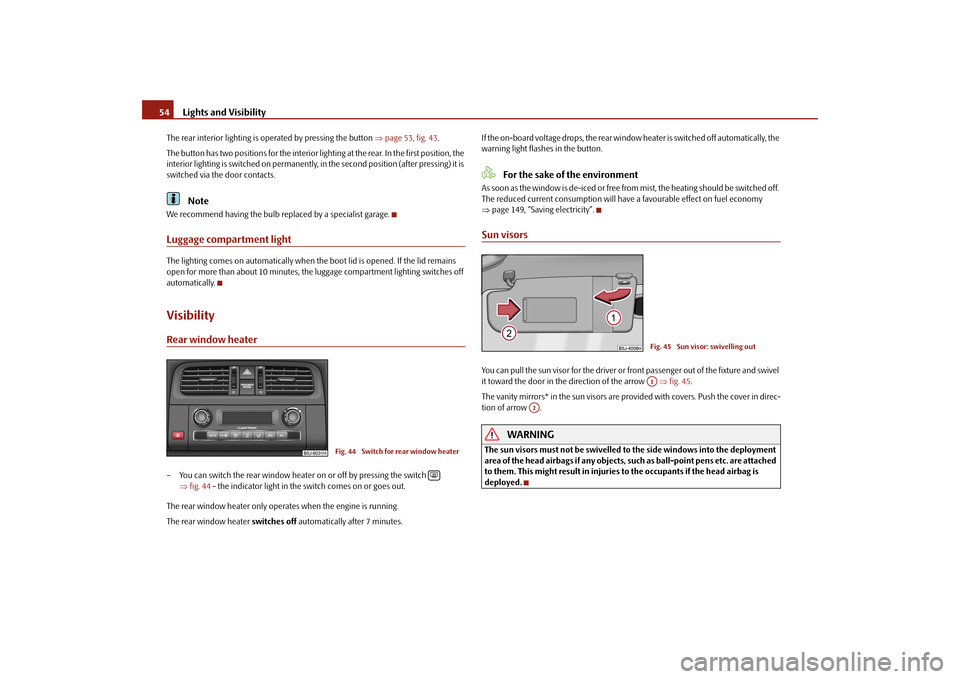
automatically.VisibilityRear window heater– You can switch the rear window heater
on or off by pressing the switch
fig. 44
- the indicator light in the switch comes on or goes out.
The rear window heater only operates when the engine is running. The rear wind
ow heater
switches
off automatically after 7 minutes.
If the on-board voltage drops, the rear window
heater is switched off automatically, the
warning light flashes in the button.
For the sake of the environment
As soon as the window is de-iced or free fr
om mist, the heating should be switched off.
The reduced current consumption will have a favourable effect on fuel economy page 149, “Saving electricity”.Sun visorsYou can pull the sun visor for the driver or front passenger out of the fixture and swivel it toward the door in the direction of the arrow
fig. 45
.
The vanity mirrors* in the sun visors are provided with covers. Push the cover in direc- tion of arrow .
WARNING
The sun visors must not be swivelled to the side windows into the deployment area of the head airbags if any objects, su
ch as ball-point pens
etc. are attached
to them. This might result in injuries to the occupants if the head airbag is deployed.
Fig. 44 Switch for rear window heater
Fig. 4 Sun visor: swivelling outA1
A2
s3j8.a.book Page 54 Tuesday, April 20, 2010 1:10 PM
Page 60 of 244
Seats and Storage
59
Using the system
Safety
Driving Tips
General Maintenance
Breakdown assistance
Technical Data
Seats and StorageFront seatsBasic informationThe front seats have a wide range of differ
ent settings and can thus be matched to the
physical characteristics of the driver and
front passenger. Correct adjustment of the
seats is particularly important for:
safely and quickly reaching the controls;
a relaxed, fatigue-free body position;
achieving the maximum protection offered by the seat belts and the airbag
system. The chapters which follow describe the procedure which you should adopt for adjusting the seats.
WARNING
Never transport more occupants than the maximum seating in the vehicle.
Each occupant must correctly fasten the seat belt belonging to the seat.
Children must be fastened
page 130, “Transporting children safely” with a
suitable restraint system.
The front seats and the head restraints must always be adjusted to match
the body size of the seat occupant as well as the seat belts must always be correctly fastened in order to provide an optimal protection for you and your occupants.
Always keep your feet in the footwell
when the vehicle is being driven -
never place your feet on the instrument panel, out of the window or on the surfaces of the seats. This is particular
ly important for the front seat passenger.
You will be exposed to increased risk of
injury if it becomes necessary to apply
the brake or in the event of an accident.
If an airbag is deployed, you may suffer
fatal injuries when adopting an incorrect seated position!
It is important for the driver and front
passenger to maintain
a distance of at
least 25 cm from the steering wheel or
dash panel. Not maintaining this
minimum distance will mean that the airbag
system will not be able to properly
protect you - hazard! The front seats and the head restraints must always also be correctly adjusted to match the body size of the occupant.
Ensure that there are no objects in
the footwell as any objects may get
behind the pedals during a driving or braking manoeuvre. You would then no longer be able to operate the clutch, to brake or accelerate.
Do not transport any objects on the front passenger seat except those
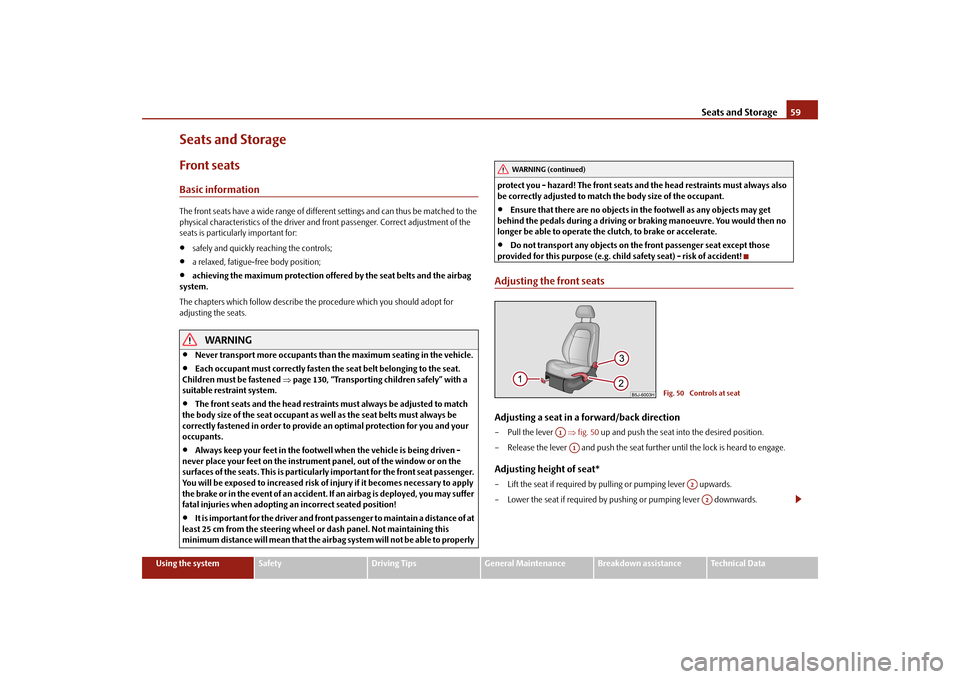
provided for this purpose (e.g. child safety seat) - risk of accident!Adjusting the front seatsAdjusting a seat in a forward/back direction–Pull the lever
fig. 50
up and push the seat into the desired position.
– Release the lever and push the seat further until the lock is heard to engage.Adjusting height of seat*– Lift the seat if required by pulling or pumping lever upwards.– Lower the seat if required by pushing or pumping lever downwards.
WARNING (continued)
Fig. 50 Controls at seat
A1A1
A2A2
s3j8.a.book Page 59 Tuesday, April 20, 2010 1:10 PM
Page 61 of 244

Seats and Storage
60 Adjust the angle of the seat backrest– Relieve any pressure on the seat backrest
(do not lean on it) and turn the hand-
wheel to adjust the angle of the backrest.
The driver's seat should be adjusted in such a way that the pedals can be fully pressed to the floor with slightly bent legs. The seat backrest on the driver's seat should
be adjusted in such a way that the upper
point of the steering wheel can be easi
ly reached with slightly bent arms.
WARNING
Only adjust the driver seat when the vehicle is stationary - risk of injury!
Take care when adjusting the seat! Adjusting the seat without care can lead
to bruises or injuries.
The seat backrests must not be angled too far back when driving otherwise
this will affect proper operation of the se
at belts and of the airbag system - risk
of injury!Head restraintsFig. 51 Head restraint: Adjusting / pulling outBest protection is achieved if the top edge of
the head restraint is at the same level as
the upper part of your head.
Adjusting the height of a head restraint– Grasp the side of the head restraint with both hands and push the head restraint in
the direction of axle of the metal guide rods, in the direction of arrow to the top or to the bottom
fig. 51
on the left.
– Move the head restraint downwards if required by pressing the locking button
fig. 51
on the right and by pressing with the other hand the head restraint down-
wards.
Removing and installing a head restraint– Pull the head restraint out of the seat backrest as far as the stop. – Press the locking button in the direction of arrow
fig. 51
and pull the head
restraint out.
– To re-insert the head restraint, push it do
wn into the seat backrest far enough until
you hear the locking button engage.
The position of the front, rear outer head restraints and the rear middle head restraint* is adjustable for height. The head restraints must be adjusted to ma
tch the size of the seat occupant. Correctly
adjusted head restraints together with the
seat belts offer effective protection for the
occupants
page 114.
WARNING
The head restraints must be correctly adjusted in order to offer effective
protection for the occupants in the event of an accident.
Do not drive under any circumstance with removed head restraints - risk of
injury!
If the rear seats are occupied, the rear
head restraint must not be in the
lower position.
A3
s3j8.a.book Page 60 Tuesday, April 20, 2010 1:10 PM