ECO mode SKODA FABIA 2012 2.G / 5J User Guide
[x] Cancel search | Manufacturer: SKODA, Model Year: 2012, Model line: FABIA, Model: SKODA FABIA 2012 2.G / 5JPages: 196, PDF Size: 4.83 MB
Page 77 of 196
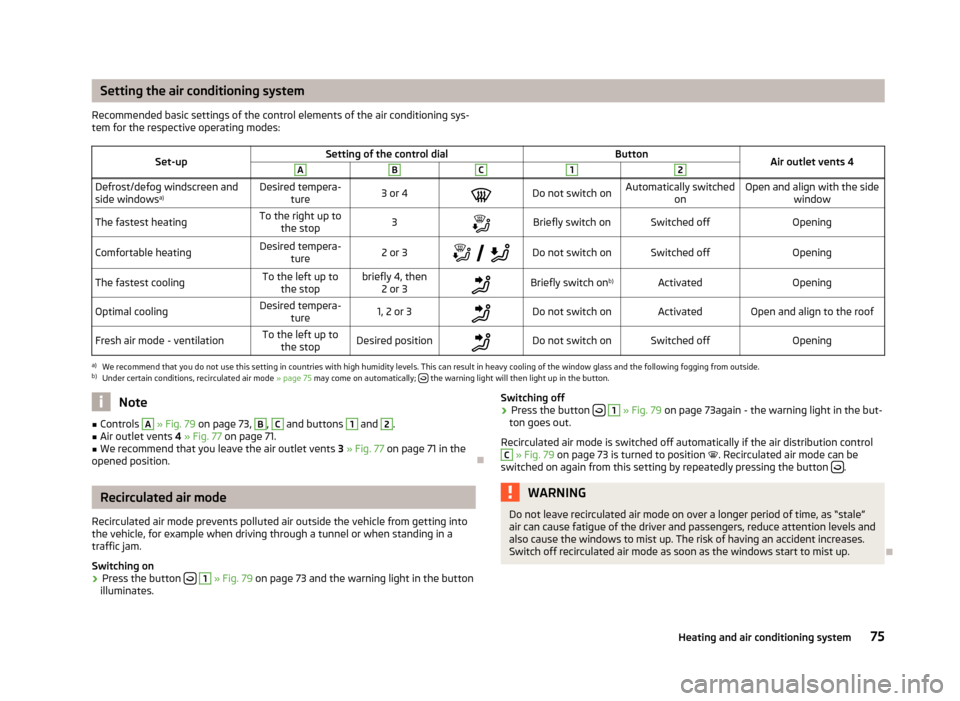
Setting the air conditioning system
Recommended basic settings of the control elements of the air conditioning sys-
tem for the respective operating modes:
Set-up Setting of the control dial
Button
Air outlet vents 4 A B C 1 2
Defrost/defog windscreen and
side windows
a) Desired tempera-
ture 3 or 4
Do not switch on Automatically switched
on Open and align with the side
window
The fastest heating To the right up to
the stop 3
Briefly switch on Switched off
Opening
Comfortable heating Desired tempera-
ture 2 or 3
Do not switch on Switched off
Opening
The fastest cooling To the left up to
the stop briefly 4, then
2 or 3 Briefly switch on
b)
Activated Opening
Optimal cooling Desired tempera-
ture 1, 2 or 3
Do not switch on Activated Open and align to the roof
Fresh air mode - ventilation To the left up to
the stop Desired position
Do not switch on Switched off
Openinga)
We recommend that you do not use this setting in countries with high humidity levels. This can result in heavy cooling of the window glass and the following fogging from outside.
b) Under certain conditions, recirculated air mode » page 75 may come on automatically; the warning light will then light up in the button.
Note
■ Controls A
» Fig. 79 on page 73
, B
, C
and buttons 1
and 2
.
■ Air outlet vents 4 » Fig. 77 on page 71 .
■ We recommend that you leave the air outlet vents 3 » Fig. 77 on page 71 in the
opened position. ÐRecirculated air mode
Recirculated air mode prevents polluted air outside the vehicle from getting into
the vehicle, for example when driving through a tunnel or when standing in a
traffic jam.
Switching on
› Press the button
1
» Fig. 79 on page 73
and the warning light in the button
illuminates. Switching off
› Press the button
1
» Fig. 79 on page 73
again - the warning light in the but-
ton goes out.
Recirculated air mode is switched off automatically if the air distribution control C
» Fig. 79 on page 73
is turned to position . Recirculated air mode can be
switched on again from this setting by repeatedly pressing the button .
WARNING
Do not leave recirculated air mode on over a longer period of time, as “stale”
air can cause fatigue of the driver and passengers, reduce attention levels and
also cause the windows to mist up. The risk of having an accident increases.
Switch off recirculated air mode as soon as the windows start to mist up. Ð
75
Heating and air conditioning system
Page 78 of 196

Climatronic (automatic air conditioning system)
Introductory information
The Climatronic maintains fully automatically a convenience temperature. This is
achieved by automatically varying the temperature of the air flow, the blower
stages and air distribution. The system also takes sunlight into account, which
eliminates the need to alter the settings manually. The automatic
mode » page 77 ensures maximum well-being of the occupants at all times of
the year.
Description of Climatronic system
The cooling system only operates if the following conditions are met:
› engine running;
› outside temperature above approx. +2 °C;
› AC 18
» Fig. 80 on page 76 switched on.
The AC compressor is switched off at a high coolant temperature in order to pro-
vide cooling at a high load of the engine.
Recommended setting for all periods of the year.
› Set the desired temperature, we recommend 22 °C.
› Press the button
AUTO 12
» Fig. 80
on page 76.
› Move the air outlet vents
3 » Fig. 77 on page 71
and 4 so that the air flow is di-
rected slightly upwards.
Switching between Celsius and Fahrenheit
Press and hold the buttons AUTO and
AC » Fig. 80
on page 76 at the same time.
The information in the desired temperature measuring unit appears in the display. Note
We recommend that you have the Climatronic system cleaned by a ŠKODA spe-
cialist garage once every year. Ð Overview of the control elements
Fig. 80
Climatronic: Control elements
The buttons/control dial Setting the interior temperature
The displays Display of selected interior temperature
Degrees Celsius or Fahrenheit
Automatic air conditioning mode
De-mist or de-ice the windshield
Direction of air flow
Recirculated air mode
Cooling system on/off
Set blower speed
The buttons/control dial Setting the blower speed
Interior temperature sensor
Automatic mode
De-mist or de-ice the windshield
Air flow to the windows
Air flow to head
Air flow in the footwell £ 1
2
3
4
5
6
7
8
9
10
11
12
13
14
15
16
76
Using the system
Page 90 of 196
START/STOP
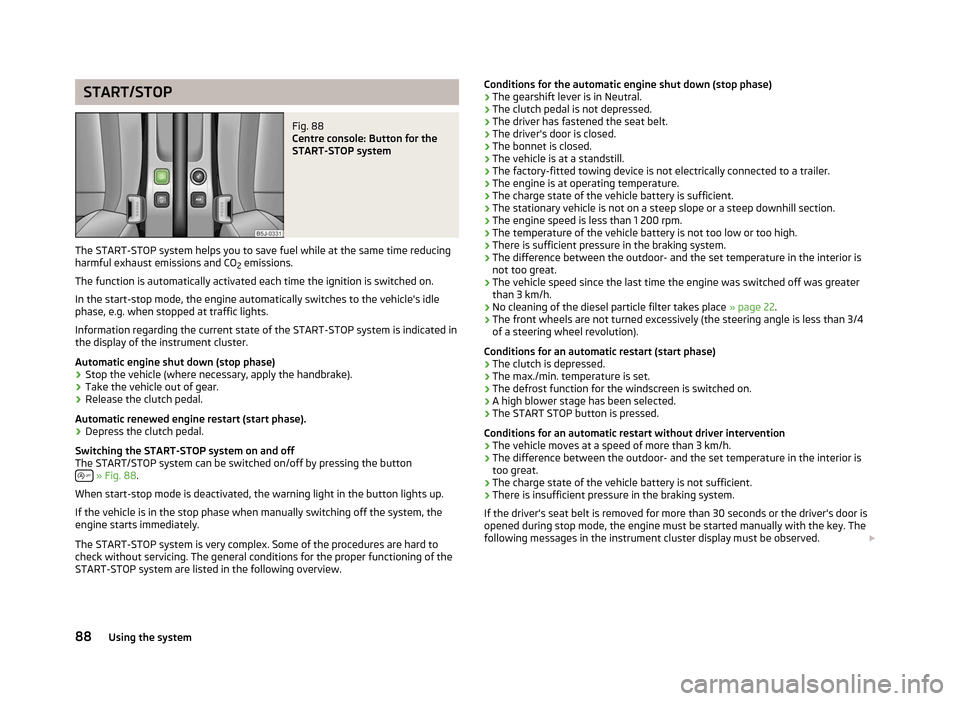
Fig. 88
Centre console: Button for the
START-STOP system
The START-STOP system helps you to save fuel while at the same time reducing
harmful exhaust emissions and CO 2 emissions.
The function is automatically activated each time the ignition is switched on.
In the start-stop mode, the engine automatically switches to the vehicle's idle
phase, e.g. when stopped at traffic lights.
Information regarding the current state of the
START-STOP system is indicated in
the display of the instrument cluster.
Automatic engine shut down (stop phase)
› Stop the vehicle (where necessary, apply the handbrake).
› Take the vehicle out of gear.
› Release the clutch pedal.
Automatic renewed engine restart (start phase).
› Depress the clutch pedal.
Switching the
START-STOP system on and off
The START/STOP system can be switched on/off by pressing the button » Fig. 88
.
When start-stop mode is deactivated, the warning light in the button lights up.
If the vehicle is in the stop phase when manually switching off the system, the
engine starts immediately.
The
START-STOP system is very complex. Some of the procedures are hard to
check without servicing. The general conditions for the proper functioning of the
START-STOP system are listed in the following overview. Conditions for the automatic engine shut down (stop phase)
› The gearshift lever is in Neutral.
› The clutch pedal is not depressed.
› The driver has fastened the seat belt.
› The driver's door is closed.
› The bonnet is closed.
› The vehicle is at a standstill.
› The factory-fitted towing device is not electrically connected to a trailer.
› The engine is at operating temperature.
› The charge state of the vehicle battery is sufficient.
› The stationary vehicle is not on a steep slope or a steep downhill section.
› The engine speed is less than 1
200 rpm.
› The temperature of the vehicle battery is not too low or too high.
› There is sufficient pressure in the braking system.
› The difference between the outdoor- and the set temperature in the interior is
not too great.
› The vehicle speed since the last time the engine was switched off was greater
than 3 km/h.
› No cleaning of the diesel particle filter takes place
» page 22.
› The front wheels are not turned excessively (the steering angle is less than 3/4
of a steering wheel revolution).
Conditions for an automatic restart (start phase) › The clutch is depressed.
› The max./min. temperature is set.
› The defrost function for the windscreen is switched on.
› A high blower stage has been selected.
› The START STOP button is pressed.
Conditions for an automatic restart without driver intervention
› The vehicle moves at a speed of more than 3 km/h.
› The difference between the outdoor- and the set temperature in the interior is
too great.
› The charge state of the vehicle battery is not sufficient.
› There is insufficient pressure in the braking system.
If the driver's seat belt is removed for more than 30 seconds or the driver's door is
opened during stop mode, the engine must be started manually with the key. The
following messages in the instrument cluster display must be observed. £
88 Using the system
Page 94 of 196

N
- Neutral
The transmission is in Neutral in this position.
The brake pedal must be depressed to move the selector lever out of the position
N (if the lever is in this position for longer than 2
seconds) into the position D or R
when the vehicle is travelling at less than 5 km/h or the vehicle is stationary and
the ignition is switched on. D
- Position for driving forward (normal programme)
When the selector lever is in this position, the forward gears are automatically
shifted up and down in line with the engine load, vehicle speed and dynamic shift
programme.
The brake pedal must be depressed to move the selector lever into position D
from Nwhen the vehicle is travelling at less than 5
km/h or is stationary.
Under certain circumstances (e.g. when driving in mountainous regions or when
towing a trailer) it may be beneficial to select the manual shift pro-
gramme » page 92 for a short time in order to adapt the gearbox ratios manual-
ly to the driving situations. S
- Position for driving forward (sports programme)
Shifting up later into a higher gear makes it possible to fully exploit the power po-
tential of the engine. The gearbox also then shifts down at higher engine speeds
as in the position D .
The Shiftlock on the selector lever grip must be pressed when moving the selec-
tor lever out of the position D into the position S. ÐManual shifting of gears (Tiptronic)
Fig. 90
Selector lever and multifunction steering wheel First read and observe the introductory information and safety warn-
ings on page 90.
Tiptronic mode makes it possible to manually shift gears with the selector lever or
multifunction steering wheel.
Switching to manual shifting
›
Push the selector lever to the right out of position
D. The selector lever posi-
tion you have engaged is indicated in the information display of the instrument
cluster together with the engaged gear 1
» Fig. 89 on page 91
on the right.
Shifting up gears
› Press the selector lever forwards +
» Fig. 90
.
› Pull the right rocker switch
+ towards the multifunction steering wheel.
Shifting down gears › Press the selector lever backwards -
» Fig. 90
.
› Pull the left rocker switch
- towards the multifunction steering wheel.
Temporarily switching to manual shifting
› If the selector lever is in position
D or S, pull the left rocker switch - or the
right rocker switch + towards the multifunction steering wheel.
› Manual shifting switches off if the rocker switches
- or
+ are not actuated for
some time. You can also switch off the temporary switch-over to manual shift-
ing by pressing the right rocker switch + for more than 1 second.
It is possible to switch to manual shifting when the car is stationary and when
driving.
When accelerating, the gearbox automatically shifts up into the higher gear just
before the maximum permissible engine speed is reached.
If a lower gear is selected, the gearbox does not shift down until there is no risk
of the engine overrevving.
If you operate the kickdown function, the gearbox shifts into a lower gear in line
with the vehicle speed and engine speed. Note
The kickdown function is also available when manually shifting gears. Ð
ä
92 Using the system
Page 95 of 196
Selector lever lock
First read and observe the introductory information and safety warn-
ings on page 90.
Automatic selector lever lock
With the ignition on, the selector lever is locked when it is in the positions P and
N. The brake pedal must be depressed to move the selector lever out of this posi-
tion. The warning light » page 24, Selector lever lock illuminates in the in-
strument cluster as a reminder for the driver when the selector lever is in the po-
sitions P and N.
The selector lever is not locked when quickly moving across the position
N (e.g.
from R to D). This, for example, helps to rock out a vehicle that is stuck. The selec-
tor lever lock will click into place if the lever is in the N position for more than 2
seconds without the brake pedal being pressed.
The selector lever lock is only active if the vehicle is stationary or moving at speed
of less than 5 km/hour. The lock is switched off automatically into position N
when the car is travelling at a higher speed.
Shiftlock button
The Shiftlock button in the handle of selector lever prevents certain selector lever
positions being engaged inadvertently. The selector lever lock is cancelled when
the Shiftlock button is pressed.
Ignition key withdrawal lock 1)
After the ignition is switched off, the ignition key can only be withdrawn if the se-
lector lever is in the position P. If the ignition key is withdrawn, the selector lever
is blocked in position P. ÐKickdown function
First read and observe the introductory information and safety warn-
ings on page 90.
The kickdown function provides you with maximum acceleration power.
When the accelerator pedal is fully depressed, the kickdown function is activated
in the desired driving program. This function has precedence over the driving pro-
gramme and serves for maximum acceleration of the vehicle when exploiting the
ä
ä
maximum power potential of the engine without taking into account the current
selector lever position (
D, S or Tiptronic ). The gearbox shifts down to one or sev-
eral gears in line with the driving state and the vehicle accelerates. The gearbox
does not shift up into the highest gear until the engine has reached its maximum
revolutions for this gear range. Ð Dynamic shift programme
First read and observe the introductory information and safety warn-
ings on page 90.
The automatic gearbox of your vehicle is controlled electronically. Shifting up and
down through the gears is performed automatically on the basis of pre-defined
driving programmes.
Adopting a moderate style of driving
will cause the gearbox to select the most
economical driving programme. Shifting up into a higher gear as soon as possible
and shifting down as late as possible will have a favourable effect on your fuel
consumption.
When adopting a sporty style of driving with rapid movements of the accelerator
pedal combined with sharp acceleration, frequent changes in speed and exploit-
ing the top speed of the car, the gearbox will adjust to this style of driving once
the accelerator pedal (kickdown function) is depressed and will shift down earlier,
frequently by several gears in comparison to a moderate style of driving.
Selecting the most appropriate driving programme for the particular style of driv-
ing is a continuous process. Irrespective of this it is, however, possible to switch
or shift down into a dynamic shift programme by depressing the accelerator rap-
idly. The gearbox shifts down into a lower gear in accordance with the speed,
therefore enabling rapid acceleration (e.g. when overtaking) without the accelera-
tor pedal having to be depressed into the kickdown range. The original pro-
gramme will be reactivated to match your particular style of driving once the
gearbox has shifted up again.
When driving in hilly regions, the gears are selected to match uphill and downhill
sections. This avoids the gearbox frequently shifting up and down when negoti-
ating an uphill stretch. When driving downhill, it is possible to shift down into the
Tiptronic position, in order to exploit the engine brake torque. Ð
ä
1)
Only valid for some countries.
93
Automatic gearbox
Page 97 of 196
Communication
Mobile phones and two-way radio systems
ŠKODA permits the operation of mobile phones and two-way radio systems with
a professionally installed external aerial and a maximum transmission power of
up to 10 watts.
Please refer to a ŠKODA Service Partner for information about the possibilities of
installing and operating mobile phones and two-way radio systems that have a
transmission power of more than 10
W.
Operating mobile phones or two-way radio systems may interfere with the func-
tionality of the electronic systems in your vehicle.
The reasons for this are as follows:
› no external aerial;
› external aerial incorrectly installed;
› transmission power greater than 10 watts. WARNING
■ Concentrate fully at all times on your driving! As the driver you are fully re-
sponsible for road safety. Use the telephone system only to such an extent
that you are in full control of your vehicle at any time.
■ The national regulations for using a mobile phone in a vehicle must be ob-
served.
■ If a mobile phone or a two-way radio system is operated in a vehicle without
an external aerial or an external aerial which has been installed incorrectly,
this can increase the strength of the electromagnetic field inside the vehicle. ■ Two-way radio systems, mobile phones or mounts must not be installed on
airbag covers or within the immediate deployment range of the airbags.
■ Never leave a mobile phone on a seat, on the dash panel or in another area,
from which it can be thrown during a sudden braking manoeuvre, an accident
or a collision - risk of injury.
■ In the event of air transport, the Bluetooth ®
function for the hands-free sys-
tem must be switched off by a specialist garage. Note
■ We recommend that the installation of mobile phones and two-way radio sys-
tems in a vehicle be carried out by a ŠKODA
Service Partner.
■ Not all mobile phones that enable Bluetooth ®
communication are compatible
with the universal telephone preinstallation GSM
II. You can ask an authorised
ŠKODA Service Partner whether your telephone is compatible with the universal
telephone preinstallation GSM II. ■ The range of the Bluetooth ®
connection to the hands-free system is restricted
to the vehicle interior. The range is dependent on local factors, e.g. obstacles be-
tween the devices and mutual interferences with other devices. If your mobile
phone is in a jacket pocket, for example, this can lead to difficulties when estab-
lishing a connection with the hands-free-system or transferring data. Ð Universal telephone preinstallation GSM II
Introductory information
The universal telephone preinstallation GSM
II (hands-free system) includes a
convenience mode for the mobile phone via voice control, the multifunction
steering wheel, the adapter, radio or the navigation system.
The universal telephone preinstallation GSM II comprises the following functions.
› Phone Phonebook » page 96
.
› Convenience operation of the telephone via the multifunction steering
wheel
» page 96 .
› Managing telephone calls via the adapter
» page 97.
› Operation of the telephone via the information display
» page 99.
› Voice control of the telephone
» page 99.
› Music playback from the telephone or other multimedia units
» page 101.
All communication between a mobile phone and your vehicle's hands-free system
is established with the help of Bluetooth ®
technology. The adapter serves only
for charging the telephone and for transmitting the signal to the vehicle's exter-
nal aerial. Note
The following guidelines must be observed » page 95, Mobile phones and two-
way radio systems. Ð
95
Communication
Page 189 of 196
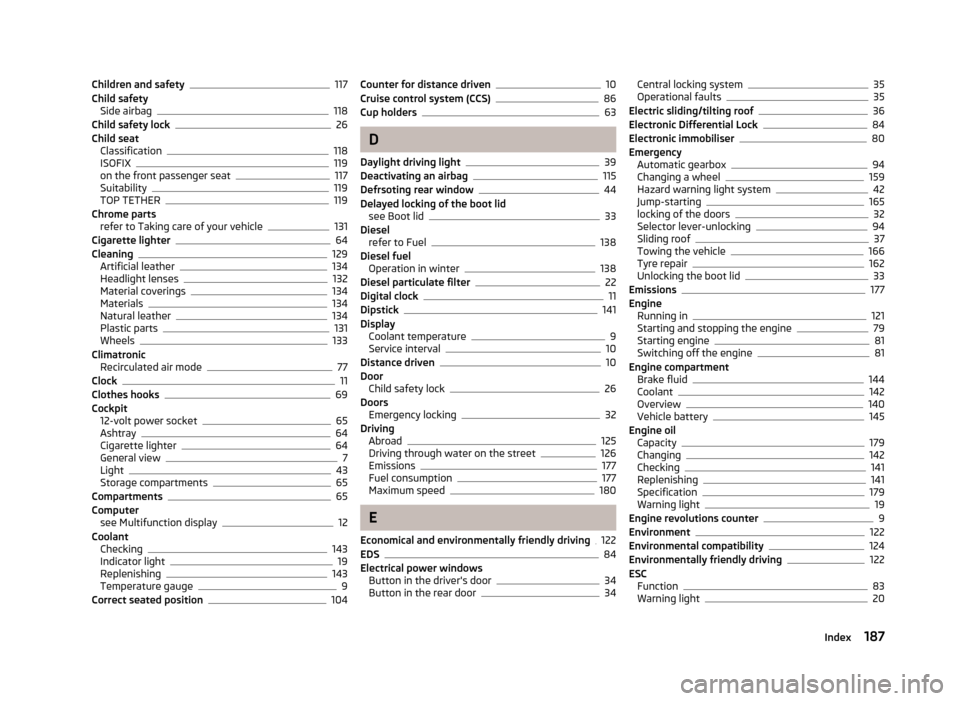
Children and safety 117
Child safety Side airbag 118
Child safety lock 26
Child seat Classification 118
ISOFIX 119
on the front passenger seat 117
Suitability 119
TOP TETHER 119
Chrome parts refer to Taking care of your vehicle 131
Cigarette lighter 64
Cleaning 129
Artificial leather 134
Headlight lenses 132
Material coverings 134
Materials 134
Natural leather 134
Plastic parts 131
Wheels 133
Climatronic Recirculated air mode 77
Clock 11
Clothes hooks 69
Cockpit 12-volt power socket 65
Ashtray 64
Cigarette lighter 64
General view 7
Light 43
Storage compartments 65
Compartments 65
Computer see Multifunction display 12
Coolant Checking 143
Indicator light 19
Replenishing 143
Temperature gauge 9
Correct seated position 104Counter for distance driven 10
Cruise control system (CCS) 86
Cup holders 63
D
Daylight driving light 39
Deactivating an airbag 115
Defrsoting rear window 44
Delayed locking of the boot lid see Boot lid 33
Diesel refer to Fuel 138
Diesel fuel Operation in winter 138
Diesel particulate filter 22
Digital clock 11
Dipstick 141
Display Coolant temperature 9
Service interval 10
Distance driven 10
Door Child safety lock 26
Doors Emergency locking 32
Driving Abroad 125
Driving through water on the street 126
Emissions 177
Fuel consumption 177
Maximum speed 180
E
Economical and environmentally friendly driving 122
EDS 84
Electrical power windows Button in the driver's door 34
Button in the rear door 34Central locking system 35
Operational faults 35
Electric sliding/tilting roof 36
Electronic Differential Lock 84
Electronic immobiliser 80
Emergency Automatic gearbox 94
Changing a wheel 159
Hazard warning light system 42
Jump-starting 165
locking of the doors 32
Selector lever-unlocking 94
Sliding roof 37
Towing the vehicle 166
Tyre repair 162
Unlocking the boot lid 33
Emissions 177
Engine Running in 121
Starting and stopping the engine 79
Starting engine 81
Switching off the engine 81
Engine compartment Brake fluid 144
Coolant 142
Overview 140
Vehicle battery 145
Engine oil Capacity 179
Changing 142
Checking 141
Replenishing 141
Specification 179
Warning light 19
Engine revolutions counter 9
Environment 122
Environmental compatibility 124
Environmentally friendly driving 122
ESC Function 83
Warning light 20
187
Index
Page 190 of 196
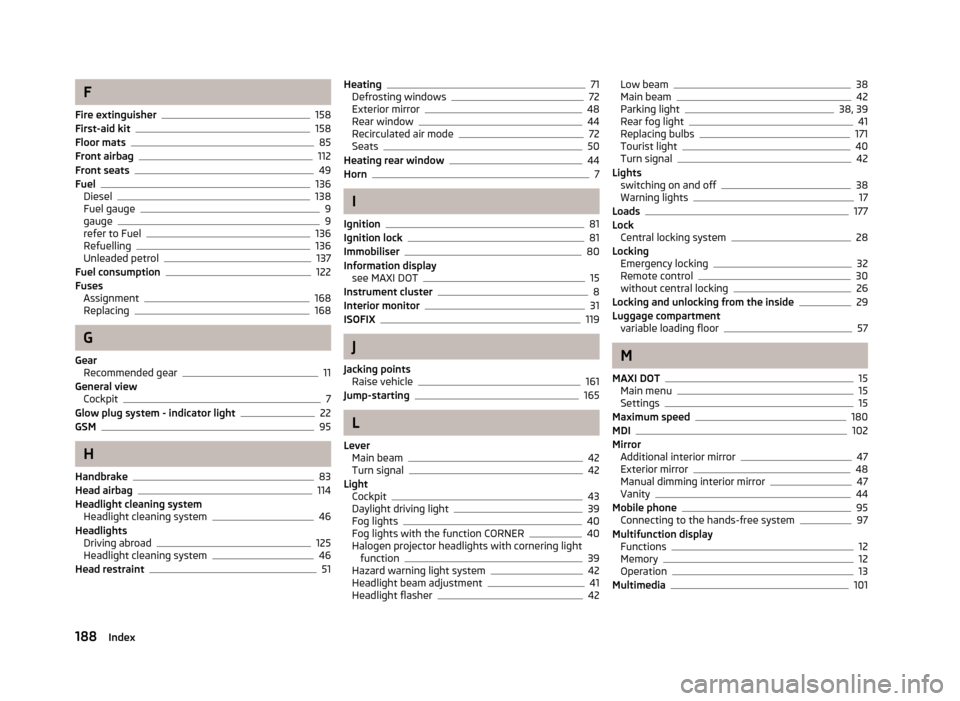
F
Fire extinguisher 158
First-aid kit 158
Floor mats 85
Front airbag 112
Front seats 49
Fuel 136
Diesel 138
Fuel gauge 9
gauge 9
refer to Fuel 136
Refuelling 136
Unleaded petrol 137
Fuel consumption 122
Fuses Assignment 168
Replacing 168
G
Gear Recommended gear 11
General view Cockpit 7
Glow plug system - indicator light 22
GSM 95
H
Handbrake 83
Head airbag 114
Headlight cleaning system Headlight cleaning system 46
Headlights Driving abroad 125
Headlight cleaning system 46
Head restraint 51Heating 71
Defrosting windows 72
Exterior mirror 48
Rear window 44
Recirculated air mode 72
Seats 50
Heating rear window 44
Horn 7
I
Ignition 81
Ignition lock 81
Immobiliser 80
Information display see MAXI DOT 15
Instrument cluster 8
Interior monitor 31
ISOFIX 119
J
Jacking points Raise vehicle 161
Jump-starting 165
L
Lever Main beam 42
Turn signal 42
Light Cockpit 43
Daylight driving light 39
Fog lights 40
Fog lights with the function CORNER 40
Halogen projector headlights with cornering light function 39
Hazard warning light system 42
Headlight beam adjustment 41
Headlight flasher 42Low beam 38
Main beam 42
Parking light 38, 39
Rear fog light 41
Replacing bulbs 171
Tourist light 40
Turn signal 42
Lights switching on and off 38
Warning lights 17
Loads 177
Lock Central locking system 28
Locking Emergency locking 32
Remote control 30
without central locking 26
Locking and unlocking from the inside 29
Luggage compartment variable loading floor 57
M
MAXI DOT 15
Main menu 15
Settings 15
Maximum speed 180
MDI 102
Mirror Additional interior mirror 47
Exterior mirror 48
Manual dimming interior mirror 47
Vanity 44
Mobile phone 95
Connecting to the hands-free system 97
Multifunction display Functions 12
Memory 12
Operation 13
Multimedia 101
188 Index
Page 191 of 196
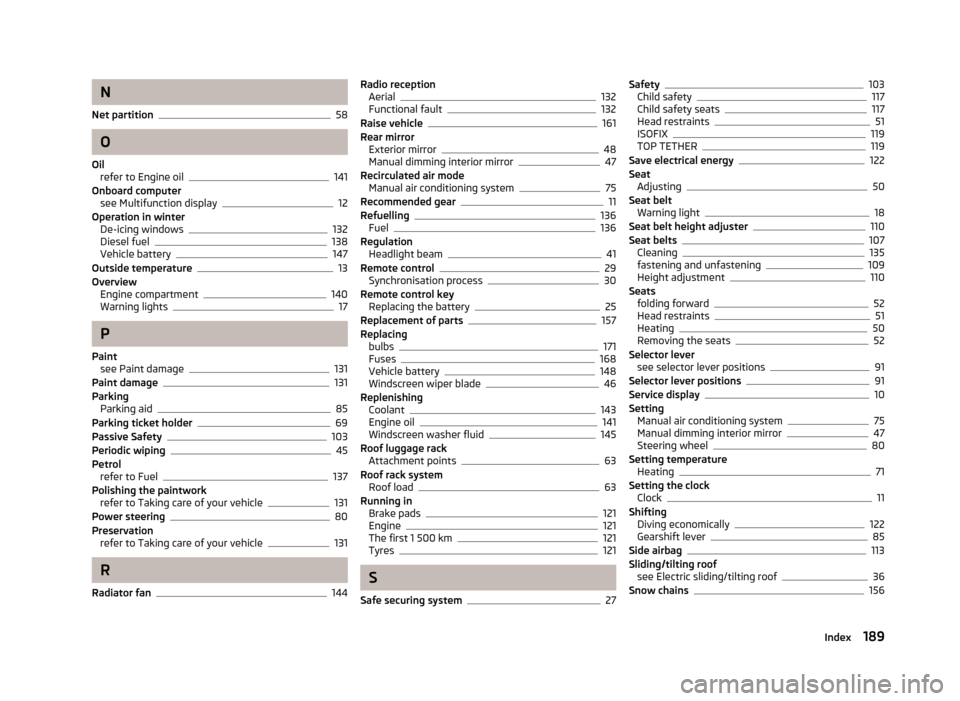
N
Net partition 58
O
Oil refer to Engine oil 141
Onboard computer see Multifunction display 12
Operation in winter De-icing windows 132
Diesel fuel 138
Vehicle battery 147
Outside temperature 13
Overview Engine compartment 140
Warning lights 17
P
Paint see Paint damage 131
Paint damage 131
Parking Parking aid 85
Parking ticket holder 69
Passive Safety 103
Periodic wiping 45
Petrol refer to Fuel 137
Polishing the paintwork refer to Taking care of your vehicle 131
Power steering 80
Preservation refer to Taking care of your vehicle 131
R
Radiator fan 144Radio reception
Aerial 132
Functional fault 132
Raise vehicle 161
Rear mirror Exterior mirror 48
Manual dimming interior mirror 47
Recirculated air mode Manual air conditioning system 75
Recommended gear 11
Refuelling 136
Fuel 136
Regulation Headlight beam 41
Remote control 29
Synchronisation process 30
Remote control key Replacing the battery 25
Replacement of parts 157
Replacing bulbs 171
Fuses 168
Vehicle battery 148
Windscreen wiper blade 46
Replenishing Coolant 143
Engine oil 141
Windscreen washer fluid 145
Roof luggage rack Attachment points 63
Roof rack system Roof load 63
Running in Brake pads 121
Engine 121
The first 1 500 km 121
Tyres 121
S
Safe securing system 27Safety 103
Child safety 117
Child safety seats 117
Head restraints 51
ISOFIX 119
TOP TETHER 119
Save electrical energy 122
Seat Adjusting 50
Seat belt Warning light 18
Seat belt height adjuster 110
Seat belts 107
Cleaning 135
fastening and unfastening 109
Height adjustment 110
Seats folding forward 52
Head restraints 51
Heating 50
Removing the seats 52
Selector lever see selector lever positions 91
Selector lever positions 91
Service display 10
Setting Manual air conditioning system 75
Manual dimming interior mirror 47
Steering wheel 80
Setting temperature Heating 71
Setting the clock Clock 11
Shifting Diving economically 122
Gearshift lever 85
Side airbag 113
Sliding/tilting roof see Electric sliding/tilting roof 36
Snow chains 156
189
Index