warning light SKODA FABIA 2013 2.G / 5J Service Manual
[x] Cancel search | Manufacturer: SKODA, Model Year: 2013, Model line: FABIA, Model: SKODA FABIA 2013 2.G / 5JPages: 223, PDF Size: 12.77 MB
Page 76 of 223
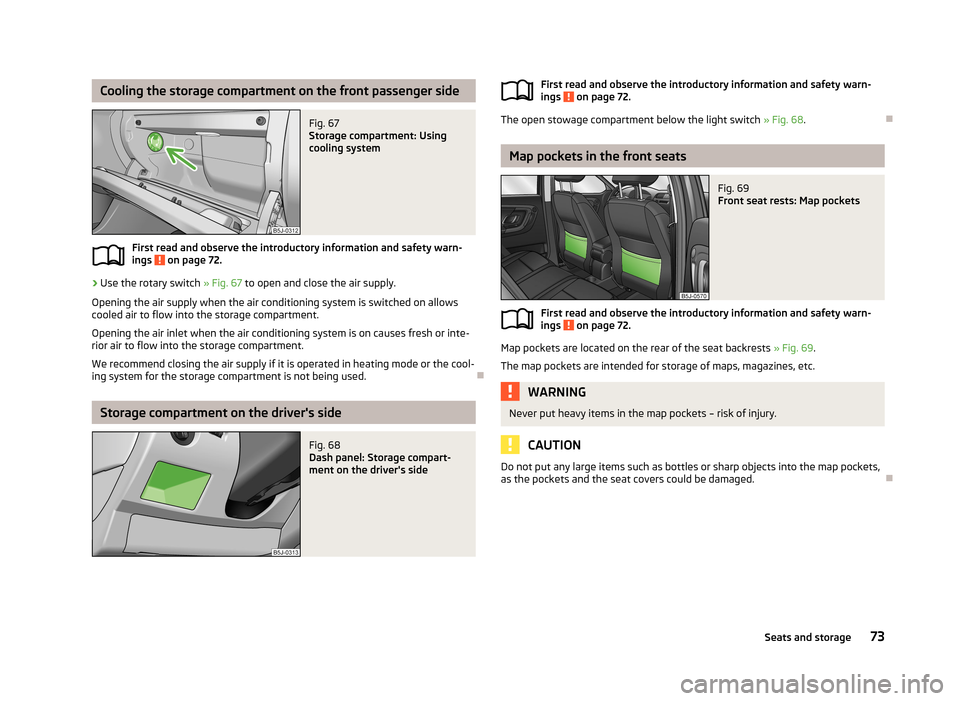
Cooling the storage compartment on the front passenger sideFig. 67
Storage compartment: Using
cooling system
First read and observe the introductory information and safety warn-
ings on page 72.
›
Use the rotary switch » Fig. 67 to open and close the air supply.
Opening the air supply when the air conditioning system is switched on allows
cooled air to flow into the storage compartment.
Opening the air inlet when the air conditioning system is on causes fresh or inte-rior air to flow into the storage compartment.
We recommend closing the air supply if it is operated in heating mode or the cool-ing system for the storage compartment is not being used.
Storage compartment on the driver's side
Fig. 68
Dash panel: Storage compart-
ment on the driver's sideFirst read and observe the introductory information and safety warn-
ings on page 72.
The open stowage compartment below the light switch » Fig. 68.
Map pockets in the front seats
Fig. 69
Front seat rests: Map pockets
First read and observe the introductory information and safety warn-
ings on page 72.
Map pockets are located on the rear of the seat backrests » Fig. 69.
The map pockets are intended for storage of maps, magazines, etc.
WARNINGNever put heavy items in the map pockets – risk of injury.
CAUTION
Do not put any large items such as bottles or sharp objects into the map pockets,
as the pockets and the seat covers could be damaged.
73Seats and storage
Page 83 of 223
We recommend that you leave the air outlet vents 3 » Fig. 77 on page 77 in the
open position in all operating modes.
Note
If the air distribution is directed only towards the windows, the total amount of
air is used to defrost the windows and thus no air will be fed to the footwell. This
can limit the heating comfort.
Recirculated air mode
First read and observe the introductory information given on page 78.
Recirculated air mode prevents polluted air from outside the vehicle getting into
the vehicle, for example when driving through a tunnel or when standing in a
traffic jam.
Switching on/off
›
Press the
button.
The indicator light in the button lights up.
›
Press the
button again.
The indicator light in the button goes out.
Recirculated air mode is switched off automatically if the air distribution control
C
» Fig. 78 on page 79 is turned to the
position. Recirculated air mode can be
switched on again from this setting by pressing the
button again.
WARNINGNever leave recirculated air mode on over a longer period, as “stale air” can
cause fatigue in the driver and the passengers, reduce attention levels and al-
so cause the windows to mist up. The risk of having an accident increases.
Switch off recirculated air mode as soon as the windows start to mist up.
Air conditioning system (manual air conditioning
system)
Introduction
This chapter contains information on the following subjects: Operation
81
Setting the air conditioning system
82
Recirculated air mode
82
The cooling system operates only if the following conditions are met. The cooling system is switched on » page 81.
The engine is running.
The outside temperature is above approximately +2 °C.
The blower switch is switched on (positions 1-4).
If the desired interior temperature can also be achieved without activating the cooling system, fresh air mode should be selected.
If the coolant temperature is too high, the cooling system is switched off to en-
sure that the engine cools down.
CAUTION
■ Under certain circumstances, air at a temperature of about 5 °C can flow out of
the vents when the cooling system is switched on.■
Lengthy and uneven distribution of the air flow out of the vents (especially
around the feet) and large differences in temperature, for example, when getting
out of the vehicle, can cause susceptible individuals to catch a cold.
Note
We recommend that you have the air conditioning system cleaned by a specialist
garage once every year.80Using the system
Page 84 of 223
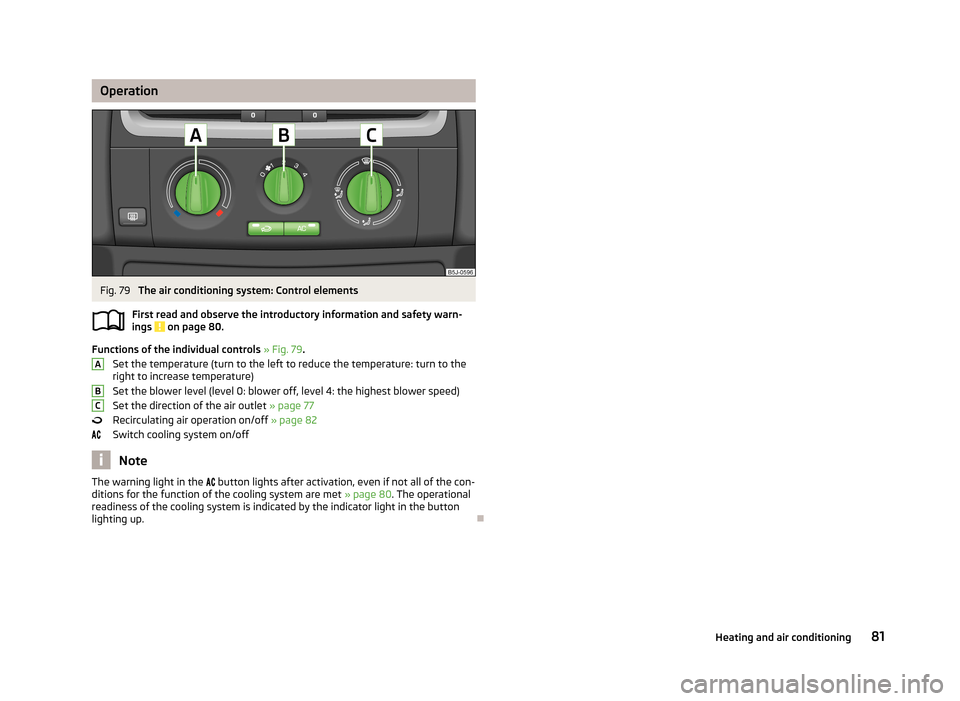
OperationFig. 79
The air conditioning system: Control elements
First read and observe the introductory information and safety warn- ings
on page 80.
Functions of the individual controls » Fig. 79 .
Set the temperature (turn to the left to reduce the temperature: turn to the right to increase temperature)
Set the blower level (level 0: blower off, level 4: the highest blower speed)
Set the direction of the air outlet » page 77
Recirculating air operation on/off » page 82
Switch cooling system on/off
Note
The warning light in the button lights after activation, even if not all of the con-
ditions for the function of the cooling system are met » page 80. The operational
readiness of the cooling system is indicated by the indicator light in the button
lighting up.
ABC81Heating and air conditioning
Page 85 of 223
Setting the air conditioning systemFirst read and observe the introductory information and safety warnings
on page 80.
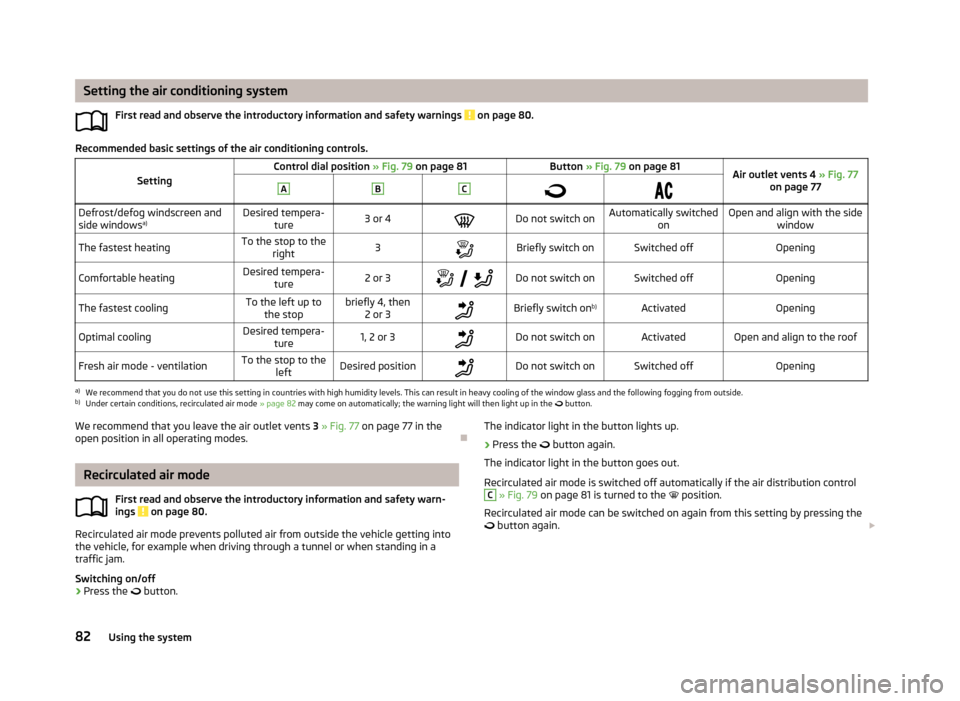
Recommended basic settings of the air conditioning controls.
SettingControl dial position » Fig. 79 on page 81Button » Fig. 79 on page 81Air outlet vents 4 » Fig. 77
on page 77ABC
Defrost/defog windscreen and
side windows a)Desired tempera-
ture3 or 4Do not switch onAutomatically switched onOpen and align with the sidewindowThe fastest heatingTo the stop to theright3Briefly switch onSwitched offOpeningComfortable heatingDesired tempera-
ture2 or 3
Do not switch onSwitched offOpeningThe fastest coolingTo the left up to
the stopbriefly 4, then 2 or 3Briefly switch on b)ActivatedOpeningOptimal coolingDesired tempera-
ture1, 2 or 3Do not switch onActivatedOpen and align to the roofFresh air mode - ventilationTo the stop to the leftDesired positionDo not switch onSwitched offOpeninga)
We recommend that you do not use this setting in countries with high humidity levels. This can result in heavy cooling of the window glass and the following fogging from outside.
b)
Under certain conditions, recirculated air mode » page 82 may come on automatically; the warning light will then light up in the
button.
We recommend that you leave the air outlet vents
3 » Fig. 77 on page 77 in the
open position in all operating modes.
Recirculated air mode
First read and observe the introductory information and safety warn-ings
on page 80.
Recirculated air mode prevents polluted air from outside the vehicle getting into
the vehicle, for example when driving through a tunnel or when standing in a traffic jam.
Switching on/off
›
Press the
button.
The indicator light in the button lights up.›
Press the button again.
The indicator light in the button goes out.
Recirculated air mode is switched off automatically if the air distribution control
C
» Fig. 79 on page 81 is turned to the position.
Recirculated air mode can be switched on again from this setting by pressing the
button again.
82Using the system
Page 86 of 223
WARNINGNever leave recirculated air mode on over a longer period, as “stale air” can
cause fatigue in the driver and the passengers, reduce attention levels and al- so cause the windows to mist up. The risk of having an accident increases.Switch off recirculated air mode as soon as the windows start to mist up.
Climatronic (automatic air conditioning system)
Introduction
This chapter contains information on the following subjects:
Control elements
83
Automatic mode
84
Setting the temperature
84
Recirculated air mode
84
Controlling the blower
85
Defrosting windscreen
85
Climatronic in automatic mode ensures the best-possible setting of the tempera-
ture of the outflowing air, the blower stage and air distribution.
The system also takes sunlight into account, which eliminates the need to alterthe settings manually.
The cooling system operates only if the following conditions are met. The cooling system is switched on » page 83.
The engine is running.
The outside temperature is above approximately +2 °C.
If the coolant temperature is too high, the cooling system is switched off to en- sure that the engine cools down.
Note
We recommend that you have Climatronic cleaned by a specialist garage once ev-
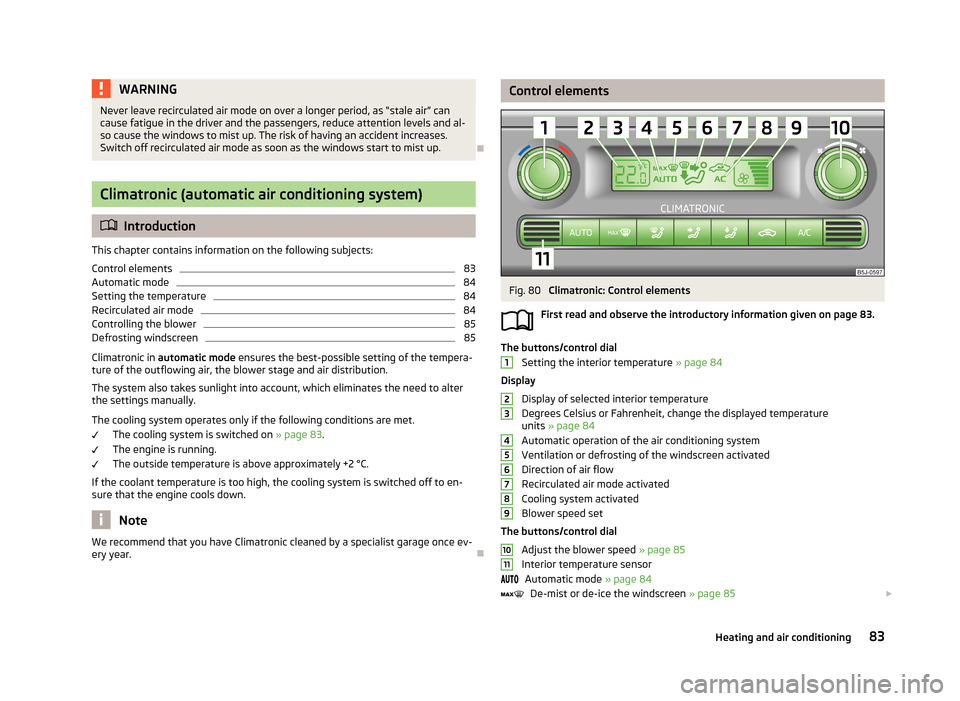
ery year.Control elementsFig. 80
Climatronic: Control elements
First read and observe the introductory information given on page 83.
The buttons/control dial Setting the interior temperature » page 84
Display
Display of selected interior temperature
Degrees Celsius or Fahrenheit, change the displayed temperature units » page 84
Automatic operation of the air conditioning system Ventilation or defrosting of the windscreen activated
Direction of air flow
Recirculated air mode activated
Cooling system activated
Blower speed set
The buttons/control dial Adjust the blower speed » page 85
Interior temperature sensor Automatic mode » page 84
De-mist or de-ice the windscreen » page 85
123456789101183Heating and air conditioning
Page 87 of 223
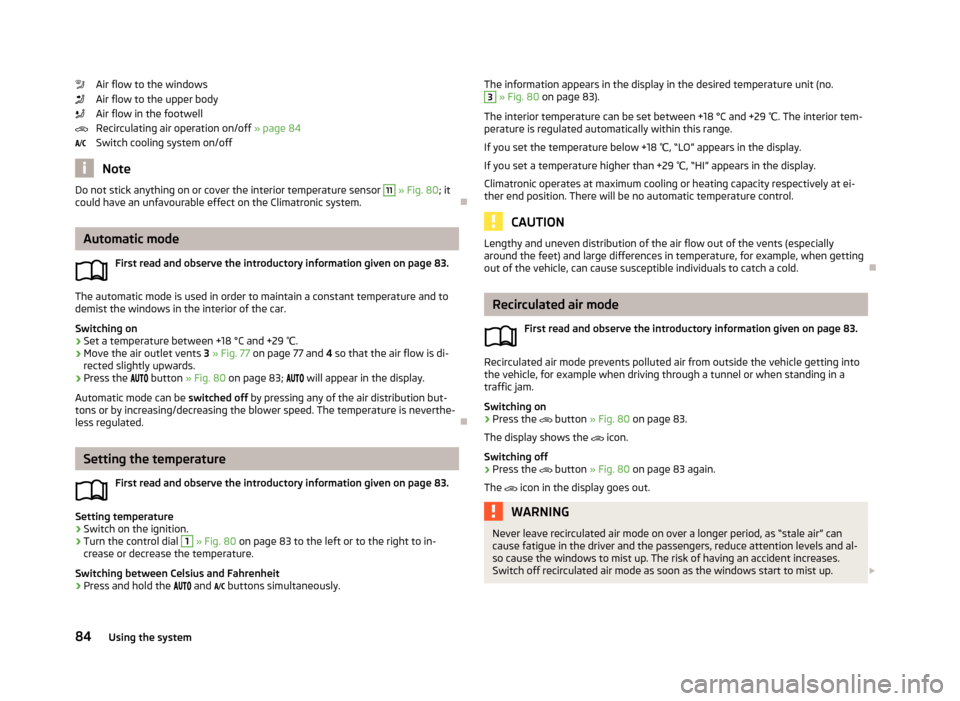
Air flow to the windows
Air flow to the upper body
Air flow in the footwell
Recirculating air operation on/off » page 84
Switch cooling system on/off
Note
Do not stick anything on or cover the interior temperature sensor 11 » Fig. 80 ; it
could have an unfavourable effect on the Climatronic system.
Automatic mode
First read and observe the introductory information given on page 83.
The automatic mode is used in order to maintain a constant temperature and to
demist the windows in the interior of the car.
Switching on
›
Set a temperature between +18 °C and +29 ℃.
›
Move the air outlet vents 3 » Fig. 77 on page 77 and 4 so that the air flow is di-
rected slightly upwards.
›
Press the
button » Fig. 80 on page 83;
will appear in the display.
Automatic mode can be switched off by pressing any of the air distribution but-
tons or by increasing/decreasing the blower speed. The temperature is neverthe-
less regulated.
Setting the temperature
First read and observe the introductory information given on page 83.
Setting temperature
›
Switch on the ignition.
›
Turn the control dial
1
» Fig. 80 on page 83 to the left or to the right to in-
crease or decrease the temperature.
Switching between Celsius and Fahrenheit
›
Press and hold the
and
buttons simultaneously.
The information appears in the display in the desired temperature unit (no.3
» Fig. 80 on page 83).
The interior temperature can be set between +18 °C and +29 ℃. The interior tem-
perature is regulated automatically within this range.
If you set the temperature below +18 ℃, “LO” appears in the display.
If you set a temperature higher than +29 ℃, “HI” appears in the display.
Climatronic operates at maximum cooling or heating capacity respectively at ei- ther end position. There will be no automatic temperature control.
CAUTION
Lengthy and uneven distribution of the air flow out of the vents (especially
around the feet) and large differences in temperature, for example, when getting
out of the vehicle, can cause susceptible individuals to catch a cold.
Recirculated air mode
First read and observe the introductory information given on page 83.
Recirculated air mode prevents polluted air from outside the vehicle getting intothe vehicle, for example when driving through a tunnel or when standing in a
traffic jam.
Switching on
›
Press the
button » Fig. 80 on page 83.
The display shows the
icon.
Switching off
›
Press the
button » Fig. 80 on page 83 again.
The
icon in the display goes out.
WARNINGNever leave recirculated air mode on over a longer period, as “stale air” can
cause fatigue in the driver and the passengers, reduce attention levels and al-
so cause the windows to mist up. The risk of having an accident increases.
Switch off recirculated air mode as soon as the windows start to mist up. 84Using the system
Page 99 of 223
It is still fully possible to steer the vehicle if the power steering fails or if the en-gine is not running (e.g. when towing). However, greater physical effort is re-
quired to turn the steering wheel.
CAUTION
You will place great stresses on the power steering system if the steering is
turned to full lock when the vehicle is stationary. Turning the steering to full lock
in such a situation will be accompanied by noises. Never leave the steering wheel at full lock for more than 15 seconds when the engine is running - there is a risk of
damaging the power steering.
Starting and stopping the engine
Introduction
This chapter contains information on the following subjects:
Electronic immobilizer
97
Ignition lock
97
Starting the engine
97
Switching off the engine
98
The engine can only be started using a correctly coded original key. The engine running noises may louder at first be louder for a short time afterstarting the cold engine. This is quite normal and is not an operating problem.
WARNING■ When the vehicle is travelling with the engine off, the ignition key must al-
ways be in position 2 » Fig. 86 on page 97 (ignition switched on). This posi-
tion is indicated by the warning lights coming on. If this is not the case, it
could result in unexpected locking of the steering wheel – there is the risk of
an accident.■
Only pull the ignition key from the ignition lock when the vehicle has come
to a complete stop (by applying the handbrake). Otherwise the steering wheel
could lock – there is the risk of an accident.
WARNING (Continued)■ When leaving the vehicle, the ignition must always be removed. This is par-
ticularly important if children are left in the vehicle. Otherwise the children
could, for example, start the engine – there is the risk of an accident or injury.■
Never leave the vehicle unattended with the engine running.
■
Never switch off the engine before the vehicle has come to a halt – there is
the risk of an accident.
WARNING■ Never leave the engine running in unventilated or closed rooms. The en-
gine's exhaust gases also contain the odourless and colourless carbon mon-
oxide, a poisonous gas – risk of death. ■ Carbon monoxide can cause unconsciousness and death.
CAUTION
■The starter must only be operated when the engine is not running and the vehi-
cle is at a standstill. The starter or engine can be damaged if the starter is activa-
ted when the engine is running 3
» Fig. 86 on page 97.
■
If the engine does not start up after a second attempt, the fuse for the fuel
pump may have a fault. Check the fuse and replace, if necessary » page 192 or
seek assistance from a specialist garage.
■
Let go of the ignition key as soon as the engine starts otherwise the starter
could be damaged.
■
Do not tow start the engine – there is a risk of damaging the engine and the
catalytic converter. The battery from another vehicle can be used as a jump-start
aid » page 187 , Jump-starting .
CAUTION
■
Avoid high engine speeds, full throttle and high engine loads until the engine
has yet reached its operating temperature – there is a risk of damaging the en-
gine.■
Do not switch the engine off immediately at the end of your journey after the
engine has been operated over a prolonged period at high loads but leave it to
run at an idling speed for about 1 minute. This prevents any possible accumulation
of heat when the engine is switched off.
96Driving
Page 100 of 223
For the sake of the environmentDo not warm up the engine while the vehicle is stationary. If possible, start your
journey as soon as the engine has started. Through this the engine reaches its operating temperature more rapidly and the pollutant emissions are lower.
Note
The radiator fan can intermittently continue to run for approximately 10 minutes
after the ignition has been switched off.
Electronic immobilizer
First read and observe the introductory information and safety warn-ings
on page 96.
An electronic chip is integrated in the head of the key. The immobiliser is deacti-
vated with the aid of this chip when the key is inserted in the ignition lock. The
electronic immobiliser is automatically activated when the ignition key is with-
drawn from the lock.
The engine will not start if a non-authorized ignition key is used. The MAXI DOT display shows the following:
Immobilizer active.
Ignition lock
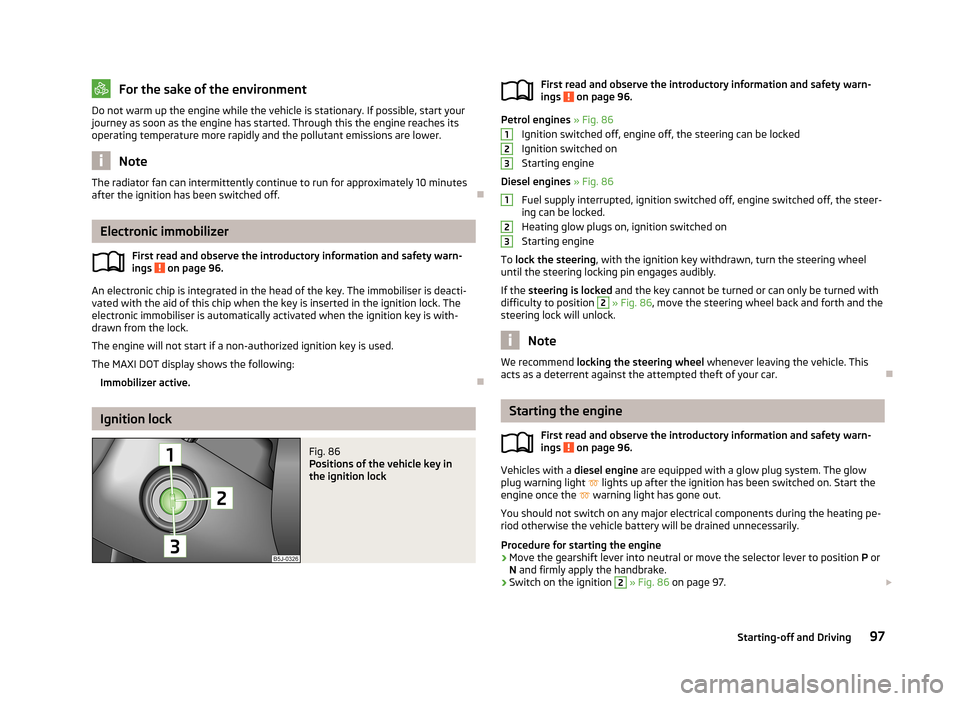
Fig. 86
Positions of the vehicle key in
the ignition lockFirst read and observe the introductory information and safety warn-
ings on page 96.
Petrol engines » Fig. 86
Ignition switched off, engine off, the steering can be locked
Ignition switched on
Starting engine
Diesel engines » Fig. 86
Fuel supply interrupted, ignition switched off, engine switched off, the steer-
ing can be locked.
Heating glow plugs on, ignition switched on
Starting engine
To lock the steering , with the ignition key withdrawn, turn the steering wheel
until the steering locking pin engages audibly.
If the steering is locked and the key cannot be turned or can only be turned with
difficulty to position
2
» Fig. 86 , move the steering wheel back and forth and the
steering lock will unlock.
Note
We recommend locking the steering wheel whenever leaving the vehicle. This
acts as a deterrent against the attempted theft of your car.
Starting the engine
First read and observe the introductory information and safety warn-
ings
on page 96.
Vehicles with a diesel engine are equipped with a glow plug system. The glow
plug warning light
lights up after the ignition has been switched on. Start the
engine once the
warning light has gone out.
You should not switch on any major electrical components during the heating pe- riod otherwise the vehicle battery will be drained unnecessarily.
Procedure for starting the engine
›
Move the gearshift lever into neutral or move the selector lever to position P or
N and firmly apply the handbrake.
›
Switch on the ignition
2
» Fig. 86 on page 97.
12312397Starting-off and Driving
Page 101 of 223
›Depress and hold the clutch pedal (vehicles with a manual gearbox) or brake
pedal (vehicles with an automatic gearbox) until the engine starts.›
Turn the key to position
3
to the stop and release immediately the engine has
started – do not depress the accelerator.
After letting go, the vehicle key will return to position
2
.
›
Release the handbrake.
If the engine does not start within 10 seconds, turn the key to position
1
. Repeat
the start-up process after approx. half a minute.
Switching off the engine
First read and observe the introductory information and safety warn-ings
on page 96.
Switch off the engine by turning the ignition key to position
1
» Fig. 86 on
page 97.
Brakes
Introduction
This chapter contains information on the following subjects:
Information for braking
98
Handbrake
99WARNING■ Greater physical effort is required for braking when the engine is switched
off – there is the risk of an accident.■
The clutch pedal must be depressed when braking on a vehicle with manual
transmission, when the vehicle is in gear and at low revs. If you fail to do so, the functionality of the brake servo can be impaired – there is the risk of an
accident.WARNING (Continued)■ If a front spoiler, full wheel trim, etc. is mounted retrospectively, it must be
ensured that the air supply to the front wheel brakes is not reduced. The front
brakes may overheat, which can have a negative impact on the functioning of
the braking system – there is a risk of an accident.■
Never leave children unattended in the vehicle. The children might, for ex-
ample, release the handbrake or take the vehicle out of gear. The vehicle might then move off – there is the risk of an accident.
CAUTION
■ Observe the recommendations on the new brake pads » page 104.■Never let the brakes slip with light pressure on the pedal if braking is not neces-
sary. This causes the brakes to overheat and can also result in a longer braking distance and excessive wear.
Information for braking
First read and observe the introductory information and safety warn-
ings
on page 98.
If the brakes are applied in full and the control unit for the braking system consid-
ers the situation to be dangerous for the following traffic, the brake light flashes
automatically.
After the speed was reduced below around 10 km/h or the vehicle was stopped,
the brake light stops flashing and the hazard warning light system switches on.
The hazard warning light system is switched off automatically after accelerating
or driving off again.
Before travelling a long distance down a steep gradient, reduce speed and shift
into the next lowest gear. As a result, the braking effect of the engine will be
used, reducing the load on the brakes. Any additional braking should be comple-
ted intermittently, not continuously.
Wear-and-tear
The wear of the brake pads is dependent on the operating conditions and driving style.
The brake pads wear more quickly if a lot of journeys are completed in towns and
over short distances or if a very sporty style of driving is adopted.
98Driving
Page 102 of 223
Under these severe conditions , the thickness of the brake pads must also be
checked by a specialist garage between services.
Wet roads or road salt
The performance of the brakes can be delayed as the brake discs and brake pads may be moist or have a coating of ice or layer of salt on them in winter. The
brakes are cleaned and dried by applying the brakes several times.
Corrosion
Corrosion on the brake discs and dirt on the bake pads occur if the vehicle has
been parked for a long period and if you do not make much use of the braking
system. The brakes are cleaned and dried by applying the brakes several times.
Faults in the brake surface
If it is found that the braking distance has suddenly become longer and that the brake pedal can be depressed further, the brake system may be faulty.
Visit a specialist garage immediately and adjust your style of driving appropriately as you will not know how great the damage is.
Low brake fluid level
An insufficient level of brake fluid may result in problems in the brake system. The level of the brake fluid is monitored electronically » page 20,
Brake system .
Brake booster
The brake booster increases the pressure generated with the brake pedal. The
brake booster only operates when the engine is running.
Handbrake
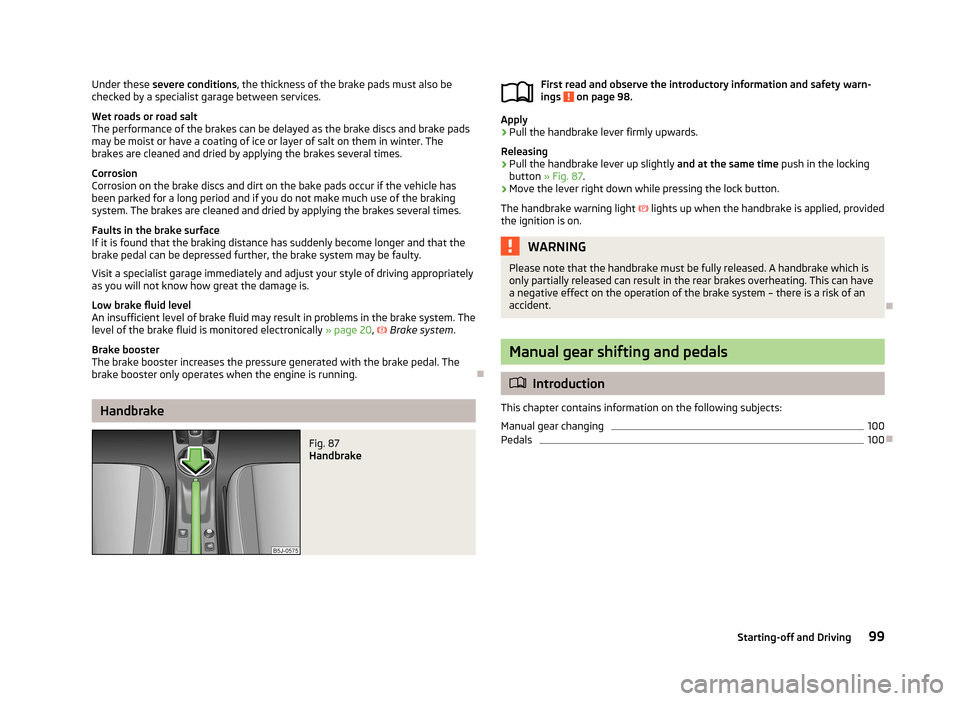
Fig. 87
Handbrake
First read and observe the introductory information and safety warn-
ings on page 98.
Apply
›
Pull the handbrake lever firmly upwards.
Releasing
›
Pull the handbrake lever up slightly and at the same time push in the locking
button » Fig. 87 .
›
Move the lever right down while pressing the lock button.
The handbrake warning light lights up when the handbrake is applied, provided
the ignition is on.
WARNINGPlease note that the handbrake must be fully released. A handbrake which is only partially released can result in the rear brakes overheating. This can have
a negative effect on the operation of the brake system – there is a risk of an
accident.
Manual gear shifting and pedals
Introduction
This chapter contains information on the following subjects:
Manual gear changing
100
Pedals
100
99Starting-off and Driving