brakes SKODA FABIA 2014 2.G / 5J Owner's Manual
[x] Cancel search | Manufacturer: SKODA, Model Year: 2014, Model line: FABIA, Model: SKODA FABIA 2014 2.G / 5JPages: 197, PDF Size: 13.56 MB
Page 5 of 197
Table of Contents
Abbreviations
Safety
Passive Safety
6
General information
6
Correct and safe seated position
7
Seat belts
10
Wearing seat belts
10
Inertia reel and belt pretensioners
13
Airbag system
14
Description of the airbag system
14
Airbag overview
15
Deactivating airbags
17
Transporting children safely
19
Child seat
19
Fastening systems
22
Using the system
Cockpit
25
Overview
24
Instruments and Indicator Lights
26
Instrument cluster
26
Multifunction display (MFD)
29
Service Interval Display
32
MAXI DOT display
33
Warning lights
35
Unlocking and locking
42
Unlocking and locking
42
Central locking system
45
Remote control
48
Anti-theft alarm system
49
Tailgate
50Electrical power windows51Electric sliding/tilting roof53
Lights and visibility
55
Lights
55
Interior lights
59
Visibility
61
Windscreen wipers and washers
61
Rear window
63
Seats and storage
65
Front seats
65
Rear seats
66
Head restraints
67
Boot
68
Variable loading floor in the luggage
compartment (Fabia Estate)
72
Net partition (Fabia Estate)
73
Bicycle carrier in the luggage compartment
75
Roof rack system
76
Useful equipment
77
Storage compartments
80
Heating and air conditioning
84
Heating, ventilation, cooling
84
Heating
86
Air conditioning system (manual air
conditioning system)
87
Climatronic (automatic air conditioning
system)
90
Communication and multimedia
92
Universal telephone preinstallation GSM II
92
Voice control
97
Multimedia
98
Driving
Starting-off and Driving
101
Starting and stopping the engine
101
Brakes
102Manual gear shifting and pedals104Automatic transmission105
Running in
108
Economical driving and respect the
environment
109
Avoiding damage to your vehicle
112
Driving abroad
113
Assist systems
114
Brake assist systems
114
Parking aid
116
Cruise control system
117
START-STOP
118
Towing a trailer
120
Towing device
120
Trailer
124
General Maintenance
Car care
126
Services, modifications and technical
alterations
126
Washing the car
128
Vehicle exterior care
129
Care of the interior
132
Inspecting and replenishing
135
Fuel
135
Engine compartment
138
Engine oil
141
Coolant
143
Brake fluid
145
Vehicle battery
145
Wheels
149
Tyres and rims
149
Winter use
1563Table of Contents
Page 38 of 197
Brake systemRead and observe
on page 35 first.
The
indicator light comes on if the brake fluid level in the braking system is
too low or there is a fault in the ABS.
The following message is shown in the MAXI DOT display.
Brake fluid: Log book!
Stop the vehicle, switch off the engine, and check the level of the brake flu-
id » page 145 .
Further information » page 102, Brakes .
WARNING■
If you have to stop for technical reasons, then park the vehicle at a safe
distance from the traffic, switch off the engine and activate the hazard
warning light system » page 59.■
The following guidelines should be observed when opening the bonnet
and checking the brake fluid level » page 138, Engine compartment .
■
If the warning light
is displayed simultaneously with warning light
» page 38 ,
Antilock brake system (ABS) ,
do not continue your
journey! Seek help from a specialist garage.
■
A fault to the ABS system or the braking system can increase the vehi-
cle's braking distance – there is a risk of accident.
Seat belt warning light
Read and observe
on page 35 first.
The indicator light comes on after the ignition is switched on as a reminder
for the driver and front passenger to fasten their seat belt. The indicator light
only goes out once the driver and front passenger have fastened their seat
belt.
A steady warning signal sounds at vehicle speeds greater than 20 km/h and
the flashes if the driver and front passenger have not fastened their seat
belts.
The warning signal is switched off and the indicator light is permanently lit if
the driver and front passenger have not fastened their seat belts within the
next 90 seconds.
Further information » page 10.
Generator
Read and observe
on page 35 first.
If the warning light lights up
when the engine is running, the vehicle battery
is not being charged.
Seek help from a specialist garage. The electrical system requires checking.
WARNINGIf you have to stop for technical reasons, park the vehicle at a safe distance
from the traffic, switch off the engine and switch on the hazard warning
lights system » page 59.
CAUTION
Do not continue driving if the warning light (coolant system fault) lights
up in addition to the warning light while you are driving. Stop the engine -
there is a risk of engine damage.
OPen door
Read and observe
on page 35 first.
The warning light
comes on if one or several doors are opened or if the boot
lid is opened.
The warning light comes on even when the ignition is switched off. The warn-
ing light lights up for a maximum of 5 minutes.
WARNINGIf you have to stop for technical reasons, park the vehicle at a safe distance
from the traffic, switch off the engine and switch on the hazard warning
lights system » page 59.
Engine oil
Read and observe
on page 35 first.
The warning light lights up red (low oil pressure)
The following message is shown in the MAXI DOT display.
Oil pressure: Engine off! Log book!
36Using the system
Page 80 of 197
WARNING■Do not place anything on the dash panel. These objects might slide or fall
down while you are driving (under acceleration or when cornering) and
could distract you from the traffic - there is a risk of an accident.■
Make sure that no objects from the centre console or from other storage
compartments can get into the driver's footwell while you are driving. You
would not be able to brake, operate the clutch pedal or accelerate - danger
of causing an accident!
■
Ash and cigarette or cigar stubs must only be discarded in ashtrays.
Cupholders
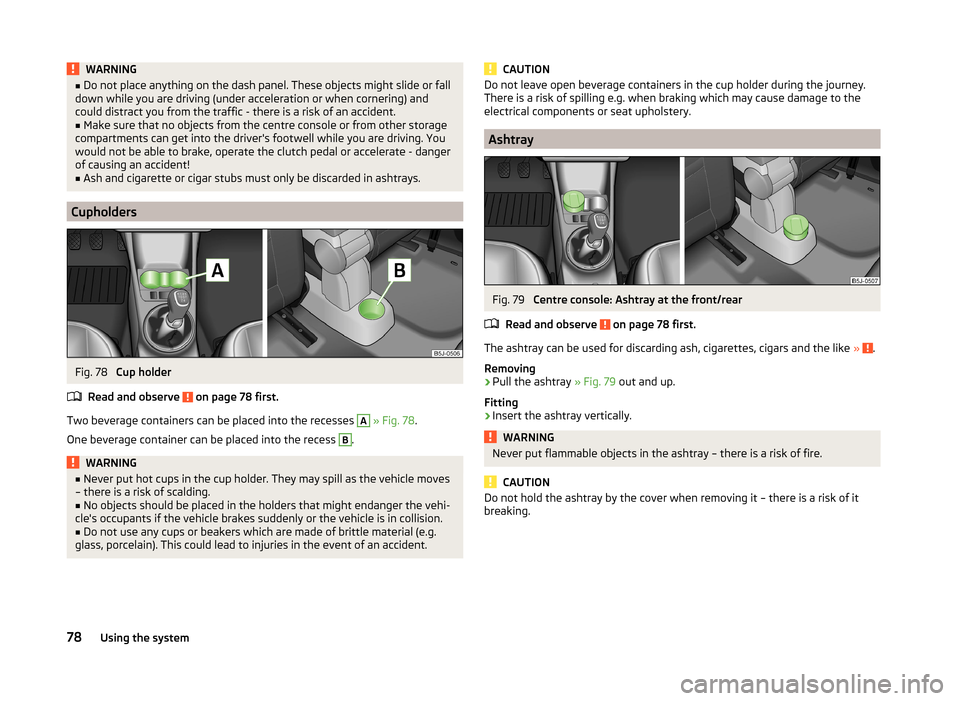
Fig. 78
Cup holder
Read and observe
on page 78 first.
Two beverage containers can be placed into the recesses
A
» Fig. 78 .
One beverage container can be placed into the recess
B
.
WARNING■ Never put hot cups in the cup holder. They may spill as the vehicle moves
– there is a risk of scalding.■
No objects should be placed in the holders that might endanger the vehi-
cle's occupants if the vehicle brakes suddenly or the vehicle is in collision.
■
Do not use any cups or beakers which are made of brittle material (e.g.
glass, porcelain). This could lead to injuries in the event of an accident.
CAUTIONDo not leave open beverage containers in the cup holder during the journey.
There is a risk of spilling e.g. when braking which may cause damage to the
electrical components or seat upholstery.
Ashtray
Fig. 79
Centre console: Ashtray at the front/rear
Read and observe
on page 78 first.
The ashtray can be used for discarding ash, cigarettes, cigars and the like » .
Removing
›
Pull the ashtray » Fig. 79 out and up.
Fitting
›
Insert the ashtray vertically.
WARNINGNever put flammable objects in the ashtray – there is a risk of fire.
CAUTION
Do not hold the ashtray by the cover when removing it – there is a risk of it
breaking.78Using the system
Page 82 of 197
■Connecting electrical components when the engine is not running will drain
the battery of the vehicle – there is a risk of the battery discharging.■
Only use matching plugs to avoid damaging the power socket.
■
Only use accessories that have been tested for electromagnetic compatibility
in accordance with the applicable directives.
■
Switch off the devices connected to the power sockets before you switch
the ignition on or off and before starting the engine, to avoid damage from
voltage fluctuations.
■
Observe the operating instructions for the connected devices!
Clothes hook
Read and observe
on page 78 first.
The clothes hooks are located on the handle of the headliner above each of
the rear doors.
WARNING■ Ensure that any clothes hanging from the hooks do not impair your vision
to the rear.■
Only use the hooks for hanging light items of clothing and ensure that
there are no heavy or sharp-edged objects in the pockets.
■
Do not use clothes hangers for hanging up items of clothing otherwise
this may reduce the effectiveness of head airbags.
CAUTION
The maximum permissible load of the hooks is 2 kg.
Car park ticket holder
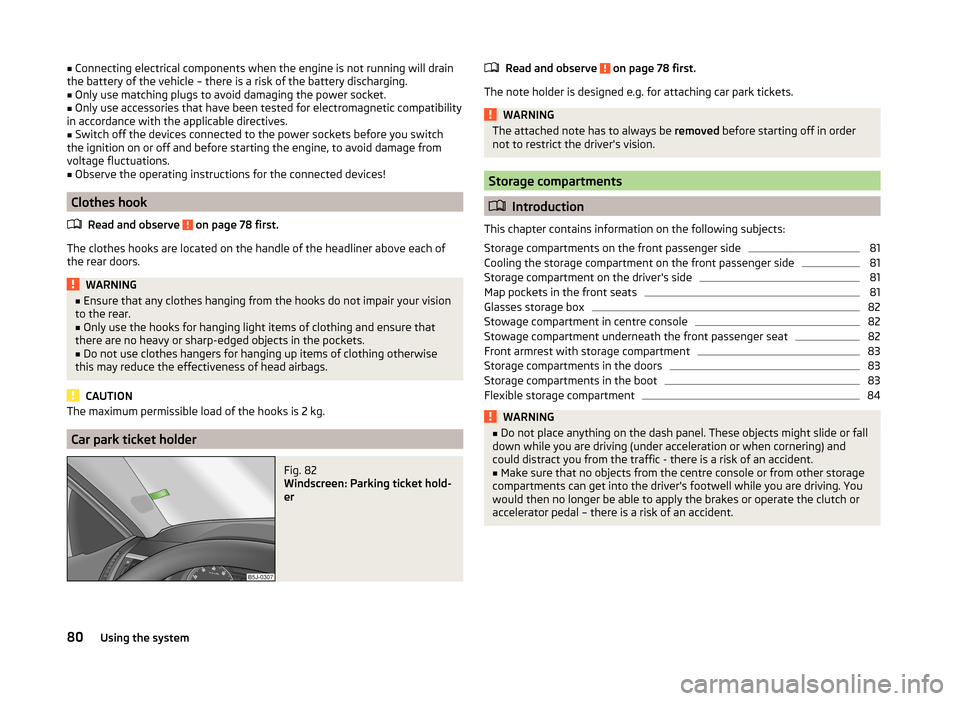
Fig. 82
Windscreen: Parking ticket hold-
er
Read and observe on page 78 first.
The note holder is designed e.g. for attaching car park tickets.
WARNINGThe attached note has to always be removed before starting off in order
not to restrict the driver's vision.
Storage compartments
Introduction
This chapter contains information on the following subjects:
Storage compartments on the front passenger side
81
Cooling the storage compartment on the front passenger side
81
Storage compartment on the driver's side
81
Map pockets in the front seats
81
Glasses storage box
82
Stowage compartment in centre console
82
Stowage compartment underneath the front passenger seat
82
Front armrest with storage compartment
83
Storage compartments in the doors
83
Storage compartments in the boot
83
Flexible storage compartment
84WARNING■ Do not place anything on the dash panel. These objects might slide or fall
down while you are driving (under acceleration or when cornering) and
could distract you from the traffic - there is a risk of an accident.■
Make sure that no objects from the centre console or from other storage
compartments can get into the driver's footwell while you are driving. You
would then no longer be able to apply the brakes or operate the clutch or
accelerator pedal – there is a risk of an accident.
80Using the system
Page 104 of 197
The MAXI DOT display shows the following:Immobilizer active.
Ignition lock
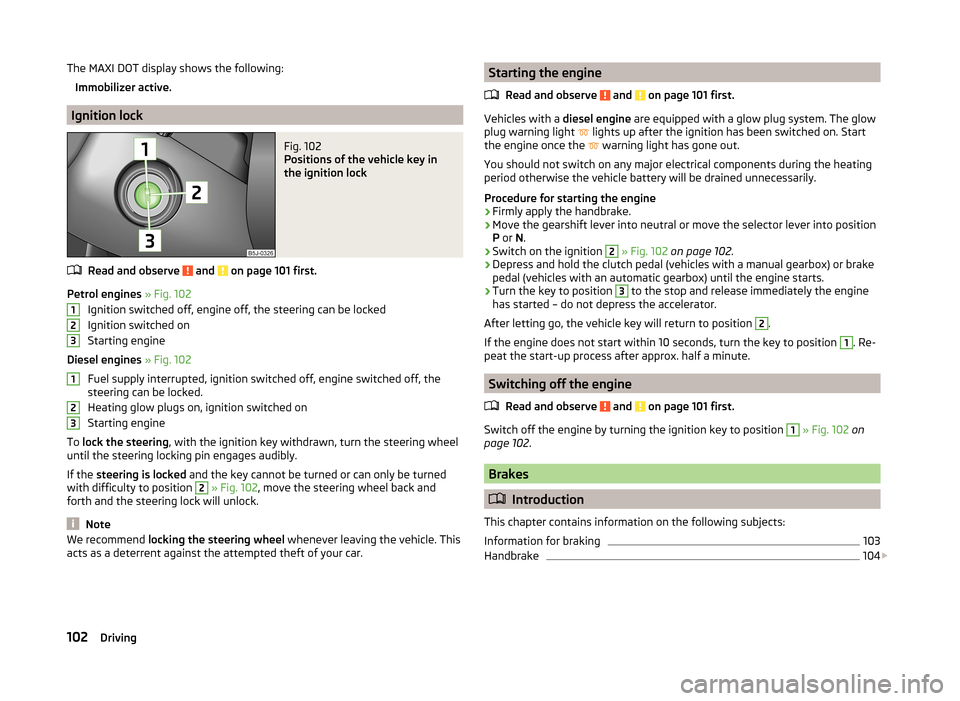
Fig. 102
Positions of the vehicle key in
the ignition lock
Read and observe and on page 101 first.
Petrol engines » Fig. 102
Ignition switched off, engine off, the steering can be locked
Ignition switched on
Starting engine
Diesel engines » Fig. 102
Fuel supply interrupted, ignition switched off, engine switched off, the
steering can be locked.
Heating glow plugs on, ignition switched on
Starting engine
To lock the steering , with the ignition key withdrawn, turn the steering wheel
until the steering locking pin engages audibly.
If the steering is locked and the key cannot be turned or can only be turned
with difficulty to position
2
» Fig. 102 , move the steering wheel back and
forth and the steering lock will unlock.
Note
We recommend locking the steering wheel whenever leaving the vehicle. This
acts as a deterrent against the attempted theft of your car.123123Starting the engine
Read and observe
and on page 101 first.
Vehicles with a diesel engine are equipped with a glow plug system. The glow
plug warning light
lights up after the ignition has been switched on. Start
the engine once the
warning light has gone out.
You should not switch on any major electrical components during the heating
period otherwise the vehicle battery will be drained unnecessarily.
Procedure for starting the engine
›
Firmly apply the handbrake.
›
Move the gearshift lever into neutral or move the selector lever into position
P or N.
›
Switch on the ignition
2
» Fig. 102 on page 102 .
›
Depress and hold the clutch pedal (vehicles with a manual gearbox) or brake
pedal (vehicles with an automatic gearbox) until the engine starts.
›
Turn the key to position
3
to the stop and release immediately the engine
has started – do not depress the accelerator.
After letting go, the vehicle key will return to position
2
.
If the engine does not start within 10 seconds, turn the key to position
1
. Re-
peat the start-up process after approx. half a minute.
Switching off the engine
Read and observe
and on page 101 first.
Switch off the engine by turning the ignition key to position
1
» Fig. 102 on
page 102 .
Brakes
Introduction
This chapter contains information on the following subjects:
Information for braking
103
Handbrake
104
102Driving
Page 105 of 197
WARNING■Greater physical effort is required for braking when the engine is switch-
ed off – there is the risk of an accident.■
The clutch pedal must be depressed when braking on a vehicle with man-
ual transmission, when the vehicle is in gear and at low revs. If you fail to
do so, the functionality of the brake servo can be impaired – there is the
risk of an accident.
■
If a front spoiler, full wheel trim, etc. is mounted retrospectively, it must
be ensured that the air supply to the front wheel brakes is not reduced.
The front brakes may overheat, which can have a negative impact on the
functioning of the braking system – there is a risk of an accident.
■
When leaving the vehicle, never leave persons who might, for example,
release the handbrake or take the vehicle out of gear unattended in the ve-
hicle. The vehicle might then move off – there is the risk of an accident.
CAUTION
■ Observe the recommendations on the new brake pads » page 109.■Never let the brakes slip with light pressure on the pedal if braking is not
necessary. This causes the brakes to overheat and can also result in a longer
braking distance and excessive wear.
Information for braking
Read and observe
and on page 103 first.
If the brakes are applied in full and the control unit for the braking system con-siders the situation to be dangerous for the following traffic, the brake light
flashes automatically.
After the speed was reduced below around 10 km/h or the vehicle was stop-
ped, the brake light stops flashing and the hazard warning light system
switches on. The hazard warning light system is switched off automatically af- ter accelerating or driving off again.
Before travelling a long distance down a steep gradient, reduce speed and
shift into the next lowest gear. As a result, the braking effect of the engine will
be used, reducing the load on the brakes. Any additional braking should be
completed intermittently, not continuously.
Wear-and-tear
The wear of the brake pads is dependent on the operating conditions and driv- ing style.
The brake pads wear more quickly if a lot of journeys are completed in towns and over short distances or if a very sporty style of driving is adopted.
Under these severe conditions , the thickness of the brake pads must also be
checked by a specialist garage between services.
Wet roads or road salt
The performance of the brakes can be delayed as the brake discs and brake
pads may be moist or have a coating of ice or layer of salt on them in winter.
The brakes are cleaned and dried by applying the brakes several times.
Corrosion
Corrosion on the brake discs and dirt on the bake pads occur if the vehicle has
been parked for a long period and if you do not make much use of the braking
system. The brakes are cleaned and dried by applying the brakes several times.
Faults in the brake surface
If it is found that the braking distance has suddenly become longer and that
the brake pedal can be depressed further, the brake system may be faulty.
Visit a specialist garage immediately and adjust your style of driving appropri-
ately as you will not know how great the damage is.
Low brake fluid level
An insufficient level of brake fluid may result in problems in the brake system.
The level of the brake fluid is monitored electronically » page 36,
Brake sys-
tem .
Brake booster
The brake booster increases the pressure generated with the brake pedal. The
brake booster only operates when the engine is running.103Starting-off and Driving
Page 106 of 197
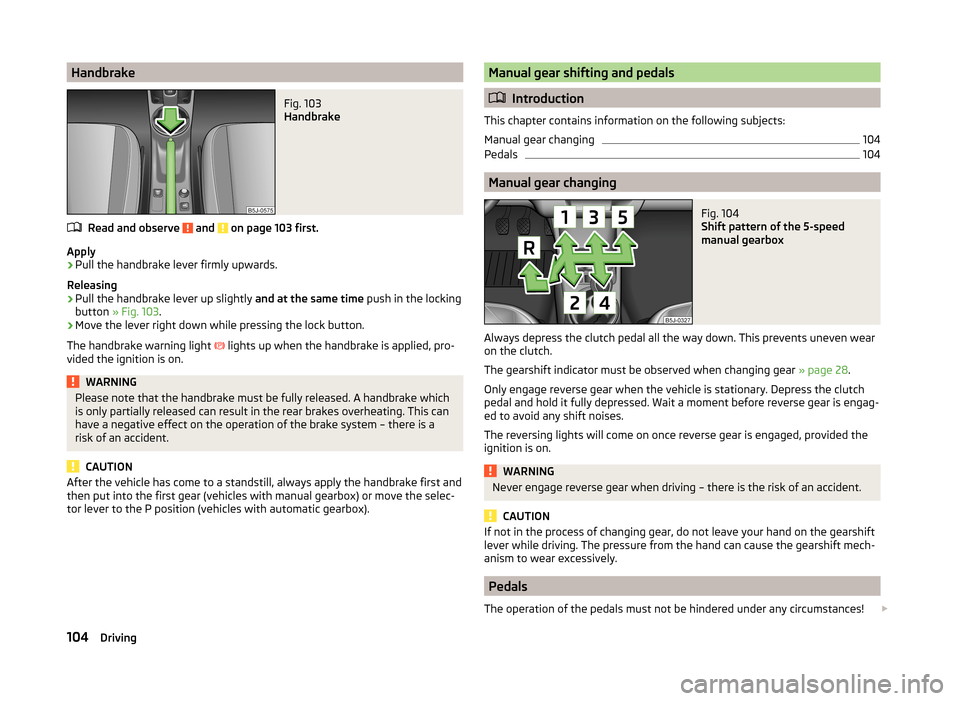
HandbrakeFig. 103
Handbrake
Read and observe and on page 103 first.
Apply
›
Pull the handbrake lever firmly upwards.
Releasing
›
Pull the handbrake lever up slightly and at the same time push in the locking
button » Fig. 103 .
›
Move the lever right down while pressing the lock button.
The handbrake warning light lights up when the handbrake is applied, pro-
vided the ignition is on.
WARNINGPlease note that the handbrake must be fully released. A handbrake which
is only partially released can result in the rear brakes overheating. This can
have a negative effect on the operation of the brake system – there is a
risk of an accident.
CAUTION
After the vehicle has come to a standstill, always apply the handbrake first and
then put into the first gear (vehicles with manual gearbox) or move the selec-
tor lever to the P position (vehicles with automatic gearbox).Manual gear shifting and pedals
Introduction
This chapter contains information on the following subjects:
Manual gear changing
104
Pedals
104
Manual gear changing
Fig. 104
Shift pattern of the 5-speed
manual gearbox
Always depress the clutch pedal all the way down. This prevents uneven wear on the clutch.
The gearshift indicator must be observed when changing gear » page 28.
Only engage reverse gear when the vehicle is stationary. Depress the clutch
pedal and hold it fully depressed. Wait a moment before reverse gear is engag-
ed to avoid any shift noises.
The reversing lights will come on once reverse gear is engaged, provided the
ignition is on.
WARNINGNever engage reverse gear when driving – there is the risk of an accident.
CAUTION
If not in the process of changing gear, do not leave your hand on the gearshift
lever while driving. The pressure from the hand can cause the gearshift mech-
anism to wear excessively.
Pedals
The operation of the pedals must not be hindered under any circumstances!
104Driving
Page 109 of 197
When accelerating, the gearbox automatically shifts up into the higher gear
just before the maximum permissible engine speed is reached.
If a lower gear is selected, the gearbox does not shift down until there is no risk of the engine overrevving.
Note
It may be advantageous to use manual gear shifting when driving downhill, for
example. Shifting to a lower gear reduces the load on the brakes and hence
brake wear » page 103, Information for braking .
Starting-off and driving
Read and observe
and on page 105 first.
Starting off
›
Start the engine.
›
Firmly depress and hold the brake pedal.
›
Press and hold the shiftlock button on the selector lever grip.
›
Move the selector lever into the desired position » page 105 and then release
the lock button.
›
Release the brake pedal and accelerate.
Stop
›
Fully depress and hold the brake pedal and bring the vehicle to a stop.
›
Keep holding the brake pedal until driving is resumed.
The selector lever position N does not have to be selected when stopping for a
short time, such as at a cross roads.
Parking
›
Fully depress and hold the brake pedal and bring the vehicle to a stop.
›
Firmly apply the handbrake.
›
Press and hold the shiftlock button on the selector lever grip.
›
Move the selector lever to the P position and then release the shiftlock but-
ton.
Kickdown
The kickdown function allows you to achieve maximum acceleration by your vehicle while driving.
When the accelerator pedal is fully depressed, the kickdown function is activa-
ted in any forward driving mode.
The gearbox shifts down one or more gears depending on the vehicle speed
and engine speed, and the vehicle accelerates.
The gearbox does not shift up into the highest gear until the engine has
reached its maximum revolutions for this gear range.WARNINGRapid acceleration, particularly on slippery roads, can lead to loss of control
of the vehicle – there is a risk of an accident.
Malfunction
Read and observe
and on page 105 first.
Emergency programme
The transmission switches to the emergency programme if there is a fault in
the automatic gearbox system.
Indications of an activated emergency programme include the following:
› Only certain gears are selected.
› Reverse gear
R cannot be used.
› Shifting gears in Tiptronic mode is not possible.
Gearbox overheating
The gearbox may, for example, become too hot due to frequent repeated
starting or stop-and-go traffic. Overheating is indicated by the warning
light » page 34 ,
Clutches of the automatic DSG gearbox are too hot
.
Note
Visit a specialist workshop if the gearbox has switched to the emergency pro-
gramme.107Starting-off and Driving
Page 111 of 197
New tyres
New tyres have to be “run in” since they do not offer optimal grip at first. Drive
especially carefully for the first 500 km or so.
New brake pads
New brake pads initially do not provide optimal braking performance. They first
need to be “run in”. Drive especially carefully for the first 200 km or so.
Economical driving and respect the environment
Introduction
This chapter contains information on the following subjects:
Driving with anticipation
109
Economical gear changing.
109
Avoiding full throttle
110
Reducing idling
110
Avoiding short distances
110
Checking tyre pressure
110
Avoiding unnecessary ballast
111
Regular maintenance
111
Saving electrical energy
111
Environmental compatibility
111
The technical requirements for low fuel usage and economic efficiency of the
vehicle have already been built into the vehicle at the works. ŠKODA places a
particular emphasis on minimising negative effects on the environment.
It is necessary to take note of the guidelines given in this chapter in order to make best use of these characteristics and to maintain their effectiveness.
Fuel consumption, environmental pollution and the wear to the engine, brakes
and tyres depend essentially on the following three factors.
› Your personal driving style
› Operating conditions
› Technical requirements
The fuel economy by can be improved by 10 -15 % by always looking ahead and
driving in an economical way.
Fuel consumption is also be influenced by external factors which are beyond
the driver's control. Consumption increases during the winter or under difficult
conditions, on poor roads, etc.
Fuel consumption can vary considerably from the manufacturer's data, as a re-
sult of outside temperatures, the weather and driving style.
The optimal engine speed should be maintained when accelerating, to avoid a high fuel consumption and resonance of the vehicle.
CAUTION
All the speed and engine revolution figures apply only when the engine is at
its normal operating temperature.
Driving with anticipation
Read and observe
on page 109 first.
A vehicle's highest fuel consumption occurs when accelerating, therefore un-necessary accelerating and braking should be avoided. If looking ahead when
driving, less braking and consequently less accelerating are required.
If possible, let your vehicle coast to a stop, or use the engine brake, if you can see that the next set of traffic lights is on red, for example.
Economical gear changing.
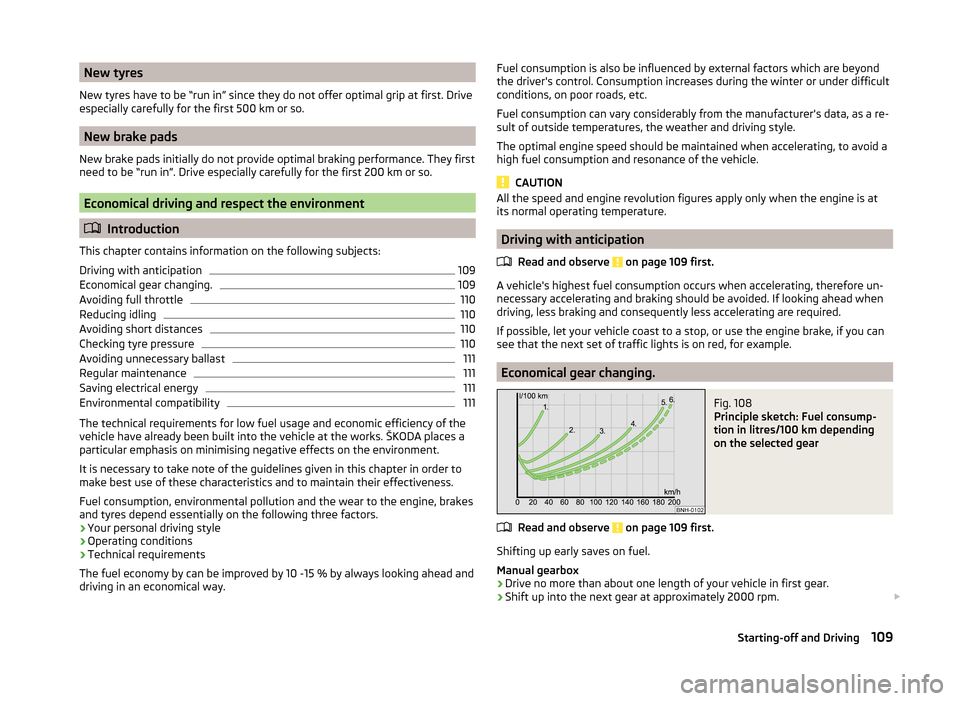
Fig. 108
Principle sketch: Fuel consump-
tion in litres/100 km depending
on the selected gear
Read and observe on page 109 first.
Shifting up early saves on fuel.
Manual gearbox › Drive no more than about one length of your vehicle in first gear.
› Shift up into the next gear at approximately 2000 rpm.
109Starting-off and Driving
Page 115 of 197
WARNING■Driving through water, mud, sludge etc. can reduce the braking power
and extend the braking distance – there is the risk of an accident.■
Avoid abrupt and sudden braking immediately after water crossings.
■
After driving through bodies of water, the brakes must be cleaned and
dried as soon as possible by intermittent braking. Only apply the brakes for
the purpose of drying and cleaning the brake discs if the traffic conditions
permit this. Do not place any other road users in jeopardy.
CAUTION
■ When driving through water, some parts of the vehicle such as the engine,
gearbox, chassis or electrics can be severely damaged.■
Oncoming vehicles can generate water waves which can exceed the permis-
sible water level for your vehicle.
■
Potholes, mud or rocks can be hidden under the water making it difficult or
impossible to drive through the body of water.
■
Do not drive through salt water. The salt can lead to corrosion. Any vehicle
parts that have come into contact with salt water must be rinsed immediately
with fresh water.
Note
We recommend that the vehicle is checked by a specialist garage after it has
been driven through water.
Driving abroad
Introduction
This chapter contains information on the following subjects:
Unleaded petrol
113
Headlights
113
In certain countries, it may be possible that the ŠKODA service partner net-
work is limited or has not been established. This is the reason why procuring
certain spare parts may be somewhat complicated and specialist garages may
only be able to make limited repairs.
Unleaded petrol
A vehicle fitted with a petrol engine must always be refuelled with unleaded
petrol » page 136 , Unleaded petrol . Information regarding the locations of fill-
ing stations that offer unleaded petrol is, for example, provided by the auto-
mobile associations.
Headlights
The low beam of your headlights is set asymmetrically. It illuminates the side
of the road on which the vehicle is being driven to a greater extent.
When driving in countries in which the traffic drives on the other side of the
road than in your home country, the asymmetrical low beam may dazzle on-
coming drivers. To prevent oncoming traffic from being dazzled, the headlights
must be adjusted by a specialist garage.
Note
For more information on adjusting the headlights, consult a specialist garage.113Starting-off and Driving