fuel consumption SKODA FABIA 2014 2.G / 5J Owner's Manual
[x] Cancel search | Manufacturer: SKODA, Model Year: 2014, Model line: FABIA, Model: SKODA FABIA 2014 2.G / 5JPages: 197, PDF Size: 13.56 MB
Page 2 of 197
Layout of this Owner's Manual (explanations)
This Owner's Manual has been systematically designed to make it easy for you
to search for and obtain the information you require.
Chapters, table of contents and subject index
The text of the Owner's manual is divided into relatively short sections which
are combined into easy-to-read chapters. The chapter you are reading at any
particular moment is always specified on the bottom right of the page.
The Table of contents is arranged according to the chapters and the detailed
Subject index at the end of the Owner's Manual helps you to rapidly find the
information you are looking for.
Direction indications
All direction indications such as “left”, “right”, “front”, “rear” relate to the direction of travel of the vehicle.
Units of measurement
All values are expressed in metric units.
Explanation of symbolsDenotes a reference to a section with important information and safety
advice in a chapter.Denotes the end of a section.Denotes the continuation of a section on the next page.Indicates situations where the vehicle must be stopped as soon as
possible.®Denotes a registered trademark.Denotes the display in the MAXI DOT display.Denotes the display in the segment display.
Display
The display in the segment display will be used in this Owner's Manual to repre-
sent the display unless otherwise specified.
NotesWARNINGThe most important notes are marked with the heading WARNING. These
WARNING notes draw your attention to a serious risk of accident or injury .
CAUTION
A Caution note draws your attention to the possibility of damage to your vehicle
(e.g. damage to gearbox), or points out general risks of an accident.
For the sake of the environment
An Environmental note draws your attention to environmental protection as-
pects. This is where you will, for example, find tips aimed at reducing your fuel
consumption.
Note
A normal Note draws your attention to important information about the opera-
tion of your vehicle. 5J6012720AH
Page 29 of 197
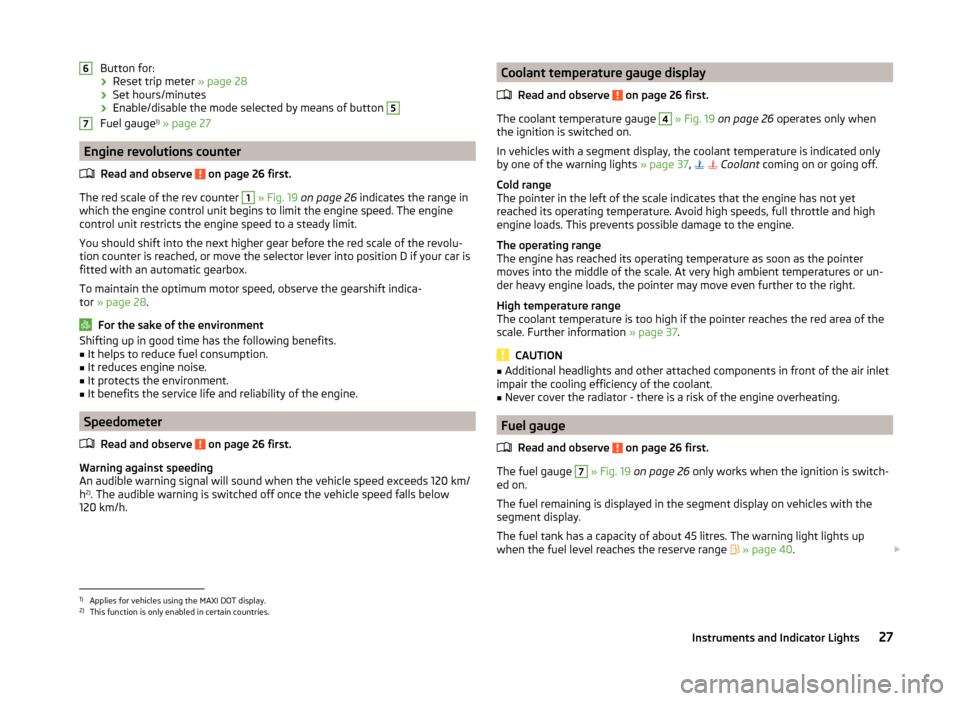
Button for:› Reset trip meter
» page 28
› Set hours/minutes
› Enable/disable the mode selected by means of button 5
Fuel gauge 1)
» page 27
Engine revolutions counter
Read and observe
on page 26 first.
The red scale of the rev counter
1
» Fig. 19 on page 26 indicates the range in
which the engine control unit begins to limit the engine speed. The engine
control unit restricts the engine speed to a steady limit.
You should shift into the next higher gear before the red scale of the revolu- tion counter is reached, or move the selector lever into position D if your car is
fitted with an automatic gearbox.
To maintain the optimum motor speed, observe the gearshift indica-
tor » page 28 .
For the sake of the environment
Shifting up in good time has the following benefits.■It helps to reduce fuel consumption.■
It reduces engine noise.
■
It protects the environment.
■
It benefits the service life and reliability of the engine.
Speedometer
Read and observe
on page 26 first.
Warning against speeding
An audible warning signal will sound when the vehicle speed exceeds 120 km/
h 2)
. The audible warning is switched off once the vehicle speed falls below
120 km/h.
67Coolant temperature gauge display
Read and observe
on page 26 first.
The coolant temperature gauge
4
» Fig. 19 on page 26 operates only when
the ignition is switched on.
In vehicles with a segment display, the coolant temperature is indicated only
by one of the warning lights » page 37,
Coolant coming on or going off.
Cold range
The pointer in the left of the scale indicates that the engine has not yet
reached its operating temperature. Avoid high speeds, full throttle and high engine loads. This prevents possible damage to the engine.
The operating range
The engine has reached its operating temperature as soon as the pointer
moves into the middle of the scale. At very high ambient temperatures or un-
der heavy engine loads, the pointer may move even further to the right.
High temperature range
The coolant temperature is too high if the pointer reaches the red area of the
scale. Further information » page 37.
CAUTION
■
Additional headlights and other attached components in front of the air inlet
impair the cooling efficiency of the coolant.■
Never cover the radiator - there is a risk of the engine overheating.
Fuel gauge
Read and observe
on page 26 first.
The fuel gauge
7
» Fig. 19 on page 26 only works when the ignition is switch-
ed on.
The fuel remaining is displayed in the segment display on vehicles with the
segment display.
The fuel tank has a capacity of about 45 litres. The warning light lights up
when the fuel level reaches the reserve range
» page 40 .
1)
Applies for vehicles using the MAXI DOT display.
2)
This function is only enabled in certain countries.
27Instruments and Indicator Lights
Page 30 of 197
CAUTIONNever drive until the fuel tank is completely empty! The irregular supply of fuel
can cause misfiring. This can result in considerable damage to parts of the en-
gine and the exhaust system.
Counter for distance driven
Read and observe
on page 26 first.
The distance which you have driven with your vehicle is shown in km. In some
countries the measuring unit “mile” is used.
Daily trip counter (trip)
The trip counter indicates the distance you have driven since it was last reset -
in steps of 100 metres or 1/10 of a mile.
Reset trip meter
The meter can be reset by pressing and holding button
6
» Fig. 19 on page 26 .
Odometer
The odometer indicates the total distance in kilometres or miles which the ve-
hicle has been driven.
Note
If the second speed display is enabled on vehicles with a segment display, this
speed will be shown instead of the odometer.
Digital clock
Read and observe
on page 26 first.
The clock is set with buttons
5
and
6
» Fig. 19 on page 26 .
Select the display that you wish to change with the button
5
and carry out
the change with the button
6
.
In vehicles equipped with the MAXI DOT display, it is also possible to set the
clock in the Time menu » page 34.
Display of the second speed
Read and observe
on page 26 first.
The display can show the current speed in mph 1)
.
This feature is provided for driving in countries with different units for speed.
MAXI DOT display
The display of the second speed can be set in the Settings menu
item » page 34 , Settings .
Segment display
›
Press the
5
» Fig. 19 on page 26 key repeatedly, until the odometer display
flashes » page 28 .
›
Press the
6
key while the display is flashing.
The second speed is displayed instead of the odometer.
Display of the second speed can be disabled in the same way.
Recommended gear
Fig. 20
Recommended gear
Read and observe on page 26 first.
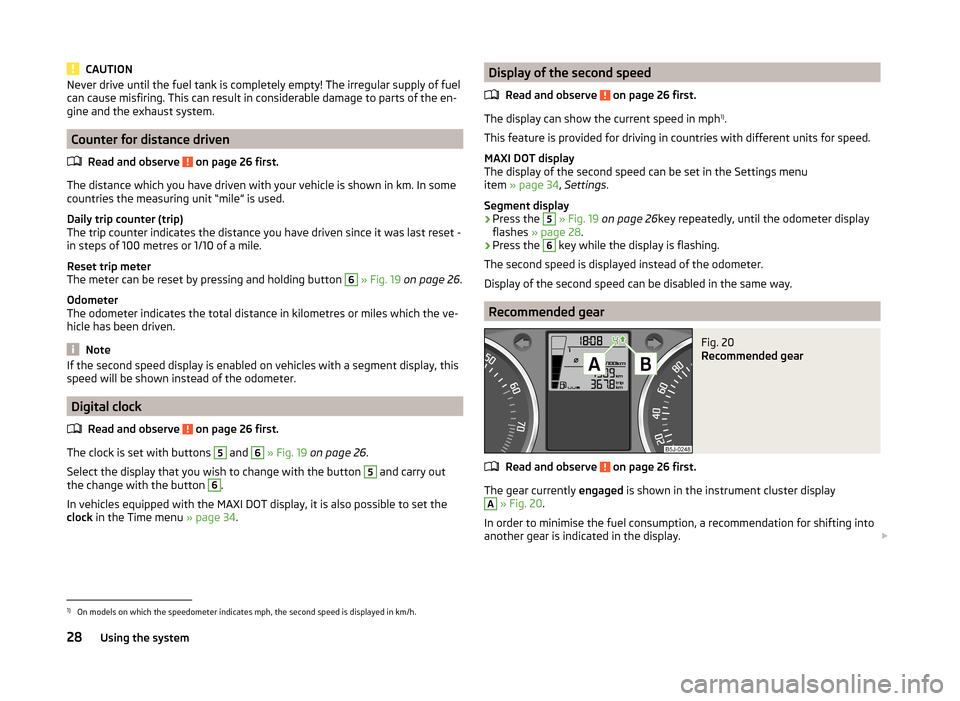
The gear currently engaged is shown in the instrument cluster display
A
» Fig. 20 .
In order to minimise the fuel consumption, a recommendation for shifting into
another gear is indicated in the display.
1)
On models on which the speedometer indicates mph, the second speed is displayed in km/h.
28Using the system
Page 32 of 197
OperationFig. 22
Multifunction display: Control el-
ements
Read and observe on page 29 first.
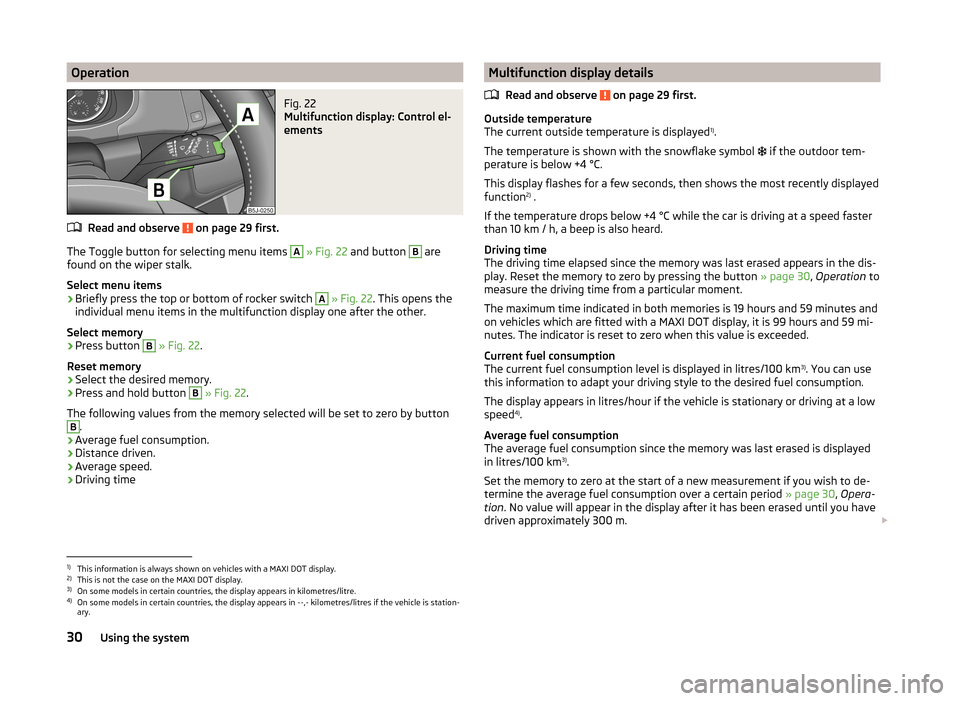
The Toggle button for selecting menu items
A
» Fig. 22 and button
B
are
found on the wiper stalk.
Select menu items
›
Briefly press the top or bottom of rocker switch
A
» Fig. 22 . This opens the
individual menu items in the multifunction display one after the other.
Select memory
›
Press button
B
» Fig. 22 .
Reset memory
›
Select the desired memory.
›
Press and hold button
B
» Fig. 22 .
The following values from the memory selected will be set to zero by button
B
.
› Average fuel consumption.
› Distance driven.
› Average speed.
› Driving time
Multifunction display details
Read and observe
on page 29 first.
Outside temperature
The current outside temperature is displayed 1)
.
The temperature is shown with the snowflake symbol
if the outdoor tem-
perature is below +4 °C.
This display flashes for a few seconds, then shows the most recently displayed
function 2)
.
If the temperature drops below +4 °C while the car is driving at a speed faster
than 10 km / h, a beep is also heard.
Driving time
The driving time elapsed since the memory was last erased appears in the dis-
play. Reset the memory to zero by pressing the button » page 30, Operation to
measure the driving time from a particular moment.
The maximum time indicated in both memories is 19 hours and 59 minutes and
on vehicles which are fitted with a MAXI DOT display, it is 99 hours and 59 mi- nutes. The indicator is reset to zero when this value is exceeded.
Current fuel consumption
The current fuel consumption level is displayed in litres/100 km 3)
. You can use
this information to adapt your driving style to the desired fuel consumption.
The display appears in litres/hour if the vehicle is stationary or driving at a low
speed 4)
.
Average fuel consumption
The average fuel consumption since the memory was last erased is displayed
in litres/100 km 3)
.
Set the memory to zero at the start of a new measurement if you wish to de-
termine the average fuel consumption over a certain period » page 30, Opera-
tion . No value will appear in the display after it has been erased until you have
driven approximately 300 m.
1)
This information is always shown on vehicles with a MAXI DOT display.
2)
This is not the case on the MAXI DOT display.
3)
On some models in certain countries, the display appears in kilometres/litre.
4)
On some models in certain countries, the display appears in --,- kilometres/litres if the vehicle is station-
ary.
30Using the system
Page 33 of 197
The display is updated regularly while you are driving.
Range
The estimated range is displayed in kilometres. It indicates the distance you can still drive with your vehicle based on the level of fuel in the tank and the
same style of driving.
The display is shown in steps of 10 km. The value is displayed in steps of 5 km
after the
warning light has come on.
The fuel consumption over the preceding 50 km is used to calculate the infor-
mation. The range will increase if you drive in a more economical manner.
If the memory is set to zero (after the battery has been disconnected), a fuel
consumption of 10 l/100 km is used initially, then the value is adapted accord-
ing to the style of driving.
Distance travelled
The distance travelled since the memory was last erased is displayed. Reset
the memory to zero if you want to measure the distance travelled from a par-
ticular moment » page 30, Operation .
The maximum distance indicated in both memories is 1999 km or 9999 km on
vehicles with a MAXI DOT display. The indicator is reset to zero when this val-
ue is exceeded.
Average speed
The average speed since the memory was last erased is displayed in km/hour .
Set the memory to zero at the start of measurement to determine the average
speed over a certain period » page 30, Operation .
No value will appear in the display until you have driven approximately 300 m after this information has been deleted.
The display is updated regularly while you are driving.
Current speed
The current speed, identical to the display on the speedometer 3
» Fig. 19 on
page 26 , is displayed.
Oil temperature 1)
The current engine oil temperature is displayed. If the oil temperature is lower
than 50 °C or if a fault in the system for checking the oil temperature is
present, only - -.- is displayed instead of the oil temperature.
Warning against speeding
The warning that the speed limit is being exceeded can be enabled/disabled in
the display » page 31.
Warning against speeding
Read and observe
on page 29 first.
Adjust the speed limit while the vehicle is stationary
›
Press button
A
» Fig. 22 on page 30 to select the Warning at (MAXI DOT
display) or
(segment display) menu item.
›
Press button
B
to activate the ability to set the speed limit 2)
(value flashes).
›
Use the button
A
to set the required speed limit, e.g. 50 km/h.
›
Confirm the speed limit that was set with button
B
, or wait approx. 5 sec-
onds until the setting is saved automatically (the value stops flashing).
This allows you to set the speed in 5 km/h intervals.
Adjusting the speed limit while the vehicle is moving
›
Press button
A
» Fig. 22 on page 30 to select the Warning at (MAXI DOT
display) or (segment display) menu item.
›
Drive at the desired speed, e.g. 50 km/h.
›
Press button
B
to accept the current speed as the speed limit (the value
flashes).
If you wish to adjust the set speed limit, you can do so in 5 km/h intervals (e.g. the accepted speed of 47 km/h increases to 50 km/h or decreases to 45 km/h).
›
Confirm the speed limit that was set by pressing button
B
again, or wait ap-
prox. 5 seconds until the setting is saved automatically (the value stops
flashing).
Change or delete speed limit
›
Press button
A
» Fig. 22 on page 30 to select the Warning at (MAXI DOT
display) or (segment display) menu item.
›
Pressing button
B
disables the speed limit.
›
Pressing the button
B
activates the ability to change the speed limit.
If the set speed limit is exceeded, an audible signal will sound as a warning.
The Warning at (MAXI DOT display) or
(segment display) menu item appears
in the display with the limit set.
1)
Applies for vehicles equipped with the MAXI DOT display.
2)
An initial value of 30 km/h is displayed automatically if no value has been specified.
31Instruments and Indicator Lights
Page 42 of 197
In order to clean the filter, and where traffic conditions permit » , the vehicle
should be driven at an even speed of at least 60 km/h at engine speeds of 1
800 - 2 500 rpm for at least 15 minutes or until the warning light goes out with
the 4th or 5th gear engaged (automatic gearbox: position S).
The
warning light only goes out once the diesel particulate filter has been
successfully cleaned.
If the filter is not properly cleaned, the warning light
does not go out and
the warning light
begins to flash.
The following message is shown in the MAXI DOT display. Diesel particulate filter: Log book!
The engine control unit allows the vehicle to run in emergency mode. After
switching the ignition off and on again the indicator light, the indicator light
also lights up.
Seek help from a specialist garage.WARNING■ The diesel particulate filter reaches very high temperatures - there is a
fire hazard and serious injury could be caused. Therefore, never stop the
vehicle at places where the underside of your vehicle can come into contact
with flammable materials such as dry grass, undergrowth, leaves, spilled
fuel or such like.■
Always adjust your speed to suit weather, road, region and traffic condi-
tions. The recommendations indicated by the warning light must not tempt
you to disregard the national regulations for road traffic.
CAUTION
As long as the warning light lights up, one must take into account an in-
creased fuel consumption and in certain circumstances a power reduction of
the engine.
Note
■ We recommend avoiding regularly driving short distances to assist the com-
bustion process of the soot particles in the filter.■
Using diesel fuel with an increased sulphur content can considerably reduce
the service life of the filter. A ŠKODA Service Partner will be able to tell you
which countries use diesel fuel with a high sulphur content.
■
If the engine is turned off during the filter cleaning process or shortly after-
wards, the cooling fan may turn on automatically for a few minutes.
Fuel reserve
Read and observe
on page 35 first.
The indicator light
will come on if the fuel level is less than 7 litres.
An audible signal sounds as a warning signal.
The following message is shown in the MAXI DOT display.
Please refuel. Range: ... km
Note
The text in the MAXI DOT display only goes out after the vehicle has been re-
fuelled and driven a short distance.
Airbag system
Read and observe
on page 35 first.
If the warning light lights up, there is a fault in the airbag system.
The following message is shown in the MAXI DOT display. Error: Airbag
The operational capability of the airbag system is monitored electronically,
even if one of the airbags is switched off.
If a front, side or head airbag or belt tensioner has been switched off using
the vehicle system tester:
› The
warning light comes on for around 4 seconds after the ignition is
switched on and then flashes for approximately another 12 seconds at 2 sec-
ond intervals.
The following message is shown in the MAXI DOT display. Airbag/belt tensioner deactivated.
If the front passenger's front airbag was switched off using the key-operat-
ed switch on the side of the dash panel on the passenger side:
› The
warning light comes on for around 4 seconds after the ignition has
been switched on.
› switching off the airbag is indicated in the middle of the dash panel by the
lighting up of the yellow indicator light in display
» page 18 .
40Using the system
Page 54 of 197
CAUTION■Keep the windows clean to ensure the correct functionality of the electric
windows.■
Should the windows freeze, first remove the ice » page 131, Windows and
exterior mirrors and only then operate the power windows. Otherwise, the
window seal and the power window mechanism could be damaged.
■
In the winter, ice on the window may cause greater resistance as the win-
dow is closed. The window will stop and open again by several centimetres.
■
Always make sure that the windows are closed when you leave the locked
vehicle.
For the sake of the environment
At high speeds, you should keep the windows closed to prevent unnecessarily high fuel consumption.
Note
■ After switching the ignition off, it is still possible to open or close the win-
dows for approx. 10 minutes. After the driver's or front passenger's door has
been opened, the windows can only be operated by using A
» Fig. 37 on
page 52 .
■
When driving always use the existing heating, air conditioning and ventila-
tion system for ventilating the interior of the vehicle. If the windows are
opened, dust as well as other dirt can get into the vehicle and in addition the
wind noise is more at certain speeds.
Opening/closing the windows
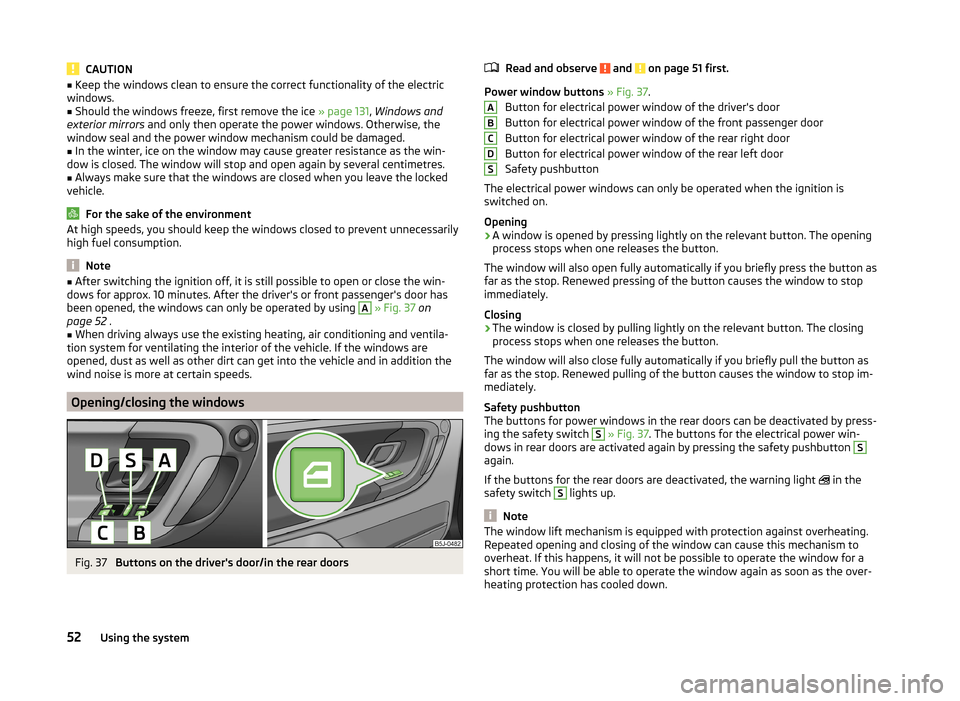
Fig. 37
Buttons on the driver's door/in the rear doors
Read and observe and on page 51 first.
Power window buttons » Fig. 37 .
Button for electrical power window of the driver's door
Button for electrical power window of the front passenger door
Button for electrical power window of the rear right door
Button for electrical power window of the rear left door
Safety pushbutton
The electrical power windows can only be operated when the ignition is
switched on.
Opening
›
A window is opened by pressing lightly on the relevant button. The opening
process stops when one releases the button.
The window will also open fully automatically if you briefly press the button as
far as the stop. Renewed pressing of the button causes the window to stop
immediately.
Closing
›
The window is closed by pulling lightly on the relevant button. The closing
process stops when one releases the button.
The window will also close fully automatically if you briefly pull the button as
far as the stop. Renewed pulling of the button causes the window to stop im-
mediately.
Safety pushbutton
The buttons for power windows in the rear doors can be deactivated by press-
ing the safety switch
S
» Fig. 37 . The buttons for the electrical power win-
dows in rear doors are activated again by pressing the safety pushbutton
S
again.
If the buttons for the rear doors are deactivated, the warning light in the
safety switch
S
lights up.
Note
The window lift mechanism is equipped with protection against overheating.
Repeated opening and closing of the window can cause this mechanism to
overheat. If this happens, it will not be possible to operate the window for a
short time. You will be able to operate the window again as soon as the over-
heating protection has cooled down.ABCDS52Using the system
Page 63 of 197
Luggage compartment light
The light comes on automatically when the boot lid is opened. If the tailgate remains open for more than 10 minutes, the luggage compartment light
switches off automatically.
Visibility
Introduction
This chapter contains information on the following subjects:
Rear window heating
61
Sun visors
61
Rear window heating
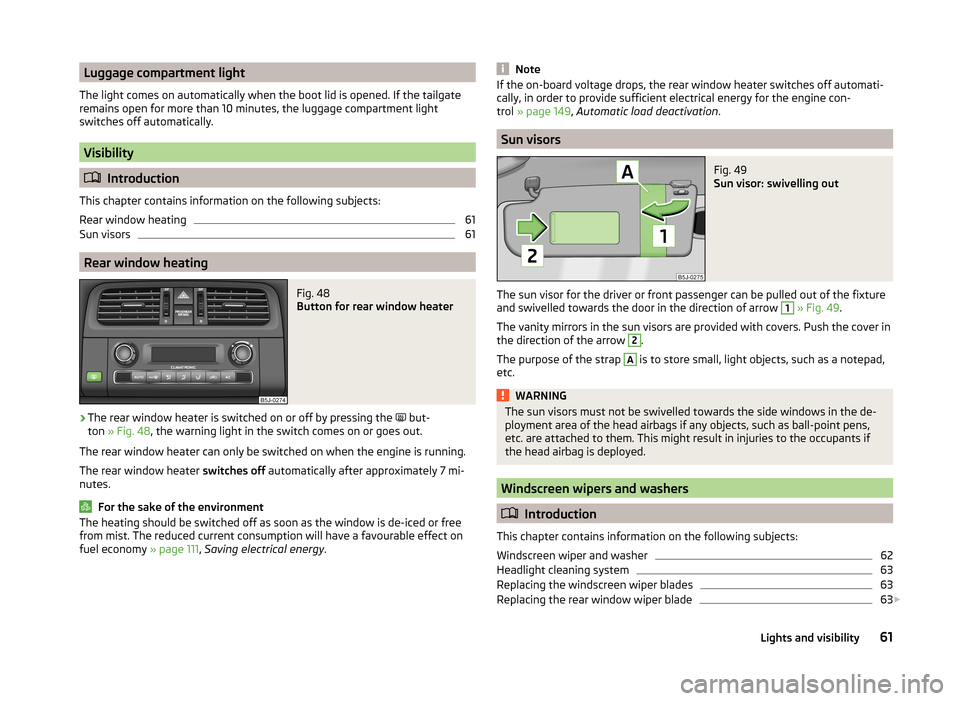
Fig. 48
Button for rear window heater
›
The rear window heater is switched on or off by pressing the but-
ton » Fig. 48 , the warning light in the switch comes on or goes out.
The rear window heater can only be switched on when the engine is running.
The rear window heater switches off automatically after approximately 7 mi-
nutes.
For the sake of the environment
The heating should be switched off as soon as the window is de-iced or free
from mist. The reduced current consumption will have a favourable effect on
fuel economy » page 111, Saving electrical energy .NoteIf the on-board voltage drops, the rear window heater switches off automati-
cally, in order to provide sufficient electrical energy for the engine con-
trol » page 149 , Automatic load deactivation .
Sun visors
Fig. 49
Sun visor: swivelling out
The sun visor for the driver or front passenger can be pulled out of the fixture
and swivelled towards the door in the direction of arrow
1
» Fig. 49 .
The vanity mirrors in the sun visors are provided with covers. Push the cover in
the direction of the arrow
2
.
The purpose of the strap
A
is to store small, light objects, such as a notepad,
etc.
WARNINGThe sun visors must not be swivelled towards the side windows in the de-
ployment area of the head airbags if any objects, such as ball-point pens,
etc. are attached to them. This might result in injuries to the occupants if
the head airbag is deployed.
Windscreen wipers and washers
Introduction
This chapter contains information on the following subjects:
Windscreen wiper and washer
62
Headlight cleaning system
63
Replacing the windscreen wiper blades
63
Replacing the rear window wiper blade
63
61Lights and visibility
Page 79 of 197
WARNING■The items being transported on the roof rack must be reliably attached –
there is the risk of an accident.■
Always secure the load with appropriate and undamaged lashing straps
or tensioning straps.
■
Distribute the load evenly over the roof rack system.
■
The handling properties of your vehicle change when you transport heavy
or bulky items on the roof rack system as a result of the centre of gravity
being shifted and the greater area exposed to the wind – there is the risk
of an accident. The style of driving and speed must therefore be adapted to
the current circumstances.
■
Avoid abrupt and sudden driving/braking manoeuvres.
■
Adjust the speed and driving style to the visibility, weather, road and traf-
fic conditions.
■
The permissible roof load, permissible axle loads and gross permissible
weight of the vehicle must not be exceeded under any circumstances –
there is the risk of an accident.
CAUTION
■ Only roof racks from the ŠKODA Original Accessories range should be used.■The fitting instructions supplied with the roof luggage rack system must be
observed when handling roof racks.■
On models fitted with a power sliding/tilting roof, ensure that the opened
sliding/tilting roof does not strike any items of luggage transported on the
roof.
■
Ensure that the boot lid does not hit the roof load when opened.
■
The height of the vehicle changes after mounting a roof luggage rack system
and the load that is secured to it. Compare the vehicle height with available
clearances, such as underpasses and garage doors.
■
Always remove the roof luggage rack system before entering an automated
car wash.
■
Ensure the roof aerial is not impaired by the secured load.
For the sake of the environment
The increased aerodynamic drag results in a higher fuel consumption.
Note
If the vehicle is not factory-equipped with a roof rack, it can be purchased from
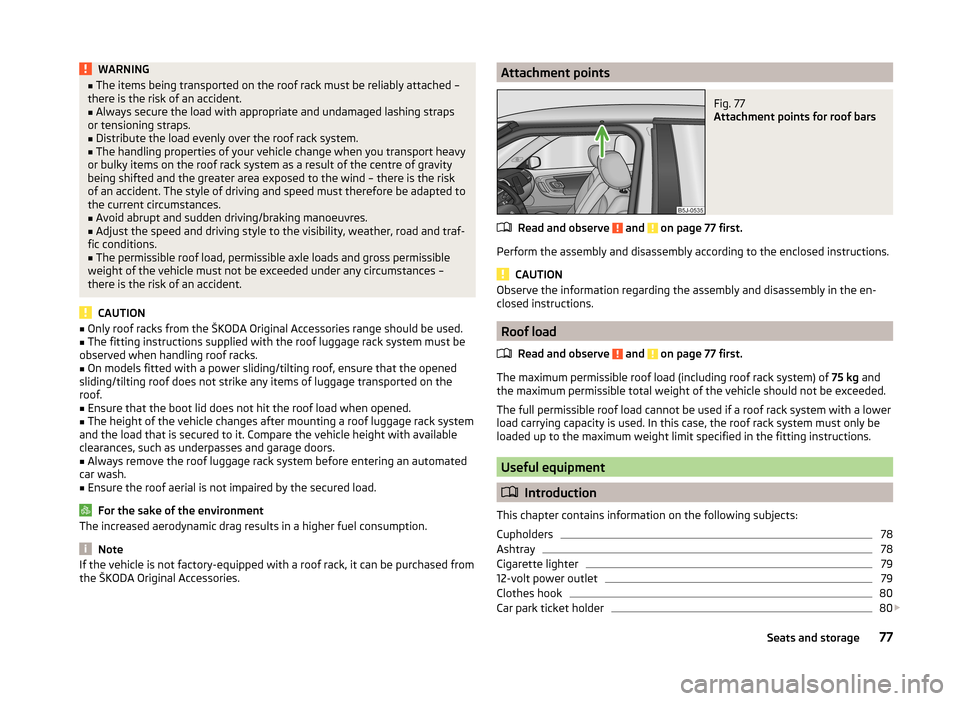
the ŠKODA Original Accessories.Attachment pointsFig. 77
Attachment points for roof bars
Read and observe and on page 77 first.
Perform the assembly and disassembly according to the enclosed instructions.
CAUTION
Observe the information regarding the assembly and disassembly in the en-
closed instructions.
Roof load
Read and observe
and on page 77 first.
The maximum permissible roof load (including roof rack system) of 75 kg and
the maximum permissible total weight of the vehicle should not be exceeded.
The full permissible roof load cannot be used if a roof rack system with a lower
load carrying capacity is used. In this case, the roof rack system must only be
loaded up to the maximum weight limit specified in the fitting instructions.
Useful equipment
Introduction
This chapter contains information on the following subjects:
Cupholders
78
Ashtray
78
Cigarette lighter
79
12-volt power outlet
79
Clothes hook
80
Car park ticket holder
80
77Seats and storage
Page 87 of 197

Note■The exhaust air streams out through vents at the rear of the luggage com-
partment.■
We recommend that you do not smoke in the vehicle when the recirculating
air mode is operating since the smoke which is drawn at the evaporator from
the interior of the vehicle forms deposits in the evaporator of the air condition-
ing system. This produces a permanent odour when the air conditioning sys-
tem is operating which can only be eliminated through considerable effort and
expense (replacement of compressor).
Air outlets
Fig. 94
Air outlet vents
Read and observe
and on page 84 first.
Warmed, not warmed fresh or cooled air will flow out of the opened air outlet
vents according to the setting of the control and the outside atmospheric con-
ditions.
The direction of airflow can be adjusted using the air outlet vents 3 and
4 » Fig. 94 and the outlets can also be opened and closed individually.
Open the air outlet vents 3 and 4
›
Turn the vertical wheel (air vents 3) » Fig. 94 or the horizontal wheel (air out-
let nozzles 4) to the
position.
Close air outlet vents 3 and 4›Turn the vertical wheel (air vents
3) » Fig. 94 or the horizontal wheel (air out-
let nozzles 4) to the 0 position.
Change air flow of air outlet vents 3 and 4›
In order to change the strength of the air flow, swivel the horizontal lamellas
with the aid of the moveable adjuster » Fig. 94.
›
In order to change the lateral direction of the air flow, swivel the vertical la-
mellas with the aid of the moveable adjuster.
Set the air supply to the individual vents with the air distribution control
C
» Fig. 95 on page 86 .
Note
Do not cover the air outlet vents with objects of any kind.
Using the air conditioning system economically
Read and observe
and on page 84 first.
The air conditioning system compressor uses power from the engine when in
cooling mode, which will affect the fuel consumption.
It recommended to open the windows or the doors of a vehicle for which the
interior has been strongly heated through the effect of direct sunlight in order
to allow the heated air to escape.
The cooling system should not be switched on if the windows are open.
For the sake of the environment
Pollutant emissions are also lower when fuel is being saved » page 109.
Operational problems
Read and observe
and on page 84 first.
If the cooling system does not operate at outside temperatures higher than +5
°C, there is a problem in the system. The reasons for this may be.
› One of the fuses has blown. Check the fuse and replace if necessa-
ry » page 168 .
› The cooling system has switched off automatically for a short time because
the coolant temperature of the engine is too hot » page 27.
85Heating and air conditioning