oil change SKODA FABIA 2014 2.G / 5J Owner's Manual
[x] Cancel search | Manufacturer: SKODA, Model Year: 2014, Model line: FABIA, Model: SKODA FABIA 2014 2.G / 5JPages: 197, PDF Size: 13.56 MB
Page 13 of 197

WARNING (Continued)■The lock tongue should only be inserted into the lock which is the correct
one for your seat. Wrong use of the safety belt will reduce its capacity to
protect and the risk of injury increases.■
The slot of the belt tongue must not be blocked otherwise the belt
tongue will not lock in place properly.
■
Many layers of clothing and loose clothing (e. g. a winter coat over a jack-
et) do not allow you to be correctly seated and impairs proper operation of
the seat belts.
■
It is prohibited to use clamps or other objects to adjust seat belts (e. g. for
shortening the belts for smaller persons).
■
The seat belts for the rear seats can only fulfil their function reliably
when the seat backrests are correctly locked into position » page 66.
WARNINGInformation on the care and maintenance of the safety belts■The belt webbing must always be kept clean. Soiled belts may impair
proper operation of the inertia reel » page 134, Seat belts .■
The seat belts must not be removed or changed in any way. Do not at-
tempt to repair the seat belts yourself.
■
Check the condition of all the seat belts on a regular basis. If any damage
to the seat belts, seat belt connections, inertia reel or the lock is detected,
the seat belt concerned must be replaced by a specialist garage.
■
Damaged seat belts which have been subjected to stress in an accident
and were therefore stretched, must be replaced - this is best done by a
specialist garage. The anchorage points of the belts must also be inspec-
ted. The anchorage points for the belts should also be checked.
Note
The national legal requirements must be observed when using seat belts.The physical principle of a frontal collisionFig. 4
Driver without a fastened seat belt/rear seat passenger without a
fastened seat belt
Read and observe
on page 10 first.
As soon as the vehicle is moving, so-called kinetic energy (the energy of mo-
tion) is produced both in terms of the car as well as in terms of the occupants.
The magnitude of this kinetic energy depends essentially on the speed at
which the vehicle is travelling and on the weight of the vehicle including the
occupants. The greater the speed and weight increase, the greater the
amount of energy which has to be absorbed in the event of an accident.
The speed of the vehicle is the most important factor. Doubling the speed of
the vehicle from 25 km/h up to 50 km/hour increases the kinetic energy four
times.
The notion that it is possible to support your body with your hands in a minor
accident is incorrect. Even in a collision at only a low speed, the forces acting
on the body are such that it is no longer possible to support your body.
Even if you only drive at a speed of 30 km/h to 50 km/h, the forces that your body is exposed to in the event of an accident can exceed a ton (1000 kg).
For example, a person's weight of 80 kg “increases” at 50 km/h to 4.8 tons (4800 kg).
In the event of a frontal collision, occupants of the car not wearing a seat belt
are thrown forward and strike parts of the interior of the car, such as the
steering wheel, dash panel, windscreen in ways which cannot be control-
led » Fig. 4 -
. In certain circumstances you could even be thrown out of the
vehicle, which could cause life threatening or even fatal injuries.
11Seat belts
Page 33 of 197
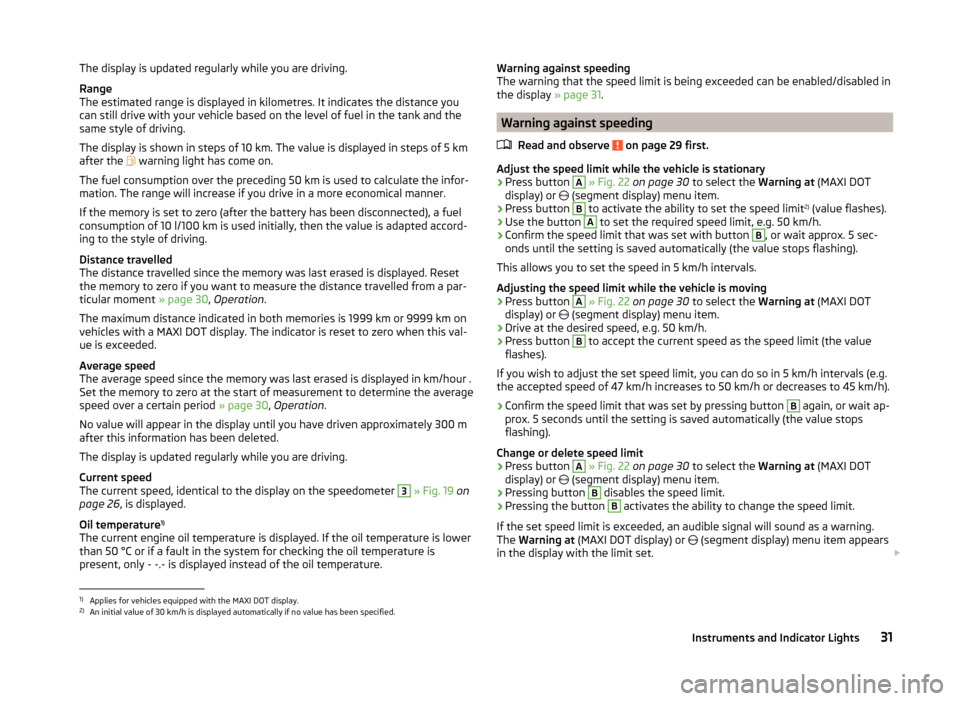
The display is updated regularly while you are driving.
Range
The estimated range is displayed in kilometres. It indicates the distance you can still drive with your vehicle based on the level of fuel in the tank and the
same style of driving.
The display is shown in steps of 10 km. The value is displayed in steps of 5 km
after the
warning light has come on.
The fuel consumption over the preceding 50 km is used to calculate the infor-
mation. The range will increase if you drive in a more economical manner.
If the memory is set to zero (after the battery has been disconnected), a fuel
consumption of 10 l/100 km is used initially, then the value is adapted accord-
ing to the style of driving.
Distance travelled
The distance travelled since the memory was last erased is displayed. Reset
the memory to zero if you want to measure the distance travelled from a par-
ticular moment » page 30, Operation .
The maximum distance indicated in both memories is 1999 km or 9999 km on
vehicles with a MAXI DOT display. The indicator is reset to zero when this val-
ue is exceeded.
Average speed
The average speed since the memory was last erased is displayed in km/hour .
Set the memory to zero at the start of measurement to determine the average
speed over a certain period » page 30, Operation .
No value will appear in the display until you have driven approximately 300 m after this information has been deleted.
The display is updated regularly while you are driving.
Current speed
The current speed, identical to the display on the speedometer 3
» Fig. 19 on
page 26 , is displayed.
Oil temperature 1)
The current engine oil temperature is displayed. If the oil temperature is lower
than 50 °C or if a fault in the system for checking the oil temperature is
present, only - -.- is displayed instead of the oil temperature.
Warning against speeding
The warning that the speed limit is being exceeded can be enabled/disabled in
the display » page 31.
Warning against speeding
Read and observe
on page 29 first.
Adjust the speed limit while the vehicle is stationary
›
Press button
A
» Fig. 22 on page 30 to select the Warning at (MAXI DOT
display) or
(segment display) menu item.
›
Press button
B
to activate the ability to set the speed limit 2)
(value flashes).
›
Use the button
A
to set the required speed limit, e.g. 50 km/h.
›
Confirm the speed limit that was set with button
B
, or wait approx. 5 sec-
onds until the setting is saved automatically (the value stops flashing).
This allows you to set the speed in 5 km/h intervals.
Adjusting the speed limit while the vehicle is moving
›
Press button
A
» Fig. 22 on page 30 to select the Warning at (MAXI DOT
display) or (segment display) menu item.
›
Drive at the desired speed, e.g. 50 km/h.
›
Press button
B
to accept the current speed as the speed limit (the value
flashes).
If you wish to adjust the set speed limit, you can do so in 5 km/h intervals (e.g. the accepted speed of 47 km/h increases to 50 km/h or decreases to 45 km/h).
›
Confirm the speed limit that was set by pressing button
B
again, or wait ap-
prox. 5 seconds until the setting is saved automatically (the value stops
flashing).
Change or delete speed limit
›
Press button
A
» Fig. 22 on page 30 to select the Warning at (MAXI DOT
display) or (segment display) menu item.
›
Pressing button
B
disables the speed limit.
›
Pressing the button
B
activates the ability to change the speed limit.
If the set speed limit is exceeded, an audible signal will sound as a warning.
The Warning at (MAXI DOT display) or
(segment display) menu item appears
in the display with the limit set.
1)
Applies for vehicles equipped with the MAXI DOT display.
2)
An initial value of 30 km/h is displayed automatically if no value has been specified.
31Instruments and Indicator Lights
Page 34 of 197
The speed limit set mode is stored even after the ignition is switched off and
on.
Service Interval Display
Introduction
This chapter contains information on the following subjects:
Prompt in the segment display
32
Display in the MAXI DOT display
33
A message concerning the kilometres and days remaining until the next
service is due is shown for about 10 seconds after the ignition is switched on
until the end of the service interval is reached.
The kilometre indicator or the days indicator reduces in steps of 100 km or
days until the service due date is reached.
Resetting the oil change service indicator in a specialist dealer's
For vehicles with variable service intervals, after resetting the screen displays,
the values of a new service interval is displayed, which are based on the previ-
ous operating conditions of the vehicle.
These values are then further continuously matched according to the actual
operating conditions of the vehicle.
Note
■ Information is retained in the Service Interval Display even after the vehicle
battery is disconnected.■
If the instrument cluster is exchanged after a repair, the correct values must
be entered in the counter for the Service Interval Display. This work will be
done by a specialist garage.
■
For more information on the service intervals, see the » Serviceplan , chap-
ter service schedules .
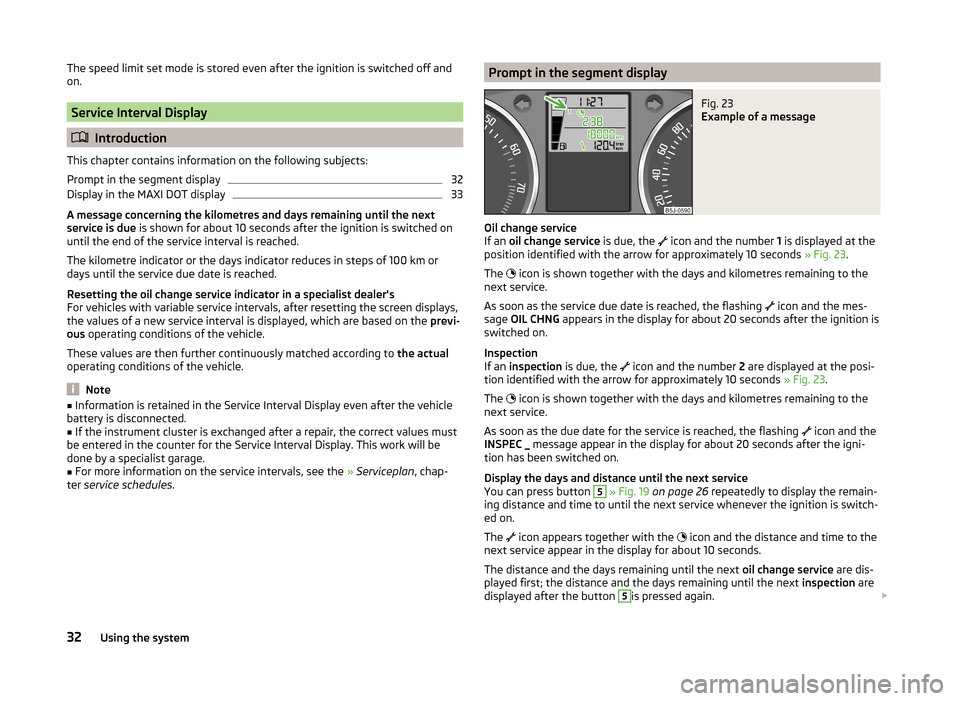
Prompt in the segment displayFig. 23
Example of a message
Oil change service
If an oil change service is due, the
icon and the number
1 is displayed at the
position identified with the arrow for approximately 10 seconds » Fig. 23.
The icon is shown together with the days and kilometres remaining to the
next service.
As soon as the service due date is reached, the flashing icon and the mes-
sage OIL CHNG appears in the display for about 20 seconds after the ignition is
switched on.
Inspection
If an inspection is due, the
icon and the number
2 are displayed at the posi-
tion identified with the arrow for approximately 10 seconds » Fig. 23.
The icon is shown together with the days and kilometres remaining to the
next service.
As soon as the due date for the service is reached, the flashing icon and the
INSPEC _ message appear in the display for about 20 seconds after the igni-
tion has been switched on.
Display the days and distance until the next service
You can press button
5
» Fig. 19 on page 26 repeatedly to display the remain-
ing distance and time to until the next service whenever the ignition is switch-
ed on.
The icon appears together with the
icon and the distance and time to the
next service appear in the display for about 10 seconds.
The distance and the days remaining until the next oil change service are dis-
played first; the distance and the days remaining until the next inspection are
displayed after the button
5
is pressed again.
32Using the system
Page 35 of 197
NoteThe kilometres remaining until the next service are displayed instead of the
odometer.
Display in the MAXI DOT display
Oil change service
If an oil change service is due, the message Oil change in ... km or .... days.
As soon as the service date has arrived, the message Oil change now! appears
after the ignition is switched on.
Inspection
If an inspection is due, the message Inspection in ... km or ... days.
As soon as the service interval date has arrived, the message Inspection now!
appears after the ignition is switched on.
Displaying the distance and days until the next service interval
You can display the remaining distance and days until the next service in the
Settings menu whenever the ignition is switched on » page 34.
The following message is displayed for 10 seconds. Oil change ... km / ... days
Inspection ... km / ... days
MAXI DOT display
Introduction
This chapter contains information on the following subjects:
Main menu
33
Settings
34
Door, boot lid and bonnet warning
34
Auto Check Control
34
The MAXI DOT display provides you with information about the current operat-
ing state of your vehicle . The information system also provides you with data
(depending on the vehicle equipment) relating to the radio, mobile phone, mul-
ti-functional display, navigation system, the device connected to the MDI input
and the automatic gearbox » page 105.
Lighting up of certain symbols is combined with an acoustic warning signal.
WARNINGConcentrate fully on your driving at all times. As the driver you are fully re-
sponsible for the operation of your vehicle.
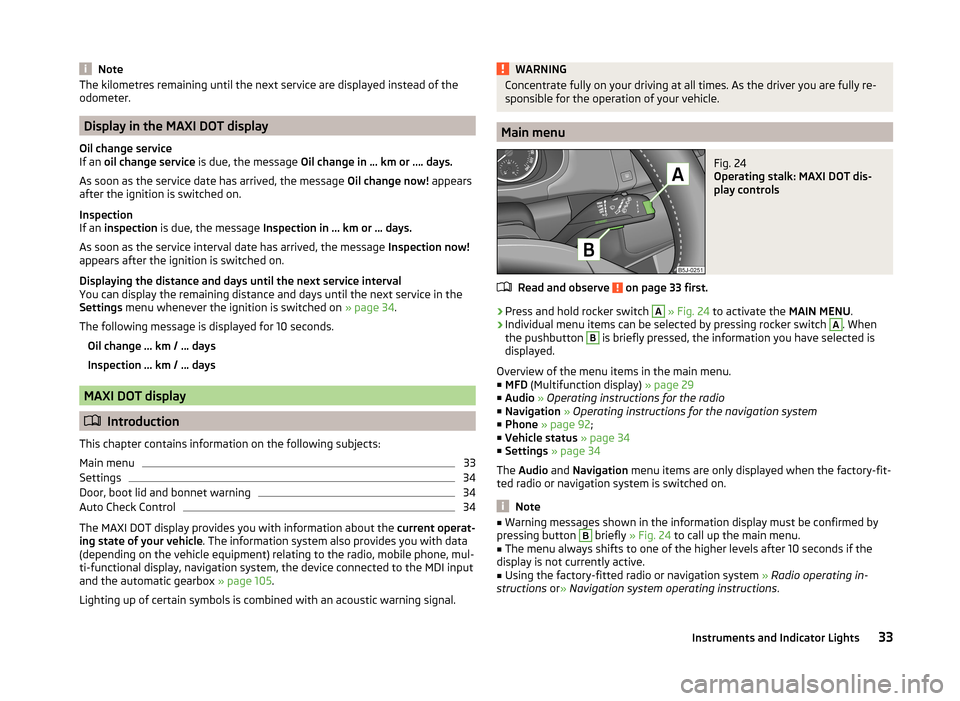
Main menu
Fig. 24
Operating stalk: MAXI DOT dis-
play controls
Read and observe on page 33 first.
›
Press and hold rocker switch
A
» Fig. 24 to activate the MAIN MENU.
›
Individual menu items can be selected by pressing rocker switch
A
. When
the pushbutton
B
is briefly pressed, the information you have selected is
displayed.
Overview of the menu items in the main menu.
■ MFD (Multifunction display) » page 29
■ Audio » Operating instructions for the radio
■ Navigation » Operating instructions for the navigation system
■ Phone » page 92 ;
■ Vehicle status » page 34
■ Settings » page 34
The Audio and Navigation menu items are only displayed when the factory-fit-
ted radio or navigation system is switched on.
Note
■ Warning messages shown in the information display must be confirmed by
pressing button B briefly » Fig. 24 to call up the main menu.■
The menu always shifts to one of the higher levels after 10 seconds if the
display is not currently active.
■
Using the factory-fitted radio or navigation system » Radio operating in-
structions or» Navigation system operating instructions .
33Instruments and Indicator Lights
Page 36 of 197
SettingsRead and observe
on page 33 first.
You can change certain settings yourself through the MAXI DOT display. The
current menu item is shown in the top of the display under a line.
You can select the following menu options:
Language
You can set the language for the warning and information texts here.
MFD data
Activate or deactivate certain displays of the multifunction display here.
Time
The time, time format (12 or 24 hour indicator) and the changeover between
summer/winter time can be set here.
Winter tyres
Here, you can set the speed at which an audible signal should sound. This
function is, for example, used for winter tyres where the maximum permissible
speed is lower than the maximum speed of the vehicle.
The following is shown on the information display if this speed is exceeded: Winter tyres max. speed ... km/h.
Units of measurement
The units for the temperature, consumption and distance driven can be set
here.
Alt. speed dis.
Display of the second speed in mph 1)
can be activated here.
Service
The days and kilometres remaining until the next service can be displayed
here.
Factory setting
The display can be restored to its factory settings here.
Door, boot lid and bonnet warning
Read and observe
on page 33 first.
If at least one door is open, or the boot or bonnet is open, the MAXI DOT dis-
play shows the vehicle with the corresponding door or boot/bonnet open.
An audible signal also sounds if the vehicle is travelling at more than 6 km/h.
Auto Check Control
Read and observe
on page 33 first.
Vehicle condition
Certain functions and conditions of individual vehicle systems are checked
continuously when the ignition is switched on and also while driving.
Some error messages and other information are displayed in the MAXI DOT
display. The messages are displayed simultaneously with the icons in the MAXI
DOT display or with the warning lights in the instrument cluster » page 35.
The Vehicle status menu item is shown in the main menu of the MAXI DOT
display whenever at least one fault message is present. The first of the fault
messages is displayed after this menu item is selected. Several error messages
are shown on the display under the message e.g. 1/3. This indicates that the
first of a total of three error messages is being displayed.
As long as the operational faults are not rectified, the symbols are always indi-
cated again. After they are displayed for the first time, the symbols continue to
be indicated without any extra messages for the driver.
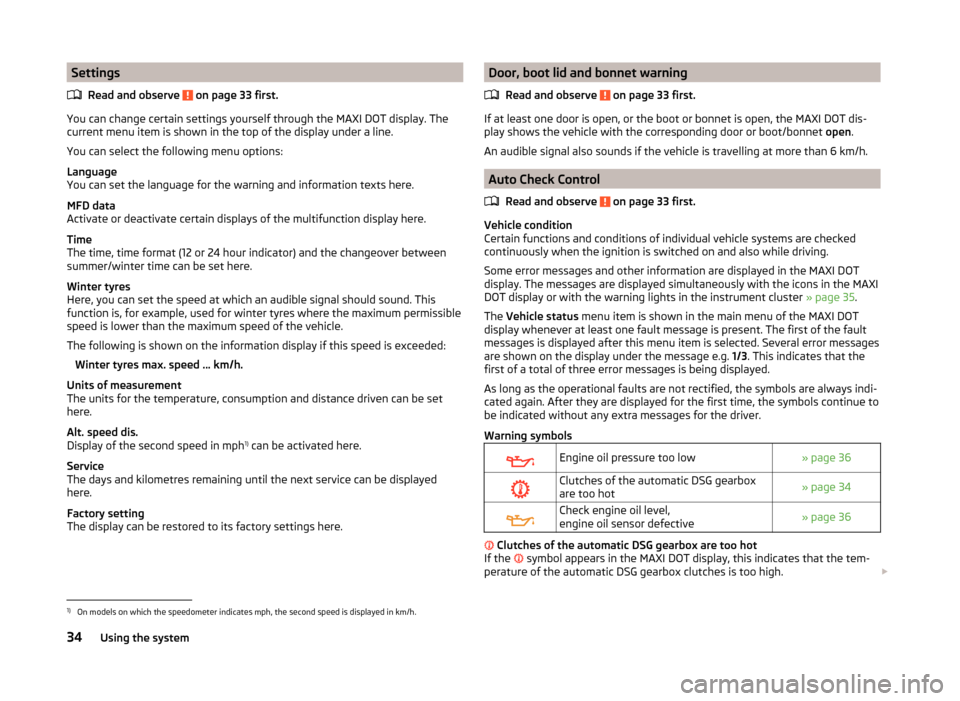
Warning symbols
Engine oil pressure too low» page 36Clutches of the automatic DSG gearbox
are too hot» page 34Check engine oil level,
engine oil sensor defective» page 36
Clutches of the automatic DSG gearbox are too hot
If the symbol appears in the MAXI DOT display, this indicates that the tem-
perature of the automatic DSG gearbox clutches is too high.
1)
On models on which the speedometer indicates mph, the second speed is displayed in km/h.
34Using the system
Page 128 of 197
General Maintenance
Car care
Services, modifications and technical alterations
Introduction
This chapter contains information on the following subjects:
ŠKODA Original Parts
126
ŠKODA Original Accessories
127
Spoiler
127
Airbags
127
The instructions and guidelines issued by ŠKODA AUTO a.s. must be observed
when making any modifications, repairs or technical changes to your vehicle.
Compliance with these guidelines and instructions is in the interest of the
roadworthiness and technical condition of your vehicle. The vehicle will comply
with road traffic regulations following the modifications, repairs and technical
changes.
Always consult a ŠKODA Partner before buying accessories or parts, or before
carrying out any modifications, repairs or technical alterations to your vehicle.
WARNING■ Work not properly performed on your vehicle can lead to faults - there is a
risk of an accident resulting in serious injury.■
We recommend only having these modifications and technical changes
performed by a specialist garage.
■
Interference on the electronic components and their software can lead to
operational faults. This interference can also impair not directly affected
systems because of the networking of the electronic components. The op-
erational safety of the vehicle may be at significant risk and parts may suf-
fer increased wear.
■
The ŠKODA Partner cannot assume any liability for products which have
not been approved by ŠKODA AUTO a.s. even though these may be prod-
ucts with a type approval or have been approved by a nationally recognised
testing laboratory.
WARNING■ We advise you only to use ŠKODA Original Accessories and ŠKODA Origi-
nal Parts which have been expressly approved for use on your vehicle. Reli-
ability, safety and suitability for your vehicle are guaranteed with these.■
ŠKODA Original Accessories and ŠKODA Original Parts can be purchased
from a ŠKODA Partner who will also fit the purchased parts correctly.
For the sake of the environment
Technical documents regarding changes carried out on the vehicle must be
kept by the vehicle user, in order to be handed over to the recyclers later. This
ensures that vehicle recycling is in accordance with environmental regulations.
Note
Any damage caused by technical alterations made without the approval of the
manufacturer is excluded from the » Service schedule warranty.
ŠKODA Original Parts
Read and observe
on page 126 first.
We recommend the use of ŠKODA Genuine Parts for your vehicle, since these
parts are approved by ŠKODA AUTO a.s. They correspond exactly to ŠKODA
AUTO a.s. specifications in respect of design, dimensional accuracy and materi-
al and are identical to the components used in the batch production.
ŠKODA AUTO a.s. can guarantee the safety, suitability, and long life of these
products. We therefore recommend that you only use ŠKODA Genuine Parts.
ŠKODA AUTO a.s. supplies the market with a complete range of ŠKODA Genu-
ine Parts not only while the model is still in production but with wear-and-tear
parts for at least 15 years after the end of series production and with all other
vehicle parts for at least 10 years.
ŠKODA service partners are liable for any defects in ŠKODA original parts for a
period of 2 years after sale in accordance with materials defect liability under
the law unless otherwise agreed in the purchase agreement. You should keep
the confirmed warranty certificate and the receipt for these components for
this period, so that the commencement of the warranty term may be verified.
Body repairs
ŠKODA vehicles are designed so that if the body suffers damage, it is only nec-
essary to replace those parts which are in fact damaged.
126General Maintenance
Page 143 of 197
Clear water is not sufficient to intensively clean the windscreen and head-
lights. We recommend using clean washing water together with the screen
cleaner from the range of ŠKODA Original Accessories (in winter additionally
with antifreeze) which is capable of removing stubborn dirt.
The washing water should always be mixed with antifreeze in winter even if
the vehicle has heated windscreen washer nozzles.
Under exceptional circumstances, methylated spirits can also be used if no
screen cleaner with antifreeze is available. The concentration of methylated
spirits must not be more than 15 %. The freeze protection at this concentration
is sufficient only to -5 °C.
CAUTION
■ Under no circumstances must radiator antifreeze or other additives be added
to the windscreen washer fluid.■
If the vehicle is fitted with a headlight cleaning system, only cleaning prod-
ucts which do not attack the polycarbonate coating of the headlights must be
added to the windscreen washer fluid.
■
Do not remove the filter from the windscreen washer fluid reservoir when re-
plenishing it with liquid otherwise the liquid transportation system can be con-
taminated, which can cause the windscreen washer system to malfunction.
Engine oil
Introduction
This chapter contains information on the following subjects:
Specifications and capacity
141
Checking the oil level
142
Replenishing
143
Changing
143
The engine has been factory-filled with a high-grade oil that can be use
throughout the year - except in extreme climate zones.
Engine oils are the subject of continuous further development. Thus the infor-
mation stated in this Owner's Manual is only correct at the time of publication.
ŠKODA Service Partners are informed about the latest changes by the manu-
facturer. We therefore recommend that you have the oil changed by a ŠKODA
Service Partner.
The specifications (VW standards) stated in the following can be indicated sep-
arately or together with other specifications on the bottle.
The oil capacities include oil filter change. Check the oil level when filling; do
not over fill. The oil level must be between the markings » page 142.WARNING■
The engine compartment of your car is a hazardous area. While working in
the engine compartment, be sure to observe the following warn-
ings » page 138 .■
Do not continue your journey if for some reason it is not possible to top
up the engine oil under the current conditions. Switch off the engine and
seek assistance from a specialist garage.
■
Do not drive on if the oil level is above range
A
» Fig. 128 on page 142 .
Switch off the engine and seek assistance from a specialist garage.
CAUTION
Do not pour any additives into the engine oil – there is a risk of serious engine
damage.
Note
■ Before a long drive we recommend that you purchase and carry with you en-
gine oil which complies with the specification for your vehicle.■
We recommend that you use oils from ŠKODA Original Accessories.
■
You must wash yourself thoroughly if your skin has come into contact with
oil.
Specifications and capacity
Read and observe
and on page 141 first.
Specifications and capacity (in l) for vehicles with flexible service intervals
Petrol enginesSpecificationCapacity1.2 litres/44 kWVW 503 00, VW 504 002.81.2 l/51 kWVW 503 00, VW 504 002.81.4 l/63 kWVW 503 00, VW 504 003.21.4 l/132 kW TSIVW 504 003.61.2 l/63 kW TSIVW 504 003.91.2 l/77 kW TSIVW 504 003.9 141Inspecting and replenishing
Page 145 of 197
We recommend maintaining the oil level within the range A, but not above , if
the engine has been operating at high loads, for example, during a lengthy
motorway trip during the summer months, towing a trailer or negotiating a
high mountain pass.
The warning light in the instrument cluster will indicate whether the oil level is
too low » page 36 ,
Engine oil . Check the oil level using the dipstick as
soon as possible. Add oil accordingly.
CAUTION
■ Always check the oil level on vehicles with the 1.2 l/44 kW engine when the
engine is cold. Otherwise the measuring result is incorrect und oil could be in-
correctly replenished - risk of engine damage!■
The oil level must never be above the
A
range » Fig. 128 – there is a risk of
damaging the exhaust system.
Replenishing
Read and observe
and on page 141 first.
›
Check the oil level » page 142.
›
Unscrew the cap of the engine oil filler opening » Fig. 126 on page 140 .
›
Replenish the oil in portions of 0.5 litres in accordance with the correct speci-
fications » page 141 .
›
Check the oil level » page 142.
›
Carefully screw on the oil filler opening cap and push the dipstick in fully.
Changing
Read and observe
and on page 141 first.
The engine oil must be changed according to prescribed service intervals or ac-cording to the » Service plan service interval display.
Coolant
Introduction
This chapter contains information on the following subjects:
Capacity
144
Checking the coolant level
144
Replenishing
144The coolant consists of water with a concentration of coolant additive. This mixture guarantees antifreeze protection, protects the cooling/heater system
against corrosion and prevents the formation of scale.
Vehicles exported to countries with a mild climate are already factory-filled
with a coolant which offers antifreeze protection down to about -25 ℃. In
these countries the concentration of coolant additive should be at least 40 %.
Vehicles exported to countries with a cold climate are already factory-filled
with a coolant which offers antifreeze protection down to about -35 °C. In
these countries the concentration of coolant additive should be at least 50 %.
If a higher concentration of antifreeze is required for climatic reasons, the
amount of coolant additive can only be increased up to a maximum of 60 %
(antifreeze protection down to approx. -40 °C).
When refilling, only use the same antifreeze identified on the coolant expan-
sion vessel » Fig. 129 on page 144 .WARNING■
The engine compartment of your car is a hazardous area. While working in
the engine compartment, be sure to observe the following warn-
ings » page 138 .■
Do not continue your journey if for some reason it is not possible to top
up the coolant under the current conditions. Switch off the engine and
seek assistance from a specialist garage.
CAUTION
■ The amount of coolant additive in the coolant must never be allowed to fall
below 40 %.■
Over 60 % coolant additive in the coolant reduces the antifreeze protection
and coolant effectiveness.
■
A coolant additive that does not comply with the correct specifications can
significantly reduce the corrosion protection.
■
Any faults resulting from corrosion may cause a loss of coolant and can con-
sequently result in major engine damage!
■
Do not fill the coolant above the mark
A
» Fig. 129 on page 144 .
■
We recommend that you visit a specialist garage if a fault causes the engine
to overheat, otherwise serious engine damage may occur.
■
Additional headlights and other attached components in front of the air inlet
impair the cooling efficiency of the coolant.
■
Never cover the radiator - there is a risk of the engine overheating.
143Inspecting and replenishing
Page 147 of 197
Do not use an alternative additive if the specified coolant is not available in an
emergency. In this case, use just water and have the correct mixing ratio of
water and coolant additive restored by a specialist garage as soon as possible.
Brake fluid
Introduction
This chapter contains information on the following subjects:
Level check
145
Changing
145WARNING■ The engine compartment of your car is a hazardous area. While working in
the engine compartment, be sure to observe the following warn-
ings » page 138 .■
Do not continue your journey if the fluid level has fallen below the MIN
marking » Fig. 130 on page 145 - there is a risk of an accident. Seek help
from a specialist garage.
■
Do not use used brake fluid - the function of the brake system may be im-
paired – there is the risk of an accident.
CAUTION
Brake fluid damages the paintwork of the vehicle.
Note
■ The brake fluid is changed as part of a prescribed inspection service.■We recommend using oils from the ŠKODA Original Accessories range.
Level check
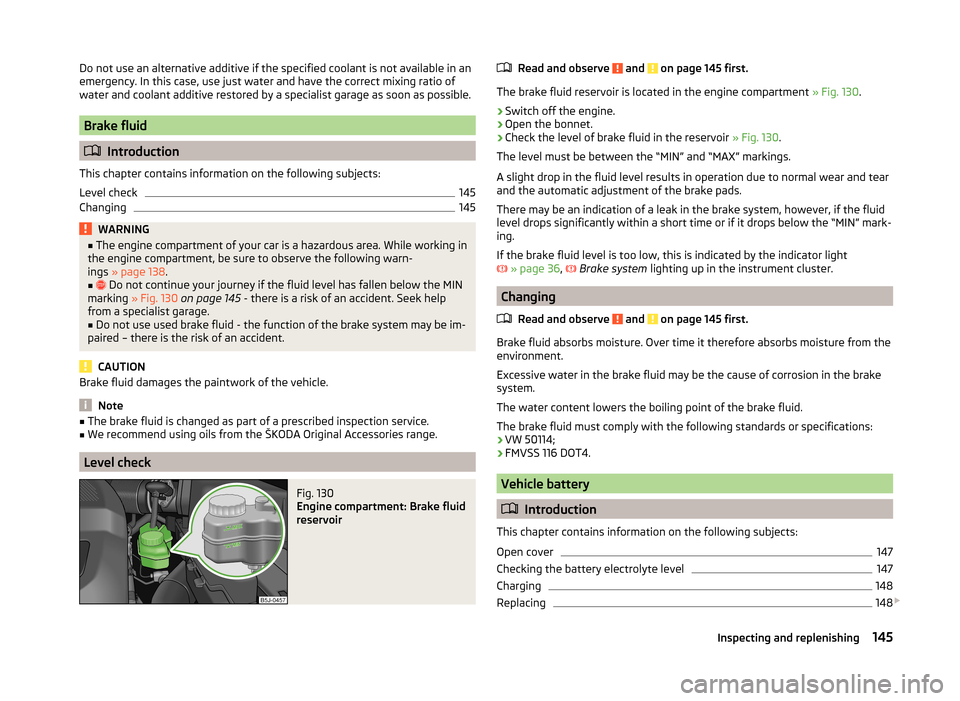
Fig. 130
Engine compartment: Brake fluid
reservoir
Read and observe and on page 145 first.
The brake fluid reservoir is located in the engine compartment » Fig. 130.
›
Switch off the engine.
›
Open the bonnet.
›
Check the level of brake fluid in the reservoir » Fig. 130.
The level must be between the “MIN” and “MAX” markings.
A slight drop in the fluid level results in operation due to normal wear and tear
and the automatic adjustment of the brake pads.
There may be an indication of a leak in the brake system, however, if the fluid level drops significantly within a short time or if it drops below the “MIN” mark-
ing.
If the brake fluid level is too low, this is indicated by the indicator light
» page 36 ,
Brake system
lighting up in the instrument cluster.
Changing
Read and observe
and on page 145 first.
Brake fluid absorbs moisture. Over time it therefore absorbs moisture from theenvironment.
Excessive water in the brake fluid may be the cause of corrosion in the brake
system.
The water content lowers the boiling point of the brake fluid.
The brake fluid must comply with the following standards or specifications: › VW 50114;
› FMVSS 116 DOT4.
Vehicle battery
Introduction
This chapter contains information on the following subjects:
Open cover
147
Checking the battery electrolyte level
147
Charging
148
Replacing
148
145Inspecting and replenishing
Page 162 of 197
WARNING (Continued)■Secure the base plate of the lifting jack with suitable means to prevent
possible moving. A soft and slippery ground under the base plate may move
the lifting jack, causing the vehicle to fall down. It is therefore always nec-
essary to place the lifting jack on a solid surface or use a wide and stable
base. Use a non-slip base (e.g. a rubber foot mat) if the surface is smooth,
such as cobbled stones, tiled floor, etc.■
Only attach the lifting jack to the attachment points provided for this pur-
pose.
■
Always raise the vehicle with the doors closed.
■
Never position any body parts, such as arms or legs under the vehicle,
while the vehicle is raised with a lifting jack.
■
Never start the engine with the vehicle sitting on the raised jack – there
is a risk of injury.
WARNINGInformation on the wheel bolts■The wheel bolts must be clean and must turn easily. Never treat them
with grease or oil.■
The prescribed tightening torque of the wheel bolts for steel and light al-
loy wheels is 120 Nm.
■
If the wheel bolts are tightened to a too low tightening torque, the rim
can come loose when the car is moving – risk of accident! A tightening tor-
que which is too high can damage the bolts and threads and this can result
in permanent deformation of the contact surfaces on the rim.
■
In case of incorrect treatment of the wheel bolts, the wheel can loosen
when the car is moving – risk of accident!
Note
The national legal requirements must be observed when changing a wheel.
Preparation
Read and observe
on page 159 first.
Always change a wheel on a level surface as far as possible.
The following steps must be carried out before actually changing the wheel:
›
Have all the occupants get out. The passengers should not stand on the
road (instead they should remain behind a crash barrier, for instance) while
the wheel is being changed.
› Switch off the engine.›Move the gearshift lever into
Neutral or move the selector lever for the auto-
matic gearbox into position P.›
Apply the handbrake firmly.
›
Uncouple any trailer.
›
Remove the vehicle tool kit » page 159 and the spare wheel » page 155 ,
Spare and back-up wheel from the boot.
Changing a wheel
Read and observe
on page 159 first.
›
Remove the full wheel trim » page 156 or caps » page 156 .
›
First of all slacken the anti-theft wheel bolt and then the other wheel
bolts » page 161 .
›
Jack up the vehicle until the wheel that needs changing is clear of the
ground » page 161 .
›
Unscrew the wheel bolts and place them on a clean surface (cloth, paper,
etc.).
›
Remove the wheel carefully.
›
Attach the spare wheel and slightly screw on the wheel bolts.
›
Lower the vehicle.
›
Tighten the opposite wheel bolts alternately (cross-wise) with the wheelwrench. Tighten the anti-theft wheel bolt last » page 161.
›
Reinstall the wheel trim/wheel trim cap or the caps.
Note
■
All bolts must be clean and must turn easily.■Under no circumstances grease or oil the wheel bolts!■
When fitting unidirectional tyres, ensure that the direction of rotation is cor-
rect » page 154 , Unidirectional tyres .
Subsequent steps
Read and observe
on page 159 first.
The following steps must also be performed after changing the wheel.
›
Stow and attach the replaced wheel in the spare wheel well using a special
screw » page 155 , Spare and back-up wheel .
›
Stow the tool kit in the space provided and secure using the strap.
›
Check the tyre pressure on the installed spare wheel as soon as possible.
160Do-it-yourself