automatic transmission SKODA FABIA 2014 3.G / NJ Operating Instruction Manual
[x] Cancel search | Manufacturer: SKODA, Model Year: 2014, Model line: FABIA, Model: SKODA FABIA 2014 3.G / NJPages: 216, PDF Size: 30.9 MB
Page 5 of 216
Downloaded from www.Manualslib.com manuals search engine Table of Contents
Board literature4
Notes
5
Structure and more information about the
Operating Instructions
6
Abbreviations
Safety
Passive Safety
8
General information
8
Correct and safe seated position
8
Seat belts
11
Wearing seat belts
11
Inertia reel and belt pre-tensioners
13
Airbag system
14
Description of the airbag system
14
Airbag overview
15
Deactivating airbags
18
Transporting children safely
20
Child seat
20
Fastening systems
22
Operation
Cockpit
26
Overview
25
Instruments and warning lights
27
Instrument cluster
27
Warning lights
31
Information system
39
Driver information system
39
Driving data (Multifunction display)
40
MAXI DOT display
42Service interval display46SmartGate47
Unlocking and opening
49
Unlocking and locking
49
Anti-theft alarm system
54
Tailgate
55
Window operations
56
Lights and visibility
59
Lights
59
Interior lights
64
Visibility
65
Windscreen wipers and washers
66
Rear mirror
68
Seats and headrests
70
Seats and headrests
70
Seat features
71
Transporting and practical equipment
74
Useful equipment
74
Luggage compartment
83
Variable loading floor in the luggage
compartment
88
Bicycle carrier in the luggage compartment
90
Roof rack
93
Heating and air conditioning
94
Heating, ventilation, cooling
94
Driving
Starting-off and driving
100
Starting and stopping the engine using the
key
100
Starting and stopping the engine at the push
of the button
102
START-STOPsystem
104
Brakes and parking
106
Manual gear shifting and pedals
107Automatic transmission108Running-in and economical driving111
Avoiding damage to your vehicle
113
Assist systems
114
Braking and stabilisation systems
114
Parking assistance (ParkPilot)
116
Speed control system
118
Speed limiter
120
Front Assistant
122
Fatigue detection
125
Tyre pressure monitoring
125
Hitch and trailer
127
Hitch
127
Trailer
132
General Maintenance
Care and maintenance
136
Services, modifications and technical
alterations
136
Washing vehicle
139
Cleaning vehicle exterior
140
Interior care
144
Inspecting and replenishing
147
Fuel
147
Engine compartment
149
Engine oil
152
Coolant
154
Brake fluid
155
Vehicle battery
156
Wheels
160
Tyres and rims
160
Winter use
1642Table of Contents
Page 34 of 216
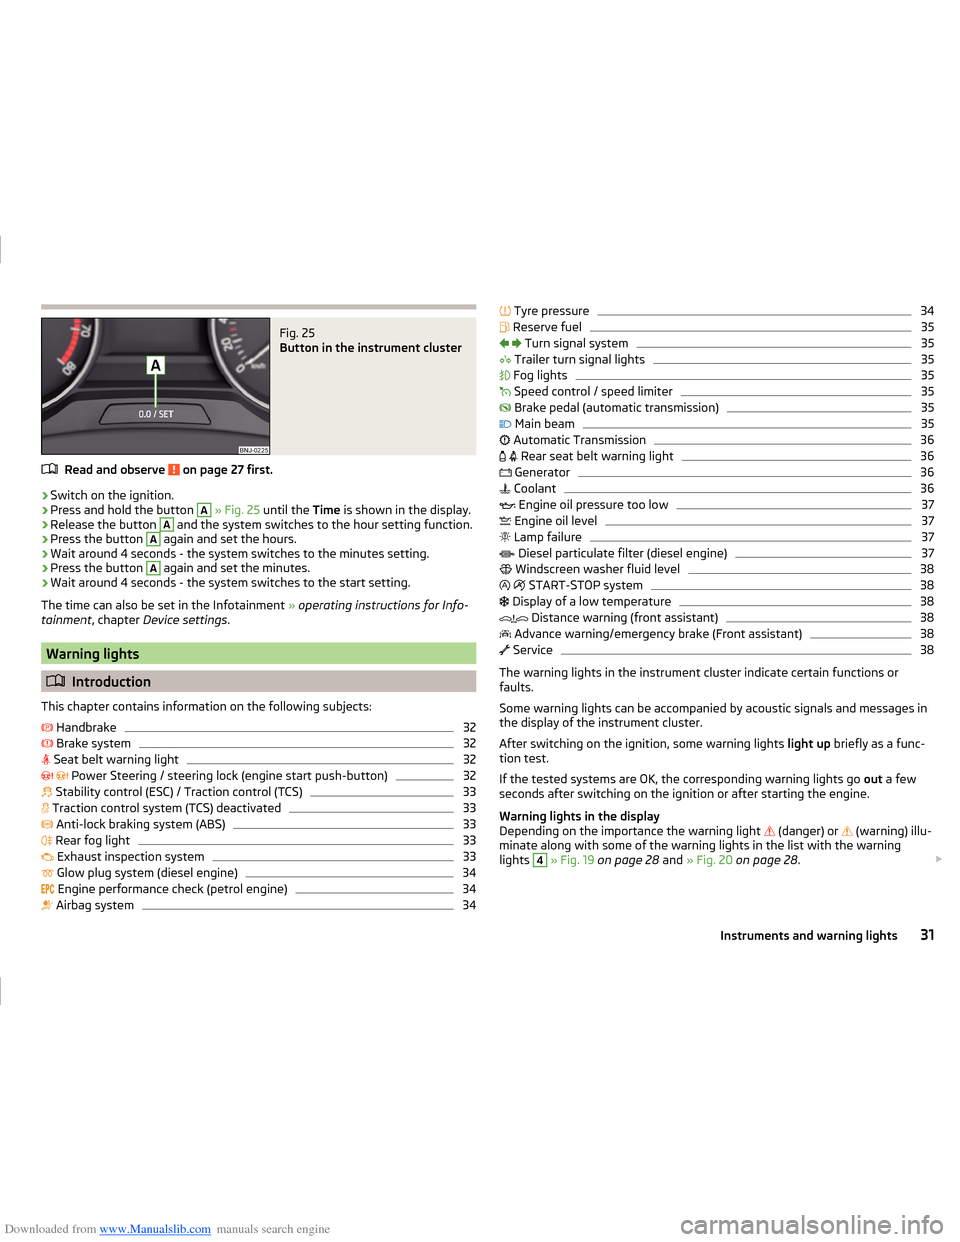
Downloaded from www.Manualslib.com manuals search engine Fig. 25
Button in the instrument cluster
Read and observe on page 27 first.
›
Switch on the ignition.
›
Press and hold the button
A
» Fig. 25 until the Time is shown in the display.
›
Release the button
A
and the system switches to the hour setting function.
›
Press the button
A
again and set the hours.
›
Wait around 4 seconds - the system switches to the minutes setting.
›
Press the button
A
again and set the minutes.
›
Wait around 4 seconds - the system switches to the start setting.
The time can also be set in the Infotainment » operating instructions for Info-
tainment , chapter Device settings .
Warning lights
Introduction
This chapter contains information on the following subjects:
Handbrake
32
Brake system
32
Seat belt warning light
32
Power Steering / steering lock (engine start push-button)
32
Stability control (ESC) / Traction control (TCS)
33
Traction control system (TCS) deactivated
33
Anti-lock braking system (ABS)
33
Rear fog light
33
Exhaust inspection system
33
Glow plug system (diesel engine)
34
Engine performance check (petrol engine)
34
Airbag system
34
Tyre pressure34 Reserve fuel35
Turn signal system
35
Trailer turn signal lights
35
Fog lights
35
Speed control / speed limiter
35
Brake pedal (automatic transmission)
35
Main beam
35
Automatic Transmission
36
Rear seat belt warning light
36
Generator
36
Coolant
36
Engine oil pressure too low
37
Engine oil level
37
Lamp failure
37
Diesel particulate filter (diesel engine)
37
Windscreen washer fluid level
38
START-STOP system
38
Display of a low temperature
38
Distance warning (front assistant)
38
Advance warning/emergency brake (Front assistant)
38
Service
38
The warning lights in the instrument cluster indicate certain functions or
faults.
Some warning lights can be accompanied by acoustic signals and messages in
the display of the instrument cluster.
After switching on the ignition, some warning lights light up briefly as a func-
tion test.
If the tested systems are OK, the corresponding warning lights go out a few
seconds after switching on the ignition or after starting the engine.
Warning lights in the display
Depending on the importance the warning light (danger) or
(warning) illu-
minate along with some of the warning lights in the list with the warning
lights
4
» Fig. 19 on page 28 and » Fig. 20 on page 28 .
31Instruments and warning lights
Page 38 of 216
Downloaded from www.Manualslib.com manuals search engine Other incidents
The following reasons can also apply if the warning light is illuminated.
› The vehicle is loaded on one side. Distribute loads as evenly as possible.
› The wheels of one axle are loaded more heavily (e.g. when towing a trailer or
when driving uphill or downhill).
› Snow chains are fitted.
› A wheel has been changed.
CAUTION
Under certain circumstances (e.g. sporty style of driving, wintry or unpaved
roads) the warning light in the instrument cluster can be delayed or does
not light up at all.
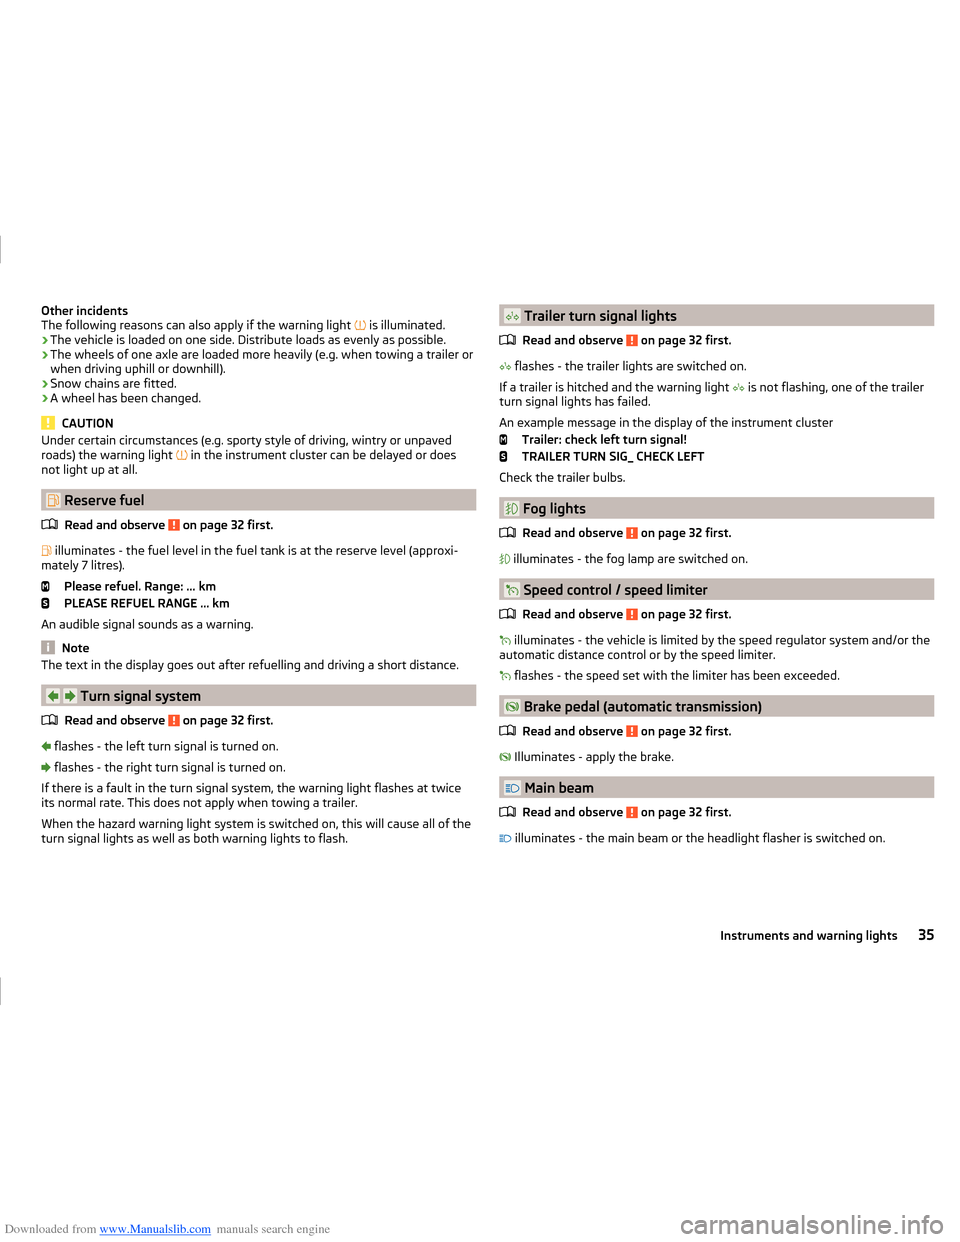
Reserve fuel
Read and observe
on page 32 first.
illuminates - the fuel level in the fuel tank is at the reserve level (approxi-
mately 7 litres).
Please refuel. Range: ... km
PLEASE REFUEL RANGE … km
An audible signal sounds as a warning.
Note
The text in the display goes out after refuelling and driving a short distance.
Turn signal system
Read and observe
on page 32 first.
flashes - the left turn signal is turned on.
flashes - the right turn signal is turned on.
If there is a fault in the turn signal system, the warning light flashes at twice
its normal rate. This does not apply when towing a trailer.
When the hazard warning light system is switched on, this will cause all of the
turn signal lights as well as both warning lights to flash.
Trailer turn signal lights
Read and observe
on page 32 first.
flashes - the trailer lights are switched on.
If a trailer is hitched and the warning light
is not flashing, one of the trailer
turn signal lights has failed.
An example message in the display of the instrument cluster Trailer: check left turn signal!
TRAILER TURN SIG_ CHECK LEFT
Check the trailer bulbs.
Fog lights
Read and observe
on page 32 first.
illuminates - the fog lamp are switched on.
Speed control / speed limiter
Read and observe
on page 32 first.
illuminates - the vehicle is limited by the speed regulator system and/or the
automatic distance control or by the speed limiter.
flashes - the speed set with the limiter has been exceeded.
Brake pedal (automatic transmission)
Read and observe
on page 32 first.
Illuminates - apply the brake.
Main beam
Read and observe
on page 32 first.
illuminates - the main beam or the headlight flasher is switched on.
35Instruments and warning lights
Page 39 of 216
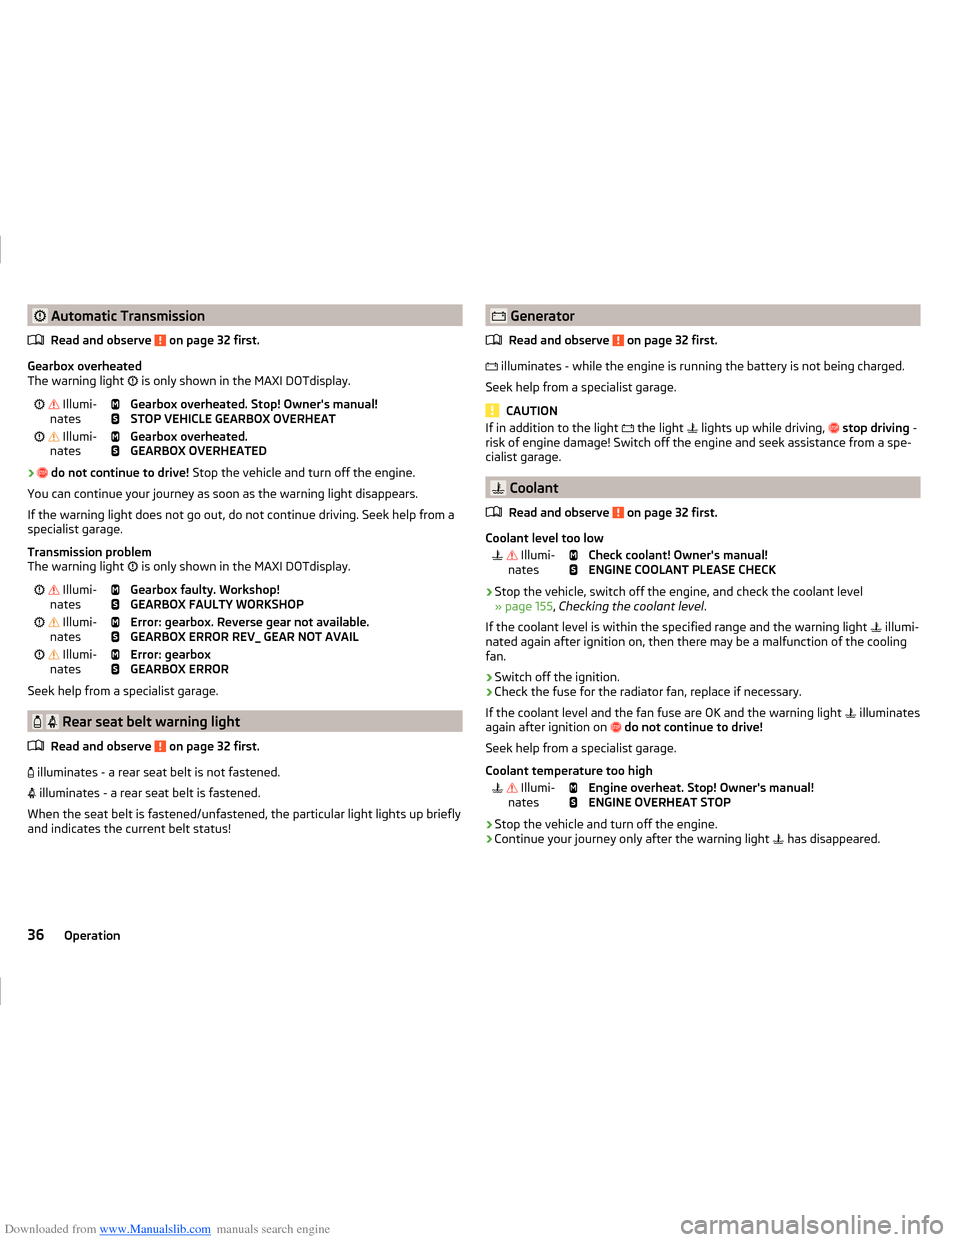
Downloaded from www.Manualslib.com manuals search engine Automatic TransmissionRead and observe
on page 32 first.
Gearbox overheated
The warning light
is only shown in the MAXI DOTdisplay.
Illumi-
nates
Gearbox overheated. Stop! Owner's manual!
STOP VEHICLE GEARBOX OVERHEAT Illumi-
nates
Gearbox overheated.
GEARBOX OVERHEATED
›
do not continue to drive! Stop the vehicle and turn off the engine.
You can continue your journey as soon as the warning light disappears.
If the warning light does not go out, do not continue driving. Seek help from a specialist garage.
Transmission problem
The warning light is only shown in the MAXI DOTdisplay.
Illumi-
nates
Gearbox faulty. Workshop!
GEARBOX FAULTY WORKSHOP Illumi-
nates
Error: gearbox. Reverse gear not available.
GEARBOX ERROR REV_ GEAR NOT AVAIL Illumi-
nates
Error: gearbox
GEARBOX ERROR
Seek help from a specialist garage.
Rear seat belt warning light
Read and observe
on page 32 first.
illuminates - a rear seat belt is not fastened.
illuminates - a rear seat belt is fastened.
When the seat belt is fastened/unfastened, the particular light lights up briefly
and indicates the current belt status!
Generator
Read and observe
on page 32 first.
illuminates - while the engine is running the battery is not being charged.
Seek help from a specialist garage.
CAUTION
If in addition to the light the light lights up while driving, stop driving -
risk of engine damage! Switch off the engine and seek assistance from a spe-
cialist garage.
Coolant
Read and observe
on page 32 first.
Coolant level too low
Illumi-
nates
Check coolant! Owner's manual!
ENGINE COOLANT PLEASE CHECK
› Stop the vehicle, switch off the engine, and check the coolant level
» page 155 , Checking the coolant level .
If the coolant level is within the specified range and the warning light illumi-
nated again after ignition on, then there may be a malfunction of the cooling
fan.
› Switch off the ignition.
› Check the fuse for the radiator fan, replace if necessary.
If the coolant level and the fan fuse are OK and the warning light illuminates
again after ignition on
do not continue to drive!
Seek help from a specialist garage.
Coolant temperature too high
Illumi-
nates
Engine overheat. Stop! Owner's manual!
ENGINE OVERHEAT STOP
› Stop the vehicle and turn off the engine.
› Continue your journey only after the warning light
has disappeared.
36Operation
Page 40 of 216
Downloaded from www.Manualslib.com manuals search engine Engine oil pressure too low
Read and observe
on page 32 first.
flashes - the engine oil pressure is too low.
Oil pressure: stop! Owner's manual!
STOP VEHICLE OIL PRESSURE
›
Stop the vehicle, switch off the engine, and check the engine oil level.
Even if the oil level is correct,
do not drive any further if the warning light is
flashing. Also do not leave the engine running at an idling speed.
Seek help from a specialist garage.
CAUTION
Do not continue if for some reason it is not possible to fill with engine oil un-
der the current circumstances! Switch off the engine and seek assistance
from a specialist garage.
Engine oil level
Read and observe
on page 32 first.
Engine oil level too low
Illumi-
nates
Oil level: add oil!
ADD OIL
› Stop the vehicle, switch off the engine, and check the engine oil level, top up
if necessary.
The warning light will go out if the bonnet is left open for more than 30 sec-
onds. If no engine oil has been replenished, the warning light will come on
again after driving about 100 km.
Engine oil level too high
Illumi-
nates
Reduce oil level!
OIL LEVEL TOO HIGH
› Stop the vehicle, switch off the engine, and check the engine oil level.
In the event of a high oil level, seek assistance from a specialist garage.
Fault on the engine oil level sensor
Illumi-
nates
Oil sensor: workshop!
OIL SENSOR WORKSHOPSeek help from a specialist garage.
CAUTION
Do not continue if for some reason it is not possible to fill with engine oil un-
der the current circumstances! Switch off the engine and seek assistance
from a specialist garage.
Lamp failure
Read and observe
on page 32 first.
illuminates - one of the lamps is defective. A message will appear con-
cerning the affected lamp.
An example message in the display of the instrument cluster Check right dipped headlight beam!
DIPPED HEADLIGHT CHECK RIGHT
Diesel particulate filter (diesel engine)
Read and observe
on page 32 first.
The diesel particulate filter separates the soot particles from the exhaust. The soot particles collect in the diesel particulate filter where they are burnt on a
regular basis.
Illuminates - the filter is clogged with soot.
To clean the filter, and where traffic conditions permit »
, drive as follows for
at least 15 minutes or until the indicator light goes out.
4th or 5th gear engaged (automatic transmission: Position D/S).
Vehicle speed at least 70 km/h.
Engine speed between 1,800-2,500 rpm.
If the filter is properly cleaned, the warning light extinguishes.
If the filter is not properly cleaned, the warning light does not go out and
the warning light begins to flash.
Particulate filter: owner's manual!
PARTICLE FILTER OWNER MANUAL
Seek help from a specialist garage.
37Instruments and warning lights
Page 42 of 216
Downloaded from www.Manualslib.com manuals search engine Information system
Driver information system
Introduction
This chapter contains information on the following subjects:
Door, luggage compartment or bonnet warning
39
Overspeed warning at 120 km/h
39
Auto-check control
39
Gear recommendation
39
Depending on the vehicle's equipment, the information system vie the display
of the instrument cluster provides the following information.
› Driving data (multifunction display)
» page 40.
› Data relating to the Maxi DOT display
» page 42.
› Service interval display
» page 46.
› Selector lever positions for an automatic transmission
» page 109.
› Information and alerts in the Assist systems
» page 114.
WARNINGConcentrate fully at all times on your driving! As the driver you are fully re-
sponsible for the operation of your vehicle.
Door, luggage compartment or bonnet warning
Read and observe
on page 39 first.
If at least one door is open, or the boot or bonnet is open, the display indicates
the relevant open door or boot/bonnet.
An acoustic signal will also sound if you drive the vehicle above 6 km/h when a
door is open.
Overspeed warning at 120 km/h
Read and observe
on page 39 first.
This function is only enabled in certain countries.
An audible warning signal will sound when the vehicle speed exceeds 120
km/h. The audible warning is switched off once the vehicle speed falls below
120 km/h.
Auto-check control
Read and observe
on page 39 first.
Certain functions and conditions of individual vehicle systems are checked
continuously when the ignition is switched on.
While the operational faults remain unrectified, the messages are always indi- cated again. After they are displayed for the first time, the warning lights
(danger) or (warning) continue to be indicated without information for the
driver.
Gear recommendation
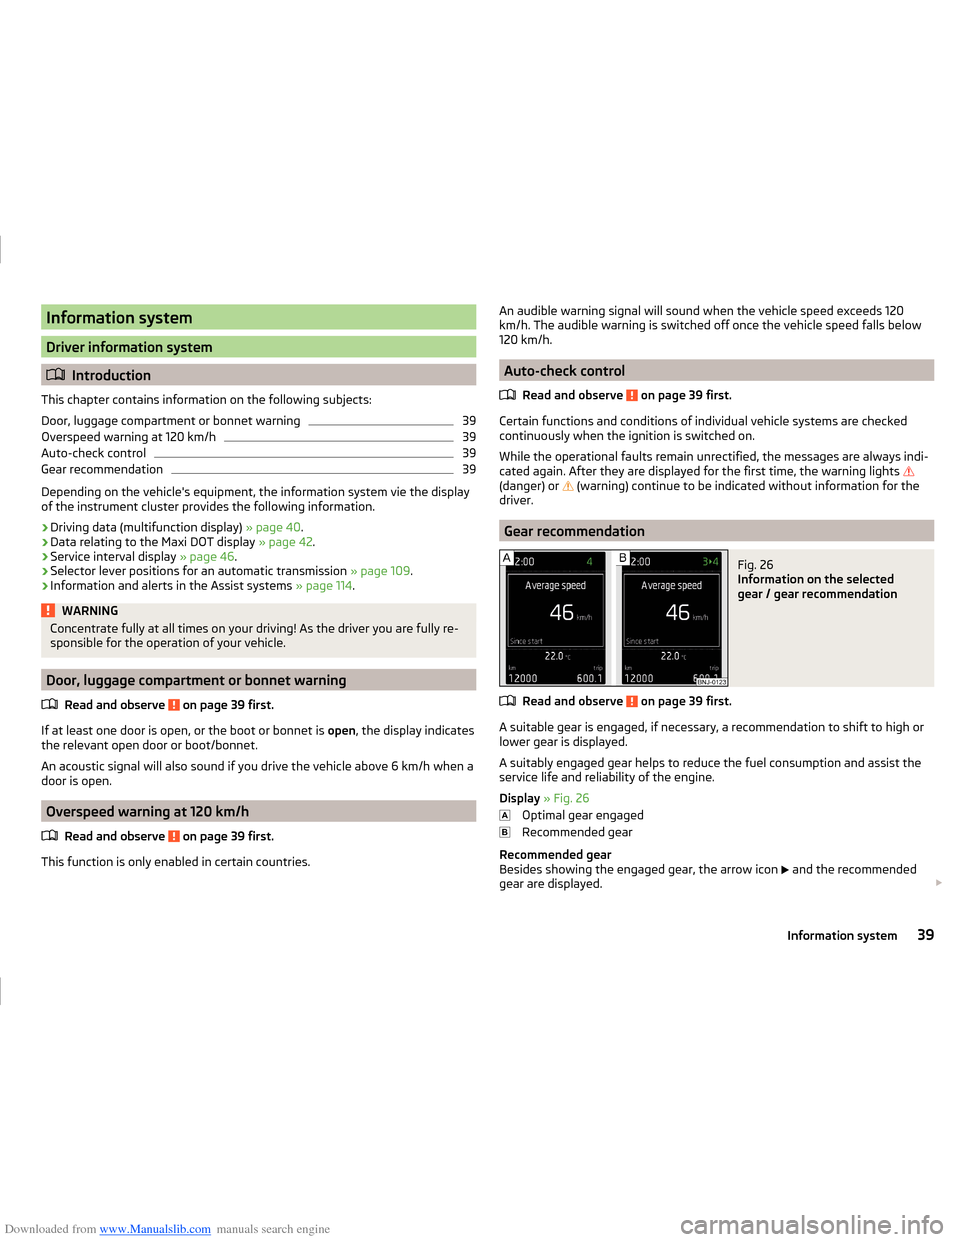
Fig. 26
Information on the selected
gear / gear recommendation
Read and observe on page 39 first.
A suitable gear is engaged, if necessary, a recommendation to shift to high or
lower gear is displayed.
A suitably engaged gear helps to reduce the fuel consumption and assist the
service life and reliability of the engine.
Display » Fig. 26
Optimal gear engaged
Recommended gear
Recommended gear
Besides showing the engaged gear, the arrow icon and the recommended
gear are displayed.
39Information system
Page 43 of 216
Downloaded from www.Manualslib.com manuals search engine For instance, if appears in this display, this means it is recommended that
you shift from 3rd into 4th Switch gear.
For vehicles with automatic transmission the recommended gear will be
shown provided the mode for manual switching (Tiptronic) is selected.WARNINGThe driver is always responsible for selecting the correct gear in different
driving situations, such as overtaking.
Driving data (Multifunction display)
Introduction
This chapter contains information on the following subjects:
Operation
40
Information overview
40
Warning when exceeding the set speed
41
Memory
42
The driving data display is only possible with the ignition switched on.
After the ignition is switched on, the function that was last selected before
switching off the ignition is displayed.
The setting of the units, as well as the display of some information in the Info-
tainment can be hidden or shown » Operating instructions Infotainment , chap-
ter CAR - Vehicle settings .
WARNINGConcentrate fully at all times on your driving! As the driver you are fully re-
sponsible for the operation of your vehicle.OperationFig. 27
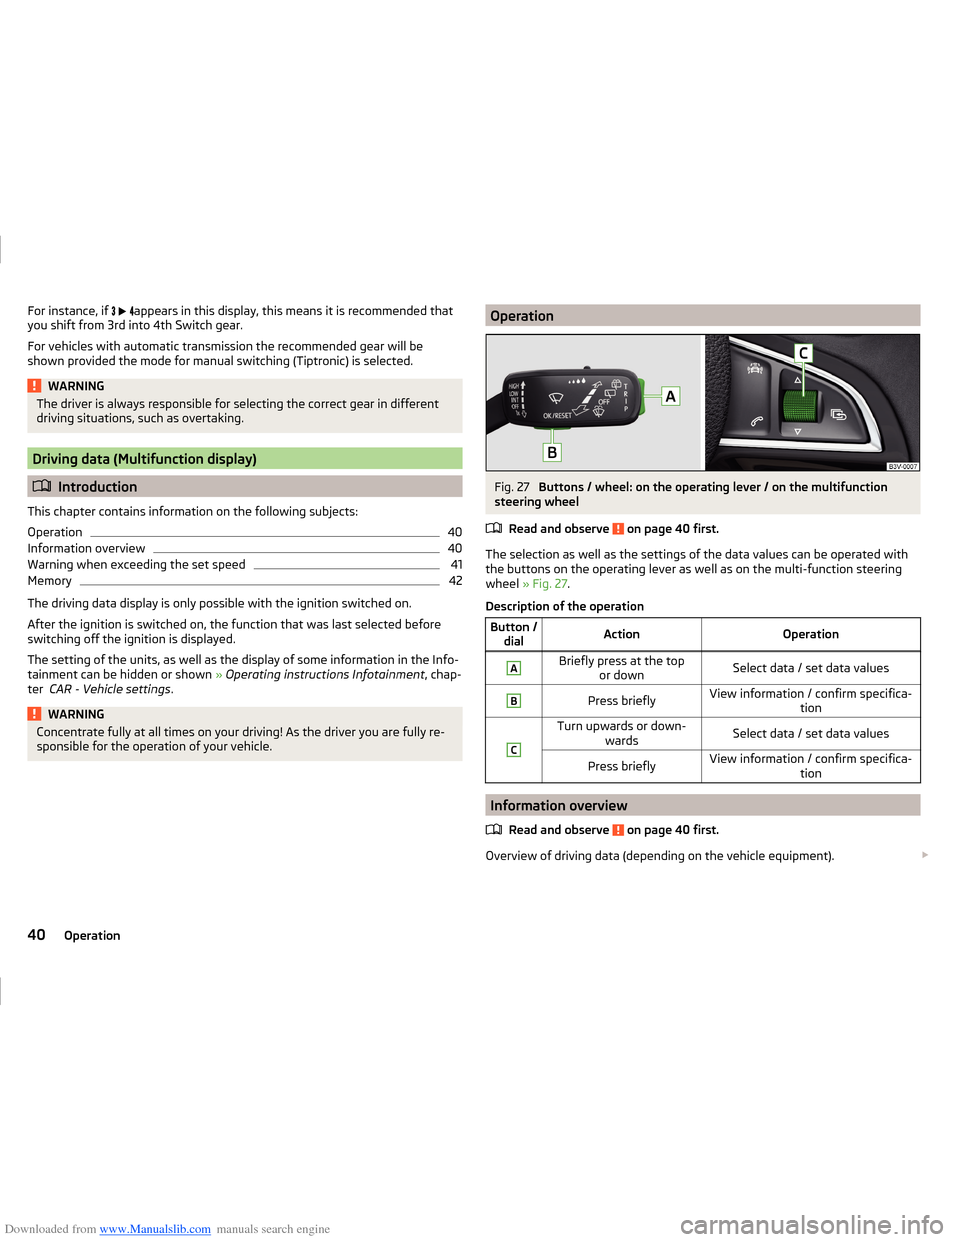
Buttons / wheel: on the operating lever / on the multifunction
steering wheel
Read and observe
on page 40 first.
The selection as well as the settings of the data values can be operated withthe buttons on the operating lever as well as on the multi-function steering
wheel » Fig. 27 .
Description of the operation
Button / dialActionOperationABriefly press at the top or downSelect data / set data valuesBPress brieflyView information / confirm specifica- tionCTurn upwards or down-wardsSelect data / set data valuesPress brieflyView information / confirm specifica- tion
Information overview
Read and observe
on page 40 first.
Overview of driving data (depending on the vehicle equipment).
40Operation
Page 104 of 216
Downloaded from www.Manualslib.com manuals search engine ›Switch on the ignition
» page 101.
The steering column lock is unlocked.
If the ignition switch cannot be turned on, turn the steering wheel back and forth slightly to unlock the steering lock.
Turn ignition on / off and start the engine
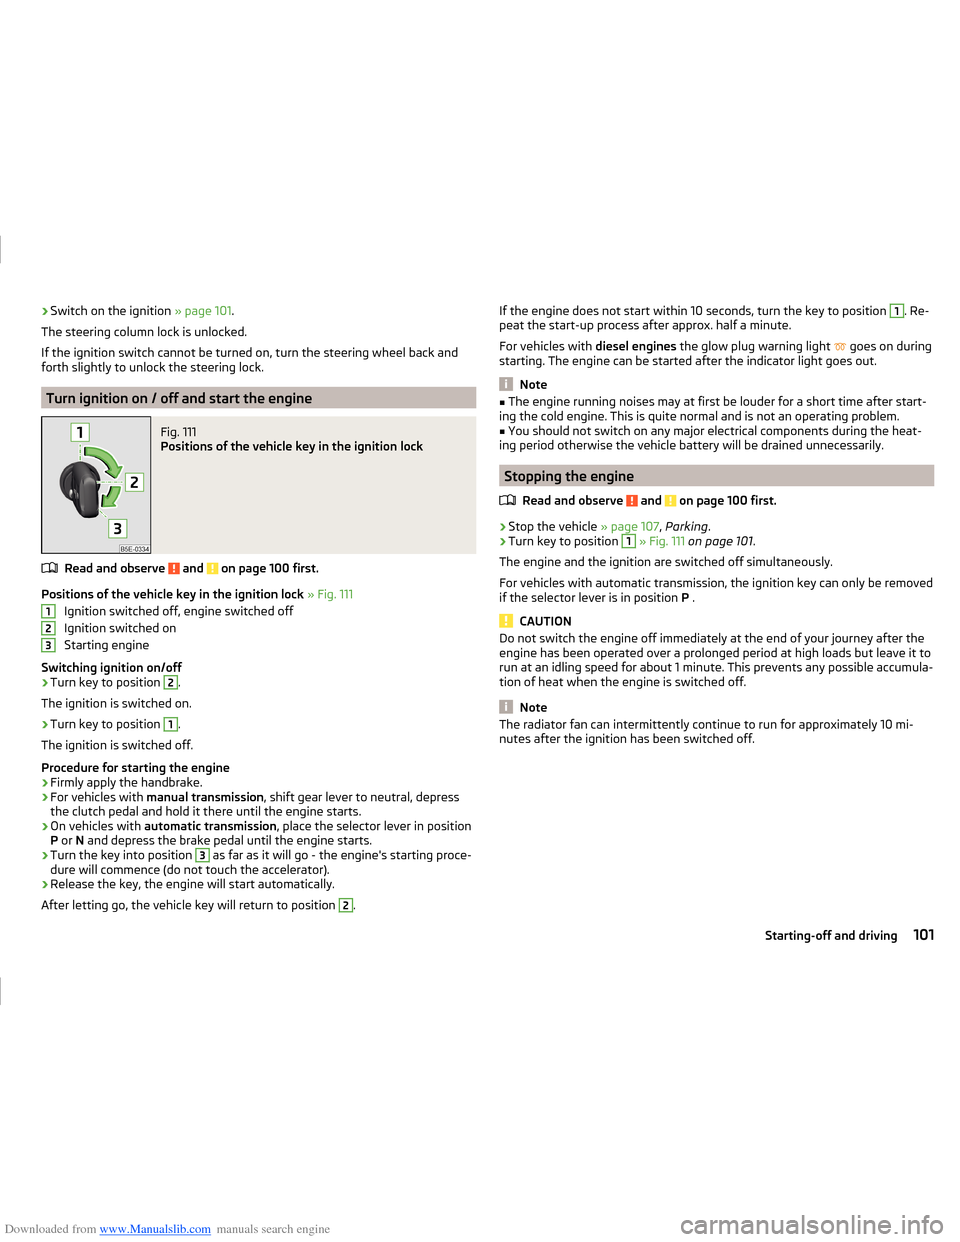
Fig. 111
Positions of the vehicle key in the ignition lock
Read and observe and on page 100 first.
Positions of the vehicle key in the ignition lock » Fig. 111
Ignition switched off, engine switched off
Ignition switched on
Starting engine
Switching ignition on/off
›
Turn key to position
2
.
The ignition is switched on.
›
Turn key to position
1
.
The ignition is switched off.
Procedure for starting the engine
›
Firmly apply the handbrake.
›
For vehicles with manual transmission , shift gear lever to neutral, depress
the clutch pedal and hold it there until the engine starts.
›
On vehicles with automatic transmission , place the selector lever in position
P or N and depress the brake pedal until the engine starts.
›
Turn the key into position
3
as far as it will go - the engine's starting proce-
dure will commence (do not touch the accelerator).
›
Release the key, the engine will start automatically.
After letting go, the vehicle key will return to position
2
.
123If the engine does not start within 10 seconds, turn the key to position 1. Re-
peat the start-up process after approx. half a minute.
For vehicles with diesel engines the glow plug warning light
goes on during
starting. The engine can be started after the indicator light goes out.
Note
■ The engine running noises may at first be louder for a short time after start-
ing the cold engine. This is quite normal and is not an operating problem.■
You should not switch on any major electrical components during the heat-
ing period otherwise the vehicle battery will be drained unnecessarily.
Stopping the engine
Read and observe
and on page 100 first.
›
Stop the vehicle » page 107, Parking .
›
Turn key to position
1
» Fig. 111 on page 101 .
The engine and the ignition are switched off simultaneously.
For vehicles with automatic transmission, the ignition key can only be removed
if the selector lever is in position P .
CAUTION
Do not switch the engine off immediately at the end of your journey after the
engine has been operated over a prolonged period at high loads but leave it to
run at an idling speed for about 1 minute. This prevents any possible accumula-
tion of heat when the engine is switched off.
Note
The radiator fan can intermittently continue to run for approximately 10 mi-
nutes after the ignition has been switched off.101Starting-off and driving
Page 106 of 216
Downloaded from www.Manualslib.com manuals search engine Switch ignition on / offRead and observe
and on page 102 first.
›
Press the button » Fig. 112 on page 102 briefly.
The ignition is switched on or off.
On vehicles fitted with a manual transmission, the clutch pedal must not be
depressed while switching the ignition on or off, otherwise the system would
try to start.
On vehicles fitted with a automatic transmission, the brake pedal must not be
depressed while switching the ignition on or off, otherwise the system would
try to start.
If the driver's door is opened while the ignition is on, an audible signal sounds
and the following message appears in the instrument cluster display.
Ignition switched on.
IGNITION STILL ON
When leaving the vehicle always switch off the ignition.
Starting the engine
Read and observe
and on page 102 first.
Procedure for starting the engine
›
Firmly apply the handbrake.
›
For vehicles with manual transmission , shift gear lever to neutral, depress
the clutch pedal and hold it there until the engine starts.
›
On vehicles with automatic transmission , place the selector lever in position
P or N and depress the brake pedal until the engine starts.
›
Press the starter button » Fig. 112 on page 102 briefly – the engine starts au-
tomatically.
In vehicles with diesel engines the glow plug warning light
lights up after
pressing the button. The engine can be started after the indicator light goes
out.
Note
■ The engine running noises may at first be louder for a short time after start-
ing the cold engine. This is quite normal and is not an operating problem.■
You should not switch on any major electrical components during the heat-
ing period otherwise the vehicle battery will be drained unnecessarily.
Switching off the engine
Read and observe
and on page 102 first.
Switching off
›
Stop the vehicle » page 107, Parking .
›
Press the button » Fig. 112 on page 102 briefly.
The engine and the ignition are switched off simultaneously.
Emergency shutdown
If necessary and in exceptional cases, the engine may even be turned off while
driving.
›
Press the starter button » Fig. 112 on page 102 for longer than 1 second or
twice within 1 second.
After the emergency stop of the engine, the steering lock will remain un-
locked.
CAUTION
Do not switch the engine off immediately at the end of your journey after the
engine has been operated over a prolonged period at high loads but leave it to
run at an idling speed for about 1 minute. This prevents any possible accumula-
tion of heat when the engine is switched off.
Note
The radiator fan can intermittently continue to run for approximately 10 mi-
nutes after the ignition has been switched off.103Starting-off and driving
Page 107 of 216
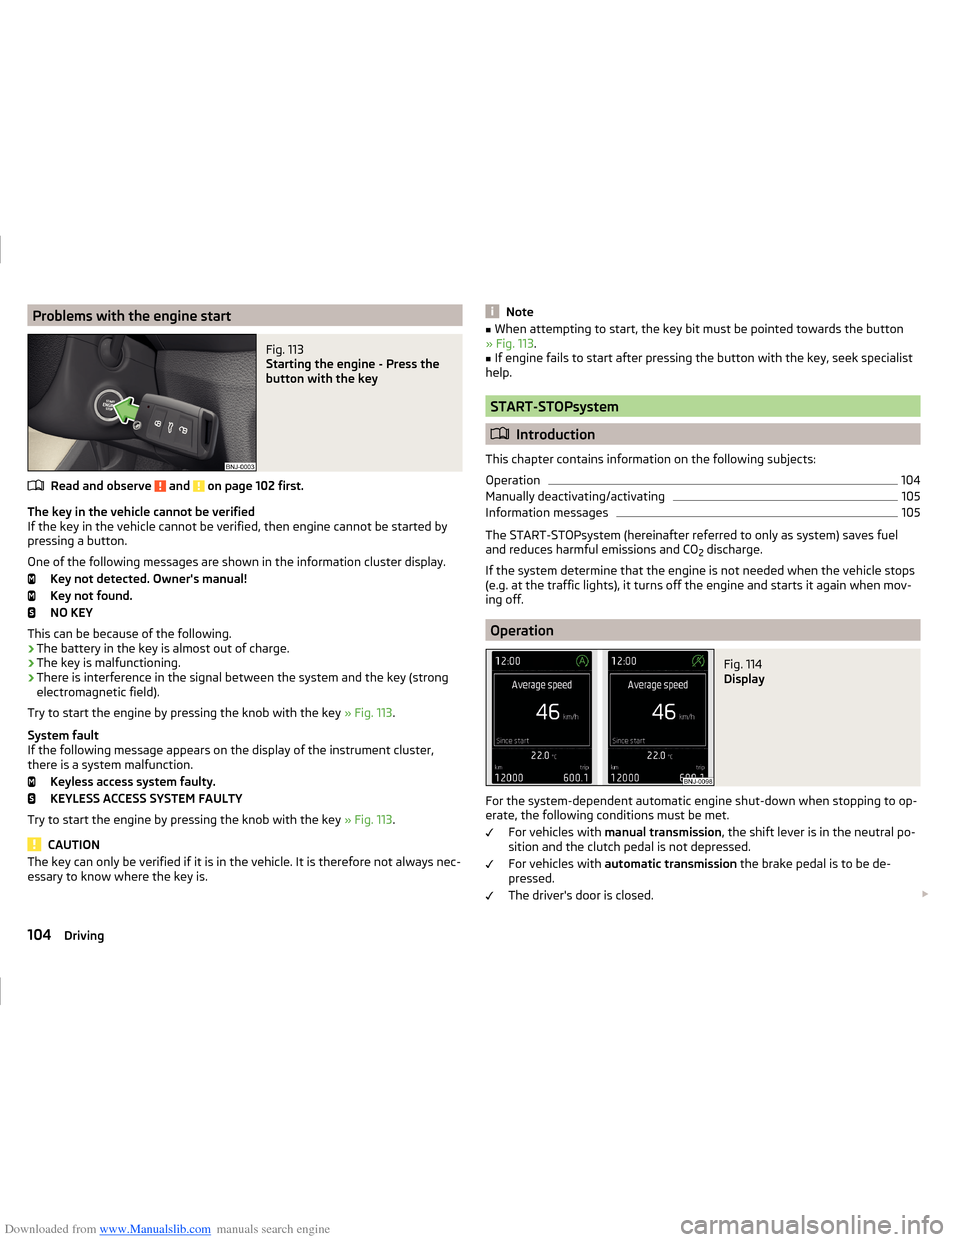
Downloaded from www.Manualslib.com manuals search engine Problems with the engine startFig. 113
Starting the engine - Press the
button with the key
Read and observe and on page 102 first.
The key in the vehicle cannot be verified
If the key in the vehicle cannot be verified, then engine cannot be started by
pressing a button.
One of the following messages are shown in the information cluster display. Key not detected. Owner's manual!
Key not found.
NO KEY
This can be because of the following.
› The battery in the key is almost out of charge.
› The key is malfunctioning.
› There is interference in the signal between the system and the key (strong
electromagnetic field).
Try to start the engine by pressing the knob with the key » Fig. 113.
System fault
If the following message appears on the display of the instrument cluster,
there is a system malfunction.
Keyless access system faulty.
KEYLESS ACCESS SYSTEM FAULTY
Try to start the engine by pressing the knob with the key » Fig. 113.
CAUTION
The key can only be verified if it is in the vehicle. It is therefore not always nec-
essary to know where the key is.Note■ When attempting to start, the key bit must be pointed towards the button
» Fig. 113 .■
If engine fails to start after pressing the button with the key, seek specialist
help.
START-STOPsystem
Introduction
This chapter contains information on the following subjects:
Operation
104
Manually deactivating/activating
105
Information messages
105
The START-STOPsystem (hereinafter referred to only as system) saves fuel
and reduces harmful emissions and CO 2 discharge.
If the system determine that the engine is not needed when the vehicle stops
(e.g. at the traffic lights), it turns off the engine and starts it again when mov-
ing off.
Operation
Fig. 114
Display
For the system-dependent automatic engine shut-down when stopping to op-
erate, the following conditions must be met.
For vehicles with manual transmission , the shift lever is in the neutral po-
sition and the clutch pedal is not depressed.
For vehicles with automatic transmission the brake pedal is to be de-
pressed.
The driver's door is closed.
104Driving