service SKODA FABIA 2014 3.G / NJ Operating Instruction Manual
[x] Cancel search | Manufacturer: SKODA, Model Year: 2014, Model line: FABIA, Model: SKODA FABIA 2014 3.G / NJPages: 216, PDF Size: 30.9 MB
Page 5 of 216
Downloaded from www.Manualslib.com manuals search engine Table of Contents
Board literature4
Notes
5
Structure and more information about the
Operating Instructions
6
Abbreviations
Safety
Passive Safety
8
General information
8
Correct and safe seated position
8
Seat belts
11
Wearing seat belts
11
Inertia reel and belt pre-tensioners
13
Airbag system
14
Description of the airbag system
14
Airbag overview
15
Deactivating airbags
18
Transporting children safely
20
Child seat
20
Fastening systems
22
Operation
Cockpit
26
Overview
25
Instruments and warning lights
27
Instrument cluster
27
Warning lights
31
Information system
39
Driver information system
39
Driving data (Multifunction display)
40
MAXI DOT display
42Service interval display46SmartGate47
Unlocking and opening
49
Unlocking and locking
49
Anti-theft alarm system
54
Tailgate
55
Window operations
56
Lights and visibility
59
Lights
59
Interior lights
64
Visibility
65
Windscreen wipers and washers
66
Rear mirror
68
Seats and headrests
70
Seats and headrests
70
Seat features
71
Transporting and practical equipment
74
Useful equipment
74
Luggage compartment
83
Variable loading floor in the luggage
compartment
88
Bicycle carrier in the luggage compartment
90
Roof rack
93
Heating and air conditioning
94
Heating, ventilation, cooling
94
Driving
Starting-off and driving
100
Starting and stopping the engine using the
key
100
Starting and stopping the engine at the push
of the button
102
START-STOPsystem
104
Brakes and parking
106
Manual gear shifting and pedals
107Automatic transmission108Running-in and economical driving111
Avoiding damage to your vehicle
113
Assist systems
114
Braking and stabilisation systems
114
Parking assistance (ParkPilot)
116
Speed control system
118
Speed limiter
120
Front Assistant
122
Fatigue detection
125
Tyre pressure monitoring
125
Hitch and trailer
127
Hitch
127
Trailer
132
General Maintenance
Care and maintenance
136
Services, modifications and technical
alterations
136
Washing vehicle
139
Cleaning vehicle exterior
140
Interior care
144
Inspecting and replenishing
147
Fuel
147
Engine compartment
149
Engine oil
152
Coolant
154
Brake fluid
155
Vehicle battery
156
Wheels
160
Tyres and rims
160
Winter use
1642Table of Contents
Page 7 of 216
Downloaded from www.Manualslib.com manuals search engine Board literature
You can always find these Operating Instructionsand the Service Plan in the
on-board instructions for your vehicle.
Depending on the equipment, the on-board literature can also include the In-
fotainment operating instructions and in some countries also the brochure On
the road .
Operating Instructions
These operating instructions apply to all body versions of the vehicle and all
related models as well as for all equipment levels .
This owner's manual describes all possible equipment versions without identi-
fying them as special equipment, model variants or market-dependent equip-
ment. Consequently, this vehicle does not contain all of the equipment com-
ponents described in this Owner's Manual.
The level of equipment of your vehicle refers to your purchase contract of the
vehicle. If you have any questions regarding the scope of equipment, please
contact a ŠKODA Partner.
The Pictures in this manual are for illustration purposes only. The illustrations
can differ in minor details from your vehicle; they are only intended to provide
general information.
ŠKODA AUTO a.s. pursues a policy of constant further development of all vehi-
cles. Each time, therefore, any changes to the vehicle occur, the scope of deliv-
ery may change in terms of its equipment and technology. The information lis-
ted in this Manual corresponds to the information available at the time of go-
ing to press.
It is therefore not possible for legal claims to be made based on the technical
details, illustrations and descriptions contained in this Owner's Manual.
Service schedule
The service plan includes the documentation of the vehicle handover informa-
tion, warranty and service events.
Infotainment operating instructions
The Infotainment manual contains a description of the Infotainment service
and possibly also some functions and vehicle systems.
Move brochure
The Move brochure contains the customer service phone number, service
number, and emergency numbers that exist in the various countries.4Board literature
Page 8 of 216
Downloaded from www.Manualslib.com manuals search engine Notes
Terms used
The on-board literature contains the following terms relating to the service
work for your vehicle. - a workshop that carries out specialist service tasks for
ŠKODA vehicles. A specialist garage can be a ŠKODA partner, a ŠKODA
service partner or an independent workshop.
- A Workshop that has been contractually authorised
by the manufacturer ŠKODA AUTO a.s. or its sales partner to perform
service tasks on ŠKODA vehicles and to sell ŠKODA Genuine Parts.
- A company that has been authorised by the manufacturer
ŠKODA AUTO a.s. or its sales partner to sell new ŠKODA vehicles and,
when applicable, to service them using ŠKODA Genuine Parts and sell
ŠKODA Genuine Parts.
Explanation of symbols
An overview of the symbols used in the instruction manual and a brief explan-
ation of their meaning.Reference to the introductory module of a chapter with important infor-
mation and safety warningsContinuation of the module on the next pageSituations in which the vehicle must be stopped as soon as possible®Registered trademarkTelephone operation in the MAXI DOT displayText display in the segment displayWARNINGTexts with this symbol warn of a serious accident, injury or loss of life .
CAUTION
Texts with this symbol draw attention to the risk of vehicle damage or possible
inoperability of some systems.
For the sake of the environment
Texts with this symbol contain information on environmental protection as
well as tips for economical operation.“Specialist garage”“ŠKODA service partner”“ŠKODA partner”NoteTexts with this symbol contain additional information.5Notes
Page 22 of 216
Downloaded from www.Manualslib.com manuals search engine ›If special attachments are required in the area of the steering wheel because
of a physical disability.
› If other seats have been installed (e.g. orthopaedic seats without side air-
bags).
The front passenger airbag can be switched off with the key-operated switch
» Fig. 11 on page 19 -
.
We recommend that you ask a ŠKODA Service Partner to switch off any other
airbags.
Deactivation indicator
Display of the airbag deactivation » page 34,
Airbag system .
Note
A ŠKODA Service Partner will be able to inform you which airbags in your vehi-
cle can/must be deactivated.
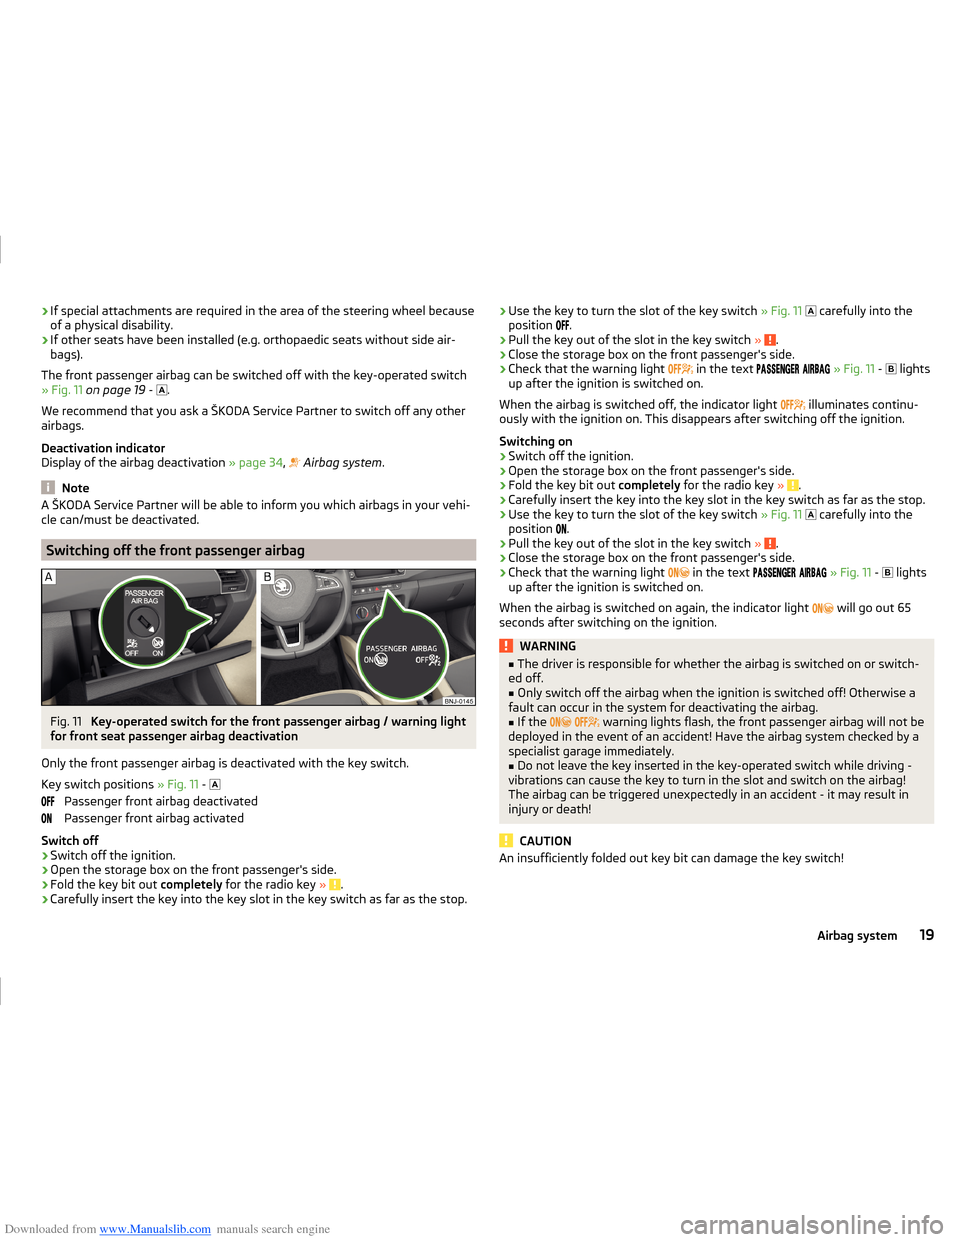
Switching off the front passenger airbag
Fig. 11
Key-operated switch for the front passenger airbag / warning light
for front seat passenger airbag deactivation
Only the front passenger airbag is deactivated with the key switch.
Key switch positions » Fig. 11 -
Passenger front airbag deactivated
Passenger front airbag activated
Switch off
›
Switch off the ignition.
›
Open the storage box on the front passenger's side.
›
Fold the key bit out completely for the radio key » .
›
Carefully insert the key into the key slot in the key switch as far as the stop.
›Use the key to turn the slot of the key switch
» Fig. 11 carefully into the
position .›
Pull the key out of the slot in the key switch » .
›
Close the storage box on the front passenger's side.
›
Check that the warning light
in the text
» Fig. 11 -
lights
up after the ignition is switched on.
When the airbag is switched off, the indicator light
illuminates continu-
ously with the ignition on. This disappears after switching off the ignition.
Switching on
›
Switch off the ignition.
›
Open the storage box on the front passenger's side.
›
Fold the key bit out completely for the radio key » .
›
Carefully insert the key into the key slot in the key switch as far as the stop.
›
Use the key to turn the slot of the key switch » Fig. 11
carefully into the
position .
›
Pull the key out of the slot in the key switch
» .
›
Close the storage box on the front passenger's side.
›
Check that the warning light
in the text
» Fig. 11 -
lights
up after the ignition is switched on.
When the airbag is switched on again, the indicator light will go out 65
seconds after switching on the ignition.
WARNING■ The driver is responsible for whether the airbag is switched on or switch-
ed off.■
Only switch off the airbag when the ignition is switched off! Otherwise a
fault can occur in the system for deactivating the airbag.
■
If the
warning lights flash, the front passenger airbag will not be
deployed in the event of an accident! Have the airbag system checked by a
specialist garage immediately.
■
Do not leave the key inserted in the key-operated switch while driving -
vibrations can cause the key to turn in the slot and switch on the airbag!
The airbag can be triggered unexpectedly in an accident - it may result in
injury or death!
CAUTION
An insufficiently folded out key bit can damage the key switch!19Airbag system
Page 31 of 216
Downloaded from www.Manualslib.com manuals search engine OverviewFig. 19
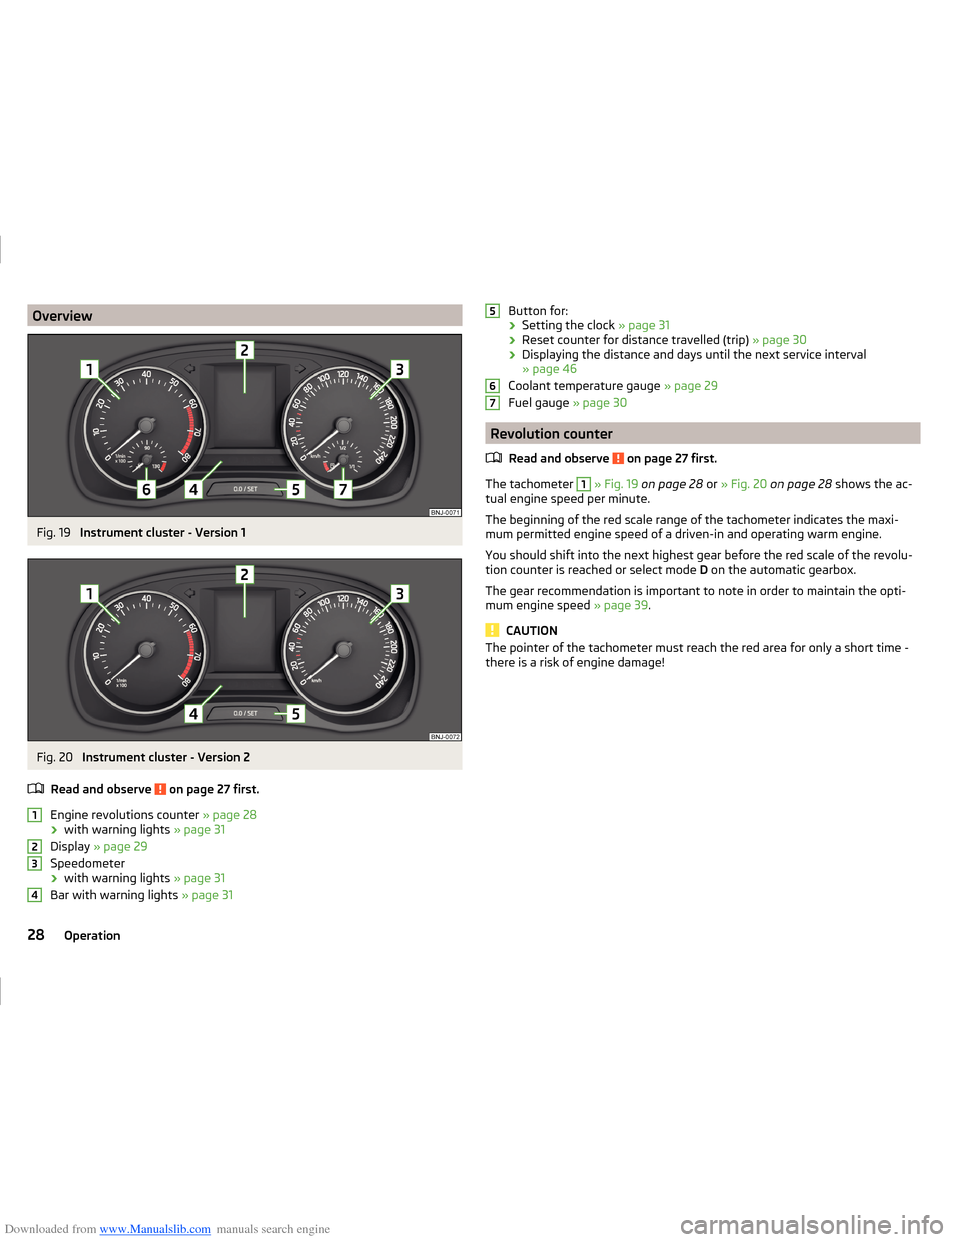
Instrument cluster - Version 1
Fig. 20
Instrument cluster - Version 2
Read and observe
on page 27 first.
Engine revolutions counter » page 28
› with warning lights
» page 31
Display » page 29
Speedometer › with warning lights
» page 31
Bar with warning lights » page 31
1234Button for:
› Setting the clock
» page 31
› Reset counter for distance travelled (trip)
» page 30
› Displaying the distance and days until the next service interval
» page 46
Coolant temperature gauge » page 29
Fuel gauge » page 30
Revolution counter
Read and observe
on page 27 first.
The tachometer
1
» Fig. 19 on page 28 or » Fig. 20 on page 28 shows the ac-
tual engine speed per minute.
The beginning of the red scale range of the tachometer indicates the maxi-
mum permitted engine speed of a driven-in and operating warm engine.
You should shift into the next highest gear before the red scale of the revolu- tion counter is reached or select mode D on the automatic gearbox.
The gear recommendation is important to note in order to maintain the opti-
mum engine speed » page 39.
CAUTION
The pointer of the tachometer must reach the red area for only a short time -
there is a risk of engine damage!56728Operation
Page 34 of 216
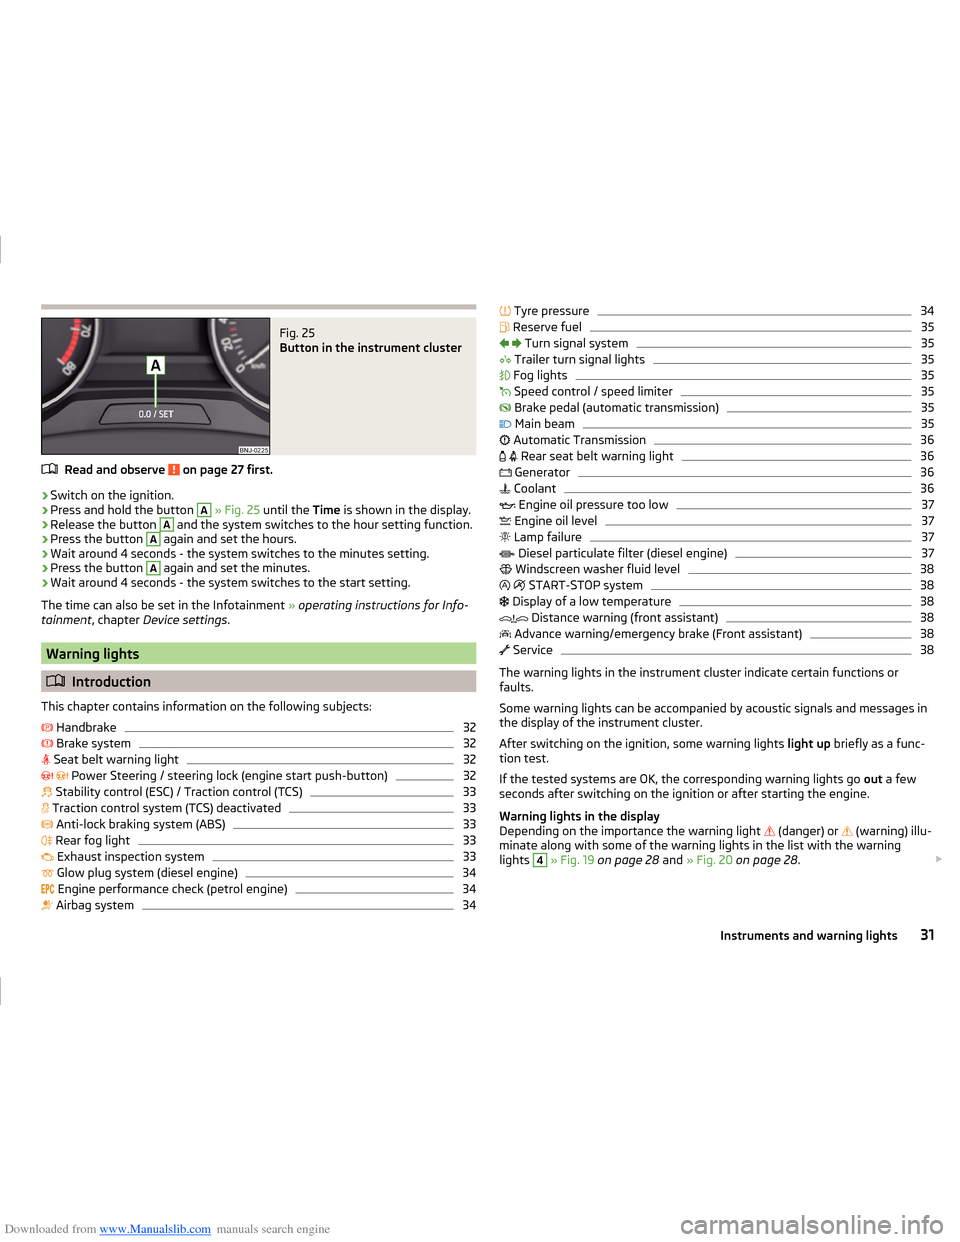
Downloaded from www.Manualslib.com manuals search engine Fig. 25
Button in the instrument cluster
Read and observe on page 27 first.
›
Switch on the ignition.
›
Press and hold the button
A
» Fig. 25 until the Time is shown in the display.
›
Release the button
A
and the system switches to the hour setting function.
›
Press the button
A
again and set the hours.
›
Wait around 4 seconds - the system switches to the minutes setting.
›
Press the button
A
again and set the minutes.
›
Wait around 4 seconds - the system switches to the start setting.
The time can also be set in the Infotainment » operating instructions for Info-
tainment , chapter Device settings .
Warning lights
Introduction
This chapter contains information on the following subjects:
Handbrake
32
Brake system
32
Seat belt warning light
32
Power Steering / steering lock (engine start push-button)
32
Stability control (ESC) / Traction control (TCS)
33
Traction control system (TCS) deactivated
33
Anti-lock braking system (ABS)
33
Rear fog light
33
Exhaust inspection system
33
Glow plug system (diesel engine)
34
Engine performance check (petrol engine)
34
Airbag system
34
Tyre pressure34 Reserve fuel35
Turn signal system
35
Trailer turn signal lights
35
Fog lights
35
Speed control / speed limiter
35
Brake pedal (automatic transmission)
35
Main beam
35
Automatic Transmission
36
Rear seat belt warning light
36
Generator
36
Coolant
36
Engine oil pressure too low
37
Engine oil level
37
Lamp failure
37
Diesel particulate filter (diesel engine)
37
Windscreen washer fluid level
38
START-STOP system
38
Display of a low temperature
38
Distance warning (front assistant)
38
Advance warning/emergency brake (Front assistant)
38
Service
38
The warning lights in the instrument cluster indicate certain functions or
faults.
Some warning lights can be accompanied by acoustic signals and messages in
the display of the instrument cluster.
After switching on the ignition, some warning lights light up briefly as a func-
tion test.
If the tested systems are OK, the corresponding warning lights go out a few
seconds after switching on the ignition or after starting the engine.
Warning lights in the display
Depending on the importance the warning light (danger) or
(warning) illu-
minate along with some of the warning lights in the list with the warning
lights
4
» Fig. 19 on page 28 and » Fig. 20 on page 28 .
31Instruments and warning lights
Page 41 of 216
Downloaded from www.Manualslib.com manuals search engine WARNING■Always adjust the speed and driving style to the actual weather, road, ter-
rain and traffic conditions. The recommendations indicated by the warning
light must not tempt you to disregard the national regulations for road traf-
fic.■
The diesel particulate filter reaches very high temperatures - there is a
fire hazard and serious injury could be caused. Therefore, never stop the
vehicle at places where the underside of your vehicle can come into contact
with flammable materials such as dry grass, undergrowth, leaves, spilled
fuel or such like.
CAUTION
■ As long as the warning light illuminates, one must take into account an
increased fuel consumption and a power reduction of the engine.■
Using diesel fuel with increased sulphur content can significantly reduce the
service life of the diesel particle filter. A ŠKODA Partner will be able to tell you
which countries use diesel fuel with increased sulphur content.
Note
We encourage you to avoid constant short journeys. This will improve the com-
bustion process of the soot particles in the diesel particulate filter.
Windscreen washer fluid level
Read and observe
on page 32 first.
illuminates - the windscreen washer fluid level is too low.
Add washer fluid!
WASHER FLUID PLEASE TOP UP
›
Fill up the windscreen washer fluid.
START-STOP system
Read and observe
on page 32 first.
The warning lights
indicates the state of the START STOP system
» page 104 , START-STOPsystem .
Display of a low temperature
Read and observe
on page 32 first.
illuminates - the outside temperature is below +4° C.
WARNINGEven at temperatures around +4 °C, black ice may still be on the road sur-
face! Do not only rely upon the information given on the outside tempera-
ture display that there is no ice on the road.
Distance warning (front assistant)
Read and observe
on page 32 first.
illuminates - the safe distance to the vehicle in front is below the mini-
mum.
The warning light is only shown in the MAXI DOTdisplay.
Information on the Front Assistant system » page 122.
Advance warning/emergency brake (Front assistant)
Read and observe
on page 32 first.
illuminates - the system has recognized the risk of a collision or automati-
cally triggered an emergency braking manoeuvre.
Information on the Front Assistant system » page 122.
Service
Read and observe
on page 32 first.
illuminates - note regarding a due service appointment
» page 46, Service
interval display .
38Operation
Page 42 of 216
Downloaded from www.Manualslib.com manuals search engine Information system
Driver information system
Introduction
This chapter contains information on the following subjects:
Door, luggage compartment or bonnet warning
39
Overspeed warning at 120 km/h
39
Auto-check control
39
Gear recommendation
39
Depending on the vehicle's equipment, the information system vie the display
of the instrument cluster provides the following information.
› Driving data (multifunction display)
» page 40.
› Data relating to the Maxi DOT display
» page 42.
› Service interval display
» page 46.
› Selector lever positions for an automatic transmission
» page 109.
› Information and alerts in the Assist systems
» page 114.
WARNINGConcentrate fully at all times on your driving! As the driver you are fully re-
sponsible for the operation of your vehicle.
Door, luggage compartment or bonnet warning
Read and observe
on page 39 first.
If at least one door is open, or the boot or bonnet is open, the display indicates
the relevant open door or boot/bonnet.
An acoustic signal will also sound if you drive the vehicle above 6 km/h when a
door is open.
Overspeed warning at 120 km/h
Read and observe
on page 39 first.
This function is only enabled in certain countries.
An audible warning signal will sound when the vehicle speed exceeds 120
km/h. The audible warning is switched off once the vehicle speed falls below
120 km/h.
Auto-check control
Read and observe
on page 39 first.
Certain functions and conditions of individual vehicle systems are checked
continuously when the ignition is switched on.
While the operational faults remain unrectified, the messages are always indi- cated again. After they are displayed for the first time, the warning lights
(danger) or (warning) continue to be indicated without information for the
driver.
Gear recommendation
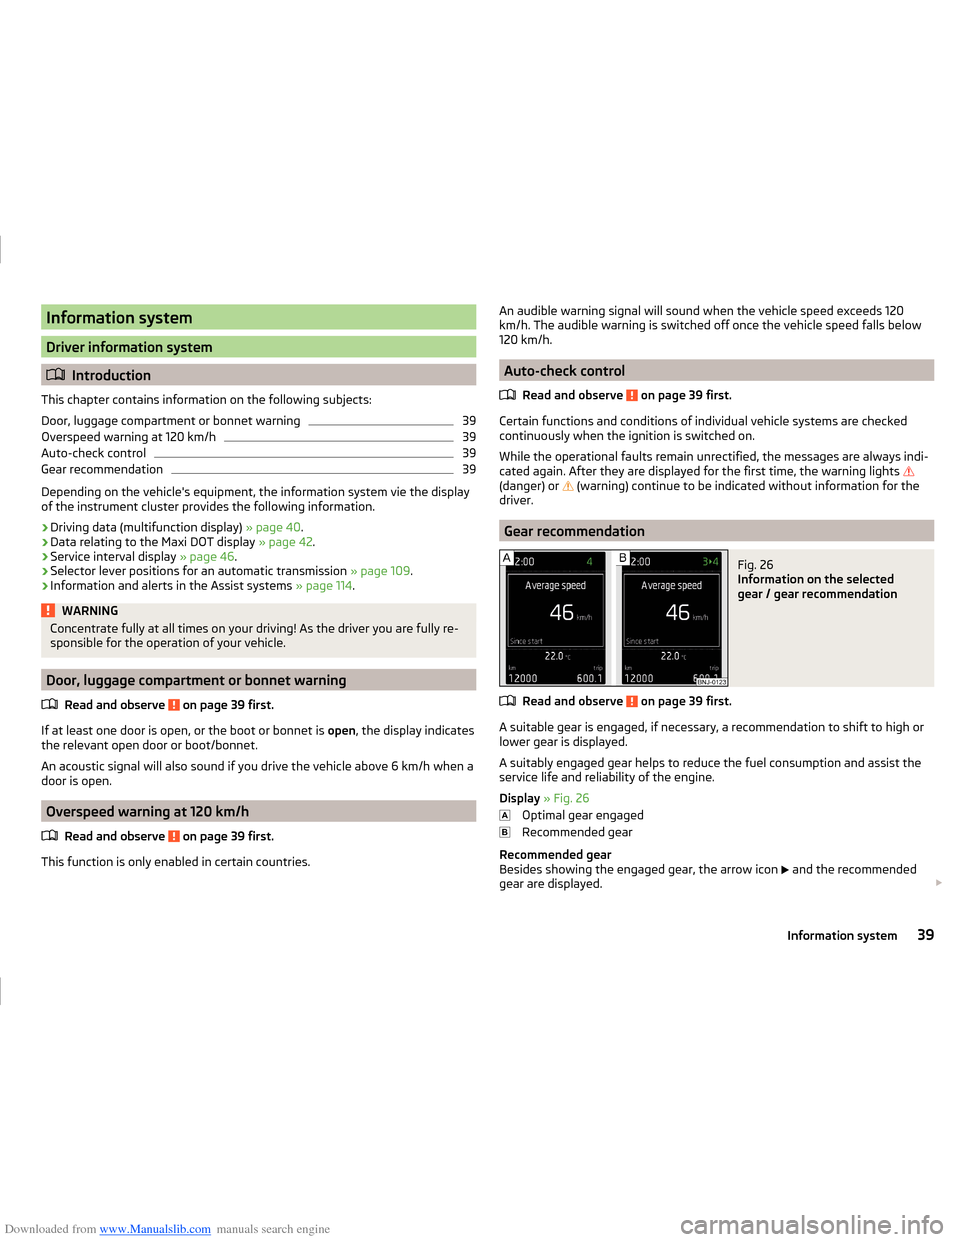
Fig. 26
Information on the selected
gear / gear recommendation
Read and observe on page 39 first.
A suitable gear is engaged, if necessary, a recommendation to shift to high or
lower gear is displayed.
A suitably engaged gear helps to reduce the fuel consumption and assist the
service life and reliability of the engine.
Display » Fig. 26
Optimal gear engaged
Recommended gear
Recommended gear
Besides showing the engaged gear, the arrow icon and the recommended
gear are displayed.
39Information system
Page 49 of 216
Downloaded from www.Manualslib.com manuals search engine Service interval display
Introduction
This chapter contains information on the following subjects:
Displaying the distance and days until the next service interval
46
Service messages
46
Resetting the service interval display
46
The service interval display shows the time and mileage to the next service
event.
The information regarding the service intervals can be found in the service
schedule.
Displaying the distance and days until the next service interval
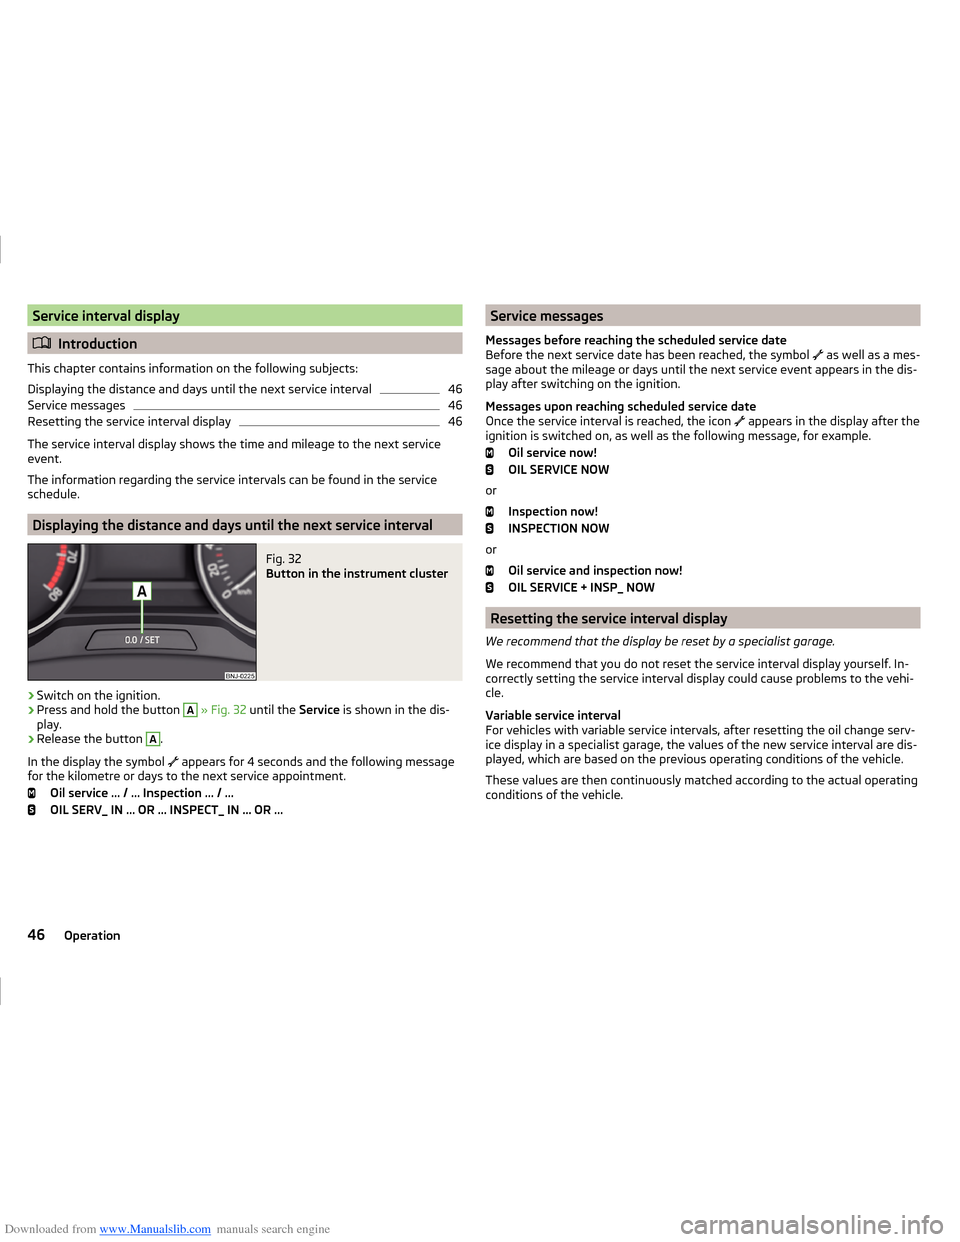
Fig. 32
Button in the instrument cluster
›
Switch on the ignition.
›
Press and hold the button
A
» Fig. 32 until the Service is shown in the dis-
play.
›
Release the button
A
.
In the display the symbol appears for 4 seconds and the following message
for the kilometre or days to the next service appointment.
Oil service … / … Inspection … / …
OIL SERV_ IN … OR … INSPECT_ IN … OR …
Service messages
Messages before reaching the scheduled service date
Before the next service date has been reached, the symbol
as well as a mes-
sage about the mileage or days until the next service event appears in the dis-
play after switching on the ignition.
Messages upon reaching scheduled service date
Once the service interval is reached, the icon
appears in the display after the
ignition is switched on, as well as the following message, for example.
Oil service now!
OIL SERVICE NOW
or Inspection now!
INSPECTION NOW
or Oil service and inspection now!
OIL SERVICE + INSP_ NOW
Resetting the service interval display
We recommend that the display be reset by a specialist garage.
We recommend that you do not reset the service interval display yourself. In-
correctly setting the service interval display could cause problems to the vehi-
cle.
Variable service interval
For vehicles with variable service intervals, after resetting the oil change serv-
ice display in a specialist garage, the values of the new service interval are dis-
played, which are based on the previous operating conditions of the vehicle.
These values are then continuously matched according to the actual operating
conditions of the vehicle.
46Operation
Page 50 of 216
Downloaded from www.Manualslib.com manuals search engine SmartGate
Introduction
This chapter contains information on the following subjects:
Connection to SmartGate using Wi-Fi
47
Connection using Wi-Fi direct to SmartGate
48
SmartGate web interface
48
SmartGate constitutes a system, which transmit certain driving data (such as
fuel consumption, speed or similar) via Wi-Fi and Wi-Fi Direct.
The ŠKODA compatible communications device (e.g. phone, tablet, notebook)
offer the possibility to further transmit the received data.
More information on available applications, a list of compatible communication
devices and on SmartGate, can be found on the ŠKODA Internet pages.
Use the Service App application to update the SmartGate software. You can
fine information on this application on the ŠKODA Internet pages.
WARNING■ The national legal regulations for using mobile communication devices in
a vehicle must be observed.■
Do not fit the equipment or mounts to be connected onto airbag covers
or within the immediate deployment range of the airbags.
■
Never leave a connected device in the deployment area of an airbag, on a
seat, on the dash panel or any another area, from which it can be thrown
during a sudden braking manoeuvre, an accident or a collision - there is a
risk of injury.
CAUTION
ŠKODA accepts no responsibility for any problems caused by incompatibility or
improper functioning of the communication equipment and the applications.Note■ The ŠKODA applications, support communications devices with the Android
operating system version 4.x.x and later and iOS 7.x.x and higher.■
With SmartGate, a device can be connected to two ongoing ŠKODA applica-
tions, possibly two devices, each with a respective current ŠKODA application.
■
If you have forgotten your password for the connection to SmartGate, Smart-
Gate must be reset to factory settings in a specialised workshop.
Connection to SmartGate using Wi-Fi
Read and observe
and on page 47 first.
For a successful connection the following conditions must be met. Wi-Fi is turned on in the device to be connected.
The ignition is switched on.
Connection set-up
›
Can enable the connected device to search for available Wi-Fi networks (see
operating instructions for the connected device).
›
In the menu of the detected networks select “SmartGate_...” 1)
or “DIRECT
SmartGate_...” 1)
.
›
Enter the password (the password is preset at the factory to the complete
Vehicle Identification Number - enter capital letters).
Disconnection
The connection can be switched off in one of the following ways.
› By disconnecting the connected device from SmartGate.
› By turning off the Wi-Fi in the connected device.
› By switching off the ignition for more than 5 s (for vehicles with starter but-
ton - by turning off the engine and opening the driver's door).
Automatic connection
If the communication device once had a connection with SmartGate, then the
connection is automatically restored under the following conditions.
Wi-Fi is turned on in the device to be connected.
The ignition is switched on.
The device to be connected stores the password required for the connec-
tion check.
1)
The last six symbols of the VIN vehicle identification number of your vehicle are displayed at position ....
47Information system