Rear lights SKODA FABIA 2014 3.G / NJ User Guide
[x] Cancel search | Manufacturer: SKODA, Model Year: 2014, Model line: FABIA, Model: SKODA FABIA 2014 3.G / NJPages: 216, PDF Size: 30.7 MB
Page 66 of 216
The windscreen wipers are on for more than 30 s.
The parking aid is activated.
The light turns off about 4 minutes after turning off the wipers.
The function can be activated/deactivated in the Infotainment » Infotainment
manual , chapter Vehicle settings (CAR button) .
CAUTION
Do not attach any stickers or similar objects in front of the light sensor on the
windscreen. This can impair its function or reliability.
Fog lights
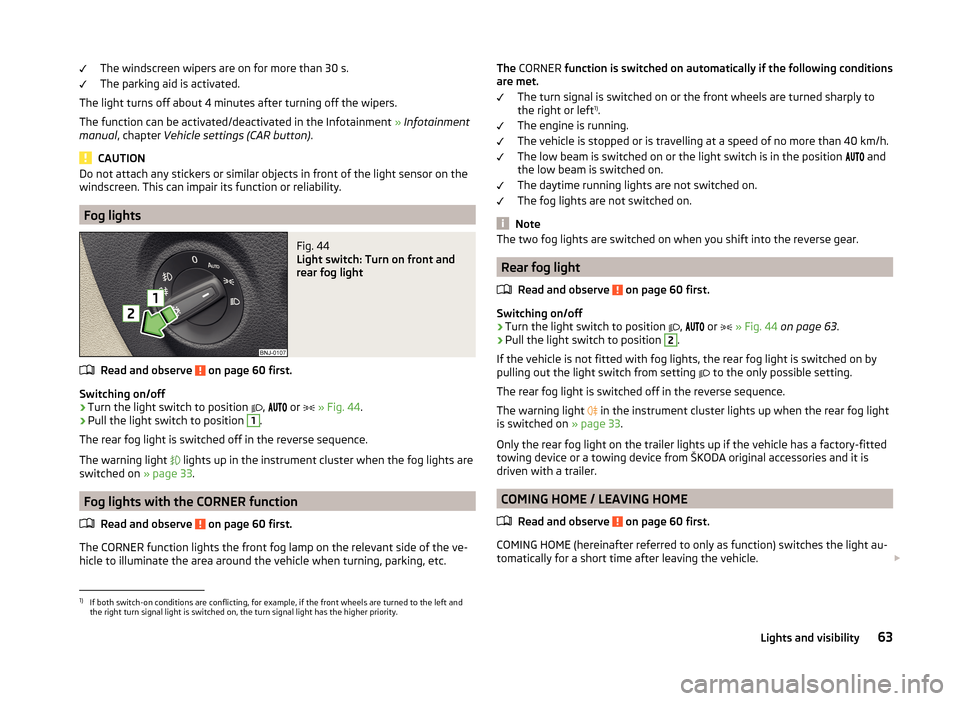
Fig. 44
Light switch: Turn on front and
rear fog light
Read and observe on page 60 first.
Switching on/off
›
Turn the light switch to position
,
or
» Fig. 44 .
›
Pull the light switch to position
1
.
The rear fog light is switched off in the reverse sequence.
The warning light
lights up in the instrument cluster when the fog lights are
switched on » page 33.
Fog lights with the CORNER function
Read and observe
on page 60 first.
The CORNER function lights the front fog lamp on the relevant side of the ve-hicle to illuminate the area around the vehicle when turning, parking, etc.
The
CORNER function is switched on automatically if the following conditions
are met.
The turn signal is switched on or the front wheels are turned sharply to
the right or left 1)
.
The engine is running.
The vehicle is stopped or is travelling at a speed of no more than 40 km/h.
The low beam is switched on or the light switch is in the position
and
the low beam is switched on.
The daytime running lights are not switched on.
The fog lights are not switched on.
Note
The two fog lights are switched on when you shift into the reverse gear.
Rear fog light
Read and observe
on page 60 first.
Switching on/off
›
Turn the light switch to position ,
or
» Fig. 44 on page 63 .
›
Pull the light switch to position
2
.
If the vehicle is not fitted with fog lights, the rear fog light is switched on by
pulling out the light switch from setting to the only possible setting.
The rear fog light is switched off in the reverse sequence.
The warning light in the instrument cluster lights up when the rear fog light
is switched on » page 33.
Only the rear fog light on the trailer lights up if the vehicle has a factory-fitted towing device or a towing device from ŠKODA original accessories and it is
driven with a trailer.
COMING HOME / LEAVING HOME
Read and observe
on page 60 first.
COMING HOME (hereinafter referred to only as function) switches the light au-tomatically for a short time after leaving the vehicle.
1)
If both switch-on conditions are conflicting, for example, if the front wheels are turned to the left and
the right turn signal light is switched on, the turn signal light has the higher priority.
63Lights and visibility
Page 68 of 216
Parking lightsRead and observe
on page 60 first.
The parking light is designed for temporary lighting of the parked vehicle.
Switching on
the parking light
›
Switch off the ignition.
›
Place the control lever into position
A
or
B
as far as it can go » Fig. 42 on
page 62 - the parking light on the right/left-hand side of the vehicle is
switched on.
If the right or left turn signal light has been switched on and the ignition is
switched off, the parking light is not automatically switched on.
Switching on the parking lights on both sides
›
Turn the light switch
A
to position
» Fig. 41 on page 60 and lock the vehi-
cle.
After pulling out the ignition key and opening the driver's door, an audible
warning sounds. After a few seconds or after closing the driver's door, the au-
dible alarm is turned off, but the parking lights will remain switched on.
CAUTION
Turning on the parking light means the battery is heavily loaded, especially
over short distances.
Driving abroad
Read and observe
on page 60 first.
The low beam is set asymmetrically. It illuminates the side of the road on
which the vehicle is being driven to a greater extent.
When driving in countries with opposing traffic system (traffic on the left/
right), asymmetric headlight adjustment can dazzle oncoming traffic. To pre-
vent oncoming traffic from being dazzled, the headlights must be adjusted by
a specialist garage.
Note
For more information on adjusting the headlights, consult a specialist garage.Interior lights
Introduction
This chapter contains information on the following subjects:
Front interior light
65
Rear interior light
66
Note
The light turns off automatically 10 minutes after switching off the ignition or
opening a door unless otherwise specified
Front interior light
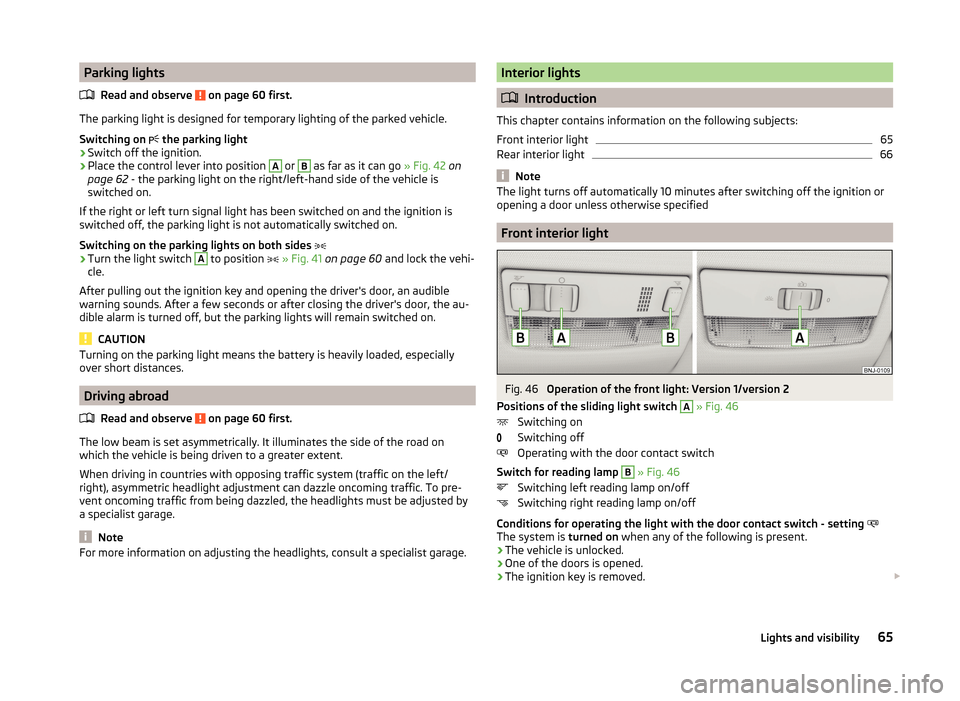
Fig. 46
Operation of the front light: Version 1/version 2
Positions of the sliding light switch
A
» Fig. 46
Switching on
Switching off
Operating with the door contact switch
Switch for reading lamp
B
» Fig. 46
Switching left reading lamp on/off
Switching right reading lamp on/off
Conditions for operating the light with the door contact switch - setting
The system is turned on when any of the following is present.
› The vehicle is unlocked.
› One of the doors is opened.
› The ignition key is removed.
65Lights and visibility
Page 69 of 216
The system is turned off when any of the following is present.
› The vehicle is locked.
› The ignition is switched on.
› About 30 seconds after all the doors have been closed.
Rear interior light
Fig. 47
Interior lights at the rear
Positions of the lens of the rear light
» Fig. 47
Switching on
Operate using the door contact switch (middle position) 1)
Switching off
Visibility
Introduction
This chapter contains information on the following subjects:
Rear window heater
66
Sun visors in the front
67
Sun screen of the panoramic roof
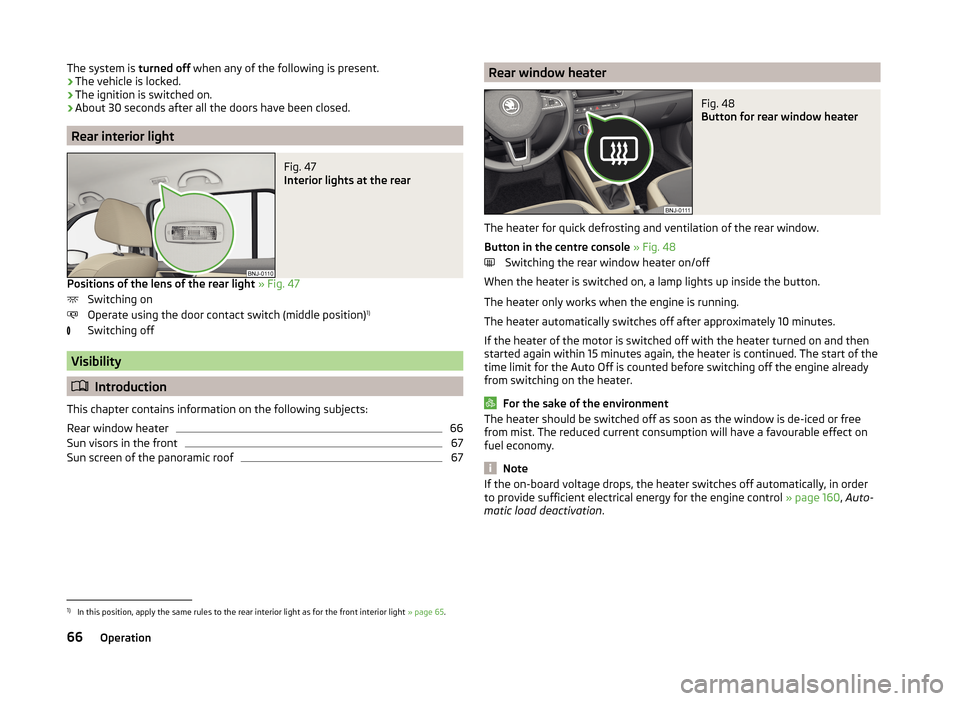
67Rear window heaterFig. 48
Button for rear window heater
The heater for quick defrosting and ventilation of the rear window.
Button in the centre console » Fig. 48
Switching the rear window heater on/off
When the heater is switched on, a lamp lights up inside the button.
The heater only works when the engine is running.
The heater automatically switches off after approximately 10 minutes.
If the heater of the motor is switched off with the heater turned on and then
started again within 15 minutes again, the heater is continued. The start of the
time limit for the Auto Off is counted before switching off the engine already
from switching on the heater.
For the sake of the environment
The heater should be switched off as soon as the window is de-iced or free
from mist. The reduced current consumption will have a favourable effect on
fuel economy.
Note
If the on-board voltage drops, the heater switches off automatically, in order
to provide sufficient electrical energy for the engine control » page 160, Auto-
matic load deactivation .1)
In this position, apply the same rules to the rear interior light as for the front interior light » page 65.
66Operation
Page 70 of 216
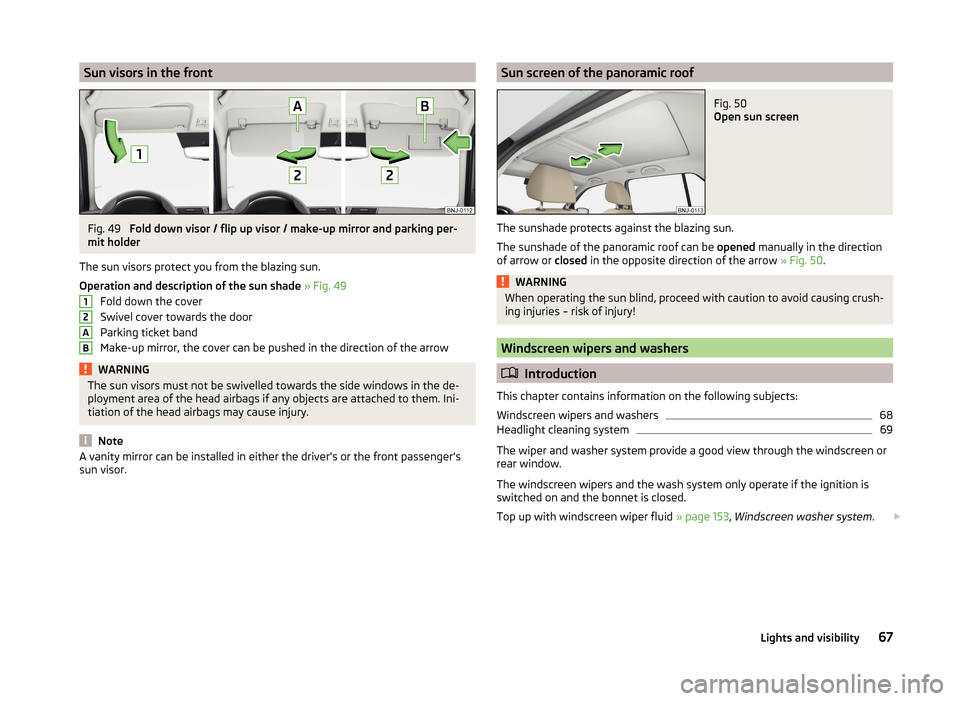
Sun visors in the frontFig. 49
Fold down visor / flip up visor / make-up mirror and parking per-
mit holder
The sun visors protect you from the blazing sun.
Operation and description of the sun shade » Fig. 49
Fold down the cover
Swivel cover towards the door
Parking ticket band
Make-up mirror, the cover can be pushed in the direction of the arrow
WARNINGThe sun visors must not be swivelled towards the side windows in the de-
ployment area of the head airbags if any objects are attached to them. Ini-
tiation of the head airbags may cause injury.
Note
A vanity mirror can be installed in either the driver's or the front passenger's
sun visor.12ABSun screen of the panoramic roofFig. 50
Open sun screen
The sunshade protects against the blazing sun.
The sunshade of the panoramic roof can be opened manually in the direction
of arrow or closed in the opposite direction of the arrow » Fig. 50.
WARNINGWhen operating the sun blind, proceed with caution to avoid causing crush-
ing injuries – risk of injury!
Windscreen wipers and washers
Introduction
This chapter contains information on the following subjects:
Windscreen wipers and washers
68
Headlight cleaning system
69
The wiper and washer system provide a good view through the windscreen or
rear window.
The windscreen wipers and the wash system only operate if the ignition is
switched on and the bonnet is closed.
Top up with windscreen wiper fluid » page 153, Windscreen washer system .
67Lights and visibility
Page 72 of 216
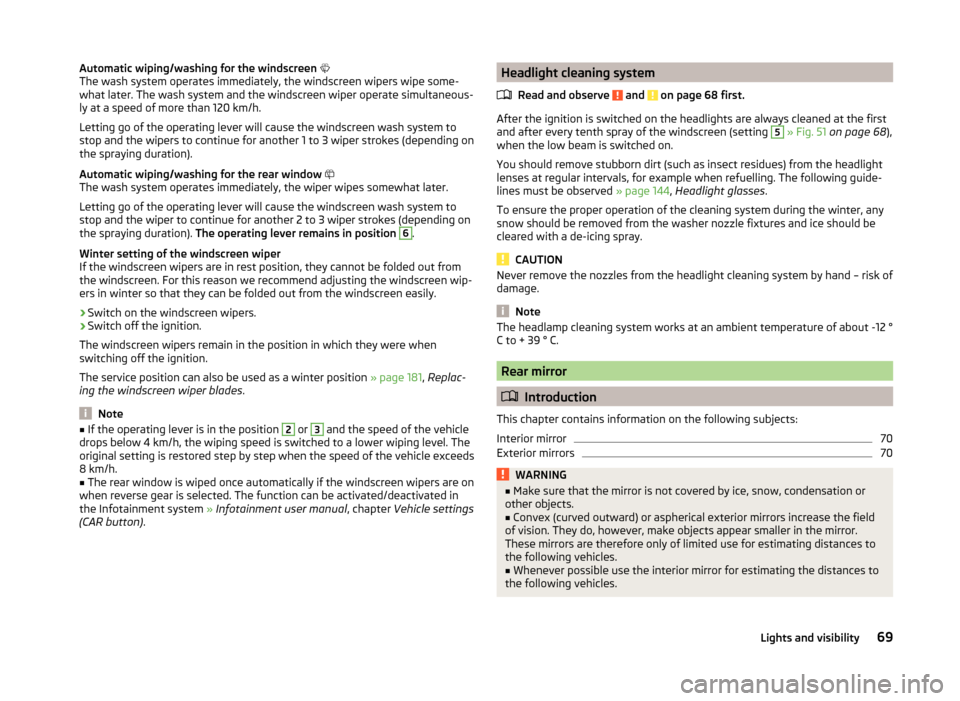
Automatic wiping/washing for the windscreen
The wash system operates immediately, the windscreen wipers wipe some-
what later. The wash system and the windscreen wiper operate simultaneous-
ly at a speed of more than 120 km/h.
Letting go of the operating lever will cause the windscreen wash system to
stop and the wipers to continue for another 1 to 3 wiper strokes (depending on
the spraying duration).
Automatic wiping/washing for the rear window
The wash system operates immediately, the wiper wipes somewhat later.
Letting go of the operating lever will cause the windscreen wash system to
stop and the wiper to continue for another 2 to 3 wiper strokes (depending on
the spraying duration). The operating lever remains in position 6
.
Winter setting of the windscreen wiper
If the windscreen wipers are in rest position, they cannot be folded out from
the windscreen. For this reason we recommend adjusting the windscreen wip-
ers in winter so that they can be folded out from the windscreen easily.
› Switch on the windscreen wipers.
› Switch off the ignition.
The windscreen wipers remain in the position in which they were when
switching off the ignition.
The service position can also be used as a winter position » page 181, Replac-
ing the windscreen wiper blades .
Note
■
If the operating lever is in the position 2 or 3 and the speed of the vehicle
drops below 4 km/h, the wiping speed is switched to a lower wiping level. The
original setting is restored step by step when the speed of the vehicle exceeds
8 km/h.■
The rear window is wiped once automatically if the windscreen wipers are on
when reverse gear is selected. The function can be activated/deactivated in
the Infotainment system » Infotainment user manual , chapter Vehicle settings
(CAR button) .
Headlight cleaning system
Read and observe
and on page 68 first.
After the ignition is switched on the headlights are always cleaned at the first
and after every tenth spray of the windscreen (setting
5
» Fig. 51 on page 68 ),
when the low beam is switched on.
You should remove stubborn dirt (such as insect residues) from the headlight
lenses at regular intervals, for example when refuelling. The following guide-
lines must be observed » page 144, Headlight glasses .
To ensure the proper operation of the cleaning system during the winter, any
snow should be removed from the washer nozzle fixtures and ice should be
cleared with a de-icing spray.
CAUTION
Never remove the nozzles from the headlight cleaning system by hand – risk of
damage.
Note
The headlamp cleaning system works at an ambient temperature of about -12 °
C to + 39 ° C.
Rear mirror
Introduction
This chapter contains information on the following subjects:
Interior mirror
70
Exterior mirrors
70WARNING■ Make sure that the mirror is not covered by ice, snow, condensation or
other objects.■
Convex (curved outward) or aspherical exterior mirrors increase the field
of vision. They do, however, make objects appear smaller in the mirror.
These mirrors are therefore only of limited use for estimating distances to
the following vehicles.
■
Whenever possible use the interior mirror for estimating the distances to
the following vehicles.
69Lights and visibility
Page 76 of 216
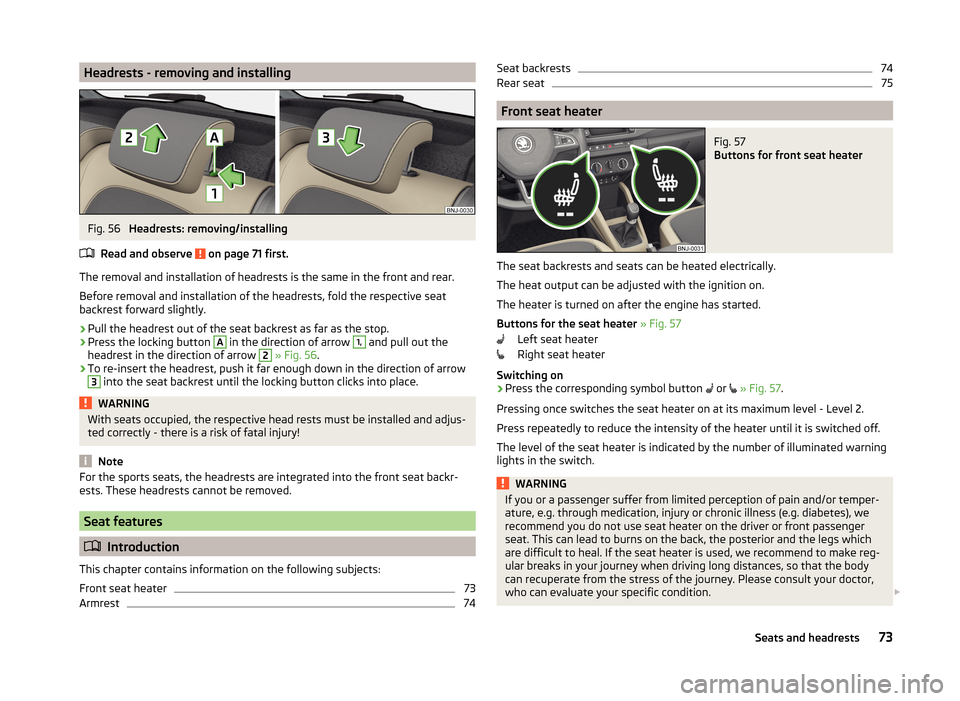
Headrests - removing and installingFig. 56
Headrests: removing/installing
Read and observe
on page 71 first.
The removal and installation of headrests is the same in the front and rear.
Before removal and installation of the headrests, fold the respective seat
backrest forward slightly.
›
Pull the headrest out of the seat backrest as far as the stop.
›
Press the locking button
A
in the direction of arrow
1,
and pull out the
headrest in the direction of arrow
2
» Fig. 56 .
›
To re-insert the headrest, push it far enough down in the direction of arrow
3
into the seat backrest until the locking button clicks into place.
WARNINGWith seats occupied, the respective head rests must be installed and adjus-
ted correctly - there is a risk of fatal injury!
Note
For the sports seats, the headrests are integrated into the front seat backr-
ests. These headrests cannot be removed.
Seat features
Introduction
This chapter contains information on the following subjects:
Front seat heater
73
Armrest
74Seat backrests74Rear seat75
Front seat heater
Fig. 57
Buttons for front seat heater
The seat backrests and seats can be heated electrically.
The heat output can be adjusted with the ignition on.
The heater is turned on after the engine has started.
Buttons for the seat heater » Fig. 57
Left seat heater
Right seat heater
Switching on
›
Press the corresponding symbol button or
» Fig. 57 .
Pressing once switches the seat heater on at its maximum level - Level 2.
Press repeatedly to reduce the intensity of the heater until it is switched off.
The level of the seat heater is indicated by the number of illuminated warning
lights in the switch.
WARNINGIf you or a passenger suffer from limited perception of pain and/or temper-
ature, e.g. through medication, injury or chronic illness (e.g. diabetes), we
recommend you do not use seat heater on the driver or front passenger
seat. This can lead to burns on the back, the posterior and the legs which
are difficult to heal. If the seat heater is used, we recommend to make reg-
ular breaks in your journey when driving long distances, so that the body
can recuperate from the stress of the journey. Please consult your doctor,
who can evaluate your specific condition. 73Seats and headrests
Page 85 of 216
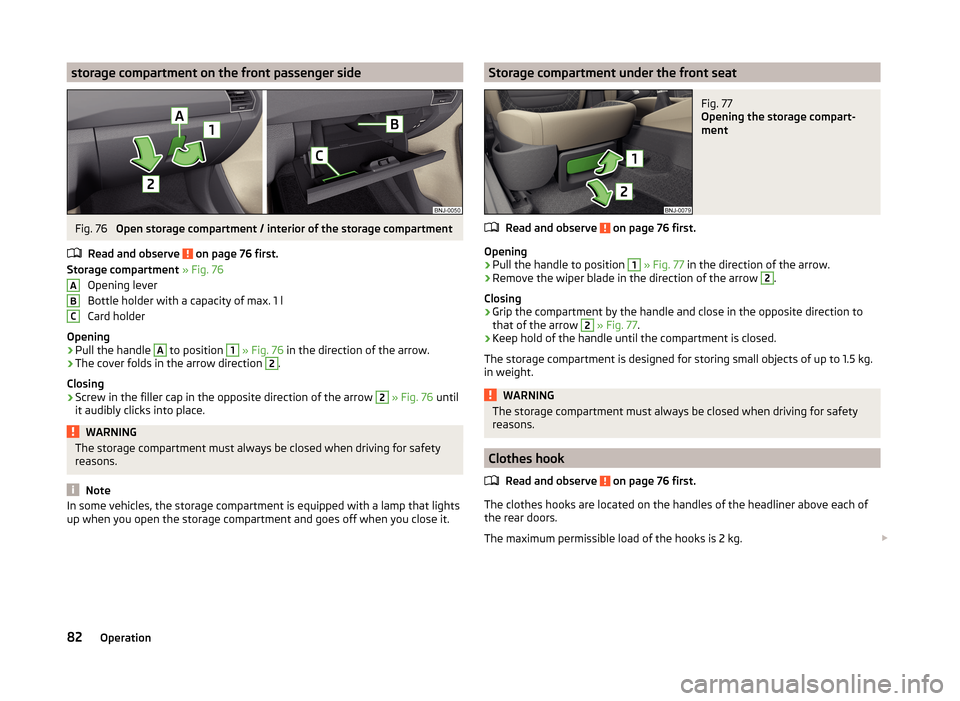
storage compartment on the front passenger sideFig. 76
Open storage compartment / interior of the storage compartment
Read and observe
on page 76 first.
Storage compartment » Fig. 76
Opening lever
Bottle holder with a capacity of max. 1 l
Card holder
Opening
›
Pull the handle
A
to position
1
» Fig. 76 in the direction of the arrow.
›
The cover folds in the arrow direction
2
.
Closing
›
Screw in the filler cap in the opposite direction of the arrow
2
» Fig. 76 until
it audibly clicks into place.
WARNINGThe storage compartment must always be closed when driving for safety
reasons.
Note
In some vehicles, the storage compartment is equipped with a lamp that lights
up when you open the storage compartment and goes off when you close it.ABCStorage compartment under the front seatFig. 77
Opening the storage compart-
ment
Read and observe on page 76 first.
Opening
›
Pull the handle to position
1
» Fig. 77 in the direction of the arrow.
›
Remove the wiper blade in the direction of the arrow
2
.
Closing
›
Grip the compartment by the handle and close in the opposite direction to
that of the arrow
2
» Fig. 77 .
›
Keep hold of the handle until the compartment is closed.
The storage compartment is designed for storing small objects of up to 1.5 kg.
in weight.
WARNINGThe storage compartment must always be closed when driving for safety
reasons.
Clothes hook
Read and observe
on page 76 first.
The clothes hooks are located on the handles of the headliner above each of
the rear doors.
The maximum permissible load of the hooks is 2 kg.
82Operation
Page 112 of 216

WARNINGPlease note that the handbrake must be fully released. A handbrake which
is only partially released can result in the rear brakes overheating. This can
have a negative effect on the operation of the brake system – risk of acci-
dent!
Parking
Read and observe
and on page 107 first.
When stopping and parking, look for a place with a suitable surface » .
Only carry out the activities while parking in the specified order.
›
Bring the vehicle to a stop and depress the brake pedal.
›
Firmly apply the handbrake.
›
On vehicles with Automatic transmission , place the selector lever in the P
position.
›
Switch off the engine.
›
For vehicles with manual transmission , engage the first gear or reverse gear.
›
Release the brake pedal.
WARNINGThe parts of the exhaust system can become very hot. Therefore, never
stop the vehicle at places where the underside of your vehicle can come in-
to contact with flammable materials such as dry grass, undergrowth,
leaves, spilled fuel or such like. - Risk of fire and serious injury can occur!
Manual gear shifting and pedals
Introduction
This chapter contains information on the following subjects:
Manual gear changing
109
Pedals
110Manual gear changingFig. 109
Shift pattern of the transmission Version 1/version 2
The individual gear positions are shown on the gear shift » Fig. 109.
The gearshift indicator must be observed when changing gear » page 44.
Always depress the clutch pedal all the way down. This prevents uneven wear
on the clutch.
Engage reverse gear - Version 1
›
Stop the vehicle.
›
The clutch pedal must be fully depressed.
›
Move the shift lever to the idle position, switch and press down.
›
Move the shift lever fully to the left and then forward into the Rposition
» Fig. 109 .
Engage reverse gear - Version 2
›
Stop the vehicle.
›
The clutch pedal must be fully depressed.
›
Move the shift lever to the idle position, switch and press down.
›
Move the shift lever fully to the right and then backwards to position R.
The reversing lights will come on once reverse gear is engaged, provided the
ignition is on.
WARNINGNever engage reverse gear when driving – risk of accident! 109Starting-off and driving
Page 121 of 216
Acoustic signals and display
The interval between the acoustic signals becomes shorter as the clearance is
reduced. A continuous tone sounds from a distance of approx. 30 cm - danger
area. From this moment on do not continue driving!
For information on setting the acoustic signals and a description of the Info-
tainment display, see » Infotainment manual , chapter Vehicle settings (button
CAR) .
Towing a trailer
On vehicles equipped with a factory-fitted towing device, only system areas A
and
B
» Fig. 114 are active when towing a trailer.
Note
The signal tones for front obstacle recognition are factory-set to be higher
than for rear obstacle recognition.
Activation/deactivation
Read and observe
and on page 117 first.
The system is automatically activated by selecting reverse gear or pressing
the symbol button
» Fig. 114 on page 117 .
This is confirmed by a short acoustic signal (the symbol in the button lights
up).
On vehicles with Version 1, the system can be deactivated by moving out of re-
verse gear.
For vehicles with Version 2, the system is deactivated by pressing the symbol
button or automatically at a speed over 10 km/h (the symbol
in the but-
ton goes out).
Displaying an error
If a warning signal sounds for about 3 seconds after activating the system and
there is no obstacle close to your car, this indicates a system fault. The fault is
also indicated by the symbol flashing in the button. Seek help from a spe-
cialist garage.
Note
The system can only be activated via the symbol button at a speed of below
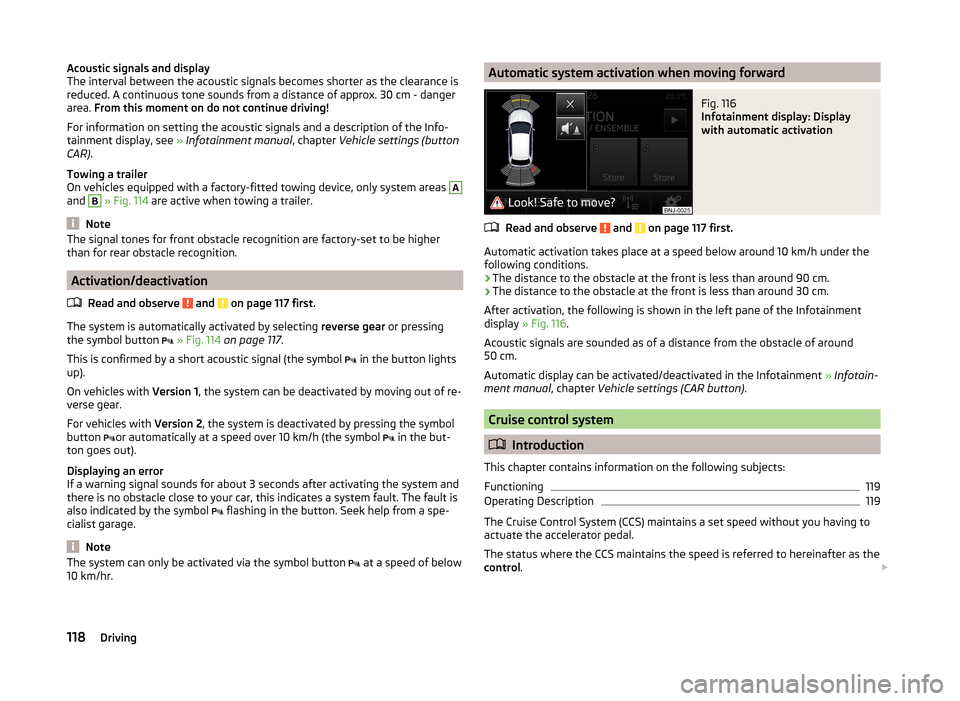
10 km/hr.Automatic system activation when moving forwardFig. 116
Infotainment display: Display
with automatic activation
Read and observe and on page 117 first.
Automatic activation takes place at a speed below around 10 km/h under the following conditions.
› The distance to the obstacle at the front is less than around 90 cm.
› The distance to the obstacle at the front is less than around 30 cm.
After activation, the following is shown in the left pane of the Infotainment
display » Fig. 116 .
Acoustic signals are sounded as of a distance from the obstacle of around
50 cm.
Automatic display can be activated/deactivated in the Infotainment » Infotain-
ment manual , chapter Vehicle settings (CAR button) .
Cruise control system
Introduction
This chapter contains information on the following subjects:
Functioning
119
Operating Description
119
The Cruise Control System (CCS) maintains a set speed without you having to
actuate the accelerator pedal.
The status where the CCS maintains the speed is referred to hereinafter as the
control .
118Driving
Page 137 of 216

Distance of the load center of gravityfrom the ball headPermissible total weight of the ac-cessories, including load0 cm50 kg30 cm50 kg60 cm25 kg70 cm0 kgWARNING■Never exceed the permissible gross weight of the accessory including
load - there is a risk of damaging the ball head of the towing device.■
Never exceed the permissible protrusion of the ball head including towing
device - there is a risk of damaging the ball head of the towing device.
Note
We recommend that you use the accessories from ŠKODA Original Accessories.
Trailer
Introduction
This chapter contains information on the following subjects:
Trailer, connect and disconnect
134
Loading a trailer
135
Towing a trailer
135
Anti-theft alarm system
136
If your vehicle has already been factory-fitted with towing equipment or is fit-
ted with towing equipment from ŠKODA Original Accessories, then it meets all
of the technical requirements and national legal provisions for towing a trailer.
Note
If there is an error in the trailer lighting system, check the fuses in the fuse box
in the dashboard » page 183.Trailer, connect and disconnectFig. 141
13-pin socket, and safety eye
Coupling
›
Fit the ball rod.
›
Lift off protective cap
3
» Fig. 129 on page 129 upwards.
›
Place the trailer onto the ball head.
›
Insert the trailer cable into the 13-pin socket
A
» Fig. 141.
If the trailer that is to be towed has a 7-pin connector, you can make an elec-
trical connection using a suitable adapter from ŠKODA Original Accessories.
›
Hook the breakaway cable of the trailer to the security lock slot
B
.
The breakaway cable of the trailer has to sag when mounted into the security
lock slot for all trailer positions relative to the vehicle (sharp curves, reverse
driving and the like.)
Detaching
›
Unhook the breakaway cable of the trailer from the securing eyelet
B
» Fig. 141 .
›
Pull the trailer cable out of the 13-pin socket.
›
Remove the trailer from the ball head.
›
Place cap
3
onto the ball head » Fig. 129 on page 129 .
Exterior mirrors
You have to have additional exterior mirrors fitted if you are not able to see
the traffic behind the trailer with the standard rear-view mirrors. National legal
requirements must be observed.
Headlights
The front of the vehicle can be lifted when a trailer is being towed and the
headlights can dazzle other road users.
Adjust the headlight setting on the headlight range control » page 60, Operat-
ing the lights .
134Driving