Rear lights SKODA FABIA 2014 3.G / NJ Owner's Guide
[x] Cancel search | Manufacturer: SKODA, Model Year: 2014, Model line: FABIA, Model: SKODA FABIA 2014 3.G / NJPages: 216, PDF Size: 30.7 MB
Page 138 of 216
Power to the trailer power grid
For the electrical connection between the vehicle and trailer, the power for the
trailer power grid is supplied by the vehicle.
The power supply works with ignition on or off.WARNING■ Incorrect or improperly connected electrical installation can cause acci-
dents and serious injury due to electric shock.■
Work on the electrical system must only be carried out by specialist ga-
rages.
■
Never directly connect the trailer's electrical system with the electrical
connections for the tail lights or other current sources.
■
After coupling the trailer and connecting up the power socket, check the
rear lights on the trailer to ensure they work correctly.
■
The handbrake on the vehicle must be applied when coupling and uncou-
pling the trailer.
■
Never use the safety eyelet for towing!
CAUTION
Incorrect or improperly connected electrical installations may cause malfunc-
tion of the entire vehicle electronics.
Loading a trailer
The vehicle/trailer combination must be balanced, whereby the maximum per-
missible drawbar load must be utilised. If the drawbar load is too low, it jeop-
ardises the performance of the vehicle/trailer combination.
Distribution of the load
Distribute the load in the trailer in such a way that heavy items are located as
close to the trailer axle as possible. Secure the items from slipping.
The distribution of the weight is very poor if your vehicle is unladen and the
trailer is laden. Maintain a particularly low speed if you cannot avoid driving
with this combination.
Tyre pressure
Correct the tyre inflation pressure on your vehicle for a “full load” » page 162.
Towing capacity and trailer weight
The permissible trailer load must not be exceeded under any circumstances
» page 194 , Technical data .
The details given in the vehicle's technical documentation always take prece-
dence over the details in the Owner's Manual.
The trailer loads specified apply only to altitudes up to 1,000 metres above
mean sea level.
The engine output falls as altitude increases, as does the ability to climb.
Therefore, for every additional 1,000 m in height (or part), the maximum per-
missible towed weight must be reduced by 10 %.
The towed weight comprises the actual weights of the (loaded) towing vehicle
and the (loaded) trailer.
The trailer and drawbar load information on the type plate of the towing
equipment are merely test data for the towing equipment. The vehicle-specific
values are detailed in the vehicle documents.WARNING■ Do not exceed the maximum permissible axle and drawbar load and
weight of the trailer - risk of accident and serious injuries!■
An unsecured load can adversely affect stability and driving safety signifi-
cantly - there is a risk of accident!
Towing a trailer
Driving speed
For safety reasons, do not drive faster than 80 km/h when towing a trailer.
Immediately reduce your speed as soon as even the slightest swaying of the
trailer is detected. Never attempt to stop the trailer from “swaying” by acceler-
ating.
Brakes
Apply the brakes in good time! If the trailer is fitted with a trailer brake, apply
the brakes gently at first, then brake firmly. This will avoid brake jolts resulting
from the trailer wheels locking.
On downhill sections shift down a gear in good time to also use the engine as
a brake.
Engine overheating
If the pointer of the coolant temperature gauge reaches the red scale range,
the speed should be reduced immediately.
Stop and switch off the engine if the warning light illuminates in the instru-
ment cluster display.
135Hitch and trailer
Page 139 of 216
The following information must be observed » page 40, Coolant .
The coolant temperature can be reduced by switching on the heating.WARNING■ Always drive particularly carefully with the trailer.■Adapt your speed to the conditions of the road surface and to the traffic
situation.
CAUTION
If you tow a trailer frequently, you should also have your vehicle inspected be-
tween service intervals.
Anti-theft alarm system
When the vehicle is locked, the alarm is activated when the electrical connec-
tion to the trailer is interrupted.
Always switch off the anti-theft alarm system before a trailer is coupled or un-
coupled » page 54 .
Conditions for including a trailer in the anti-theft alarm system. The vehicle is factory-fitted with an anti-theft alarm system and towing
equipment.
The trailer is electrically connected to the towing vehicle by means of the
trailer socket.
The electrical system of the vehicle and trailer is functional.
The vehicle is locked with the vehicle key and the anti-theft alarm system
is activated.
CAUTION
For technical reasons, trailers with rear LED lights cannot be connected to the
anti-theft alarm system.136Driving
Page 156 of 216
Radiator fanRead and observe
and on page 151 first.
The radiator fan is powered by an electric motor. Operation is controlled ac-
cording to the temperature of the coolant.
WARNINGThe fan can intermittently continue to run for approximately 10 minutes af-
ter the ignition is switched off.
Windscreen washer system
Fig. 146
Windscreen washer fluid reser-
voir
Read and observe and on page 151 first.
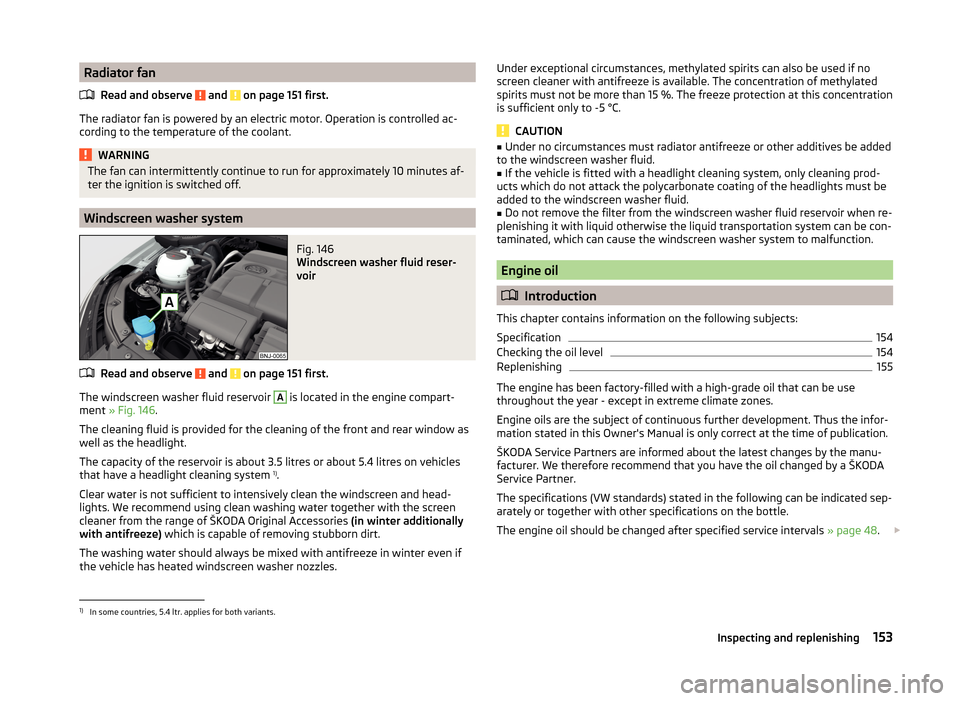
The windscreen washer fluid reservoir
A
is located in the engine compart-
ment » Fig. 146 .
The cleaning fluid is provided for the cleaning of the front and rear window as
well as the headlight.
The capacity of the reservoir is about 3.5 litres or about 5.4 litres on vehicles
that have a headlight cleaning system 1)
.
Clear water is not sufficient to intensively clean the windscreen and head-
lights. We recommend using clean washing water together with the screen
cleaner from the range of ŠKODA Original Accessories (in winter additionally
with antifreeze) which is capable of removing stubborn dirt.
The washing water should always be mixed with antifreeze in winter even if
the vehicle has heated windscreen washer nozzles.
Under exceptional circumstances, methylated spirits can also be used if no
screen cleaner with antifreeze is available. The concentration of methylated
spirits must not be more than 15 %. The freeze protection at this concentration
is sufficient only to -5 °C.
CAUTION
■ Under no circumstances must radiator antifreeze or other additives be added
to the windscreen washer fluid.■
If the vehicle is fitted with a headlight cleaning system, only cleaning prod-
ucts which do not attack the polycarbonate coating of the headlights must be
added to the windscreen washer fluid.
■
Do not remove the filter from the windscreen washer fluid reservoir when re-
plenishing it with liquid otherwise the liquid transportation system can be con-
taminated, which can cause the windscreen washer system to malfunction.
Engine oil
Introduction
This chapter contains information on the following subjects:
Specification
154
Checking the oil level
154
Replenishing
155
The engine has been factory-filled with a high-grade oil that can be use
throughout the year - except in extreme climate zones.
Engine oils are the subject of continuous further development. Thus the infor-
mation stated in this Owner's Manual is only correct at the time of publication.
ŠKODA Service Partners are informed about the latest changes by the manu-
facturer. We therefore recommend that you have the oil changed by a ŠKODA
Service Partner.
The specifications (VW standards) stated in the following can be indicated sep-
arately or together with other specifications on the bottle.
The engine oil should be changed after specified service intervals » page 48.
1)
In some countries, 5.4 ltr. applies for both variants.
153Inspecting and replenishing
Page 180 of 216

›If the engine does not start, halt the attempt to start the engine after 10 sec-
onds and wait for 30 seconds before repeating the process.›
Detach the jumper cables in the exact reverse order that they were attached.
Both batteries must have a rated voltage of 12 V. The capacity (Ah) of the bat-
tery supplying the power must not be significantly less than the capacity of
the discharged battery in your vehicle.
Jump-start cables
Only use jump-start cables which have an adequately large cross-section and
insulated terminal clamps. Obey the instructions of the jump start cable manu-
facturer.
Positive cable - colour coding in the majority of cases is red.
Negative cable - colour coding in the majority of cases is black.
WARNING■
Do not clamp the jump-start cable to the negative terminal of the dis-
charged battery. There is the risk of detonating gas seeping out the battery
being ignited by the strong spark which results from the engine being star-
ted.■
The non-insulated parts of the terminal clamps must never touch each
other – risk of short circuit.
■
The jump-start cable connected to the positive terminal of the battery
must not come into contact with electrically conducting parts of the vehicle
– risk of short circuit.
■
Route the jump-start cables so that they cannot be caught by any rotat-
ing parts in the engine compartment.
■
There must not be any contact between the two vehicles otherwise cur-
rent may flow as soon as the negative terminals are connected.
Towing the vehicle
Introduction
Fig. 168
Braided tow ropes/spiral tow rope
This chapter contains information on the following subjects:
Front towing eye
178
Rear towing eye
179
Vehicles with a tow hitch
179
A braided tow rope must be used for towing » Fig. 168 -
.
The following guidelines must be observed when towing.
Vehicles with manual transmission may be towed with a tow bar or a tow rope
or with the front or rear wheels raised.
Vehicles with automatic transmission may be towed with a tow bar or a tow
rope or with the front wheels raised. If the vehicle is raised at rear, the auto-
matic gearbox is damaged!
Driver of the tow vehicle
›
Engage the clutch gently when starting off or depress the accelerator partic-
ularly gently if the vehicle is fitted with an automatic gearbox.
›
Only then, approach correctly when the rope is taut.
The maximum towing speed is 50 km/h.
Driver of the towed vehicle
›
Switch on the ignition so that the steering wheel is not locked and so that
the turn signal lights, windscreen wipers and windscreen washer system can
be used.
177Emergency equipment, and self-help
Page 189 of 216
Replacing bulbs
Introduction
This chapter contains information on the following subjects:
Bulb arrangement in the headlights
186
Removing and installing the cover in the front wheel arch
187
Fitting and removing the wash water container nozzle
187
Replacing the low beam and high beam bulb (halogen headlights)
188
Change bulb for turn signal switch (halogen headlight)
188
Replacing the parking light bulb (halogen headlights)
188
Changing bulb for daytime running lights switch (halogen headlight)
189
Replacing the high beam bulb (halogen projector headlights)
189
Replacing the high beam bulb (halogen projector headlights)
190
Replacing the turn signal switch bulb (halogen projector headlights)
190
Replacing the bulb for the fog light
191
Changing the licence plate light bulb
191
Rear Light
192
Replacing bulbs in rear light
192
Some manual skills are required to change a bulb. For this reason, if uncertain,
we recommend that bulbs are replaced by a specialist garage or other expert
help is sought.
› Switch off the ignition and all of the lights before replacing a bulb.
› Faulty bulbs must only be replaced with the same type of bulbs. The designa-
tion is located on the light socket or the glass bulb.
› A stowage compartment for replacement bulbs is located in a plastic box in
the spare wheel or underneath the floor covering in the boot.
WARNING■ Always read and observe the warnings before completing any work in the
engine compartment » page 150.■
Accidents can be caused if the road in front of the vehicle is not suffi-
ciently illuminated and the vehicle cannot or can only be seen with difficul-
ty by other road users.
■
Bulbs H8, H7 and H4 are pressurised and may burst when changed - there
is a risk of injury! We therefore recommended wearing gloves and safety
glasses when changing a bulb.
■
Switch off the respective vehicle light when changing the bulb.
CAUTIONDo not take hold of the glass bulb with naked fingers (even the smallest
amount of dirt reduces the working life of the light bulb). Use a clean cloth,
napkin, or similar.
Note
■ This Owner's Manual only describes the replacement of bulbs where it is pos-
sible to replace the bulbs on your own without any complications arising. Other
light bulbs should be changed by your specialist garage.■
We recommend that you always carry a box of replacement bulbs in the vehi-
cle. Replacement bulbs can be purchased from ŠKODAOriginal Accessories.
■
We recommend having the headlight settings checked by a specialist garage
after replacing a bulb in the main beam, low beam or fog lights.
■
Visit a specialist garage if an LED is faulty.
Bulb arrangement in the headlights
Fig. 182
Principle sketch: Halogen headlights/halogen projector head-
lights
Read and observe
and on page 186 first.
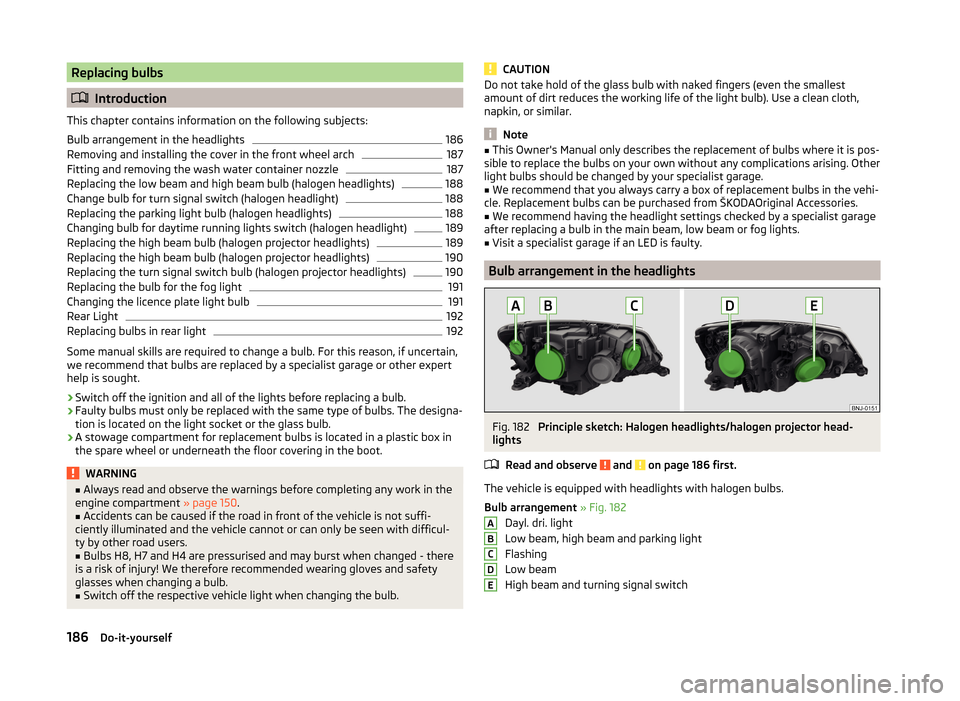
The vehicle is equipped with headlights with halogen bulbs.
Bulb arrangement » Fig. 182
Dayl. dri. light
Low beam, high beam and parking light
Flashing
Low beam
High beam and turning signal switch
ABCDE186Do-it-yourself
Page 206 of 216
Cleaning the vehicle exteriorCavity protection144
Door locking cylinder144
Headlight glasses144
Towing device145
Under-body protection145
wheels144
Windows and external mirrors143
Cleaning vehicle140
Cleaning vehicle exterior141
Plastic parts142
Rubber seals143
Vehicle paint work142
Wiper blades145
Clean interior Safety belt
147
clean outside of vehicle chrome parts
143
Climatronic Operating elements
98
Recirculated air mode96
Clothes hook82
Cockpit 12-volt power outlet
79
Ashtray79
Cigarette lighter78
General view28
Lighting65
Storage compartments76
useful equipment76
COMING HOME63
compartments76
Component protection139
Components of the puncture repair kit174
Computer see multifunction display
45
Convenience turn signal62
Coolant155
Checking156
Indicator symbol40
Information messages40
Replenishing156
Temperature gauge31
Cooling system cost-effective use
99
Malfunctions100
CORNER See Fog lights with CORNER function
63
Correct seated position9
Driver9
Front passenger10
Notes11
Rear seats11
Counter for distance driven32
cruise control operation
119
operation description119
Cruise control system118
Cup holders78
D
DAY LIGHT see Daylight running lights
61
Daylight running lights61
Dazzle see sun screen of the panoramic roof
67
De-icing windows
143
De-icing rear window66
Deactivating airbags20
Decorative films143
Delayed locking of the boot lid see boot lid
56
Departure angle197
Diesel refer to Fuel
150
Diesel fuel Operation in winter
150
Diesel particulate filter41
information messages41
Digital Clock Time
33
Dipstick154
Display31
Coolant temperature31
Fuel supply32
Gear changes44
Service interval48
Disposal Acceptance and recycling of used vehicles
140
Distance driven32
Distance warning Warning symbol
42
Door Child safety lock
54
Closing51
Emergency locking180
Emergency locking the driver's door180
Opening51
Door warning44
driving emissions
195
fuel consumption195
Driving Driving through water
113
Maximum speed198
off made-up roads113
Driving in Brake linings
113
the engine113
Tyres113
Driving off made-up roads113
Driving through water113
E
Economical driving Tips
113
203Index
Page 207 of 216
EDL116
Electrical power windows Button in the rear doors
58
Electric power windows Operational faults
58
Electronic Differential Lock (EDL)116
Electronic immobilizer103
Electronic Stability Control (ESC)115
Emergency Changing a wheel
170
Hazard warning light system64
Jump-starting176
Locking the door without a locking cylinder180
Locking the driver's door180
Selector lever-unlocking181
Switch off the engine by pressing a button106
Towing the vehicle177
Towing the vehicle using the tow hitch179
Tyre repair173
Unlocking the driver's door180
Unlocking the tailgate181
Emergency equipment Fire extinguisher
168
First aid kit167
Jack168
Reflective Vest167
Vehicle tool kit168
Warning triangle167
emergency wheel169
Emissions195
Engine Starting the engine
106
Engine compartment150
Brake fluid157
Overview152
Vehicle battery157
Engine number194
engine oil specification
154
Engine oil153
change153
Checking154
Replenishing155
Warning icon40
EPC Warning light
36
ESC Function
115
Indicator light35
Exhaust inspection system Warning light
36
F
Fastening elements
85
Fatigue detection126
Function126
Information messages127
Films143
Fire extinguisher168
First aid kit167
Flexible storage compartment89
Fog lights63
Warning light38
Fog lights with CORNER function63
Fold variable loading floor up
91
Footmats110
see Footmats110
Force limitation Power windows
58
Front airbag17
Front Assistant121
Activating/deactivating123
Information messages124
Operation122
Radar sensor122
Warning symbol42
fuel lead-free petrol149
Fuel148
Diesel150
Fuel gauge32
Indicator light37
refer to Fuel148
Refuelling148
fuel consumption195
Fuel reserve Indicator light
37
Fuses Assignment
182
Assignment of fuses in the dash panel183
Changing182
Colour coding182
Fuse assignment in the engine compartment185
Fuses in the engine compartment Assignment
185
G
Gear change Gear recommendation
44
Information on the selected gear44
Gear changing Gear stick
109
gears spare
169
General view Cockpit
28
Genuine parts138
Glasses compartment81
Glow plug system Warning light
36
H
Handbrake
108
Warning light34
Hazard warning light system64
204Index
Page 208 of 216
HBA116
Head airbag19
Headlight cleaning system Headlight cleaning system
69
Headlights Bulb arrangement
186
Driving abroad65
Headlight cleaning system69
Headrests72
Adjust height72
Headrest, removing and installing
73
heater Rear window
66
Heater Recirculated air mode
96
Heating95
Control elements97
Exterior mirrors70
Seats73
HHC116
Hill Hold Control (HHC)116
Hitch129
Drawback load129
Hooks86
Horn28
Hydraulic Brake Assist (HBA)116
I
Ice scrapers
143
Ignition lock104
Immobilizer103
Individual settings Locking
53
Unlocking53
Inertia reel15
Information system43
Door warning44
Gear recommendation44
MAXI DOT display45
Multifunction display45
Operation43
Outside temperature44
Service interval display48
Infotainment4
Instrument cluster29
Auto-check control44
Counter for distance driven32
Display31
Fuel gauge32
Overview30
Revolution counter30
Speedometer31
Temperature gauge31
Viewing the charge level of the vehicle battery 33
Warning icons
38
Warning lights33
Interior care145
Natural leather146
interior light Front
65
Interior monitor55
ISOFIX25
J
Jack
168
Maintenance144
Jacking points Raise vehicle
172
Jump-starting176
K
KESSY Locking
52
Unlocking52
Key Locking
50
Start the engine104
Stopping the engine104
Switch off the ignition104
Switch on the ignition104
Unlocking50
Keys in the door Power windows
56
L
Lamp failure Indicator symbol
41
Lamps Indicator symbol
41
Leather Natural leather care
146
LEAVING HOME63
Lever Main beam
62
Turn signal62
Levers Windscreen wipers
68
Light Cockpit
65
COMING HOME / LEAVING HOME63
Fog lights with CORNER function63
Lighting Luggage compartment
84
Lights60
Automatic driving lamp control62
Daylight running61
Fog lights63
Hazard warning light system64
Headlight flasher62
Headlight range adjustment60
Low beam60
Main beam62
parking lights60
Parking lights65
Rear fog light63
Replacing bulbs186
Switching on and off60
205Index
Page 210 of 216
Passive safetyBefore every journey8
Driving safety8
Safety equipment8
Passive Safety8
Payload195
Pedals110
Footmats110
Petrol see fuel
149
Phone see Infotainment
4
Plastic parts142
Pockets on the front seat rests83
Polishing vehicle paint work see vehicle care
142
Power Steering Warning light
34
Power windows56
Button in the driver's door57
Button in the front passenger door58
Force limitation58
Practical equipment Net pockets on the front seat rests
83
Reflective Vest167
Practical features Storage pockets on the front seats
83
Waste container80
R
Radiator fan
153
Radio see Infotainment
4
Raise vehicle172
Rear interior light
66
Rear-view mirror Exterior mirrors
70
Rear fog light63
Warning light36
Rear mirror69
Interior mirror70
Rear window - heater66
Recirculated air mode96
Refuelling148
Fuel148
Remote control Locking
50
Replacing the battery179
Synchronisation process180
Unlocking50
Remote control key Replacing the battery
179
Removing the bar ball, Step 1
132
bar ball, Step 2133
Repairs and technical alterations137
Replacing Bulb for the fog light
191
Bulb in rear light192
Bulbs186
High beam bulb (halogen projector headlights) 189, 190
Low beam and high beam bulb (halogen head- lights)
188
parking light bulb188
Rear window wiper blade182
turn signal switch bulb (halogen projector headlights)
190
Vehicle battery160
windscreen wiper blades181
Replenishing Coolant
156
Engine oil155
Windscreen washer fluid153
Retraction and economical driving112
Revolution counter30
Rims161
Roller blind Luggage compartment cover88
Roof Load
94
Roof rack93
mounting points94
Roof load94
Rubber seals143
S
SAFE see SafeLock
52
SafeLock52
SAFELOCK see SafeLock
52
Safety8
Child safety22
Child safety seats22
Correct seated position9
Headrests72
ISOFIX25
TOP TETHER26
Save electrical energy113
Save fuel113
Seals Vehicle care
143
Seat Adjusting
72
Seat belt Warning icon
39
Warning light34
Seat belts12
Belt tensioners15
fastening and unfastening14
Height adjustment15
Seatbelts Inertia reels
15
Seat belts The physical principle of a frontal collision
13
207Index
Page 211 of 216
Seat features73
Seats Armrest
74
Headrests72
Heating73
Rear seat75
Seat backrests74
Seats and headrest71
Secure variable loading floor
91
see Automatic gearbox Manual gear shifting on the multifunction steering wheel
112
see Instrument cluster see Instrument cluster
29
Selector lever Refer to Selector lever
111
Selector lever lock Indicator light
38
Service138
Service interval display48
setting Lower position of the variable loading floor
90
Setting33
seats and headrests71
Upper position of the variable loading floor89
Setting the33
Side airbag18
SmartGate connection
101
Password101
Settings101
Smart Gate Website
101
Snow chains165
Sockets 12 V
79
Spare change
169
spare wheel169
change169
instructions169
Speed controller Indicator light
38
Speed Limiter120
Operation120
Operation description121
Speed Limiter Indicator light
38
Speedometer31
See speedometer31
Speed symbol see Wheels
164
Spoiler139
Staring engine Jump-starting
176
START-STOP124
Jump-starting176
Operating conditions for the system124
operation in vehicles with automatic gearbox125
operation in vehicles with manual gearbox125
system-related automatic start-up126
Warning icon42
START-STOPP Manually deactivating/activating the system
126
Starter button Loc / unlock k the steering lock
105
Problems with the engine start107
Start or stop the engine by pressing a button105
Switching off the engine106
Switch off the ignition106
Switch on the ignition106
Starting and stopping the engine using the key 103
Starting engine Jump-starting
176
Starting the engine Starter button
106
Start or stop the engine by pressing a button105
START STOP Information messages126
Start the engine Key
104
Steering lock (engine start push-button) Warning light
34
Steering wheel10
Stop see Parking
109
Stopping the engine Key
104
Storage76
compartment beneath the front seat82
storage compartment Glasses compartment
81
on the front passenger side82
Storage compartment in the doors
77
in the front arm rest81
in the front centre console77
in the rear centre console84
on the dash panel78
on the side of the front seat77
Storage compartments76
Storage pockets on the front seats83
sun visors67
Sun visors67
Switching lights on and off60
Switching off the engine Starter button
106
Switch off the ignition Key
104
Starter button106
Switch on the ignition Key
104
Starter button106
T
Tailgate
55
208Index