steering wheel SKODA FABIA 2014 3.G / NJ User Guide
[x] Cancel search | Manufacturer: SKODA, Model Year: 2014, Model line: FABIA, Model: SKODA FABIA 2014 3.G / NJPages: 216, PDF Size: 30.7 MB
Page 46 of 216
Information system
Driver information system
Introduction
This chapter contains information on the following subjects:
Using the information system
43
Outside temperature
44
Gear recommendation
44
Door, luggage compartment or bonnet warning
44
Auto-check control
44
MAXI DOT display
45
The information system provides the driver with alerts and messages about in-
dividual vehicle systems.
These alerts and messages appear in display
2
of the instrument cluster
» Fig. 20 on page 30 or » Fig. 21 on page 30 (hereafter only in the display).
The information system provides the following information and instructions
(depending on vehicle equipment).
› Driving data (multifunction display)
» page 45.
› Data relating to the Maxi DOT display
» page 45.
› Service interval display
» page 48.
› Fatigue detection
» page 126.
› Selector lever positions for an automatic transmission
» page 111.
› Information and alerts in the Assist systems
» page 115.
WARNINGConcentrate fully at all times on your driving! As the driver you are fully re-
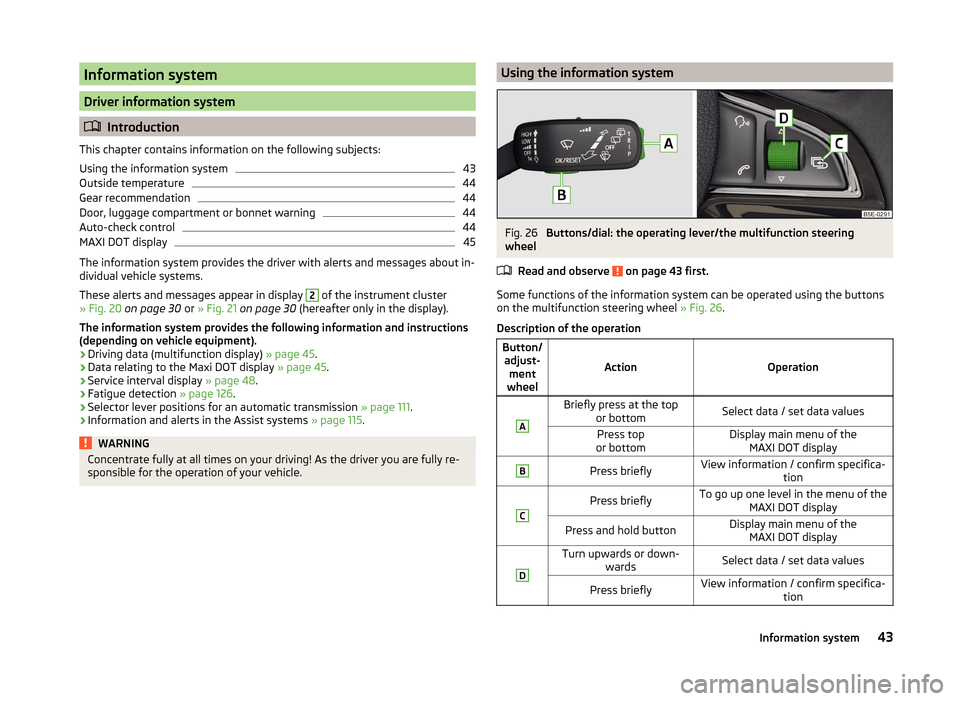
sponsible for the operation of your vehicle.Using the information systemFig. 26
Buttons/dial: the operating lever/the multifunction steering
wheel
Read and observe
on page 43 first.
Some functions of the information system can be operated using the buttons
on the multifunction steering wheel » Fig. 26.
Description of the operation
Button/ adjust- ment
wheel
ActionOperation
ABriefly press at the top or bottomSelect data / set data valuesPress top
or bottomDisplay main menu of the MAXI DOT displayBPress brieflyView information / confirm specifica- tionCPress brieflyTo go up one level in the menu of theMAXI DOT displayPress and hold buttonDisplay main menu of theMAXI DOT displayDTurn upwards or down- wardsSelect data / set data valuesPress brieflyView information / confirm specifica- tion43Information system
Page 64 of 216
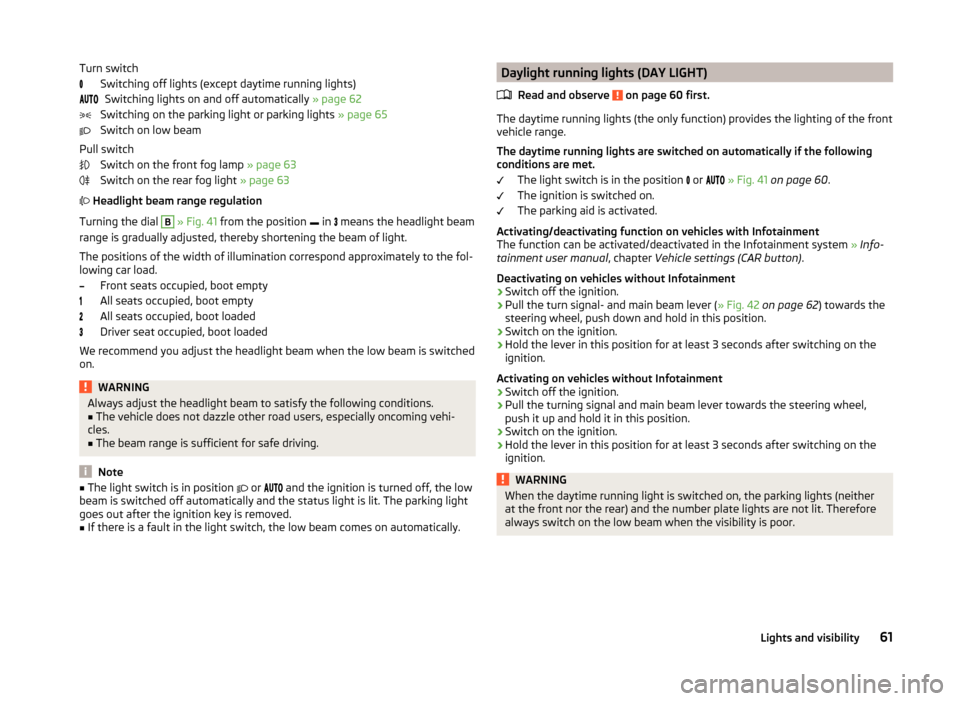
Turn switchSwitching off lights (except daytime running lights)Switching lights on and off automatically » page 62
Switching on the parking light or parking lights » page 65
Switch on low beam
Pull switch Switch on the front fog lamp » page 63
Switch on the rear fog light » page 63
Headlight beam range regulation
Turning the dial B
» Fig. 41 from the position
in
means the headlight beam
range is gradually adjusted, thereby shortening the beam of light.
The positions of the width of illumination correspond approximately to the fol-
lowing car load.
Front seats occupied, boot empty
All seats occupied, boot empty
All seats occupied, boot loaded
Driver seat occupied, boot loaded
We recommend you adjust the headlight beam when the low beam is switched
on.
WARNINGAlways adjust the headlight beam to satisfy the following conditions.■The vehicle does not dazzle other road users, especially oncoming vehi-
cles.■
The beam range is sufficient for safe driving.
Note
■ The light switch is in position or and the ignition is turned off, the low
beam is switched off automatically and the status light is lit. The parking light
goes out after the ignition key is removed.■
If there is a fault in the light switch, the low beam comes on automatically.
Daylight running lights (DAY LIGHT)
Read and observe
on page 60 first.
The daytime running lights (the only function) provides the lighting of the frontvehicle range.
The daytime running lights are switched on automatically if the following
conditions are met.
The light switch is in the position
or
» Fig. 41 on page 60 .
The ignition is switched on.
The parking aid is activated.
Activating/deactivating function on vehicles with Infotainment
The function can be activated/deactivated in the Infotainment system » Info-
tainment user manual , chapter Vehicle settings (CAR button) .
Deactivating on vehicles without Infotainment
›
Switch off the ignition.
›
Pull the turn signal- and main beam lever ( » Fig. 42 on page 62 ) towards the
steering wheel, push down and hold in this position.
›
Switch on the ignition.
›
Hold the lever in this position for at least 3 seconds after switching on the
ignition.
Activating on vehicles without Infotainment
›
Switch off the ignition.
›
Pull the turning signal and main beam lever towards the steering wheel,
push it up and hold it in this position.
›
Switch on the ignition.
›
Hold the lever in this position for at least 3 seconds after switching on the
ignition.
WARNINGWhen the daytime running light is switched on, the parking lights (neither
at the front nor the rear) and the number plate lights are not lit. Therefore
always switch on the low beam when the visibility is poor.61Lights and visibility
Page 74 of 216
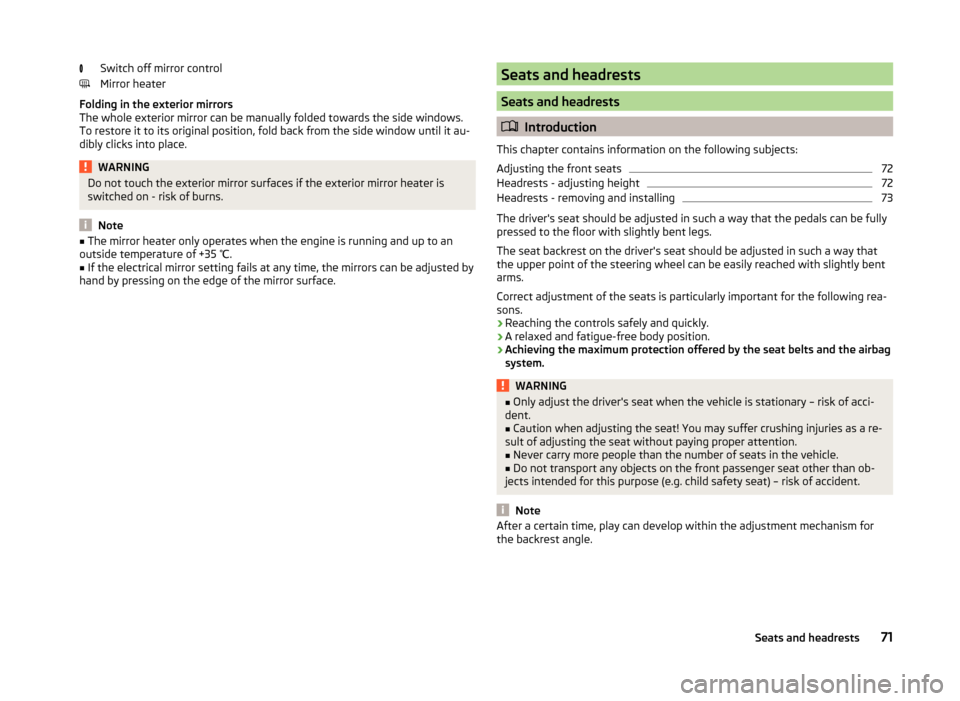
Switch off mirror control
Mirror heater
Folding in the exterior mirrors
The whole exterior mirror can be manually folded towards the side windows.
To restore it to its original position, fold back from the side window until it au-
dibly clicks into place.WARNINGDo not touch the exterior mirror surfaces if the exterior mirror heater is
switched on - risk of burns.
Note
■ The mirror heater only operates when the engine is running and up to an
outside temperature of +35 ℃.■
If the electrical mirror setting fails at any time, the mirrors can be adjusted by
hand by pressing on the edge of the mirror surface.
Seats and headrests
Seats and headrests
Introduction
This chapter contains information on the following subjects:
Adjusting the front seats
72
Headrests - adjusting height
72
Headrests - removing and installing
73
The driver's seat should be adjusted in such a way that the pedals can be fully
pressed to the floor with slightly bent legs.
The seat backrest on the driver's seat should be adjusted in such a way that the upper point of the steering wheel can be easily reached with slightly bent
arms.
Correct adjustment of the seats is particularly important for the following rea-
sons.
› Reaching the controls safely and quickly.
› A relaxed and fatigue-free body position.
› Achieving the maximum protection offered by the seat belts and the airbag
system.
WARNING■ Only adjust the driver's seat when the vehicle is stationary – risk of acci-
dent.■
Caution when adjusting the seat! You may suffer crushing injuries as a re-
sult of adjusting the seat without paying proper attention.
■
Never carry more people than the number of seats in the vehicle.
■
Do not transport any objects on the front passenger seat other than ob-
jects intended for this purpose (e.g. child safety seat) – risk of accident.
Note
After a certain time, play can develop within the adjustment mechanism for
the backrest angle.71Seats and headrests
Page 106 of 216
Driving
Starting-off and driving
Starting and stopping the engine using the key
Introduction
This chapter contains information on the following subjects:
Electronic immobilizer
103
Lock / unlock steering lock
103
Turn ignition on / off and start the engine
104
Stopping the engine
104
With the key in the ignition, the ignition can be switched on and off and the
engine can be started / stopped.
WARNING■ While driving with the engine stopped, the ignition must always be
switched on » page 104, Turn ignition on / off and start the engine .
■ With the ignition off, the steering may lock » page 103 - danger of an
accident!■
Do not withdraw the ignition key from the ignition lock until the vehicle
has come to a stop » page 109, Parking . Otherwise the steering wheel
could lock – risk of accident.
■
Never leave the key in the vehicle when you exit the vehicle. Unauthor-
ized persons, children for example, could lock the car, turn on the ignition
or start the engine - risk of injury and accidents!
■
Never leave the vehicle unattended with the engine running - risk of acci-
dent, damage or theft!
■
Never switch off the engine before the vehicle has come to a halt – risk of
accident.
WARNING■ Never (e.g. in garages) run the engine in a closed place - risk of poisoning
and death!■
Do not leave any items (e.g. cleaning cloths or tools) in the engine com-
partment. There is a fire hazard and the risk of engine damage.
■
Never cover the engine with additional insulation material (e.g. with a
blanket) – risk of fire.
CAUTION■ Only start the engine when the engine and the vehicle are stationary - risk of
starter and engine damage!■
Do not push-start the engine – there is a risk of damaging the engine and
the catalytic converter. The battery from another vehicle can be used as a
jump-start aid » page 176.
Note
Do not warm up the engine while the vehicle is stationary. If possible, start
your journey as soon as the engine has started. Through this, the engine rea-
ches its operating temperature faster.
Electronic immobilizer
Read and observe
and on page 103 first.
The electronic immobilizer makes a possible attempted theft or unauthorizeduse of your vehicle more difficult.
An electronic chip is integrated in the head of the key. The immobilizer is deac-
tivated with the aid of this chip when the key is inserted in the ignition lock.
The electronic immobilizer is automatically activated when the ignition key is
withdrawn from the lock.
The engine will not start if an unauthorized ignition key is used.
The following message is shown in the information cluster display. Immobilizer active.
IMMOBILIZER ACTIVE
Lock / unlock steering lock
Read and observe
and on page 103 first.
The steering lock (steering lock) deters any attempted theft of your vehicle.
Locking
›
Withdraw the ignition key.
›
Turn the steering wheel to the left or right until the steering lock clicks into
place.
Unlocking
›
Insert the key into the ignition lock.
›
Switch on the ignition » page 104.
103Starting-off and driving
Page 107 of 216
The vehicle is unlocked.
If the ignition switch cannot be turned on, turn the steering wheel back and
forth slightly to unlock the steering lock.
Turn ignition on / off and start the engine
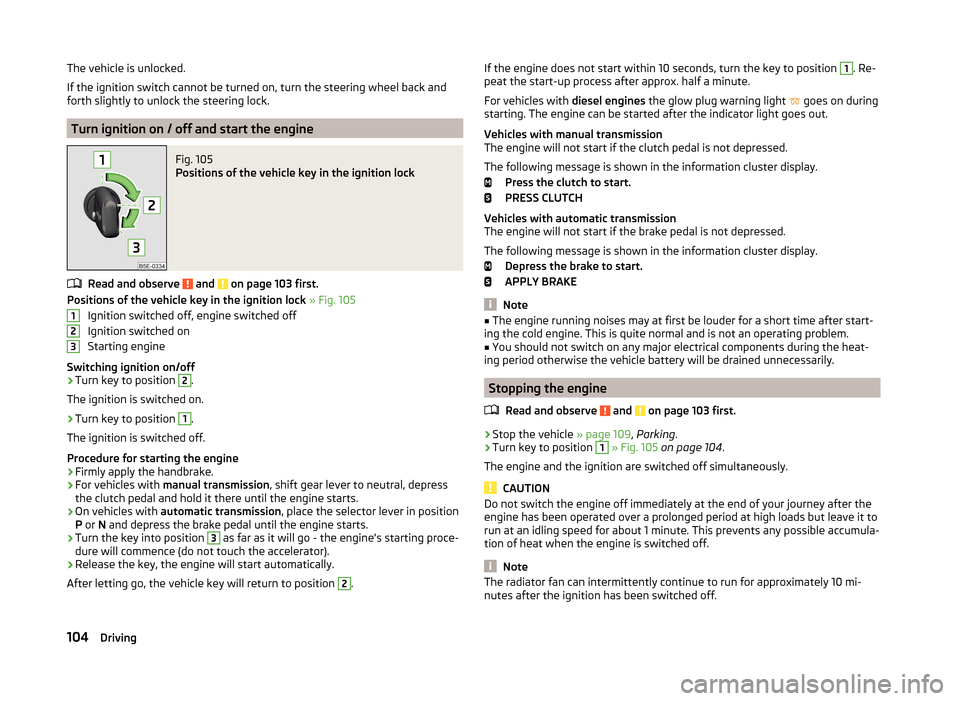
Fig. 105
Positions of the vehicle key in the ignition lock
Read and observe and on page 103 first.
Positions of the vehicle key in the ignition lock » Fig. 105
Ignition switched off, engine switched off
Ignition switched on
Starting engine
Switching ignition on/off
›
Turn key to position
2
.
The ignition is switched on.
›
Turn key to position
1
.
The ignition is switched off.
Procedure for starting the engine
›
Firmly apply the handbrake.
›
For vehicles with manual transmission , shift gear lever to neutral, depress
the clutch pedal and hold it there until the engine starts.
›
On vehicles with automatic transmission , place the selector lever in position
P or N and depress the brake pedal until the engine starts.
›
Turn the key into position
3
as far as it will go - the engine's starting proce-
dure will commence (do not touch the accelerator).
›
Release the key, the engine will start automatically.
After letting go, the vehicle key will return to position
2
.
123If the engine does not start within 10 seconds, turn the key to position 1. Re-
peat the start-up process after approx. half a minute.
For vehicles with diesel engines the glow plug warning light
goes on during
starting. The engine can be started after the indicator light goes out.
Vehicles with manual transmission
The engine will not start if the clutch pedal is not depressed.
The following message is shown in the information cluster display. Press the clutch to start.
PRESS CLUTCH
Vehicles with automatic transmission
The engine will not start if the brake pedal is not depressed.
The following message is shown in the information cluster display. Depress the brake to start.
APPLY BRAKE
Note
■ The engine running noises may at first be louder for a short time after start-
ing the cold engine. This is quite normal and is not an operating problem.■
You should not switch on any major electrical components during the heat-
ing period otherwise the vehicle battery will be drained unnecessarily.
Stopping the engine
Read and observe
and on page 103 first.
›
Stop the vehicle » page 109, Parking .
›
Turn key to position
1
» Fig. 105 on page 104 .
The engine and the ignition are switched off simultaneously.
CAUTION
Do not switch the engine off immediately at the end of your journey after the
engine has been operated over a prolonged period at high loads but leave it to
run at an idling speed for about 1 minute. This prevents any possible accumula-
tion of heat when the engine is switched off.
Note
The radiator fan can intermittently continue to run for approximately 10 mi-
nutes after the ignition has been switched off.104Driving
Page 130 of 216
The system evaluates steering behaviour and recommends a break at speeds
of 65 - 200 km/h.
The system detects a break from driving when one of the following condi-
tions is met.
› The vehicle is stopped and the ignition switched off.
› The vehicle is stopped, the seat belt removed and the driver's door opened.
› The vehicle is stopped for more than 15 minutes.
If none of these conditions are met or if the driving style is not changed, the
system recommends a driving break again after 15 minutes.
The system can be activated/deactivated in the Infotainment » operating in-
structions for Infotainment , chapter Vehicle settings (CAR button) .
Information messages
Read and observe
on page 126 first.
The icon appears and the following message for a few seconds in the display
of the instrument cluster .
Fatigue detected. Take a break!
DRIVER ALERT TAKE A BREAK
An audible signal is also emitted.
Tyre pressure monitoring
Introduction
This chapter contains information on the following subjects:
Save tyre pressure values
127
Save tyre pressure values and infotainment display
128
Save tyre pressure values by pressing a button
128
The tyre pressure monitoring function monitors (hereinafter referred to only as
a system) the tyre pressure while driving.
When changing the tyre inflation pressure, the warning light illuminates in
the instrument cluster and an audible signal is heard.
Information on the procedure for the indication of change in tyre pressure val- ues » page 37 .
The system can only function properly if the tyres have the prescribed tyre
pressure and this pressure values are stored in the system.
WARNING■ The correct tyre pressure values is always the driver's responsibility. The
tyre pressure should be checked regularly » page 162.■
The system cannot warn in case of very rapid loss of tyre pressure, e.g. in
the event of a sudden puncture.
Save tyre pressure values
Read and observe
on page 127 first.
The tyre pressure valuesare always stored in the system, if one of the follow-
ing events is present.
› Change of tyre pressure values.
› Change one or more wheels.
› Change in position of a wheel on the vehicle.
› The warning light
in the instrument cluster.
The storage of the tyre pressure values depends on equipment, either in the
infotainment or by pressing a button.
WARNINGBefore storing the tyre pressures they must be inflated to the specified in-
flation pressure » page 162. If incorrect pressure values are storedthe sys-
tem may not warn even with a tyre pressure that is too low.
CAUTION
The tyre pressure values should be stored every 10 000 km or once a year to
ensure proper system function.127Assist systems
Page 142 of 216

any other agreements. You should keep the confirmed warranty certificate and
the receipt for these accessories for this period, so that the commencement of
the warranty term may be verified.
In addition, ŠKODA Service Partners also stock a range of suitable car care
products as well as those parts which are subject to natural wear and tear,
such as tyres, batteries, bulbs and wiper blades.
Note
The accessories authorized by ŠKODA AUTO a.s. will be offered by the ŠKODA
Partners in all countries where ŠKODA AUTO a.s. has a sales and service net- work. This will usually be in the form of a printed catalogue of Original ŠKODA
Accessories, in the form of separate printed brochures or in the form of offers
for ŠKODA Genuine Accessories on the ŠKODA Partner's website.
Spoiler
Read and observe
on page 137 first.
If your new vehicle is fitted with a spoiler on the front bumper in combination
with the spoiler on the luggage compartment lid, then the following instruc-
tions must be adhered to.
› For safety reasons the vehicle must only ever be equipped with a spoiler on
the front bumper in combination with the associated spoiler on the tailgate.
› A spoiler cannot be fitted alone on the front bumper nor in combination with-
out a spoiler on the tailgate or in combination with an inappropriate spoiler
on the tailgate.
› We recommend that you consult a ŠKODA Service Partner for any repairs, re-
placement, fitting or removal of spoilers.
WARNING■ Work not properly performed on the spoilers on your vehicle can result in
faults - there is a risk of an accident and serious injury.■
If a front spoiler, full wheel trim, etc. is mounted retrospectively, it must
be ensured that the air supply to the front wheel brakes is not reduced.
The front brakes may overheat, which can have a negative impact on the
functioning of the braking system – there is a risk of an accident.
Component protection
Read and observe
on page 137 first.
Some electronic vehicle components (such as the instrument cluster) are fac-
tory-equipped with component protection.
Component protection has been developed as a protection mechanism for the
following situations.
› Impairment of factory- or garage-fitted electronic components after installa-
tion in another vehicle (for example, after a theft).
› Impairment of electronic components used outside the vehicle.
› The possibility of a legitimate installation or change of electronic compo-
nents for repairs at a specialist garage.
The activated component protection can be realized by functional limitations
of the specific electronic component. Seek help from a specialist garage.
Airbags
Read and observe
on page 137 first.
The system components for the airbag system may be found in the front
bumper, doors, front seats, the roof lining or in the bodywork.
WARNINGAny work on the airbag system including the installation and removal of
system components due to other repair work (e.g. removal of the steering
wheel) must only be carried out by a specialist garage.■
Adjustments, repairs and modifications which have been carried out un-
professionally can cause damage, operational faults, and can also seriously
impair the effectiveness of airbag system – there is the risk of an accident
and fatal injury.
■
The airbag system must be replaced if an airbag has been deployed. Air-
bag modules cannot be repaired.
WARNINGInformation on the use of the airbag system■It is prohibited to tamper with individual parts of the airbag system as this
might result in the airbag being deployed. 139Care and maintenance
Page 148 of 216
CAUTION■Damage to the paint layer on the wheel rims must be touched up immediate-
ly.■
Severe layers of dirt on the wheels can also result in wheel imbalance. This
may show itself in the form of a wheel vibration which is transmitted to the
steering wheel which, in certain circumstances, can cause premature wear of
the steering. This means it is necessary to remove the dirt.
Towing device and mounting recess
Read and observe
and on page 142 first.
Close the mounting recess with the cap to prevent any ingress of dirt.
In the event of dirt, clean the inner surfaces of the mounting recess and treat
with a suitable preservative.
Before hitching a trailer check the ball head and apply a suitable grease where
necessary.
Fit the protective cap when stowing away the ball head to protect the luggage
compartment against dirt.
CAUTION
Apply grease to the inner part of the mounting recess. Make sure you do not
remove any grease.
Under-body protection
Read and observe
and on page 142 first.
The underside of your vehicle is already permanently protected by the factory
against chemical and mechanical influences.
Damage to the protective coating cannot be excluded when the vehicle is
driven.
We recommend that you have the protective coating under the body and on
the chassis inspected - preferably before the beginning and at the end of the
cold season.
WARNINGNever use additional underbody protection or anti-corrosion agents for ex-
haust pipes, catalytic converters, diesel particle filters or heat shields.
These substances could ignite when the engine reaches its operating tem-
perature - there is a risk of fire.
Wiper blades
Read and observe
and on page 142 first.
Clean the wiper blades regularly with a glass cleaner. The wiper blades should
be cleaned with a sponge or cloth if they are heavily soiled by insect residues,
for example.
The wiper blades can become soiled with wax residues after washing in auto-
matic vehicle wash systems for example » page 141.
Interior care
Introduction
This chapter contains information on the following subjects:
Natural leather
146
Artificial leather, materials and Alcantara ®
146
Seat covers
147
Safety belts
147
We recommend using care products from ŠKODA Original Accessories that are
available from ŠKODA Partners. The instructions for use on the package must
be observed.
WARNING■ Care products may be harmful to your health if not used according to the
instructions.■
Always keep the automobile care products safe from people who are not
completely independent, e.g. children - there is a danger of poisoning!
■
Air fresheners and scents can be hazardous to heath when the tempera-
ture inside the vehicle is high.
145Care and maintenance
Page 149 of 216
CAUTION■Be sure to check clothing for colourfastness to avoid any damage or visible
stains on the material (leather), panels and textiles.■
Remove fresh stains such as those from ball-point pens, ink, lipstick, shoe
polish, etc., from the material (leather), panels and textiles as quickly as possi-
ble.
■
Do not attach scents and air fresheners to the dashboard – risk of damage to
the dash panel.
■
Do not attach any stickers to the filaments or glass antenna - there is risk of
damage.
■
Do not clean the headlining with a brush – risk of damage to the lining sur-
face.
■
Cleaners containing solvents can damage the material being cleaned.
■
Apply only a small amount of the cleaning and care product.
For the sake of the environment
Used cans of vehicle care product represent hazardous waste that is harmful
to the environment. These must be disposed of in accordance with national
legislation.
Note
Because of the special tools and knowledge required, and to avoid any poten-
tial problems with the cleaning and care of the interior of your vehicle, we rec-
ommend that cleaning and care of the interior of your vehicle be carried out by
a ŠKODA Service Partner.
Natural leather
Read and observe
and on page 145 first.
The leather needs, depending on the strain placed on it, regular cleaning andmaintenance.
Dust and dirt in pores and creases cause abrasions on the surface and lead to
premature brittling of the leather surface. Therefore, they must be removed
regularly at short intervals with a cloth or vacuum cleaner.
Clean soiled leather surfaces with a cotton or woollen cloth lightly moistened
with water and then dry with a clean dry cloth »
.
Clean more severely soiled areas with a cloth soaked in a mild soap solution (2
tablespoons of natural soap to 1 litre of water).
To remove stains , use a cleaning agent specially designed for this purpose.
Treat the leather periodically with a suitable leather protector and use a skin
care cream with light blocker and impregnation after each cleaning.
CAUTION
■ Ensure that the leather is not soaked through at any point during cleaning
and that no water gets into the stitching of the seams. The leather would then
become brittle and cracked.■
Avoid leaving the vehicle for lengthy periods in bright sunlight to avoid the
leather from bleaching. If the vehicle is parked in the open for lengthy periods,
protect the leather from direct sunlight by covering it.
■
The use of an additional mechanical steering wheel lock may damage the
leather surface of the steering wheel.
■
Some clothing materials, such as dark denim, do not have sufficient colour
fastness. This can cause damage or clearly visible discolouration to seat covers
even when treated correctly. This is particularly true for light-coloured uphols-
tery. This is not a defect in the seat cover, but poor colour fastness of the
clothing textiles.
■
Sharp-edged objects on items of clothing such as zip fasteners, rivets, sharp-
edged belts etc. may leave permanent scratches or signs of rubbing on the
surface or damage these. Damage of this nature cannot later be recognized as
a justified complaint.
Note
During the life of the vehicle, minor visible changes can occur on the leather
parts of the covers (e. g wrinkles or creases as a result of the stress of the cov-
ers).
Artificial leather, materials and Alcantara ®
Read and observe
and on page 145 first.
Synthetic leather
Clean the synthetic leather with a damp cloth.
If the synthetic leather does not come completely clean with this method, a
mild soap solution or specific cleaning agent must be used.
Fabrics
Clean upholstery cover materials and cloth trims on doors, boot cover, etc. us-
ing specific cleaning agents, e.g., dry foam.
Use a soft sponge, brush, or commercially available microfibre cloth.
Use a cloth and special detergent to clean the headlining.
146General Maintenance
Page 165 of 216
Tyre storage
Mark the tyres as you remove them so that you are able to refit them to run in
the same direction.
Always store wheels or tyres in a cool, dry and, where possible, dark place.
Tyres which are not fixed to a wheel trim should be stored upright.
Tyre age
Tyres age losing their original characteristics, even if they are not used. The
service life of the tyres is 6 years. Therefore, we recommend not using tyres
older than 6 years.
Wheel bolts
Wheels and wheel bolts are matched to each other in terms of design. There-
fore we recommend that you use wheel rims and wheel bolts from ŠKODA
Original Accessories.WARNINGNever use tyres if you do not know anything about the condition and age.
Tyre pressure
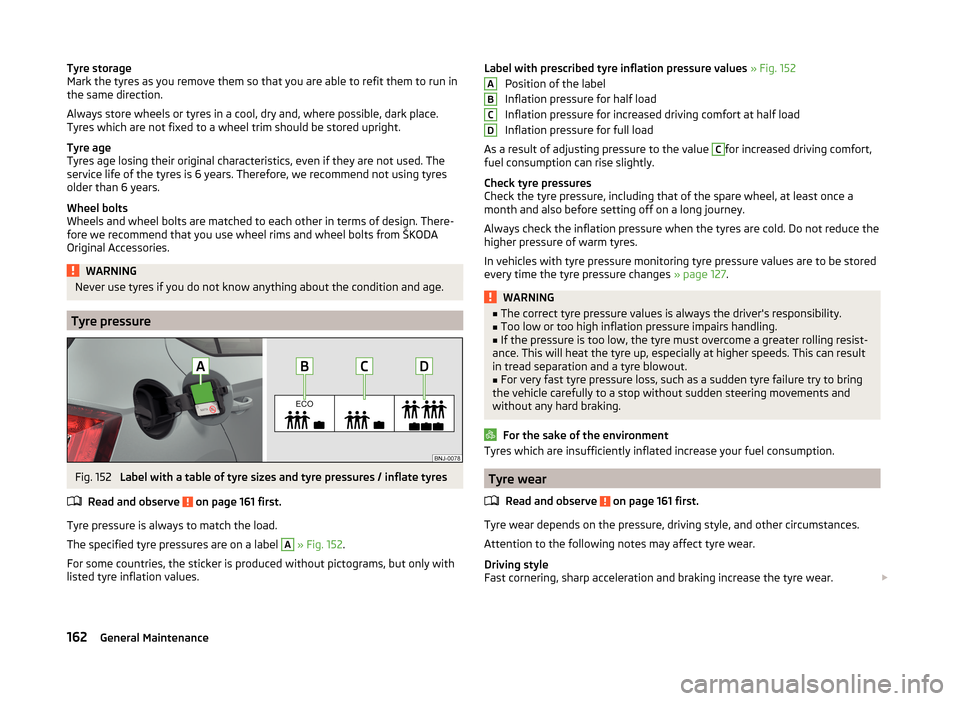
Fig. 152
Label with a table of tyre sizes and tyre pressures / inflate tyres
Read and observe
on page 161 first.
Tyre pressure is always to match the load.
The specified tyre pressures are on a label
A
» Fig. 152 .
For some countries, the sticker is produced without pictograms, but only with
listed tyre inflation values.
Label with prescribed tyre inflation pressure values » Fig. 152
Position of the label
Inflation pressure for half load
Inflation pressure for increased driving comfort at half load
Inflation pressure for full load
As a result of adjusting pressure to the value C
for increased driving comfort,
fuel consumption can rise slightly.
Check tyre pressures
Check the tyre pressure, including that of the spare wheel, at least once a
month and also before setting off on a long journey.
Always check the inflation pressure when the tyres are cold. Do not reduce the
higher pressure of warm tyres.
In vehicles with tyre pressure monitoring tyre pressure values are to be stored
every time the tyre pressure changes » page 127.
WARNING■
The correct tyre pressure values is always the driver's responsibility.■Too low or too high inflation pressure impairs handling.■
If the pressure is too low, the tyre must overcome a greater rolling resist-
ance. This will heat the tyre up, especially at higher speeds. This can result
in tread separation and a tyre blowout.
■
For very fast tyre pressure loss, such as a sudden tyre failure try to bring
the vehicle carefully to a stop without sudden steering movements and
without any hard braking.
For the sake of the environment
Tyres which are insufficiently inflated increase your fuel consumption.
Tyre wear
Read and observe
on page 161 first.
Tyre wear depends on the pressure, driving style, and other circumstances.
Attention to the following notes may affect tyre wear.
Driving style
Fast cornering, sharp acceleration and braking increase the tyre wear.
ABCD162General Maintenance