turn signal SKODA FABIA 2014 3.G / NJ User Guide
[x] Cancel search | Manufacturer: SKODA, Model Year: 2014, Model line: FABIA, Model: SKODA FABIA 2014 3.G / NJPages: 216, PDF Size: 30.7 MB
Page 64 of 216
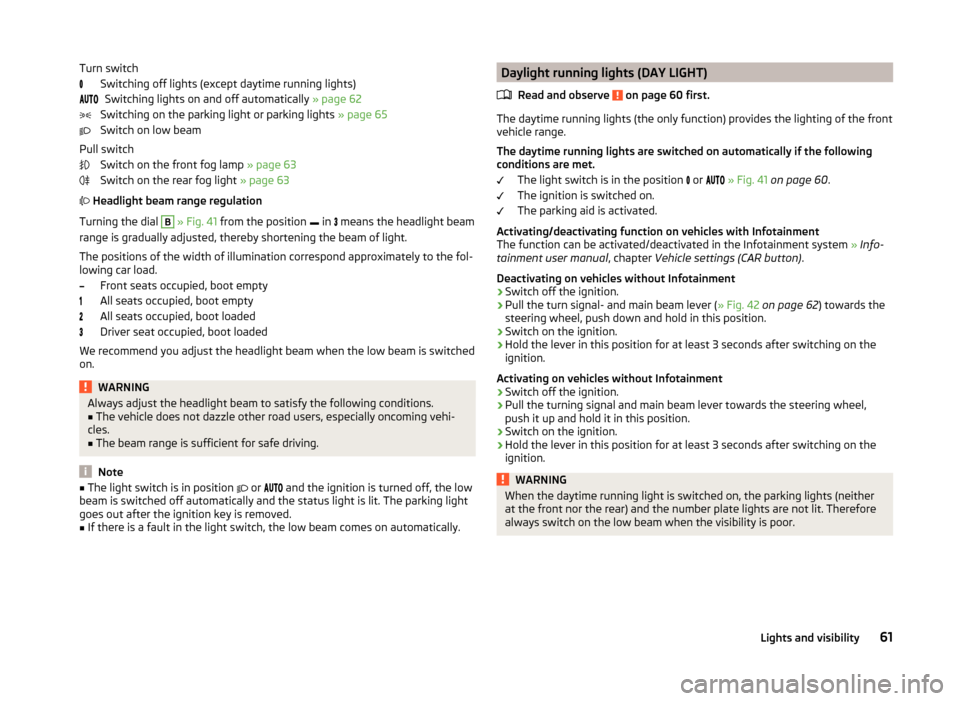
Turn switchSwitching off lights (except daytime running lights)Switching lights on and off automatically » page 62
Switching on the parking light or parking lights » page 65
Switch on low beam
Pull switch Switch on the front fog lamp » page 63
Switch on the rear fog light » page 63
Headlight beam range regulation
Turning the dial B
» Fig. 41 from the position
in
means the headlight beam
range is gradually adjusted, thereby shortening the beam of light.
The positions of the width of illumination correspond approximately to the fol-
lowing car load.
Front seats occupied, boot empty
All seats occupied, boot empty
All seats occupied, boot loaded
Driver seat occupied, boot loaded
We recommend you adjust the headlight beam when the low beam is switched
on.
WARNINGAlways adjust the headlight beam to satisfy the following conditions.■The vehicle does not dazzle other road users, especially oncoming vehi-
cles.■
The beam range is sufficient for safe driving.
Note
■ The light switch is in position or and the ignition is turned off, the low
beam is switched off automatically and the status light is lit. The parking light
goes out after the ignition key is removed.■
If there is a fault in the light switch, the low beam comes on automatically.
Daylight running lights (DAY LIGHT)
Read and observe
on page 60 first.
The daytime running lights (the only function) provides the lighting of the frontvehicle range.
The daytime running lights are switched on automatically if the following
conditions are met.
The light switch is in the position
or
» Fig. 41 on page 60 .
The ignition is switched on.
The parking aid is activated.
Activating/deactivating function on vehicles with Infotainment
The function can be activated/deactivated in the Infotainment system » Info-
tainment user manual , chapter Vehicle settings (CAR button) .
Deactivating on vehicles without Infotainment
›
Switch off the ignition.
›
Pull the turn signal- and main beam lever ( » Fig. 42 on page 62 ) towards the
steering wheel, push down and hold in this position.
›
Switch on the ignition.
›
Hold the lever in this position for at least 3 seconds after switching on the
ignition.
Activating on vehicles without Infotainment
›
Switch off the ignition.
›
Pull the turning signal and main beam lever towards the steering wheel,
push it up and hold it in this position.
›
Switch on the ignition.
›
Hold the lever in this position for at least 3 seconds after switching on the
ignition.
WARNINGWhen the daytime running light is switched on, the parking lights (neither
at the front nor the rear) and the number plate lights are not lit. Therefore
always switch on the low beam when the visibility is poor.61Lights and visibility
Page 65 of 216

Turn signal and main beamFig. 42
Stalk: turn signal and main beam
operation
Read and observe on page 60 first.
Control stalk positions » Fig. 42
Switch on right turn signal
Switch on left turn signal
Switch on high beam
Switching off main beam / switching on headlamp flasher (spring-loaded
position)
Main beam
The main beam can only be switched on when the low beam lights are on.
The warning light lights up in the instrument cluster when the high beam is
switched on.
Flasher
The headlight flasher can be operated even if the ignition is switched off.
The warning light lights up in the instrument cluster when the headlight
flasher is switched on.
Flashing
When the left turn signal switch is switched on, the warning light flashes in
the instrument cluster.
When the right turn signal switch is switched on, the warning light flashes in
the instrument cluster.
The turn signal light switches itself off automatically when driving around a
curve or after making a turn.
The warning light flashes at twice its normal rate if a bulb for the turn signal
light fails.
ABCD“Convenience turn signal”
If you wish to flash three times only, briefly push the stalk to the upper or low-
er pressure point and release again.
The “convenience turn signal” can be activated or deactivated in the Infotain- ment » Operating instructions for Infotainment , chapter Vehicle settings (CAR
button) .WARNINGOnly turn on the main beam or the headlight flasher if other road users will
not be dazzled.
Automatic driving lamp control
Fig. 43
Light switch: AUTO position
Read and observe on page 60 first.
If the light switch is in position
» Fig. 43 , the parking lights, low beam and
number plate lights are switched on or off automatically.
The light on/off switching is controlled by a sensor mounted under the wind- screen in the holder of the inside mirror or in the control panel.
If the light switch is in position
, the lettering
illuminates next to the
light switch. If the light is switched on automatically, the symbol
next to the
light switch also lights up.
Automatic driving-light control during rain
The daytime running lights are switched on automatically if the following con-
ditions are met.
The light switch is in position
» Fig. 43 .
Automatic wiping with rain - position
1
or wiping - position
2
or
3
is
turned on » page 68, Windscreen wipers and washers .
62Operation
Page 66 of 216
The windscreen wipers are on for more than 30 s.
The parking aid is activated.
The light turns off about 4 minutes after turning off the wipers.
The function can be activated/deactivated in the Infotainment » Infotainment
manual , chapter Vehicle settings (CAR button) .
CAUTION
Do not attach any stickers or similar objects in front of the light sensor on the
windscreen. This can impair its function or reliability.
Fog lights
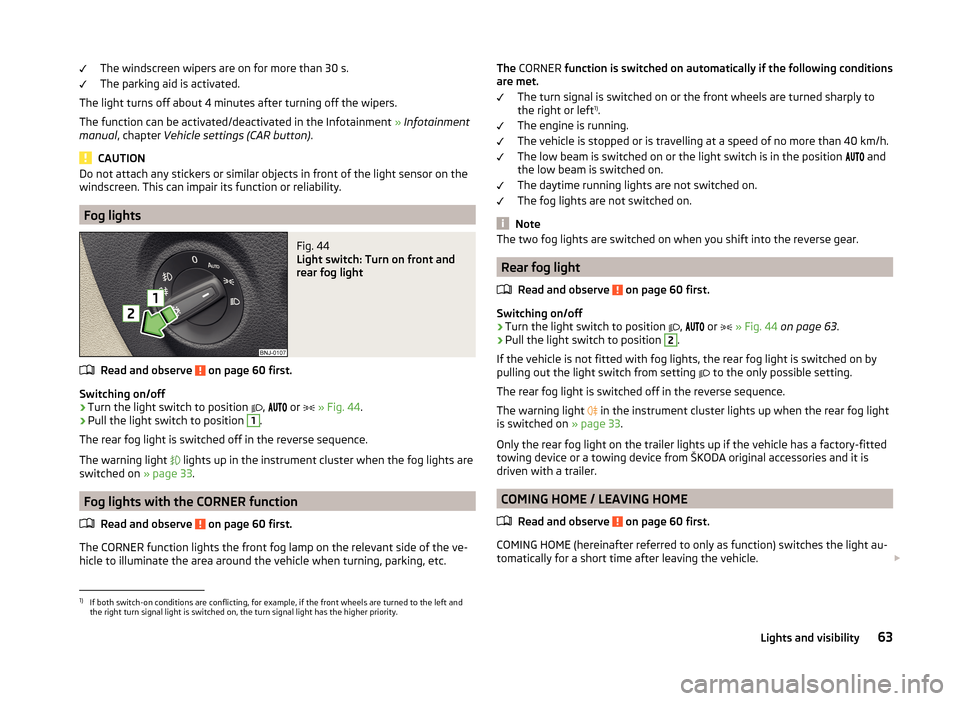
Fig. 44
Light switch: Turn on front and
rear fog light
Read and observe on page 60 first.
Switching on/off
›
Turn the light switch to position
,
or
» Fig. 44 .
›
Pull the light switch to position
1
.
The rear fog light is switched off in the reverse sequence.
The warning light
lights up in the instrument cluster when the fog lights are
switched on » page 33.
Fog lights with the CORNER function
Read and observe
on page 60 first.
The CORNER function lights the front fog lamp on the relevant side of the ve-hicle to illuminate the area around the vehicle when turning, parking, etc.
The
CORNER function is switched on automatically if the following conditions
are met.
The turn signal is switched on or the front wheels are turned sharply to
the right or left 1)
.
The engine is running.
The vehicle is stopped or is travelling at a speed of no more than 40 km/h.
The low beam is switched on or the light switch is in the position
and
the low beam is switched on.
The daytime running lights are not switched on.
The fog lights are not switched on.
Note
The two fog lights are switched on when you shift into the reverse gear.
Rear fog light
Read and observe
on page 60 first.
Switching on/off
›
Turn the light switch to position ,
or
» Fig. 44 on page 63 .
›
Pull the light switch to position
2
.
If the vehicle is not fitted with fog lights, the rear fog light is switched on by
pulling out the light switch from setting to the only possible setting.
The rear fog light is switched off in the reverse sequence.
The warning light in the instrument cluster lights up when the rear fog light
is switched on » page 33.
Only the rear fog light on the trailer lights up if the vehicle has a factory-fitted towing device or a towing device from ŠKODA original accessories and it is
driven with a trailer.
COMING HOME / LEAVING HOME
Read and observe
on page 60 first.
COMING HOME (hereinafter referred to only as function) switches the light au-tomatically for a short time after leaving the vehicle.
1)
If both switch-on conditions are conflicting, for example, if the front wheels are turned to the left and
the right turn signal light is switched on, the turn signal light has the higher priority.
63Lights and visibility
Page 67 of 216
LEAVING HOME (hereinafter referred to only as function) switches the light au-
tomatically for a short time when approaching the vehicle.
The daytime running lights are switched on automatically if the following
conditions are met.
The light switch is in position
» Fig. 43 on page 62 .
The visibility in the vehicle environment is reduced.
The ignition is switched off.
The parking aid is activated.
The function is switched on (the driver's door is opened / the car is un-
locked with the remote control).
The function switches on the following light. › Parking lights
› Low beam
› Licence plate light
Poorer visibility is detected by a sensor mounted in the holder of the inside
mirror or in the control panel .
Enabling / disabling and setting function
The functions and setting of the lighting duration can be activated or deactiva-
ted in the Infotainment system » Operating instructions for Infotainment ,
chapter Vehicle settings (button CAR) .
COMING HOME
The light turns on automatically when you open the driver's door on (within 60
seconds of turning off the ignition).
The light turns off 10 seconds after closing all the doors and the boot lid or af-
ter the pre-set time has expired.
If a door or the boot lid remains open, the light goes out after 60 seconds.
LEAVING HOME
The light turns on automatically after the vehicle is unlocked with the remote
control.
The light turns off after 10 seconds or after a pre-set time or after the vehicle
is locked.CAUTION■ Do not attach any stickers or similar objects in front of the light sensor on
the windscreen. This can impair its function or reliability.■
If this function is activated constantly, the battery will be heavily discharged
particularly in short-haul travel.
Hazard warning light system
Fig. 45
Hazard warning light system
button
Read and observe on page 60 first.
Switching on/off
›
Press the
» Fig. 45 button.
All the turn signal lights on the vehicle flash at the same time when the hazard
warning light system is switched on. The warning light for the turn signals and
the warning light in the button also flash at the same time. The hazard warn-
ing light system can also be operated if the ignition is switched off.
The hazard warning light system will switch on automatically if one of the air-
bags is deployed.
If the turn signal light is switched on when the hazard warning light and the
ignition are both switched on, then only the turn signal light on the corre-
sponding vehicle side will flash.
WARNINGSwitch on the hazard warning light system if, for example, the following oc-
curs.■
You encounter a traffic jam.
■
The vehicle has to be parked on the roadside, due to a fault for example.
64Operation
Page 68 of 216
Parking lightsRead and observe
on page 60 first.
The parking light is designed for temporary lighting of the parked vehicle.
Switching on
the parking light
›
Switch off the ignition.
›
Place the control lever into position
A
or
B
as far as it can go » Fig. 42 on
page 62 - the parking light on the right/left-hand side of the vehicle is
switched on.
If the right or left turn signal light has been switched on and the ignition is
switched off, the parking light is not automatically switched on.
Switching on the parking lights on both sides
›
Turn the light switch
A
to position
» Fig. 41 on page 60 and lock the vehi-
cle.
After pulling out the ignition key and opening the driver's door, an audible
warning sounds. After a few seconds or after closing the driver's door, the au-
dible alarm is turned off, but the parking lights will remain switched on.
CAUTION
Turning on the parking light means the battery is heavily loaded, especially
over short distances.
Driving abroad
Read and observe
on page 60 first.
The low beam is set asymmetrically. It illuminates the side of the road on
which the vehicle is being driven to a greater extent.
When driving in countries with opposing traffic system (traffic on the left/
right), asymmetric headlight adjustment can dazzle oncoming traffic. To pre-
vent oncoming traffic from being dazzled, the headlights must be adjusted by
a specialist garage.
Note
For more information on adjusting the headlights, consult a specialist garage.Interior lights
Introduction
This chapter contains information on the following subjects:
Front interior light
65
Rear interior light
66
Note
The light turns off automatically 10 minutes after switching off the ignition or
opening a door unless otherwise specified
Front interior light
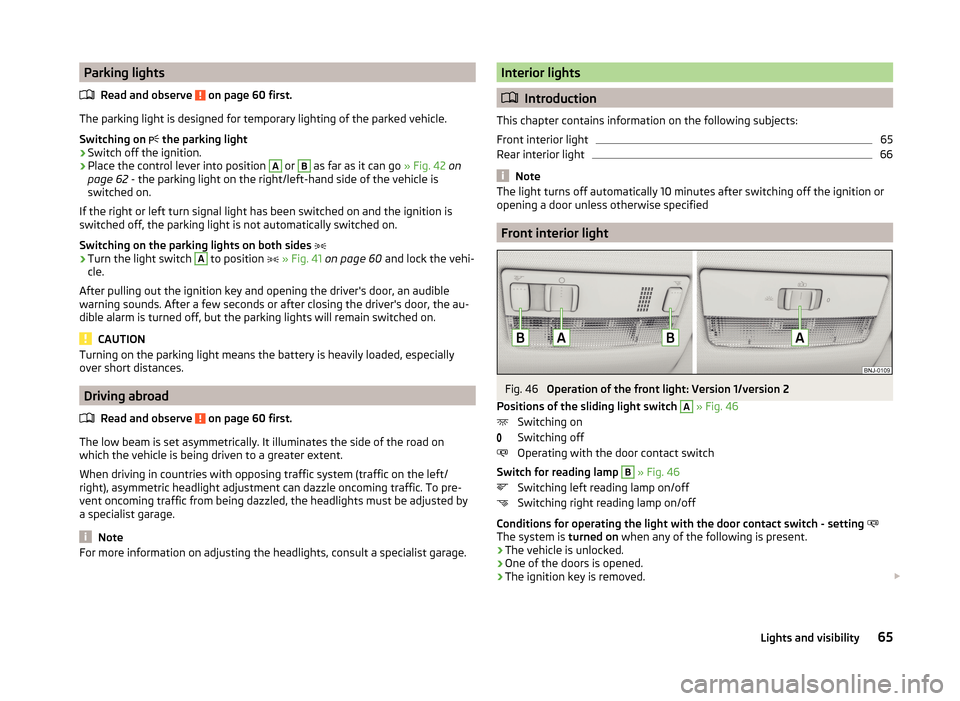
Fig. 46
Operation of the front light: Version 1/version 2
Positions of the sliding light switch
A
» Fig. 46
Switching on
Switching off
Operating with the door contact switch
Switch for reading lamp
B
» Fig. 46
Switching left reading lamp on/off
Switching right reading lamp on/off
Conditions for operating the light with the door contact switch - setting
The system is turned on when any of the following is present.
› The vehicle is unlocked.
› One of the doors is opened.
› The ignition key is removed.
65Lights and visibility
Page 109 of 216
Switch ignition on / offRead and observe
and on page 105 first.
›
Press the button » Fig. 106 on page 105 briefly.
The ignition is switched on or off.
On vehicles fitted with a manual transmission, the clutch pedal must not be
depressed while switching the ignition on or off, otherwise the system would
try to start.
On vehicles fitted with a automatic transmission, the brake pedal must not be
depressed while switching the ignition on or off, otherwise the system would
try to start.
If the driver's door is opened while the ignition is on, an audible signal sounds
and the following message appears in the instrument cluster display.
Ignition on!
IGNITION STILL ON
When leaving the vehicle always switch off the ignition.
Starting the engine
Read and observe
and on page 105 first.
Procedure for starting the engine
›
Firmly apply the handbrake.
›
For vehicles with manual transmission , shift gear stick to neutral, depress
the clutch pedal and hold it there until the engine starts.
›
On vehicles with automatic transmission , place the selector lever in position
P or N and depress the brake pedal until the engine starts.
›
Press the starter button » Fig. 106 on page 105 briefly – the engine starts au-
tomatically.
In vehicles with diesel engines the glow plug warning light
lights up after
pressing the button. The engine can be started after the indicator light goes
out.
Note
■ The engine running noises may louder at first be louder for a short time after
starting the cold engine. This is quite normal and is not an operating problem.■
You should not switch on any major electrical components during the heat-
ing period otherwise the vehicle battery will be drained unnecessarily.
Switching off the engine
Read and observe
and on page 105 first.
Switching off
›
Stop the vehicle » page 109, Parking .
›
Press the button » Fig. 106 on page 105 briefly.
The engine and the ignition are switched off simultaneously.
Emergency shutdown
If necessary and in exceptional cases, the engine may even be turned off while driving.
›
Press the starter button » Fig. 106 on page 105 for longer than 1 second or
twice within 1 second.
After the emergency stop of the engine, the steering lock will remain un-
locked.
CAUTION
Do not switch the engine off immediately at the end of your journey after the
engine has been operated over a prolonged period at high loads but leave it to
run at an idling speed for about 1 minute. This prevents any possible accumula-
tion of heat when the engine is switched off.
Note
The radiator fan can intermittently continue to run for approximately 10 mi-
nutes after the ignition has been switched off.106Driving
Page 180 of 216

›If the engine does not start, halt the attempt to start the engine after 10 sec-
onds and wait for 30 seconds before repeating the process.›
Detach the jumper cables in the exact reverse order that they were attached.
Both batteries must have a rated voltage of 12 V. The capacity (Ah) of the bat-
tery supplying the power must not be significantly less than the capacity of
the discharged battery in your vehicle.
Jump-start cables
Only use jump-start cables which have an adequately large cross-section and
insulated terminal clamps. Obey the instructions of the jump start cable manu-
facturer.
Positive cable - colour coding in the majority of cases is red.
Negative cable - colour coding in the majority of cases is black.
WARNING■
Do not clamp the jump-start cable to the negative terminal of the dis-
charged battery. There is the risk of detonating gas seeping out the battery
being ignited by the strong spark which results from the engine being star-
ted.■
The non-insulated parts of the terminal clamps must never touch each
other – risk of short circuit.
■
The jump-start cable connected to the positive terminal of the battery
must not come into contact with electrically conducting parts of the vehicle
– risk of short circuit.
■
Route the jump-start cables so that they cannot be caught by any rotat-
ing parts in the engine compartment.
■
There must not be any contact between the two vehicles otherwise cur-
rent may flow as soon as the negative terminals are connected.
Towing the vehicle
Introduction
Fig. 168
Braided tow ropes/spiral tow rope
This chapter contains information on the following subjects:
Front towing eye
178
Rear towing eye
179
Vehicles with a tow hitch
179
A braided tow rope must be used for towing » Fig. 168 -
.
The following guidelines must be observed when towing.
Vehicles with manual transmission may be towed with a tow bar or a tow rope
or with the front or rear wheels raised.
Vehicles with automatic transmission may be towed with a tow bar or a tow
rope or with the front wheels raised. If the vehicle is raised at rear, the auto-
matic gearbox is damaged!
Driver of the tow vehicle
›
Engage the clutch gently when starting off or depress the accelerator partic-
ularly gently if the vehicle is fitted with an automatic gearbox.
›
Only then, approach correctly when the rope is taut.
The maximum towing speed is 50 km/h.
Driver of the towed vehicle
›
Switch on the ignition so that the steering wheel is not locked and so that
the turn signal lights, windscreen wipers and windscreen washer system can
be used.
177Emergency equipment, and self-help
Page 189 of 216
Replacing bulbs
Introduction
This chapter contains information on the following subjects:
Bulb arrangement in the headlights
186
Removing and installing the cover in the front wheel arch
187
Fitting and removing the wash water container nozzle
187
Replacing the low beam and high beam bulb (halogen headlights)
188
Change bulb for turn signal switch (halogen headlight)
188
Replacing the parking light bulb (halogen headlights)
188
Changing bulb for daytime running lights switch (halogen headlight)
189
Replacing the high beam bulb (halogen projector headlights)
189
Replacing the high beam bulb (halogen projector headlights)
190
Replacing the turn signal switch bulb (halogen projector headlights)
190
Replacing the bulb for the fog light
191
Changing the licence plate light bulb
191
Rear Light
192
Replacing bulbs in rear light
192
Some manual skills are required to change a bulb. For this reason, if uncertain,
we recommend that bulbs are replaced by a specialist garage or other expert
help is sought.
› Switch off the ignition and all of the lights before replacing a bulb.
› Faulty bulbs must only be replaced with the same type of bulbs. The designa-
tion is located on the light socket or the glass bulb.
› A stowage compartment for replacement bulbs is located in a plastic box in
the spare wheel or underneath the floor covering in the boot.
WARNING■ Always read and observe the warnings before completing any work in the
engine compartment » page 150.■
Accidents can be caused if the road in front of the vehicle is not suffi-
ciently illuminated and the vehicle cannot or can only be seen with difficul-
ty by other road users.
■
Bulbs H8, H7 and H4 are pressurised and may burst when changed - there
is a risk of injury! We therefore recommended wearing gloves and safety
glasses when changing a bulb.
■
Switch off the respective vehicle light when changing the bulb.
CAUTIONDo not take hold of the glass bulb with naked fingers (even the smallest
amount of dirt reduces the working life of the light bulb). Use a clean cloth,
napkin, or similar.
Note
■ This Owner's Manual only describes the replacement of bulbs where it is pos-
sible to replace the bulbs on your own without any complications arising. Other
light bulbs should be changed by your specialist garage.■
We recommend that you always carry a box of replacement bulbs in the vehi-
cle. Replacement bulbs can be purchased from ŠKODAOriginal Accessories.
■
We recommend having the headlight settings checked by a specialist garage
after replacing a bulb in the main beam, low beam or fog lights.
■
Visit a specialist garage if an LED is faulty.
Bulb arrangement in the headlights
Fig. 182
Principle sketch: Halogen headlights/halogen projector head-
lights
Read and observe
and on page 186 first.
The vehicle is equipped with headlights with halogen bulbs.
Bulb arrangement » Fig. 182
Dayl. dri. light
Low beam, high beam and parking light
Flashing
Low beam
High beam and turning signal switch
ABCDE186Do-it-yourself
Page 191 of 216

The holder must engage firmly.›
Push the container nozzle into the holder in the opposite direction to the ar-
row
1
.
Replacing the low beam and high beam bulb (halogen headlights)
Fig. 185
Replacing the bulb for low beam and main beam
Read and observe
and on page 186 first.
›
Remove the respective cover in the front wheel arch » page 187.
To replace lamp, first remove the bracket of the wash water container nozzle
in the right headlight » page 187.
›
Remove the protective cap
B
» Fig. 182 on page 186 .
›
Press the connector latch and remove the plug connector by jiggling in the
direction of arrow
1
» Fig. 185 .
›
Push in the spring in the direction of the arrow
2›
Release the spring in the direction of the arrow
3
.
›
Remove the defective bulb in the direction of arrow
4
.
›
Fit a new bulb into the headlamp and secure the spring in the opposite direc-
tion to the arrow
3
.
›
Insert the plug in the opposite direction to the arrow
1
.
›
Fit protective cap
B
» Fig. 182 on page 186 .
After changing the lamp in the right headlamp, replace the holder of the wash
water container nozzle » page 187.
›
Replace the appropriate cover in the front wheel arch » page 187.
Change bulb for turn signal switch (halogen headlight)Fig. 186
Changing the bulb for the front
turn signal light
Read and observe and on page 186 first.
Remove the bracket of the wash water container nozzle before replacing the
lamp in the right headlight » page 187.
›
Remove the protective cap
B
» Fig. 182 on page 186 .
›
Turn the socket with the bulb in the direction of arrow
1
» Fig. 186 .
›
Remove the socket with the bulb in the direction of arrow
2
.
›
Insert the socket with the new bulb in the opposite direction to the arrow
2
.
›
Turn the socket with the new bulb in the opposite direction to the arrow
1
until it stops.
›
Fit protective cap
C
» Fig. 182 on page 186 .
Replacing the parking light bulb (halogen headlights)
Fig. 187
Change the light bulb for the parking light
Read and observe
and on page 186 first.
›
Remove the relevant cover in the front wheel arch » page 187.
188Do-it-yourself
Page 193 of 216

Replacing the high beam bulb (halogen projector headlights)Fig. 190
Changing the bulb for the main beam
Read and observe
and on page 186 first.
Remove the holder of the wash water container nozzle before replacing the
lamp in the right headlight » page 187.
›
Remove the protective cap
B
» Fig. 182 on page 186 .
›
Turn the holder with the bulb in the direction of arrow
1
» Fig. 190 .
›
Remove the holder with the bulb in the direction of arrow
2
.
›
Remove the bulb from the holder in the direction of the arrow
3
.
›
Insert a new bulb into the connector so that the lug
A
on the connector
snaps into the groove on the bulb.
›
Insert the connector with the new bulb into the headlight in the opposite di-
rection to the arrow
2
.
›
Turn the connector with the new bulb in the opposite direction to the arrow
1
until it stops.
›
Fit protective cap
E
» Fig. 182 on page 186 .
After changing the lamp in the right headlamp, replace the holder of the wash
water container nozzle » page 187.
Replacing the turn signal switch bulb (halogen projector
headlights)Fig. 191
Changing the bulb for the turn signal light
Read and observe
and on page 186 first.
To replace lamp, first remove the bracket of the wash water container nozzle
in the right headlight » page 187.
›
Remove the protective cap
B
» Fig. 182 on page 186 .
›
Remove the bulb holder with the bulb by jiggling it out in the direction of the
arrow
1
» Fig. 191 .
›
Grasp the lamp socket at the places marked by arrows.
›
Remove the faulty bulb from the holder in the direction of the arrow
2
.
›
Push a new bulb into the bulb holder up to the stop.
›
Replace the bulb holder in the headlamp with the bulb.
›
Fit protective cap
E
» Fig. 182 on page 186 .
After changing the lamp in the right headlamp, replace the holder of the wash
water container nozzle » page 187.
190Do-it-yourself