lock SKODA FABIA 2015 3.G / NJ User Guide
[x] Cancel search | Manufacturer: SKODA, Model Year: 2015, Model line: FABIA, Model: SKODA FABIA 2015 3.G / NJPages: 220, PDF Size: 32.46 MB
Page 26 of 220
IL-SUThe seat is suited for installation of a -child seat with the “Semi-Universal” approval. The “Semi-Universal” category means that the child seat is
approved for use with the
-system. Note the information in the list of vehicles which comes with the child seat.IUFThe seat is suitable for the installation of a child seat with the “Universal” approval and attachment with the system belt.XThe seat is not fitted with -system attachment points.Attachment points of the -systemFig. 18
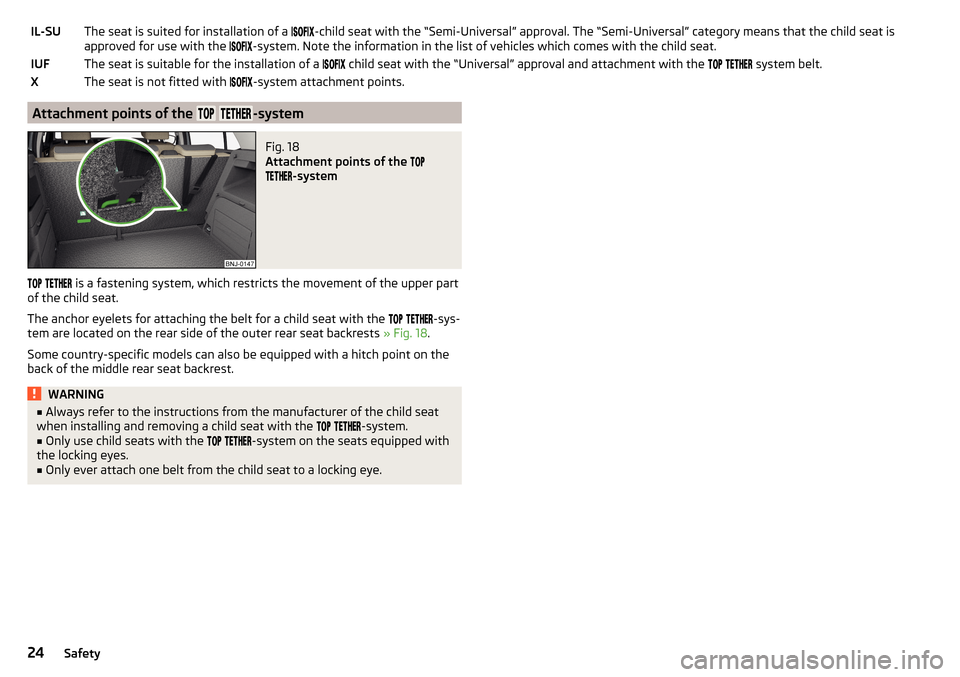
Attachment points of the
-system
is a fastening system, which restricts the movement of the upper part
of the child seat.
The anchor eyelets for attaching the belt for a child seat with the
-sys-
tem are located on the rear side of the outer rear seat backrests » Fig. 18.
Some country-specific models can also be equipped with a hitch point on the
back of the middle rear seat backrest.
WARNING■ Always refer to the instructions from the manufacturer of the child seat
when installing and removing a child seat with the -system.■
Only use child seats with the
-system on the seats equipped with
the locking eyes.
■
Only ever attach one belt from the child seat to a locking eye.
24Safety
Page 28 of 220
Operation
Cockpit
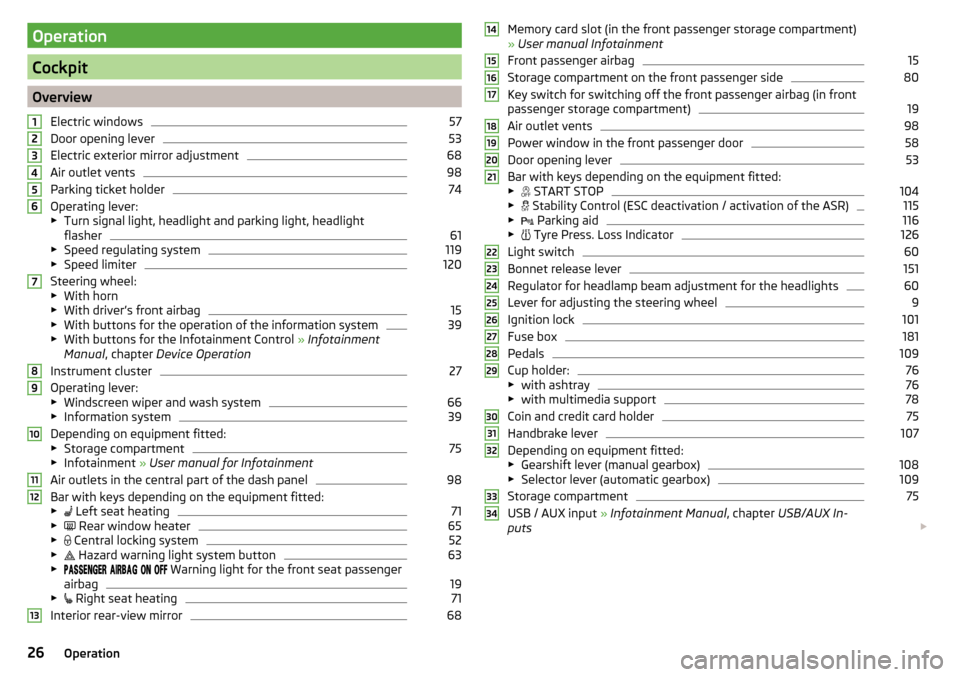
OverviewElectric windows
57
Door opening lever
53
Electric exterior mirror adjustment
68
Air outlet vents
98
Parking ticket holder
74
Operating lever:
▶ Turn signal light, headlight and parking light, headlight
flasher
61
▶ Speed regulating system
119
▶Speed limiter
120
Steering wheel:
▶ With horn
▶ With driver’s front airbag
15
▶With buttons for the operation of the information system
39
▶With buttons for the Infotainment Control » Infotainment
Manual , chapter Device Operation
Instrument cluster
27
Operating lever:
▶ Windscreen wiper and wash system
66
▶Information system
39
Depending on equipment fitted:
▶ Storage compartment
75
▶Infotainment » User manual for Infotainment
Air outlets in the central part of the dash panel
98
Bar with keys depending on the equipment fitted: ▶ Left seat heating
71
▶
Rear window heater
65
▶
Central locking system
52
▶
Hazard warning light system button
63
▶
Warning light for the front seat passenger
airbag
19
▶ Right seat heating
71
Interior rear-view mirror
6812345678910111213Memory card slot (in the front passenger storage compartment)
» User manual Infotainment
Front passenger airbag15
Storage compartment on the front passenger side
80
Key switch for switching off the front passenger airbag (in front
passenger storage compartment)
19
Air outlet vents
98
Power window in the front passenger door
58
Door opening lever
53
Bar with keys depending on the equipment fitted:
▶ START STOP
104
▶
Stability Control (ESC deactivation / activation of the ASR)
115
▶
Parking aid
116
▶
Tyre Press. Loss Indicator
126
Light switch
60
Bonnet release lever
151
Regulator for headlamp beam adjustment for the headlights
60
Lever for adjusting the steering wheel
9
Ignition lock
101
Fuse box
181
Pedals
109
Cup holder:
76
▶
with ashtray
76
▶with multimedia support
78
Coin and credit card holder
75
Handbrake lever
107
Depending on equipment fitted:
▶ Gearshift lever (manual gearbox)
108
▶Selector lever (automatic gearbox)
109
Storage compartment
75
USB / AUX input » Infotainment Manual , chapter USB/AUX In-
puts
14151617181920212223242526272829303132333426Operation
Page 29 of 220
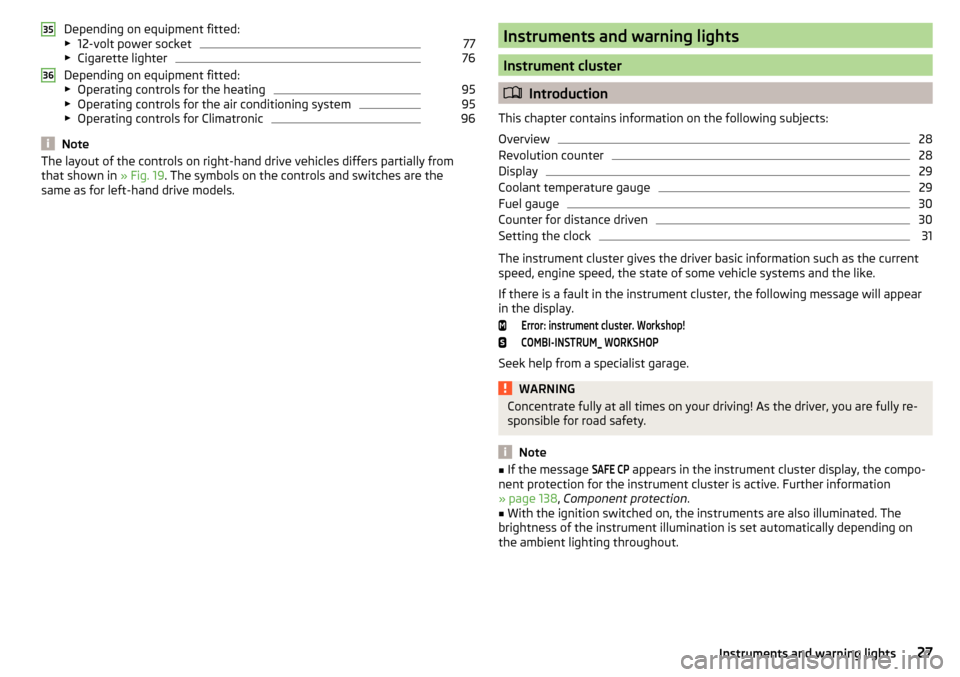
Depending on equipment fitted:
▶ 12-volt power socket77
▶Cigarette lighter
76
Depending on equipment fitted:
▶ Operating controls for the heating
95
▶Operating controls for the air conditioning system
95
▶Operating controls for Climatronic
96
Note
The layout of the controls on right-hand drive vehicles differs partially from
that shown in » Fig. 19. The symbols on the controls and switches are the
same as for left-hand drive models.3536Instruments and warning lights
Instrument cluster
Introduction
This chapter contains information on the following subjects:
Overview
28
Revolution counter
28
Display
29
Coolant temperature gauge
29
Fuel gauge
30
Counter for distance driven
30
Setting the clock
31
The instrument cluster gives the driver basic information such as the current
speed, engine speed, the state of some vehicle systems and the like.
If there is a fault in the instrument cluster, the following message will appear
in the display.
Error: instrument cluster. Workshop!COMBI-INSTRUM_ WORKSHOP
Seek help from a specialist garage.
WARNINGConcentrate fully at all times on your driving! As the driver, you are fully re-
sponsible for road safety.
Note
■ If the message SAFE CP appears in the instrument cluster display, the compo-
nent protection for the instrument cluster is active. Further information
» page 138 , Component protection .■
With the ignition switched on, the instruments are also illuminated. The
brightness of the instrument illumination is set automatically depending on
the ambient lighting throughout.
27Instruments and warning lights
Page 30 of 220
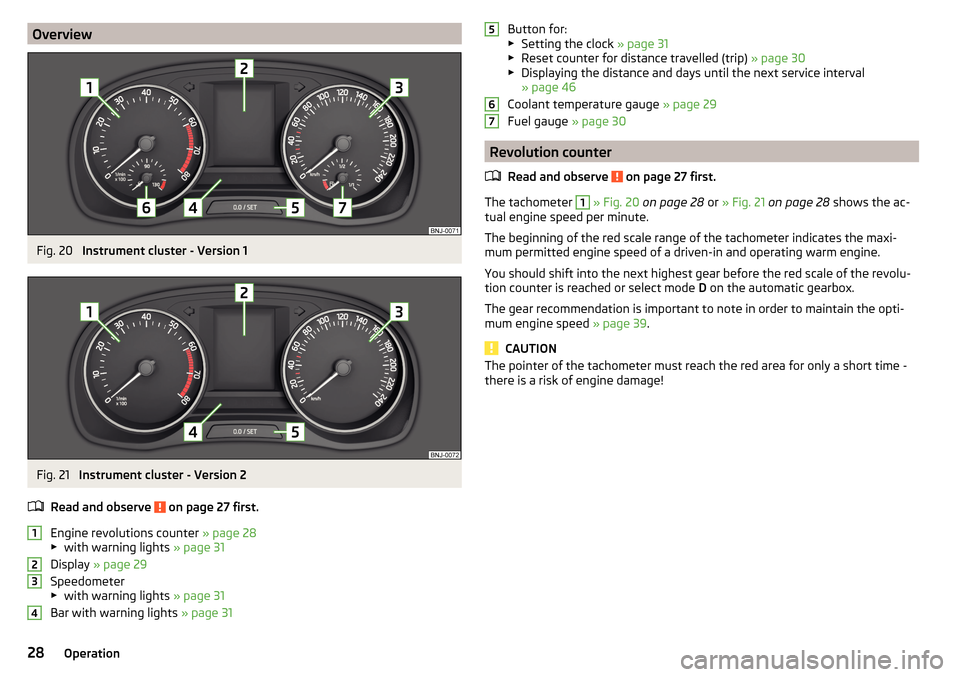
OverviewFig. 20
Instrument cluster - Version 1
Fig. 21
Instrument cluster - Version 2
Read and observe
on page 27 first.
Engine revolutions counter » page 28
▶ with warning lights » page 31
Display » page 29
Speedometer
▶ with warning lights » page 31
Bar with warning lights » page 31
1234Button for:
▶ Setting the clock » page 31
▶ Reset counter for distance travelled (trip) » page 30
▶ Displaying the distance and days until the next service interval
» page 46
Coolant temperature gauge » page 29
Fuel gauge » page 30
Revolution counter
Read and observe
on page 27 first.
The tachometer
1
» Fig. 20 on page 28 or » Fig. 21 on page 28 shows the ac-
tual engine speed per minute.
The beginning of the red scale range of the tachometer indicates the maxi-
mum permitted engine speed of a driven-in and operating warm engine.
You should shift into the next highest gear before the red scale of the revolu- tion counter is reached or select mode D on the automatic gearbox.
The gear recommendation is important to note in order to maintain the opti-
mum engine speed » page 39.
CAUTION
The pointer of the tachometer must reach the red area for only a short time -
there is a risk of engine damage!56728Operation
Page 33 of 220
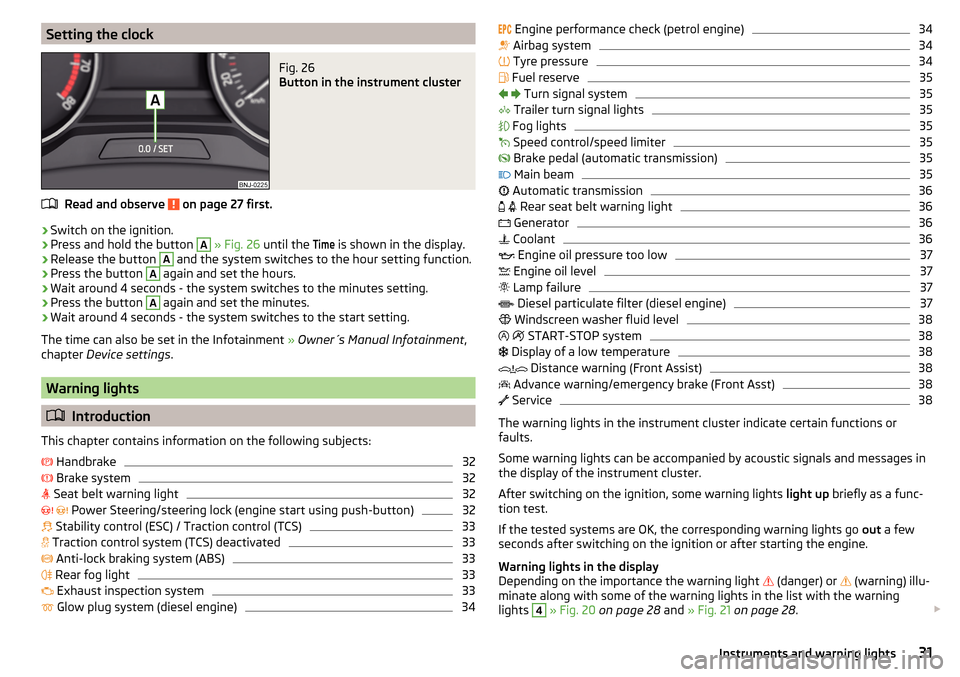
Setting the clockFig. 26
Button in the instrument cluster
Read and observe on page 27 first.
›
Switch on the ignition.
›
Press and hold the button
A
» Fig. 26 until the
Time
is shown in the display.
›
Release the button
A
and the system switches to the hour setting function.
›
Press the button
A
again and set the hours.
›
Wait around 4 seconds - the system switches to the minutes setting.
›
Press the button
A
again and set the minutes.
›
Wait around 4 seconds - the system switches to the start setting.
The time can also be set in the Infotainment » Owner´s Manual Infotainment ,
chapter Device settings .
Warning lights
Introduction
This chapter contains information on the following subjects:
Handbrake
32
Brake system
32
Seat belt warning light
32
Power Steering/steering lock (engine start using push-button)
32
Stability control (ESC) / Traction control (TCS)
33
Traction control system (TCS) deactivated
33
Anti-lock braking system (ABS)
33
Rear fog light
33
Exhaust inspection system
33
Glow plug system (diesel engine)
34
Engine performance check (petrol engine)34 Airbag system34
Tyre pressure
34
Fuel reserve
35
Turn signal system
35
Trailer turn signal lights
35
Fog lights
35
Speed control/speed limiter
35
Brake pedal (automatic transmission)
35
Main beam
35
Automatic transmission
36
Rear seat belt warning light
36
Generator
36
Coolant
36
Engine oil pressure too low
37
Engine oil level
37
Lamp failure
37
Diesel particulate filter (diesel engine)
37
Windscreen washer fluid level
38
START-STOP system
38
Display of a low temperature
38
Distance warning (Front Assist)
38
Advance warning/emergency brake (Front Asst)
38
Service
38
The warning lights in the instrument cluster indicate certain functions or
faults.
Some warning lights can be accompanied by acoustic signals and messages in
the display of the instrument cluster.
After switching on the ignition, some warning lights light up briefly as a func-
tion test.
If the tested systems are OK, the corresponding warning lights go out a few
seconds after switching on the ignition or after starting the engine.
Warning lights in the display
Depending on the importance the warning light (danger) or
(warning) illu-
minate along with some of the warning lights in the list with the warning
lights
4
» Fig. 20 on page 28 and » Fig. 21 on page 28 .
31Instruments and warning lights
Page 34 of 220
WARNING■Ignoring illuminated indicator lights and related messages or instructions
in the instrument cluster display may lead to serious personal injury or
damage to the vehicle.■
If you have to stop for technical reasons, then park the vehicle at a safe
distance from the traffic, switch off the engine and activate the hazard
warning lights system » page 63. Place the warning triangle at the pre-
scribed distance.
■
The engine compartment of your car is a hazardous area. While working in
the engine compartment, be sure to observe the following warnings
» page 149 , Engine compartment .
Handbrake
Read and observe
on page 32 first.
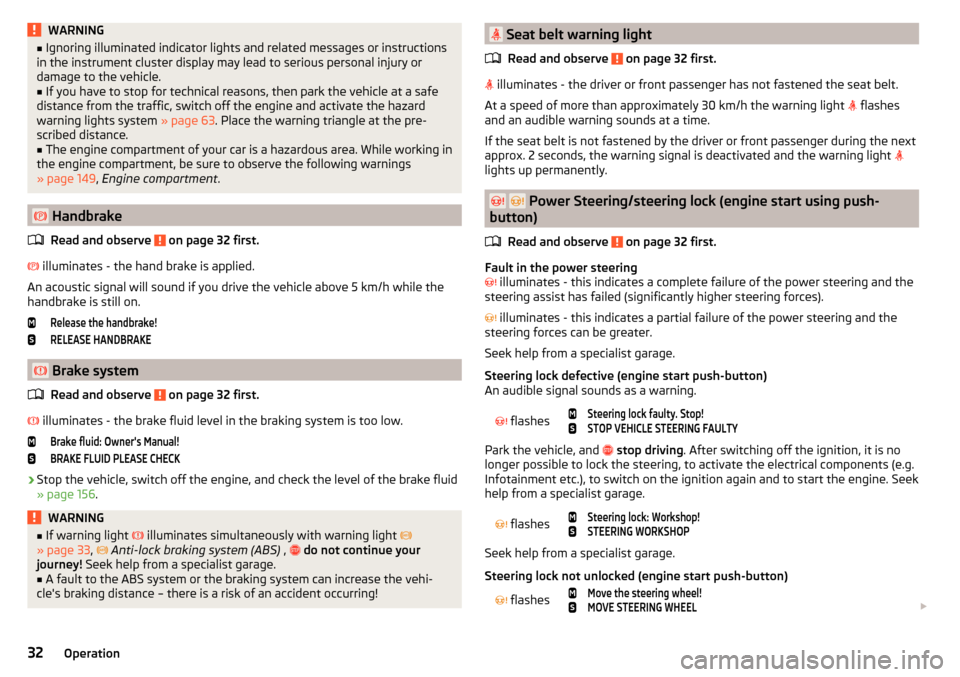
illuminates - the hand brake is applied.
An acoustic signal will sound if you drive the vehicle above 5 km/h while the
handbrake is still on.
Release the handbrake!RELEASE HANDBRAKE
Brake system
Read and observe
on page 32 first.
illuminates - the brake fluid level in the braking system is too low.
Brake fluid: Owner's Manual!BRAKE FLUID PLEASE CHECK›
Stop the vehicle, switch off the engine, and check the level of the brake fluid
» page 156 .
WARNING■
If warning light illuminates simultaneously with warning light
» page 33 , Anti-lock braking system (ABS) , do not continue your
journey! Seek help from a specialist garage.■
A fault to the ABS system or the braking system can increase the vehi-
cle's braking distance – there is a risk of an accident occurring!
Seat belt warning light
Read and observe
on page 32 first.
illuminates - the driver or front passenger has not fastened the seat belt.
At a speed of more than approximately 30 km/h the warning light
flashes
and an audible warning sounds at a time.
If the seat belt is not fastened by the driver or front passenger during the next
approx. 2 seconds, the warning signal is deactivated and the warning light
lights up permanently.
Power Steering/steering lock (engine start using push-
button)
Read and observe
on page 32 first.
Fault in the power steering
illuminates - this indicates a complete failure of the power steering and the
steering assist has failed (significantly higher steering forces).
illuminates - this indicates a partial failure of the power steering and the
steering forces can be greater.
Seek help from a specialist garage.
Steering lock defective (engine start push-button)
An audible signal sounds as a warning.
flashes
Steering lock faulty. Stop!STOP VEHICLE STEERING FAULTY
Park the vehicle, and
stop driving . After switching off the ignition, it is no
longer possible to lock the steering, to activate the electrical components (e.g.
Infotainment etc.), to switch on the ignition again and to start the engine. Seek
help from a specialist garage.
flashes
Steering lock: Workshop!STEERING WORKSHOP
Seek help from a specialist garage.
Steering lock not unlocked (engine start push-button)
flashes
Move the steering wheel!MOVE STEERING WHEEL
32Operation
Page 35 of 220
▶Move the steering wheel slightly back and forth, thereby facilitating unlock-
ing the steering lock.
If the steering does also not unlock then, the help of a specialist garage is re-
quired.
Disconnecting the vehicle battery
If the vehicle's battery has been disconnected and reconnected, the indicator
light
comes on after switching on the ignition.
The warning light should go out after driving a short distance.
If, after the motor is restarted and a short drive, the indicator light does not go
out, there is a system error.
Seek help from a specialist garage.
Stability control (ESC) / Traction control (TCS)
Read and observe
on page 32 first.
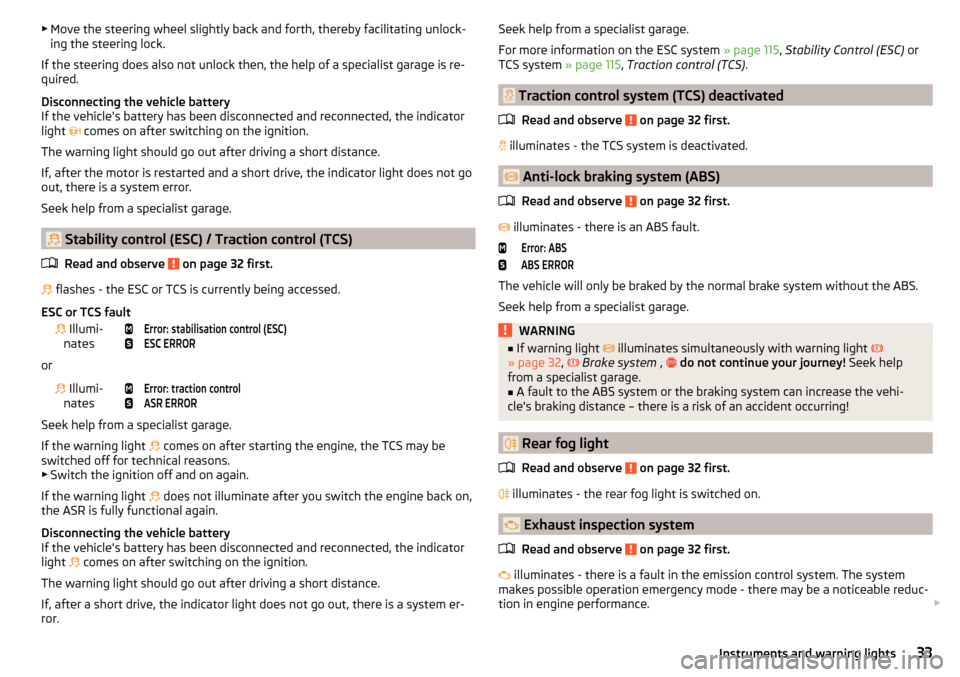
flashes - the ESC or TCS is currently being accessed.
ESC or TCS fault
Illumi-
nates
Error: stabilisation control (ESC)ESC ERROR
or
Illumi-
nates
Error: traction controlASR ERROR
Seek help from a specialist garage.
If the warning light comes on after starting the engine, the TCS may be
switched off for technical reasons. ▶ Switch the ignition off and on again.
If the warning light does not illuminate after you switch the engine back on,
the ASR is fully functional again.
Disconnecting the vehicle battery
If the vehicle's battery has been disconnected and reconnected, the indicator
light comes on after switching on the ignition.
The warning light should go out after driving a short distance.
If, after a short drive, the indicator light does not go out, there is a system er-
ror.
Seek help from a specialist garage.
For more information on the ESC system » page 115, Stability Control (ESC) or
TCS system » page 115, Traction control (TCS) .
Traction control system (TCS) deactivated
Read and observe
on page 32 first.
illuminates - the TCS system is deactivated.
Anti-lock braking system (ABS)
Read and observe
on page 32 first.
illuminates - there is an ABS fault.
Error: ABSABS ERROR
The vehicle will only be braked by the normal brake system without the ABS.
Seek help from a specialist garage.
WARNING■ If warning light illuminates simultaneously with warning light
» page 32 , Brake system , do not continue your journey! Seek help
from a specialist garage.■
A fault to the ABS system or the braking system can increase the vehi-
cle's braking distance – there is a risk of an accident occurring!
Rear fog light
Read and observe
on page 32 first.
illuminates - the rear fog light is switched on.
Exhaust inspection system
Read and observe
on page 32 first.
illuminates - there is a fault in the emission control system. The system
makes possible operation emergency mode - there may be a noticeable reduc-
tion in engine performance.
33Instruments and warning lights
Page 51 of 220
›Restart SmartGate by tapping on the “Reboot” 1)
interface.
PIN code change for the Wi-Fi Direct connection›
Open the SmartGate web interface.
›
In the menu item “Wi-Fi Direct PIN:” Enter the new PIN code (6 digits).
›
Confirm the PIN code change by tapping on the “Save” interface.
›
Restart SmartGate by tapping on the “Reboot” 1 )
interface.
Note
If you have forgotten your password for the connection to SmartGate,
SmartGate must be reset to factory settings in a specialised workshop.Unlocking and opening
Unlocking and locking
Introduction
This chapter contains information on the following subjects:
Locking/unlocking using the key via the lock cylinder
50
Unlocking/locking with the remote control key
50
Unlocking / locking - KESSY
51
Locking/unlocking the vehicle with the central locking button
52
SafeLock
52
Individual settings
52
Opening/closing the door
53
Child safety lock
53
Malfunctions
54
Your car is equipped with a central locking system.
The central locking system allows you to lock and unlock all doors, the fuel fill-
er flap and boot lid at the same time. The functions of the central locking sys-
tem can be individually adjusted » page 52.
After unlocking, depending on vehicle equipment and setting, the following
is valid for the central locking.
▶ The turn signal lights flash twice as confirmation that the vehicle has been
unlocked.
▶ A double audible signal sounds additionally on vehicles which are fitted with
the anti-theft alarm system.
▶ The doors, the boot lid and the fuel filler flap are unlocked.
▶ The interior lamp illuminates.
▶ The SafeLock system is switched off.
▶ The warning icon in the driver door stops flashing.
▶ The anti-theft alarm system is deactivated.
1)
If the “Reboot” interface is not displayed, you must manually restore the web browser display.
49Unlocking and opening
Page 52 of 220
After locking, depending on vehicle equipment and setting, the following is
valid for the central locking. ▶ The turn signal lights flash once as confirmation that the vehicle has been
locked.
▶ An audible signal sounds additionally on vehicles which are fitted with the
anti-theft alarm system.
▶ The doors, the boot lid and the fuel filler flap are locked.
▶ The interior lamp goes out.
▶ The SafeLock system is switched on.
▶ The warning light in the driver door begins flashing.
▶ The anti-theft alarm system is activated.
If the doors or the boot lid remain open after the vehicle doors have been
locked, the turn signal lights do not flash until they have been closed.
Protection against unwanted vehicle unlocking
If you unlock the vehicle and do not open a door or the boot lid within the next
45 seconds, the vehicle will lock again automatically and the SafeLock system
or anti-theft alarm system will be switched on.WARNING■ Never leave the key in the vehicle when you exit the vehicle. Unauthor-
ized persons, such as children, for example, could lock the car, turn on the
ignition or start the engine - danger of injury and accidents!■
When leaving the vehicle, never leave people who are not completely in-
dependent, such as children, unattended in the vehicle. These individuals
might not be able to leave the vehicle on their own or to help themselves.
At very high or very low temperatures can be fatal!
CAUTION
■ Each key contains electronic components; therefore it must be protected
against moisture and severe shocks.■
Keep the groove of the keys absolutely clean. Impurities (textile fibres, dust,
etc.) impair the function of the locking cylinder and ignition lock.
■
If the driver's door has been opened, the vehicle cannot be locked.
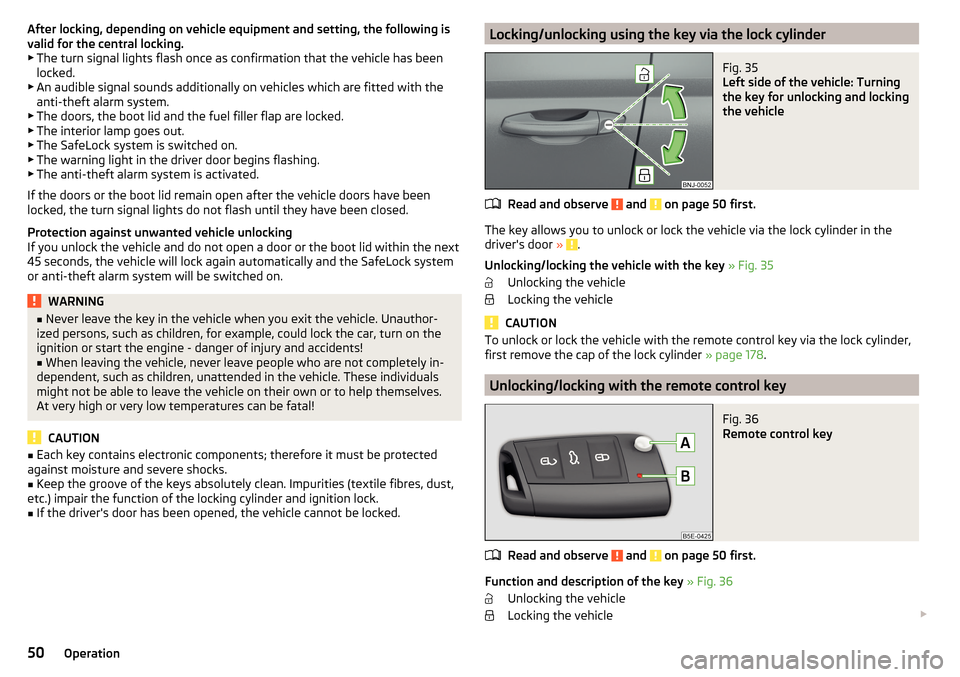
Locking/unlocking using the key via the lock cylinderFig. 35
Left side of the vehicle: Turning
the key for unlocking and locking
the vehicle
Read and observe and on page 50 first.
The key allows you to unlock or lock the vehicle via the lock cylinder in the
driver's door » .
Unlocking/locking the vehicle with the key » Fig. 35
Unlocking the vehicle
Locking the vehicle
CAUTION
To unlock or lock the vehicle with the remote control key via the lock cylinder,
first remove the cap of the lock cylinder » page 178.
Unlocking/locking with the remote control key
Fig. 36
Remote control key
Read and observe and on page 50 first.
Function and description of the key » Fig. 36
Unlocking the vehicle
Locking the vehicle
50Operation
Page 53 of 220
Unlocking / locking the boot lid
Button for folding the key in/out
Warning light for the battery condition
If the red warning light does not flash when you press a button on the key,
the battery is flat.
Unlocking / locking the boot lid
By briefly pressing the symbol key
, the boot lid unlocks.
Press and hold the symbol key
to release the lid (partially opened).
If the lid is unlocked or released with the key symbol
on the key, then the
lid is automatically locked after closing. You can set a lock delay » page 56.
CAUTION
■
Operation of the remote control may temporarily be affected by signal inter-
ference from transmitters close to the car and which operate in the same fre-
quency range (e.g. mobile phone, TV transmitter).■
The operating range of the remote control key is approx. 30 m. But this range
of the remote control can be reduced if the batteries are weak.
■
The battery must be replaced if the central locking only reacts to the remote
control at less than around 3 metres away » page 177.
Note
The remote control will only operate when in visual contact with the vehicle.
Unlocking / locking - KESSY
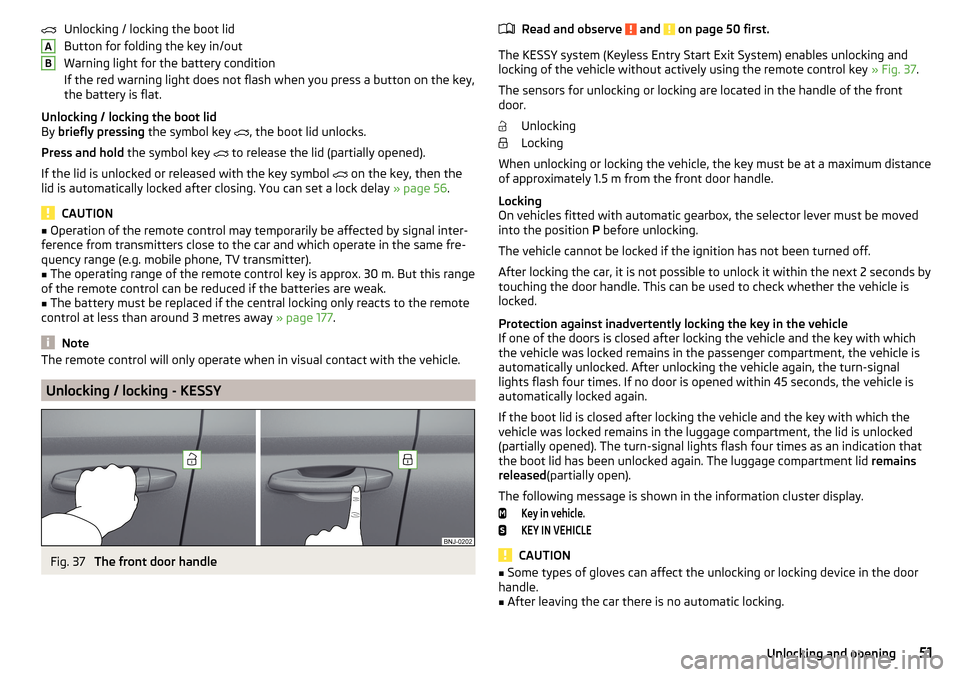
Fig. 37
The front door handle
ABRead and observe and on page 50 first.
The KESSY system (Keyless Entry Start Exit System) enables unlocking and
locking of the vehicle without actively using the remote control key » Fig. 37.
The sensors for unlocking or locking are located in the handle of the front
door.
Unlocking
Locking
When unlocking or locking the vehicle, the key must be at a maximum distance
of approximately 1.5 m from the front door handle.
Locking
On vehicles fitted with automatic gearbox, the selector lever must be moved into the position P before unlocking.
The vehicle cannot be locked if the ignition has not been turned off.
After locking the car, it is not possible to unlock it within the next 2 seconds by touching the door handle. This can be used to check whether the vehicle is
locked.
Protection against inadvertently locking the key in the vehicle
If one of the doors is closed after locking the vehicle and the key with which
the vehicle was locked remains in the passenger compartment, the vehicle is
automatically unlocked. After unlocking the vehicle again, the turn-signal
lights flash four times. If no door is opened within 45 seconds, the vehicle is
automatically locked again.
If the boot lid is closed after locking the vehicle and the key with which the
vehicle was locked remains in the luggage compartment, the lid is unlocked
(partially opened). The turn-signal lights flash four times as an indication that
the boot lid has been unlocked again. The luggage compartment lid remains
released (partially open).
The following message is shown in the information cluster display.
Key in vehicle.KEY IN VEHICLE
CAUTION
■ Some types of gloves can affect the unlocking or locking device in the door
handle.■
After leaving the car there is no automatic locking.
51Unlocking and opening