lock SKODA FABIA 2015 3.G / NJ Owner's Guide
[x] Cancel search | Manufacturer: SKODA, Model Year: 2015, Model line: FABIA, Model: SKODA FABIA 2015 3.G / NJPages: 220, PDF Size: 32.46 MB
Page 54 of 220
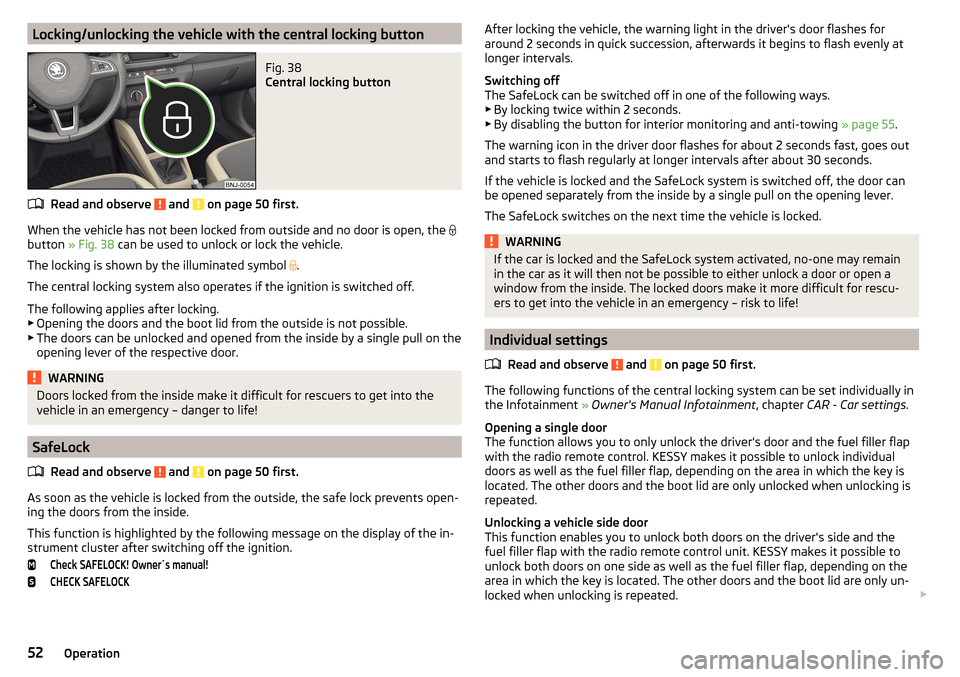
Locking/unlocking the vehicle with the central locking buttonFig. 38
Central locking button
Read and observe and on page 50 first.
When the vehicle has not been locked from outside and no door is open, the
button » Fig. 38 can be used to unlock or lock the vehicle.
The locking is shown by the illuminated symbol .
The central locking system also operates if the ignition is switched off.
The following applies after locking. ▶ Opening the doors and the boot lid from the outside is not possible.
▶ The doors can be unlocked and opened from the inside by a single pull on the
opening lever of the respective door.
WARNINGDoors locked from the inside make it difficult for rescuers to get into the
vehicle in an emergency – danger to life!
SafeLock
Read and observe
and on page 50 first.
As soon as the vehicle is locked from the outside, the safe lock prevents open-
ing the doors from the inside.
This function is highlighted by the following message on the display of the in-
strument cluster after switching off the ignition.
Check SAFELOCK! Owner´s manual!CHECK SAFELOCKAfter locking the vehicle, the warning light in the driver's door flashes for
around 2 seconds in quick succession, afterwards it begins to flash evenly at
longer intervals.
Switching off
The SafeLock can be switched off in one of the following ways. ▶ By locking twice within 2 seconds.
▶ By disabling the button for interior monitoring and anti-towing » page 55.
The warning icon in the driver door flashes for about 2 seconds fast, goes out
and starts to flash regularly at longer intervals after about 30 seconds.
If the vehicle is locked and the SafeLock system is switched off, the door can
be opened separately from the inside by a single pull on the opening lever.
The SafeLock switches on the next time the vehicle is locked.WARNINGIf the car is locked and the SafeLock system activated, no-one may remain
in the car as it will then not be possible to either unlock a door or open a
window from the inside. The locked doors make it more difficult for rescu-
ers to get into the vehicle in an emergency – risk to life!
Individual settings
Read and observe
and on page 50 first.
The following functions of the central locking system can be set individually inthe Infotainment » Owner's Manual Infotainment , chapter CAR - Car settings.
Opening a single door
The function allows you to only unlock the driver's door and the fuel filler flap
with the radio remote control. KESSY makes it possible to unlock individual
doors as well as the fuel filler flap, depending on the area in which the key is
located. The other doors and the boot lid are only unlocked when unlocking is
repeated.
Unlocking a vehicle side door
This function enables you to unlock both doors on the driver's side and the
fuel filler flap with the radio remote control unit. KESSY makes it possible to
unlock both doors on one side as well as the fuel filler flap, depending on the
area in which the key is located. The other doors and the boot lid are only un-
locked when unlocking is repeated.
52Operation
Page 55 of 220
Unlock all doors
The function allows you to unlock all doors, the boot lid and the fuel filler flap.
Automatic locking/unlocking
The function allows you to lock all doors and the boot lid from a speed of
about 15 km/h. The button in the handle of the boot lid is deactivated.
All doors and the luggage compartment is unlocked again when the ignition key is removed or by opening any of the doors. In vehicles with the KESSY sys-
tem, this is when any door is opened.
The vehicle can also be unlocked by pressing the central locking button
in
the centre console » page 52.
Acoustic signals when locking/unlocking
For vehicles with an anti-theft alarm system, the acoustic signals can be ena-
bled/disabled in the Infotainment » Owner's Manual Infotainment , chap-
ter CAR - Vehicle Settings .
Opening/closing the door
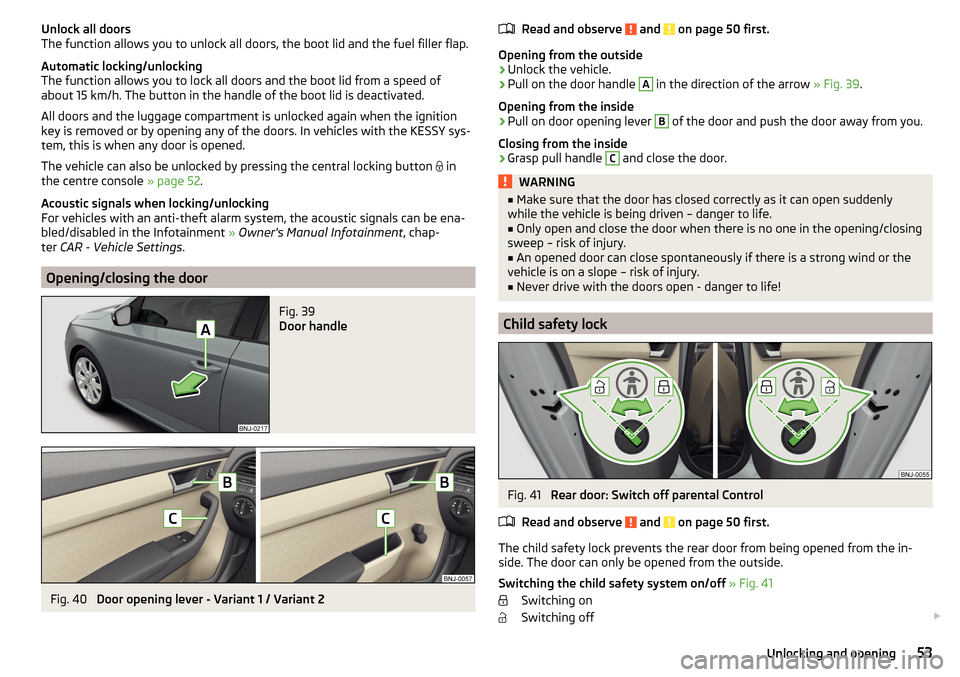
Fig. 39
Door handle
Fig. 40
Door opening lever - Variant 1 / Variant 2
Read and observe and on page 50 first.
Opening from the outside
›
Unlock the vehicle.
›
Pull on the door handle
A
in the direction of the arrow » Fig. 39.
Opening from the inside
›
Pull on door opening lever
B
of the door and push the door away from you.
Closing from the inside
›
Grasp pull handle
C
and close the door.
WARNING■ Make sure that the door has closed correctly as it can open suddenly
while the vehicle is being driven – danger to life.■
Only open and close the door when there is no one in the opening/closing
sweep – risk of injury.
■
An opened door can close spontaneously if there is a strong wind or the
vehicle is on a slope – risk of injury.
■
Never drive with the doors open - danger to life!
Child safety lock
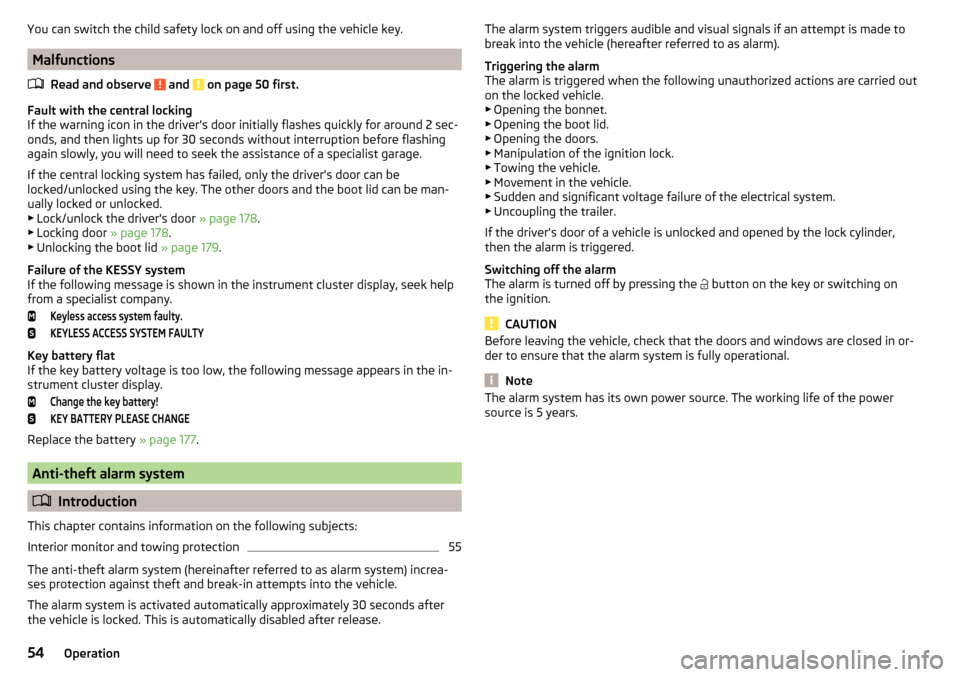
Fig. 41
Rear door: Switch off parental Control
Read and observe
and on page 50 first.
The child safety lock prevents the rear door from being opened from the in- side. The door can only be opened from the outside.
Switching the child safety system on/off » Fig. 41
Switching on
Switching off
53Unlocking and opening
Page 56 of 220
You can switch the child safety lock on and off using the vehicle key.
MalfunctionsRead and observe
and on page 50 first.
Fault with the central locking
If the warning icon in the driver's door initially flashes quickly for around 2 sec-
onds, and then lights up for 30 seconds without interruption before flashing
again slowly, you will need to seek the assistance of a specialist garage.
If the central locking system has failed, only the driver's door can be
locked/unlocked using the key. The other doors and the boot lid can be man-
ually locked or unlocked.
▶ Lock/unlock the driver's door » page 178.
▶ Locking door » page 178.
▶ Unlocking the boot lid » page 179.
Failure of the KESSY system
If the following message is shown in the instrument cluster display, seek help
from a specialist company.
Keyless access system faulty.KEYLESS ACCESS SYSTEM FAULTY
Key battery flat
If the key battery voltage is too low, the following message appears in the in-
strument cluster display.
Change the key battery!KEY BATTERY PLEASE CHANGE
Replace the battery » page 177.
Anti-theft alarm system
Introduction
This chapter contains information on the following subjects:
Interior monitor and towing protection
55
The anti-theft alarm system (hereinafter referred to as alarm system) increa-
ses protection against theft and break-in attempts into the vehicle.
The alarm system is activated automatically approximately 30 seconds after
the vehicle is locked. This is automatically disabled after release.
The alarm system triggers audible and visual signals if an attempt is made to
break into the vehicle (hereafter referred to as alarm).
Triggering the alarm
The alarm is triggered when the following unauthorized actions are carried out
on the locked vehicle. ▶ Opening the bonnet.
▶ Opening the boot lid.
▶ Opening the doors.
▶ Manipulation of the ignition lock.
▶ Towing the vehicle.
▶ Movement in the vehicle.
▶ Sudden and significant voltage failure of the electrical system.
▶ Uncoupling the trailer.
If the driver's door of a vehicle is unlocked and opened by the lock cylinder,
then the alarm is triggered.
Switching off the alarm
The alarm is turned off by pressing the button on the key or switching on
the ignition.
CAUTION
Before leaving the vehicle, check that the doors and windows are closed in or-
der to ensure that the alarm system is fully operational.
Note
The alarm system has its own power source. The working life of the power
source is 5 years.54Operation
Page 57 of 220
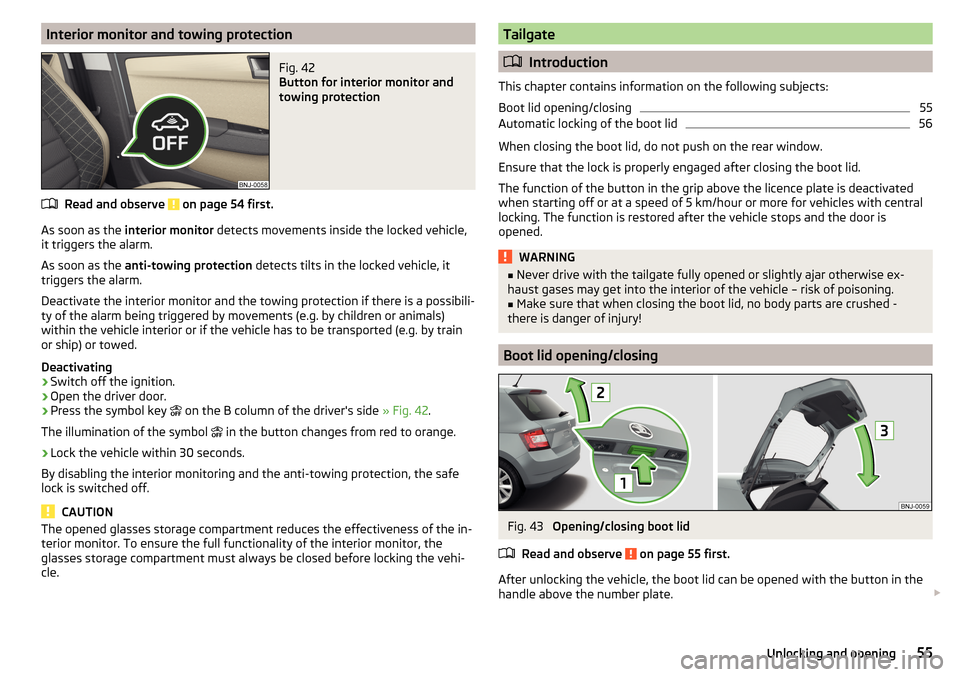
Interior monitor and towing protectionFig. 42
Button for interior monitor and
towing protection
Read and observe on page 54 first.
As soon as the interior monitor detects movements inside the locked vehicle,
it triggers the alarm.
As soon as the anti-towing protection detects tilts in the locked vehicle, it
triggers the alarm.
Deactivate the interior monitor and the towing protection if there is a possibili-
ty of the alarm being triggered by movements (e.g. by children or animals)
within the vehicle interior or if the vehicle has to be transported (e.g. by train
or ship) or towed.
Deactivating
›
Switch off the ignition.
›
Open the driver door.
›
Press the symbol key on the B column of the driver's side
» Fig. 42.
The illumination of the symbol in the button changes from red to orange.
›
Lock the vehicle within 30 seconds.
By disabling the interior monitoring and the anti-towing protection, the safe
lock is switched off.
CAUTION
The opened glasses storage compartment reduces the effectiveness of the in-
terior monitor. To ensure the full functionality of the interior monitor, the
glasses storage compartment must always be closed before locking the vehi-
cle.Tailgate
Introduction
This chapter contains information on the following subjects:
Boot lid opening/closing
55
Automatic locking of the boot lid
56
When closing the boot lid, do not push on the rear window.
Ensure that the lock is properly engaged after closing the boot lid.
The function of the button in the grip above the licence plate is deactivated
when starting off or at a speed of 5 km/hour or more for vehicles with central
locking. The function is restored after the vehicle stops and the door is
opened.
WARNING■ Never drive with the tailgate fully opened or slightly ajar otherwise ex-
haust gases may get into the interior of the vehicle – risk of poisoning.■
Make sure that when closing the boot lid, no body parts are crushed -
there is danger of injury!
Boot lid opening/closing
Fig. 43
Opening/closing boot lid
Read and observe
on page 55 first.
After unlocking the vehicle, the boot lid can be opened with the button in the
handle above the number plate.
55Unlocking and opening
Page 58 of 220
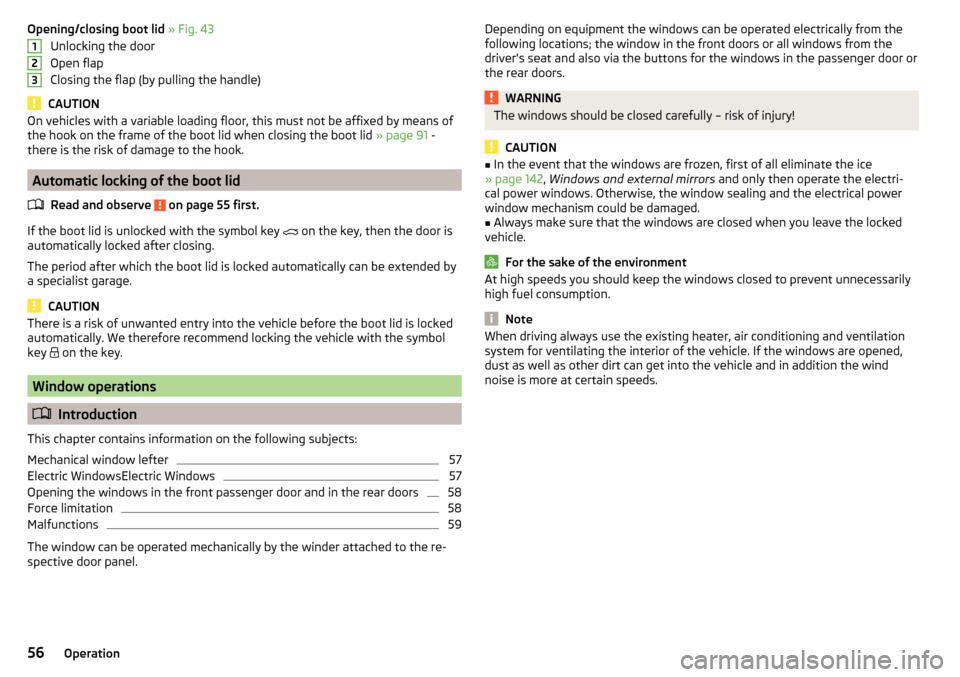
Opening/closing boot lid » Fig. 43
Unlocking the door
Open flap
Closing the flap (by pulling the handle)
CAUTION
On vehicles with a variable loading floor, this must not be affixed by means of
the hook on the frame of the boot lid when closing the boot lid » page 91 -
there is the risk of damage to the hook.
Automatic locking of the boot lid
Read and observe
on page 55 first.
If the boot lid is unlocked with the symbol key on the key, then the door is
automatically locked after closing.
The period after which the boot lid is locked automatically can be extended by
a specialist garage.
CAUTION
There is a risk of unwanted entry into the vehicle before the boot lid is locked
automatically. We therefore recommend locking the vehicle with the symbol
key
on the key.
Window operations
Introduction
This chapter contains information on the following subjects:
Mechanical window lefter
57
Electric WindowsElectric Windows
57
Opening the windows in the front passenger door and in the rear doors
58
Force limitation
58
Malfunctions
59
The window can be operated mechanically by the winder attached to the re-
spective door panel.
123Depending on equipment the windows can be operated electrically from the
following locations; the window in the front doors or all windows from the
driver's seat and also via the buttons for the windows in the passenger door or
the rear doors.WARNINGThe windows should be closed carefully – risk of injury!
CAUTION
■ In the event that the windows are frozen, first of all eliminate the ice
» page 142 , Windows and external mirrors and only then operate the electri-
cal power windows. Otherwise, the window sealing and the electrical power
window mechanism could be damaged.■
Always make sure that the windows are closed when you leave the locked
vehicle.
For the sake of the environment
At high speeds you should keep the windows closed to prevent unnecessarily high fuel consumption.
Note
When driving always use the existing heater, air conditioning and ventilation
system for ventilating the interior of the vehicle. If the windows are opened,
dust as well as other dirt can get into the vehicle and in addition the wind
noise is more at certain speeds.56Operation
Page 59 of 220
Mechanical window lefterFig. 44
Operating the window: left/right
Read and observe
and on page 56 first.
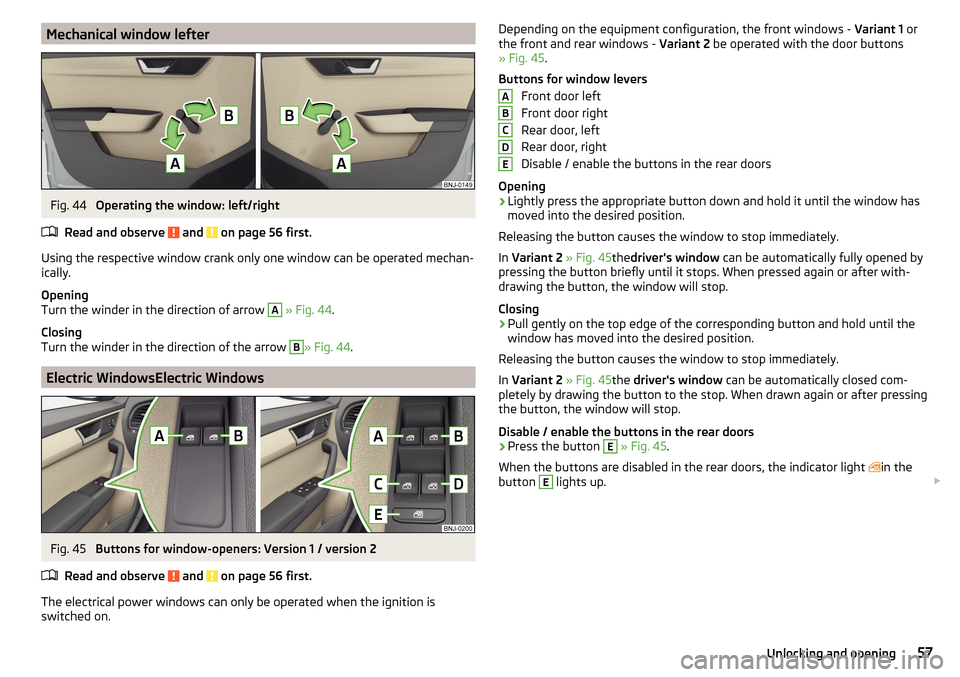
Using the respective window crank only one window can be operated mechan-
ically.
Opening
Turn the winder in the direction of arrow
A
» Fig. 44 .
Closing
Turn the winder in the direction of the arrow
B
» Fig. 44 .
Electric WindowsElectric Windows
Fig. 45
Buttons for window-openers: Version 1 / version 2
Read and observe
and on page 56 first.
The electrical power windows can only be operated when the ignition is
switched on.
Depending on the equipment configuration, the front windows - Variant 1 or
the front and rear windows - Variant 2 be operated with the door buttons
» Fig. 45 .
Buttons for window levers Front door left
Front door right
Rear door, left
Rear door, right
Disable / enable the buttons in the rear doors
Opening›
Lightly press the appropriate button down and hold it until the window has
moved into the desired position.
Releasing the button causes the window to stop immediately.
In Variant 2 » Fig. 45thedriver's window can be automatically fully opened by
pressing the button briefly until it stops. When pressed again or after with-
drawing the button, the window will stop.
Closing
›
Pull gently on the top edge of the corresponding button and hold until the
window has moved into the desired position.
Releasing the button causes the window to stop immediately.
In Variant 2 » Fig. 45the driver's window can be automatically closed com-
pletely by drawing the button to the stop. When drawn again or after pressing
the button, the window will stop.
Disable / enable the buttons in the rear doors
›
Press the button
E
» Fig. 45 .
When the buttons are disabled in the rear doors, the indicator light in the
button
E
lights up.
ABCDE57Unlocking and opening
Page 65 of 220
COMING HOME / LEAVING HOMERead and observe
on page 59 first.
The function COMING HOME ensures that the vehicle's environment is illumi-
nated after switching off the ignition and opening the driver's door.
The function LEAVING HOME ensures that the vehicle's environment is illumi-
nated after unlocking the vehicle with the radio remote control unit.
The function switches the light on only if there is poorer visibility and the light
switch is in the position
.
Enabling / disabling and setting functions
The functions and setting of the lighting duration can be activated or deactiva-
ted in the Infotainment system » Owner´s Manual Infotainment , chap-
ter CARVehicle settings .
CAUTION
■
Poorer visibility is detected by a sensor mounted below the windscreen in
the holder of the inside mirror or in the control panel. Do not attach any stick-
ers or similar objects in front of the sensor in order to avoid impairing the func-
tion or its reliability.■
If this option is always enabled, then the battery is heavily loaded.
Hazard warning light system
Fig. 51
Hazard warning light system
button
Read and observe on page 59 first.
The hazard warning lights make other road users aware of your vehicle.
The function switches on all indicators.
Switching on/off
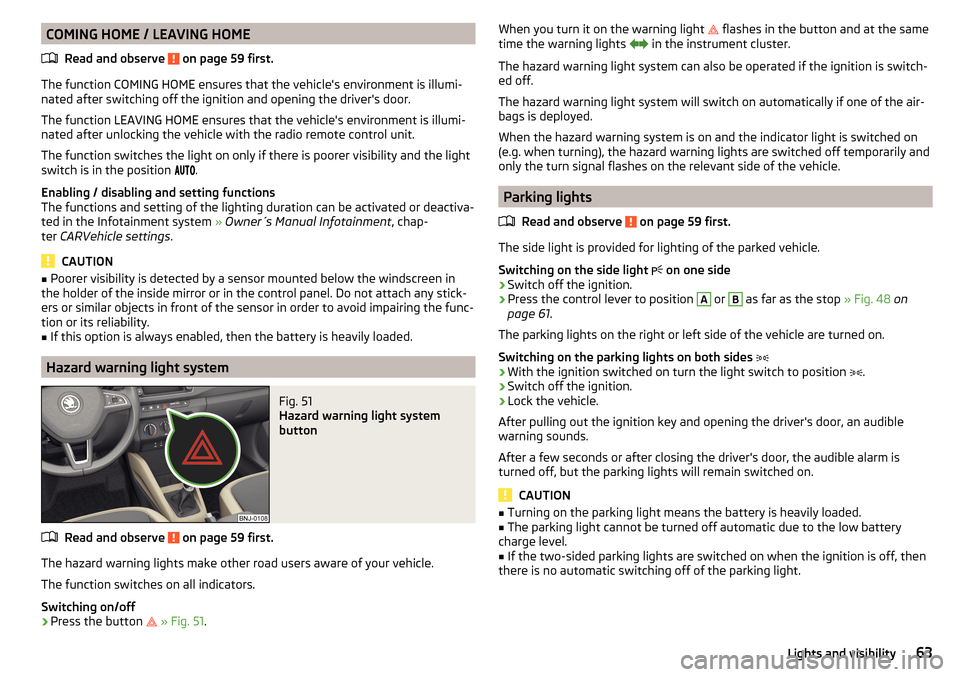
›
Press the button
» Fig. 51 .
When you turn it on the warning light flashes in the button and at the same
time the warning lights in the instrument cluster.
The hazard warning light system can also be operated if the ignition is switch-
ed off.
The hazard warning light system will switch on automatically if one of the air-
bags is deployed.
When the hazard warning system is on and the indicator light is switched on
(e.g. when turning), the hazard warning lights are switched off temporarily and
only the turn signal flashes on the relevant side of the vehicle.
Parking lights
Read and observe
on page 59 first.
The side light is provided for lighting of the parked vehicle.
Switching on the side light on one side
›
Switch off the ignition.
›
Press the control lever to position
A
or
B
as far as the stop
» Fig. 48 on
page 61 .
The parking lights on the right or left side of the vehicle are turned on.
Switching on the parking lights on both sides
›
With the ignition switched on turn the light switch to position .
›
Switch off the ignition.
›
Lock the vehicle.
After pulling out the ignition key and opening the driver's door, an audible
warning sounds.
After a few seconds or after closing the driver's door, the audible alarm is
turned off, but the parking lights will remain switched on.
CAUTION
■ Turning on the parking light means the battery is heavily loaded.■The parking light cannot be turned off automatic due to the low battery
charge level.■
If the two-sided parking lights are switched on when the ignition is off, then
there is no automatic switching off of the parking light.
63Lights and visibility
Page 66 of 220
Driving abroadRead and observe
on page 59 first.
When driving in countries with opposing traffic system (traffic on the
left/right), your headlights may dazzle oncoming traffic. To prevent oncoming
traffic from being dazzled, the headlights must be adjusted by a specialist ga-
rage.
Interior lights
Introduction
This chapter contains information on the following subjects:
Front interior light
64
Rear interior light
64
The inner lighting also works if the ignition is switched off.
The light turns off automatically 10 minutes after switching off the ignition or
opening a door unless otherwise specified.
Front interior light
Fig. 52
Operation of the front light: Version 1 / version 2
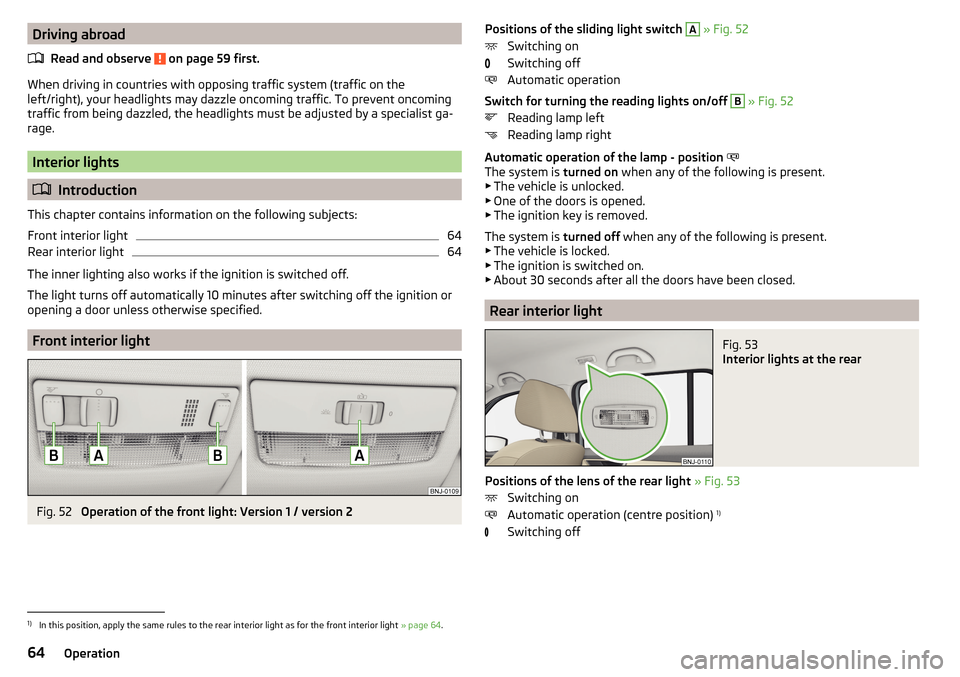
Positions of the sliding light switch A » Fig. 52
Switching on
Switching off
Automatic operation
Switch for turning the reading lights on/off B
» Fig. 52
Reading lamp left
Reading lamp right
Automatic operation of the lamp - position
The system is turned on when any of the following is present.
▶ The vehicle is unlocked.
▶ One of the doors is opened.
▶ The ignition key is removed.
The system is turned off when any of the following is present.
▶ The vehicle is locked.
▶ The ignition is switched on.
▶ About 30 seconds after all the doors have been closed.
Rear interior light
Fig. 53
Interior lights at the rear
Positions of the lens of the rear light » Fig. 53
Switching on
Automatic operation (centre position) 1)
Switching off
1)
In this position, apply the same rules to the rear interior light as for the front interior light » page 64.
64Operation
Page 72 of 220
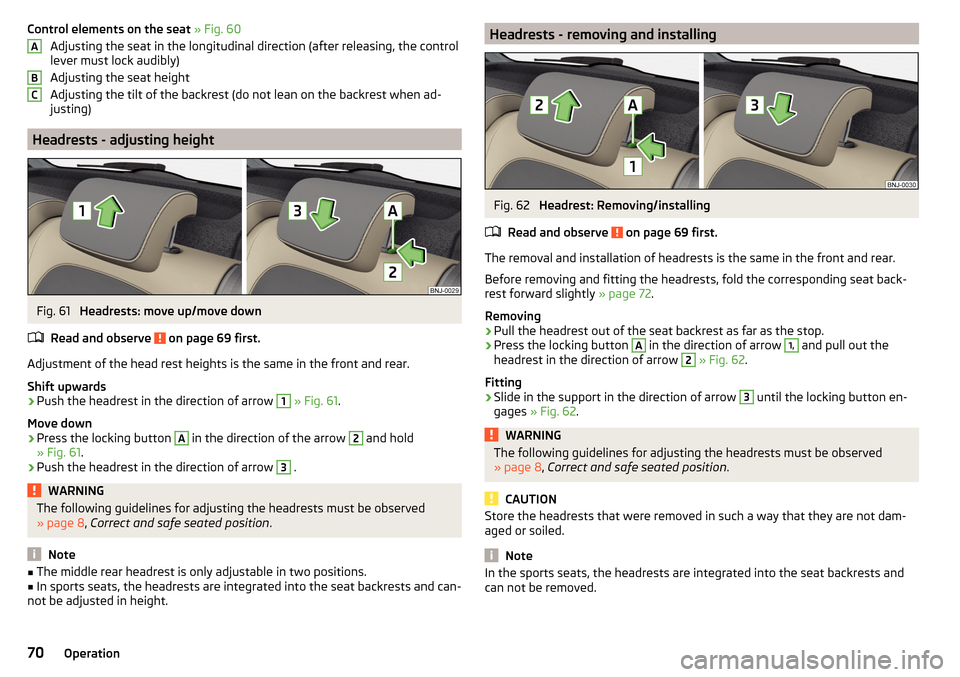
Control elements on the seat » Fig. 60
Adjusting the seat in the longitudinal direction (after releasing, the control
lever must lock audibly)
Adjusting the seat height
Adjusting the tilt of the backrest (do not lean on the backrest when ad-
justing)
Headrests - adjusting height
Fig. 61
Headrests: move up/move down
Read and observe
on page 69 first.
Adjustment of the head rest heights is the same in the front and rear.
Shift upwards
›
Push the headrest in the direction of arrow
1
» Fig. 61 .
Move down
›
Press the locking button
A
in the direction of the arrow
2
and hold
» Fig. 61 .
›
Push the headrest in the direction of arrow
3
.
WARNINGThe following guidelines for adjusting the headrests must be observed
» page 8 , Correct and safe seated position .
Note
■
The middle rear headrest is only adjustable in two positions.■In sports seats, the headrests are integrated into the seat backrests and can-
not be adjusted in height.ABCHeadrests - removing and installingFig. 62
Headrest: Removing/installing
Read and observe
on page 69 first.
The removal and installation of headrests is the same in the front and rear.
Before removing and fitting the headrests, fold the corresponding seat back-
rest forward slightly » page 72.
Removing
›
Pull the headrest out of the seat backrest as far as the stop.
›
Press the locking button
A
in the direction of arrow
1,
and pull out the
headrest in the direction of arrow
2
» Fig. 62 .
Fitting
›
Slide in the support in the direction of arrow
3
until the locking button en-
gages » Fig. 62 .
WARNINGThe following guidelines for adjusting the headrests must be observed
» page 8 , Correct and safe seated position .
CAUTION
Store the headrests that were removed in such a way that they are not dam-
aged or soiled.
Note
In the sports seats, the headrests are integrated into the seat backrests and
can not be removed.70Operation
Page 73 of 220
Seat features
Introduction
This chapter contains information on the following subjects:
Front seat heater
71
Adjusting the armrest
71
Seat backrests
72
Rear seat
72
Front seat heater
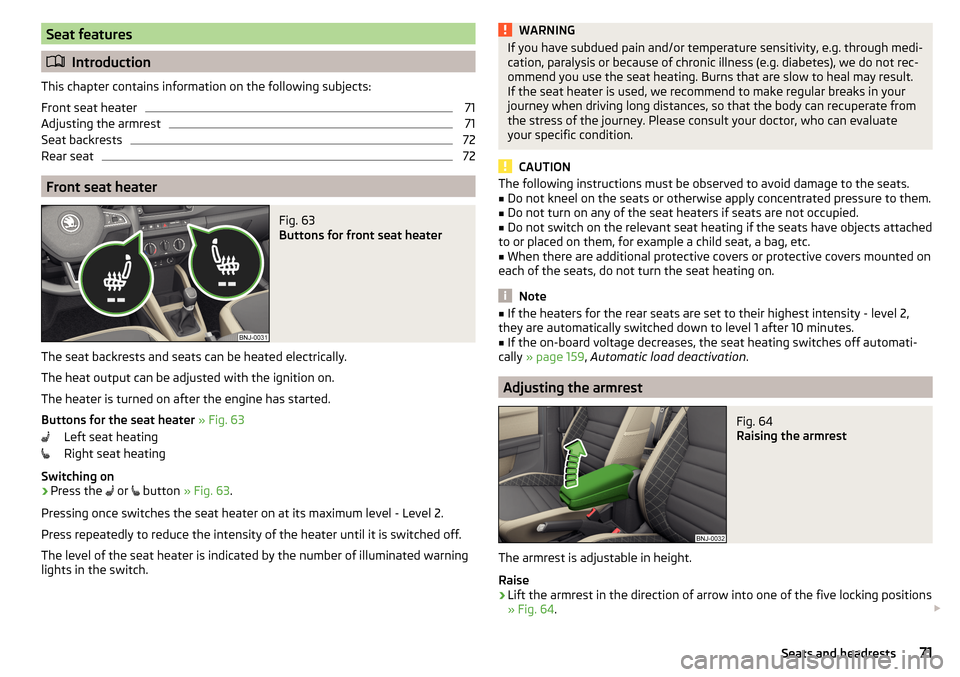
Fig. 63
Buttons for front seat heater
The seat backrests and seats can be heated electrically.
The heat output can be adjusted with the ignition on.
The heater is turned on after the engine has started.
Buttons for the seat heater » Fig. 63
Left seat heating
Right seat heating
Switching on
›
Press the or
button
» Fig. 63 .
Pressing once switches the seat heater on at its maximum level - Level 2.
Press repeatedly to reduce the intensity of the heater until it is switched off.
The level of the seat heater is indicated by the number of illuminated warning
lights in the switch.
WARNINGIf you have subdued pain and/or temperature sensitivity, e.g. through medi-
cation, paralysis or because of chronic illness (e.g. diabetes), we do not rec-
ommend you use the seat heating. Burns that are slow to heal may result.
If the seat heater is used, we recommend to make regular breaks in your
journey when driving long distances, so that the body can recuperate from
the stress of the journey. Please consult your doctor, who can evaluate
your specific condition.
CAUTION
The following instructions must be observed to avoid damage to the seats.■Do not kneel on the seats or otherwise apply concentrated pressure to them.■
Do not turn on any of the seat heaters if seats are not occupied.
■
Do not switch on the relevant seat heating if the seats have objects attached
to or placed on them, for example a child seat, a bag, etc.
■
When there are additional protective covers or protective covers mounted on
each of the seats, do not turn the seat heating on.
Note
■ If the heaters for the rear seats are set to their highest intensity - level 2,
they are automatically switched down to level 1 after 10 minutes.■
If the on-board voltage decreases, the seat heating switches off automati-
cally » page 159 , Automatic load deactivation .
Adjusting the armrest
Fig. 64
Raising the armrest
The armrest is adjustable in height.
Raise
›
Lift the armrest in the direction of arrow into one of the five locking positions
» Fig. 64 .
71Seats and headrests