start and stop SKODA KODIAQ 2016 1.G User Guide
[x] Cancel search | Manufacturer: SKODA, Model Year: 2016, Model line: KODIAQ, Model: SKODA KODIAQ 2016 1.GPages: 344, PDF Size: 58.96 MB
Page 54 of 344
Unlocking and opening
Unlocking and locking
Introduction
This chapter contains information on the following subjects:
Unlocking/locking with the remote control key
52
Remove KESSY emergency key
53
Locking / unlocking - KESSY
53
Locking/unlocking the vehicle with the central locking button
54
SafeLock
54
Individual settings
54
Opening / closing door
55
Door edge protection
55
Child safety lock
56
Malfunctions
57
The vehicle is equipped with a central locking system which makes it possible
to unlock / lock all the doors, the fuel filler flap and boot lid simultaneously.
The door unlocking can be adjusted individually » page 54.
The unlocking of the vehicle is displayed by the turn signal lights flashing
twice.
If you unlock the vehicle and do not open a door or the boot lid within the next
45 seconds, the vehicle will lock again automatically.
The locking of the vehicle is displayed by the turn signal lights flashing once.
If the driver's door has been opened, the vehicle cannot be locked.
If the doors or the boot lid remain open after the vehicle has been locked, the turn signal lights do not flash until they have been closed.
WARNING■ Never leave the key in the vehicle when you exit the vehicle. Unauthor-
ized persons (e.g. children) could lock the car, turn on the ignition or start
the engine - there is a danger of injury and accidents!■
When leaving the vehicle, never leave people who are not completely in-
dependent, such as children, unattended in the vehicle. These individuals
might not be able to leave the vehicle on their own or to help themselves.
Can be fatal at very high or very low temperatures!
CAUTION
■ Each key contains electronic components; therefore it must be protected
against moisture and severe shocks.■
Keep the keyway clean. Impurities (textile fibres, dust etc.) have a negative
effect on the functionality of the locking cylinder and ignition lock.
Unlocking/locking with the remote control key
Fig. 34
Key with fold/out key bit/KESSY key
Read and observe
and on page 52 first.
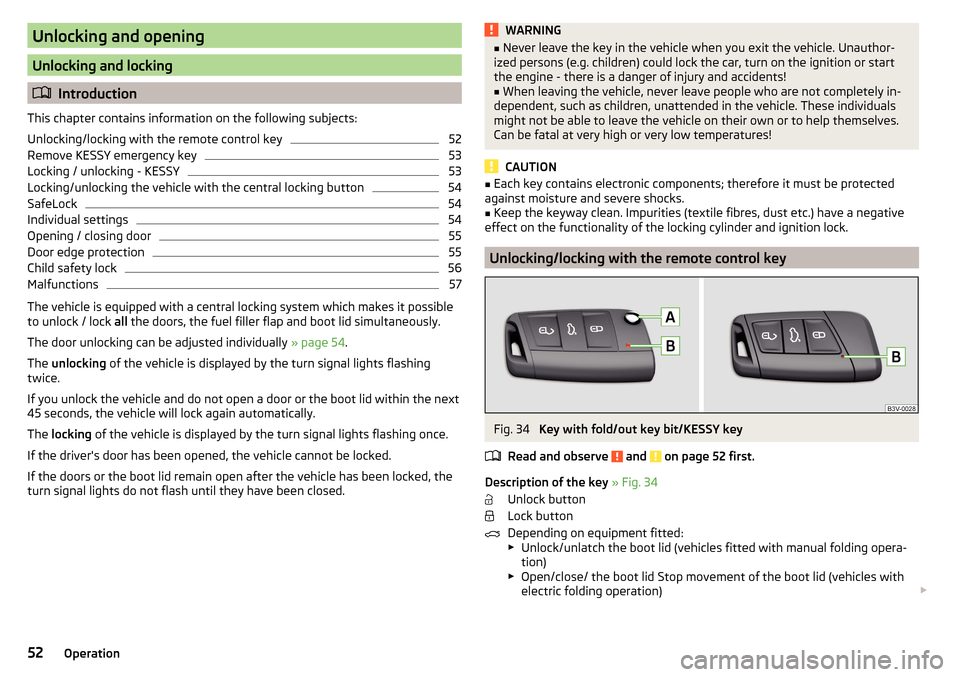
Description of the key » Fig. 34
Unlock button
Lock button
Depending on equipment fitted:
▶ Unlock/unlatch the boot lid (vehicles fitted with manual folding opera-
tion)
▶ Open/close/ the boot lid Stop movement of the boot lid (vehicles with
electric folding operation)
52Operation
Page 61 of 344
NoteButton A » Fig. 44 is deactivated when starting or at a speed of more than 5
km/h. The button is activated again after the vehicle has stopped and a door is
opened.
Setting the delayed locking of the boot lid
Read and observe
on page 58 first.
If the boot lid is unlocked with the button on the key, the lid is automatical-
ly locked again after closing.
The period after which the boot lid is locked automatically can be extended by
a specialist garage.
CAUTION
There is a risk of unwanted entry into the vehicle before the boot lid is locked
automatically.
Electric boot lid
Introduction
This chapter contains information on the following subjects:
Description of operation
60
Set the top position of the lid
60
Malfunctions
61
Operate boot lid contactless
61
The boot lid (hereinafter as lid) can be operated electrically and manual in the
event of an emergency » page 61.
WARNING■
Ensure that the lock is properly engaged after closing the lid. Otherwise,
the lid might open suddenly while the vehicle is moving, even if the lid was
locked – risk of accident!■
Never drive with the lid open or unlatched, as otherwise exhaust gases
may get into the interior of the vehicle – risk of poisoning!
■
Only open and close the lid when no one is located in the opening/closing
range – risk of injury!
WARNING (Continued)■ Make sure that no limbs are caught or crushed when closing the lid - risk
of injury!■
When you open the boot lid make sure that there are no persons in the
opening area of the lid - there is a danger of injury!
CAUTION
■ Do not attempt to close the lid manually during the electrical closing process
- there is a risk of damaging the electric lid operation.■
When washing the vehicle in a car wash, we recommend that you lock the
vehicle (with the central locking button). In some car washes the boot lid might
open automatically due to the pressure action of the washing brushes - there
is a risk of damage to the vehicle interior.
CAUTION
■ Check that no objects are located in the opening/closing area which could
hinder the movement (e.g. cargo on the roof rack or on the trailer etc.) - there
is a risk of damage to the lid!■
In certain circumstances, if the lid is loaded (e.g. by a thick layer of snow), the
opening process of the lid can be interrupted. Remove the snow from the lid to
re-enable the electrical operation.
■
If the lid closes automatically (e.g. under load of snow), you will hear an inter-
mittent beep.
■
The flap is always to be close before disconnecting the battery.
59Unlocking and opening
Page 62 of 344
Description of operationFig. 45
Lid operation
Read and observe
and on page 59 first.
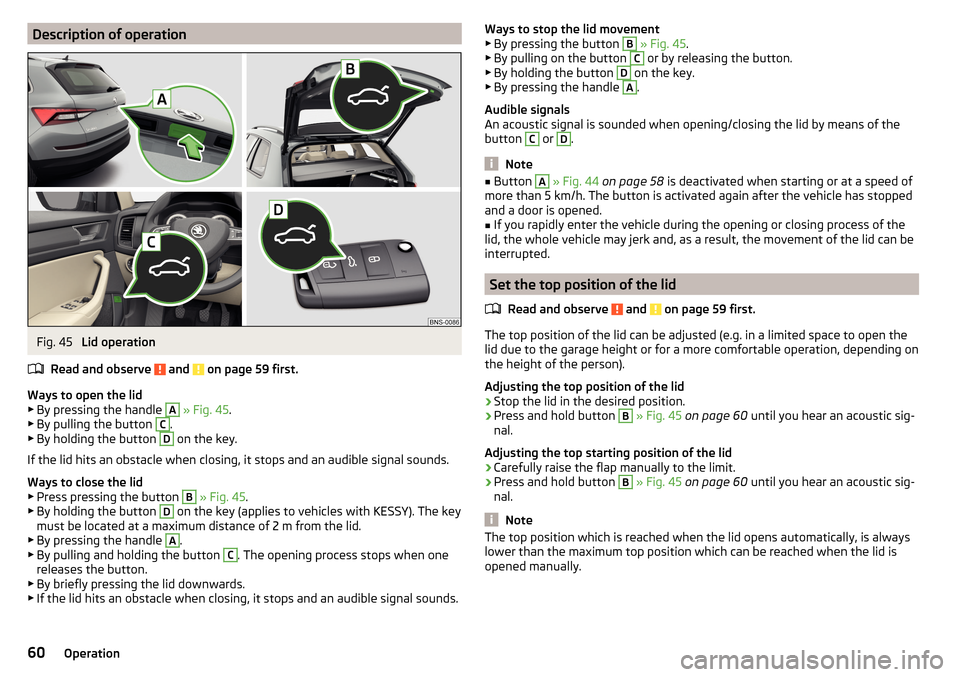
Ways to open the lid
▶ By pressing the handle
A
» Fig. 45 .
▶ By pulling the button
C
.
▶ By holding the button
D
on the key.
If the lid hits an obstacle when closing, it stops and an audible signal sounds.
Ways to close the lid ▶ Press pressing the button
B
» Fig. 45 .
▶ By holding the button
D
on the key (applies to vehicles with KESSY). The key
must be located at a maximum distance of 2 m from the lid.
▶ By pressing the handle
A
.
▶ By pulling and holding the button
C
. The opening process stops when one
releases the button.
▶ By briefly pressing the lid downwards.
▶ If the lid hits an obstacle when closing, it stops and an audible signal sounds.
Ways to stop the lid movement
▶ By pressing the button B » Fig. 45 .
▶ By pulling on the button C
or by releasing the button.
▶ By holding the button
D
on the key.
▶ By pressing the handle
A
.
Audible signals
An acoustic signal is sounded when opening/closing the lid by means of the
button
C
or
D
.
Note
■ Button A » Fig. 44 on page 58 is deactivated when starting or at a speed of
more than 5 km/h. The button is activated again after the vehicle has stopped
and a door is opened.■
If you rapidly enter the vehicle during the opening or closing process of the
lid, the whole vehicle may jerk and, as a result, the movement of the lid can be
interrupted.
Set the top position of the lid
Read and observe
and on page 59 first.
The top position of the lid can be adjusted (e.g. in a limited space to open thelid due to the garage height or for a more comfortable operation, depending on
the height of the person).
Adjusting the top position of the lid
›
Stop the lid in the desired position.
›
Press and hold button
B
» Fig. 45 on page 60 until you hear an acoustic sig-
nal.
Adjusting the top starting position of the lid
›
Carefully raise the flap manually to the limit.
›
Press and hold button
B
» Fig. 45 on page 60 until you hear an acoustic sig-
nal.
Note
The top position which is reached when the lid opens automatically, is always
lower than the maximum top position which can be reached when the lid is
opened manually.60Operation
Page 67 of 344
The sliding/tilting roof opens/closes again after around 10 seconds.›
Release the lever.
Electrically operated sunblind
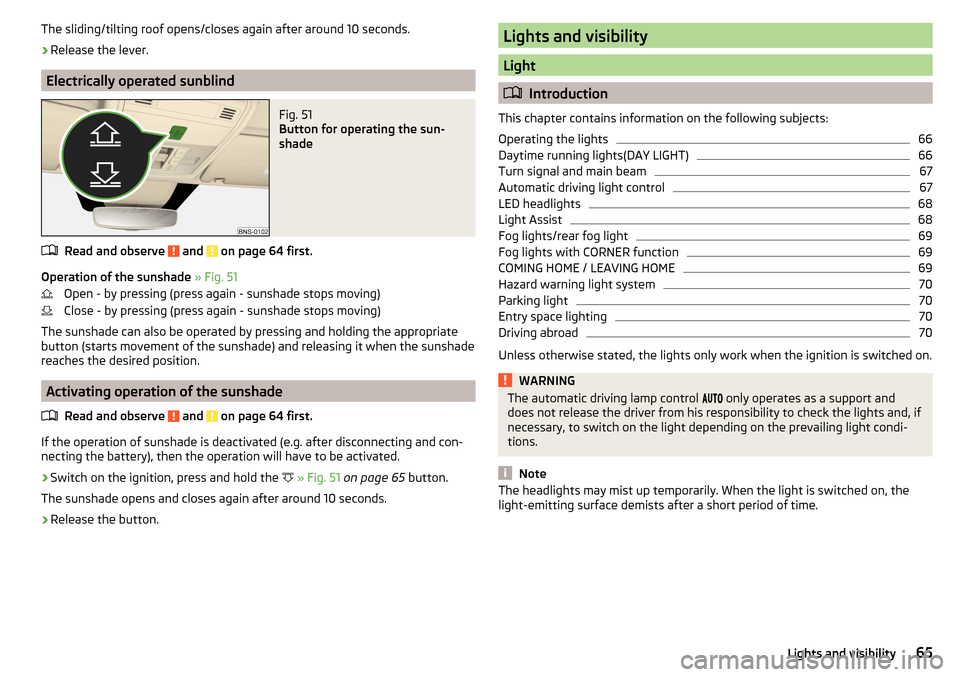
Fig. 51
Button for operating the sun-
shade
Read and observe and on page 64 first.
Operation of the sunshade » Fig. 51
Open - by pressing (press again - sunshade stops moving)
Close - by pressing (press again - sunshade stops moving)
The sunshade can also be operated by pressing and holding the appropriate
button (starts movement of the sunshade) and releasing it when the sunshade
reaches the desired position.
Activating operation of the sunshade
Read and observe
and on page 64 first.
If the operation of sunshade is deactivated (e.g. after disconnecting and con-
necting the battery), then the operation will have to be activated.
›
Switch on the ignition, press and hold the
» Fig. 51 on page 65 button.
The sunshade opens and closes again after around 10 seconds.
›
Release the button.
Lights and visibility
Light
Introduction
This chapter contains information on the following subjects:
Operating the lights
66
Daytime running lights(DAY LIGHT)
66
Turn signal and main beam
67
Automatic driving light control
67
LED headlights
68
Light Assist
68
Fog lights/rear fog light
69
Fog lights with CORNER function
69
COMING HOME / LEAVING HOME
69
Hazard warning light system
70
Parking light
70
Entry space lighting
70
Driving abroad
70
Unless otherwise stated, the lights only work when the ignition is switched on.
WARNINGThe automatic driving lamp control only operates as a support and
does not release the driver from his responsibility to check the lights and, if
necessary, to switch on the light depending on the prevailing light condi-
tions.
Note
The headlights may mist up temporarily. When the light is switched on, the
light-emitting surface demists after a short period of time.65Lights and visibility
Page 72 of 344
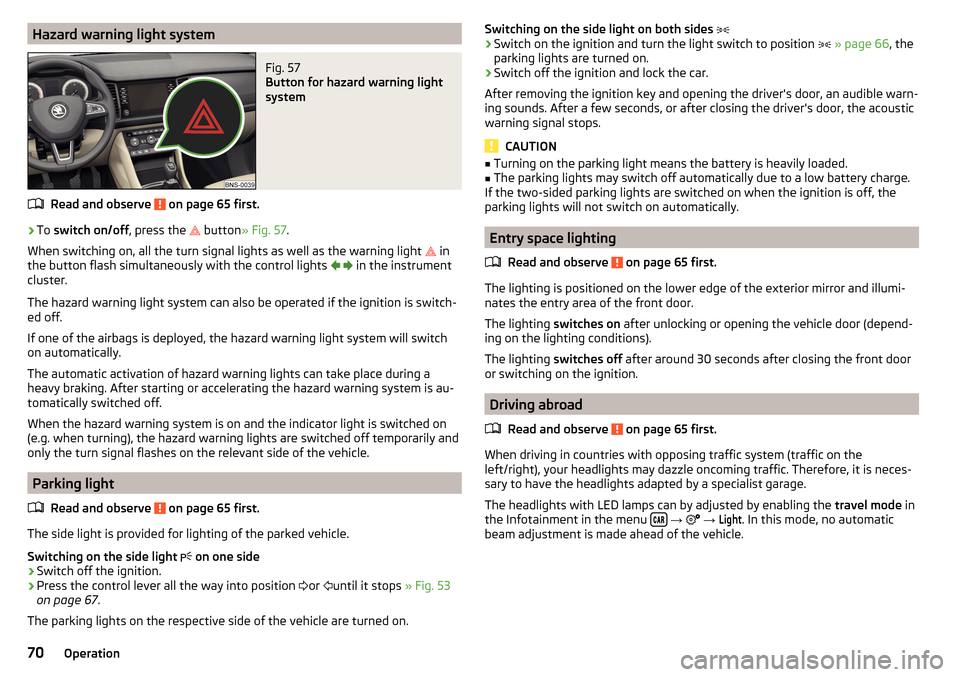
Hazard warning light systemFig. 57
Button for hazard warning light
system
Read and observe on page 65 first.
›
To switch on/off , press the
button
» Fig. 57 .
When switching on, all the turn signal lights as well as the warning light in
the button flash simultaneously with the control lights
in the instrument
cluster.
The hazard warning light system can also be operated if the ignition is switch-
ed off.
If one of the airbags is deployed, the hazard warning light system will switch
on automatically.
The automatic activation of hazard warning lights can take place during a
heavy braking. After starting or accelerating the hazard warning system is au-
tomatically switched off.
When the hazard warning system is on and the indicator light is switched on
(e.g. when turning), the hazard warning lights are switched off temporarily and
only the turn signal flashes on the relevant side of the vehicle.
Parking light
Read and observe
on page 65 first.
The side light is provided for lighting of the parked vehicle.
Switching on the side light on one side
›
Switch off the ignition.
›
Press the control lever all the way into position
or
until it stops
» Fig. 53
on page 67 .
The parking lights on the respective side of the vehicle are turned on.
Switching on the side light on both sides ›Switch on the ignition and turn the light switch to position » page 66 , the
parking lights are turned on.›
Switch off the ignition and lock the car.
After removing the ignition key and opening the driver's door, an audible warn-
ing sounds. After a few seconds, or after closing the driver's door, the acoustic
warning signal stops.
CAUTION
■ Turning on the parking light means the battery is heavily loaded.■The parking lights may switch off automatically due to a low battery charge.
If the two-sided parking lights are switched on when the ignition is off, the
parking lights will not switch on automatically.
Entry space lighting
Read and observe
on page 65 first.
The lighting is positioned on the lower edge of the exterior mirror and illumi-nates the entry area of the front door.
The lighting switches on after unlocking or opening the vehicle door (depend-
ing on the lighting conditions).
The lighting switches off after around 30 seconds after closing the front door
or switching on the ignition.
Driving abroad
Read and observe
on page 65 first.
When driving in countries with opposing traffic system (traffic on the
left/right), your headlights may dazzle oncoming traffic. Therefore, it is neces-
sary to have the headlights adapted by a specialist garage.
The headlights with LED lamps can by adjusted by enabling the travel mode in
the Infotainment in the menu
→
→
Light
. In this mode, no automatic
beam adjustment is made ahead of the vehicle.
70Operation
Page 99 of 344
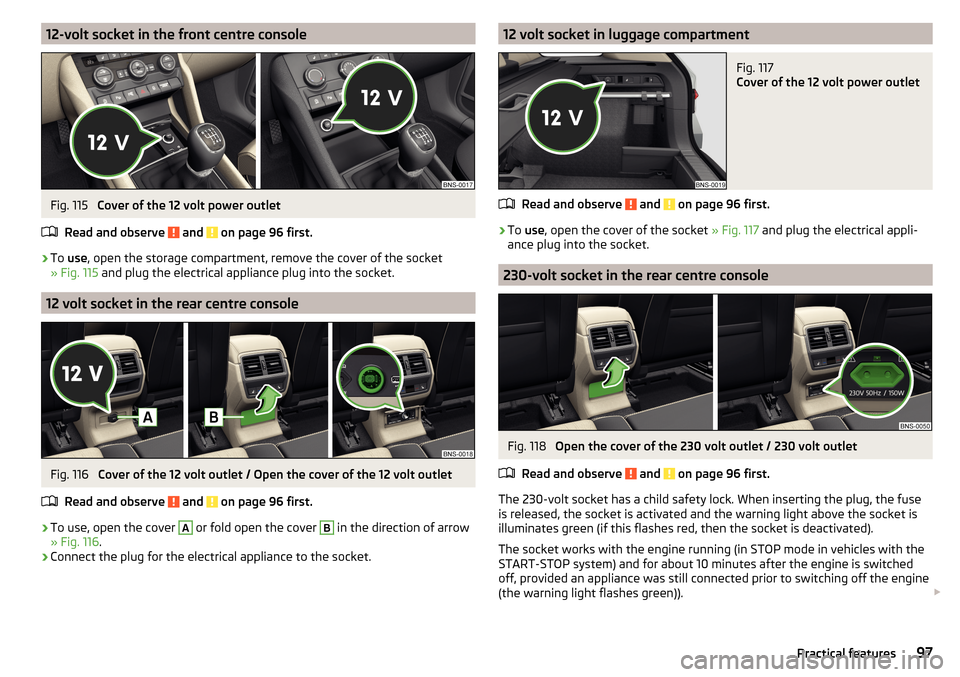
12-volt socket in the front centre consoleFig. 115
Cover of the 12 volt power outlet
Read and observe
and on page 96 first.
›
To use , open the storage compartment, remove the cover of the socket
» Fig. 115 and plug the electrical appliance plug into the socket.
12 volt socket in the rear centre console
Fig. 116
Cover of the 12 volt outlet / Open the cover of the 12 volt outlet
Read and observe
and on page 96 first.
›
To use, open the cover
A
or fold open the cover
B
in the direction of arrow
» Fig. 116 .
›
Connect the plug for the electrical appliance to the socket.
12 volt socket in luggage compartmentFig. 117
Cover of the 12 volt power outlet
Read and observe and on page 96 first.
›
To use , open the cover of the socket » Fig. 117 and plug the electrical appli-
ance plug into the socket.
230-volt socket in the rear centre console
Fig. 118
Open the cover of the 230 volt outlet / 230 volt outlet
Read and observe
and on page 96 first.
The 230-volt socket has a child safety lock. When inserting the plug, the fuse
is released, the socket is activated and the warning light above the socket is
illuminates green (if this flashes red, then the socket is deactivated).
The socket works with the engine running (in STOP mode in vehicles with the
START-STOP system) and for about 10 minutes after the engine is switched
off, provided an appliance was still connected prior to switching off the engine
(the warning light flashes green)).
97Practical features
Page 130 of 344
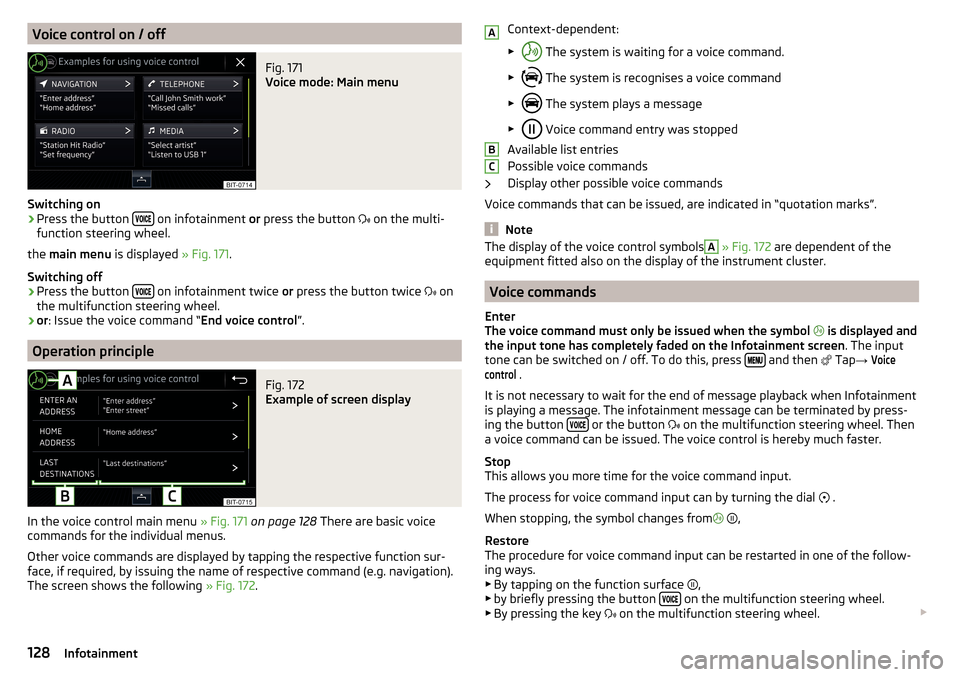
Voice control on / offFig. 171
Voice mode: Main menu
Switching on
›
Press the button on infotainment
or press the button
on the multi-
function steering wheel.
the main menu is displayed » Fig. 171.
Switching off
›
Press the button on infotainment twice
or press the button twice
on
the multifunction steering wheel.
›
or : Issue the voice command “ End voice control”.
Operation principle
Fig. 172
Example of screen display
In the voice control main menu » Fig. 171 on page 128 There are basic voice
commands for the individual menus.
Other voice commands are displayed by tapping the respective function sur-
face, if required, by issuing the name of respective command (e.g. navigation).
The screen shows the following » Fig. 172.
Context-dependent:
▶ The system is waiting for a voice command.
▶ The system is recognises a voice command
▶ The system plays a message
▶ Voice command entry was stopped
Available list entries
Possible voice commands
Display other possible voice commands
Voice commands that can be issued, are indicated in “quotation marks”.
Note
The display of the voice control symbolsA » Fig. 172 are dependent of the
equipment fitted also on the display of the instrument cluster.
Voice commands
Enter
The voice command must only be issued when the symbol
is displayed and
the input tone has completely faded on the Infotainment screen . The input
tone can be switched on / off. To do this, press
and then
Tap
→
Voicecontrol
.
It is not necessary to wait for the end of message playback when Infotainment
is playing a message. The infotainment message can be terminated by press-
ing the button
or the button
on the multifunction steering wheel. Then
a voice command can be issued. The voice control is hereby much faster.
Stop
This allows you more time for the voice command input.
The process for voice command input can by turning the dial .
When stopping, the symbol changes from
,
Restore
The procedure for voice command input can be restarted in one of the follow-
ing ways.
▶ By tapping on the function surface ,
▶ by briefly pressing the button
on the multifunction steering wheel.
▶ By pressing the key on the multifunction steering wheel.
ABC128Infotainment
Page 131 of 344
Not recognising a voice command
If a voice command is not detected three times in succession from Infotain-
ment, then the voice control is stopped.
Correction of a voice command input
A voice command can be corrected, modified or re-entered by pressing the
button
or the button
on the multifunction steering wheel. However,
this is only possible as long as the symbol
appears on the screen.
You do not have to wait until the voice command is recognised by Infotain-
ment.
Voice commands can be used anytime during voice control
Voice commandOperation“ Back ”Return to the previous menu“Help ”reproducing and displaying possible voice com-
mands
Voice commands that can be used while browsing the list entries
Voice commandOperation“ Next page ”
Browse menu / list / directory
“Previous page ”“First page ”“Last page ”
Additional Information
Navigation - applies to Infotainment Columbus
If the set Infotainment language matches with the language of the currently
selected country when entering the destination, then the destination address
is entered in one step .
The voice command “ Navigate” and immediately the city, street and street
number (if it is included in the navigation data) Interest (POI) or a contact with
the previously stored address, can be issued.
Navigation - applies to Infotainment Amundsen
To the destination, you are first required to issue the command “enter ad-
dress” and then follow Infotainment instructions.
You can say the house number and a further additional address in the form of
a number where necessary. Infotainment will then offer the number combina-
tion it has found if the house number and the further address supplement,
where appropriate, exists in the street entered.
It is not necessary to spell city and street names if the entered destination is
located in a country that has no voice control available for the language.
Navigation - activated online services
When activated online services ŠKODA Connect » page 117 a POI search online
by Pronouncing “ Search Online POI ” possible.
Radio
In order for a radio station can be selected using voice command, the station
must be stored in the list of available stations » page 142 or in the preset list
» page 143 .
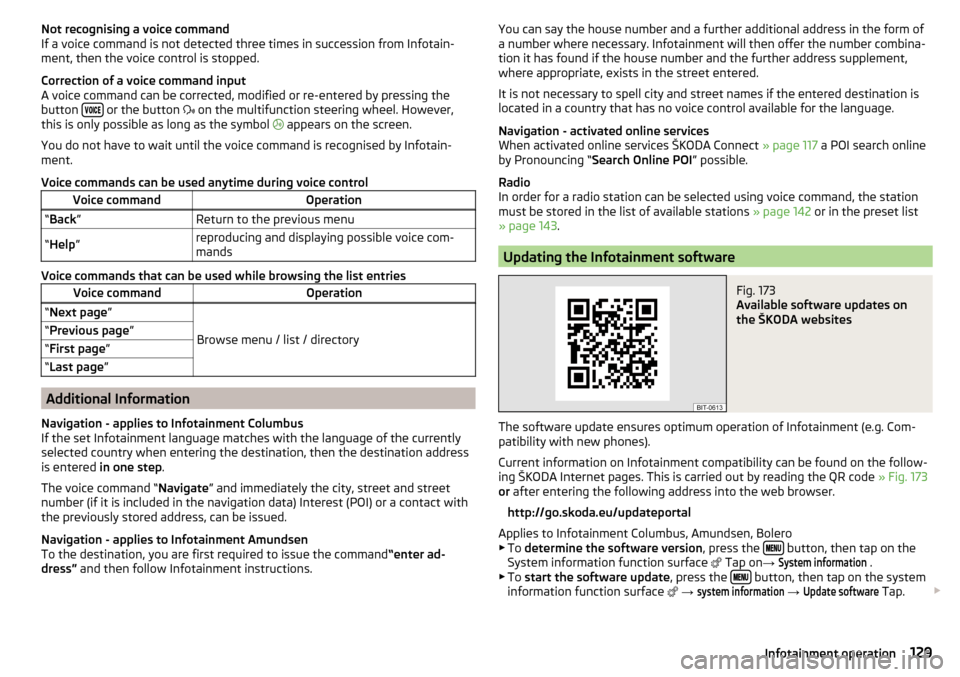
Updating the Infotainment software
Fig. 173
Available software updates on
the ŠKODA websites
The software update ensures optimum operation of Infotainment (e.g. Com-
patibility with new phones).
Current information on Infotainment compatibility can be found on the follow-
ing ŠKODA Internet pages. This is carried out by reading the QR code » Fig. 173
or after entering the following address into the web browser.
http://go.skoda.eu/updateportal
Applies to Infotainment Columbus, Amundsen, Bolero
▶ To determine the software version , press the
button, then tap on the
System information function surface Tap on
→
System information
.
▶ To start the software update , press the button, then tap on the system
information function surface
→
system information
→
Update software
Tap.
129Infotainment operation
Page 148 of 344
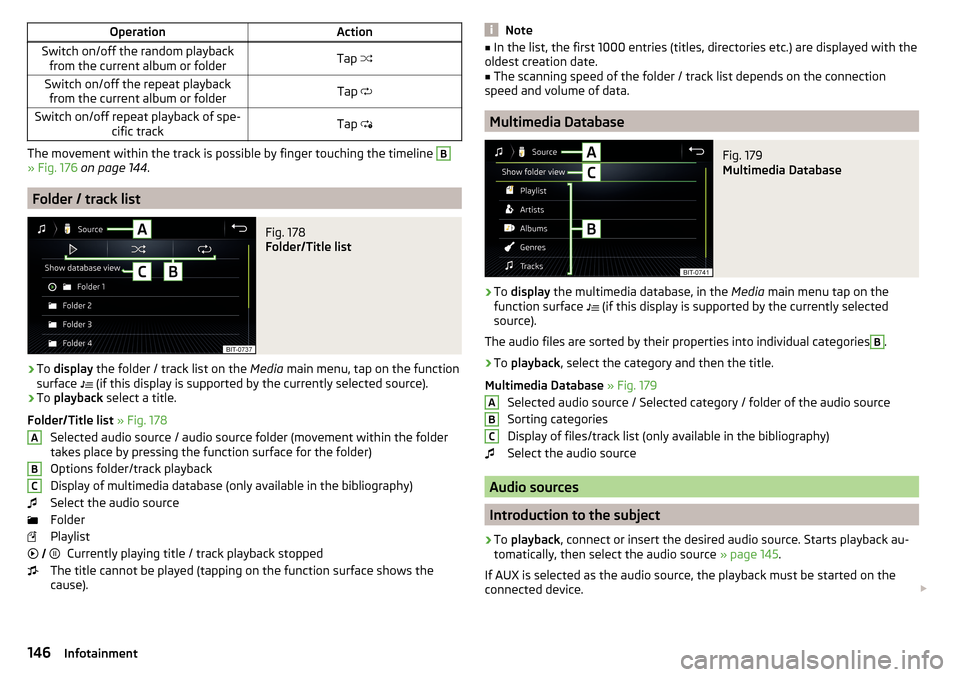
OperationActionSwitch on/off the random playbackfrom the current album or folderTap Switch on/off the repeat playback
from the current album or folderTap Switch on/off repeat playback of spe-
cific trackTap
The movement within the track is possible by finger touching the timeline
B
» Fig. 176 on page 144 .
Folder / track list
Fig. 178
Folder/Title list
›
To display the folder / track list on the Media main menu, tap on the function
surface (if this display is supported by the currently selected source).
›
To
playback select a title.
Folder/Title list » Fig. 178
Selected audio source / audio source folder (movement within the folder
takes place by pressing the function surface for the folder)
Options folder/track playback
Display of multimedia database (only available in the bibliography)
Select the audio source
Folder
Playlist Currently playing title / track playback stopped
The title cannot be played (tapping on the function surface shows the
cause).
ABC Note■
In the list, the first 1000 entries (titles, directories etc.) are displayed with the
oldest creation date.■
The scanning speed of the folder / track list depends on the connection
speed and volume of data.
Multimedia Database
Fig. 179
Multimedia Database
›
To display the multimedia database, in the Media main menu tap on the
function surface
(if this display is supported by the currently selected
source).
The audio files are sorted by their properties into individual categories
B
.
›
To playback , select the category and then the title.
Multimedia Database » Fig. 179
Selected audio source / Selected category / folder of the audio source
Sorting categories
Display of files/track list (only available in the bibliography)
Select the audio source
Audio sources
Introduction to the subject
›
To playback , connect or insert the desired audio source. Starts playback au-
tomatically, then select the audio source » page 145.
If AUX is selected as the audio source, the playback must be started on the
connected device.
ABC146Infotainment
Page 194 of 344
For trailer towing , We recommend that you activate recognition of road signs
relevant to trailers.›
Press the button, then tap on the function surface
→
Driver assistance
→
Show road signs relevant to trailers
.
Route guidance
Introduction to the subject
A route is created by starting route guidance to a destination. Additional inter-
mediate destinations can be added to the route.
The route guidance takes place as follows
▶ Through graphical driving instructions on the Infotainment screen and in the
display of the instrument cluster.
▶ With nav. announcements.
Infotainment tries to allow for continued guidance even if the navigation data
is incomplete or there is no data at all for the given area.
The route is recalculated each time if you ignore driving recommendations or change the route.
CAUTION
The nav. announcements provided may vary from the actual situations, e.g.
due to out-of-date navigation data.
Destination details
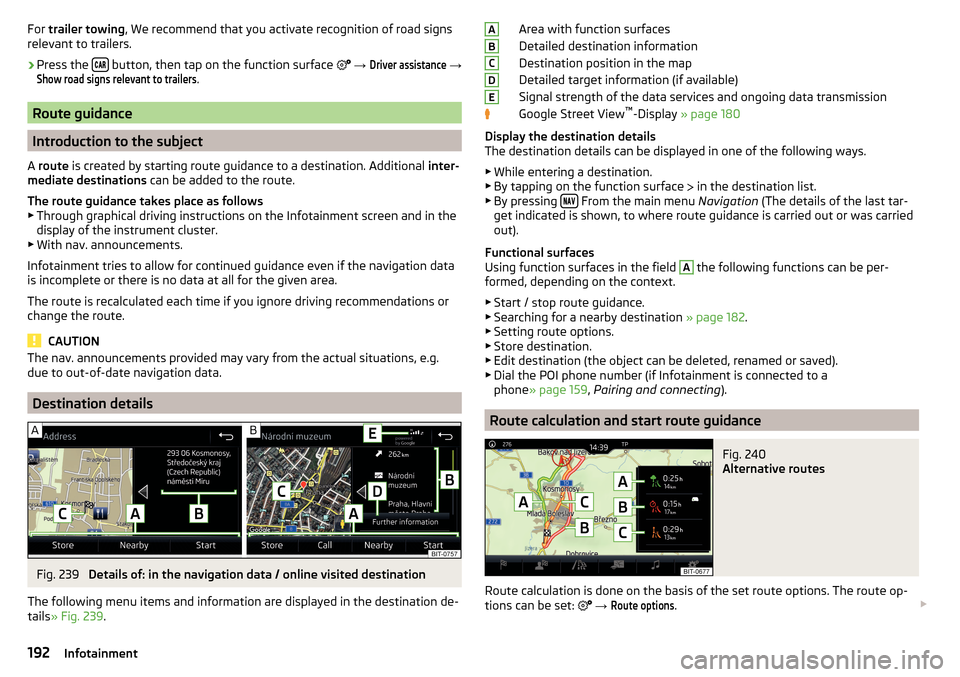
Fig. 239
Details of: in the navigation data / online visited destination
The following menu items and information are displayed in the destination de-
tails » Fig. 239 .
Area with function surfaces
Detailed destination information
Destination position in the map
Detailed target information (if available)
Signal strength of the data services and ongoing data transmission
Google Street View ™
-Display » page 180
Display the destination details
The destination details can be displayed in one of the following ways.
▶ While entering a destination.
▶ By tapping on the function surface
in the destination list.
▶ By pressing
From the main menu
Navigation (The details of the last tar-
get indicated is shown, to where route guidance is carried out or was carried
out).
Functional surfaces
Using function surfaces in the field
A
the following functions can be per-
formed, depending on the context.
▶ Start / stop route guidance.
▶ Searching for a nearby destination » page 182.
▶ Setting route options.
▶ Store destination.
▶ Edit destination (the object can be deleted, renamed or saved).
▶ Dial the POI phone number (if Infotainment is connected to a
phone » page 159 , Pairing and connecting ).
Route calculation and start route guidance
Fig. 240
Alternative routes
Route calculation is done on the basis of the set route options. The route op-
tions can be set:
→
Route options
.
ABCDE192Infotainment