coolant level SKODA KODIAQ 2016 1.G Owner's Manual
[x] Cancel search | Manufacturer: SKODA, Model Year: 2016, Model line: KODIAQ, Model: SKODA KODIAQ 2016 1.GPages: 344, PDF Size: 58.96 MB
Page 14 of 344
Safety
Passive Safety
General information
Introduction
This chapter contains information on the following subjects:
Before setting off
12
Driving safety
12
This section of the manual includes important information on the subject of
passive safety. We have combined everything here which you should be famili-
ar with, for example, regarding seat belts, airbags, safety of children and any-
thing similar.
Other important safety information can also be found in the following chapters
of this Owner´s Manual. The Owner´s Manual should therefore always be in
the vehicle.
Before setting off
For your own safety and the safety of the people travelling with you, please
pay attention to the following points before setting off.
▶ Check the function of the lighting and turn signal systems.
▶ Check the function of the wipers and check the wiper blades for wear. Check
the windscreen washer fluid level.
▶ Ensure that all of the windows offer good visibility to the outside.
▶ Adjust the rear-view mirror so that vision to the rear is guaranteed. Ensure
that the mirrors are not covered.
▶ Check the tyre inflation pressure.
▶ Check the engine oil, brake fluid and coolant level.
▶ Secure all items of luggage.
▶ Do not exceed the permissible axle loads and permissible gross weight of the
vehicle.
▶ Close all doors as well as the bonnet and boot lid.
▶ Ensure that no objects can obstruct the pedals.
▶
Protect children by using a suitable child seat » page 23, Transporting chil-
dren safely .
▶ Adopt the correct seated position. Instruct your passengers to assume the
correct seated position » page 12, Correct and safe seated position .
Driving safety
In the interests of traffic safety, the following information must be observed. ▶ Do not become distracted from concentrating on the traffic situation, (e.g. by
your passengers or mobile phone calls).
▶ Never drive when your driving ability is impaired, (e.g. due to medication, al-
cohol or drugs).
▶ Keep to the traffic regulations and the permissible speed limit.
▶ Always adjust the driving speed to the road, traffic and weather conditions.
▶ Take regular breaks on long journeys (at least every two hours).
Correct and safe seated position
Introduction
This chapter contains information on the following subjects:
Driver’s correct seated position
13
Adjusting the steering wheel position
13
Passenger’s correct seating position
14
Passengers’ correct seating position on the rear seats
14
Always assume the correct seated position before setting off and do not
change this position while driving. Also advise your passengers to adopt the
correct seated position and not to change this position while the car is moving.
The following list contains instructions for the Passenger which, if not ob-
served, may cause serious injuries or death. ▶ Do not lean against the dash panel.
▶ Do not put your feet on the dash panel.
The following list contains instructions for all Passengers which, if not ob-
served, may cause serious injuries or death.
▶ Do not sit only on the front part of the seat.
▶ Do not sit facing to the side.
▶ Do not lean out of the window.
▶ Do not put your limbs out of the window.
▶ Do not put your feet on the seat cushion.
12Safety
Page 35 of 344
High temperature range - The pointer is in the range C. The coolant tempera-
ture is too high. The warning light illuminates in the instrument clus-
ter » page 39 .
Fuel gauge
Fig. 22
Fuel gauge
The display » Fig. 22 only works if the ignition is switched on.
The fuel tank has a capacity of about 58 litres.
If the fuel level reaches the reserve level
A
» Fig. 22 , the warning light
illu-
minates in the instrument cluster » page 38.
WARNINGFor the vehicle systems to function correctly, and thus for safe driving,
there must be sufficient fuel in the tank. Never drain the fuel tank com-
pletely – risk of accident!
CAUTION
Never drive until the fuel tank is completely empty! The irregular supply of fuel
can cause misfiring, which can result in damage to parts of the engine and the
exhaust system.
Note
■ After filling up, it can occur that during dynamic driving (e.g. numerous
curves, braking, driving downhill and climbing a steep hill) the fuel gauge indi-
cates a fraction less.■
The arrow
next to the symbol
within the fuel gauge displays the installa-
tion location of the fuel filler on the right side of the vehicle.
Display in the rear centre consoleFig. 23
Display in rear centre console
The following information is shown in the display depending on the equipment
installed on the vehicle.
▶ Time
▶ Exterior temperature information
▶ Information on the Climatronic set temperature for occupants in the rear
seats
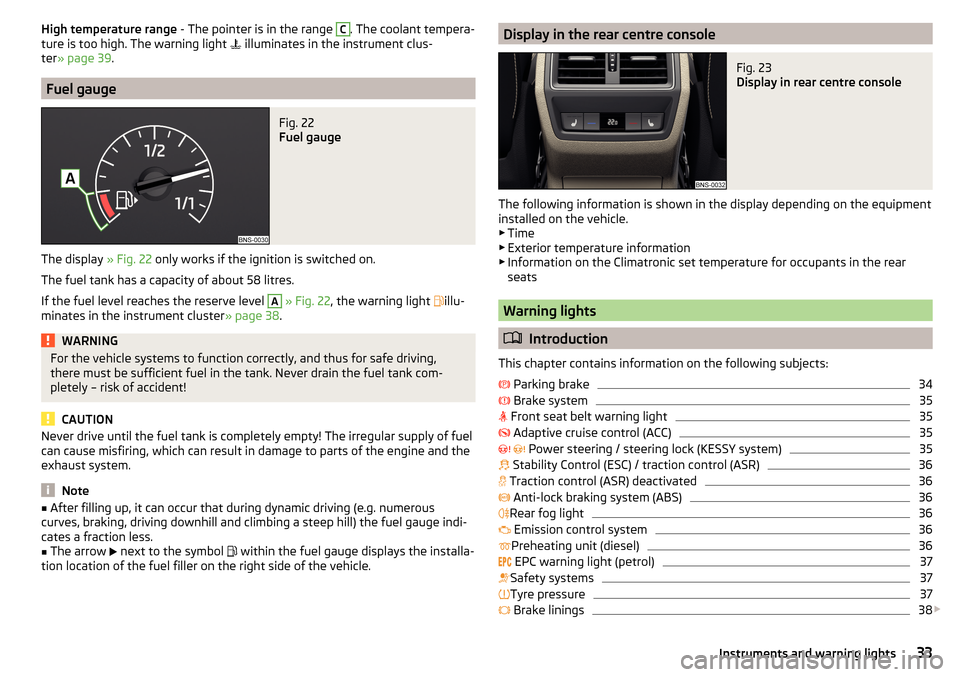
Warning lights
Introduction
This chapter contains information on the following subjects:
Parking brake
34
Brake system
35
Front seat belt warning light
35
Adaptive cruise control (ACC)
35
Power steering / steering lock (KESSY system)
35
Stability Control (ESC) / traction control (ASR)
36
Traction control (ASR) deactivated
36
Anti-lock braking system (ABS)
36
Rear fog light
36
Emission control system
36
Preheating unit (diesel)
36
EPC warning light (petrol)
37
Safety systems
37
Tyre pressure
37
Brake linings
38
33Instruments and warning lights
Page 36 of 344
Fuel reserve38 Lane Departure Warning (Lane Assist)38
Turn signal system
38
Trailer turn signal lights
38
Fog lights
38
Speed regulating system / speed limiter
38
Brake pedal (automatic gearbox)
38
Auto Hold function
39
Main beam
39
Automatic gearbox
39
Rear seat belt warning light
39
Generator
39
Coolant
39
Engine oil pressure
40
Engine oil level
40
AdBlue ®
(diesel engine)
40
Lamp failure
41
Diesel particle filter (diesel)
41
Windscreen washer fluid level
41
High-beam assistant
41
START-STOPsystem
41
Display of a low temperature
42
Water in the fuel filter (diesel engine)
42
Adaptive Cruise Control (ACC)
42
Front Assist
42
Front assist
42
Economy mode
42
OFF ROAD mode
42
Adaptive Chassis Control (DCC)
42
Service
43
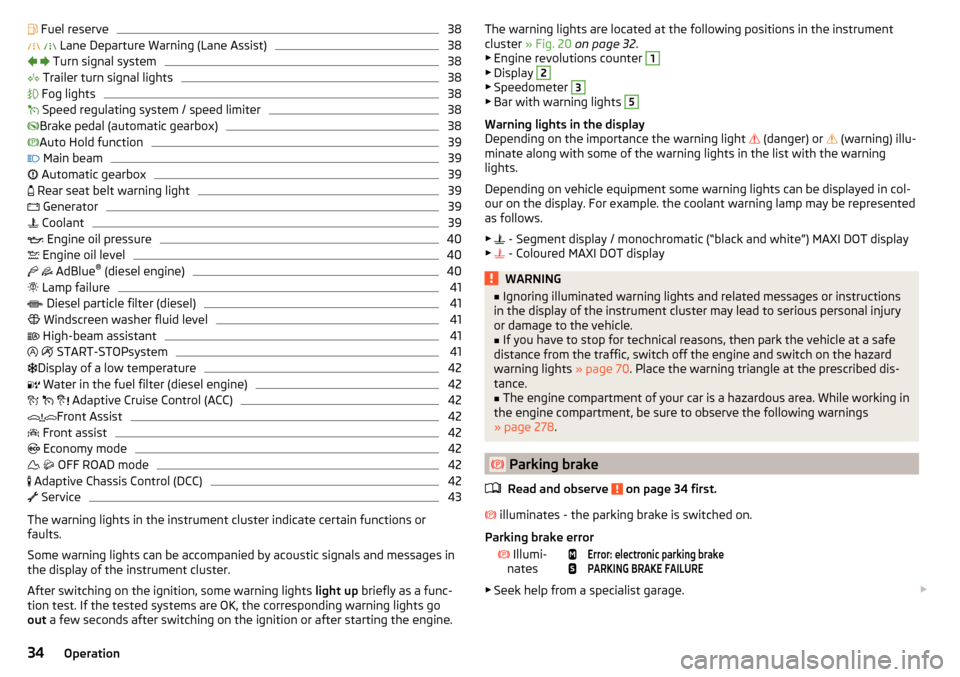
The warning lights in the instrument cluster indicate certain functions or
faults.
Some warning lights can be accompanied by acoustic signals and messages in
the display of the instrument cluster.
After switching on the ignition, some warning lights light up briefly as a func-
tion test. If the tested systems are OK, the corresponding warning lights go
out a few seconds after switching on the ignition or after starting the engine.
The warning lights are located at the following positions in the instrument
cluster » Fig. 20 on page 32 .
▶ Engine revolutions counter 1
▶Display
2
▶Speedometer
3
▶Bar with warning lights
5
Warning lights in the display
Depending on the importance the warning light
(danger) or
(warning) illu-
minate along with some of the warning lights in the list with the warning
lights.
Depending on vehicle equipment some warning lights can be displayed in col-
our on the display. For example. the coolant warning lamp may be represented
as follows.
▶ - Segment display / monochromatic (“black and white”) MAXI DOT display
▶ - Coloured MAXI DOT display
WARNING■
Ignoring illuminated warning lights and related messages or instructions
in the display of the instrument cluster may lead to serious personal injury
or damage to the vehicle.■
If you have to stop for technical reasons, then park the vehicle at a safe
distance from the traffic, switch off the engine and switch on the hazard
warning lights » page 70. Place the warning triangle at the prescribed dis-
tance.
■
The engine compartment of your car is a hazardous area. While working in
the engine compartment, be sure to observe the following warnings
» page 278 .
Parking brake
Read and observe
on page 34 first.
illuminates - the parking brake is switched on.
Parking brake error
Illumi-
nates
Error: electronic parking brakePARKING BRAKE FAILURE
▶ Seek help from a specialist garage.
34Operation
Page 41 of 344
Auto Hold functionRead and observe
on page 34 first.
illuminates - the Auto Hold function is activated.
For more information about the Auto-Hold Function » page 207.
Main beam
Read and observe
on page 34 first.
lights up – the main beam or the headlight flasher is switched on.
Automatic gearbox
Read and observe
on page 34 first.
Gearbox overheated
The warning light is only shown in the MAXI DOTdisplay.
Illumi-
nates
Gearbox overheated. You can drive on.GEARBOX OVERHEATED
Transmission overheated. You can drive on, exercising appropriate caution.
Illumi-
nates
Gearbox overheated. Stop! Log book!STOP VEHICLE GEARBOX OVERHEAT
▶
Do not drive the vehicle! Stop the vehicle and turn off the engine.
You can continue your journey as soon as the warning light disappears.
▶ If the warning light do not go out,
stop driving! Seek help from a specialist
garage.
Transmission problem
The warning light is only shown in the MAXI DOTdisplay.
Illumi-
nates
Gearbox faulty. Stop the vehicle safely!GEARBOX FAULTY WORKSHOP Illumi-
nates
Gearbox in emergency mode. No reverse gear.GEARBOX ERROR REV_ GEAR NOT AVAIL Illumi-
nates
Error: gearbox. Speed is limited.GEARBOX ERROR▶ You can drive on, exercising appropriate caution. Seek assistance from a spe-
cialist garage immediately.
Rear seat belt warning light
Read and observe
on page 34 first.
lights up – a rear seat belt is not fastened.
lights up – a rear seat belt is fastened.
When the seat belt is fastened/unfastened, the particular light lights up briefly
and indicates the current belt status!
Generator
Read and observe
on page 34 first.
lights up – the battery is not being charged whilst the engine is running.
CAUTION
If in addition to the light
the light lights up while driving, stop driving -
risk of engine damage! Switch off the engine and seek assistance from a spe-
cialist garage.
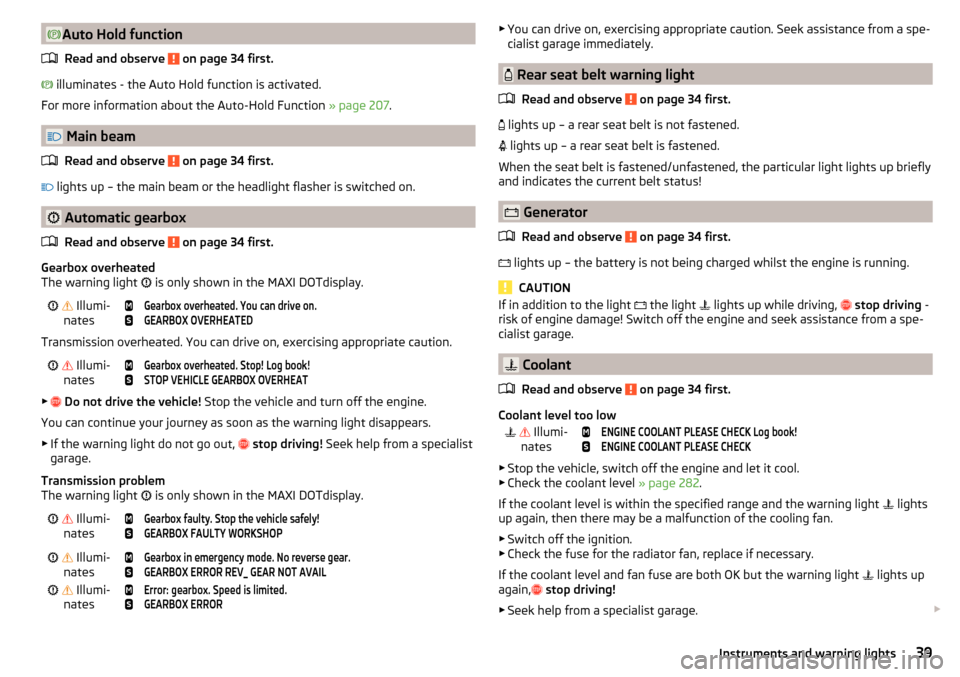
Coolant
Read and observe
on page 34 first.
Coolant level too low
Illumi-
nates
ENGINE COOLANT PLEASE CHECK Log book!ENGINE COOLANT PLEASE CHECK
▶ Stop the vehicle, switch off the engine and let it cool.
▶ Check the coolant level » page 282.
If the coolant level is within the specified range and the warning light lights
up again, then there may be a malfunction of the cooling fan.
▶ Switch off the ignition.
▶ Check the fuse for the radiator fan, replace if necessary.
If the coolant level and fan fuse are both OK but the warning light lights up
again,
stop driving!
▶ Seek help from a specialist garage.
39Instruments and warning lights
Page 42 of 344
Coolant temperature too high Illumi-
nates
Engine overheat. Stop! Log book!ENGINE OVERHEAT STOP
▶ Stop the vehicle, switch off the engine and let it cool.
▶ Continue your journey only after the warning light
has disappeared.
Engine oil pressure
Read and observe
on page 34 first.
flashes – the engine oil pressure is too low.
▶ Stop the vehicle, switch off the engine, and check the engine oil level.
▶ If the warning light flashes,
stop driving , even if the oil level is OK! Also do
not leave the engine running at an idling speed.
▶ Seek help from a specialist garage.
CAUTION
If it is not possible to top up with engine oil under the given conditions, stop
driving - there is a risk of engine damage! Switch off the engine and seek as-
sistance from a specialist garage.
Engine oil level
Read and observe
on page 34 first.
Engine oil level too low
Illumi-
nates
Oil level: add oil!ADD OIL
▶ Stop the vehicle, switch off the engine, and check the engine oil level, top up
if necessary.
The warning light will go out if the bonnet is left open for more than 30 sec-
onds. If the engine oil is not replenished, the warning light will come on again
after driving about 100 km.
Engine oil level too high
Illumi-
nates
Reduce oil level!OIL LEVEL TOO HIGH
▶ Stop the vehicle, switch off the engine, and check the engine oil level.
▶ If the oil level is too high, you can driven on, exercising appropriate caution.
Seek assistance from a specialist garage immediately.
Fault on the engine oil level sensor Illumi-
nates
Oil sensor: Workshop!OIL SENSOR WORKSHOP
▶ You can drive on, exercising appropriate caution. Seek assistance from a spe-
cialist garage immediately.
CAUTION
If it is not possible to top up with engine oil under the given conditions, stop
driving - there is a risk of engine damage! Switch off the engine and seek as-
sistance from a specialist garage.
AdBlue ®
(diesel engine)
Read and observe
on page 34 first.
AdBlue ®
level too low
Information on the amount of AdBlue ®
to be added is also shown. The values
"min" and "max" stand for the minimum and maximum AdBlue ®
replenishment
amounts.
Illuminates
AdBlue (DEF) refill! Range: ...REFILL ADBLUE (DEF)... RANGE_ ...
The range in the display indicates the distance that can be driven with the re-
maining AdBlue ®
left in the tank.
▶ Add AdBlue ®
» page 277 .
Illumi-
nates
AdBlue (DEF) refill! No start in ...REFILL ADBLUE (DEF)_...NO START IN …
The value in the display indicates the distance that can still be travelled, after
which no engine restart is possible unless AdBlue ®
is added.
▶ Add AdBlue ®
» page 277 .
Illumi-
nates
AdBlue (DEF) refill! Engine start no longer possible.REFILL ADBLUE (DEF)... NO RESTART
It is no longer possible to start the engine.
▶ Add AdBlue ®
» page 277 .
AdBlue ®
fault
Illumi-
nates
Error: AdBlue (DEF). No engine start in ...ADBLUE (DEF) ERROR NO START IN …
40Operation
Page 112 of 344
WARNING■The blower should always be on to prevent the windows from misting.
Otherwise there could be an accident.■
Under certain circumstances, air at a temperature of about 5 °C can flow
out of the vents when the cooling system is switched on.
Note
■ The air inlet in front of the windscreen must be free of e.g. ice, snow or
leaves to ensure that the heating and cooling system operates properly.■
After switching on the cooling Condensation from the evaporator of the air
conditioning may drip down and form a puddle below the vehicle. This is not a
leak!
■
If the coolant temperature is too high, the cooling system is switched off to
ensure that the engine cools down.
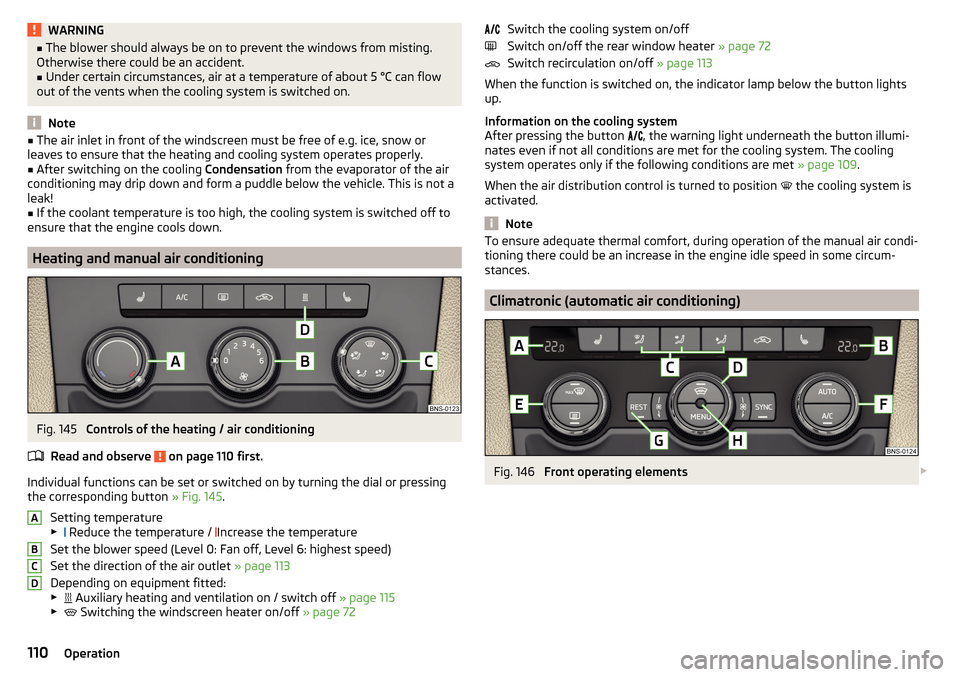
Heating and manual air conditioning
Fig. 145
Controls of the heating / air conditioning
Read and observe
on page 110 first.
Individual functions can be set or switched on by turning the dial or pressing the corresponding button » Fig. 145.
Setting temperature
▶ Reduce the temperature /
Increase the temperature
Set the blower speed (Level 0: Fan off, Level 6: highest speed)
Set the direction of the air outlet » page 113
Depending on equipment fitted:
▶ Auxiliary heating and ventilation on / switch off
» page 115
▶ Switching the windscreen heater on/off
» page 72
ABCDSwitch the cooling system on/off
Switch on/off the rear window heater » page 72
Switch recirculation on/off » page 113
When the function is switched on, the indicator lamp below the button lights up.
Information on the cooling system
After pressing the button
, the warning light underneath the button illumi-
nates even if not all conditions are met for the cooling system. The cooling
system operates only if the following conditions are met » page 109.
When the air distribution control is turned to position
the cooling system is
activated.
Note
To ensure adequate thermal comfort, during operation of the manual air condi-
tioning there could be an increase in the engine idle speed in some circum-
stances.
Climatronic (automatic air conditioning)
Fig. 146
Front operating elements
110Operation
Page 283 of 344
Engine oil VW 505 01 can optionally be used in diesel engines without a DPF.
CAUTION
■
If no prescribed engine oil is available, then max. 0.5 l oil of the following
specifications can be refilled. ■Petrol engines: ACEA A3/ACEA B4 or API SN, (API SM);
■ Diesel engines: ACEA C3 or API CJ-4.
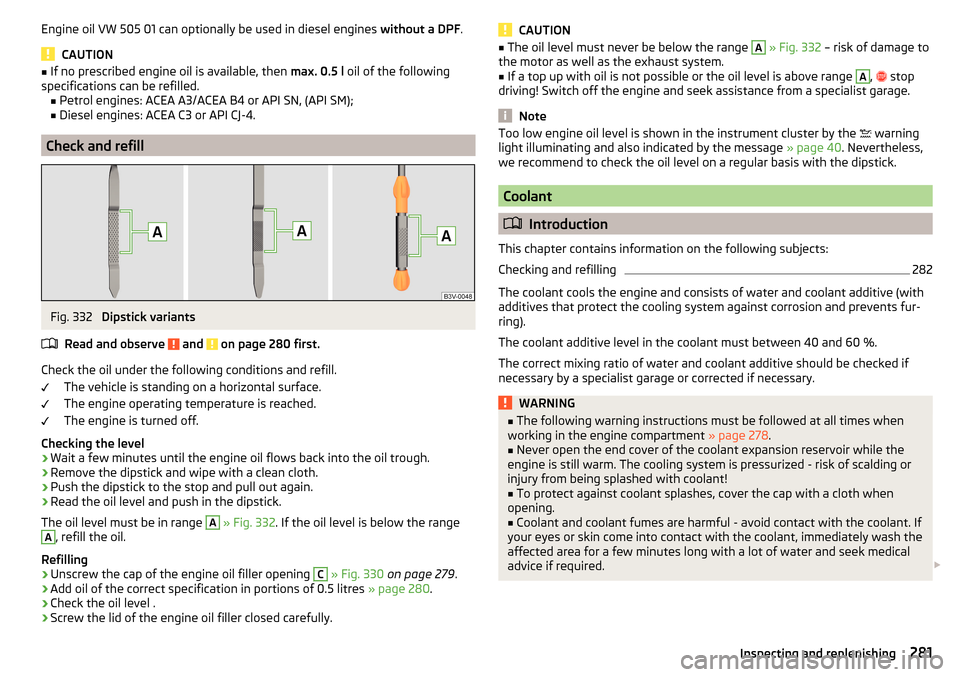
Check and refill
Fig. 332
Dipstick variants
Read and observe
and on page 280 first.
Check the oil under the following conditions and refill. The vehicle is standing on a horizontal surface.
The engine operating temperature is reached.
The engine is turned off.
Checking the level
›
Wait a few minutes until the engine oil flows back into the oil trough.
›
Remove the dipstick and wipe with a clean cloth.
›
Push the dipstick to the stop and pull out again.
›
Read the oil level and push in the dipstick.
The oil level must be in range
A
» Fig. 332 . If the oil level is below the range
A
, refill the oil.
Refilling
›
Unscrew the cap of the engine oil filler opening
C
» Fig. 330 on page 279 .
›
Add oil of the correct specification in portions of 0.5 litres » page 280.
›
Check the oil level .
›
Screw the lid of the engine oil filler closed carefully.
CAUTION■
The oil level must never be below the range A » Fig. 332 – risk of damage to
the motor as well as the exhaust system.■
If a top up with oil is not possible or the oil level is above range
A
,
stop
driving! Switch off the engine and seek assistance from a specialist garage.
Note
Too low engine oil level is shown in the instrument cluster by the warning
light illuminating and also indicated by the message » page 40. Nevertheless,
we recommend to check the oil level on a regular basis with the dipstick.
Coolant
Introduction
This chapter contains information on the following subjects:
Checking and refilling
282
The coolant cools the engine and consists of water and coolant additive (with
additives that protect the cooling system against corrosion and prevents fur-
ring).
The coolant additive level in the coolant must between 40 and 60 %.
The correct mixing ratio of water and coolant additive should be checked if
necessary by a specialist garage or corrected if necessary.
WARNING■ The following warning instructions must be followed at all times when
working in the engine compartment » page 278.■
Never open the end cover of the coolant expansion reservoir while the
engine is still warm. The cooling system is pressurized - risk of scalding or
injury from being splashed with coolant!
■
To protect against coolant splashes, cover the cap with a cloth when
opening.
■
Coolant and coolant fumes are harmful - avoid contact with the coolant. If
your eyes or skin come into contact with the coolant, immediately wash the
affected area for a few minutes long with a lot of water and seek medical
advice if required.
281Inspecting and replenishing
Page 284 of 344
CAUTIONDo not cover the radiator or fit any parts (e.g. auxiliary lights) in front of the air
intakes - there is a risk of the engine overheating.
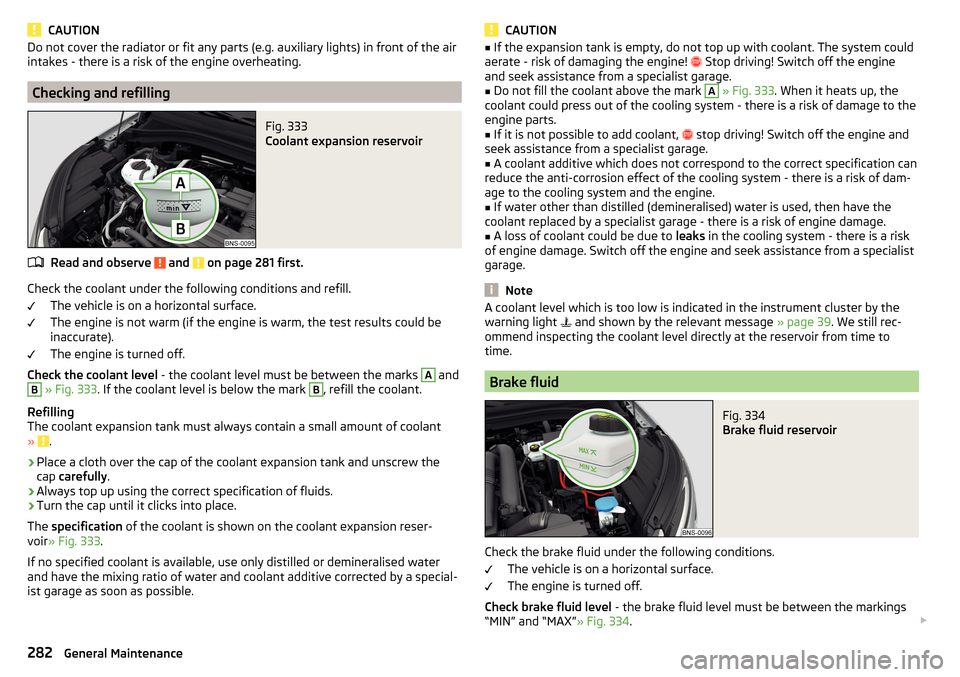
Checking and refilling
Fig. 333
Coolant expansion reservoir
Read and observe and on page 281 first.
Check the coolant under the following conditions and refill.
The vehicle is on a horizontal surface.
The engine is not warm (if the engine is warm, the test results could be
inaccurate).
The engine is turned off.
Check the coolant level - the coolant level must be between the marks
A
and
B
» Fig. 333 . If the coolant level is below the mark
B
, refill the coolant.
Refilling
The coolant expansion tank must always contain a small amount of coolant
»
.
›
Place a cloth over the cap of the coolant expansion tank and unscrew the
cap carefully .
›
Always top up using the correct specification of fluids.
›
Turn the cap until it clicks into place.
The specification of the coolant is shown on the coolant expansion reser-
voir » Fig. 333 .
If no specified coolant is available, use only distilled or demineralised water
and have the mixing ratio of water and coolant additive corrected by a special-
ist garage as soon as possible.
CAUTION■ If the expansion tank is empty, do not top up with coolant. The system could
aerate - risk of damaging the engine! Stop driving! Switch off the engine
and seek assistance from a specialist garage.■
Do not fill the coolant above the mark
A
» Fig. 333 . When it heats up, the
coolant could press out of the cooling system - there is a risk of damage to the
engine parts.
■
If it is not possible to add coolant,
stop driving! Switch off the engine and
seek assistance from a specialist garage.
■
A coolant additive which does not correspond to the correct specification can
reduce the anti-corrosion effect of the cooling system - there is a risk of dam-
age to the cooling system and the engine.
■
If water other than distilled (demineralised) water is used, then have the
coolant replaced by a specialist garage - there is a risk of engine damage.
■
A loss of coolant could be due to leaks in the cooling system - there is a risk
of engine damage. Switch off the engine and seek assistance from a specialist
garage.
Note
A coolant level which is too low is indicated in the instrument cluster by the
warning light and shown by the relevant message » page 39. We still rec-
ommend inspecting the coolant level directly at the reservoir from time to
time.
Brake fluid
Fig. 334
Brake fluid reservoir
Check the brake fluid under the following conditions.
The vehicle is on a horizontal surface.
The engine is turned off.
Check brake fluid level - the brake fluid level must be between the markings
“MIN” and “MAX” » Fig. 334.
282General Maintenance
Page 285 of 344
Specification - the brake fluid must comply with VW 501 14 standard (this
standard meets the requirements of FMVSS 116 DOT4).WARNING■ The following warning instructions must be followed at all times when
working in the engine compartment » page 278.■
There may be an indication of a leak in the brake system, however, if the
fluid level drops significantly within a short time or if it drops below the
“MIN” » Fig. 334 marking.
Stop driving - There is a risk of an accident!
Seek help from a specialist garage.
Note
■ The brake fluid is changed as part of a compulsory inspection service.■A low brake fluid level which is too low is indicated by the warning light
being shown on the display of the instrument cluster as well as the corre-
sponding message » page 35. We therefore recommend that you check the
coolant level directly at the reservoir from time to time.
Vehicle battery
Introduction
This chapter contains information on the following subjects:
Check condition
284
Charging
284
Disconnect/reconnect and change
285
The vehicle battery represents a power source for the motor to start and for the supply of electrical consumers in the car.
Automatic consumer shutdown - Discharge protection of the vehicle battery
The on-board power supply tries as follows to avoid draining the vehicle bat-
tery when it is heavily loaded.
▶ By increasing the engine idle speed.
▶ By limiting the power of certain consumers.
▶ By turning off some consumers (heated seats, heated rear window) for as
long as necessary.
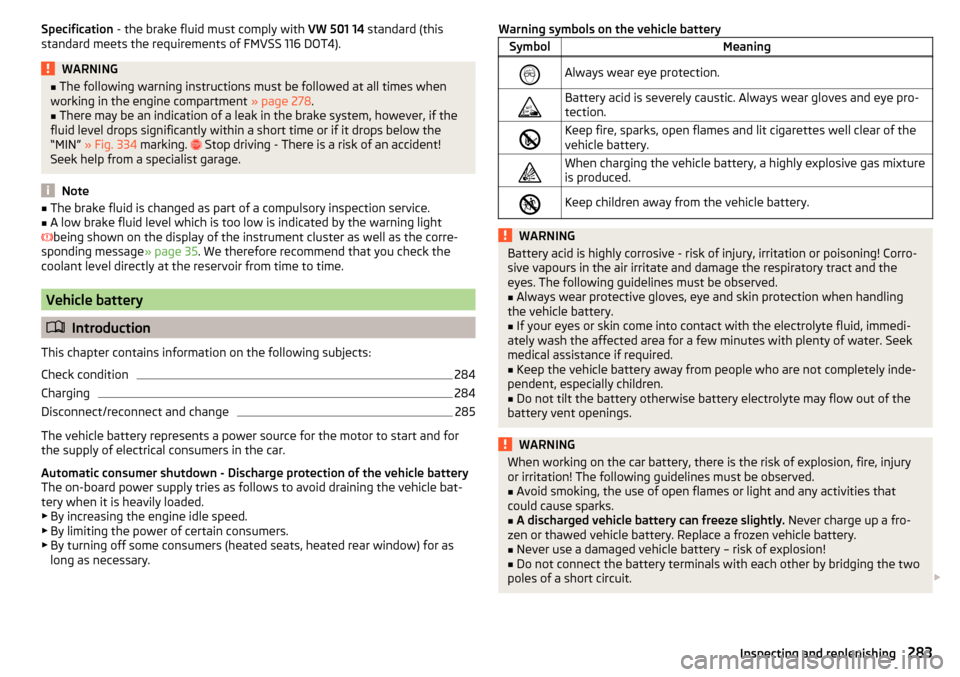
Warning symbols on the vehicle batterySymbolMeaningAlways wear eye protection.Battery acid is severely caustic. Always wear gloves and eye pro-
tection.Keep fire, sparks, open flames and lit cigarettes well clear of the
vehicle battery.When charging the vehicle battery, a highly explosive gas mixture
is produced.Keep children away from the vehicle battery.WARNINGBattery acid is highly corrosive - risk of injury, irritation or poisoning! Corro-
sive vapours in the air irritate and damage the respiratory tract and the
eyes. The following guidelines must be observed.■
Always wear protective gloves, eye and skin protection when handling
the vehicle battery.
■
If your eyes or skin come into contact with the electrolyte fluid, immedi-
ately wash the affected area for a few minutes with plenty of water. Seek
medical assistance if required.
■
Keep the vehicle battery away from people who are not completely inde-
pendent, especially children.
■
Do not tilt the battery otherwise battery electrolyte may flow out of the
battery vent openings.
WARNINGWhen working on the car battery, there is the risk of explosion, fire, injury
or irritation! The following guidelines must be observed.■
Avoid smoking, the use of open flames or light and any activities that
could cause sparks.
■
A discharged vehicle battery can freeze slightly. Never charge up a fro-
zen or thawed vehicle battery. Replace a frozen vehicle battery.
■
Never use a damaged vehicle battery – risk of explosion!
■
Do not connect the battery terminals with each other by bridging the two
poles of a short circuit.
283Inspecting and replenishing
Page 310 of 344
Fuse assignment in engine compartmentFig. 372
Fuses
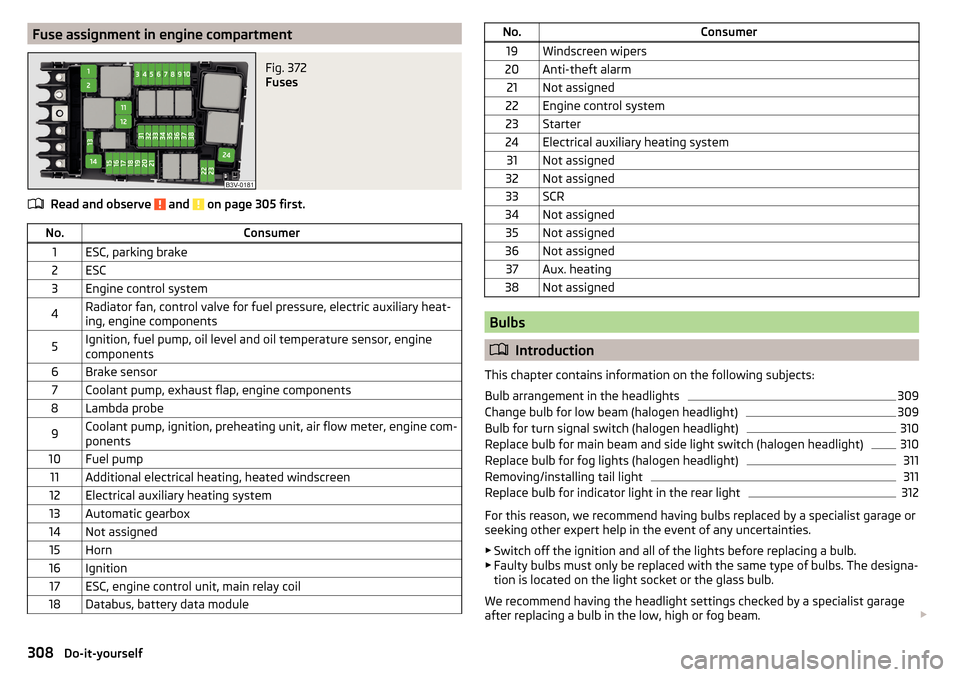
Read and observe and on page 305 first.
No.Consumer1ESC, parking brake2ESC3Engine control system4Radiator fan, control valve for fuel pressure, electric auxiliary heat-
ing, engine components5Ignition, fuel pump, oil level and oil temperature sensor, engine
components6Brake sensor7Coolant pump, exhaust flap, engine components8Lambda probe9Coolant pump, ignition, preheating unit, air flow meter, engine com-
ponents10Fuel pump11Additional electrical heating, heated windscreen12Electrical auxiliary heating system13Automatic gearbox14Not assigned15Horn16Ignition17ESC, engine control unit, main relay coil18Databus, battery data moduleNo.Consumer19Windscreen wipers20Anti-theft alarm21Not assigned22Engine control system23Starter24Electrical auxiliary heating system31Not assigned32Not assigned33SCR34Not assigned35Not assigned36Not assigned37Aux. heating38Not assigned
Bulbs
Introduction
This chapter contains information on the following subjects:
Bulb arrangement in the headlights
309
Change bulb for low beam (halogen headlight)
309
Bulb for turn signal switch (halogen headlight)
310
Replace bulb for main beam and side light switch (halogen headlight)
310
Replace bulb for fog lights (halogen headlight)
311
Removing/installing tail light
311
Replace bulb for indicator light in the rear light
312
For this reason, we recommend having bulbs replaced by a specialist garage or
seeking other expert help in the event of any uncertainties.
▶ Switch off the ignition and all of the lights before replacing a bulb.
▶ Faulty bulbs must only be replaced with the same type of bulbs. The designa-
tion is located on the light socket or the glass bulb.
We recommend having the headlight settings checked by a specialist garage
after replacing a bulb in the low, high or fog beam.
308Do-it-yourself