driver seat adjustment SKODA KODIAQ 2016 1.G Owner's Manual
[x] Cancel search | Manufacturer: SKODA, Model Year: 2016, Model line: KODIAQ, Model: SKODA KODIAQ 2016 1.GPages: 344, PDF Size: 58.96 MB
Page 23 of 344
WARNING (Continued)■The airbag system must be replaced if it has been deployed.■In the area of the front airbag and the knee airbag, the surface of the
steering wheel and the dashboard should be cleaned using only a dry cloth
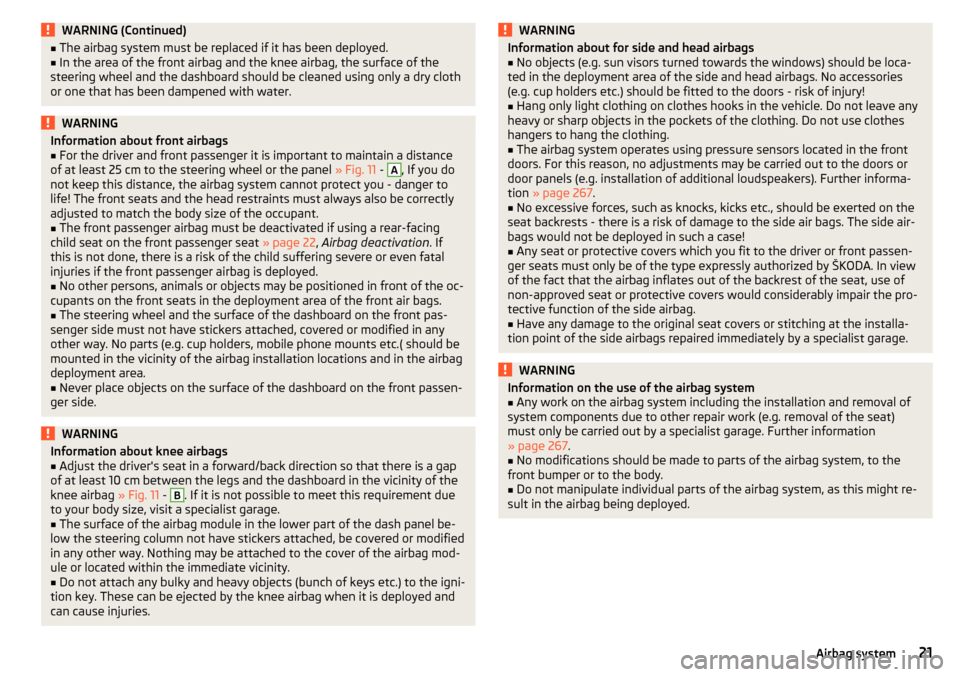
or one that has been dampened with water.WARNINGInformation about front airbags■For the driver and front passenger it is important to maintain a distance
of at least 25 cm to the steering wheel or the panel » Fig. 11 - A
, If you do
not keep this distance, the airbag system cannot protect you - danger to
life! The front seats and the head restraints must always also be correctly
adjusted to match the body size of the occupant.
■
The front passenger airbag must be deactivated if using a rear-facing
child seat on the front passenger seat » page 22, Airbag deactivation . If
this is not done, there is a risk of the child suffering severe or even fatal
injuries if the front passenger airbag is deployed.
■
No other persons, animals or objects may be positioned in front of the oc-
cupants on the front seats in the deployment area of the front air bags.
■
The steering wheel and the surface of the dashboard on the front pas-
senger side must not have stickers attached, covered or modified in any
other way. No parts (e.g. cup holders, mobile phone mounts etc.( should be
mounted in the vicinity of the airbag installation locations and in the airbag
deployment area.
■
Never place objects on the surface of the dashboard on the front passen-
ger side.
WARNINGInformation about knee airbags■Adjust the driver's seat in a forward/back direction so that there is a gap
of at least 10 cm between the legs and the dashboard in the vicinity of the
knee airbag » Fig. 11 - B
. If it is not possible to meet this requirement due
to your body size, visit a specialist garage.
■
The surface of the airbag module in the lower part of the dash panel be-
low the steering column not have stickers attached, be covered or modified
in any other way. Nothing may be attached to the cover of the airbag mod-
ule or located within the immediate vicinity.
■
Do not attach any bulky and heavy objects (bunch of keys etc.) to the igni-
tion key. These can be ejected by the knee airbag when it is deployed and
can cause injuries.
WARNINGInformation about for side and head airbags■No objects (e.g. sun visors turned towards the windows) should be loca-
ted in the deployment area of the side and head airbags. No accessories
(e.g. cup holders etc.) should be fitted to the doors - risk of injury!■
Hang only light clothing on clothes hooks in the vehicle. Do not leave any
heavy or sharp objects in the pockets of the clothing. Do not use clothes
hangers to hang the clothing.
■
The airbag system operates using pressure sensors located in the front
doors. For this reason, no adjustments may be carried out to the doors or
door panels (e.g. installation of additional loudspeakers). Further informa-
tion » page 267 .
■
No excessive forces, such as knocks, kicks etc., should be exerted on the
seat backrests - there is a risk of damage to the side air bags. The side air-
bags would not be deployed in such a case!
■
Any seat or protective covers which you fit to the driver or front passen-
ger seats must only be of the type expressly authorized by ŠKODA. In view
of the fact that the airbag inflates out of the backrest of the seat, use of
non-approved seat or protective covers would considerably impair the pro-
tective function of the side airbag.
■
Have any damage to the original seat covers or stitching at the installa-
tion point of the side airbags repaired immediately by a specialist garage.
WARNINGInformation on the use of the airbag system■Any work on the airbag system including the installation and removal of
system components due to other repair work (e.g. removal of the seat)
must only be carried out by a specialist garage. Further information
» page 267 .■
No modifications should be made to parts of the airbag system, to the
front bumper or to the body.
■
Do not manipulate individual parts of the airbag system, as this might re-
sult in the airbag being deployed.
21Airbag system
Page 33 of 344
Operation
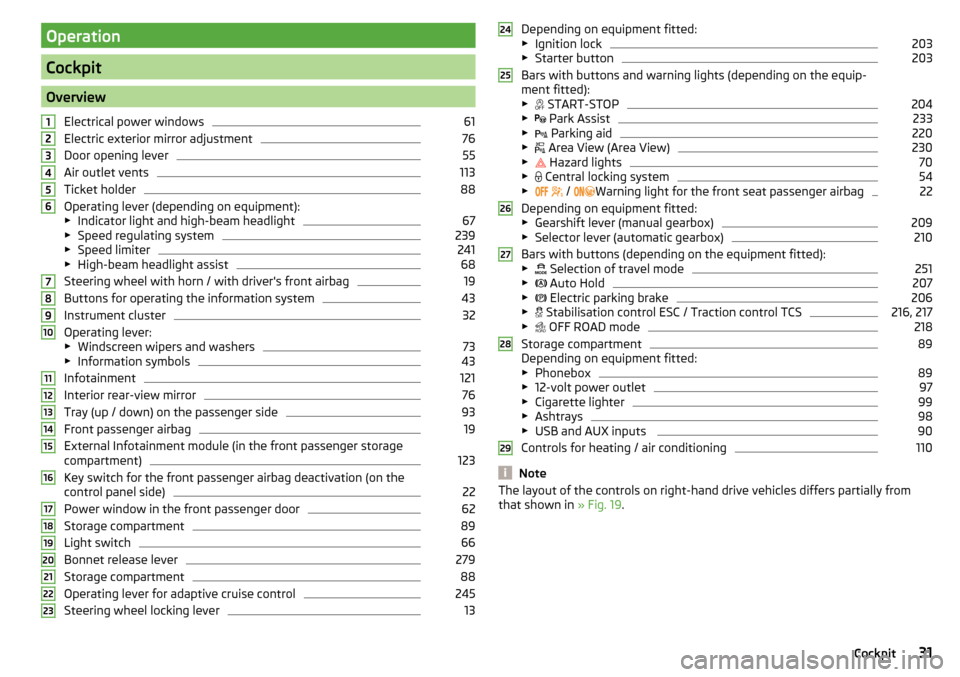
Cockpit
OverviewElectrical power windows
61
Electric exterior mirror adjustment
76
Door opening lever
55
Air outlet vents
113
Ticket holder
88
Operating lever (depending on equipment):
▶ Indicator light and high-beam headlight
67
▶Speed regulating system
239
▶Speed limiter
241
▶High-beam headlight assist
68
Steering wheel with horn / with driver's front airbag
19
Buttons for operating the information system
43
Instrument cluster
32
Operating lever:
▶ Windscreen wipers and washers
73
▶Information symbols
43
Infotainment
121
Interior rear-view mirror
76
Tray (up / down) on the passenger side
93
Front passenger airbag
19
External Infotainment module (in the front passenger storage
compartment)
123
Key switch for the front passenger airbag deactivation (on the
control panel side)
22
Power window in the front passenger door
62
Storage compartment
89
Light switch
66
Bonnet release lever
279
Storage compartment
88
Operating lever for adaptive cruise control
245
Steering wheel locking lever
131234567891011121314151617181920212223Depending on equipment fitted:
▶ Ignition lock203
▶Starter button
203
Bars with buttons and warning lights (depending on the equip-
ment fitted): ▶ START-STOP
204
▶
Park Assist
233
▶
Parking aid
220
▶
Area View (Area View)
230
▶
Hazard lights
70
▶
Central locking system
54
▶
/
Warning light for the front seat passenger airbag
22
Depending on equipment fitted:
▶ Gearshift lever (manual gearbox)
209
▶Selector lever (automatic gearbox)
210
Bars with buttons (depending on the equipment fitted):
▶ Selection of travel mode
251
▶
Auto Hold
207
▶
Electric parking brake
206
▶
Stabilisation control ESC / Traction control TCS
216, 217
▶
OFF ROAD mode
218
Storage compartment
89
Depending on equipment fitted:
▶ Phonebox
89
▶12-volt power outlet
97
▶Cigarette lighter
99
▶Ashtrays
98
▶USB and AUX inputs
90
Controls for heating / air conditioning
110
Note
The layout of the controls on right-hand drive vehicles differs partially from
that shown in » Fig. 19.24252627282931Cockpit
Page 52 of 344
Resetting the service interval display
We recommend that the display reset is completed by a specialist garage.
We recommend that you do not reset the service interval display yourself. In-
correctly setting the service interval display could cause problems to the vehi-
cle.
Variable service interval
For vehicles with variable service intervals, after resetting the oil change serv-
ice display in a specialist garage, the values of the new service interval are dis-
played, which are based on the previous operating conditions of the vehicle.
These values are then continuously matched according to the actual operating
conditions of the vehicle.
Personalization
Introduction
This chapter contains information on the following subjects:
Operating principle
50
Overview of some personalized functions
51
Setting the personalization
51
Thanks to the personalisation, more drivers have the opportunity to use a ve-
hicle with individually set system functions by means of a user account which
is assigned to the respective vehicle key.
WARNINGMake all adjustments when the vehicle is stationary - otherwise there is
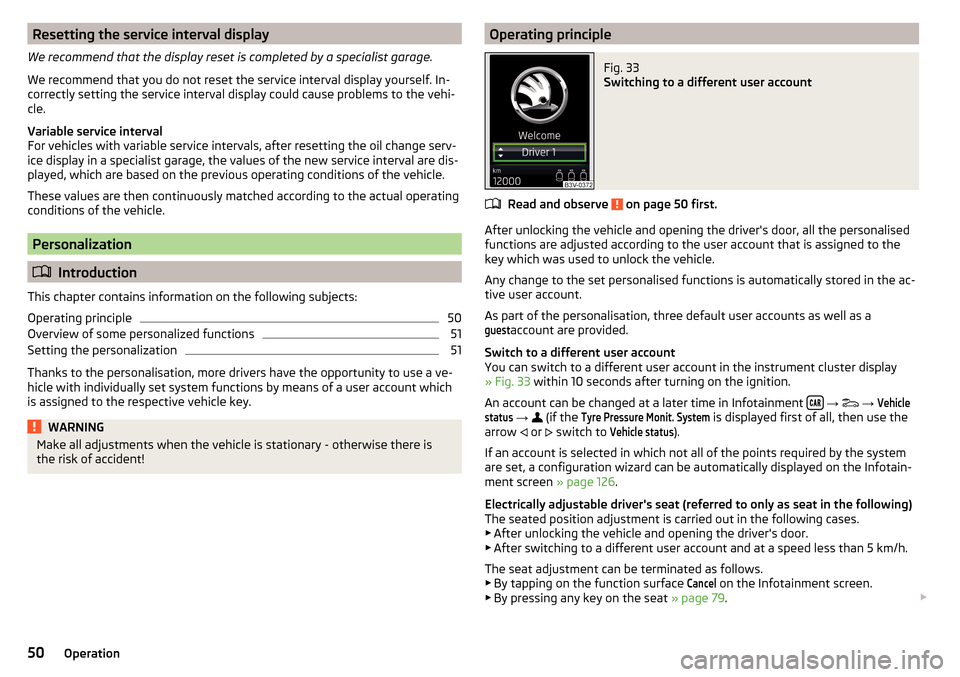
the risk of accident!Operating principleFig. 33
Switching to a different user account
Read and observe on page 50 first.
After unlocking the vehicle and opening the driver's door, all the personalised
functions are adjusted according to the user account that is assigned to the
key which was used to unlock the vehicle.
Any change to the set personalised functions is automatically stored in the ac- tive user account.
As part of the personalisation, three default user accounts as well as a
guest
account are provided.
Switch to a different user account
You can switch to a different user account in the instrument cluster display
» Fig. 33 within 10 seconds after turning on the ignition.
An account can be changed at a later time in Infotainment
→
→
Vehiclestatus
→
(if the
Tyre Pressure Monit. System
is displayed first of all, then use the
arrow or
switch to
Vehicle status
).
If an account is selected in which not all of the points required by the system
are set, a configuration wizard can be automatically displayed on the Infotain-
ment screen » page 126.
Electrically adjustable driver's seat (referred to only as seat in the following)
The seated position adjustment is carried out in the following cases. ▶ After unlocking the vehicle and opening the driver's door.
▶ After switching to a different user account and at a speed less than 5 km/h.
The seat adjustment can be terminated as follows.
▶ By tapping on the function surface
Cancel
on the Infotainment screen.
▶ By pressing any key on the seat » page 79.
50Operation
Page 53 of 344
NoteVehicles with the personalisation function are provided with three vehicle
keys.
Overview of some personalized functions
Read and observe
on page 50 first.
▶Driving mode - the last selected mode, mode setting
Individual
▶Setting the electrically adjustable driver's seat.
▶ Exterior mirror adjustment.
▶ Assistance systems - Lane Assist, parking aid (Park Pilot).
▶ Light - ambient lighting, convenience turn signal, COMING HOME / LEAVING
HOME.
▶ Climatronic - temperature in each individual area, fan speed, recirculation
mode.
▶ Infotainment settings - brightness level of the screen, keyboard arrange-
ment.
▶ Radio - sound settings, station sorting.
▶ Media - shuffle / repeat title, selected video format.
▶ Voice control - acoustic signals.
▶ Navigation - home address, alternative routes, recommended route, remind-
er of the lack of fuel.
Note
The scope of the personalisation functions is dependent on the type of Info-
tainment package.
Setting the personalization
Read and observe
on page 50 first.
›
On Infotainment, press the button, then tap the function surface
→
Personalisation
.
The following menu items are displayed.
Personalisation
Active
- activate/deactivate the personalisation
Select a user account
A list of user accounts with the option to manage user accounts and to switch
to another account.
■ - Account management with the following options:
■Rename user account
- rename the user account (not applicable to the
Guest
account)
■
Copy settings to another account
- copy the settings of an active user account to
another user account
■
Reset user account
- reset the selected user account to factory settings
Adjusting ■
Key assignment:
- options for assigning the vehicle key to the user account:
■
Manual
- detected vehicle key must be assigned to the active user account
manually
■
Automatic
- detected vehicle key automatically assigned to a different ac-
count of the active user account
■
Assign vehicle key to current user account
- manual assignment of the detected ve-
hicle key to the active user account - follow the instructions on the Infotain-
ment screen
■
Reset all
- reset the personalisation and the user accounts to factory settings
51Information system
Page 79 of 344
Setting the mirror surfaces synchronously
This function allows the simultaneous adjustment of the two mirror areas. The
function can be activated / deactivated in the Infotainment menu
→
→
Mirrors and wipers
.
›
Turn the knob for the mirror control to the position for the driver mirror ad-
justment.
›
Adjust the mirror areas to the desired position.
Manual folding mirrors
The mirror can be manually folded towards the side windows. To put it back to
its original position, it should be folded back from the side window until it au-
dibly clicks into place.
Automatic folding in/back of both mirrors
The exterior mirrors are automatically collapsed after locking the vehicle in the park position. After unlocking the vehicle, the mirrors are folded back to the
driving position »
.
This function can be activated / deactivated in the Infotainment menu
→
→
Mirrors and wipers
.
Mirror with automatic dimming
The exterior mirror dimming is controlled together with the automatic rear-
view mirror dimming » page 76.
Memory function for mirror (vehicles with electrically adjustable driver's
seat)
It is possible to save the current setting of the exterior mirror when saving the
driver's seat position with » page 79, Memory Function of the electrically ad-
justable seat or » page 79 , Memory function of the remote control key .
Tilting the mirror area of the front passenger mirror (vehicles with
electrically adjustable driver's seat)
The front passenger mirror area can be tilted to the stored position to improve
the view to the curb when reversing.
Operating conditions. The function is activated in the Infotainment menu
→
→
Mirrors andwipers
.
The setting of the mirror area has been previously stored » page 79,
Memory Function of the electrically adjustable seat or. » page 79 , Memo-
ry function of the remote control key .
The reverse gear is engaged.
The knob for the mirror control is in the position for the passenger mirror
adjustment.
The mirror area returns to its initial position after the rotary knob is set to an-
other position or if the speed is greater than 15 km/h.WARNINGDo not touch the exterior mirror surfaces, if the exterior mirror heating is
switched on - hazard of burning.
CAUTION
■ Never manually fold in/out the electrically folding exterior mirrors - there is a
risk of damage to the mirror!■
When the mirror is swung by external influences (due to impact during ma-
noeuvring, for example), then first fold-in the mirror by turning the knob and
wait for a loud clapping noise.
Note
The setting of the mirror functions is stored in Infotainment (depending on the
Infotainment type) in the active user account personalisation » page 50.77Lights and visibility
Page 80 of 344
Seats and head restraints
Front seats
Introduction
This chapter contains information on the following subjects:
Manual adjustment
78
Electrical adjustment
78
Memory Function of the electrically adjustable seat
79
Memory function of the remote control key
79
Folding front passenger seat
80
Armrest setting
80WARNING■ Only adjust the driver's seat when the vehicle is stationary – risk of acci-
dent!■
Caution when adjusting the seat! You may suffer injuries or bruises as a
result of adjusting the seat without paying proper attention.
Manual adjustment
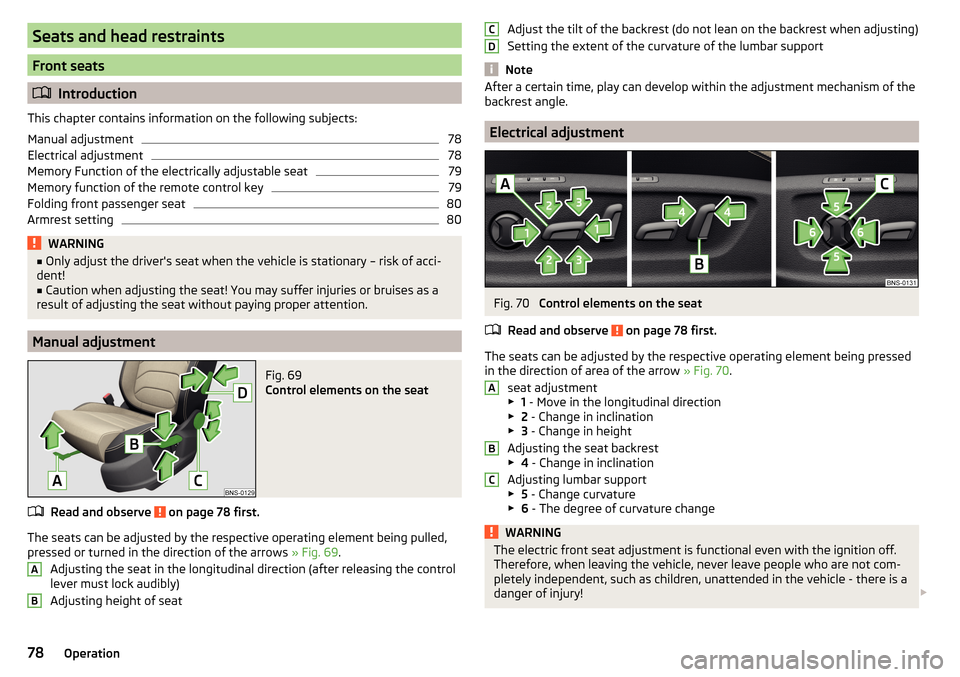
Fig. 69
Control elements on the seat
Read and observe on page 78 first.
The seats can be adjusted by the respective operating element being pulled,
pressed or turned in the direction of the arrows » Fig. 69.
Adjusting the seat in the longitudinal direction (after releasing the control
lever must lock audibly)
Adjusting height of seat
ABAdjust the tilt of the backrest (do not lean on the backrest when adjusting)
Setting the extent of the curvature of the lumbar support
Note
After a certain time, play can develop within the adjustment mechanism of the
backrest angle.
Electrical adjustment
Fig. 70
Control elements on the seat
Read and observe
on page 78 first.
The seats can be adjusted by the respective operating element being pressed in the direction of area of the arrow » Fig. 70.
seat adjustment
▶ 1 - Move in the longitudinal direction
▶ 2 - Change in inclination
▶ 3 - Change in height
Adjusting the seat backrest
▶ 4 - Change in inclination
Adjusting lumbar support
▶ 5 - Change curvature
▶ 6 - The degree of curvature change
WARNINGThe electric front seat adjustment is functional even with the ignition off.
Therefore, when leaving the vehicle, never leave people who are not com-
pletely independent, such as children, unattended in the vehicle - there is a
danger of injury! CDABC78Operation
Page 81 of 344
Note■If the inclination angle of the seat backrest relative to the seat surface is
greater than approx. 110°, then it is not possible for safety reasons to save this
setting in the memory of the electrically adjustable seats or the remote control
key.■
On vehicles with personalisation, the driver's seat setting is stored in the ac-
tive user account personalisation » page 50.
Memory Function of the electrically adjustable seat
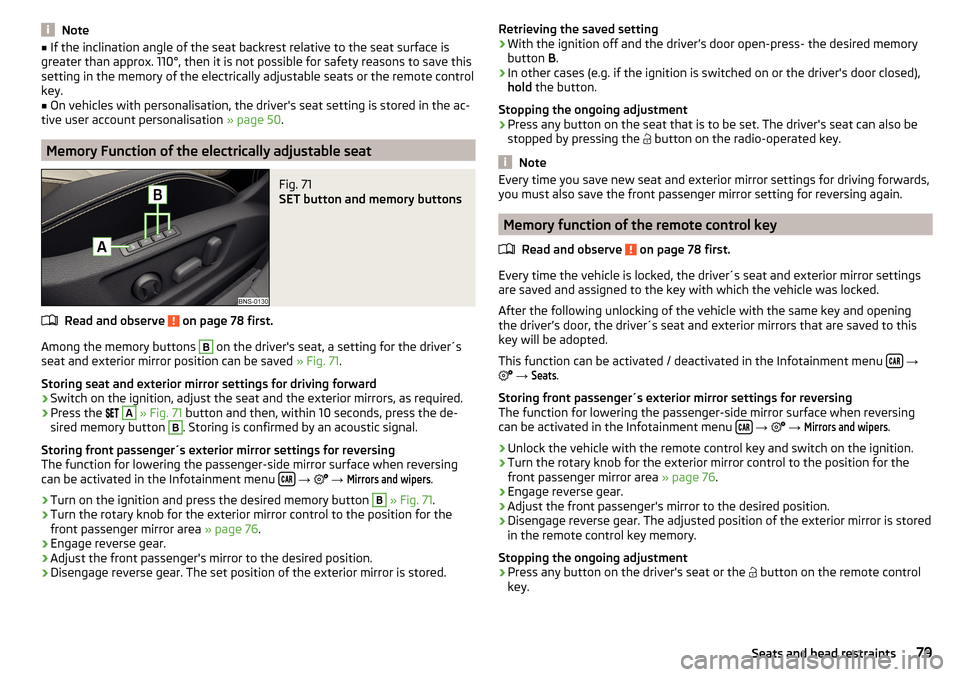
Fig. 71
SET button and memory buttons
Read and observe on page 78 first.
Among the memory buttons
B
on the driver's seat, a setting for the driver´s
seat and exterior mirror position can be saved » Fig. 71.
Storing seat and exterior mirror settings for driving forward
›
Switch on the ignition, adjust the seat and the exterior mirrors, as required.
›
Press the
A
» Fig. 71 button and then, within 10 seconds, press the de-
sired memory button
B
. Storing is confirmed by an acoustic signal.
Storing front passenger´s exterior mirror settings for reversing
The function for lowering the passenger-side mirror surface when reversing can be activated in the Infotainment menu
→
→
Mirrors and wipers
.
›
Turn on the ignition and press the desired memory button
B
» Fig. 71 .
›
Turn the rotary knob for the exterior mirror control to the position for the
front passenger mirror area » page 76.
›
Engage reverse gear.
›
Adjust the front passenger's mirror to the desired position.
›
Disengage reverse gear. The set position of the exterior mirror is stored.
Retrieving the saved setting›With the ignition off and the driver’s door open-press- the desired memory
button B.›
In other cases (e.g. if the ignition is switched on or the driver's door closed),
hold the button.
Stopping the ongoing adjustment
›
Press any button on the seat that is to be set. The driver's seat can also be
stopped by pressing the
button on the radio-operated key.
Note
Every time you save new seat and exterior mirror settings for driving forwards,
you must also save the front passenger mirror setting for reversing again.
Memory function of the remote control key
Read and observe
on page 78 first.
Every time the vehicle is locked, the driver´s seat and exterior mirror settingsare saved and assigned to the key with which the vehicle was locked.
After the following unlocking of the vehicle with the same key and opening
the driver’s door, the driver´s seat and exterior mirrors that are saved to this
key will be adopted.
This function can be activated / deactivated in the Infotainment menu
→
→
Seats
.
Storing front passenger´s exterior mirror settings for reversing
The function for lowering the passenger-side mirror surface when reversing
can be activated in the Infotainment menu
→
→
Mirrors and wipers
.
›
Unlock the vehicle with the remote control key and switch on the ignition.
›
Turn the rotary knob for the exterior mirror control to the position for the
front passenger mirror area » page 76.
›
Engage reverse gear.
›
Adjust the front passenger's mirror to the desired position.
›
Disengage reverse gear. The adjusted position of the exterior mirror is stored
in the remote control key memory.
Stopping the ongoing adjustment
›
Press any button on the driver's seat or the button on the remote control
key.
79Seats and head restraints
Page 132 of 344
Applies to Infotainment Swing▶ To determine the software version , press the button, then tap on the
system information
function surface.
▶ To determine the software version , press the button, then tap on the
system information
→
Update software
function surface.
Infotainment settings - Columbus, Amundsen, Bolero
Infotainment system settings
sound settings
›
Press the button, then tap on the function surface
.
■
Volume
- Volume settings
■
Message
- Adjustment of traffic announcements volume (TP)
■
Nav. announcements
- sets the volume for the nav. announcements
■
Voice control
- volume setting for voice output
■
Maximum switch-on volume
- Setting the maximum volume when switching on
Infotainment
■
Speed-dependent volume adjustment
- increases the volume as speed increases
■
AUX volume:
- Sets the volume for the device connected through AUX
■
Quiet
- Low volume
■
Medium
- Medium volume
■
Loud
- High volume
■
Bluetooth audio:
- Volume setting of the device connected via Bluetooth ®
au-
dio profile of the connected device
■
Entertainment fading while parking
- Lowers the audio volume (e.g. radio volume)
with activated parking aid
■
Entertainment fading (nav. announce.)
- Lowers the audio volume (e.g. radio vol-
ume) in the event of a nav. announcements
■
Voice Enhancer
- Volume adjustment of speech amplification for driver and
front passenger to the speakers in the rear
■
Bass - Mid - Treble
- Setting the equalizer
■
Balance - Fader
- Sets the balance between left and right, front and rear
■
CANTON Equaliser
- Setting the equaliser
■
Individual
- Adjustment of treble, mid and bass
■
Profile
- Setting of the profile (e.g.
Rock
,
Classical
and so on.)
■
CANTON optimisation
-Setting the optimum room sound perception
■
All
- Setting optimised for the whole vehicle interior
■
Front
- Setting optimised for the front seats
■
Driver
- Setting optimised for the driver
■
CANTON surround
- Setting the surround sound level (“-9 ”Stereo / “+9”full sur-
round)
■
Subwoofer
- Subwoofer volume settings
■
Sound focus
-Setting the optimum room sound perception
■
All
- Setting optimised for the whole vehicle interior
■
Driver
- Setting optimised for the driver
130Infotainment