fuel pump SKODA KODIAQ 2016 1.G Owner's Manual
[x] Cancel search | Manufacturer: SKODA, Model Year: 2016, Model line: KODIAQ, Model: SKODA KODIAQ 2016 1.GPages: 344, PDF Size: 58.96 MB
Page 117 of 344
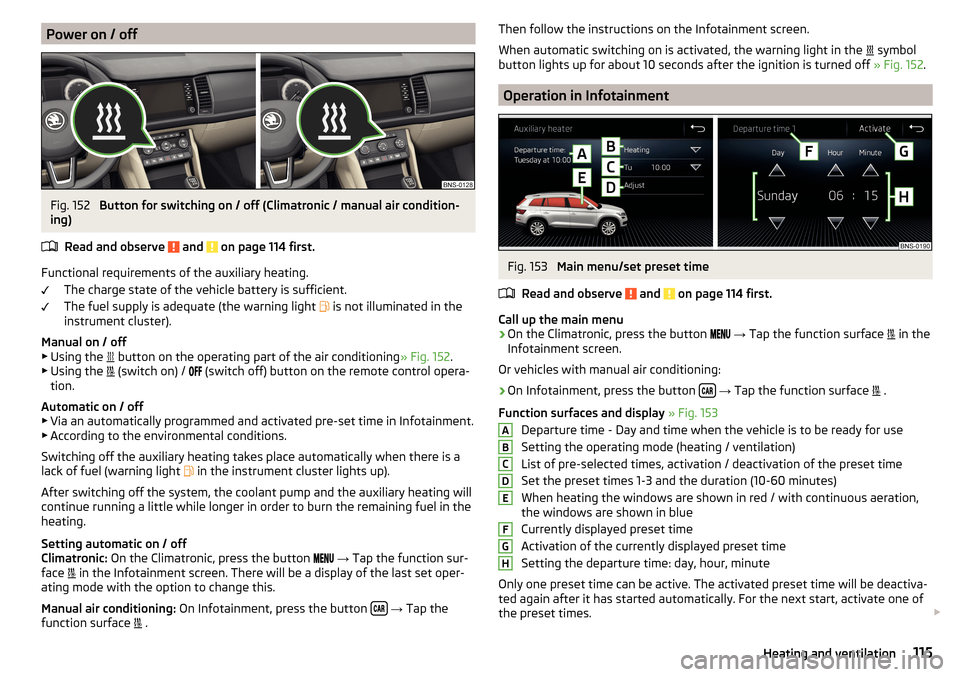
Power on / offFig. 152
Button for switching on / off (Climatronic / manual air condition-
ing)
Read and observe
and on page 114 first.
Functional requirements of the auxiliary heating. The charge state of the vehicle battery is sufficient.
The fuel supply is adequate (the warning light is not illuminated in the
instrument cluster).
Manual on / off ▶ Using the button on the operating part of the air conditioning
» Fig. 152.
▶ Using the (switch on) /
(switch off) button on the remote control opera-
tion.
Automatic on / off ▶ Via an automatically programmed and activated pre-set time in Infotainment.
▶ According to the environmental conditions.
Switching off the auxiliary heating takes place automatically when there is a
lack of fuel (warning light in the instrument cluster lights up).
After switching off the system, the coolant pump and the auxiliary heating will
continue running a little while longer in order to burn the remaining fuel in the
heating.
Setting automatic on / off
Climatronic: On the Climatronic, press the button
→ Tap the function sur-
face in the Infotainment screen. There will be a display of the last set oper-
ating mode with the option to change this.
Manual air conditioning: On Infotainment, press the button
→ Tap the
function surface .
Then follow the instructions on the Infotainment screen.
When automatic switching on is activated, the warning light in the
symbol
button lights up for about 10 seconds after the ignition is turned off » Fig. 152.
Operation in Infotainment
Fig. 153
Main menu/set preset time
Read and observe
and on page 114 first.
Call up the main menu
›
On the Climatronic, press the button
→ Tap the function surface
in the
Infotainment screen.
Or vehicles with manual air conditioning:
›
On Infotainment, press the button
→ Tap the function surface
.
Function surfaces and display » Fig. 153
Departure time - Day and time when the vehicle is to be ready for use
Setting the operating mode (heating / ventilation)
List of pre-selected times, activation / deactivation of the preset time Set the preset times 1-3 and the duration (10-60 minutes)
When heating the windows are shown in red / with continuous aeration,
the windows are shown in blue
Currently displayed preset time
Activation of the currently displayed preset time
Setting the departure time: day, hour, minute
Only one preset time can be active. The activated preset time will be deactiva-
ted again after it has started automatically. For the next start, activate one of
the preset times.
ABCDEFGH115Heating and ventilation
Page 277 of 344
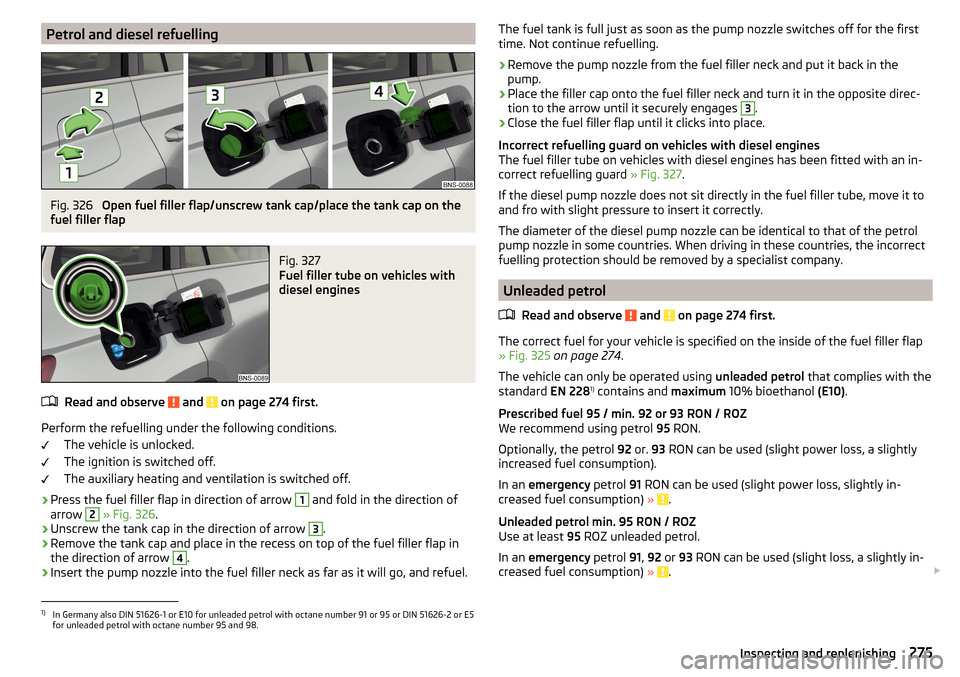
Petrol and diesel refuellingFig. 326
Open fuel filler flap/unscrew tank cap/place the tank cap on the
fuel filler flap
Fig. 327
Fuel filler tube on vehicles with
diesel engines
Read and observe and on page 274 first.
Perform the refuelling under the following conditions.
The vehicle is unlocked.
The ignition is switched off.
The auxiliary heating and ventilation is switched off.
›
Press the fuel filler flap in direction of arrow
1
and fold in the direction of
arrow
2
» Fig. 326 .
›
Unscrew the tank cap in the direction of arrow
3
.
›
Remove the tank cap and place in the recess on top of the fuel filler flap in
the direction of arrow
4
.
›
Insert the pump nozzle into the fuel filler neck as far as it will go, and refuel.
The fuel tank is full just as soon as the pump nozzle switches off for the first
time. Not continue refuelling.›
Remove the pump nozzle from the fuel filler neck and put it back in the
pump.
›
Place the filler cap onto the fuel filler neck and turn it in the opposite direc-
tion to the arrow until it securely engages
3
.
›
Close the fuel filler flap until it clicks into place.
Incorrect refuelling guard on vehicles with diesel engines
The fuel filler tube on vehicles with diesel engines has been fitted with an in-
correct refuelling guard » Fig. 327.
If the diesel pump nozzle does not sit directly in the fuel filler tube, move it to
and fro with slight pressure to insert it correctly.
The diameter of the diesel pump nozzle can be identical to that of the petrol
pump nozzle in some countries. When driving in these countries, the incorrect
fuelling protection should be removed by a specialist company.
Unleaded petrol
Read and observe
and on page 274 first.
The correct fuel for your vehicle is specified on the inside of the fuel filler flap
» Fig. 325 on page 274 .
The vehicle can only be operated using unleaded petrol that complies with the
standard EN 2281)
contains and maximum 10% bioethanol (E10).
Prescribed fuel 95 / min. 92 or 93 RON / ROZ
We recommend using petrol 95 RON.
Optionally, the petrol 92 or. 93 RON can be used (slight power loss, a slightly
increased fuel consumption).
In an emergency petrol 91 RON can be used (slight power loss, slightly in-
creased fuel consumption) »
.
Unleaded petrol min. 95 RON / ROZ
Use at least 95 ROZ unleaded petrol.
In an emergency petrol 91, 92 or 93 RON can be used (slight loss, a slightly in-
creased fuel consumption) »
.
1)
In Germany also DIN 51626-1 or E10 for unleaded petrol with octane number 91 or 95 or DIN 51626-2 or E5
for unleaded petrol with octane number 95 and 98.
275Inspecting and replenishing
Page 280 of 344
We recommend when refilling using refill bottles that you use refill bottles
from ŠKODA Original Accessories.
When adding AdBlue ®
take note of the minimum and maximum AdBlue ®
tank
capacity shown in the display of the instrument cluster » page 40.
Refill AdBlue ®
under the following conditions.
The vehicle is on a horizontal surface.
The ignition is switched off.
Refilling›
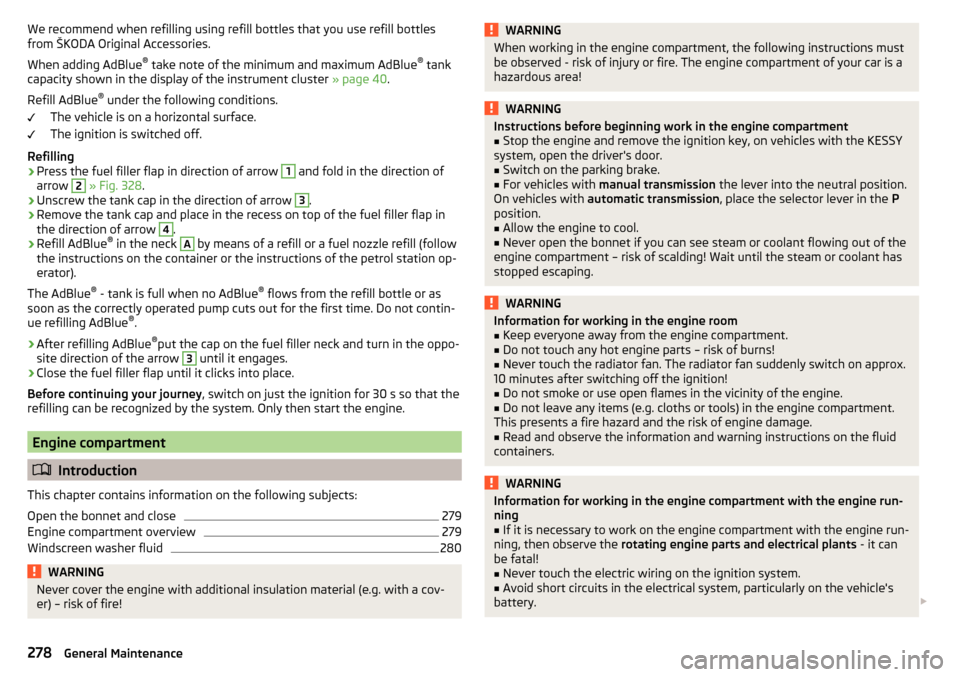
Press the fuel filler flap in direction of arrow
1
and fold in the direction of
arrow
2
» Fig. 328 .
›
Unscrew the tank cap in the direction of arrow
3
.
›
Remove the tank cap and place in the recess on top of the fuel filler flap in
the direction of arrow
4
.
›
Refill AdBlue ®
in the neck
A
by means of a refill or a fuel nozzle refill (follow
the instructions on the container or the instructions of the petrol station op-
erator).
The AdBlue ®
- tank is full when no AdBlue ®
flows from the refill bottle or as
soon as the correctly operated pump cuts out for the first time. Do not contin-
ue refilling AdBlue ®
.
›
After refilling AdBlue ®
put the cap on the fuel filler neck and turn in the oppo-
site direction of the arrow
3
until it engages.
›
Close the fuel filler flap until it clicks into place.
Before continuing your journey , switch on just the ignition for 30 s so that the
refilling can be recognized by the system. Only then start the engine.
Engine compartment
Introduction
This chapter contains information on the following subjects:
Open the bonnet and close
279
Engine compartment overview
279
Windscreen washer fluid
280WARNINGNever cover the engine with additional insulation material (e.g. with a cov-
er) – risk of fire!WARNINGWhen working in the engine compartment, the following instructions must
be observed - risk of injury or fire. The engine compartment of your car is a
hazardous area!WARNINGInstructions before beginning work in the engine compartment■Stop the engine and remove the ignition key, on vehicles with the KESSY
system, open the driver's door.■
Switch on the parking brake.
■
For vehicles with manual transmission the lever into the neutral position.
On vehicles with automatic transmission , place the selector lever in the P
position.
■
Allow the engine to cool.
■
Never open the bonnet if you can see steam or coolant flowing out of the
engine compartment – risk of scalding! Wait until the steam or coolant has
stopped escaping.
WARNINGInformation for working in the engine room■Keep everyone away from the engine compartment.■
Do not touch any hot engine parts – risk of burns!
■
Never touch the radiator fan. The radiator fan suddenly switch on approx.
10 minutes after switching off the ignition!
■
Do not smoke or use open flames in the vicinity of the engine.
■
Do not leave any items (e.g. cloths or tools) in the engine compartment.
This presents a fire hazard and the risk of engine damage.
■
Read and observe the information and warning instructions on the fluid
containers.
WARNINGInformation for working in the engine compartment with the engine run-
ning■
If it is necessary to work on the engine compartment with the engine run-
ning, then observe the rotating engine parts and electrical plants - it can
be fatal!
■
Never touch the electric wiring on the ignition system.
■
Avoid short circuits in the electrical system, particularly on the vehicle's
battery.
278General Maintenance
Page 310 of 344
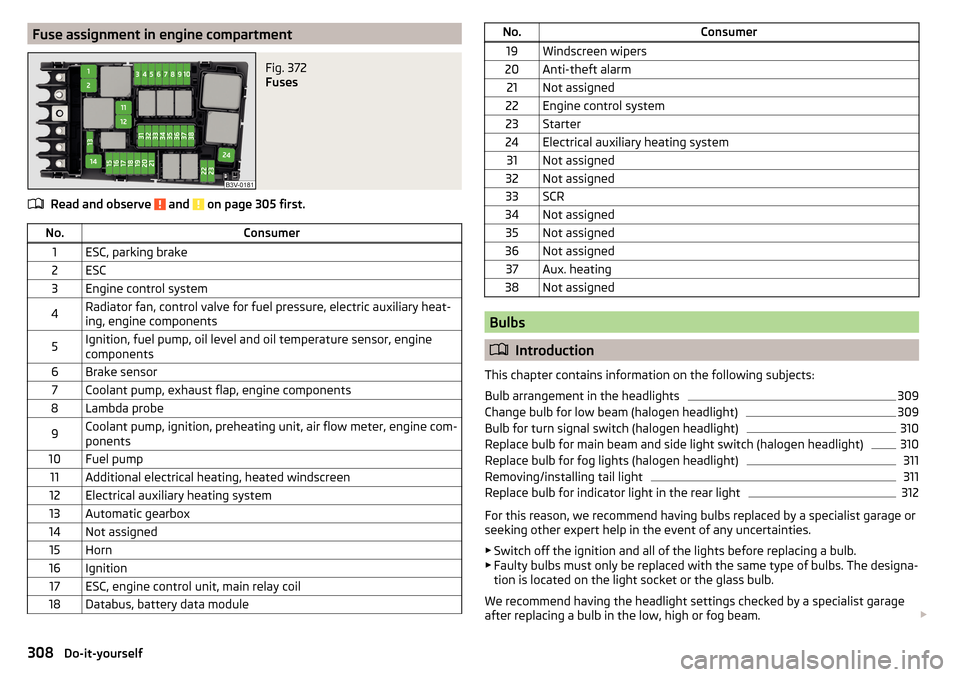
Fuse assignment in engine compartmentFig. 372
Fuses
Read and observe and on page 305 first.
No.Consumer1ESC, parking brake2ESC3Engine control system4Radiator fan, control valve for fuel pressure, electric auxiliary heat-
ing, engine components5Ignition, fuel pump, oil level and oil temperature sensor, engine
components6Brake sensor7Coolant pump, exhaust flap, engine components8Lambda probe9Coolant pump, ignition, preheating unit, air flow meter, engine com-
ponents10Fuel pump11Additional electrical heating, heated windscreen12Electrical auxiliary heating system13Automatic gearbox14Not assigned15Horn16Ignition17ESC, engine control unit, main relay coil18Databus, battery data moduleNo.Consumer19Windscreen wipers20Anti-theft alarm21Not assigned22Engine control system23Starter24Electrical auxiliary heating system31Not assigned32Not assigned33SCR34Not assigned35Not assigned36Not assigned37Aux. heating38Not assigned
Bulbs
Introduction
This chapter contains information on the following subjects:
Bulb arrangement in the headlights
309
Change bulb for low beam (halogen headlight)
309
Bulb for turn signal switch (halogen headlight)
310
Replace bulb for main beam and side light switch (halogen headlight)
310
Replace bulb for fog lights (halogen headlight)
311
Removing/installing tail light
311
Replace bulb for indicator light in the rear light
312
For this reason, we recommend having bulbs replaced by a specialist garage or
seeking other expert help in the event of any uncertainties.
▶ Switch off the ignition and all of the lights before replacing a bulb.
▶ Faulty bulbs must only be replaced with the same type of bulbs. The designa-
tion is located on the light socket or the glass bulb.
We recommend having the headlight settings checked by a specialist garage
after replacing a bulb in the low, high or fog beam.
308Do-it-yourself