overheating SKODA KODIAQ 2016 1.G Owner's Manual
[x] Cancel search | Manufacturer: SKODA, Model Year: 2016, Model line: KODIAQ, Model: SKODA KODIAQ 2016 1.GPages: 344, PDF Size: 58.96 MB
Page 284 of 344

CAUTIONDo not cover the radiator or fit any parts (e.g. auxiliary lights) in front of the air
intakes - there is a risk of the engine overheating.
Checking and refilling
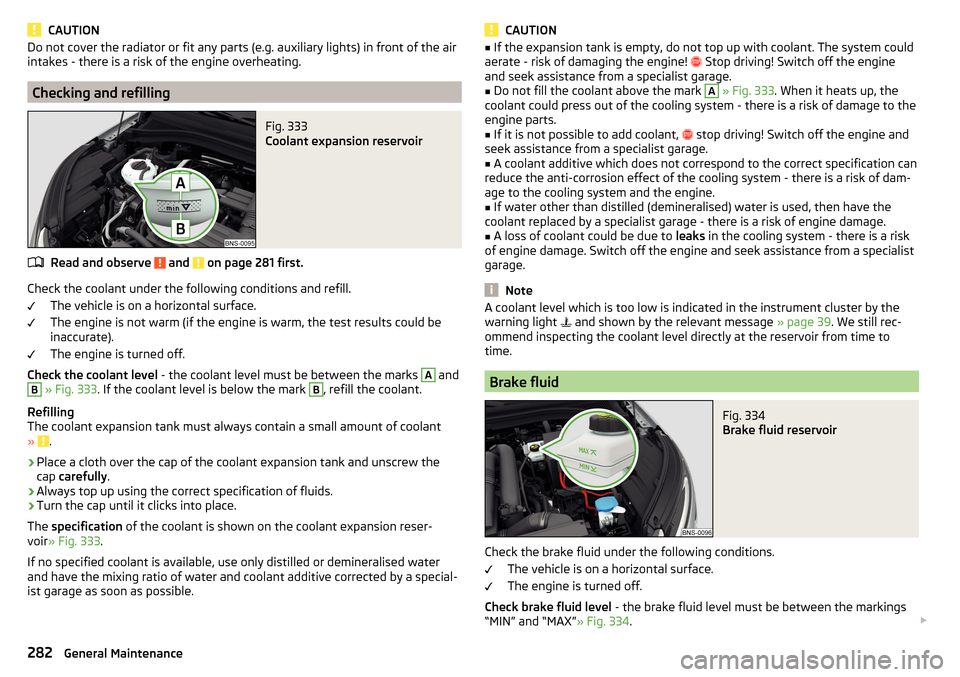
Fig. 333
Coolant expansion reservoir
Read and observe and on page 281 first.
Check the coolant under the following conditions and refill.
The vehicle is on a horizontal surface.
The engine is not warm (if the engine is warm, the test results could be
inaccurate).
The engine is turned off.
Check the coolant level - the coolant level must be between the marks
A
and
B
» Fig. 333 . If the coolant level is below the mark
B
, refill the coolant.
Refilling
The coolant expansion tank must always contain a small amount of coolant
»
.
›
Place a cloth over the cap of the coolant expansion tank and unscrew the
cap carefully .
›
Always top up using the correct specification of fluids.
›
Turn the cap until it clicks into place.
The specification of the coolant is shown on the coolant expansion reser-
voir » Fig. 333 .
If no specified coolant is available, use only distilled or demineralised water
and have the mixing ratio of water and coolant additive corrected by a special-
ist garage as soon as possible.
CAUTION■ If the expansion tank is empty, do not top up with coolant. The system could
aerate - risk of damaging the engine! Stop driving! Switch off the engine
and seek assistance from a specialist garage.■
Do not fill the coolant above the mark
A
» Fig. 333 . When it heats up, the
coolant could press out of the cooling system - there is a risk of damage to the
engine parts.
■
If it is not possible to add coolant,
stop driving! Switch off the engine and
seek assistance from a specialist garage.
■
A coolant additive which does not correspond to the correct specification can
reduce the anti-corrosion effect of the cooling system - there is a risk of dam-
age to the cooling system and the engine.
■
If water other than distilled (demineralised) water is used, then have the
coolant replaced by a specialist garage - there is a risk of engine damage.
■
A loss of coolant could be due to leaks in the cooling system - there is a risk
of engine damage. Switch off the engine and seek assistance from a specialist
garage.
Note
A coolant level which is too low is indicated in the instrument cluster by the
warning light and shown by the relevant message » page 39. We still rec-
ommend inspecting the coolant level directly at the reservoir from time to
time.
Brake fluid
Fig. 334
Brake fluid reservoir
Check the brake fluid under the following conditions.
The vehicle is on a horizontal surface.
The engine is turned off.
Check brake fluid level - the brake fluid level must be between the markings
“MIN” and “MAX” » Fig. 334.
282General Maintenance
Page 299 of 344

›Firmly screw the inflation hose 3 onto the tyre inflater bottle 10. The film on
the cap is pierced automatically.›
Remove the plug from the inflation hose
3
and plug the open end fully onto
the tyre valve.
›
Hold the bottle
10
with the bottom facing upwards and fill all of the sealing
agent from the tyre inflator bottle into the tyre.
›
Remove the filler plug from the tyre valve.
›
Screw in the valve insert using the valve remover
2
.
Inflating
›
Screw the air compressor tyre inflation hose
7
» Fig. 349 on page 296 firmly
onto the tyre valve.
›
For vehicles with manual transmission , set the lever in the neutral position.
›
On vehicles with automatic transmission , place the selector lever in the P
position.
›
Start the engine.
›
Plug the connector
6
into 12 volt socket » page 97.
›
Switch on the air compressor with the ON and OFF switch
9
.
›
Once a tyre inflation pressure of 2.0-2.5 bar is reached, turn off the air com-
pressor. Maximum run time of 6 minutes » .
›
If you cannot reach an air pressure of 2.0 - 2.5 bar, unscrew the tyre inflation
hose
7
from the tyre valve.
›
Drive the vehicle approx. 10 metres forwards or backwards to allow the seal-
ing agent to “distribute” in the tyre.
›
Firmly screw the tyre inflation hose
7
back onto the tyre valve and repeat
the inflation process.
›
Stick the corresponding sticker
1
on the dashboard in the driver's field of
view.
Once a tyre inflation pressure of 2.0 – 2.5 bar is achieved, continue the journey
at a maximum speed of 80 km/h (50 mph).
WARNING■ If it is not possible to inflate the tyre to at least. 2.0 bar, the damage is
too great. The sealing agent cannot be used to seal the tyre. Stop driv-
ing! Seek help from a specialist garage.■
The tyre inflation hose and air compressor may get hot as the tyre is be-
ing inflated – risk of burning.
CAUTIONSwitch off the air compressor after running 6 minutes at the most – risk of
overheating! Allow the air compressor to cool a few minutes before switching
it on again.
Information for driving with repaired tyres
Read and observe
on page 296 first.
The inflation pressure of the repaired tyre must be checked after driving for 10minutes.
If the tyre inflation pressure is 1.3 bar or less
›
The tyre cannot be properly sealed with the breakdown kit.
Do not drive
the vehicle! Seek help from a specialist garage.
If the tyre inflation pressure is 1.3 bar or more
›
Set the tyre pressure back to the correct value » page 286.
›
Continue driving carefully to the nearest specialist garage at a maximum
speed of 80 km/h (50 mph).
WARNINGA tyre filled with sealant has the same driving characteristics as a standard
tyre. The following guidelines must be observed.■
Do not drive faster than 80 km/h (50 mph).
■
Avoid accelerating at full throttle, sharp braking and fast cornering.
Jump-starting
Introduction
This chapter contains information on the following subjects:
Jump-starting using the battery from another vehicle
298WARNING■ The following instructions must be followed at all times when working on
the engine compartment » page 278.■
When handling the vehicle battery, the following warnings must be ob-
served » page 283 .
297Emergency equipment and self-help